Seat Altea XL 2015 Owner's Manual
Manufacturer: SEAT, Model Year: 2015, Model line: Altea XL, Model: Seat Altea XL 2015Pages: 236, PDF Size: 4.23 MB
Page 121 of 236
DrivingMessage in the instru-
ment panel displayHow to proceed
Gas operating mode cur-
rently impossible See the
manual!
Check that all conditions
for LPG operating mode
have been met
››› page 118. If so, have
the system checked imme-
diately by a specialised
workshop.
Petrol operating mode cur-
rently impossible. See the
manual!Have the system checked
immediately by a special-
ised workshop. LPG quality and consumption
Quality requirements for LPG are regulated
for all Europe in DIN EN 589 and permit the
use of LPG throughout Europe without any
problems.
LPG is a mixture of propane and butane.
A difference is drawn between winter gas and
summer gas. Winter gas has a higher propor-
tion of propane gas. As a result, the driving
range of winter gas may be lower (due to in-
creased consumption) than that of summer
gas.
The vehicle's engine management adapts au-
tomatically to the LPG used. Therefore, both
types of LPG can be mixed in the tank, with-
out the need for comprehensive draining be-
fore applying a different quality LPG. LPG and safety
If you smell gas or suspect that there is a
leak in the LPG system.
››› ●
Stop the vehicle immediately.
● Switch the ignition off.
● Open all the doors to properly ventilate the
vehicle.
● Extinguish cigarettes immediately.
● Move away from the vehicle or switch off
objects that may cause sparks or a fire.
● If you continue to smell gas, do not contin-
ue driving!
● Seek specialist assistance. Have the fault
repaired. WARNING
LPG is a highly explosive and inflammable
substance. It may cause severe burns and
other injury.
● Due care must be taken to avoid any risk of
fire or explosion.
● When parking the vehicle in a closed area
(for example in a garage), make sure that
there is adequate ventilation, either natural
or mechanical, to neutralise the LPG in the
event of a leak. WARNING
Failure to act when you can smell gas in the
vehicle or when refuelling can cause serious
injuries.
● Carry out the necessary operations.
● Leave the danger zone.
● If necessary, warn the emergency services. Note
● The LPG system must be subject to regular
inspections at a specialised workshop in ac-
cordance with the Maintenance Plan.
● The engine is always started with petrol,
even when LPG was being used when it was
switched off. For this reason the tank should
never be drained of petrol completely.
● If frequent short journeys are made, espe-
cially when the outside temperature is low,
the vehicle will tend to run on petrol more of-
ten than on LPG. Therefore, the petrol tank
may empty before the LPG tank.
● If while driving the system switches auto-
matically to petrol operating mode because
the LPG tank is almost empty, the next few
times the engine starts up, and depending on
the outside temperature and driving style, it
may automatically switch briefly to LPG oper-
ating mode to use up what is left in the tank.
● When the system automatically switches to
petrol operating mode because the LPG tank
is almost empty, you can revert to gas operat-
ing mode by pressing the ››› Fig. 121 GAS »
119
Technical specifications
Advice
Operation
Safety
Page 122 of 236
Operation
button while driving slowly and with low ac-
celeration. This procedure can be repeated
several times while driving carefully until all
the LPG left in the tank has been used up.
● Vehicles that display information or warn-
ing messages on the dash panel may show
information related to LPG operation.
● The notification LPG mode not possible may
be displayed. Journeys abroad
To drive abroad, the following must be taken
into consideration:
● For vehicles fitted with a catalytic converter
ensure that unleaded petrol is available for
the journey. See the chapter “Refuelling”. Au-
tomobile organisations will have information
about service station networks selling unlea-
ded fuel.
● In some countries, your vehicle model may
not be available, and therefore some spare
parts may not available or technical services
can only carry out limited repairs.
SEAT importers and distributors will gladly
provide information about the technical prep-
aration that your vehicle requires and also
about necessary maintenance and repair
possibilities. Adhesive strips for headlights
If you have to drive a right-hand drive vehicle
in a left-hand drive country, or vice versa, the
asymmetric dipped beam headlights will daz-
zle oncoming traffic.
To prevent dazzling, you must apply stickers
to certain parts of the headlight lenses. Fur-
ther information is available at any Technical
Service.
In vehicles with adaptive headlights, the ro-
tation system must previously be disconnec-
ted. To do this, please go to a specialised
workshop.
Ignition lock
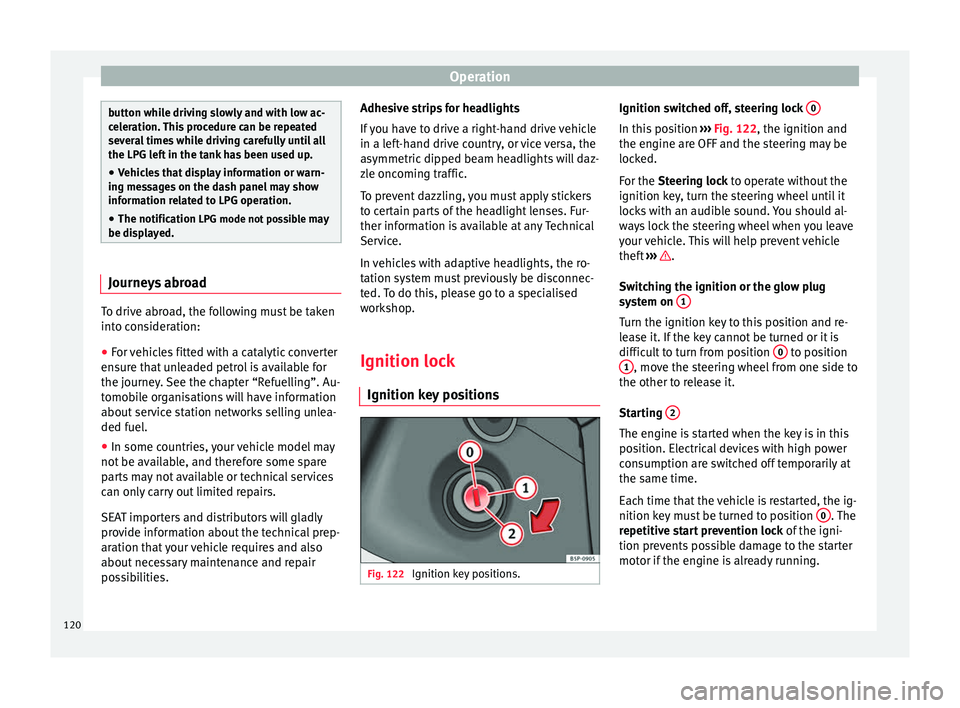
Ignition key positions Fig. 122
Ignition key positions. Ignition switched off, steering lock
0 In this position
››› Fig. 122, the ignition and
the engine are OFF and the steering may be
locked.
For the Steering lock
to operate without the
ignition k
ey, turn the steering wheel until it
locks with an audible sound. You should al-
ways lock the steering wheel when you leave
your vehicle. This will help prevent vehicle
theft ››› .
Switching the ignition or the glow plug
system on 1 Turn the ignition key to this position and re-
lease it. If the key cannot be turned or it is
difficult to turn from position
0 to position
1 , move the steering wheel from one side to
the other to release it.
Starting 2 The engine is started when the key is in this
position. Electrical devices with high power
consumption are switched off temporarily at
the same time.
Each time that the vehicle is restarted, the ig-
nition key must be turned to position
0 . The
repetitive start prevention lock of the igni-
tion prevents possible damage to the starter
motor if the engine is already running.
120
Page 123 of 236
Driving
WARNING
● The ignition key must NOT be removed from
the lock until the vehicle comes to a stand-
still. Otherwise, the steering could be imme-
diately blocked- Risk of accident!
● Always remove the key from the ignition
when leaving the vehicle, even if only for a
short period. This is especially important if
children or disabled people are left alone in
the vehicle. They could accidentally start the
engine or work electrical equipment such as
the electric windows, resulting in an acci-
dent.
● Unsupervised use of the key could start the
engine or any electrical system, such as the
electric windows. This could result in serious
injury. CAUTION
The starter motor will only work when the en-
gine is stopped (ignition key position 2 ).
Electronic immobiliser
The electronic immobiliser prevents unau-
thorised persons from driving the vehicle.
Inside the key there is a chip that deactivates
the electronic immobiliser automatically
when the key is inserted into the ignition. The electronic immobiliser will be activated
again automatically as soon as you pull the
key out of the ignition lock.
The engine can only be started using a genu-
ine SEAT key with its correct code.
Note
A perfect operation of the vehicle is ensured
if genuine SEAT keys are used. Starting petrol engines
The engine can only be started using a genu-
ine SEAT key with its correct code.
– Move the gearbox lever to the neutral posi-
tion and depress the clutch pedal thor-
oughly and hold it in this position for the
starter to turn the engine on.
– Turn the ignition key to the starting posi-
tion ›››
page 120 .
– Let
go of the ignition key as soon as the en-
gine starts; the starter motor must not run
on with the engine.
After starting a very hot engine, you may
need to slightly press down the accelerator.
When starting a cold engine, it may be a little
noisy for the first few seconds until oil pres-
sure has built up in the hydraulic valve com-
pensators. This is quite normal, and no cause
for concern. If the engine does not start immediately,
switch the starter off after 10 seconds and try
again after half a minute. If the engine still
does not start, the fuel pump fuse should be
checked
››› page 196, Fuses. WARNING
● Never start or run the engine in unventila-
ted or closed rooms. The exhaust gases con-
tain carbon monoxide, an odourless and col-
ourless poisonous gas. Risk of fatal acci-
dents. Carbon monoxide can cause loss of
consciousness and result in death.
● Never leave the vehicle unattended if the
engine is running.
● Never use “cold start sprays”, they could
explode or cause the engine to run at high
revs. Risk of injury. CAUTION
● When the engine is cold, you should avoid
high engine speeds, driving at full throttle
and over-loading the engine. Risk of engine
damage.
● The vehicle should not be pushed or towed
more than 50 metres to start the engine. Un-
burnt fuel could enter the catalytic converter
and damage it.
● Before attempting to push-start or tow a ve-
hicle in order to start it, you should first try to
start it using the battery of another vehicle.
Note and follow the instructions in
››› page 189, Jump-starting.
» 121
Technical specifications
Advice
Operation
Safety
Page 124 of 236
Operation
For the sake of the environment
Do not warm-up the engine by running the
engine with the vehicle stationary. Start off
immediately, driving gently. This helps the
engine reach operating temperature faster
and reduces emissions. Starting diesel engines
The engine can only be started using a genu-
ine SEAT key with its correct code.
– Move the gearbox lever to the neutral posi-
tion and depress the clutch pedal thor-
oughly and hold it in this position for the
starter to turn the engine on.
– Turn the ignition key to position ›››
Fig. 122
1 . The warning lamp
will light for en-
gine pre-heating.
– When the lamp turns off, turn the ignition
key to position 2 to start the engine. Do
not press the accelerator.
– Release the ignition key as soon as the en-
gine starts. The starter motor should not
turn at the same time.
When starting a cold engine, it may be a little
noisy for the first few seconds until oil pres-
sure has built up in the hydraulic valve com-
pensators. This is quite normal, and no cause
for concern. If there are problems starting the engine, see
the
››› page 189 .
Glo w p
lug system for the diesel engine
To avoid unnecessary discharging of the bat-
tery, do not use any other major electrical
equipment while the glow plugs are pre-heat-
ing.
Start the engine as soon as the glow plug
warning lamp ››› page 41 goes out.
Starting a diesel engine after the fuel tank
has been completely run dry
If the fuel tank has been completely run dry,
it may take longer than normal (up to one mi-
nute) to start a diesel engine after refuelling.
This is because the fuel system must elimi-
nate air first. WARNING
● Never start or run the engine in unventila-
ted or closed rooms. The exhaust gases con-
tain carbon monoxide, an odourless and col-
ourless poisonous gas. Risk of fatal acci-
dents. Carbon monoxide can cause loss of
consciousness and result in death.
● Never leave the vehicle unattended if the
engine is running.
● Never use “cold start sprays”, they could
explode or cause the engine to run at high
revs. Risk of injury. CAUTION
● When the engine is cold, you should avoid
high engine speeds, driving at full throttle
and over-loading the engine. Risk of engine
damage.
● The vehicle should not be pushed or towed
more than 50 metres to start the engine. Un-
burnt fuel could enter the catalytic converter
and damage it.
● Before attempting to push-start or tow a ve-
hicle in order to start it, you should first try to
start it using the battery of another vehicle.
Note and follow the instructions in
››› page 189, Jump-starting. For the sake of the environment
Do not warm-up the engine by running the
engine with the vehicle stationary. You
should drive off as soon as you start the en-
gine. This helps the engine reach operating
temperature faster and reduces emissions. Switching off the engine
–
Stop the vehicle.
– Turn the ignition key to position ›››
Fig. 122
0 .
After switching the engine off, the radiator
fan may run on for up to 10 minutes. The fan
may also turn on again if coolant temperature
increases from accumulated heat in the
122
Page 125 of 236
Driving
engine compartment or due to its prolonged
exposure to solar radiation. WARNING
● Never switch the engine off until the vehi-
cle is completely stationary.
● The brake servo works only when the en-
gine is running. With the engine switched off,
more strength is needed to brake. As normal
brake operation cannot be performed, risk of
accidents and serious injury may exist.
● The steering lock can be immediately
blocked once the key is removed from the ig-
nition. The vehicle cannot be steered. Risk of
accident. CAUTION
When the engine has been running under a
heavy load for a long period, heat can accu-
mulate in the engine compartment and cause
engine damage. For this reason, idle the en-
gine for approximately 2 minutes before
switching it off. Braking and parking
Braking capacity and distance The following factors impair braking capacity: New brake pads
New brake pads do not provide optimal per-
formance during the first 400 km; first they
must be “run in”. However, the reduced brak-
ing capacity may be compensated by press-
ing on the brake pedal a little harder. Avoid
overloading the brakes during run-in.
Wear
The rate of wear on the
brake pads depends
a great deal on how you drive and the condi-
tions in which the vehicle is operated. Nega-
tive factors are, for instance, city traffic, fre-
quent short trips or hard driving with abrupt
starts and stops.
Wet roads or road salt
In certain conditions, such as in heavy rain,
or after washing the vehicle or driving
through water, the full braking effect can be
delayed by moisture (or in winter by ice) on
the discs and brake pads. In this case the
brakes should be “dried” by pressing the
brake pedal several times.
The effectiveness of the brakes can also be
temporarily reduced if the vehicle is driven
for some distance without using the brakes
when there is a lot of salt on the road in win-
ter. In this case, the layer of salt on the brake
discs and pads has to wear off before brak-
ing. Corrosion
There may be a tendency for corrosion to
form on the discs and dirt to build up on the
brake pads if the vehicle is used infrequently
or the brakes are not used very often.
If the brakes are not used frequently, or if
rust has formed on the disks, it is advisable
to clean off the pads and disks by braking
firmly a few times at a moderately high speed
››› .
Faults in the brake system
If the brake pedal travel should ever increase
suddenly , this may mean that one of the two
br ak
e circuits has failed. Drive immediately
to the nearest specialised workshop and
have the fault repaired. Drive there slowly
and remember that you will have to apply
more pressure on the brake pedal and allow
for longer stopping distances.
Low brake fluid level
Malfunctions can occur in the brake system if
the brake fluid level is too low. The brake flu-
id level is monitored electronically.
Brake servo
The brake servo increases the pressure you
apply to the brake pedal. It works only when
the engine is running. »
123
Technical specifications
Advice
Operation
Safety
Page 126 of 236
Operation
WARNING
● Apply the brakes heavily to clean the brake
system only in a suitable traffic situation. Do
not put other road users in danger: there is
risk of causing an accident.
● Ensure the vehicle does not move while in
neutral, when the engine is stopped. Failure
to follow this instruction could result in an
accident.
● If the brake fluid loses its viscosity and is
subjected to heavy use, vapour bubbles can
form in the brake system. This reduces the ef-
ficiency of the brakes.
● If a brake system circuit fails, the braking
distance will be increased considerably. Con-
tact a specialised workshop immediately and
avoid unnecessary journeys. CAUTION
● Never let the brakes “drag” by leaving your
foot on the pedal when it is not necessary to
brake. This overheats the brakes, resulting in
longer stopping distances and greater wear.
● Before driving down a long, steep gradient,
it is advisable to reduce speed and select a
lower gear. This makes use of engine braking
and relieves the brakes. If you still have to
use the brakes, it is better to brake firmly at
intervals than to apply the brakes continu-
ously. Note
● If the brake servo is out of action, for exam-
ple when the car is being towed, you will
have to press the brake pedal considerably
harder than normal to make up for the lack of
servo assistance.
● If you wish to equip the vehicle with acces-
sories such as a front spoiler or wheel covers,
it is important that the flow of air to the front
wheels is not obstructed, otherwise the
brakes can overheat. Before purchasing ac-
cessories please observe the relevant instruc-
tions ››› page 147, Technical modifications . Operating the handbrake
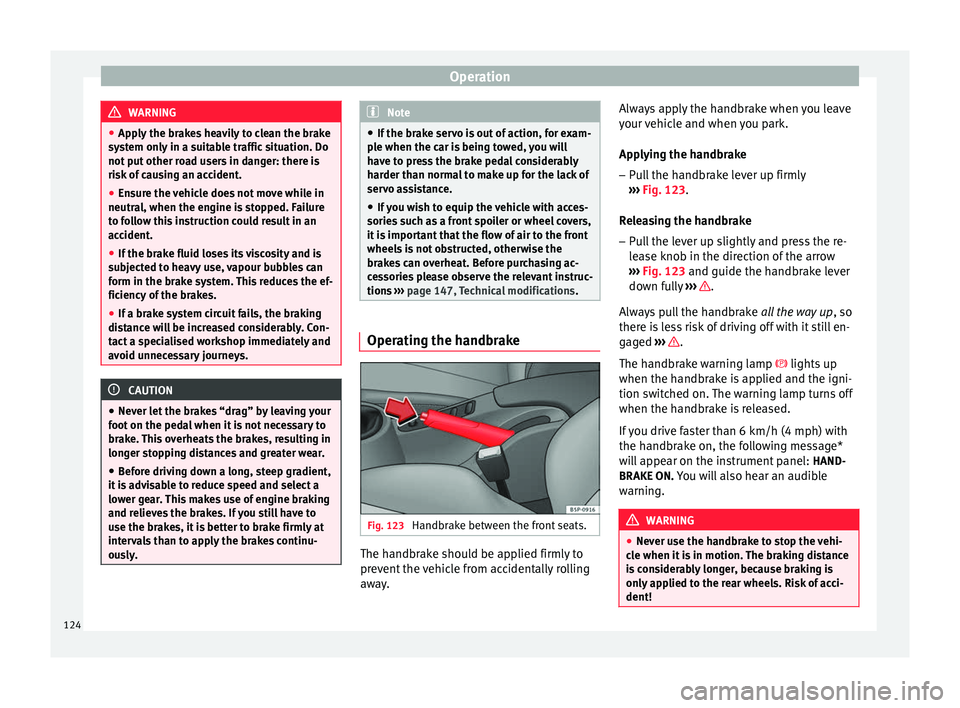
Fig. 123
Handbrake between the front seats. The handbrake should be applied firmly to
prevent the vehicle from accidentally rolling
away.Always apply the handbrake when you leave
your vehicle and when you park.
Applying the handbrake
– Pull the handbrake lever up firmly
››› Fig. 123 .
R el
easing the handbrake
– Pull the lever up slightly and press the re-
lease knob in the direction of the arrow
››› Fig. 123 and guide the handbrake lever
down f
ully ››› .
Always pull the handbrake all the way up, so
there is less risk of driving off with it still en-
gaged ››› .
The handbrake warning lamp lights up
when the handbrake is applied and the igni-
tion switched on. The warning lamp turns off
when the handbrake is released.
If you drive faster than 6 km/h (4 mph) with
the handbrake on, the following message*
will appear on the instrument panel: HAND-
BRAKE ON. You will also hear an audible
warning. WARNING
● Never use the handbrake to stop the vehi-
cle when it is in motion. The braking distance
is considerably longer, because braking is
only applied to the rear wheels. Risk of acci-
dent! 124
Page 127 of 236
Driving
●
If the handbrake is only partially released,
this will cause the rear brakes to overheat,
which can impair the function of the brake
system and could lead to an accident. This al-
so causes premature wear on the rear brake
pads. CAUTION
Always apply the handbrake before you leave
the vehicle. Put it in 1st gear as well. Parking
The handbrake should always be firmly ap-
plied when the vehicle is parked.
Always note the following points when park-
ing the vehicle:
– Use the brake pedal to stop the vehicle.
– Apply the handbrake.
– Put it in 1st gear.
– Switch the engine off and remove the key
from the ignition. Turn the steering wheel
slightly to engage the steering lock.
– Always take you keys with you when you
leave the vehicle ››› .Additional notes on parking the vehicle on
gradients:
Turn the steering wheel so that the vehicle
rolls against the kerb if it started to roll.
●
If the vehicle is parked facing downhill,
turn the front wheels so that they point to-
wards the kerb .
● If the vehicle is parked facing uphill, turn
the fr ont
wheels so that they point away from
the kerb
.
● Secure the vehicle as usual by applying the
handbrake firmly and putting it in 1st gear. WARNING
● Take measures to reduce the risk of injury
when you leave your vehicle unattended.
● Never park where the hot exhaust system
could ignite inflammable materials, such as
dry grass, low bushes, spilt fuel etc.
● Never allow vehicle occupants to remain in
the vehicle when it is locked. They would be
unable to open the vehicle from the inside,
and could become trapped in the vehicle in
an emergency. In the event of an emergency,
locked doors will delay assistance to vehicle
occupants.
● Never leave children alone in the vehicle.
They could set the vehicle in motion, for ex-
ample, by releasing the handbrake or the
gearbox lever. ●
Depending on weather conditions, it may
become extremely hot or cold inside the vehi-
cle. This can be fatal. Hill driving assistant*
This function is only included in vehicles with
ESC.
The hill driving assistant helps the driver to
move off and upward on a hill without rolling
backward.
The system maintains brake pressure for ap-
proximately 2 seconds after the driver takes
his foot off the brake pedal to prevent the ve-
hicle from rolling backward when starting off.
During these 2 seconds, the driver has
enough time to release the clutch pedal and
accelerate without the vehicle moving and
without having to use the handbrake, making
starting off easier, more comfortable and saf-
er.
These are the basic operation conditions:
● being on a ramp or hill/slope,
● closed doors,
● vehicle completely stationary,
● engine running and foot on the brake,
● besides having a gear engaged or being in
neutral for manual gear change and with the
selector lever at position S,
D
or R for an au-
tomatic gearbox. »
125
Technical specifications
Advice
Operation
Safety
Page 128 of 236
Operation
This system is also active when reversing up-
hill. WARNING
● If you do not start the vehicle immediately
after taking your foot off the brake pedal, the
vehicle may start to roll back under certain
conditions. Depress the brake pedal or use
the hand brake immediately.
● If the engine stalls, depress the brake ped-
al or use the hand brake immediately.
● When following a line of traffic uphill, if you
want to prevent the vehicle from rolling back
accidentally when starting off, hold the brake
pedal down for a few seconds before starting
to move. Note
The official service or a specialist workshop
can tell you if your vehicle is equipped with
this system. Manual gearbox
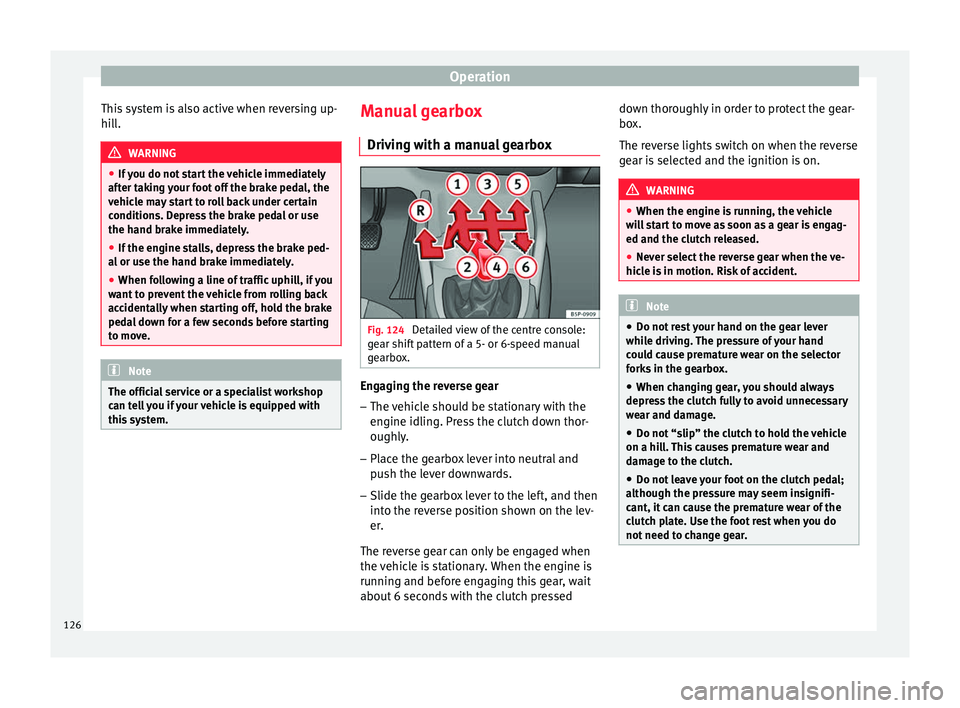
Driving with a manual gearbox Fig. 124
Detailed view of the centre console:
gear shift pattern of a 5- or 6-speed manual
gearbox. Engaging the reverse gear
– The vehicle should be stationary with the
engine idling. Press the clutch down thor-
oughly.
– Place the gearbox lever into neutral and
push the lever downwards.
– Slide the gearbox lever to the left, and then
into the reverse position shown on the lev-
er.
The reverse gear can only be engaged when
the vehicle is stationary. When the engine is
running and before engaging this gear, wait
about 6 seconds with the clutch pressed down thoroughly in order to protect the gear-
box.
The reverse lights switch on when the reverse
gear is selected and the ignition is on.
WARNING
● When the engine is running, the vehicle
will start to move as soon as a gear is engag-
ed and the clutch released.
● Never select the reverse gear when the ve-
hicle is in motion. Risk of accident. Note
● Do not rest your hand on the gear lever
while driving. The pressure of your hand
could cause premature wear on the selector
forks in the gearbox.
● When changing gear, you should always
depress the clutch fully to avoid unnecessary
wear and damage.
● Do not “slip” the clutch to hold the vehicle
on a hill. This causes premature wear and
damage to the clutch.
● Do not leave your foot on the clutch pedal;
although the pressure may seem insignifi-
cant, it can cause the premature wear of the
clutch plate. Use the foot rest when you do
not need to change gear. 126
Page 129 of 236
Driving
Automatic gearbox/DSG
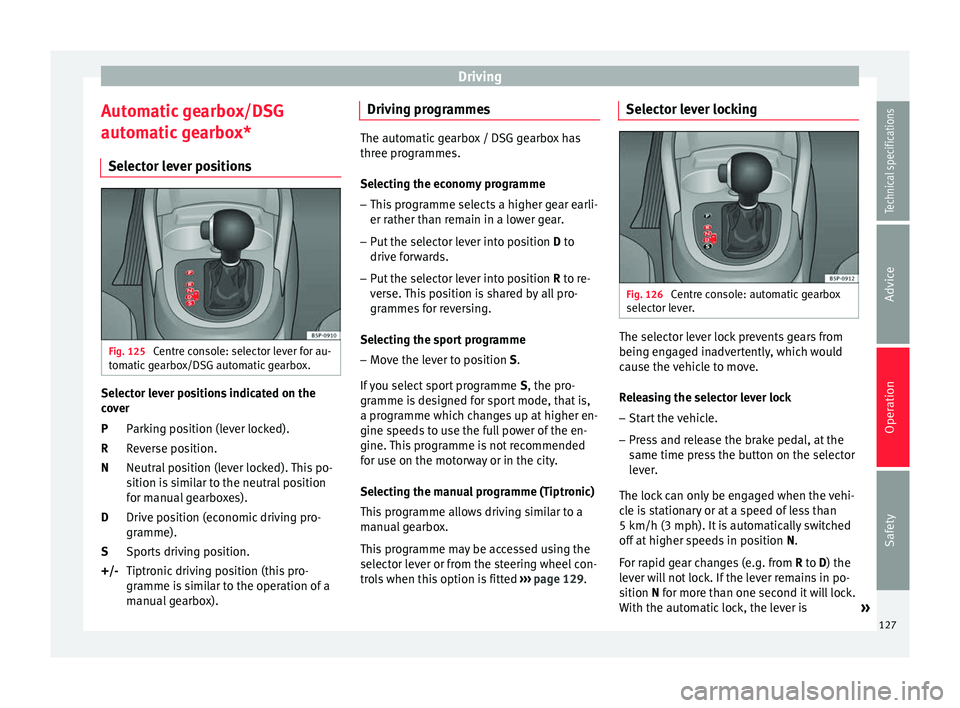
automatic gearbox* Selector lever positions Fig. 125
Centre console: selector lever for au-
tomatic gearbox/DSG automatic gearbox. Selector lever positions indicated on the
cover
Parking position (lever locked).
Reverse position.
Neutral position (lever locked). This po-
sition is similar to the neutral position
for manual gearboxes).
Drive position (economic driving pro-
gramme).
Sports driving position.
Tiptronic driving position (this pro-
gramme is similar to the operation of a
manual gearbox).
P
R
N
D
S
+/- Driving programmes The automatic gearbox / DSG gearbox has
three programmes.
Selecting the economy programme
– This programme selects a higher gear earli-
er rather than remain in a lower gear.
– Put the selector lever into position D to
driv e f
orwards.
– Put the selector lever into position R to re-
ver
se. This position is shared by all pro-
grammes for reversing.
Selecting the sport programme – Move the lever to position S.
If you select sport programme S, the pro-
gr amme i
s designed for sport mode, that is,
a programme which changes up at higher en-
gine speeds to use the full power of the en-
gine. This programme is not recommended
for use on the motorway or in the city.
Selecting the manual programme (Tiptronic)
This programme allows driving similar to a
manual gearbox.
This programme may be accessed using the
selector lever or from the steering wheel con-
trols when this option is fitted ›››
page 129. Selector lever locking
Fig. 126
Centre console: automatic gearbox
selector lever. The selector lever lock prevents gears from
being engaged inadvertently, which would
cause the vehicle to move.
Releasing the selector lever lock
– Start the vehicle.
– Press and release the brake pedal, at the
same time press the button on the selector
lever.
The lock can only be engaged when the vehi-
cle is stationary or at a speed of less than
5 km/h (3 mph). It is automatically switched
off at higher speeds in position N.
F or r
apid gear changes (e.g. from R
to D) the
lever will not lock. If the lever remains in po-
sition
N for more than one second it will lock.
With the automatic lock, the lever is »
127
Technical specifications
Advice
Operation
Safety
Page 130 of 236
Operation
prevented from passing from P
and N to any
other gear without first pressing the brake
pedal.
The selector lever must be put in the position
P
in order to remove the key.
Driving with automatic gearbox/DSG
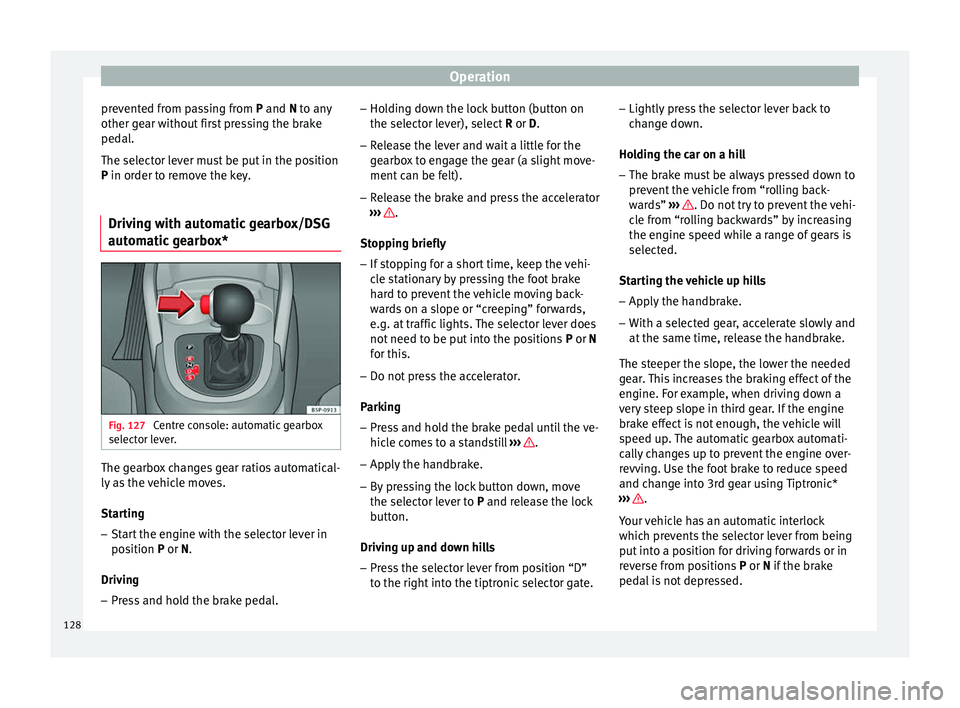
automatic gearbox* Fig. 127
Centre console: automatic gearbox
selector lever. The gearbox changes gear ratios automatical-
ly as the vehicle moves.
Starting
– Start the engine with the selector lever in
position P
or
N.
Driving – Press and hold the brake pedal. –
Holding down the lock button (button on
the selector lever), select R or D.
– Rel
ease the lever and wait a little for the
gearbox to engage the gear (a slight move-
ment can be felt).
– Release the brake and press the accelerator
››› .
Stopping briefly – If stopping for a short time, keep the vehi-
cle stationary by pressing the foot brake
hard to prevent the vehicle moving back-
wards on a slope or “creeping” forwards,
e.g. at traffic lights. The selector lever does
not need to be put into the positions P or N
f or thi
s.
– Do not press the accelerator.
Parking
– Press and hold the brake pedal until the ve-
hicle comes to a standstill ››› .
– Apply the handbrake.
– By pressing the lock button down, move
the selector lever to P
and release the lock
b
utton.
Driving up and down hills
– Press the selector lever from position “D”
to the right into the tiptronic selector gate. –
Lightly press the selector lever back to
change down.
Holding the car on a hill – The brake must be always pressed down to
prevent the vehicle from “rolling back-
wards” ››› . Do not try to prevent the vehi-
cle from “rolling backwards” by increasing
the engine speed while a range of gears is
selected.
Starting the vehicle up hills
– Apply the handbrake.
– With a selected gear, accelerate slowly and
at the same time, release the handbrake.
The steeper the slope, the lower the needed
gear. This increases the braking effect of the
engine. For example, when driving down a
very steep slope in third gear. If the engine
brake effect is not enough, the vehicle will
speed up. The automatic gearbox automati-
cally changes up to prevent the engine over-
revving. Use the foot brake to reduce speed
and change into 3rd gear using Tiptronic*
››› .
Your vehicle has an automatic interlock
which prevents the selector lever from being
put into a position for driving forwards or in
reverse from positions P or N
if the brake
ped
al is not depressed.
128