light Seat Altea XL 2015 Owner's Guide
[x] Cancel search | Manufacturer: SEAT, Model Year: 2015, Model line: Altea XL, Model: Seat Altea XL 2015Pages: 236, PDF Size: 4.23 MB
Page 67 of 236
Opening and closing
Automatic locking system for
involuntary unlocking* It is an anti-theft system and prevents the un-
intentional unlocking of the vehicle.
If the vehicle is unlocked and none of the
doors (including the boot) are opened within
30 seconds, it re-locks automatically. This
function prevents the vehicle from remaining
unlocked if the unlock button is pressed by
mistake.
Emergency unlocking system If the airbags are triggered during an acci-
dent, the vehicle is unlocked, except for the
luggage compartment. It is possible to lock
the vehicle from inside with the central lock-
ing, after turning the ignition off and back on
again.
If the doors must be locked from the outside,
see “Emergency locking of the doors”.
Unlocking and locking - Manual
personalisation Activating selective unlocking
With the driver door open, turn the key to un-
lock for approx. 3 seconds. Deactivating selective unlocking
With the driver door open, turn the key to
lock for approx. 3 seconds.
The turn signal lamps flash to confirm activa-
tion or deactivation.
Activation of automatic locking
Press the lock button
on the central lock-
ing button for 3 seconds.
Deactivation of automatic locking
Press the unlock button on the central
locking button for 3 seconds.
The lock button lamp flashes to confirm acti-
vation or deactivation.
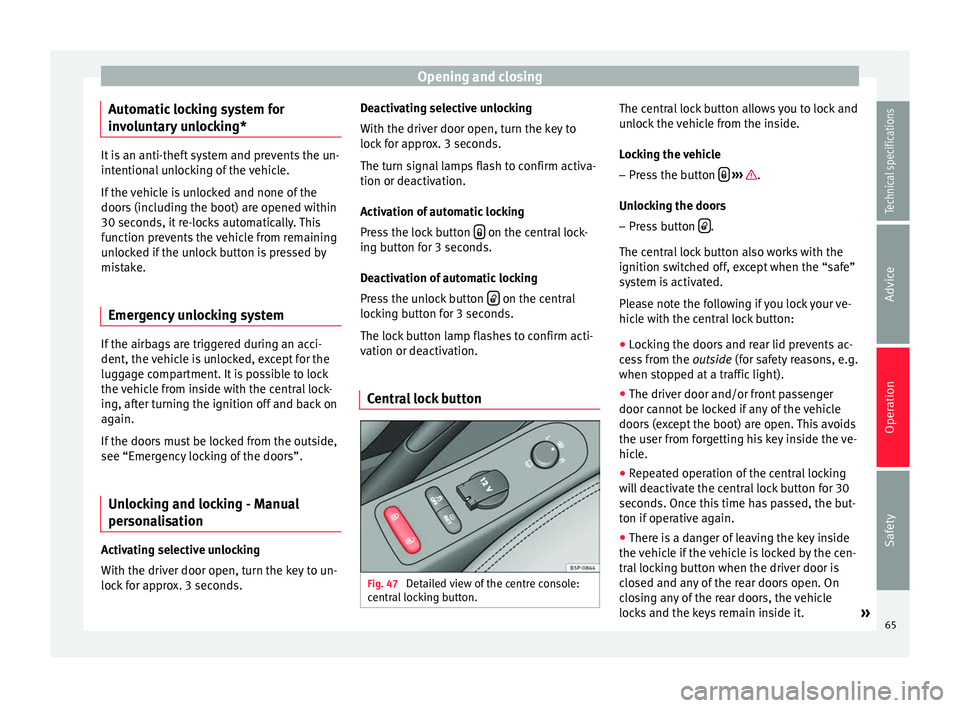
Central lock button Fig. 47
Detailed view of the centre console:
central locking button. The central lock button allows you to lock and
unlock the vehicle from the inside.
Locking the vehicle
– Press the button
››› .
Unlocking the doors
– Press button .
The central lock button also works with the
ignition switched off, except when the “safe”
system is activated.
Please note the following if you lock your ve-
hicle with the central lock button: ● Locking the doors and rear lid prevents ac-
cess from the outside (for safety reasons, e.g.
when s t
opped at a traffic light).
● The driver door and/or front passenger
door cannot be locked if any of the vehicle
doors (except the boot) are open. This avoids
the user from forgetting his key inside the ve-
hicle.
● Repeated operation of the central locking
will deactivate the central lock button for 30
seconds. Once this time has passed, the but-
ton if operative again.
● There is a danger of leaving the key inside
the vehicle if the vehicle is locked by the cen-
tral locking button when the driver door is
closed and any of the rear doors open. On
closing any of the rear doors, the vehicle
locks and the keys remain inside it. »
65
Technical specifications
Advice
Operation
Safety
Page 70 of 236
Operation
is inside the vehicle. The maximum range de-
pends on different factors. The range is re-
duced as the batteries start to lose power.
Selective unlocking*
When the button
››› Fig. 50 1 , is pressed
once, the driver door is unlocked, all others
remain locked.
Press the button
››› Fig. 50 1 twice to un-
lock all doors. WARNING
Read and observe the relevant warnings ››› in Set of keys on page 67
Note
● The radio frequency remote control can be
programmed by means of pressing the un-
locking button once; as a result, only the
driver door will unlock. When the button is
pressed once more, all doors and the rear lid
will be unlocked.
● The radio frequency remote control func-
tions only when you are in range ››› Fig. 51
(red area).
● If the vehicle is unlocked using the
1 button, it will lock again automatically if any
of the doors or the rear lid are not opened
within 30 seconds after unlocking it. This
function prevents the vehicle from remaining
unlocked if the unlock button is pressed by
mistake. ●
If the vehicle cannot be opened and closed
using the radio frequency remote control, the
remote control key will have to be re-
synchronised ››› page 68. Changing the battery
If the battery indicator does not flash when
the buttons are pushed, the battery must be
replaced.
CAUTION
The use of inappropriate batteries may dam-
age the radio frequency remote control. For
this reason, always replace the dead battery
with another of the same size and power. For the sake of the environment
Used batteries must be disposed of at an ap-
propriate waste facility or through an author-
ised service, given that their components can
affect the environment. Synchronising the remote control key
If it is not possible to unlock or lock the door
with the remote control, it should be re-
synchronised.
– Press the
›››
Fig. 50 button on the re-
mot e c
ontrol. –
Then close the vehicle using the key shaft
within one minute.
It i
s possible that the vehicle could no longer
be opened and closed with the remote con-
trol if the button is repeatedly pressed
outside of the effective range of the radio fre-
quency remote control. The remote control
key will have to be resynchronised.
Spare remote control keys are available at
your Technical Service, where they must be
matched to the locking system.
Up to four remote control keys can be used.
Anti-theft alarm system* Description of anti-theft alarm
system* The anti-theft alarm makes it more difficult to
break into the vehicle or steal it. Audible and
visible alarms are triggered if the vehicle is
opened using the key, or if unauthorised ac-
cess to the vehicle is forced.
The anti-theft alarm system is automatically
switched on when locking the vehicle. The
system is then primed.
● The turn signal light will flash twice on
opening and deactivating the alarm.
68
Page 71 of 236
Opening and closing
● The turn signal light will flash once on clos-
ing and activating the alarm.
When does the system trigger an alarm?
The system triggers an alarm if the following
unauthorised actions are carried out when
the vehicle is locked:
● Opening the vehicle mechanically using
the key and with the ignition off.
● A door is opened.
● Opening the bonnet.
● The rear lid is opened.
● Ignition switched on with a non-validated
key.
● Movements in the driving compartment
(vehicles with interior monitoring).
● Undue manipulation of the alarm.
● Battery handling.
The acoustic signals sound and the turn sig-
nals flash for approx. 30 seconds. This cycle
may be repeated up to 10 times depending
on the country.
Opening the doors mechanically (emergency
opening)
If the radio frequency remote control function
fails, you will have to use the key to unlock
the vehicle. This is done as follows: ●
Use the lock on the driver door to unlock
the vehicle. The anti-theft alarm system re-
mains active, but an alarm is not triggered
immediately.
● Switch on the ignition within 15 seconds.
When the ignition is switched on, the elec-
tronic immobiliser recognises a valid vehicle
key and deactivates the anti-theft alarm sys-
tem. If you do not switch on the ignition with-
in 15 seconds, the alarm is triggered (in cer-
tain markets, such as the Netherlands, there
is no 15-second waiting time and the alarm
is activated immediately after opening the
door).
Opening all the doors in manual mode
In vehicles without an alarm, when opening
the driver door manually, all doors are
opened.
How to switch the alarm off
When the vehicle is unlocked via the unlock-
ing button of the radio frequency remote con-
trol or when the key is inserted in the ignition
lock. Note
● After 28 days, the indicator light will be
switched off to prevent the battery from
draining if the vehicle has been left parked
for a long period of time. The alarm system
remains activated. ●
If, after the audible warning turns off, an-
other monitored area is accessed (e.g. the
boot hatch is opened after a door has been
opened), the alarm is triggered again.
● The anti-theft alarm is not activated when
the vehicle is locked from within using the
central locking button .
● If the vehicle battery is run down or flat
then the anti-theft alarm will not operate cor-
rectly.
● Vehicle monitoring remains active even if
the battery is disconnected or not working for
any reason.
● The alarm is triggered immediately if one of
the battery cables is disconnected while the
alarm system is active. Interior monitoring*
This is a monitoring or control function incor-
porated in the anti-theft alarm* which de-
tects unauthorized vehicle entry by means of
ultrasound.
The system consists of 3 sensors, 2 emitters
and a receptor.
Activation
– It is automatically turned on with the anti-
theft alarm, when the vehicle is locked me-
chanically with the key and when the but-
ton on the remote control is used.
»
69Technical specifications
Advice
Operation
Safety
Page 72 of 236
Operation
Deactivation – Press the button on the remote control
twice. It only deactivates the interior moni-
tor. The alarm system remains activated.
False alarms
Interior monitoring will only operate correctly
if the vehicle is completely closed. Please ob-
serve related legal requirements.
The following cases may cause a false alarm:
● Open windows (partially or fully).
● Panoramic/tilting sunroof open (partially or
completely).
● Movement of objects inside the vehicle,
such as loose papers, items hanging from
the rear vision mirror (air fresheners), etc. WARNING
● The “deadlock” system remains deactiva-
ted if the interior monitor is deactivated.
● For those vehicles in which a separation
screen is fitted, the alarm will not function
correctly due to interference with the sensor. Note
● If the alarm has been triggered by the inte-
rior monitor, this will be indicated by a flash-
ing of the warning lamp on the driver door when the vehicle is opened. This flashing will
be different to that for an activated alarm.
Deactivating vehicle interior
monitoring systems
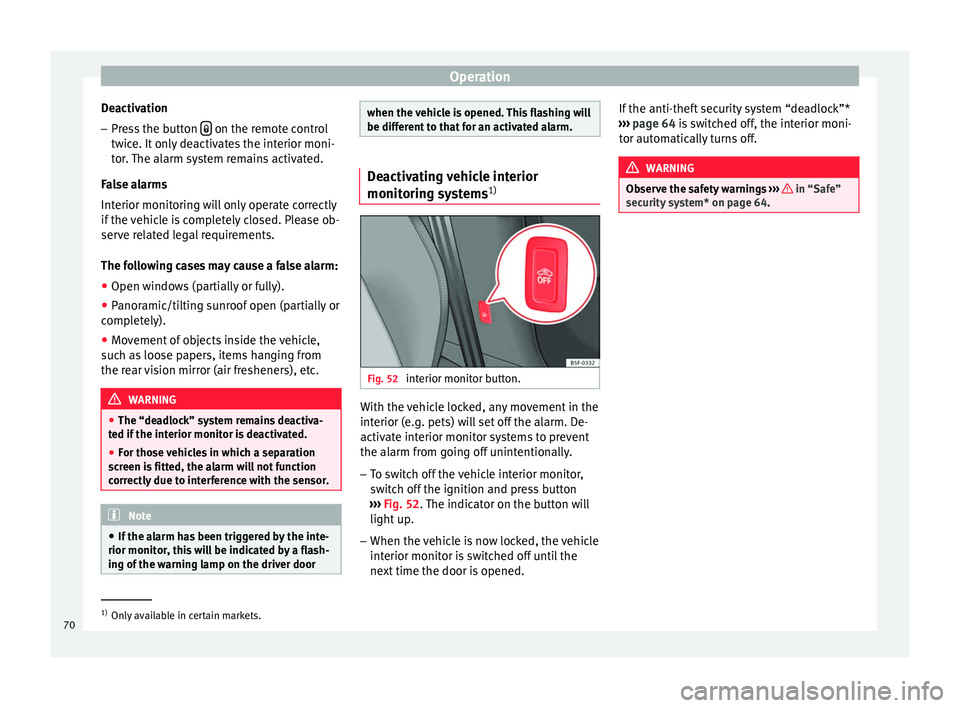
1) Fig. 52
interior monitor button. With the vehicle locked, any movement in the
interior (e.g. pets) will set off the alarm. De-
activate interior monitor systems to prevent
the alarm from going off unintentionally.
– To switch off the vehicle interior monitor,
switch off the ignition and press button
››› Fig. 52 . The indicator on the button will
light up
.
– When the vehicle is now locked, the vehicle
interior monitor is switched off until the
next time the door is opened. If the anti-theft security system “deadlock”*
››› page 64 is switched off, the interior moni-
tor aut
omatically turns off. WARNING
Observe the safety warnings ››› in “Safe”
security system* on page 64. 1)
Only available in certain markets.
70
Page 73 of 236
Opening and closing
Boot hatch Unlocking and locking Fig. 53
Rear lid: opening from the outside. Fig. 54
Close-up of the inside trim of the rear
lid: hand grip The rear lid opening system operates electri-
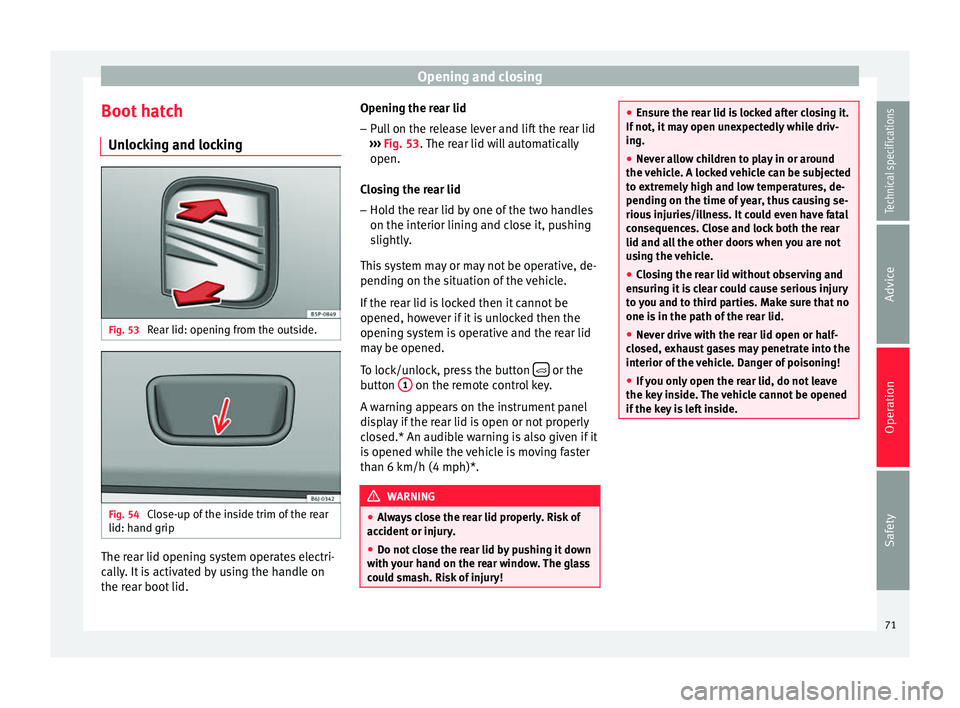
cally. It is activated by using the handle on
the rear boot lid. Opening the rear lid
– Pull on the release lever and lift the rear lid
››› Fig. 53 . The rear lid will automatically
open.
C lo
sing the rear lid
– Hold the rear lid by one of the two handles
on the interior lining and close it, pushing
slightly.
This system may or may not be operative, de-
pending on the situation of the vehicle.
If the rear lid is locked then it cannot be
opened, however if it is unlocked then the
opening system is operative and the rear lid
may be opened.
To lock/unlock, press the button or the
button 1 on the remote control key.
A warning appears on the instrument panel
display if the rear lid is open or not properly
closed.* An audible warning is also given if it
is opened while the vehicle is moving faster
than 6 km/h (4 mph)*. WARNING
● Always close the rear lid properly. Risk of
accident or injury.
● Do not close the rear lid by pushing it down
with your hand on the rear window. The glass
could smash. Risk of injury! ●
Ensure the rear lid is locked after closing it.
If not, it may open unexpectedly while driv-
ing.
● Never allow children to play in or around
the vehicle. A locked vehicle can be subjected
to extremely high and low temperatures, de-
pending on the time of year, thus causing se-
rious injuries/illness. It could even have fatal
consequences. Close and lock both the rear
lid and all the other doors when you are not
using the vehicle.
● Closing the rear lid without observing and
ensuring it is clear could cause serious injury
to you and to third parties. Make sure that no
one is in the path of the rear lid.
● Never drive with the rear lid open or half-
closed, exhaust gases may penetrate into the
interior of the vehicle. Danger of poisoning!
● If you only open the rear lid, do not leave
the key inside. The vehicle cannot be opened
if the key is left inside. 71
Technical specifications
Advice
Operation
Safety
Page 77 of 236

Lights and visibility
Using the remote control
– Push the lock button on the remote control
for approximately 3 seconds. The slid-
ing/tilting sunroof is closed.
– Release the unlock button to interrupt the
function.
– When the sliding/tilting sunroof has closed
completely, the turn signals flash once. Note
The sliding/tilting sunroof rotary knob re-
mains in the last position selected if the roof
is closed using convenience closing from out-
side the vehicle and will have to be re-posi-
tioned the next time you drive. Roll-back function of the
sliding/tilting sunroof*
Fig. 57
Roof lining description: sliding/tilting
sunroof rotary knob. The sliding/tilting sunroof has a
roll-back
function which prevents larger objects get-
tin g tr
apped when the roof is closed. The roll-
back function does not prevent fingers get-
ting pinched against the roof opening. The
sliding/tilting sunroof stops and opens again
immediately if it is obstructed when closing.
If the sliding/tilting sunroof has been
opened again by the roll-back function, it can
be closed only by pressing the rotary button
at the front in position A
››› Fig. 57 until the
s lidin
g/tilting sunroof has closed fully.
Please note that the sunroof will now close
without the roll-back function. Lights and visibility
Lights Switching lights on and off Fig. 58
Detailed view of the dash panel:
lights, front fog lights and rear fog light
switch. Switching on the side lights
– Turn the light switch ››› Fig. 58 to position
.
Sw it
ching on dipped beam headlights
– Turn the light switch to position .
Switching off the lights – Turn the light switch to position 0.
»
75
Technical specifications
Advice
Operation
Safety
Page 78 of 236

Operation
Switching on front fog lights* – Pull the switch out of position or
to
the first stop. The symbol of the light
control lights up.
Switching on the rear fog lights (vehicles
with front fog lights) – Pull the switch out of position or
to
the second stop ››› . A control lamp lights
up on the dash panel.
Switching on the rear fog lights (vehicles
with no front fog lights) – Pull the light switch from position to the
last stop. A control lamp lights up in the
dash panel. WARNING
Never drive with just the side lights on. Risk
of accident. The side lights are not bright
enough to illuminate the road ahead and to
ensure that other road users are able to see
you. Always use your dipped beam head-
lights if it is dark or if visibility is poor. Note
● The dipped beam headlights will only work
with the ignition on. The side lights come on
automatically when the ignition is turned off.
● If the lights are left on after the key has
been taken out of the ignition lock, an audi-
ble warning will sound while the driver door remains open. This is a reminder to switch
the lights off.
● The rear fog light is so bright that it can
dazzle drivers behind you. You should use
the rear fog light only when visibility is very
poor.
● If you are towing a trailer equipped with a
rear fog light on a vehicle with a factory-fitted
towing bracket, the rear fog light on the vehi-
c l
e will automatically be switched off.
● The use of the lighting described here is
subject to the relevant statutory require-
ments.
● Depending on weather conditions (very
cold or wet), the front and rear lights and the
indicators may be temporarily misted. This
has no influence on the useful life of the
lighting system. The lights will soon demist
when they are switched on. Automatic lighting*
Fig. 59
Automatic lighting. Activation
– Rotate the switch to the position. It will
light up.
Deactivation – Turn the light switch to .
Automatic lighting
If automatic headlight control is switched on,
dipped beam headlights are automatically
switched on by a photosensor if you drive in-
to a tunnel, for example.
The rain sensor switches on the dipped beam
headlights when the windscreen wipers have
been operating continuously for a few sec-
onds and it switches the lights off when the
continuous or interval wipe is switched off for
some minutes ››› page 84.
76
Page 79 of 236

Lights and visibility
When the automatic dipped beam headlight
control is on but the dipped beam headlights
are off, the warning lamp lights up on
the light control ››› Fig. 59. If the automatic
control switches on the dipped lights, the in-
strument and control lighting is also switch-
ed on. WARNING
● Even if the automatic headlight control is
switched on, the dipped beam headlights will
not be switched on with fog. Therefore, the
dipped beam must be switched on manually. Note
● For those vehicles with the automatic head-
light system, when the key is removed from
the ignition, the audible warning will only
sound if the light control is in the position
or if the vehicle is not fitted with the com-
in g home f
unction.
● If the daylight driving automatic light func-
tion is switched on, the front fog lights or
rear fog light cannot be switched on in addi-
tion.
● The use of the lighting described here is
subject to the relevant statutory require-
ments.
● Do not put stickers on the windscreen in
front of the sensor. This may cause disrup-
tions or faults in the automatic lighting sys-
tem. ●
To avoid damage to the tail lights, the
lights mounted on the rear lid go off when the
rear lid is opened (depending on the country). Turn signal and main beam headlight
lever
Fig. 60
Turn signal and main beam lever The turn signal and main beam headlight lev-
er has the following functions:
Switching on the turn signals
– Move the lever all the way up ››› Fig. 60 1 to indicate
right
, and all the way down 2 to indicate
left
.
Sign
alling a lane change
– Push the lever up 1 or down
2 to the
point where you incur resistance and then
release it. The turn signal will flash several times. The corresponding control lamp will
also flash.
Switching main beam on and off – If the dipped lights are on, push the lever
forward ››› Fig. 60 3 to switch on the main
beam headlights.
– Push the lever towards the steering wheel
››› Fig. 60 4 to switch off the main beam.
Headlight flashers
– Pull the lever towards the steering wheel
4 to operate the flasher.
Switching on parking lights
– Switch the ignition off and remove the key
from the lock.
– Move the turn signal lever up or down to
turn the right or left-hand parking lights on,
respectively. WARNING
The main beam can dazzle other drivers. Risk
of accident! Never use the main beam head-
lights or the headlight flasher if they could
dazzle other drivers. Note
● The turn signals only
work when the igni-
tion is switched on. The corresponding warn-
ing lamp or flashes in the instrument
» 77
Technical specifications
Advice
Operation
Safety
Page 80 of 236
Operation
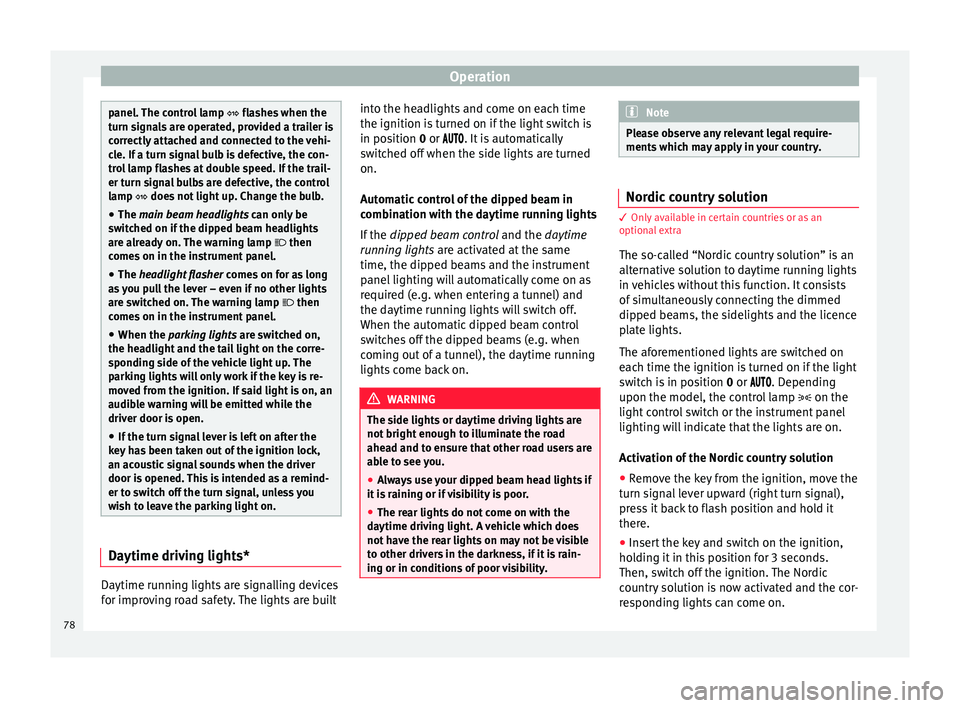
panel. The control lamp
flashes when the
t urn s
ignals are operated, provided a trailer is
correctly attached and connected to the vehi-
cle. If a turn signal bulb is defective, the con-
trol lamp flashes at double speed. If the trail-
er turn signal bulbs are defective, the control
lamp does not light up. Change the bulb.
● The main beam headlights can only be
sw
itched on if the dipped beam headlights
are already on. The warning lamp then
comes on in the instrument panel.
● The headlight flasher come
s on for as long
as you pull the lever – even if no other lights
are switched on. The warning lamp then
comes on in the instrument panel.
● When the parking lights are switched on,
the he
adlight and the tail light on the corre-
sponding side of the vehicle light up. The
parking lights will only work if the key is re-
moved from the ignition. If said light is on, an
audible warning will be emitted while the
driver door is open.
● If the turn signal lever is left on after the
key has been taken out of the ignition lock,
an acoustic signal sounds when the driver
door is opened. This is intended as a remind-
er to switch off the turn signal, unless you
wish to leave the parking light on. Daytime driving lights*
Daytime running lights are signalling devices
for improving road safety. The lights are built into the headlights and come on each time
the ignition is turned on if the light switch is
in position
0 or
. It is automatically
sw
itched off when the side lights are turned
on.
Automatic control of the dipped beam in
combination with the daytime running lights
If the dipped beam control and the daytime
running lights
are activated at the same
time, the dipped beams and the instrument
panel lighting will automatically come on as
required (e.g. when entering a tunnel) and
the daytime running lights will switch off.
When the automatic dipped beam control
switches off the dipped beams (e.g. when
coming out of a tunnel), the daytime running
lights come back on. WARNING
The side lights or daytime driving lights are
not bright enough to illuminate the road
ahead and to ensure that other road users are
able to see you.
● Always use your dipped beam head lights if
it is raining or if visibility is poor.
● The rear lights do not come on with the
daytime driving light. A vehicle which does
not have the rear lights on may not be visible
to other drivers in the darkness, if it is rain-
ing or in conditions of poor visibility. Note
Please observe any relevant legal require-
ments which may apply in your country. Nordic country solution
3 Only available in certain countries or as an
option
al
extra
The so-called “Nordic country solution” is an
alternative solution to daytime running lights
in vehicles without this function. It consists
of simultaneously connecting the dimmed
dipped beams, the sidelights and the licence
plate lights.
The aforementioned lights are switched on
each time the ignition is turned on if the light
switch is in position 0 or . Depending
upon the model, the control lamp on the
light control switch or the instrument panel
lighting will indicate that the lights are on.
Activation of the Nordic country solution
● Remove the key from the ignition, move the
turn signal lever upward (right turn signal),
press it back to flash position and hold it
there.
● Insert the key and switch on the ignition,
holding it in this position for 3 seconds.
Then, switch off the ignition. The Nordic
country solution is now activated and the cor-
responding lights can come on.
78
Page 81 of 236

Lights and visibility
Deactivation of the Nordic country solution
● Remove the key from the ignition, press the
turn signal lever down (left turn signal), press
it back to flash position and hold it here.
● Insert the key and switch on the ignition,
holding it in this position for 3 seconds.
Then, switch off the ignition. The Nordic
country solution is now deactivated and the
corresponding lights will not come on.
Coming Home/Leaving Home
function* The Coming Home function is controlled man-
ually. The Leaving Home function is control-
led with a photosensor.
If the Coming Home or Leaving Home func-
tion is connected, the front side and dipped
lights, the tail lights and the number plate
light will light up to provide assistance.
Coming home function
The Coming Home function is activated by
switching off the ignition and briefly flashing
the lights. When the driver door is opened,
the Coming Home lighting comes on. If the
driver door is already open when the lights
are flashed briefly, the Coming Home lighting
comes on
immediately .
When the l a
st door of the vehicle or the rear
lid is closed, the Coming Home function starts and the switching off the headlights is
delayed.
The Coming Home lighting switches off in the
following cases:
● On completion of the time period establish-
ed for the delay in switching off the lights af-
ter all the vehicle doors and the rear lid have
been closed.
● If, 30 seconds after being connected, any
doors or the rear lid remain open.
● If the light switch is turned to position
.
● If the ignition is switched on.
Leaving home function
The Leaving Home function is activated when
the vehicle is unlocked if:
● the light control is in position and
● the photosensor detects “darkness”.
The Leaving Home lighting switches off in the
following cases:
● If the time period for the delay in switching
off the headlights has ended
● If the vehicle is locked again.
● If the light switch is turned to position .
● If the ignition is switched on. Note
The setting for the delay in switching off the
headlights in the Coming Home and Leaving
Home function can be changed or the func-
tion can be connected or disconnected in the
menu Lights and visibility › ›
› page 56.
● If the ignition key is removed while the
lights are on, the lights flash briefly and the
driver door opens, no audible warning is
heard, since with the Coming Home function
on, the lights are automatically switched off
after a period of time (except when the light
switch is in position or . Instrument and switch lighting /
Headlight range control
Fig. 61
Dash panel: Instrument panel and
control dimmers and headlight range control. » 79
Technical specifications
Advice
Operation
Safety