park assist Seat Arona 2017 Owner's Manual
[x] Cancel search | Manufacturer: SEAT, Model Year: 2017, Model line: Arona, Model: Seat Arona 2017Pages: 308, PDF Size: 6.66 MB
Page 8 of 308
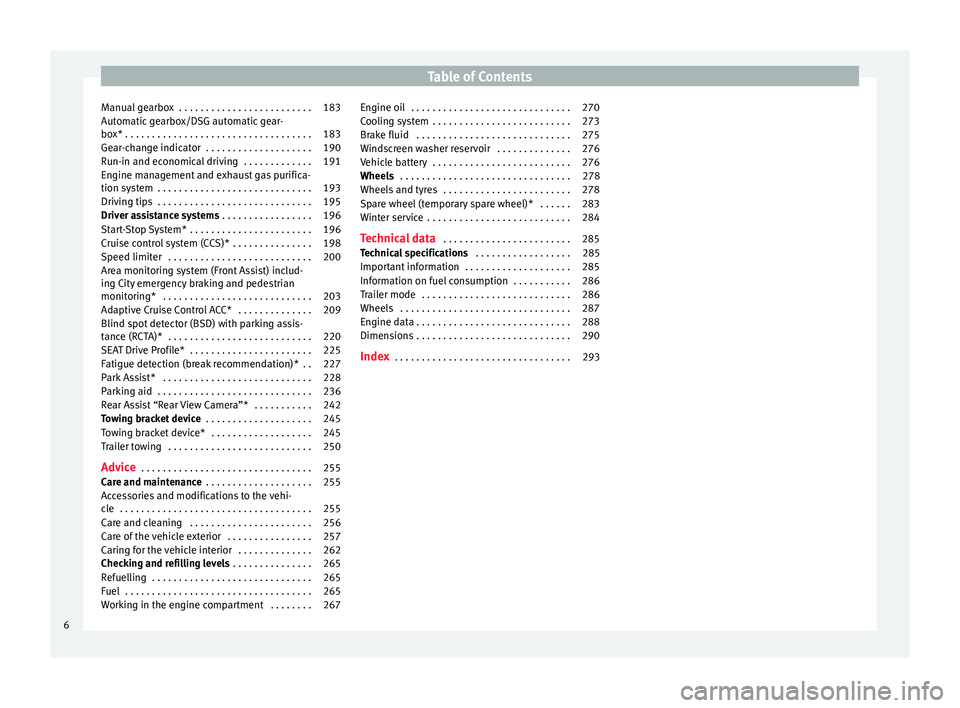
Table of Contents
Manual gearbox . . . . . . . . . . . . . . . . . . . . . . . . . 183
Automatic gearbox/DSG automatic gear-
bo x*
. . . . . . . . . . . . . . . . . . . . . . . . . . . . . . . . . . . 183
Ge
ar-change indicator . . . . . . . . . . . . . . . . . . . . 190
Run-in and economical driving . . . . . . . . . . . . . 191
Engine management and exhaust gas purifica-
tion syst
em . . . . . . . . . . . . . . . . . . . . . . . . . . . . . 193
Driving tips . . . . . . . . . . . . . . . . . . . . . . . . . . . . . 195
Driver assistance systems . . . . . . . . . . . . . . . . . 196
Start-Stop System* . . . . . . . . . . . . . . . . . . . . . . . 196
Cruise control system (CCS)* . . . . . . . . . . . . . . . 198
Speed limiter . . . . . . . . . . . . . . . . . . . . . . . . . . . 200
Area monitoring system (Front Assist) includ-
ing City
emergency braking and pedestrian
monitoring* . . . . . . . . . . . . . . . . . . . . . . . . . . . . 203
Adaptive Cruise Control ACC* . . . . . . . . . . . . . . 209
Blind spot detector (BSD) with parking assis-
tance (RCT
A)* . . . . . . . . . . . . . . . . . . . . . . . . . . . 220
SEAT Drive Profile* . . . . . . . . . . . . . . . . . . . . . . . 225
Fatigue detection (break recommendation)* . . 227
Park Assist* . . . . . . . . . . . . . . . . . . . . . . . . . . . . 228
Parking aid . . . . . . . . . . . . . . . . . . . . . . . . . . . . . 236
Rear Assist “Rear View Camera”* . . . . . . . . . . . 242
Towing bracket device . . . . . . . . . . . . . . . . . . . . 245
Towing bracket device* . . . . . . . . . . . . . . . . . . . 245
Trailer towing . . . . . . . . . . . . . . . . . . . . . . . . . . . 250
Advice . . . . . . . . . . . . . . . . . . . . . . . . . . . . . . . . 255
Care and maintenance . . . . . . . . . . . . . . . . . . . . 255
Accessories and modifications to the vehi-
cle
. . . . . . . . . . . . . . . . . . . . . . . . . . . . . . . . . . . . 255
Care and cleaning . . . . . . . . . . . . . . . . . . . . . . . 256
Care of the vehicle exterior . . . . . . . . . . . . . . . . 257
Caring for the vehicle interior . . . . . . . . . . . . . . 262
Checking and refilling levels . . . . . . . . . . . . . . . 265
Refuelling . . . . . . . . . . . . . . . . . . . . . . . . . . . . . . 265
Fuel . . . . . . . . . . . . . . . . . . . . . . . . . . . . . . . . . . . 265
Working in the engine compartment . . . . . . . . 267 Engine oil . . . . . . . . . . . . . . . . . . . . . . . . . . . . . . 270
Cooling system . . . . . . . . . . . . . . . . . . . . . . . . . . 273
Brake fluid . . . . . . . . . . . . . . . . . . . . . . . . . . . . . 275
Windscreen washer reservoir . . . . . . . . . . . . . . 276
Vehicle battery . . . . . . . . . . . . . . . . . . . . . . . . . . 276
Wheels
. . . . . . . . . . . . . . . . . . . . . . . . . . . . . . . . 278
Wheels and tyres . . . . . . . . . . . . . . . . . . . . . . . . 278
Spare wheel (temporary spare wheel)* . . . . . . 283
Winter service . . . . . . . . . . . . . . . . . . . . . . . . . . . 284
Technical data . . . . . . . . . . . . . . . . . . . . . . . . 285
Technical specifications . . . . . . . . . . . . . . . . . . 285
Important information . . . . . . . . . . . . . . . . . . . . 285
Information on fuel consumption . . . . . . . . . . . 286
Trailer mode . . . . . . . . . . . . . . . . . . . . . . . . . . . . 286
Wheels . . . . . . . . . . . . . . . . . . . . . . . . . . . . . . . . 287
Engine data . . . . . . . . . . . . . . . . . . . . . . . . . . . . . 288
Dimensions . . . . . . . . . . . . . . . . . . . . . . . . . . . . . 290
Index . . . . . . . . . . . . . . . . . . . . . . . . . . . . . . . . . 293
6
Page 36 of 308
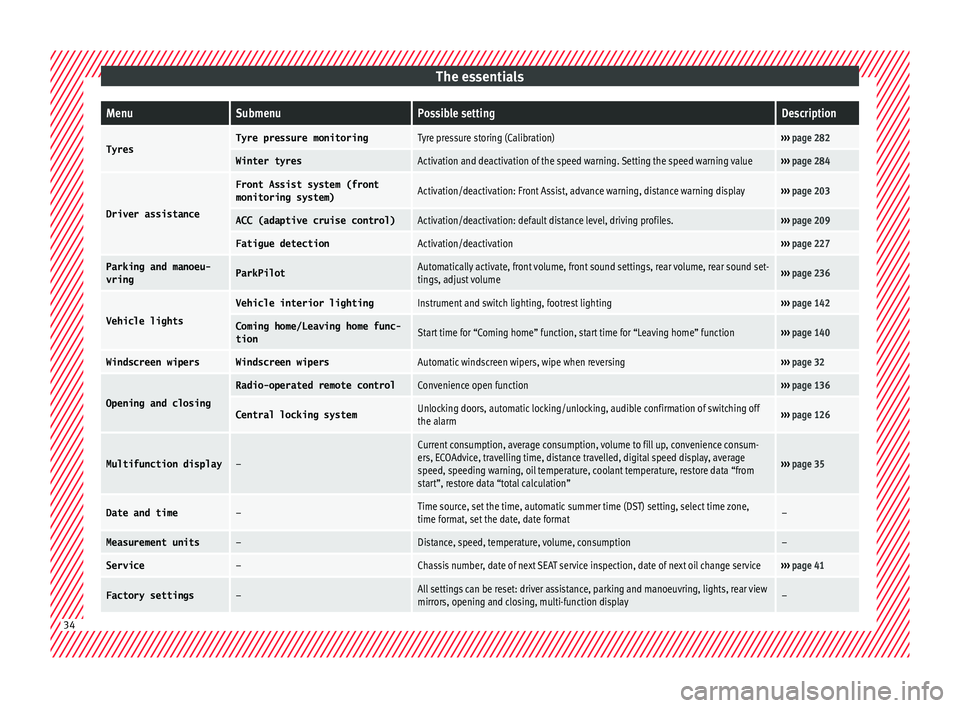
The essentialsMenuSubmenuPossible settingDescription
TyresTyre pressure monitoringTyre pressure storing (Calibration)›››
page 282
Winter tyresActivation and deactivation of the speed warning. Setting the speed warning value››› page 284
Driver assistance
Front Assist system (front
monitoring system)Activation/deactivation: Front Assist, advance warning, distance warning display››› page 203
ACC (adaptive cruise control)Activation/deactivation: default distance level, driving profiles.››› page 209
Fatigue detectionActivation/deactivation››› page 227
Parking and manoeu-
vringParkPilotAutomatically activate, front volume, front sound settings, rear volume, rear sound set-
tings, adjust volume››› page 236
Vehicle lights
Vehicle interior lightingInstrument and switch lighting, footrest lighting››› page 142
Coming home/Leaving home func‐
tionStart time for “Coming home” function, start time for “Leaving home” function››› page 140
Windscreen wipersWindscreen wipersAutomatic windscreen wipers, wipe when reversing››› page 32
Opening and closing
Radio-operated remote controlConvenience open function››› page 136
Central locking systemUnlocking doors, automatic locking/unlocking, audible confirmation of switching off
the alarm››› page 126
Multifunction display–
Current consumption, average consumption, volume to fill up, convenience consum-
ers, ECOAdvice, travelling time, distance travelled, digital speed display, average
speed, speeding warning, oil temperature, coolant temperature, restore data “from
start”, restore data “total calculation”
››› page 35
Date and time–Time source, set the time, automatic summer time (DST) setting, select time zone,
time format, set the date, date format–
Measurement units–Distance, speed, temperature, volume, consumption–
Service–Chassis number, date of next SEAT service inspection, date of next oil change service››› page 41
Factory settings–All settings can be reset: driver assistance, parking and manoeuvring, lights, rear view
mirrors, opening and closing, multi-function display– 34
Page 71 of 308
The essentials
Make sure the battery clamps have sufficient
met al-t
o-met
al contact with the battery termi-
nals.
If the engine fails to start, switch off the start-
er after about 10 seconds and try again after
about a minute. WARNING
● Ple a
se note the safety warnings referring to
working in the engine compartment
››› page 267, Working in the engine
compartment.
● The battery providing assistance must have
the same v
oltage as the flat battery (12 V)
and approximately the same capacity (see
imprint on battery). Failure to comply could
result in an explosion.
● Never use jump leads when one of the bat-
teries
is frozen. Danger of explosion! Even af-
ter the battery has thawed, battery acid could
leak and cause chemical burns. If a battery
freezes, it should be replaced.
● Keep sparks, flames and lighted cigarettes
awa
y from batteries, danger of explosion.
Failure to comply could result in an explo-
sion.
● Observe the instructions provided by the
manufact
urer of the jump leads.
● Do not connect the negative cable from the
other vehic
le directly to the negative terminal
of the flat battery. The gas emitted from the
battery could be ignited by sparks. Danger of
explosion. ●
Never att ac
h the negative cable to fuel sys-
tem components or the brake lines in the oth-
er vehicle.
● The non-insulated parts of the battery
clamp
s must not be allowed to touch. The
jump lead attached to the positive battery
terminal must not touch metal parts of the ve-
hicle, this can cause a short circuit.
● Position the leads in such a way that they
cannot c
ome into contact with any moving
parts in the engine compartment.
● Do not lean on the batteries. This could re-
sult
in chemical burns. Note
The vehicles must not touch each other, oth-
erw i
se electricity could flow as soon as the
positive terminals are connected. Changing the windscreen wiper
b
l
a
des
Changing the wiper blades Fig. 88
Wipers in service position. Fig. 89
Changing the windscreen wiper
b l
a
de. To change the blades it is necessary to move
the w
iper
s
from the rest position into the
service position. » 69
Page 94 of 308
Safety
Event Data Recorder D e
s
cription and operation Your vehicle has an event data recorder
(EDR).
The EDR’s f
u
nction is to record data in the
event of a mild or serious accident. These da-
ta are used to support the analysis of how
different vehicle systems behaved.
The EDR records, over a reduced time range
(normally 10 seconds or less), dynamic driv-
ing data and data from the restraint systems,
such as:
● How different vehicle systems worked.
● Whether the driver and the occupants were
we arin
g their seatbelts.
● How hard the acceleration or brake pedal
was
pressed.
● Vehicle speed.
These dat
a will provide a better understand-
ing of the circumstances of the accident.
Data from the driving assist systems are also
recorded. This includes data such as whether
the systems were inactive or active and if
such action had an impact on the vehicle’s
dynamic behaviour, changing its path in the
aforementioned situations, accelerating or
decelerating the vehicle. Depending on vehicle equipment, this in-
cludes
data from systems such as:
● Adaptive Cruise Control (ACC)
● Front Assist.
● Park Pilot system
The EDR data ar
e only recorded in specific ac-
cident situations. No data are recorded in
normal driving conditions.
No audio or video data inside or around the
vehicle are recorded. Under no circumstances
are personal data such as name, age, or gen-
der recorded. Nevertheless, third parties
(such as criminal proceedings authorities)
may relate the contents of the EDR data to
other data sources and create a personal ref-
erence in the context of an accident investi-
gation.
In order to read the EDR data it is necessary
to access (if legally permitted to do so) the
vehicle's ODB (“On-Board-Diagnose”) inter-
face while the vehicle is switched on.
SEAT will not have access to EDR data unless
the owner (or, in “Leasing” cases, the lessee
or hirer) gives their consent. There may be ex-
ceptions to this, depending on legal or con-
tractual provisions.
Due to legal requirements in safety-related
products, SEAT may use the EDR data for field
research and in order to improve vehicle sys-
tem quality. Any data used for the purposes of research will be treated anonymously (in
other word
s, no reference will be made to the
vehicle, their owner or the lessee/hirer).
92
Page 96 of 308
Emergencies
Tyre repair TM S
(T
yre Mobility System)* Read the additional information carefully
›› ›
page 60
The Anti-puncture kit* (Tyre Mobility System)
will reliably seal punctures caused by the
penetration of a foreign body of up to about
4 mm in diameter. Do not remove foreign ob-
jects, e.g. screws or nails, from the tyre.
After inserting the sealant residue in the tyre,
you must again check the tyre pressure about
10 minutes after starting the engine.
You should only use the tyre mobility set if
the vehicle is parked in a safe place, you are
familiar with the procedure and you have the
necessary tyre mobility set! Otherwise, you
should seek professional assistance.
Do not use the tyre sealant in the following
cases:
● If the wheel rim has been damaged.
● In outside temperatures below -20°C (-4°F).
● In the event of cuts or perforations in the
tyr e gr
eater than 4 mm.
● If you have been driving with very low pres-
sure or a c
ompletely flat tyre.
● If the sealant bottle has passed its use by
date. WARNING
Using the tyre mobility system can be dan-
ger ou
s, especially when filling the tyre at the
roadside. Please observe the following rules
to minimise the risk of injury:
● Stop the vehicle safely as soon as possible.
Park it
at a safe distance from surrounding
traffic to fill the tyre.
● Ensure the ground on which you park is flat
and solid.
● Al
l passengers and particularly children
must
keep a safe distance from the work area.
● Turn on the hazard warning lights to warn
other roa
d users.
● Use the tyre mobility system only if you are
famili
ar with the necessary procedures. Oth-
erwise, you should seek professional assis-
tance.
● The tyre mobility set is intended for tempo-
rary
emergency use only until you can reach
the nearest specialised workshop.
● Replace the repaired tyre with the tyre mo-
bility
set as soon as possible.
● The sealant is a health hazard and must be
cle
aned immediately if it comes into contact
with the skin.
● Always keep the tyre mobility set out of the
reac
h of small children.
● Never use a jack, even if it has been ap-
prov
ed for your vehicle.
● Always stop the engine, apply the hand-
brake l
ever firmly and engage gear if using a manual gearbox, in order to reduce the risk of
vehic
l
e involuntary movement. WARNING
A tyre filled with sealant does not have the
s ame per f
ormance properties as a conven-
tional tyre.
● Never drive faster than 80 km/h (50 mph).
● Avoid heavy acceleration, hard braking and
fas
t cornering.
● Drive for only 10 minutes at a maximum
speed of 80
km/h (50 mph) and then check
the tyre. For the sake of the environment
Dispose of used or expired sealant observing
any l
egal requirements. Note
● A new bottle of se
alant can be purchased at
SEAT dealerships.
● Take into account the separate instruction
manual
of the tyre mobility set* manufactur-
er. 94
Page 120 of 308
Operation
●
Stop the v
ehicle safely as soon as possible.
● Park the vehicle away from traffic and en-
sure th
at there are no highly flammable ma-
terials under the vehicle that could come into
contact with the exhaust system (e.g. dry
grass, fuel).
● A faulty vehicle represents a risk of acci-
dent for the driv
er and for other road users. If
necessary, switch on the hazard warning
lamps and put out the warning triangle to ad-
vise other drivers.
● Before opening the bonnet, switch off the
engine and al
low it to cool.
● In any vehicle, the engine compartment is a
hazar
dous area and could cause severe inju-
ries ››› page 267. CAUTION
Failure to heed the control lamps and text
mes s
ages when they appear may result in
faults in the vehicle. Introduction to the Easy
C
onnect
sy
stem*
System settings (CAR)* CAR menu Read the additional information carefully
›› ›
page 33
To select the settings menus, depending on
the version, press the Easy Connect button and the
S
ET
TINGS function button, OR
pr e
s
s the button and then SETTINGS .
The act ual
number of
menus available and
the name of the various options in these me-
nus will depend on the vehicle’s electronics
and equipment.
Pressing the menu button will always take
you to the last menu used.
When the function button check box is activa-
ted , the function is active.
Pressing the menu button will always take
y ou t
o the l
ast menu used.
Any changes made using the settings menus
are automatically saved on closing those me-
nus.
Function buttons in the vehicle settings
menuPage
ESC system››› page 177
Tyres››› page 282
Driver assistance››› table on page 33
Parking and manoeuvring››› page 236
Vehicle lights››› table on page 33
Mirrors and windscreen wipers››› table on page 33
Opening and closing››› table on page 33
Multifunction display››› table on page 33
Date and time››› table on page 33
Units››› table on page 33
Service››› page 114
Factory settings››› table on page 33 WARNING
Any distraction may lead to an accident, with
the risk of
injury. Operating the Easy Connect
system while driving could distract you from
traffic. 118
Page 142 of 308
Operation
are already on. The warning lamp
then
come s
on in the instrument panel.
● The headlight flasher come
s on for as long
as you pull the lever – even if no other lights
are switched on. The warning lamp then
comes on in the instrument panel.
● When the parking ligh
ts are switched on,
the headlight and the tail light on the corre-
sponding side of the vehicle light up. The
parking lights will only work with the ignition
off. If said light is on, an audible warning will
be emitted while the driver door is open.
● If the turn signal lever is left on after the
key h
as been taken out of the ignition lock,
an acoustic signal sounds when the driver
door is opened. This is intended as a remind-
er to switch off the turn signal, unless you
wish to leave the parking light on. Coming Home/Leaving Home Func-
tion*
Fig. 145
Related video The Leaving Home function is controlled with
a phot
o
sen
sor. If the Coming Home or Leaving Home func-
tion is c
onnected, the front side and dipped
lights, the tail lights and the number plate
light will light up to provide assistance.
Coming home function
The Coming Home function is activated by
switching off the ignition. When the driver
door is opened, the Coming Home lighting
comes on.
The Coming Home lighting switches off in the
following cases:
● If, 30 seconds after being connected, any
doors or the r
ear lid remain open.
● If the light switch is turned to position .
● If the ignition is switched on.
Automatic
Leaving Home function
The Leaving Home function is activated when
the vehicle is unlocked if:
● the light control is in position and
● the photo
sensor detects “darkness”.
The Leav
ing Home lighting switches off in the
following cases:
● If the time period for the delay in switching
off the hea
dlights has ended
● If the vehicle is locked again.
● If the light switch is turned to position .●
If the ignition is
switched on. Note
● To activ at
e the Coming/Leaving home func-
tion, the rotary light switch must be in posi-
tion and the light sensor must detect
darkness. Fog lights with cornering function*
This is an additional light source to dipped
beam he
a
dlights to light up the road as a
bend is taken.
The cornering light operates with the lights
switched on and when driving at less than
40 Km/h (25 mph). Ignition occurs by turning
the steering or connecting the turn signal.
Forward gear
● If the steering wheel is turned to the right,
or the right-h and t
urn signal operated, the
right-hand fog light turns on.
● If the steering wheel is turned to the left, or
the left
-hand turn signal operated, the left-
hand fog light turns on.
In reverse, both fog lights turn on. Note
When the fog lamps are on, the cornering
fu nction i
s activated and both headlights are
continuously on. 140
Page 170 of 308
Operation
Note
Failure to heed the control lamps and corre-
spondin g t
ext messages when they light up
may result in damage to the vehicle. Information relating to different vehi-
cl
e pr
ocesses. In order to make the vehicle more difficult to
st
e
al, you should always lock the steering be-
fore leaving the vehicle.
Mechanical steering lock
The steering column is locked when the key
is removed from the ignition lock and the ve-
hicle is stationary.
Activating the steering lock
● Park the vehicle ››
›
page 174.
● Remove the ignition key.
● Turn the steering wheel slightly until the
steerin
g lock has engaged.
Deactivating the steering lock
● Turn the steering wheel slightly to release
the lock.
● Inser
t the key in the ignition lock.
● Hold the steering wheel in this position
and switc
h on the ignition. Electromechanical steering
In vehic
les with electromechanical steering,
the assisted steering function automatically
adjusts according to vehicle speed, steering
wheel torque and wheel orientation. The
power steering only works when the engine
is running.
You should take into account that you will
need considerably more power than normal
to steer the vehicle if the power steering is
not working correctly or at all.
Power-assisted steering
Power-assisted steering helps the driver in
critical situations. In counter-steering, it as-
sists by applying additional torque ››› .
WARNING
Power-assisted steering, together with the
ESC, help s
the driver to control vehicle steer-
ing in critical situations. However, the driver
is ultimately responsible for steering the ve-
hicle at all times. Power-assisted steering
does not remove this responsibility. Starting and stopping the en-
gine
Ignition k ey
po
sitions Fig. 173
Ignition key positions. Read the additional information carefully
› ›
›
page 30
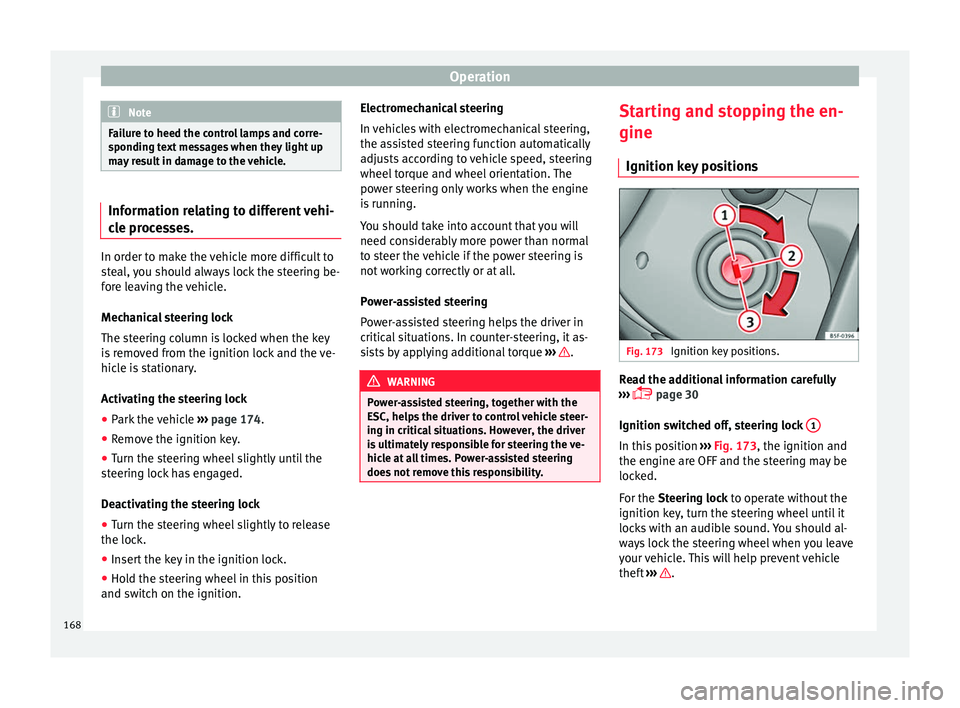
Ignition switched off, steering lock 1 In this position
››
›
Fig. 173, the ignition and
the engine are OFF and the steering may be
locked.
For the Steering lock to operate without the
ignition key, turn the steering wheel until it
locks with an audible sound. You should al-
ways lock the steering wheel when you leave
your vehicle. This will help prevent vehicle
theft ››› .
168
Page 178 of 308
Operation
The handbrake should be applied firmly to
pr ev
ent
the vehicle from accidentally rolling
away. Always apply the handbrake when you
leave your vehicle and when you park.
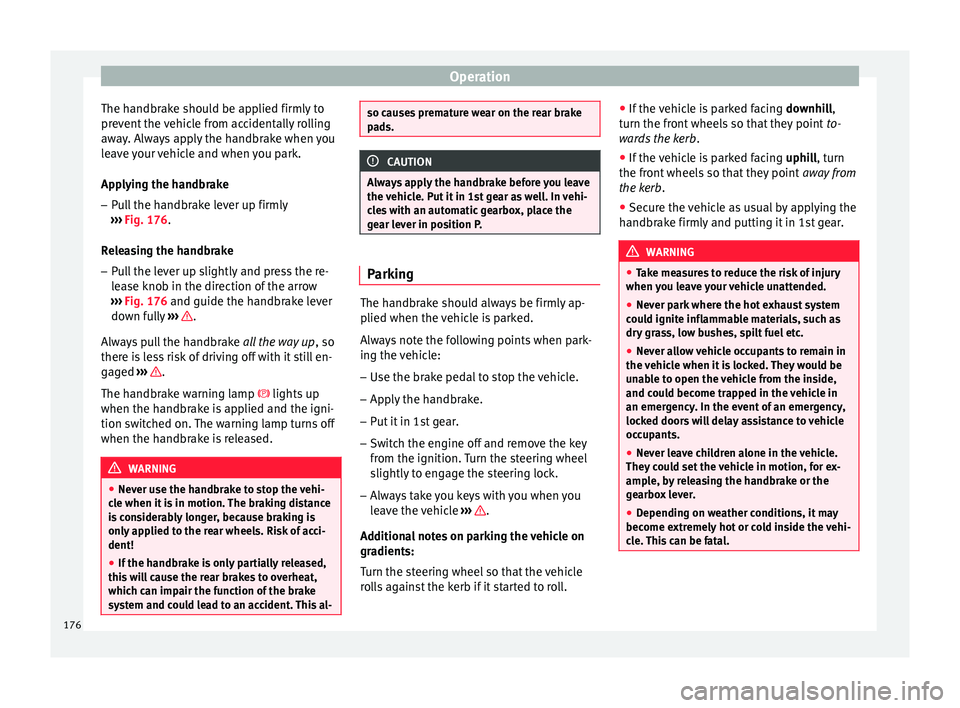
Applying the handbrake
– Pull the handbrake lever up firmly
›››
Fig. 176.
Releasing the handbrake
– Pull the lever up slightly and press the re-
lea
se knob in the direction of the arrow
››› Fig. 176 and guide the handbrake lever
down fully ››› .
A lw
a
ys pull the handbrake all the way up, so
there is less risk of driving off with it still en-
gaged ››› .
The h andbr
ak
e warning lamp lights up
when the handbrake is applied and the igni-
tion switched on. The warning lamp turns off
when the handbrake is released. WARNING
● Never u se the h
andbrake to stop the vehi-
cle when it is in motion. The braking distance
is considerably longer, because braking is
only applied to the rear wheels. Risk of acci-
dent!
● If the handbrake is only partially released,
this w
ill cause the rear brakes to overheat,
which can impair the function of the brake
system and could lead to an accident. This al- so causes premature wear on the rear brake
pa
d
s. CAUTION
Always apply the handbrake before you leave
the vehic
le. Put it in 1st gear as well. In vehi-
cles with an automatic gearbox, place the
gear lever in position P. Parking
The handbrake should always be firmly ap-
p
lied when the
v
ehicle is parked.
Always note the following points when park-
ing the vehicle: – Use the brake pedal to stop the vehicle.
– Apply the handbrake.
– Put it in 1st gear.
– Switch the engine off and remove the key
from the ignition. T
urn the steering wheel
slightly to engage the steering lock.
– Always take you keys with you when you
leav
e the vehicle ››› .
Ad dition
a
l notes on parking the vehicle on
gradients:
Turn the steering wheel so that the vehicle
rolls against the kerb if it started to roll. ●
If the v
ehicle is parked facing downhill,
turn the front wheels so that they point to-
wards the kerb .
● If the vehicle is parked facing uphill
, turn
the front wheels so that they point away from
the kerb.
● Secure the vehicle as usual by applying the
handbrak
e firmly and putting it in 1st gear. WARNING
● Tak e me
asures to reduce the risk of injury
when you leave your vehicle unattended.
● Never park where the hot exhaust system
coul
d ignite inflammable materials, such as
dry grass, low bushes, spilt fuel etc.
● Never allow vehicle occupants to remain in
the vehic
le when it is locked. They would be
unable to open the vehicle from the inside,
and could become trapped in the vehicle in
an emergency. In the event of an emergency,
locked doors will delay assistance to vehicle
occupants.
● Never leave children alone in the vehicle.
They cou
ld set the vehicle in motion, for ex-
ample, by releasing the handbrake or the
gearbox lever.
● Depending on weather conditions, it may
become extr
emely hot or cold inside the vehi-
cle. This can be fatal. 176
Page 199 of 308
Driver assistance systems
display. The engine may stop before the ve-
hic l
e c
omes to a halt in the deceleration
phase (at 7 km/h or 2 km/h, depending on
the vehicle’s gearbox).
– When you take your foot off the brake pedal
the engine wi
ll start up again. The warning
lamp will switch off.
Additional information related to the auto-
matic gearbox
The engine stops when the selector lever is in
the positions P, D, N and S, in addition to
when in manual mode. With the selector lev-
er in position P, the engine will also remain
switched off when you take your foot off the
brake pedal. In order to start the engine up
again the accelerator must be pressed, or an-
other gear engaged or the brake released.
If the selector lever is placed in position R
during the stopping phase, the engine will
start up again.
Change from position D to P to prevent the
engine from accidentally starting when
changing and passing by position R.
Additional information about vehicles with
Adaptive Cruise Control (ACC)
In vehicles with an automatic gearbox and
the ACC function, if the vehicle ahead drives
off again, the engine will start up again in
certain operating conditions. Note
● In v ehic
les with an automatic gearbox, you
can control whether the engine should switch
off or not by reducing or increasing the brake
force applied. While the vehicle remains stop-
ped, the engine will not stop if the brake ped-
al is slightly pressed, in traffic jams with fre-
quent stopping and starting for example. As
soon as strong pressure is applied to the
brake pedal, the engine will stop.
● In vehicles with manual gearbox, during
the stop
ping phases the brake pedal must re-
main depressed to prevent the vehicle from
moving.
● If the engine “stalls” in vehicles with man-
ual g
earbox, it can be directly started up
again by immediately pressing the clutch
pedal. General notes
The system can interrupt the Start-Stop mode
fr
equently
f
or different reasons.
The engine does not switch off
Before the stopping phase, the system veri-
fies whether certain conditions are met. The
engine does not switch off, in the following
situations for example:
● The engine has not yet reached the mini-
mum required t
emperature for the Start-Stop
mode. ●
The interior temper
ature selected for the air
conditioner has not yet been reached.
● The interior temperature is very high/low.
● Defrost function button activated
›››
page 48.
● The parking aid* is switched on.
● The battery is very low.
● The steering wheel is overly turned or is be-
ing turned.
● If
there is a danger of misting.
● After engaging reverse gear.
● In case of a very steep gradient.
The indication is
shown on the instrument
panel display, and in addition, the driver in-
formation system* shows, .
The engine starts by itself
During a stopping phase the normal Start-
Stop mode can be interrupted in the follow-
ing situations: The engine restarts by itself
without involvement from the driver.
● The interior temperature differs from the
value select
ed on the air conditioner.
● Defrost function button activated
›››
page 48.
● The brake has been pressed several times
consec
utively.
● The battery is too low.
● High power consumption. »
197
Technical data
Advice
Operation
Emergencies
Safety