Seat Cordoba 2007 Owner's Manual
Manufacturer: SEAT, Model Year: 2007, Model line: Cordoba, Model: Seat Cordoba 2007Pages: 256, PDF Size: 7.75 MB
Page 211 of 256
If and when209
Safety First
Operating instructions
Tips and Maintenance
Te c h n i c a l D a t a
turn signals 12V/PY21W
position lights 12V/W5W
Fog lights*
Fog lights 12V/55W (H3)
Registration plate light
Registration plate light - C5W
Caution
•
The halogen lamps (H3, H7, H4...) are pressurised and might explode on
changing them.
•
Therefore protective gloves and glasses should be worn when changing a
halogen lamp.Note
•
Due to the difficulty in accessing the lamps, any replacement work should
be done by a SEAT dealer. However, we shall explain how to change these
lamps, except for the xenon lights*.
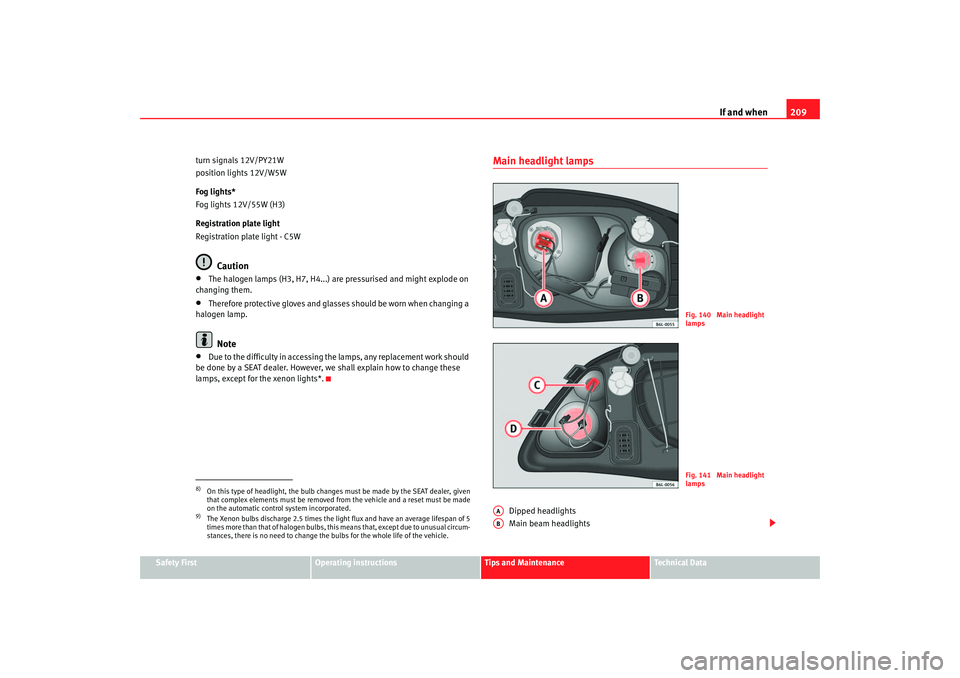
Main headlight lamps
Dipped headlights
Main beam headlights
8)On this type of headlight, the bulb changes must be made by the SEAT dealer, given
that complex elements must be removed from the vehicle and a reset must be made
on the automatic control system incorporated.9)The Xenon bulbs discharge 2.5 times the light flux and have an average lifespan of 5
times more than that of halogen bulbs, this means that, except due to unusual circum-
stances, there is no need to change the bulbs for the whole life of the vehicle.
Fig. 140 Main headlight
lampsFig. 141 Main headlight
lamps
AAAB
cordoba_ingles_0706 Seite 209 Montag, 28. August 2006 1:18 13
Page 212 of 256
If and when
210
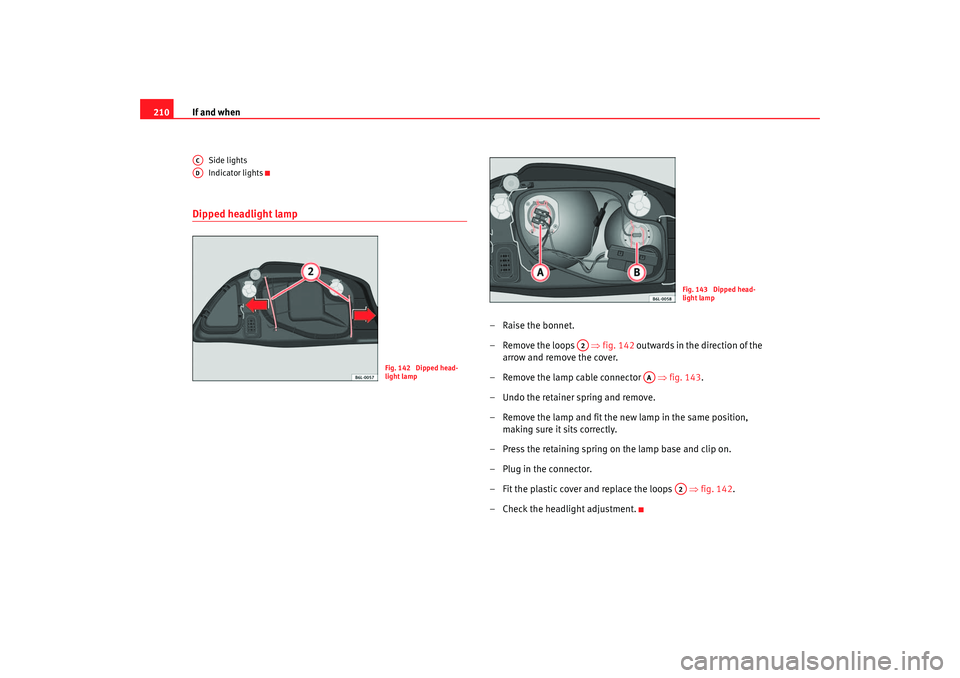
Side lights
Indicator lights
Dipped headlight lamp
–Raise the bonnet.
– Remove the loops ⇒fig. 142 outwards in the direction of the
arrow and remove the cover.
– Remove the lamp cable connector ⇒fig. 143 .
– Undo the retainer spring and remove.
– Remove the lamp and fit the new lamp in the same position, making sure it sits correctly.
– Press the retaining spring on the lamp base and clip on.
– Plug in the connector.
– Fit the plastic cover and replace the loops ⇒fig. 142.
– Check the headlight adjustment.
ACAD
Fig. 142 Dipped head-
light lamp
Fig. 143 Dipped head-
light lamp
A2
AA
A2
cordoba_ingles_0706 Seite 210 Montag, 28. August 2006 1:18 13
Page 213 of 256
If and when211
Safety First
Operating instructions
Tips and Maintenance
Te c h n i c a l D a t a
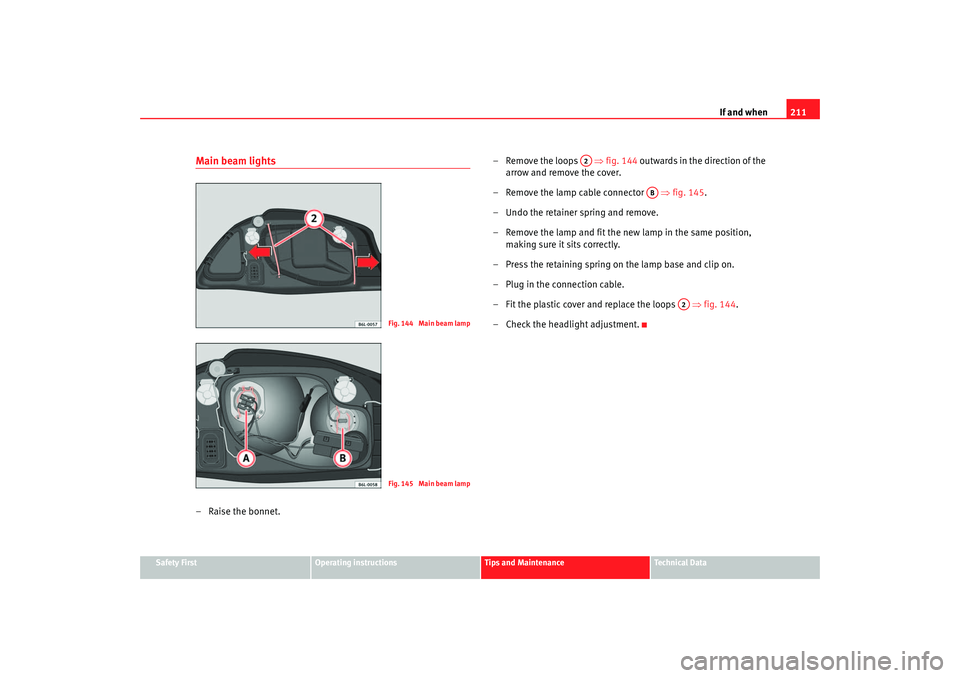
Main beam lights–Raise the bonnet. – Remove the loops
⇒fig. 144 outwards in the direction of the
arrow and remove the cover.
– Remove the lamp cable connector ⇒fig. 145.
– Undo the retainer spring and remove.
– Remove the lamp and fit the new lamp in the same position, making sure it sits correctly.
– Press the retaining spring on the lamp base and clip on.
– Plug in the connection cable.
– Fit the plastic cover and replace the loops ⇒fig. 144 .
– Check the headlight adjustment.
Fig. 144 Main beam lampFig. 145 Main beam lamp
A2
AB
A2
cordoba_ingles_0706 Seite 211 Montag, 28. August 2006 1:18 13
Page 214 of 256
If and when
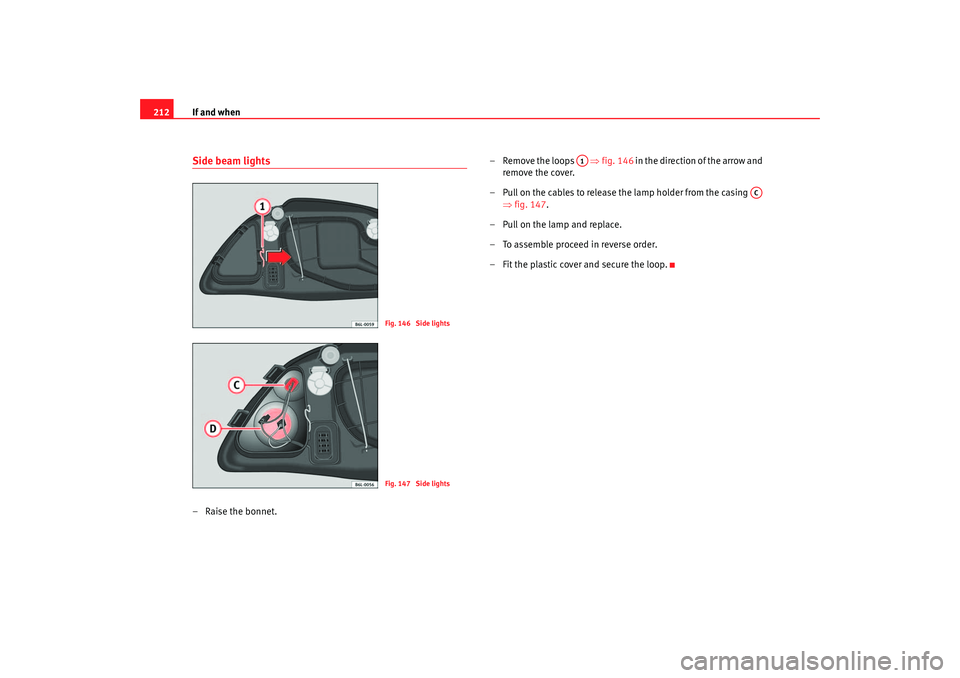
212Side beam lights– Raise the bonnet. – Remove the loops
⇒fig. 146 in the direction of the arrow and
remove the cover.
– Pull on the cables to release the lamp holder from the casing ⇒fig. 147.
–Pull on the lamp and replace.
– To assemble proceed in reverse order.
– Fit the plastic cover and secure the loop.
Fig. 146 Side lightsFig. 147 Side lights
A1
AC
cordoba_ingles_0706 Seite 212 Montag, 28. August 2006 1:18 13
Page 215 of 256
If and when213
Safety First
Operating instructions
Tips and Maintenance
Te c h n i c a l D a t a
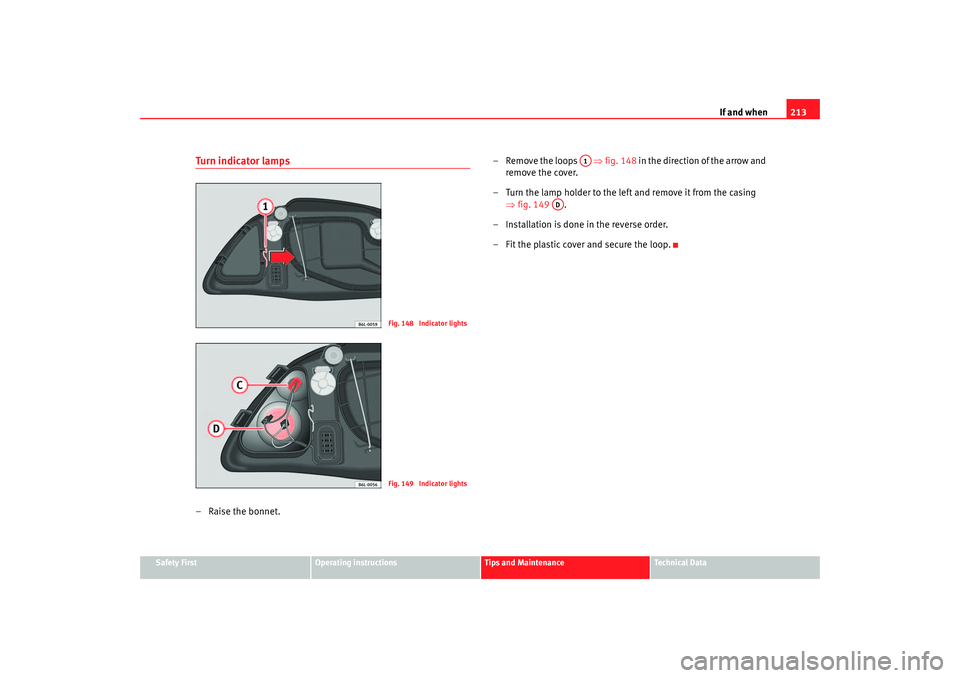
Turn indicator lamps–Raise the bonnet. – Remove the loops
⇒fig. 148 in the direction of the arrow and
remove the cover.
– Turn the lamp holder to the left and remove it from the casing ⇒fig. 149 .
– Installation is done in the reverse order.
– Fit the plastic cover and secure the loop.
Fig. 148 Indicator lightsFig. 149 Indicator lights
A1
AD
cordoba_ingles_0706 Seite 213 Montag, 28. August 2006 1:18 13
Page 216 of 256
If and when
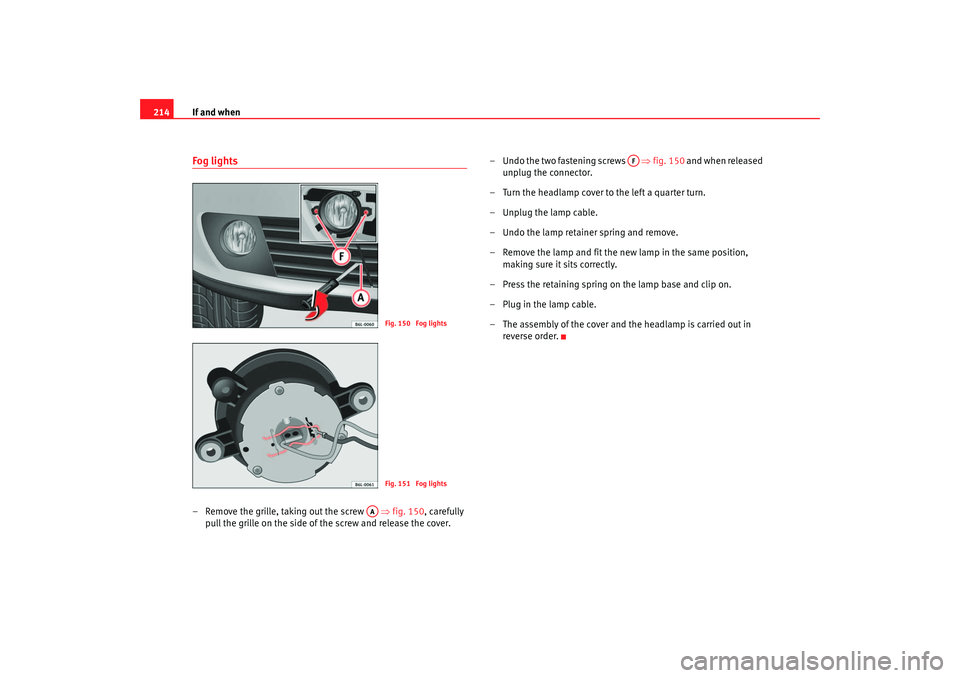
214Fog lights– Remove the grille, taking out the screw ⇒fig. 150, carefully
pull the grille on the side of the screw and release the cover. – Undo the two fastening screws
⇒fig. 150 and when released
unplug the connector.
– Turn the headlamp cover to the left a quarter turn.
– Unplug the lamp cable.
– Undo the lamp retainer spring and remove.
– Remove the lamp and fit the new lamp in the same position, making sure it sits correctly.
– Press the retaining spring on the lamp base and clip on.
– Plug in the lamp cable.
– The assembly of the cover and the headlamp is carried out in reverse order.
Fig. 150 Fog lightsFig. 151 Fog lights
AA
AF
cordoba_ingles_0706 Seite 214 Montag, 28. August 2006 1:18 13
Page 217 of 256
If and when215
Safety First
Operating instructions
Tips and Maintenance
Te c h n i c a l D a t a
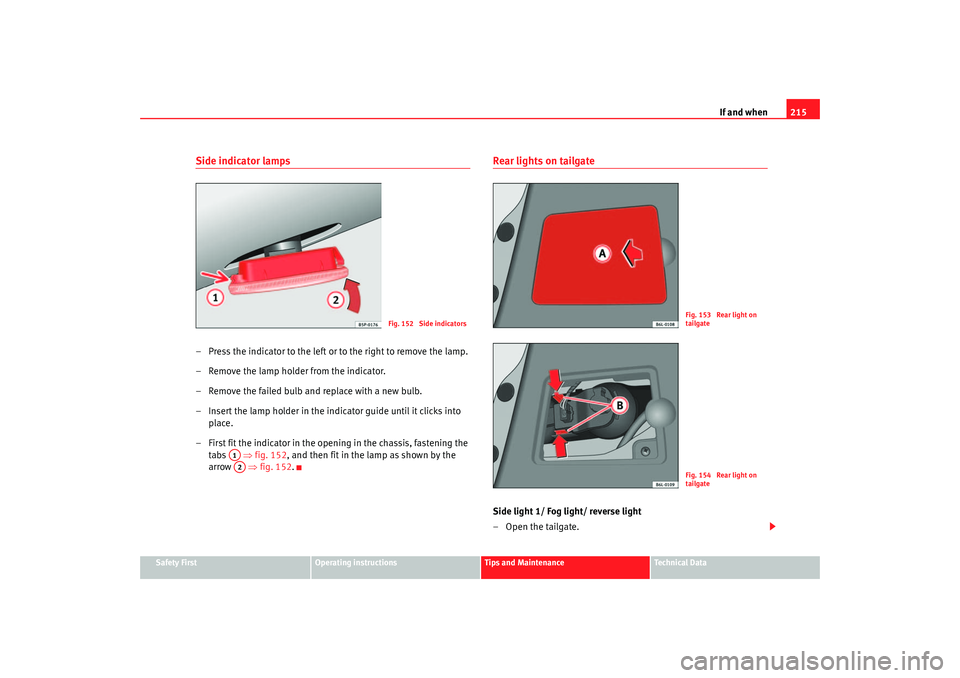
Side indicator lamps– Press the indicator to the left or to the right to remove the lamp.
– Remove the lamp holder from the indicator.
– Remove the failed bulb and replace with a new bulb.
– Insert the lamp holder in the indicator guide until it clicks into
place.
– First fit the indicator in the opening in the chassis, fastening the tabs ⇒fig. 152 , and then fit in the lamp as shown by the
arrow ⇒fig. 152.
Rear lights on tailgateSide light 1/ Fog light/ reverse light
–Open the tailgate.
Fig. 152 Side indicators
A1A2
Fig. 153 Rear light on
tailgateFig. 154 Rear light on
tailgate
cordoba_ingles_0706 Seite 215 Montag, 28. August 2006 1:18 13
Page 218 of 256
If and when
216
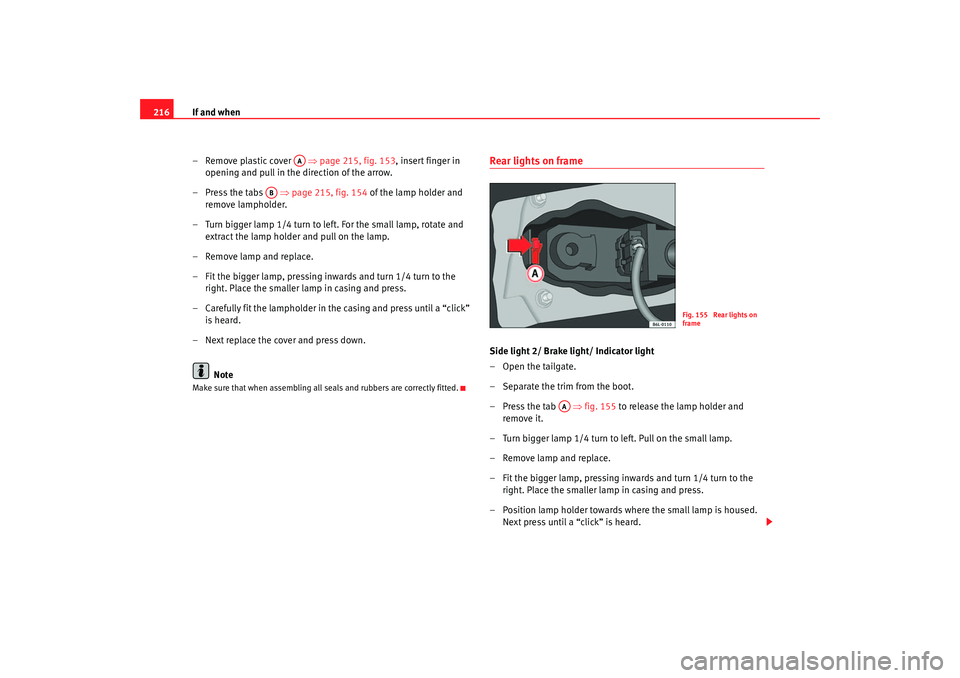
–Remove plastic cover ⇒ page 215, fig. 153, insert finger in
opening and pull in the direction of the arrow.
– Press the tabs ⇒page 215, fig. 154 of the lamp holder and
remove lampholder.
– Turn bigger lamp 1/4 turn to left. For the small lamp, rotate and extract the lamp holder and pull on the lamp.
– Remove lamp and replace.
– Fit the bigger lamp, pressing inwards and turn 1/4 turn to the right. Place the smaller lamp in casing and press.
– Carefully fit the lampholder in the casi ng and press until a “click”
is heard.
– Next replace the cover and press down.
NoteMake sure that when assembling all seals and rubbers are correctly fitted.
Rear lights on frameSide light 2/ Brake light/ Indicator light
–Open the tailgate.
– Separate the trim from the boot.
– Press the tab ⇒fig. 155 to release the lamp holder and
remove it.
– Turn bigger lamp 1/4 turn to left. Pull on the small lamp.
– Remove lamp and replace.
– Fit the bigger lamp, pressing inwards and turn 1/4 turn to the right. Place the smaller lamp in casing and press.
– Position lamp holder towards where the small lamp is housed. Next press until a “click” is heard.
AA
AB
Fig. 155 Rear lights on
frame
AA
cordoba_ingles_0706 Seite 216 Montag, 28. August 2006 1:18 13
Page 219 of 256
If and when217
Safety First
Operating instructions
Tips and Maintenance
Te c h n i c a l D a t a
Note
Make sure that when assembling all seals and rubbers are correctly fitted.Number plate light– Release transparent lamp cover by levering the tab with the flat
part of a screwdriver.
– Remove the defective lamp from the lamp holder, holding it in the centre, press to one side and fit new lamp
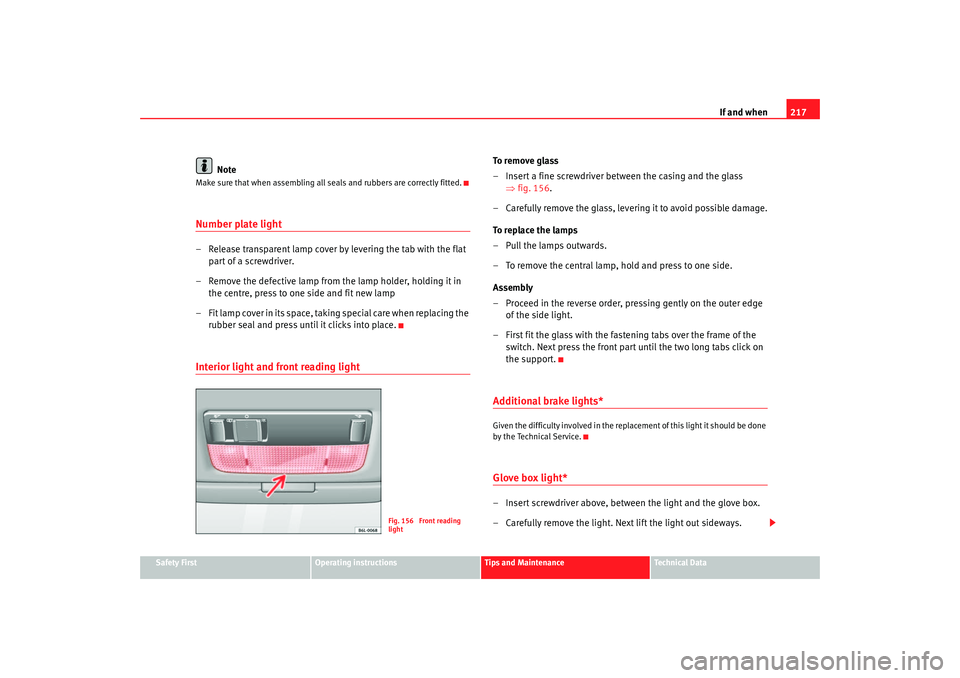
– Fit lamp cover in its space, taking special care when replacing the rubber seal and press until it clicks into place.Interior light and front reading light
To r e m o v e g l a s s
– Insert a fine screwdriver between the casing and the glass ⇒fig. 156.
– Carefully remove the glass, levering it to avoid possible damage.
To replace the lamps
– Pull the lamps outwards.
– To remove the central lamp, hold and press to one side.
Assembly
– Proceed in the reverse order, pressing gently on the outer edge of the side light.
– First fit the glass with the fast ening tabs over the frame of the
switch. Next press the front part until the two long tabs click on
the support.Additional brake lights*Given the difficulty involved in the replac ement of this light it should be done
by the Technical Service.Glove box light*– Insert screwdriver above, between the light and the glove box.
– Carefully remove the light. Next li ft the li ght out sideways.
Fig. 156 Front reading
light
cordoba_ingles_0706 Seite 217 Montag, 28. August 2006 1:18 13
Page 220 of 256
If and when
218
– Replace the bulb.
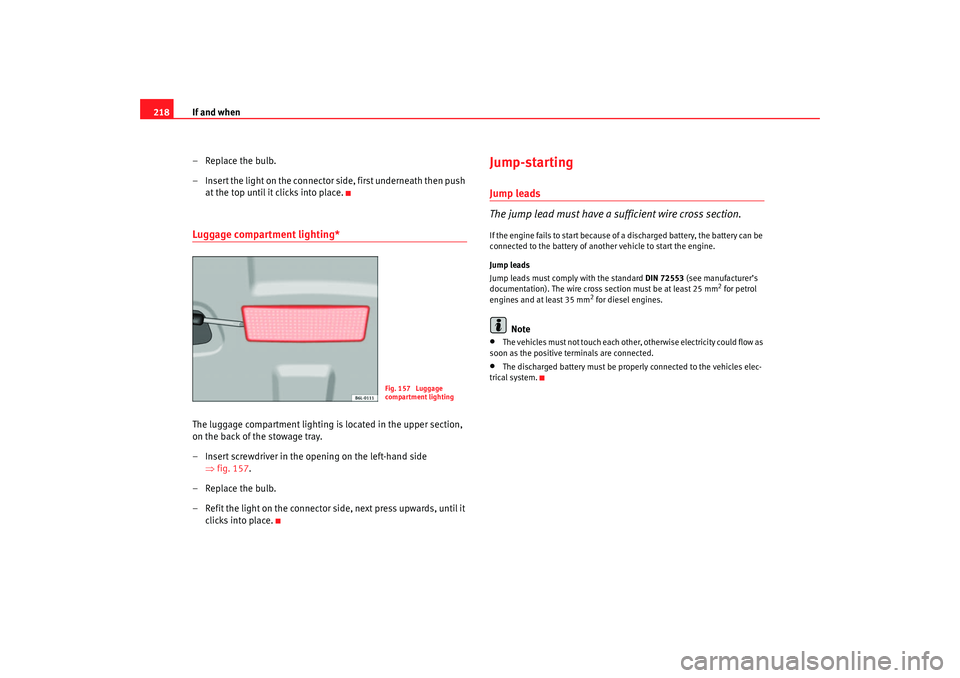
– Insert the light on the connector side, first underneath then push at the top until it clicks into place.Luggage compartment lighting*The luggage compartment lighting is located in the upper section,
on the back of the stowage tray.
– Insert screwdriver in the opening on the left-hand side ⇒fig. 157.
– Replace the bulb.
– Refit the light on the connector side, next press upwards, until it clicks into place.
Jump-startingJump leads
The jump lead must have a sufficient wire cross section.If the engine fails to start because of a discharged battery, the battery can be
connected to the battery of anot her vehicle to start the engine.
Jump leads
Jump leads must comply with the standard DIN 72553 (see manufacturer’s
documentation). The wire cross section must be at least 25 mm
2 for petrol
engines and at least 35 mm
2 for diesel engines.
Note
•
The vehicles must not touch each other, otherwise electricity could flow as
soon as the positive terminals are connected.
•
The discharged battery must be properly connected to the vehicles elec-
trical system.
Fig. 157 Luggage
compartment lighting
cordoba_ingles_0706 Seite 218 Montag, 28. August 2006 1:18 13