change time Seat Exeo 2008 ADAGIO
[x] Cancel search | Manufacturer: SEAT, Model Year: 2008, Model line: Exeo, Model: Seat Exeo 2008Pages: 47, PDF Size: 1.76 MB
Page 16 of 47
Media drives15
Media drivesCD playerGeneral informationThe sound system has an internal CD player. You can load standard audio CDs
or MP3 CDs into the CD player.
Use the CD function to play back a CD already loaded in the player
⇒ page 24. To switch between the CD player and external CD changer*, press
the button several times ⇒page 24.
For important notes regarding the use of the different storage media, please
refer to ⇒page 16.
MP3 files must meet the following specifications:
Different information can be stored on an MP3 CD. The following information
appears on the display:
•
File name of the MP3 file currently playing ( FILE).
•
Directory on the MP3 CD containing the track that is currently playing. The
top level is given the name ROOT (FOLDER )
•
Name of the ALBUM
•
Name of the ARTIST
•
CD TITLE . Titles that are too long are disp layed with “...”. To see the full
title, press the button assigned to the title.
To switch between the above categories, press the INFO control button
several times.
The display will show NOT AVAILABLE for a few seconds if no information is
stored on the MP3 CD for one of the categories.
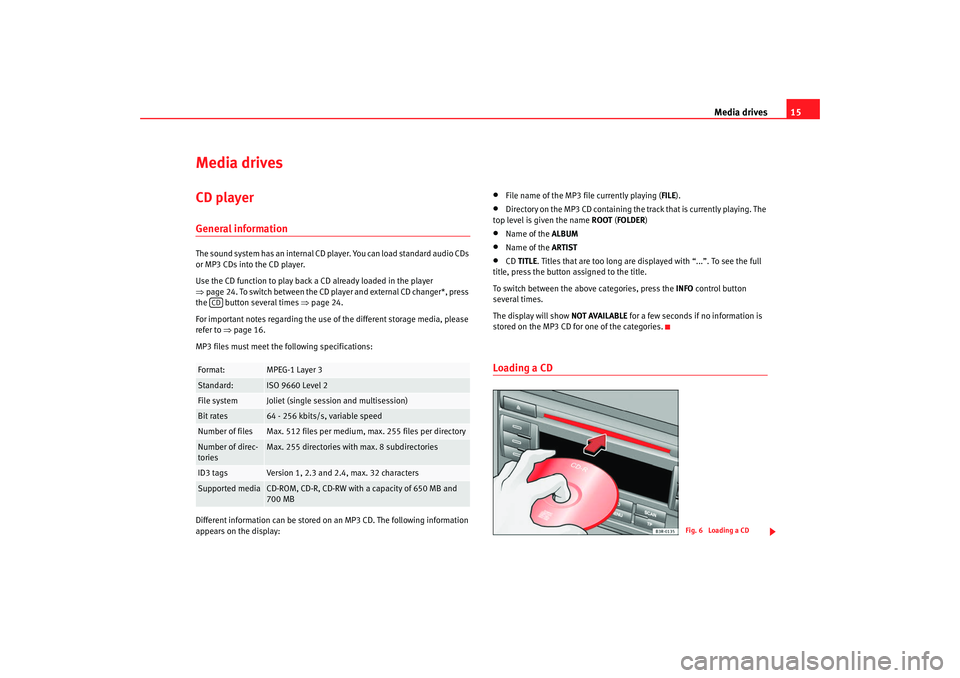
Loading a CD
Format:
MPEG-1 Layer 3
Standard:
ISO 9660 Level 2
File system
Joliet (single session and multisession)
Bit rates
64 - 256 kbits/s, variable speed
Number of files
Max. 512 files per medium, max. 255 files per directory
Number of direc-
tories
Max. 255 directories with max. 8 subdirectories
ID3 tags
Version 1, 2.3 and 2.4, max. 32 characters
Supported media
CD-ROM, CD-R, CD-RW with a capacity of 650 MB and
700 MB
CD
Fig. 6 Loading a CD
Adagio_EN Seite 15 Dienstag, 7. Oktober 2008 10:55 10
Page 20 of 47
Media drives19
•
Make sure that the iPod is fixed in place with one of the adapters
supplied.Note
•
Your Dealer also offers appropriate adapters for iPods that are not latest
generation.
•
For further information on adapter adaptation, please see the information
enclosed with the adapters supplied.
Inserting the iPod into the iPod interface– Switch on the sound system ⇒page 9.
– With the display facing upwards and the contact towards the front, slide the iPod into the bay until you hear it engage. The
iPod will switch on automatically and the battery will be charged.
– If the sound system does not detect the iPod after you insert it, please “reset” the iPod (refer to the iPod operating instructions).To start the iPod, press the button several times ⇒page 19.
The iPod is switched off automatically when you switch off the sound system
or the ignition.
Note
•
To ensure optimum sound quality, you should enable the “sound check”
setting on the iPod and disable the “EQ” (equaliser) before inserting the iPod
(please refer to the iPod operating instructions).
•
Slight scoring marks may occur on the iPod when used with the adapter.
Functions
The iPod is operated just like an external CD changer using
the controls on your car's sound system.To start the iPod, press the button until the display shows CD positions
CD 1 to CD 6 ⇒ page 24.
The following functions are available:•
Play all tracks stored on the iPod
•
Select and play up to five playlists (just like selecting CD 1 to 5 on an
external CD changer)
•
Change between playlists (just like changing the CD on an external CD
changer)
•
Change tracks within a playlist
•
Fast forward and rewind within a track
•
Play tracks in shuffle mode ("mix")
•
SCAN function
For further information on operation, please refer to the “CD” chapter
⇒ page 24.
NotesHere are some tips and points to remember when using the iPod in the car:•
Track numbers appear with a maximum of two digits in the sound system
display. The first digit is suppressed if you select a track with a three-digit
number, i.e. track 125 and track 25 are both displayed as track “25”. For this
reason we do not recommend allocating mo re than 99 tracks to each playlist.
•
If you reach the end of a playlist when selecting a track directly
(forward/reverse), the count is resumed at track “1”.
CD
CD
Adagio_EN Seite 19 Dienstag, 7. Oktober 2008 10:55 10
Page 23 of 47
Media drives
22
Caution•
Do not connect a device other than a memory stick or MP3 player to the
USB port. It is not possible to operate hard disks or USB hubs, etc. via the USB
port.
•
Do not connect the MP3 player directly to the USB port. This could
damage the device.
•
Never remove a memory device when the USB port is selected as source
(CD). This could damage your memory device.
Functions
Music files are played just like on a CD changer using the
controls on the sound system.To start the memory stick or MP3 player, press the button several times
until the display shows CD positions CD 1 to CD 6 ⇒ page 24.
The following functions are available:•
Play all tracks stored on the memory device (if no folders are stored on the
memory device)
•
Select and play up to six main folders with music files (just like selecting
CD 1 to 6 on a CD changer)
•
Change between main folders with music files (just like changing the CD
on a CD changer)
•
Change tracks within a main folder
•
Fast forward and rewind within a track
•
SCAN function
•
Play tracks in shuffle mode ("mix")
For further information on operations, please refer to the “CD” chapter
⇒ page 24.
NotesHere are some tips and points to reme mber when playing music files in the
car:•
We recommend that, instead of storing music files in the main directory of
the memory stick or MP3 player, you create separate folders e.g. for tracks
belonging to the same genre or artist. Therefore, bear in mind that your sound
system can display and play a maximum of six folders. The folders are allo-
cated first in numerical order and then in alphabetical order as CD 1 to CD 6.
Folders that do not contain music file s are automatically ignored. You can
create any number of subfolders.
•
If there are no folders on your memory device, the sound system will allo-
cate all the music files it finds to CD 1.
•
Track numbers appear with a maximum of two digits in the sound system
display. The first digit is suppressed if you select a track with a three-digit
number, i.e. track 125 and track 25 are both displayed as track “25”. We
therefore do not recommend allocating more than 99 tracks to each folder.
•
Bear in mind that special characters (umlauts, accents, etc) are at the end
of the alphabet.
The following music formats are supported:
•
mp3 (MPEG1 Layer3 from 32 to 320 kbps)
•
wma (from 8 to 192 kbps)
•
wav (11.025, 22.050 and 44.1 kHz sa mpling frequency with 16-bit
encoding, stereo)
•
ogg vorbis (up to q10, 48 kHz, stereo)
DRM music formats are not supported.Caution
Never store important data on the memory stick or MP3 player. SEAT is not
liable in any manner for any data or files that may be damaged or lost.
CD
Adagio_EN Seite 22 Dienstag, 7. Oktober 2008 10:55 10
Page 25 of 47
CD
24CDSelecting CD ModeImportant: A CD must have been inserted in the CD player
⇒ page 15.
– Press the button.The following information appears in the display:•
Duration
•
CD track
2)
•
Number of the track on the CD
•
Name of the directory/ album
2)
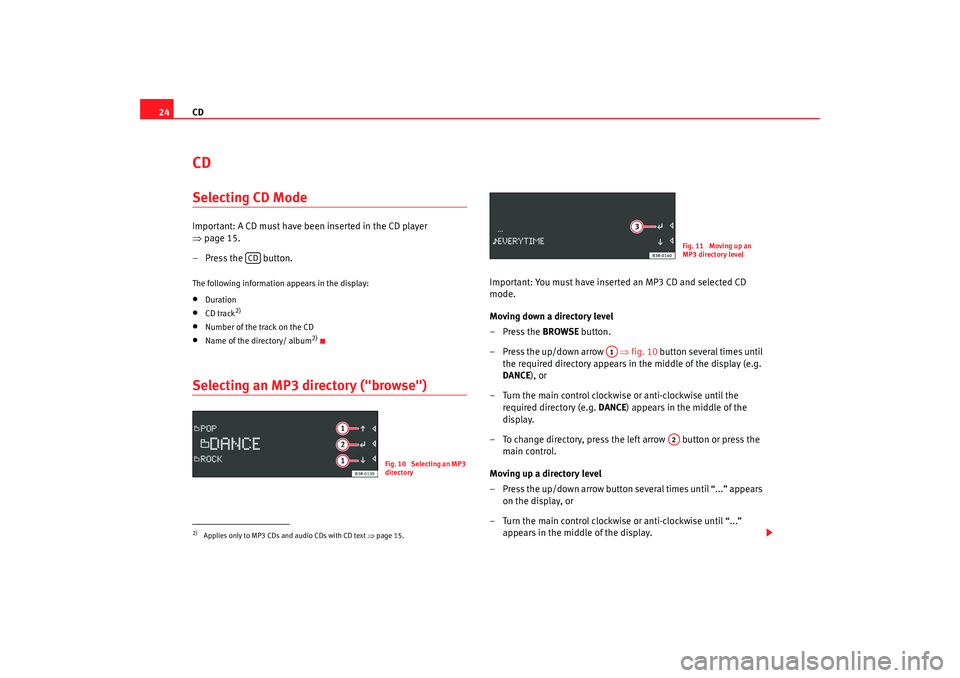
Selecting an MP3 directory ("browse")
Important: You must have inserted an MP3 CD and selected CD
mode.
Moving down a directory level
–Press the BROWSE button.
– Press the up/down arrow ⇒fig. 10 button several times until
the required directory appears in the middle of the display (e.g.
DANCE ), or
– Turn the main control clockwise or anti-clockwise until the required directory (e.g. DANCE) appears in the middle of the
display.
– To change directory, press the left arrow button or press the main control.
Moving up a directory level
– Press the up/down arrow button several times until “...” appears on the display, or
– Turn the main control clockwise or anti-clockwise until “...” appears in the middle of the display.
2)Applies only to MP3 CDs and audio CDs with CD text ⇒page 15.
CD
Fig. 10 Selecting an MP3
directory
Fig. 11 Moving up an
MP3 directory level
A1
A2
Adagio_EN Seite 24 Dienstag, 7. Oktober 2008 10:55 10
Page 31 of 47
Mobile phone interface
30
The external aerial directs the electromagnetic fields to the exterior,
which reduces the field strength in the vehicle interior.
− If retrofitting an external aerial, please ensure that it is installed
correctly.
Bluetooth®
Bluetooth technology enables a wireless connection between
a mobile phone and the on-board phone system.The mobile phone
3) must be bonded once to the mobile phone
interface in the vehicle. This procedure involves various steps,
depending on the mobile phone you are using. After switching the
ignition on (and with the vehicle at a standstill), your mobile phone
can be connected to the mobile phone interface.
– Make sure that no other mobile phone is connected to the mobile phone interface via Bluetooth.
– Switch the ignition on.
– Select the appropriate menu option on your mobile phone to search for Bluetooth compatible devices (i.e. the mobile phone
interface).
– Connect the mobile phone to the mobile phone interface. Your mobile phone interface will use the name “SEAT XXXX” when it
connects with the mobile phone.
– Enter the PIN for handsfree mode (“1234”) on the mobile phone interface within 30 seconds.
4)
– Wait until your mobile phone indicates that it has bonded.Up to four mobile phones
You can bond up to four mobile phones to the mobile phone interface.
However, it is only possible to activate one connection at a time. If you bond
a fifth mobile phone to the mobile phone interface, the system will delete the
device which has not been used for the longest time in conjunction with the
mobile phone interface.
Connecting and disconnecting
A mobile phone which has been bonded to the mobile phone interface and is
ready to operate will be connected automatically when you switch on the igni-
tion. On some mobile phones, yo u have to confirm the connection.
The Bluetooth connection is terminated when the key is removed from the
ignition lock. With most mobile phones the Bluetooth connection will also be
terminated when you insert the mobile phone in the adapter.
Autonomy
The Bluetooth connection between the mobile phone and the mobile phone
interface is restricted to the interior of the vehicle. The connection can be
susceptible to interference caused by other electronic devices or obstacles
between the devices. For example, the mobile phone interface may have diffi-
culty detecting your mobile phone or communicating with it if you keep it in
your jacket pocket.
3)Please make sure that the mobile phone supports the handsfree profile.
4)To prevent unauthorised use of your mobile phone, we recommend that you have the
Bluetooth PIN changed by a Technical Service or specialist garage.
Adagio_EN Seite 30 Dienstag, 7. Oktober 2008 10:55 10
Page 32 of 47
Mobile phone interface31
Phone book
The phone book entries on your SIM card and your mobile
phone directory are automatically stored in the mobile phone
interface.Loading the phone book entries
Provided your mobile phone supports this function, the phone book entries
will be automatically scanned into the memory of the mobile phone interface
after you have switched on the ignition and inserted the mobile phone in the
adapter. It may take several minutes to load the entries, depending on how
many entries are stored on the mobile phone. The message Please wait... will
appear on the instrument panel display during this process.
The last four phone books loaded into the mobile phone interface remain
stored there. When you link a fifth mobile phone to the mobile phone inter-
face, the phone book from the mobile phone which has not been used for the
longest time is deleted from the mobi le phone interface. Up to 500 phone
book entries per phone book ca n be stored in the memory.
Using the mobile phone again later
If the SIM card is identical, the phone book entries are already stored in the
mobile phone interface. You can use the phone book almost immediately.
The system automatically searches for changes or new entries and stores
them automatically. This process can take several minutes. If your vehicle is
equipped with the speech control system* ⇒ page 31, you cannot record any
spoken names in the phone book for the speech control system while phone
book entries are being loaded from the mobile phone.
Speech control systemIntroduction
You can use speech commands to operate various functions
of the telephone.Functions
When used in combination with the hands-free system, you can make calls
without touching your mobile phone. The speech control system recognises
commands and digits spoken by different people.
The speech control system allows you to do the following:•
Create an acoustic phone book for the speech control system ⇒page 32
•
Enter and dial a telephone number ⇒page 35
Traffic reports are not announced duri ng a running dialogue. The dialogue
will be ended immediately when an incoming phone call is received. To
answer the call, press the left thumbwheel on the multi-function steering
wheel* or the talk button on the mobile phone adapter.
Unclear speech commands
The system acknowledges your commands with an acoustic signal. If the
system does not recognise a speech command, it will answer with Pardon?
and request you to repeat the command. After a third failed attempt the
system will answer with Cancel and the dialogue will be ended.
How to help the system understand you
•
Speak clearly in a normal volume. Speak louder if you are driving fast.
•
Speak in a normal tone without long pauses.
•
Avoid speaking when the system is saying a cue.
•
Close doors, windows and sun roof* to reduce background noise. Make
sure that passengers are not talking when you say a command.
Adagio_EN Seite 31 Dienstag, 7. Oktober 2008 10:55 10
Page 33 of 47
Mobile phone interface
32•
Keep the air outlets of the air distribu tion system pointed away from the
microphone, which is fitted in the vicinity of the front interior lights.
•
The system should only be operated by the driver, since the hands-free
microphone is directed towards the driver.
WARNING
•
Please direct your full attention to the road at all times! As the driver,
you bear the responsibility for road safety. Therefore, you should only use
the functions in a manner that allows you to maintain control of the vehicle
in all situations.
•
The speech control system must not be used in cases of emergency,
since the voice changes in stressful situations. This could result in a failed
or delayed telephone connection. Always dial emergency numbers
manually.
Phone book for the speech control system
Name tags are stored in the phone book for the speech
control system.General notes
The phone book for the speech control system has 50 memory positions. You
can use it independently of the mobile phone. The name tags are stored in
the phone book for the speech control system.
Functions
The phone book for the speech control system gives you various options:•
Dialling phone numbers stored previously ⇒page 37
•
Recording a name in the speech cont rol phone book for a phone book
entry in the on-board phone system ⇒page 36
•
Storing name tags (consisting of a name and number) in the phone book
for the speech control system ⇒page 36
•
Playing the phone book for the speech control system ⇒page 38
Once you have saved name tags in the phone book for the speech control
system, you can select them via the speech control system.
Entering data
You should choose spoken names that can be identified clearly by the speech
control system.
Numbers from ZERO to NINE are recognised when you enter a telephone
number. The telephone number can be specified all at once, in blocks of
digits (separated by a brief pause), or as single digits. After each block of
digits you specify (separated by a brief pause) the system will repeat the
digits. The system does not recogni se number combinations (e.g. "twenty-
three") but separate figures ( TWO, THREE ). Say the numbers clearly so that
the system can recognise them easily.
If you indicate a number of more than tw enty figures, the system will respond:
The number is too long. A Plus (+) can also be placed ahead of the number.
If the system does not recognise a phone book entry, you can play back the
name tags (voice entries) on the speech control system by saying the
command PLAY PHONE BOOK ⇒ page 38. Press the talk button as a name is
being read to select the entry.
The function is not possible
Should the system say The function is not possible , please check the status
of the speech control system:
•
Is the ignition switched on?
•
Is the mobile phone connected to the mobile phone interface via Blue-
tooth?
•
Is the mobile phone inserted in the mobile phone adapter?
•
Is the mobile phone switched on and the PIN entered?
Adagio_EN Seite 32 Dienstag, 7. Oktober 2008 10:55 10
Page 36 of 47
Mobile phone interface35
During the dialogue, you can use the commands REPEAT, BACK , and
DELETE .Entering a PIN
You can change the PIN code for the SIM card via the speech
control system.– Switch on the speech control system ⇒page 33.
– Give the command ENTER PIN.
– Say the individual digits of your PIN code.
– Give the command CORRECT.If the PIN code is more than 8 digits long, the speech control system will
decline and give the cue The PIN is too long . If the specified PIN code is incor-
rect, the system will say The PIN is incorrect. If the wrong PIN code is entered
three times, the SIM card will be blocked. The SIM card can be unblocked with
the PUK (personal unblock key). The unblocking key can only be entered on
the mobile phone keypad and not via the speech control system.
Dialling a number
A telephone number can be specified to the system and then
dialled.– Switch on the speech control system ⇒page 33.
–Say the command DIAL NUMBER. The speech control system will
ask you to enter a telephone number.
– Say the digits of the telephone nu mber individually or in groups.
After each block of digits you sp ecify (separated by a brief pause)
the system will repeat the digits.
–Say DIAL when you have completed the number entry. The tele-
phone number will be dialled.Redialling– Switch on the speech control system ⇒page 33.
–Say the command REDIAL. The last telephone number you used
will be dialled.
NoteOn some mobile phones, the number you dialled last is placed at the bottom
of the list. In this case, the redial function of the speech control system
cannot be used.
delete a name tag from the phone
book for the speech control system.
DELETE NAME ⇒ page 37, or
DELETE PHONE BOOK ⇒ page 38
play back name tags from the phone
book of the speech control system.
PLAY PHONE BOOK ⇒ page 38
delete name tags from the phone
book for the speech control system.
DELETE PHONE BOOK ⇒ page 38
To . . .
Speak this command:
Adagio_EN Seite 35 Dienstag, 7. Oktober 2008 10:55 10