key Seat Exeo 2009 MEDIA SYSTEM 1.0
[x] Cancel search | Manufacturer: SEAT, Model Year: 2009, Model line: Exeo, Model: Seat Exeo 2009Pages: 124, PDF Size: 6.27 MB
Page 2 of 124
Contents1
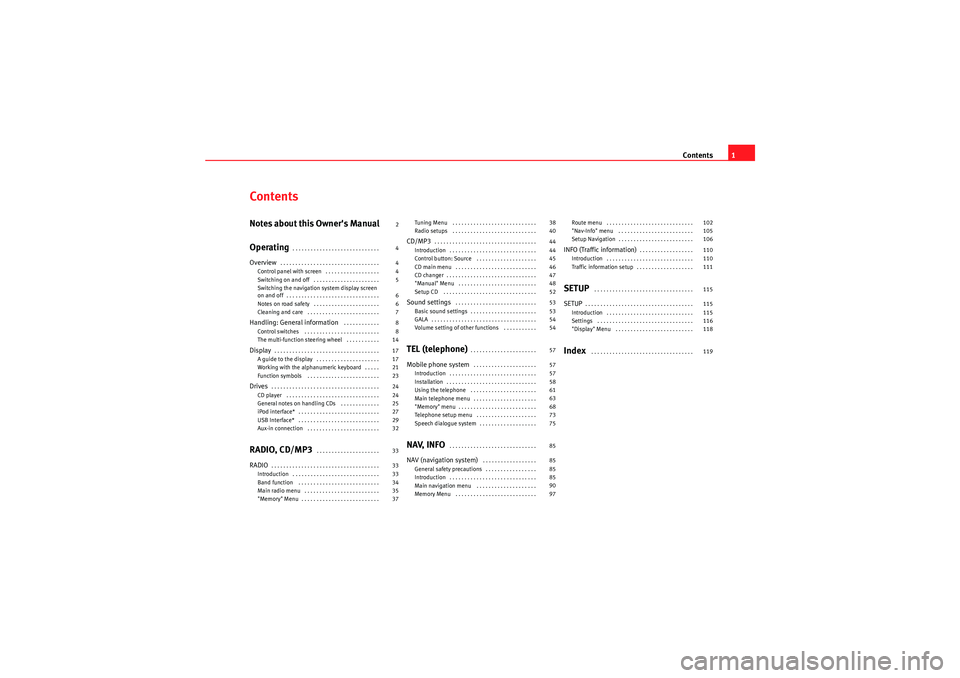
ContentsNotes about this Owner's Manual
Operating
. . . . . . . . . . . . . . . . . . . . . . . . . . . . .
Overview
. . . . . . . . . . . . . . . . . . . . . . . . . . . . . . . . .
Control panel with screen . . . . . . . . . . . . . . . . . .
Switching on and off . . . . . . . . . . . . . . . . . . . . . .
Switching the navigation system display screen
on and off . . . . . . . . . . . . . . . . . . . . . . . . . . . . . . .
Notes on road safety . . . . . . . . . . . . . . . . . . . . . .
Cleaning and care . . . . . . . . . . . . . . . . . . . . . . . .
Handling: General information
. . . . . . . . . . . .
Control switches . . . . . . . . . . . . . . . . . . . . . . . . .
The multi-function steering wheel . . . . . . . . . . .
Display
. . . . . . . . . . . . . . . . . . . . . . . . . . . . . . . . . . .
A guide to the display . . . . . . . . . . . . . . . . . . . . .
Working with the alphanumeric keyboard . . . . .
Function symbols . . . . . . . . . . . . . . . . . . . . . . . .
Drives
. . . . . . . . . . . . . . . . . . . . . . . . . . . . . . . . . . . .
CD player . . . . . . . . . . . . . . . . . . . . . . . . . . . . . . .
General notes on handling CDs . . . . . . . . . . . . .
iPod interface* . . . . . . . . . . . . . . . . . . . . . . . . . . .
USB Interface* . . . . . . . . . . . . . . . . . . . . . . . . . . .
Aux-in connection . . . . . . . . . . . . . . . . . . . . . . . .
RADIO, CD/MP3
. . . . . . . . . . . . . . . . . . . . .
RADIO
. . . . . . . . . . . . . . . . . . . . . . . . . . . . . . . . . . . .
Introduction . . . . . . . . . . . . . . . . . . . . . . . . . . . . .
Band function . . . . . . . . . . . . . . . . . . . . . . . . . . .
Main radio menu . . . . . . . . . . . . . . . . . . . . . . . . .
"Memory" Menu . . . . . . . . . . . . . . . . . . . . . . . . . . Tuning Menu . . . . . . . . . . . . . . . . . . . . . . . . . . . .
Radio setups . . . . . . . . . . . . . . . . . . . . . . . . . . . .
CD/MP3
. . . . . . . . . . . . . . . . . . . . . . . . . . . . . . . . . .
Introduction . . . . . . . . . . . . . . . . . . . . . . . . . . . . .
Control button: Source . . . . . . . . . . . . . . . . . . . .
CD main menu . . . . . . . . . . . . . . . . . . . . . . . . . . .
CD changer . . . . . . . . . . . . . . . . . . . . . . . . . . . . . .
"Manual" Menu . . . . . . . . . . . . . . . . . . . . . . . . . .
Setup CD . . . . . . . . . . . . . . . . . . . . . . . . . . . . . . .
Sound settings
. . . . . . . . . . . . . . . . . . . . . . . . . . .
Basic sound settings . . . . . . . . . . . . . . . . . . . . . .
GALA . . . . . . . . . . . . . . . . . . . . . . . . . . . . . . . . . . .
Volume setting of other functions . . . . . . . . . . .
TEL (telephone)
. . . . . . . . . . . . . . . . . . . . . .
Mobile phone system
. . . . . . . . . . . . . . . . . . . . .
Introduction . . . . . . . . . . . . . . . . . . . . . . . . . . . . .
Installation . . . . . . . . . . . . . . . . . . . . . . . . . . . . . .
Using the telephone . . . . . . . . . . . . . . . . . . . . . .
Main telephone menu . . . . . . . . . . . . . . . . . . . . .
"Memory" menu . . . . . . . . . . . . . . . . . . . . . . . . . .
Telephone setup menu . . . . . . . . . . . . . . . . . . . .
Speech dialogue system . . . . . . . . . . . . . . . . . . .
NAV, INFO
. . . . . . . . . . . . . . . . . . . . . . . . . . . . .
NAV (navigation system)
. . . . . . . . . . . . . . . . . .
General safety precautions . . . . . . . . . . . . . . . . .
Introduction . . . . . . . . . . . . . . . . . . . . . . . . . . . . .
Main navigation menu . . . . . . . . . . . . . . . . . . . .
Memory Menu . . . . . . . . . . . . . . . . . . . . . . . . . . . Route menu . . . . . . . . . . . . . . . . . . . . . . . . . . . . .
"Nav-Info" menu . . . . . . . . . . . . . . . . . . . . . . . . .
Setup Navigation . . . . . . . . . . . . . . . . . . . . . . . . .
INFO (Traffic information)
. . . . . . . . . . . . . . . . . .
Introduction . . . . . . . . . . . . . . . . . . . . . . . . . . . . .
Traffic information setup . . . . . . . . . . . . . . . . . . .
SETUP
. . . . . . . . . . . . . . . . . . . . . . . . . . . . . . . . .
SETUP
. . . . . . . . . . . . . . . . . . . . . . . . . . . . . . . . . . . .
Introduction . . . . . . . . . . . . . . . . . . . . . . . . . . . . .
Settings . . . . . . . . . . . . . . . . . . . . . . . . . . . . . . . .
"Display" Menu . . . . . . . . . . . . . . . . . . . . . . . . . .
Index
. . . . . . . . . . . . . . . . . . . . . . . . . . . . . . . . . .
2
4
4
4
5
6
6
7
8
8
14
17
17
21
23
24
24
25
27
29
32
33
33
33
34
35
37 38
40
44
44
45
46
47
48
52
53
53
54
54
57
57
57
58
61
63
68
73
75
85
85
85
85
90
97
102
105
106
110
110
111
115
115
115
116
118
119
Media System 1.0_EN.book Seite 1 Donnerstag, 10. September 2009 1:52 13
Page 6 of 124
Overview5
Operating
RADIO, CD/MP3
TEL (telephone)
NAV, INFO
SETUP
Display control knob (
) . . . . . . . . . . . . . . . . . . . . . . . . . . . . . .
Function buttons . . . . . . . . . . . . . . . . . . . . . . . . . . . . . . . . . . . . .
Eject button . . . . . . . . . . . . . . . . . . . . . . . . . . . . . . . . . . . . . . . . .
Display . . . . . . . . . . . . . . . . . . . . . . . . . . . . . . . . . . . . . . . . . . . . .
CD slot
Forward/reverse buttons . . . . . . . . . . . . . . . . . . . . . . . . . . . . . .
Rotary pushbutton . . . . . . . . . . . . . . . . . . . . . . . . . . . . . . . . . . .
Control buttons . . . . . . . . . . . . . . . . . . . . . . . . . . . . . . . . . . . . . . button . . . . . . . . . . . . . . . . . . . . . . . . . . . . . . . . . . . . . .
Note
•Please note that this instruction manual only describes the SEAT naviga-
tion system and its components. For more information about the features and
equipment fitted on your vehicle, please refer to the owner's manual.•Some of the equipment shown is found only in certain model versions or
is not supplied as standard.Switching on and offAutomatic switching on and offThe navigation system switches on automatically after you turn the ignition
on . When you remove your key from the ignition lock , the navigation system
will automatically switch off.
What happens when it is switched on?
When the system is switched on, the start screen appears. Then the last
selected main function is switched on automatically. The last selected
audio/video source is automatically switched on. What happens when it is switched off?
When the equipment is switched off, the display darkens and the audio
source is silenced. Settings made are stored.
Switching on and off manually
The navigation system can also be turned on and off manu-
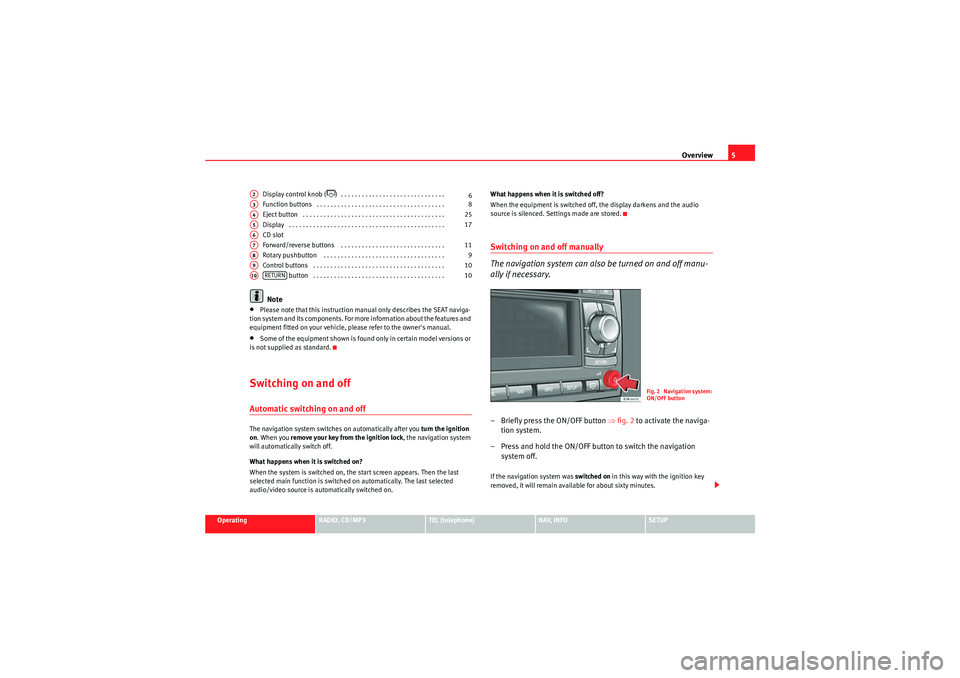
ally if necessary.– Briefly press the ON/OFF button
⇒fig. 2 to activate the naviga-
tion system.
– Press and hold the ON/OFF button to switch the navigation system off.If the navigation system was switched on in this way with the ignition key
removed, it will remain available for about sixty minutes.
A2
6
A3
8
A4
25
A5
17
A6A7
11
A8
9
A9
10
A10
RETURN
10
Fig. 2 Navigation system:
ON/OFF button
Media System 1.0_EN.book Seite 5 Donnerstag, 10. September 2009 1:52 13
Page 22 of 124
Display21
Operating
RADIO, CD/MP3
TEL (telephone)
NAV, INFO
SETUP
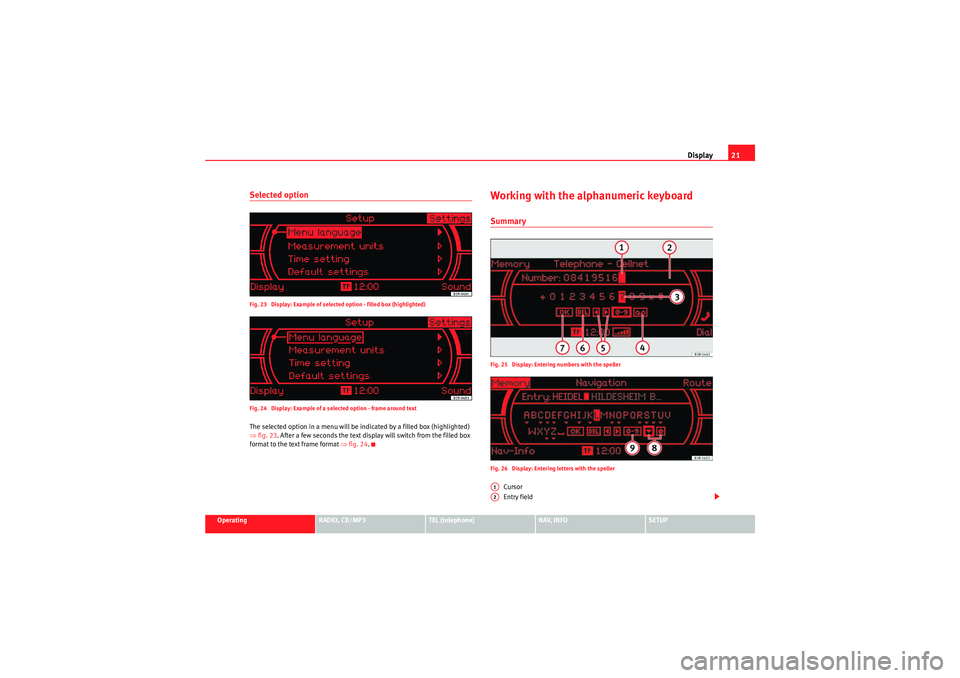
Selected optionFig. 23 Display: Example of selected option - filled box (highlighted)
Fig. 24 Display: Example of a selected option - frame around textThe selected option in a menu will be indicated by a filled box (highlighted)
⇒fig. 23 . After a few seconds the text display will switch from the filled box
format to the text frame format ⇒fig. 24.
Working with the alphanumeric keyboardSummaryFig. 25 Display: Entering numbers with the speller
Fig. 26 Display: Entering letters with the speller
Cursor
Entry field
A1A2
Media System 1.0_EN.book Seite 21 Donnerstag, 10. September 2009 1:52 13
Page 23 of 124
Display
22
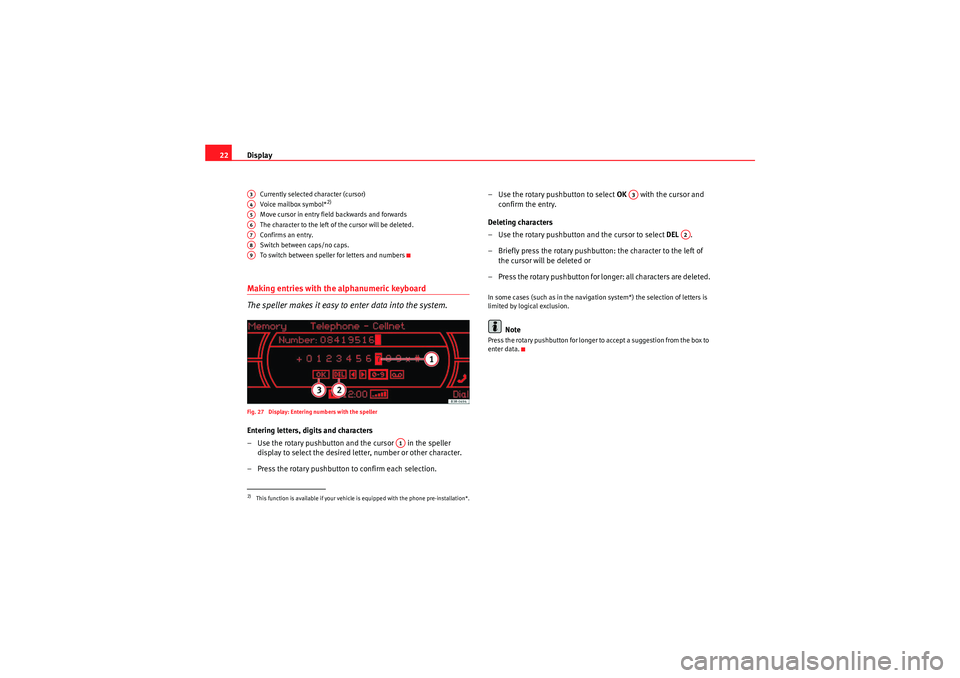
Currently selected character (cursor)
Voice mailbox symbol*
2)
Move cursor in entry field backwards and forwards
The character to the left of the cursor will be deleted.
Confirms an entr y.
Switch between caps/no caps.
To switch between speller for letters and numbers
Making entries with the alphanumeric keyboard
The speller makes it easy to enter data into the system.Fig. 27 Display: Entering numbers with the spellerEntering letters, digits and characters
– Use the rotary pushbutton and the cursor in the speller
display to select the desired letter, number or other character.
– Press the rotary pushbutton to confirm each selection. – Use the rotary pushbutton to select
OK with the cursor and
confirm the entry.
Deleting characters
– Use the rotary pushbutton and the cursor to select DEL .
– Briefly press the rotary pushbutton: the character to the left of the cursor will be deleted or
– Press the rotary pushbutton for longer: all characters are deleted.
In some cases (such as in the navigation system*) the selection of letters is
limited by logical exclusion.
Note
Press the rotary pushbutton for longer to accept a suggestion from the box to
enter data.
2)This function is available if your vehicle is equipped with the phone pre-installation*.A3A4A5A6A7A8A9
A1
A3
A2
Media System 1.0_EN.book Seite 22 Donnerstag, 10. September 2009 1:52 13
Page 50 of 124
CD/MP349
Operating
RADIO, CD/MP3
TEL (telephone)
NAV, INFO
SETUP
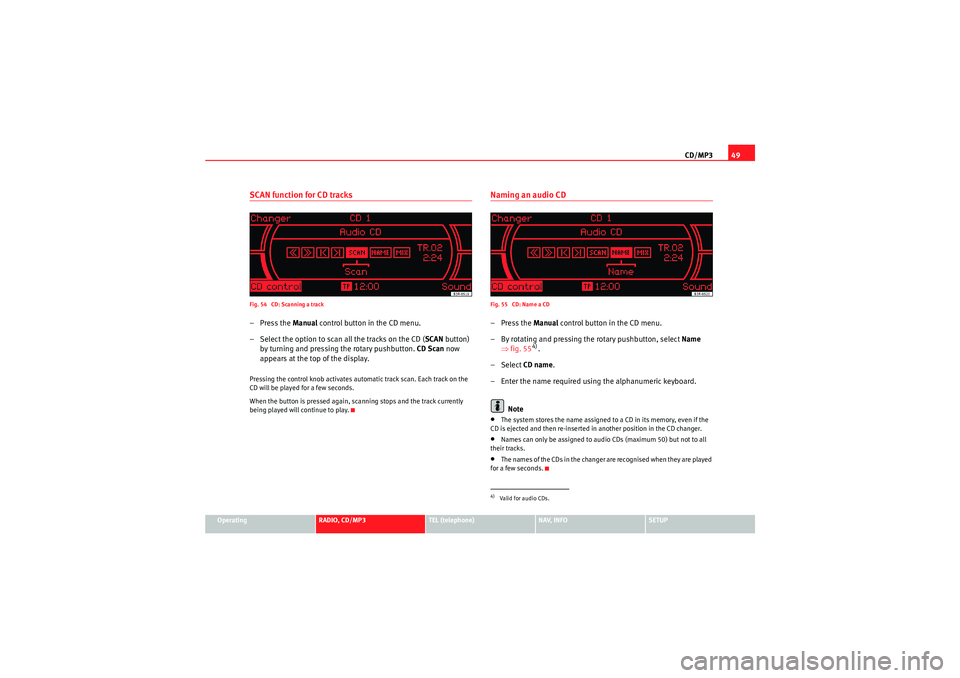
SCAN function for CD tracksFig. 54 CD: Scanning a track–Press the Manual control button in the CD menu.
– Select the option to scan all the tracks on the CD ( SCAN button)
by turning and pressing the rotary pushbutton. CD Scan now
appears at the top of the display.Pressing the control knob activates automatic track scan. Each track on the
CD will be played for a few seconds.
When the button is pressed again, scanning stops and the track currently
being played will continue to play.
Naming an audio CDFig. 55 CD: Name a CD–Press the Manual control button in the CD menu.
– By rotating and pressing the rotary pushbutton, select Name
⇒ fig. 55
4).
– Select CD name.
– Enter the name required using the alphanumeric keyboard.
Note
•The system stores the name assigned to a CD in its memory, even if the
CD is ejected and then re-inserted in another position in the CD changer.•Names can only be assigned to audio CDs (maximum 50) but not to all
their tracks.•The names of the CDs in the changer are recognised when they are played
for a few seconds.4)Valid for audio CDs.
Media System 1.0_EN.book Seite 49 Donnerstag, 10. September 2009 1:52 13
Page 61 of 124
Mobile phone system
60− If retrofitting an external aerial, please ensure that it is installed
correctly.Bluetooth®
Bluetooth technology enables a wireless connection between
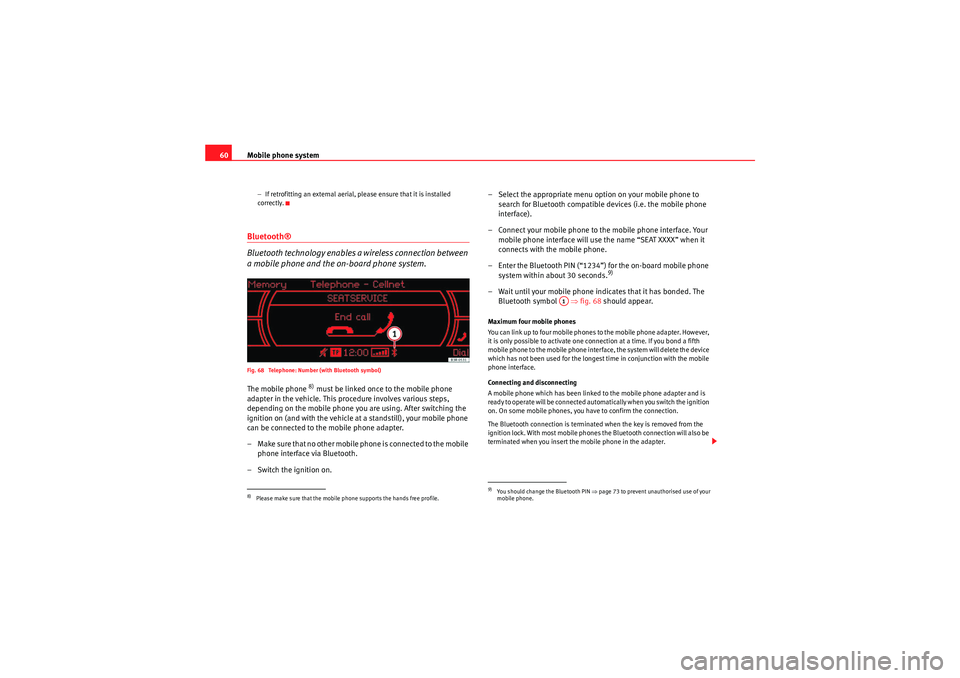
a mobile phone and the on-board phone system.Fig. 68 Telephone: Number (with Bluetooth symbol)The mobile phone
8) must be linked once to the mobile phone
adapter in the vehicle. This procedure involves various steps,
depending on the mobile phone yo u are using. After switching the
ignition on (and with the vehicle at a standstill), your mobile phone
can be connected to the mobile phone adapter.
– Make sure that no other mobile phone is connected to the mobile phone interface via Bluetooth.
– Switch the ignition on. – Select the appropriate menu option on your mobile phone to
search for Bluetooth compatible devices (i.e. the mobile phone
interface).
– Connect your mobile phone to the mobile phone interface. Your mobile phone interface will use the name “SEAT XXXX” when it
connects with the mobile phone.
– Enter the Bluetooth PIN (“1234”) for the on-board mobile phone system within about 30 seconds.
9)
– Wait until your mobile phone indicates that it has bonded. The Bluetooth symbol ⇒fig. 68 should appear.Maximum four mobile phones
You can link up to four mobile phones to the mobile phone adapter. However,
it is only possible to activate one connection at a time. If you bond a fifth
mobile phone to the mobile phone interface, the system will delete the device
which has not been used for the longest time in conjunction with the mobile
phone interface.
Connecting and disconnecting
A mobile phone which has been linked to the mobile phone adapter and is
ready to operate will be connected automatically when you switch the ignition
on. On some mobile phones, you have to confirm the connection.
The Bluetooth connection is terminated when the key is removed from the
ignition lock. With most mobile phones the Bluetooth connection will also be
terminated when you insert the mobile phone in the adapter.
8)Please make sure that the mobile phone supports the hands free profile.
9)You should change the Bluetooth PIN ⇒page 73 to prevent unauthorised use of your
mobile phone.
A1
Media System 1.0_EN.book Seite 60 Donnerstag, 10. September 2009 1:52 13
Page 64 of 124
Mobile phone system63
Operating
RADIO, CD/MP3
TEL (telephone)
NAV, INFO
SETUP
– Enter the PIN code (Personal Identification Number) via the
speller ⇒page 62, fig. 70 and confirm with OK.The PIN symbol ⇒page 62, fig. 70 in the status line indicates that you
must enter your PIN code. You receive the PIN code from your mobile network
service provider together with the SIM card.
You can enter the PIN code using the speech control system and the
command ENTER PIN ⇒page 79 or using the keypad of your mobile phone.
The alphanumeric keyboard will be displayed automatically when the PIN
code is to be entered in the telephone menu. This will be the case, for
example, when you switch on the mobile phone.
The SIM card will automatically be blocked if you enter the PIN code incor-
rectly 3 times
10). The SIM card can be unblocked with the PUK (personal
unblocking key).
Note
•When you enter the PIN code the digits appear as * in the display.•The PIN sy m b ol may no t a lways b e sh own i n t he display ( de p end s o n t yp e
of mobile phone).•Depending on your type of mobile phone, you may need to enter the PIN
code at the phone. In this case, no message will appear in the display indi-
cating that you need to enter the PIN code.
Main telephone menuMaking a call
Telephone numbers can be entered using the keypad on the
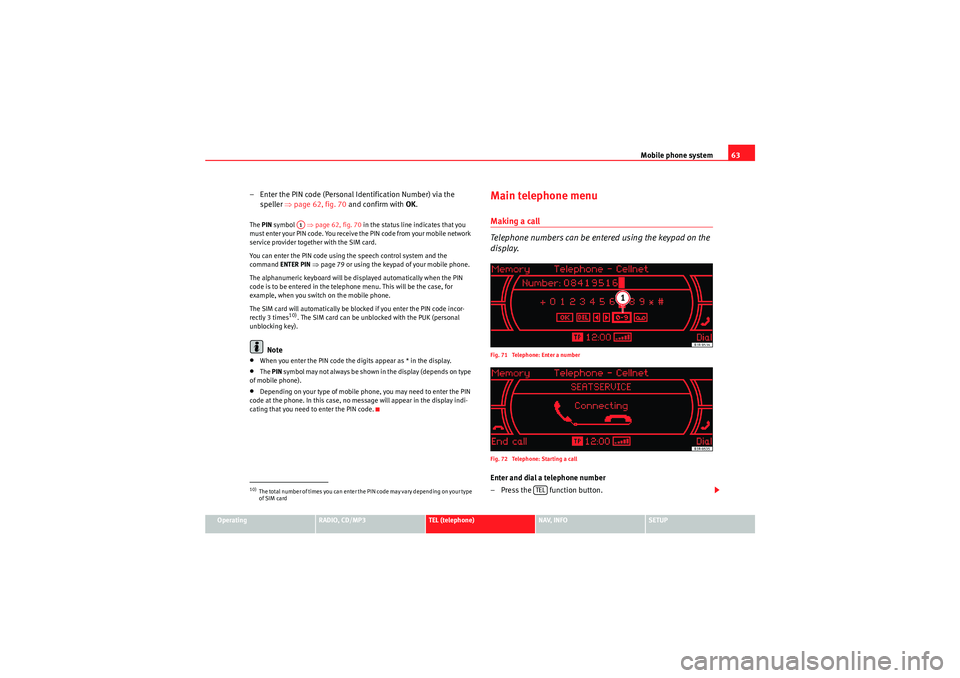
display.Fig. 71 Telephone: Enter a number
Fig. 72 Telephone: Starting a callEnter and dial a telephone number
– Press the function button.
10)The total number of times you can enter the PIN code may vary depending on your type
of SIM card
A1
TEL
Media System 1.0_EN.book Seite 63 Donnerstag, 10. September 2009 1:52 13
Page 65 of 124
Mobile phone system
64
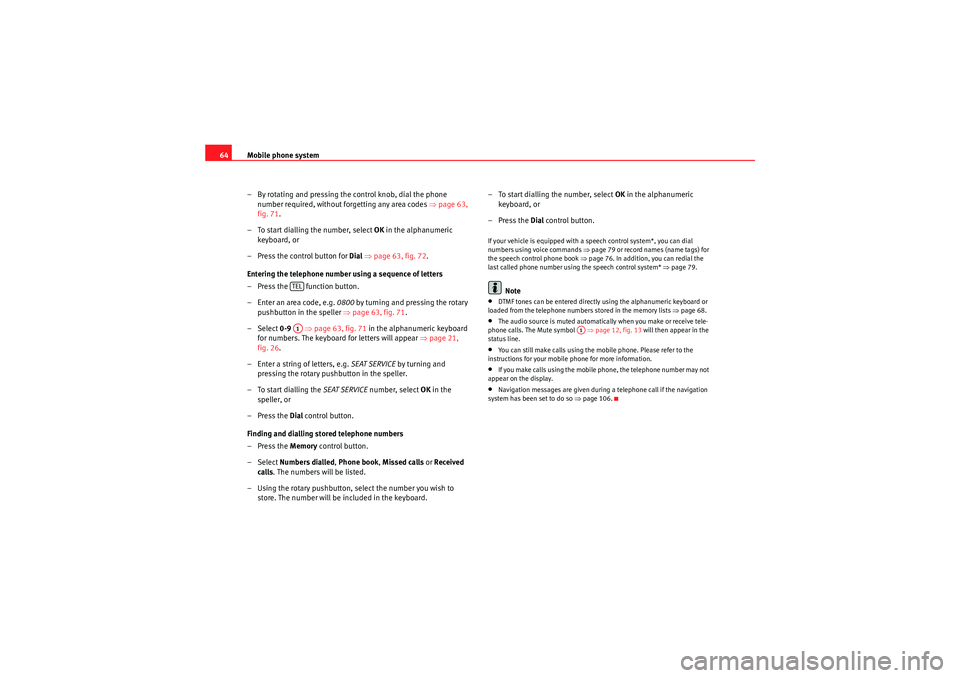
– By rotating and pressing the control knob, dial the phone number required, without forgetting any area codes ⇒page 63,
fig. 71 .
– To start dialling the number, select OK in the alphanumeric
keyboard, or
– Press the control button for Dial ⇒ page 63, fig. 72 .
Entering the telephone number using a sequence of letters
– Press the function button.
– Enter an area code, e.g. 0800 by turning and pressing the rotary
pushbutton in the speller ⇒ page 63, fig. 71.
– Select 0-9 ⇒page 63, fig. 71 in the alphanumeric keyboard
for numbers. The keyboard for letters will appear ⇒page 21,
fig. 26 .
– Enter a string of letters, e.g. SEAT SERVICE by turning and
pressing the rotary pushbutton in the speller.
– To start dialling the SEAT SERVICE number, select OK in the
speller, or
–Press the Dial control button.
Finding and dialling stored telephone numbers
–Press the Memory control button.
– Select Numbers dialled , Phone book , Missed calls or Received
calls . The numbers will be listed.
– Using the rotary pushbutton, select the number you wish to store. The number will be included in the keyboard. – To start dialling the number, select
OK in the alphanumeric
keyboard, or
–Press the Dial control button.
If your vehicle is equipped with a speech control system*, you can dial
numbers using voice commands ⇒ page 79 or record names (name tags) for
the speech control phone book ⇒ page 76. In addition, you can redial the
last called phone number using the speech control system* ⇒page 79.
Note
•DTMF tones can be entere d directly using the alphanumeric keyboard or
loaded from the telephone numbers stored in the memory lists ⇒page 68.•The audio source is muted automatically when you make or receive tele-
phone calls. The Mute symbol ⇒page 12, fig. 13 will then appear in the
status line.•You can still make calls using the mobile phone. Please refer to the
instructions for your mobile phone for more information.•If you make calls using the mobile phone, the telephone number may not
appear on the display.•Navigation messages are given during a telephone call if the navigation
system has been set to do so ⇒page 106.
TELA1
A1
Media System 1.0_EN.book Seite 64 Donnerstag, 10. September 2009 1:52 13
Page 69 of 124
Mobile phone system
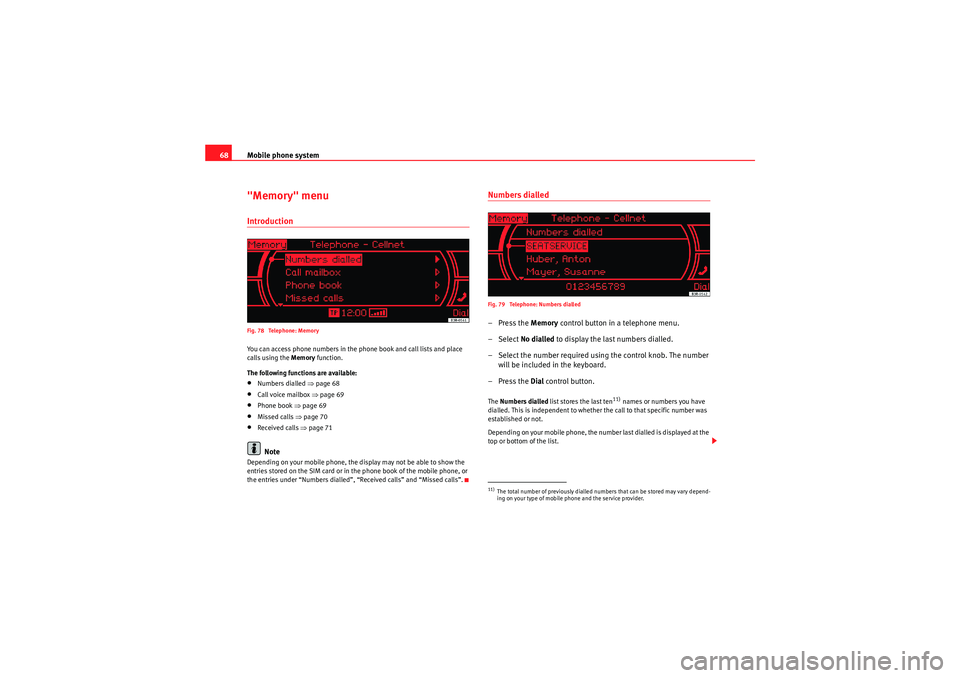
68"Memory" menuIntroductionFig. 78 Telephone: MemoryYou can access phone numbers in the phone book and call lists and place
calls using the Memory function.
The following functions are available:•Numbers dialled ⇒page 68•Call voice mailbox ⇒page 69•Phone book ⇒page 69•Missed calls ⇒ page 70•Received calls ⇒page 71Note
Depending on your mobile phone, the display may not be able to show the
entries stored on the SIM card or in the phone book of the mobile phone, or
the entries under “Numbers dialled”, “Received calls” and “Missed calls”.
Numbers dialledFig. 79 Telephone: Numbers dialled–Press the Memory control button in a telephone menu.
– Select No dialled to display the last numbers dialled.
– Select the number required using the control knob. The number will be included in the keyboard.
–Press the Dial control button.The Numbers dialled list stores the last ten
11) names or numbers you have
dialled. This is independent to whether the call to that specific number was
established or not.
Depending on your mobile phone, the number last dialled is displayed at the
top or bottom of the list.
11)The total number of previously dialled numbers that can be stored may vary depend-
ing on your type of mobile phone and the service provider.
Media System 1.0_EN.book Seite 68 Donnerstag, 10. September 2009 1:52 13
Page 70 of 124
Mobile phone system69
Operating
RADIO, CD/MP3
TEL (telephone)
NAV, INFO
SETUP
Note
If the number last dialled is placed at the bottom of the list, you cannot use
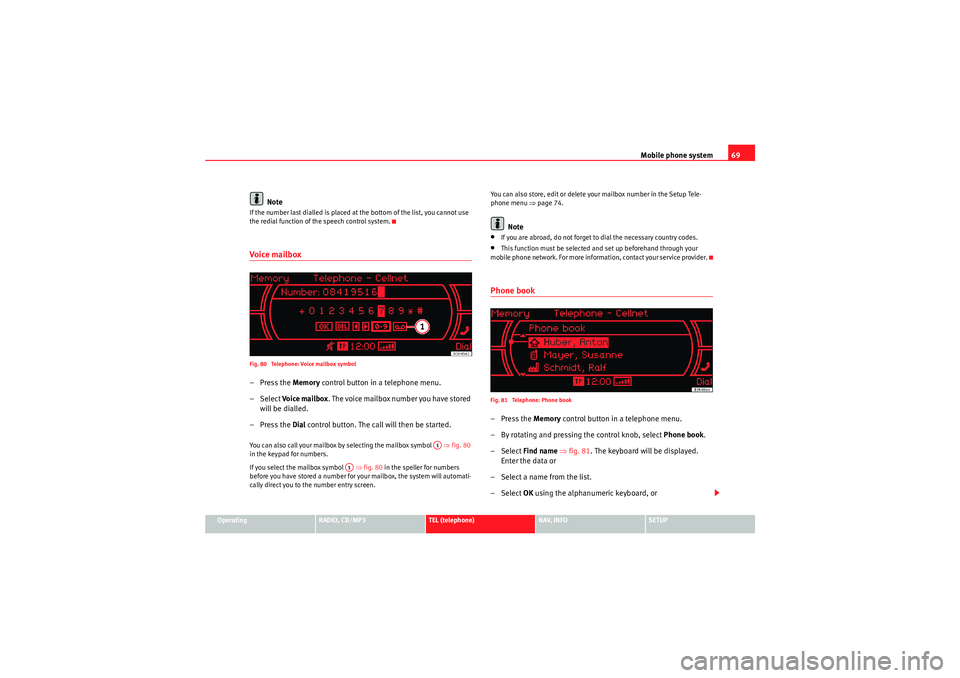
the redial function of the speech control system.Voice mailboxFig. 80 Telephone: Voice mailbox symbol–Press the Memory control button in a telephone menu.
– Select Voi ce ma ilbox . The voice mailbox number you have stored
will be dialled.
–Press the Dial control button. The call will then be started.You can also call your mailbox by selecting the mailbox symbol ⇒fig. 80
in the keypad for numbers.
If you select the mailbox symbol ⇒fig. 80 in the speller for numbers
before you have stored a number for your mailbox, the system will automati-
cally direct you to the number entry screen. You can also store, edit or delete your mailbox number in the Setup Tele-
phone menu
⇒page 74.
Note
•If you are abroad, do not forget to dial the necessary country codes.•This function must be selected and set up beforehand through your
mobile phone network. For more information, contact your service provider.Phone bookFig. 81 Telephone: Phone book–Press the Memory control button in a telephone menu.
– By rotating and pressing the control knob, select Phone book.
– Select Find name ⇒ fig. 81 . The keyboard will be displayed.
Enter the data or
– Select a name from the list.
– Select OK using the alphanumeric keyboard, or
A1
A1
Media System 1.0_EN.book Seite 69 Donnerstag, 10. September 2009 1:52 13