engine coolant Seat Exeo 2009 User Guide
[x] Cancel search | Manufacturer: SEAT, Model Year: 2009, Model line: Exeo, Model: Seat Exeo 2009Pages: 310, PDF Size: 8.54 MB
Page 227 of 310
Checking and refilling levels225
Safety First
Controls and equipment
Practical tips
Technical Data
– Carefully put in the specified grade of oil ⇒page 223, adding
0.5 litres at a time.
– After two minutes, check the oil level once again ⇒page 224.
– Where necessary, add more engine oil.
– Replace the oil filler cap carefully and push the dipstick all the way in.
WARNING
•When refilling with oil, make sure no oil falls onto hot engine parts.
Failure to comply could result in fire.•Wash your skin thoroughly if it comes into contact with engine oil.Caution
•The oil level must never be above area . This could damage the cata-
lytic converter or the engine. Contact a specialist garage to drain the engine
oil if necessary.•No additives should be used with engine oil. Any damage caused by the
use of such additives would not be covered by the factory warranty.For the sake of the environment
•Oil must not be disposed of into the drains or onto the ground.•Always observe legal requirements when disposing of empty oil
canisters.
Cooling systemLiquid coolant
The purpose of the liquid coolant is to carry heat away from
the engine. The correct amount of antifreeze is decisive in
preventing the cooling system from freezing in winter.The your vehicle's engine cooling system is filled for life at the factory, so no
coolant needs to be changed. The liquid coolant consists of a mixture of water
and anti-freeze G12++. This is a glycol-based antifreeze with anti-corrosion
additives.
Liquid coolant additive
The amount of antifreeze required depends on the temperatures to be
expected in the winter season. If the antifreeze concentration is too low the
coolant can freeze, resulting in failure of the cooling system and heater.
The cooling system is filled at the factory with the correct amount of anti-
freeze for the country concerned.
In most cases, the mixture consists of 60% water and 40% anti-freeze . This
mixture gives the required anti-freeze protection at temperatures down to
-25°C and particularly protects the metal parts of the cooling system against
corrosion. It also prevents scaling and significantly raises the boiling point of
the liquid coolant.
Countries with warm climate
The liquid coolant concentration must not be reduced by adding plain water,
even in the summer or in warm climates. The concentration of the anti-freeze
must always be at least 40%.
Countries with cold climate
If greater frost protection is required in very cold climates, the proportion of
the anti-freeze G12++ can be increased. A concentration of 60% offers anti-
Aa
Exeo_EN.book Seite 225 Freitag, 28. August 2009 10:14 10
Page 228 of 310
Checking and refilling levels
226freeze protection of temperatures down to approx. -40°C. However, the
concentration of anti-freeze must not exceed 60%, as the anti-freeze protec-
tion would then drop and the performance of the coolant system would suffer.
Vehicles for countries with cold climates (e.g. Sweden, Norway and Finland)
have factory-filled anti-freeze protection for temperatures down to -35°C. In
these countries, the concentration of anti-freeze should always be at least
50%.
Caution
•It is advisable to have the cooling system checked before the winter
season to make sure that the antifreeze concentration is adequate for the
conditions to be expected. This applies particularly if you intend to take the
car into a colder climate zone. If necessary, have the antifreeze concentration
increased to 50 - 60% as required.•Use only anti-freeze G12++ , an additive meeting the “TL-VW 774G” spec-
ification. Other anti-freezes may give considerably inferior corrosion protec-
tion. The damage caused by the use of these anti-freezes may lead to a loss
of liquid coolant, causing serious damage to the engine.•The anti-freeze G12++ can be mixed only with anti-freeze additives G11,
G12 and G12+.
Checking the liquid coolant level
The liquid coolant level can be checked at a glance.– Switch the ignition off.
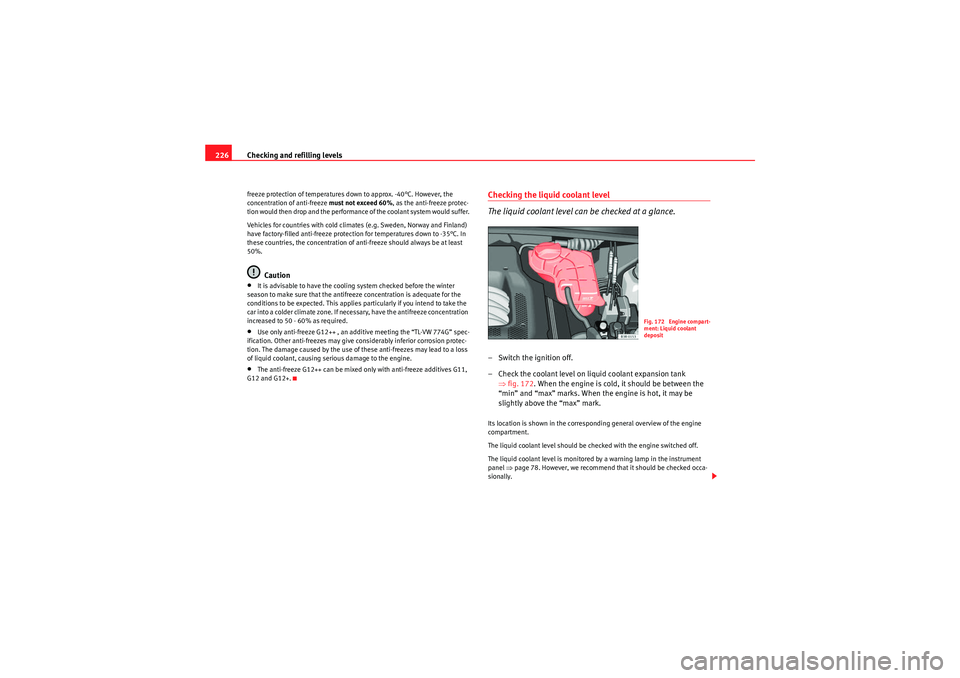
– Check the coolant level on liquid coolant expansion tank ⇒fig. 172 . When the engine is cold, it should be between the
“min” and “max” marks. When the engine is hot, it may be
slightly above the “max” mark.Its location is shown in the corresponding general overview of the engine
compartment.
The liquid coolant level should be checked with the engine switched off.
The liquid coolant level is monitored by a warning lamp in the instrument
panel ⇒ page 78. However, we recommend that it should be checked occa-
sionally.
Fig. 172 Engine compart-
ment: Liquid coolant
deposit
Exeo_EN.book Seite 226 Freitag, 28. August 2009 10:14 10
Page 229 of 310
Checking and refilling levels227
Safety First
Controls and equipment
Practical tips
Technical Data
Liquid coolant losses
Any loss of liquid coolant normally indicates a
leak in the cooling system. In
this case the cooling system should be inspected by a specialist garage
without delay. It is not sufficient merely to top up the liquid coolant.
If there are no leaks in the system, a loss of liquid coolant can only occur if
the coolant boils and is forced out of the system as a result of overheating.
Caution
Radiator sealants must not be added to the liquid coolant. Such additives
could seriously impair the function of the cooling system.Topping up the liquid coolant
Be careful when topping up with liquid coolant.– Switch the engine off.
– Wait for the engine to cool down.
– Cover the cap on the expansion tank ⇒page 226, fig. 172 with a
cloth, and carefully unscrew the cap anti-clockwise ⇒.
– Add liquid coolant.
– Screw on the cap tightly.Make sure that the liquid coolant meets the required specifications
⇒page 225, “Liquid coolant”. Do not use a different type of anti-freeze if
anti-freeze G12++ is not available. In this case, use only water and bring the
anti-freeze concentration back up to the correct level as soon as possible.
Always top up with new liquid coolant. Do not fill above the “max” mark. Excess liquid coolant is forced out of the
system through the valve in the filler cap when the engine gets hot.
If a lot of liquid coolant has been lost, wait for the engine to
cool down before
putting in cold coolant. Failure to do so could result in serious engine
damage.
WARNING
•The cooling system is under pressure. Do not unscrew the cap on the
expansion tank when the engine is hot. Failure to comply could result in
burns.•The anti-freeze and liquid coolant can be a health hazard. Therefore,
the anti-freeze should be stored in the original container in a safe place out
of reach of children. Failure to comply could result in poisoning.For the sake of the environment
Drained off coolant should not be used again. Drain off the used coolant into
a suitable container and dispose of it in the proper manner (observe environ-
mental regulations).Radiator fan
The radiator fan can start running spontaneously.The auxiliary fan can continue to run for as long as 10 minutes after stopping
the engine – even after the ignition is switched off. It may also start running
suddenly ⇒ after some while if•stored heat raises the coolant temperature, or•the hot engine compartment is additionally heated up by the sun.
Exeo_EN.book Seite 227 Freitag, 28. August 2009 10:14 10
Page 291 of 310
Technical Data289
Safety First
Controls and equipment
Practical tips
Technical Data
Te c h n i c a l D a t aChecking fluid levelsFrom time to time, the levels of the different fluids in the
vehicle must be checked. Never fill with incorrect fluids,
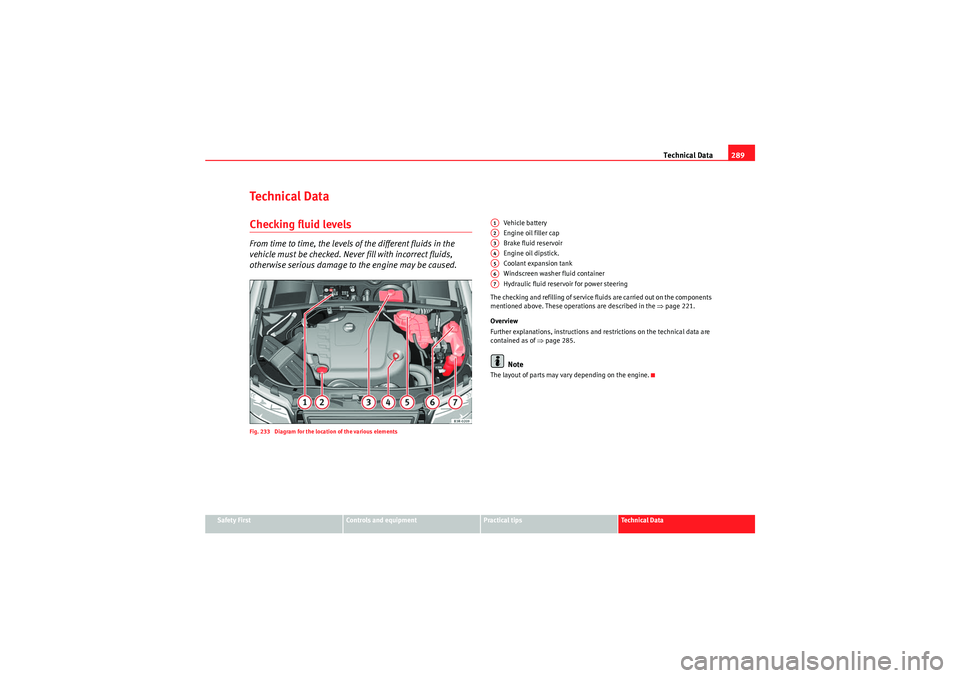
otherwise serious damage to the engine may be caused.Fig. 233 Diagram for the location of the various elements
Vehicle battery
Engine oil filler cap
Brake fluid reservoir
Engine oil dipstick.
Coolant expansion tank
Windscreen washer fluid container
Hydraulic fluid reservoir for power steering
The checking and refilling of service fluids are carried out on the components
mentioned above. These operations are described in the ⇒page 221.
Overview
Further explanations, instructions and restrictions on the technical data are
contained as of ⇒page 285.Note
The layout of parts may vary depending on the engine.A1A2A3A4A5A6A7
Exeo_EN.book Seite 289 Freitag, 28. August 2009 10:14 10
Page 302 of 310
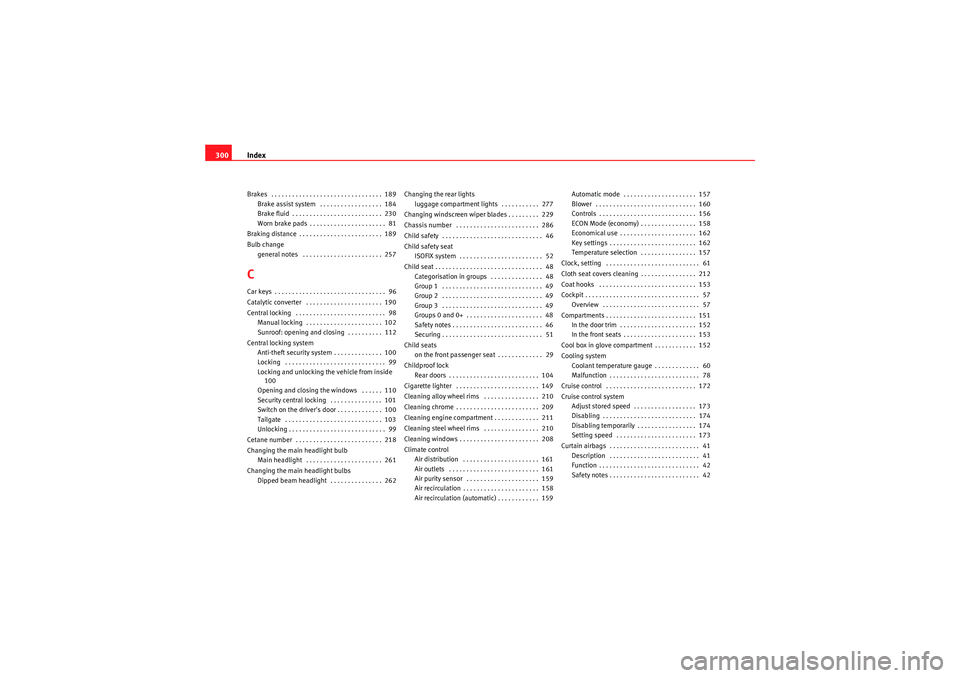
Index
300Brakes . . . . . . . . . . . . . . . . . . . . . . . . . . . . . . . . 189
Brake assist system . . . . . . . . . . . . . . . . . . 184
Brake fluid . . . . . . . . . . . . . . . . . . . . . . . . . . 230
Worn brake pads . . . . . . . . . . . . . . . . . . . . . . 81
Braking distance . . . . . . . . . . . . . . . . . . . . . . . . 189
Bulb change general notes . . . . . . . . . . . . . . . . . . . . . . . 257CCar keys . . . . . . . . . . . . . . . . . . . . . . . . . . . . . . . . 96
Catalytic converter . . . . . . . . . . . . . . . . . . . . . . 190
Central locking . . . . . . . . . . . . . . . . . . . . . . . . . . 98Manual locking . . . . . . . . . . . . . . . . . . . . . . 102
Sunroof: opening and closing . . . . . . . . . . 112
Central locking system Anti-theft security system . . . . . . . . . . . . . . 100
Locking . . . . . . . . . . . . . . . . . . . . . . . . . . . . . 99
Locking and unlocking the vehicle from inside100
Opening and closing the windows . . . . . . 110
Security central locking . . . . . . . . . . . . . . . 101
Switch on the driver's door . . . . . . . . . . . . . 100
Tailgate . . . . . . . . . . . . . . . . . . . . . . . . . . . . 103
Unlocking . . . . . . . . . . . . . . . . . . . . . . . . . . . . 99
Cetane number . . . . . . . . . . . . . . . . . . . . . . . . . 218
Changing the main headlight bulb Main headlight . . . . . . . . . . . . . . . . . . . . . . 261
Changing the main headlight bulbs Dipped beam headlight . . . . . . . . . . . . . . . 262 Changing the rear lights
luggage compartment lights . . . . . . . . . . . 277
Changing windscreen wiper blades . . . . . . . . . 229
Chassis number . . . . . . . . . . . . . . . . . . . . . . . . 286
Child safety . . . . . . . . . . . . . . . . . . . . . . . . . . . . . 46
Child safety seat ISOFIX system . . . . . . . . . . . . . . . . . . . . . . . . 52
Child seat . . . . . . . . . . . . . . . . . . . . . . . . . . . . . . . 48 Categorisation in groups . . . . . . . . . . . . . . . 48
Group 1 . . . . . . . . . . . . . . . . . . . . . . . . . . . . . 49
Group 2 . . . . . . . . . . . . . . . . . . . . . . . . . . . . . 49
Group 3 . . . . . . . . . . . . . . . . . . . . . . . . . . . . . 49
Groups 0 and 0+ . . . . . . . . . . . . . . . . . . . . . . 48
Safety notes . . . . . . . . . . . . . . . . . . . . . . . . . . 46
Securing . . . . . . . . . . . . . . . . . . . . . . . . . . . . . 51
Child seats on the front passenger seat . . . . . . . . . . . . . 29
Childproof lock Rear doors . . . . . . . . . . . . . . . . . . . . . . . . . . 104
Cigarette lighter . . . . . . . . . . . . . . . . . . . . . . . . 149
Cleaning alloy wheel rims . . . . . . . . . . . . . . . . 210
Cleaning chrome . . . . . . . . . . . . . . . . . . . . . . . . 209
Cleaning engine compartment . . . . . . . . . . . . . 211
Cleaning steel wheel rims . . . . . . . . . . . . . . . . 210
Cleaning windows . . . . . . . . . . . . . . . . . . . . . . . 208
Climate control Air distribution . . . . . . . . . . . . . . . . . . . . . . 161
Air outlets . . . . . . . . . . . . . . . . . . . . . . . . . . 161
Air purity sensor . . . . . . . . . . . . . . . . . . . . . 159
Air recirculation . . . . . . . . . . . . . . . . . . . . . . 158
Air recirculation (automatic) . . . . . . . . . . . . 159 Automatic mode . . . . . . . . . . . . . . . . . . . . . 157
Blower . . . . . . . . . . . . . . . . . . . . . . . . . . . . . 160
Controls . . . . . . . . . . . . . . . . . . . . . . . . . . . . 156
ECON Mode (economy) . . . . . . . . . . . . . . . . 158
Economical use . . . . . . . . . . . . . . . . . . . . . . 162
Key settings . . . . . . . . . . . . . . . . . . . . . . . . . 162
Temperature selection . . . . . . . . . . . . . . . . 157
Clock, setting . . . . . . . . . . . . . . . . . . . . . . . . . . . 61
Cloth seat covers cleaning . . . . . . . . . . . . . . . . 212
Coat hooks . . . . . . . . . . . . . . . . . . . . . . . . . . . . 153
Cockpit . . . . . . . . . . . . . . . . . . . . . . . . . . . . . . . . . 57 Overview . . . . . . . . . . . . . . . . . . . . . . . . . . . . 57
Compartments . . . . . . . . . . . . . . . . . . . . . . . . . . 151 In the door trim . . . . . . . . . . . . . . . . . . . . . . 152
In the front seats . . . . . . . . . . . . . . . . . . . . . 153
Cool box in glove compartment . . . . . . . . . . . . 152
Cooling system Coolant temperature gauge . . . . . . . . . . . . . 60
Malfunction . . . . . . . . . . . . . . . . . . . . . . . . . . 78
Cruise control . . . . . . . . . . . . . . . . . . . . . . . . . . 172
Cruise control system Adjust stored speed . . . . . . . . . . . . . . . . . . 173
Disabling . . . . . . . . . . . . . . . . . . . . . . . . . . . 174
Disabling temporarily . . . . . . . . . . . . . . . . . 174
Setting speed . . . . . . . . . . . . . . . . . . . . . . . 173
Curtain airbags . . . . . . . . . . . . . . . . . . . . . . . . . . 41 Description . . . . . . . . . . . . . . . . . . . . . . . . . . 41
Function . . . . . . . . . . . . . . . . . . . . . . . . . . . . . 42
Safety notes . . . . . . . . . . . . . . . . . . . . . . . . . . 42
Exeo_EN.book Seite 300 Freitag, 28. August 2009 10:14 10