change time Seat Exeo 2010 MEDIA SYSTEM E
[x] Cancel search | Manufacturer: SEAT, Model Year: 2010, Model line: Exeo, Model: Seat Exeo 2010Pages: 167, PDF Size: 5.4 MB
Page 116 of 167
Navigation (NAV)*115
Operating
RADIO, MEDIA (audiovisual
systems)
NAME, TEL
NAV, INFO
CAR, SETUP
Route includes toll road sections with indication of length of section
Route includes ferry connection(s)
Route includes motorrail section(s)
Route includes season-restricted roads
Route includes time-restricted roads
Estimated distance to destination
Estimated time of arrival at destination
Starting point highlighted (arrow)
Stopover 1 on the map
Stopover 2 on the map
Stopover 3 on the map
Final destination on the map
Orientation
Map scale
Changing/Interrupting route guidance– Press the button or the button.
–Select
Stop route guidance .
– Change the information if necessary.
–Select Start route guidance .The previously entered data and settings remain unchanged even when you
cancel the route guidance. This means you can change e.g. the route criteria
⇒page 121 and then re-calculate the route.
If you start a route guidance, but do not complete it, this guidance will be
continued automatically when you start driving again. This also applies to
entered destinations that were not reached due to unexpected circumstances (e.g. change of plans). To end route guidance, select Stop route guidance
⇒ page 115.
Note
Calculated destinations can also be changed on the map display by moving
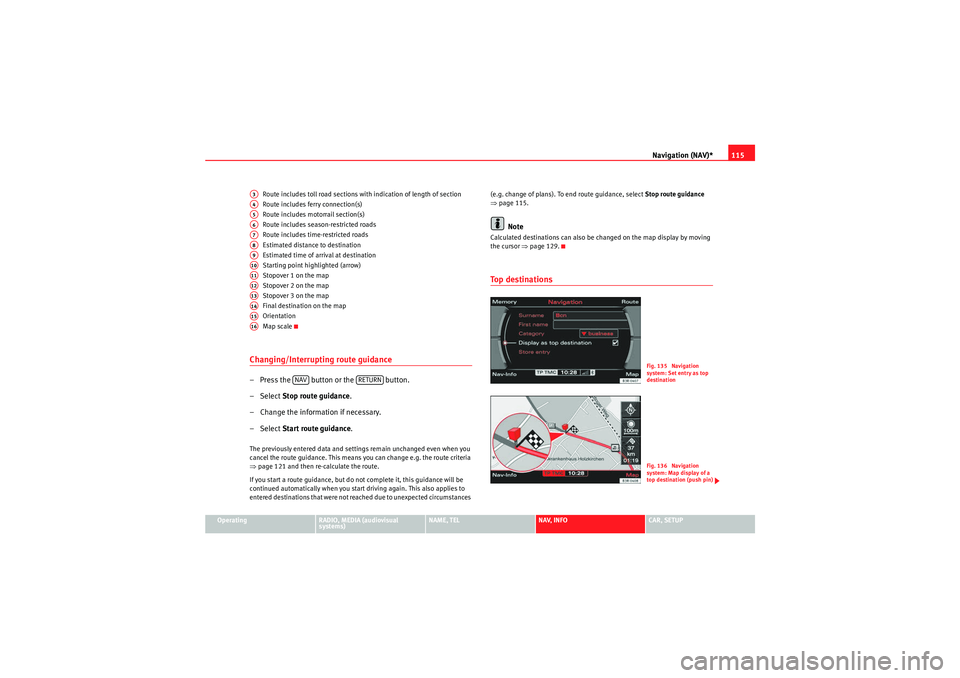
the cursor ⇒page 129.To p d e s t i n a t i o n s
A3A4A5A6A7A8A9A10A11A12A13A14A15A16
NAV
RETURN
Fig. 135 Navigation
system: Set entry as top
destinationFig. 136 Navigation
system: Map display of a
top destination (push pin)
media_systemE_EN.book Seite 115 Montag, 21. September 2009 1:48 13
Page 120 of 167
Navigation (NAV)*119
Operating
RADIO, MEDIA (audiovisual
systems)
NAME, TEL
NAV, INFO
CAR, SETUP
– Enter a route plan ⇒page 118, fig. 141 .
– Press the Memory control button.
–Select Store route .
– Use the keyboard to enter a name for the route you want to store.
–Select OK in the alphanumeric keyboard. The route plan you
entered will be stored.You can store a destination and up to three stopovers in the route plan
⇒ page 106. You can then drive to these destinations in the order that you
set.
The route entered will be saved with the final destination and stopovers and
can be loaded again as a new destination ⇒page 119.
You can edit the route plan at any time as necessary. To do so, select one of
the destinations and press the control knob. You can then select Edit, Move ,
Delete or Drive to now as desired ⇒ page 119.
If you have selected Drive to now and do not wish to edit the route the system
will use the existing route plan and the current start position once you have
confirmed Start route guidance .
If the option Store route is greyed out this indicates that the route memory is
full or that the mode Route without stopover is activated. Delete routes not
needed from the route memory ⇒page 120. Or select the Route with
stopover function ⇒page 120.
Note
You can store individual destinations to the directory ⇒page 117.
Loading a route–Press the Memory control button in the navigation menu.
– Select Load route ⇒ page 116, fig. 137 .
– Select the route you would like to load from the list.
– Select Start route guidance .Route plans that have been stored ⇒page 118 can be loaded again quickly
and conveniently.
You can change the route plan at any time. To do so, select one of the desti-
nations and press the control knob. You can then select Edit, Move , Delete or
Drive to now as desired.
Modifying
To enter new information for the final destination or stopover.
Moving
To change the order of destinations in the route plan.
Deleting
To delete the selected final destination or stopover. If you delete the final
destination, a stopover will automatically be set as the new destination.
Driving to now
You can drive directly to the selected final destination or stopover.
If you do not want to edit the stored route, the route plan will be loaded upon
selecting Start route guidance and the starting point will be the current posi-
tion of the vehicle.
media_systemE_EN.book Seite 119 Montag, 21. September 2009 1:48 13
Page 125 of 167

Navigation (NAV)*
124Map and information displayThe figures ⇒fig. 147 and ⇒fig. 148 show the possible types of information
in the map display:
Map orientation
Map scale
Estimated distance to the next destination/stopover
Estimated time of arrival at the next destination/stopover
Route (marked blue)
Examples of selected map contents ⇒page 134
Motorway exits are shown for a scale ranging from 500 m to 6 km Vehicle symbol
Turn list inserted in the Setup menu
⇒page 135
The map display modes can be changed ⇒page 131.
Traffic jam announcements are shown automatically, showing the traffic jam
symbol on the map and marking the roads affected. If the dynamic navigation
⇒ page 121 is activated, the route will, if possible, be recalculated in order
to avoid the traffic jam.
You can select a destination directly from the map using the cursor
⇒ page 128.
You will see directional arrows in the instrument panel display ⇒page 101
which inform you of the route guidance directions.
The degrees of latitude and longitude ⇒page 125, fig. 149 and the current
altitude of the vehicle are shown when the map is displayed with the side
menu activated.
Note
A tunnel or underpass is displayed on the map as a broken line up to a scale
of 750 m.
Fig. 147 Navigation:
Example of map represen-
tationFig. 148 Navigation
system: Map representa-
tion with activated turn
list
A1A2A3A4A5A6A7
A8A9
media_systemE_EN.book Seite 124 Montag, 21. September 2009 1:48 13
Page 126 of 167

Navigation (NAV)*125
Operating
RADIO, MEDIA (audiovisual
systems)
NAME, TEL
NAV, INFO
CAR, SETUP
Map representation with active side menu
The map representation can be changed through the active
side menu.– Press the Map control button in the navigation menu.
– Press the control knob to switch to the side menu.
– Select the desired submenu item by rotating and pressing the control knob and make your changes.
– Press the ⇒page 9 button to leave the map side menu.If you have activated the zoom function ⇒page 126 or the cursor
⇒ page 129 in the active side menu, you have to press the button
twice to leave the map side menu.
After you have activated the side menu, you are shown information
(city/street names and longitude/latitude) for the position you reached at the
time of activation. The following functions can be carried out using the active map side menu:
Note
Any setting adjustments you make using the active side menu are not kept
after deactivation. You can enter permanent settings for the map display
using navigation setup
⇒page 131.
Fig. 149 Navigation
system: Map representa-
tion with active side menu
RETURN
RETURN
Legend
FunctionMap orientation
⇒page 126Map scale
⇒page 126Map position menu
⇒page 128Activation of map cursor
⇒page 129Scroll
⇒page 129 FunctionPresentation of map cursor
⇒page 129Vehicle symbol
A1A2A3A4A5A6A7
media_systemE_EN.book Seite 125 Montag, 21. September 2009 1:48 13
Page 127 of 167

Navigation (NAV)*
126Map orientation
Inside side menu activation you can switch back and forth
between direction of travel (Vehicle) and North.– Press the Map control button in the navigation menu.
– Press the control knob to switch to the map side menu.
– Rotate the control knob to switch to the first map menu item ⇒fig. 150 .
– By pressing the control knob, you can switch back and forth between orientation North ⇒ fig. 150 and Ve hicle . The changed
setting remains for the time the side menu is active.
– Press the ⇒page 9 button to leave the map side menu.When you change the map orientation with the side menu active, this map
orientation remains only for the time the side menu remains active. After the
side menu is deactivated, the orientation entered is Setup becomes active
again ⇒page 132. By selecting
North the map is oriented to the North ⇒ fig. 150. The vehicle
always remains in the centre of the display.
Select vehicle , the vehicle symbol is oriented pointing North. The map will
then rotate around the vehicle symbol.
Zoom mapChanging scale with inactive side menu:
–Press the Map control button in the navigation menu.
Fig. 150 Navigation: Map
orientation North in the
active side menu
A1
RETURN
Fig. 151 Navigation:
Adjusting zoom with inac-
tive side menuFig. 152 Navigation
system: Adjusting zoom
in active side menu
media_systemE_EN.book Seite 126 Montag, 21. September 2009 1:48 13
Page 133 of 167
Navigation (NAV)*
132Map scheme
The map representation can be changed according to driving
conditions (day or night).– Press the ⇒page 9 function button in the navigation
menu.
– Select Map scheme ⇒ page 131, fig. 160 .
– Select day , night or auto as desired.Day
The map representation contains all type of topographical details. The back-
ground is shown in light colours. This makes map features easy to recognise.
The daytime view is optimised for ambient light ⇒page 101, fig. 117 .
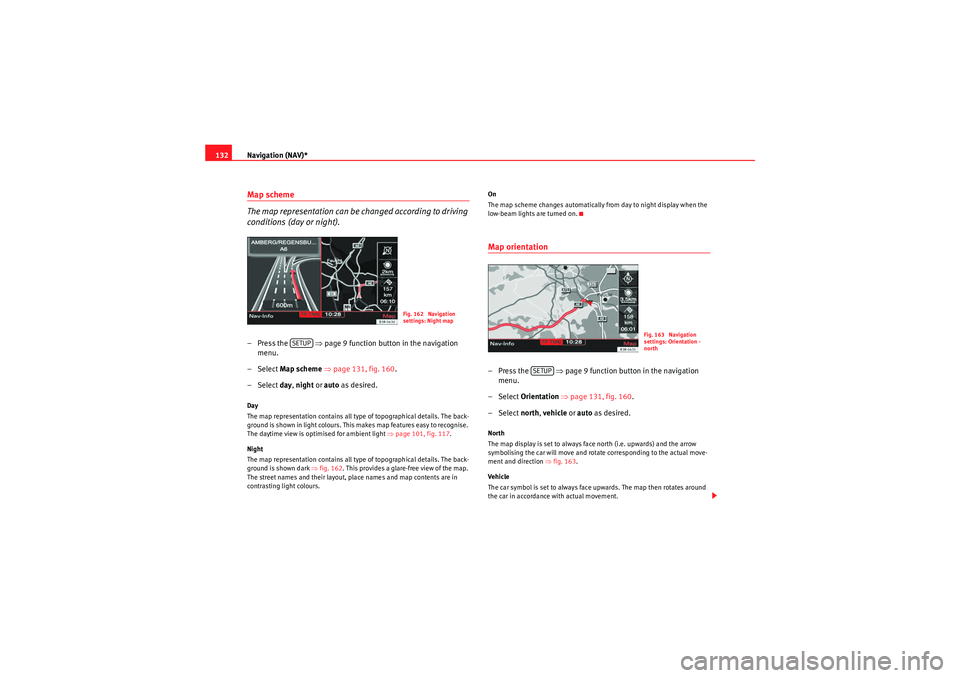
Night
The map representation contains all type of topographical details. The back-
ground is shown dark ⇒fig. 162 . This provides a glare-free view of the map.
The street names and their layout, place names and map contents are in
contrasting light colours. On
The map scheme changes automatically from day to night display when the
low-beam lights are turned on.
Map orientation–Press the ⇒
page 9 function button in the navigation
menu.
– Select Orientation ⇒page 131, fig. 160 .
– Select north, vehicle or auto as desired.North
The map display is set to always face north (i.e. upwards) and the arrow
symbolising the car will move and rotate corresponding to the actual move-
ment and direction ⇒fig. 163.
Vehicle
The car symbol is set to always face upwards. The map then rotates around
the car in accordance with actual movement.
Fig. 162 Navigation
settings: Night map
SETUP
Fig. 163 Navigation
settings: Orientation -
north
SETUP
media_systemE_EN.book Seite 132 Montag, 21. September 2009 1:48 13
Page 148 of 167
INFO (Traffic information)147
Operating
RADIO, MEDIA (audiovisual
systems)
NAME, TEL
NAV, INFO
CAR, SETUP
You will receive a message in the display if no traffic announcements are
stored.
Traffic announcements are cancelled when you change to another main func-
tion.
You can also specify times for recording traffic announcements using the
TP
memo timer function ⇒page 148.
Note
A traffic announcement will not be recorded if you use the Cancel function
while it is playing. This means you will not be able to access the announce-
ment using the TP memo function.Source function buttonPreferred TMC
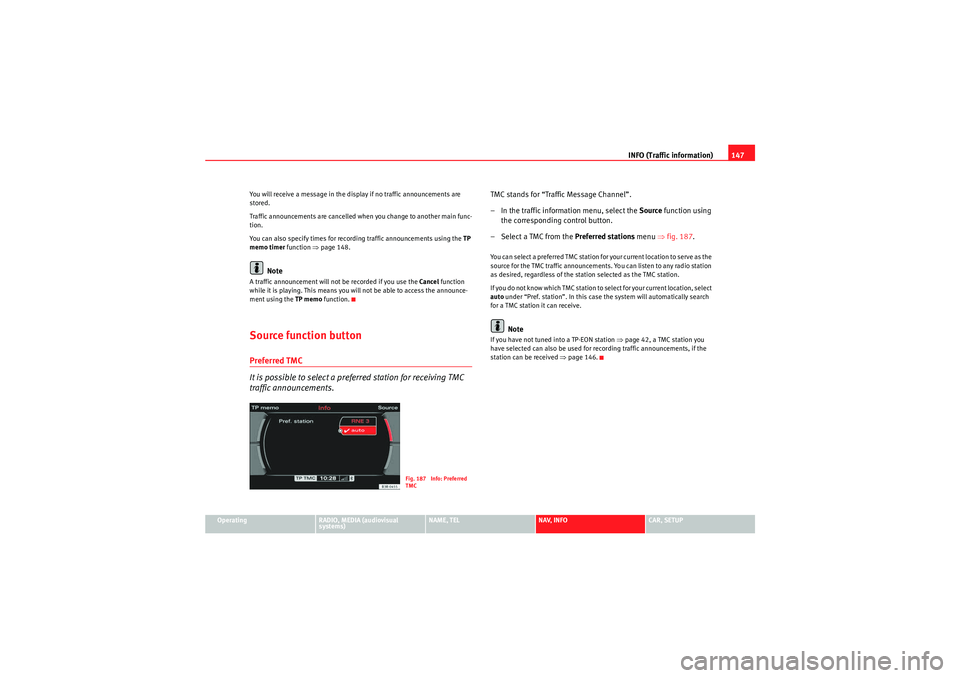
It is possible to select a preferred station for receiving TMC
traffic announcements.
TMC stands for “Traffic Message Channel”.
– In the traffic information menu, select the Source function using
the corresponding control button.
– Select a TMC from the Preferred stations menu ⇒fig. 187 .You can select a preferred TMC station for your current location to serve as the
source for the TMC traffic announcements. You can listen to any radio station
as desired, regardless of the station selected as the TMC station.
If you do not know which TMC station to select for your current location, select
auto under “Pref. station”. In this case the system will automatically search
for a TMC station it can receive.
Note
If you have not tuned into a TP-EON station ⇒page 42, a TMC station you
have selected can also be used for recording traffic announcements, if the
station can be received ⇒page 146.
Fig. 187 Info: Preferred
TMC
media_systemE_EN.book Seite 147 Montag, 21. September 2009 1:48 13
Page 155 of 167
SETUP
154The following submenus are available in the Setup function:
Note
Additional menu options can be called up for each main function. These are
listed in the Setup main menu. You can, for example, set the traffic
programmes in the RADIO SETUP function ⇒page 42.
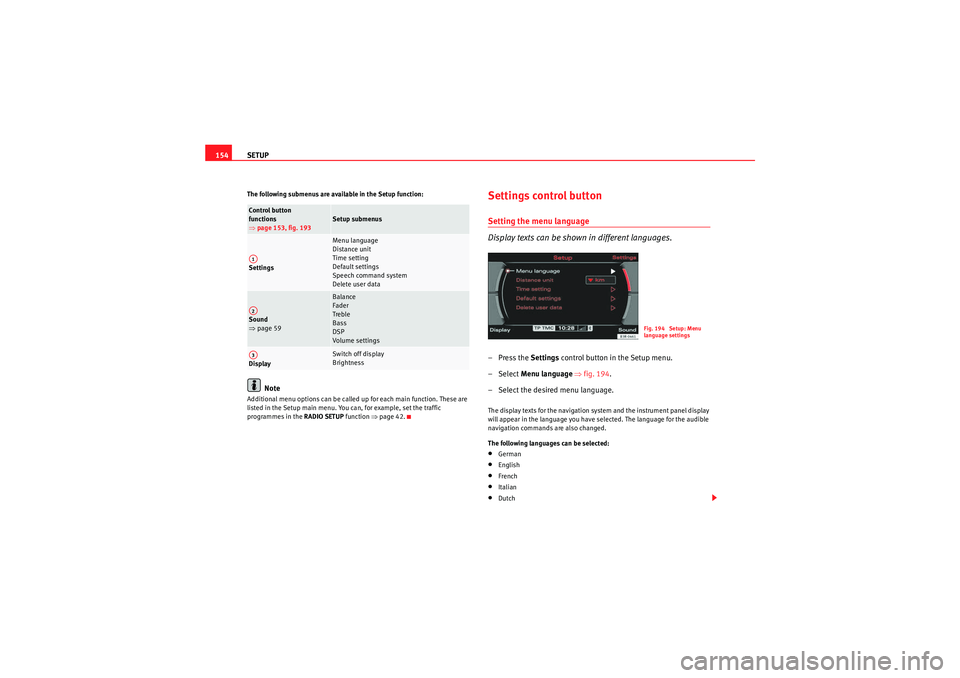
Settings control buttonSetting the menu language
Display texts can be shown in different languages.–Press the Settings control button in the Setup menu.
– Select Menu language ⇒fig. 194 .
– Select the desired menu language.The display texts for the navigation system and the instrument panel display
will appear in the language you have selected. The language for the audible
navigation commands are also changed.
The following languages can be selected:•German•English•French•Italian•Dutch
Control button
functions
⇒ page 153, fig. 193
Setup submenus
Settings
Menu language
Distance unit
Time setting
Default settings
Speech command system
Delete user data
Sound
⇒ page 59
Balance
Fader
Treble
Bass
DSP
Volume settings
Display
Switch off display
Brightness
A1A2A3
Fig. 194 Setup: Menu
language settings
media_systemE_EN.book Seite 154 Montag, 21. September 2009 1:48 13