stop start Seat Exeo 2010 MEDIA SYSTEM E
[x] Cancel search | Manufacturer: SEAT, Model Year: 2010, Model line: Exeo, Model: Seat Exeo 2010Pages: 167, PDF Size: 5.4 MB
Page 14 of 167
Handling: General information13
Operating
RADIO, MEDIA (audiovisual
systems)
NAME, TEL
NAV, INFO
CAR, SETUP
•Press the right thumbwheel while the route guidance is enabled to
repeat the last navigation voice cue*.Note
•During an active call, the speech commands of the telephone* cannot be
enabled.•If certain equipment has not been installed in the vehicle, the multi-func-
tion steering wheel assigned to that equipment will be inoperative.Radio modeSelecting the radio
– Press the button ⇒page 12, fig. 11 until a
station/station name from the radio station list appears in the
instrument panel display.
Changing between stations in the radio station list
–Use the left thumbwheel ⇒ page 12, fig. 11 to scroll
up/down
1).
Tuning
– Press the left thumbwheel once to start the station search ⇒page 12, fig. 11 .
– Press the left thumbwheel again to stop the station search.
If you hear only a hissing noise when you change stations, the current station
number has not been assigned or the selected station is currently not within
the reception range.CD/MP3 ModeSelecting CD/MP3 mode
–Press the button ⇒ page 12, fig. 11 until a CD or MP3
track appears in the instrument panel display.
Next/previous track
– Use the left thumbwheel ⇒page 12, fig. 11 to scroll
up/down.
Fast forward
– Press and hold the left thumbwheel to start the fast forward ⇒page 12, fig. 11 .
– Release the left thumbwheel again to continue listening to the CD.Scroll the left thumbwheel up or down several click stops to skip up or down
through the tracks.Te l e p h o n e m o d e *Selecting a phone number
–Press the button ⇒page 12, fig. 11 until a telephone
number appears in the instrument panel display.
1)When the navigation system display shows the radio memory list you can also use the
left thumbwheel to select a station from the list.
AD
MODE
ABAAAAAA
MODE
ABAA
AA
MODE
AB
media_systemE_EN.book Seite 13 Montag, 21. September 2009 1:48 13
Page 33 of 167
Drives
32you were playing. If you do not alter the contents of your memory device, the
music will be continued at the point where you stopped playing.
MP3 players and USB sticks which are not explicitly approved must have
“CERTIFIED USB
TM” or “CERTIFIED HIGH SPEED USB
TM” status.
Caution
•Do not connect a device other than a memory stick or MP3 player to the
USB port. It is not possible to operate hard discs or USB hubs, etc. via the USB
port.•Do not connect the MP3 player directly to the USB port. This could
damage the device.•Never remove a memory device when the USB port is selected as source
(CD). This could damage your memory device.Note
For up-to-date information on compatible MP3 players and USB sticks, please
ask a SEAT dealer or visit www.seat.es.Functions
Music files are played just like on a CD changer using the
controls on your car's sound system.To start the memory stick or MP3 player, select the “CD changer” function on
the sound system.
The following functions are available:•Play all tracks stored on the memory device (if no folders are stored on the
memory device)
•Select and play up to six main folders with music files (just like selecting
CD 1 to 6 on a CD changer)•Change between main folders with music files (just like changing the CD
on a CD changer)•Change tracks within a main folder•Fast forward and rewind within a track•SCAN function•Play tracks in random or shuffle mode
For more information on how to operate the system, please refer to the “CD”
chapter in the operating manual for your sound system.TipsHere are some tips and points to remember when playing music files in the
car:•We recommend that, instead of storing music files in the main directory of
the memory stick or MP3 player, you create separate folders e.g. for tracks
belonging to the same genre or artist. Your sound system can display and
play a maximum of six folders, however. The folders are allocated first in
numerical order and then in alphabetical order as CD 1 to CD 6. Folders that
do not contain music files are automatically ignored. You can create any
number of subfolders.•If there are no folders on your memory device, the sound system will allo-
cate all the music files it finds to CD 1.•Track numbers appear with a maximum of two digits in the sound system
display. The first digit is suppressed if you select a track with a three-digit
number, i.e. track 125 and track 25 are both displayed as track “25”. We
therefore do not recommend allocating more than 99 tracks to each folder.•We recommend you not to use the “Name CD” function on vehicles with
the BNS 5.0 navigation system, as the folders may not be named correctly.
media_systemE_EN.book Seite 32 Montag, 21. September 2009 1:48 13
Page 41 of 167
RADIO
40By briefly pressing the control knob you start automatic seek, which stops at
the next receivable frequency. Since a station often broadcasts on different
frequency, the tuning stops at each of the receivable frequencies. This means
that a station can be found several times.Storing stations– Press the Tuning control button in the radio menu. – Using “Manual station search”
⇒page 39 or “automatic tuning”
⇒ page 39, select the station or frequency to be stored.
– By rotating and pressing the control knob, select STORE (“store
station”) ⇒fig. 41 .
– Select your desired memory location by rotating the control knob ⇒fig. 42 .
– Press the control knob. The station will be stored to the list ⇒page 38.
Using the control wheel, you can also save manually-set radio stations
⇒page 39.
A new station will be stored automatically at a vacant position in the memory
list. Alternatively, you may choose a specific position in the list to store the
station.
Note
For more information about storing radio stations, please refer to ⇒page 38.
You can delete radio stations stored in the memory list ⇒page 47.
Fig. 41 Radio: Store
stationFig. 42 Radio: Storing a
station in the memory list
media_systemE_EN.book Seite 40 Montag, 21. September 2009 1:48 13
Page 45 of 167
RADIO
44tion quality. This avoids switching back and forth between different regional
programmes, whenever the reception quality changes. The current regional
programme remains set. This can, however, lead to reception problems.
You can select any other regional programme broadcast by the regional
station you are tuned to from the station list ⇒ page 36.
We recommend you have the “Regional stations” function switched on (on ) at
all times.
Regional stations switched off
If the Regional stations function is off, only the strongest regional programme
of a specific broadcasting station will be received. In some cases, the radio
will then switch between stations with differing programme contents.Station reception
The sensitivity level of the automatic seek function can be
adjusted.– Starting from any one of the radio menus, press the ⇒page 9 button. – Select
Sensitivity ⇒ fig. 48.
Station reception: local
The automatic seek function ⇒page 39 will only stop at stations with a
strong reception signal.
Station reception: distant
The automatic seek function ⇒page 39 will also stop at stations that have a
weaker reception signal.Station display
Ticker texts broadcast by certain radio stations can be
stopped.– Starting from any one of the radio menus, press the ⇒page 9 button.
– Under the Station names , select fixed ⇒ fig. 49 to stop the ticker
texts broadcast. The current text in the display will then freeze.
Fig. 48 Radio settings
(RADIO SETUP): Station
recep tion
SETUP
Fig. 49 Radio settings
(RADIO SETUP): Station
display
SETUP
media_systemE_EN.book Seite 44 Montag, 21. September 2009 1:48 13
Page 99 of 167
Navigation (NAV)*
98Route without stopover (single destination mode)
In the single destination mode you can drive directly to a destination
⇒ page 104.
If you enter a direct destination and start route guidance, you are given the
option of up to three different routes ⇒page 113.
Route with stopovers (route plan)
In this mode, you can choose to three stopovers and one final destination
( ⇒ page 120).
For example, when travelling you can save time by finding the nearest filling
station in unfamiliar towns. You can also make a stopover to eat in a restau-
rant or visit a tourist attraction ⇒page 106.
Note
You do not receive any information about the meaning of road signs!How does the navigation system work?
The navigation system works with the help of satellites (GPS).The current vehicle position is determined with the aid of distance sensors,
manoeuvre sensors and satellite signals. GPS satellites send the necessary
signals required by the system (GPS stands for “Global Positioning System”).
The information is transmitted to the navigation system and compared with
the information stored in the navigation DVD map database. This way, the
route guidance can be accurately calculated.
Before the system can function, a navigation DVD must be inserted in the
navigation drive. The navigation drive is located behind the system display
⇒page 22, fig. 24 . When the navigation DVD is inserted, the system starts automatically and
navigation destinations can be entered
⇒page 104.
Six different languages (German, Spanish, French, English, Italian and Portu-
guese) are available on the navigation DVD for the audible navigation
prompts. You can change the language for the voice guidance cues via the
option Menu language ⇒ page 154 in the Setup menu.
Note
•Snow or other obstructions on the GPS aerial or interference caused by
trees or large buildings could affect the reception of the satellite signals and
make positioning difficult. GPS reception and vehicle positioning can also be
adversely affected by deactivation or a malfunction of several satellites.•GPS positioning is uni-directional, i.e. the navigation system receives
data for positioning the vehicle, but does not transmit any data.Navigation DVDs
The data relating to the starting point and the destination can
be saved separately in the two navigation DVDs.If this is the case, proceed as follows:
– First put the DVD covering the country of your destination into the navigation drive ⇒page 23.
– Enter your destination ⇒page 104.
– Then put in the DVD for the country where your starting point is located ⇒page 23.
–Start the route guidance ⇒page 112. The navigation system will
calculate the route.
media_systemE_EN.book Seite 98 Montag, 21. September 2009 1:48 13
Page 100 of 167
Navigation (NAV)*99
Operating
RADIO, MEDIA (audiovisual
systems)
NAME, TEL
NAV, INFO
CAR, SETUP
– Wait until you reach one of the countries that is covered by both
DVDs. These countries serve as an overlap zone where you can
change the DVDs.
– Without stopping the route guidance, put the DVD for the country of your destination into the navigation drive once again
⇒page 23. Route guidance will be continued automatically.When navigating with two different DVDs, please note the following:•The destination flag will be displayed to indicate the direct line between
your starting point and your destination.•The system does not process the detailed navigation information on the
DVD which is not being used.•Some countries are covered by both DVDs. We recommend that you
change over the DVDs in good time before leaving this overlap zone.Note
•The packaging of the navigation DVD will indicate which countries are
covered by the DVD.•The traffic infrastructure is subject to changes. Therefore, the information
stored on the navigation DVD may not always correspond exactly to the roads
and other features that you encounter.•You can obtain navigation DVDs from your dealer. Your dealer will also be
able to provide information on updates which are available for the CDs.
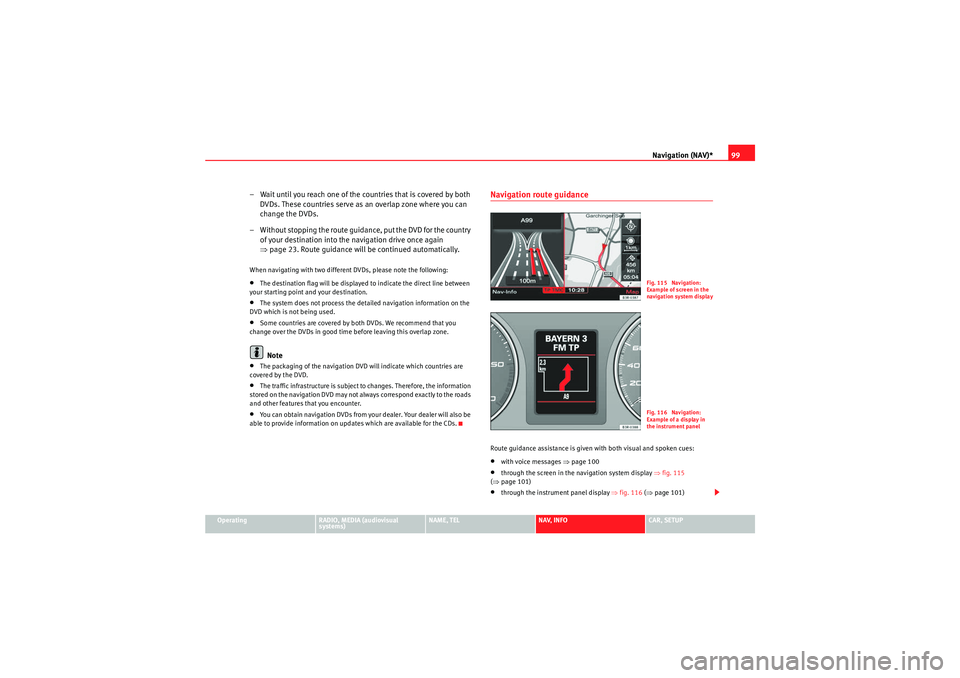
Navigation route guidanceRoute guidance assistance is given with both visual and spoken cues:•with voice messages ⇒page 100•through the screen in the navigation system display ⇒fig. 115
( ⇒ page 101)•through the instrument panel display ⇒fig. 116 (⇒ page 101)
Fig. 115 Navigation:
Example of screen in the
navigation system displa
y
Fig. 116 Navigation:
Example of a display in
the instrument panel
media_systemE_EN.book Seite 99 Montag, 21. September 2009 1:48 13
Page 106 of 167
Navigation (NAV)*105
Operating
RADIO, MEDIA (audiovisual
systems)
NAME, TEL
NAV, INFO
CAR, SETUP
– If necessary, press the control button with the Route function and
confirm the Route without stopover function to switch to single
destination mode ⇒page 120. The destination entry menu
⇒ page 104, fig. 121 will then appear.
–Select a country from the list by rotating and pressing the control
knob.
–Select City/ZIP and enter the data using the alphanumeric
keyboard ⇒page 104, fig. 122 (⇒ page 108) and confirm with
OK , or
–Select LIST in the keyboard and select a city from the list.
–Select City centre (end entry) to navigate to the centre of a
selected locality or
–Choose Street, Special destination in city or Destination input
on map to enter more detailed destination criteria.
–Select Start route guidance ⇒ page 112.When you start the route guidance you will be offered up to three alternative
routes ⇒ page 113, fig. 133 . Select one of the available routes by rotating
and pressing the control knob. Should you not select one of the routes, the
highlighted route will automatically be set soon after you begin driving.
During this time you can still decide to select one of the other route options.
For more information about the route selection, please refer to ⇒page 113.
You can switch from the keyboard for letters to the keyboard for numbers to
be able to enter special characters (e.g. dash, apostrophe or full stop) for a
city name ⇒page 107 or to enter a post code for a city ⇒ page 108.
When you enter the name of a city in the keyboard you will be offered a list of
the most recent entries as soon as you enter the first letters. Select City Centre (end entry)
This navigation system calculates route guidance to the centre of the city
entered.
Select Street
You can specify the destination more precisely by entering a street name.
After selecting the street, you can specify more detailed destination criteria
by entering an intersection
, a house number or through Enter destination on
map ⇒ page 111.
If you would like to find a street independently of the city, select Street
⇒ page 109 in the destination entry menu after selecting the country.
Select Special destination in city
You can select a special destination in the specified city. For example, you can
navigate directly to tourist attractions or public facilities (e.g. hospital,
cinema, recreation areas).
If this function is not available in the display (is greyed out) there are no
special destinations available for the city selected.
If you would like to find a particular special destination independently of the
city, select Special destination ⇒ page 110 in the destination entry menu
after selecting the country.
Select Destination entry on map
You can find destinations for a specified city from the map display.
If the map is being displayed to select a destination, the cursor is in the
centre of the city in question. By moving the cursor horizontally and vertically,
you can set a new destination ⇒page 129.
If additional information is available for the selected point on the map, you
can display it by selecting the Detail info function.
If you are using the route without stopover mode, the option Set as stopover
will be greyed out ⇒page 120.
media_systemE_EN.book Seite 105 Montag, 21. September 2009 1:48 13
Page 107 of 167
Navigation (NAV)*
106You can also store the selected map destination using the option Store in
directory ⇒ page 117.
Enter a street name to specify a more detailed position of the map.
Note
Once you have entered a city in the keyboard, you can confirm the entry by
pressing and holding down the control knob. Or, you can enter the first few
letters of a city until you see the desired town listed on the keyboard display
and then shift directly to the city list by pressing down on the control knob.Route plan (route with stopover)
In the route with stopover mode you can enter up to three
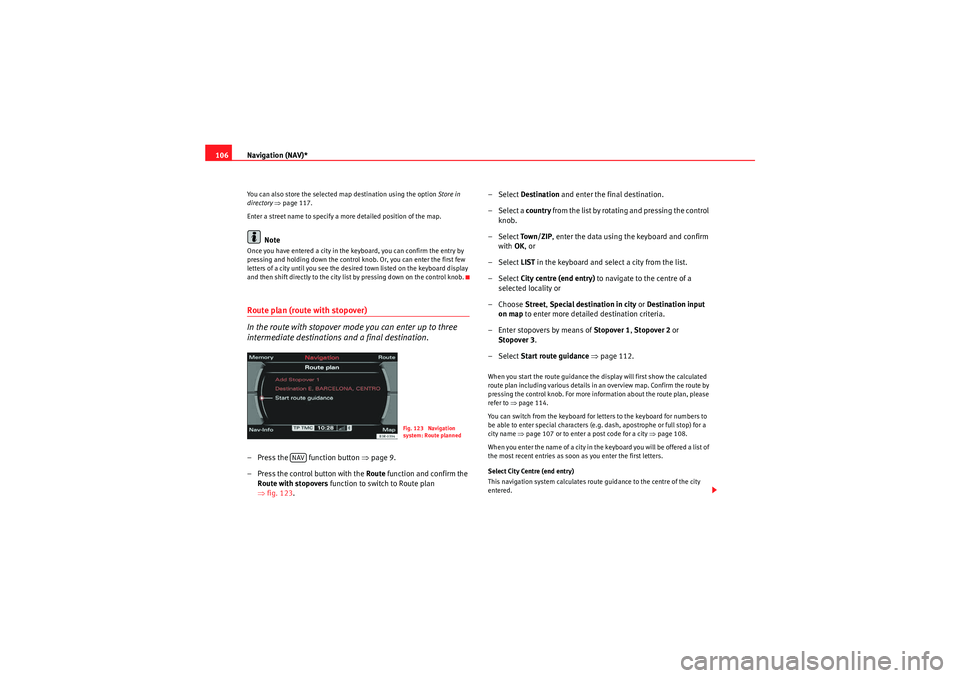
intermediate destinations and a final destination.– Press the function button ⇒page 9.
– Press the control button with the Route function and confirm the
Route with stopovers function to switch to Route plan
⇒ fig. 123 . – Select
Destination and enter the final destination.
– Select a country from the list by rotating and pressing the control
knob.
– Select To w n / Z I P , enter the data using the keyboard and confirm
with OK, or
– Select LIST in the keyboard and select a city from the list.
– Select City centre (end entry) to navigate to the centre of a
selected locality or
– Choose Street, Special destination in city or Destination input
on map to enter more detailed destination criteria.
– Enter stopovers by means of Stopover 1, Stopover 2 or
Stopover 3 .
– Select Start route guidance ⇒ page 112.
When you start the route guidance the display will first show the calculated
route plan including various details in an overview map. Confirm the route by
pressing the control knob. For more information about the route plan, please
refer to ⇒page 114.
You can switch from the keyboard for letters to the keyboard for numbers to
be able to enter special characters (e.g. dash, apostrophe or full stop) for a
city name ⇒page 107 or to enter a post code for a city ⇒page 108.
When you enter the name of a city in the keyboard you will be offered a list of
the most recent entries as soon as you enter the first letters.
Select City Centre (end entry)
This navigation system calculates route guidance to the centre of the city
entered.
Fig. 123 Navigation
system: Route planned
NAV
media_systemE_EN.book Seite 106 Montag, 21. September 2009 1:48 13
Page 109 of 167
Navigation (NAV)*
108
– Select 0-9 ⇒ page 107, fig. 124 in the keyboard display to
switch from the keyboard for letters to the keyboard for numbers.
– Enter the special character (e.g. a dash) for the city/street name.
– Then switch back to the keyboard for letters to continue entering letters for the city/street name.
– Confirm the city/street name with OK , or
– Select List in the keyboard and choose a city/street from the list.
– Enter the remaining details for your route and start route guid- ance ⇒page 112.You can enter special characters (e.g. a dash, apostrophe or full stop) using
the keyboard for numbers.
Example: To enter “Stratford-upon-Avon”, first enter “Stratford” using the
keyboard for letters. Then switch to the keyboard for numbers ⇒page 107,
fig. 124 to add the dash. Then switch back to the keyboard for letters to enter
“UPON”, and so on.
As an alternative to spelling out the place name, you can also enter the post
code ⇒page 108.
Note
Options that are not available due to your preset criteria cannot be selected
(these are greyed out in the display).
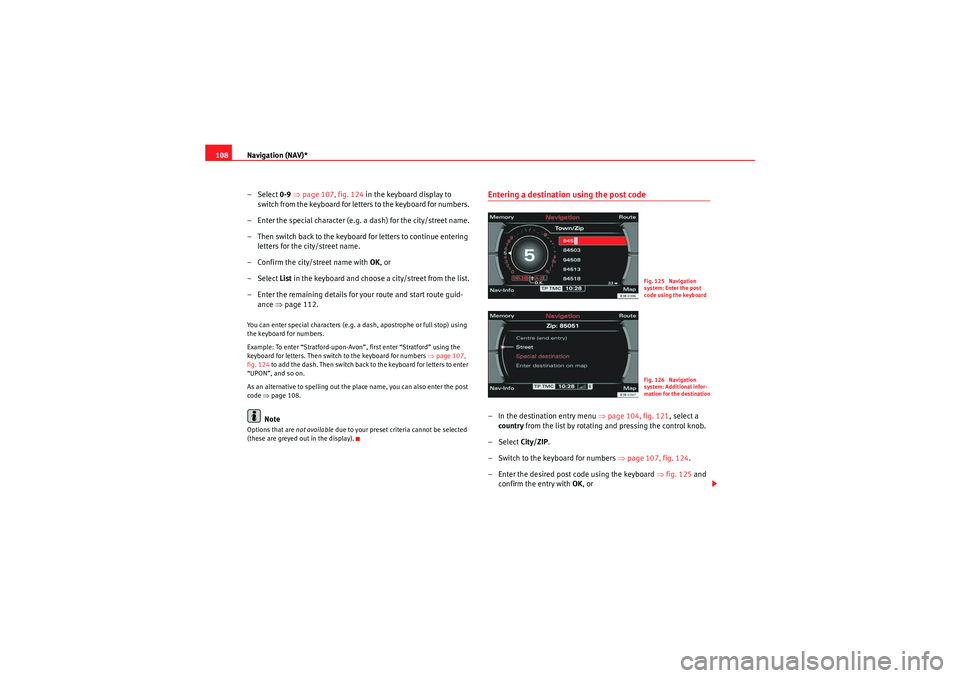
Entering a destination using the post code– In the destination entry menu ⇒page 104, fig. 121 , select a
country from the list by rotating and pressing the control knob.
– Select City/ZIP.
– Switch to the keyboard for numbers ⇒page 107, fig. 124 .
– Enter the desired post code using the keyboard ⇒fig. 125 and
confirm the entry with OK , or
Fig. 125 Navigation
system: Enter the post
code using the keyboardFig. 126 Navigation
system: Additional infor-
mation for the destination
media_systemE_EN.book Seite 108 Montag, 21. September 2009 1:48 13
Page 110 of 167
Navigation (NAV)*109
Operating
RADIO, MEDIA (audiovisual
systems)
NAME, TEL
NAV, INFO
CAR, SETUP
–Select List in the keyboard and choose a post code from the list.
–Select a Street or Special destination ⇒ page 108, fig. 126 .
– Enter the street name using the keyboard, or
– Select a special destination.
– Enter stopover(s) if desired ⇒page 120.
–Select Start route guidance ⇒ page 112.If you start a route guidance, but do not complete it, this guidance will be
continued automatically when you start driving again. This also applies to
entered destinations that were not reached due to unexpected circumstances
(e.g. change of plans). To end route guidance, select Stop route guidance
⇒ page 115.Entering the destination street
A street can be selected within a selected country.
– In the destination entry menu ⇒page 104, fig. 121 , select a
country from the list by rotating and pressing the control knob.
– Select Street ⇒ page 102, fig. 120 .
– Select In all cities (if desired), enter the street name using the
keyboard and confirm with OK , or
– Select List ⇒ page 18 in the keyboard and choose a street name
from the list.
– Enter the town using the keyboard, or
– Select a city from the following list.
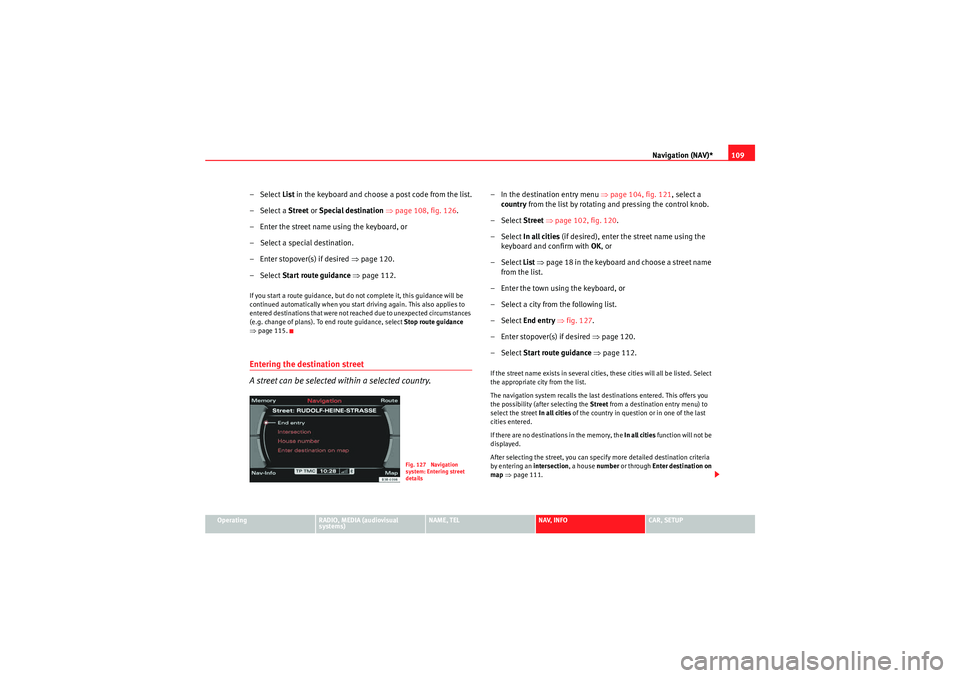
– Select End entry ⇒ fig. 127 .
– Enter stopover(s) if desired ⇒page 120.
– Select Start route guidance ⇒ page 112.If the street name exists in several cities, these cities will all be listed. Select
the appropriate city from the list.
The navigation system recalls the last destinations entered. This offers you
the possibility (after selecting the Street from a destination entry menu) to
select the street In all cities of the country in question or in one of the last
cities entered.
If there are no destinations in the memory, the In all cities function will not be
displayed.
After selecting the street, you can specify more detailed destination criteria
by entering an intersection , a house number or through Enter destination on
map ⇒ page 111.
Fig. 127 Navigation
system: Entering street
details
media_systemE_EN.book Seite 109 Montag, 21. September 2009 1:48 13