Mirrors Seat Exeo 2010 User Guide
[x] Cancel search | Manufacturer: SEAT, Model Year: 2010, Model line: Exeo, Model: Seat Exeo 2010Pages: 319, PDF Size: 9.64 MB
Page 141 of 319
Seats and storage compartments139
Safety First
Operating Instructions
Practical Tips
Technical Specifications
adjustment. Use of the button is recommended to disable the memory
system when the vehicle is being driven
temporarily by a different driver
whose settings do not need to be stored in the memory.
Note
You can also use the remote control to call up the stored settings
⇒ page 140.Storing settingsThe button must be in its down position (pressed in) before
you can store the desired settings.
– Adjust the driver seat as required ⇒page 136.
– Adjust both exterior mirrors ⇒page 132.
– Press and hold the button. At the same time, press one of the memory buttons for at least a second.
– Release both buttons. The settin g is now stored on the selected
memory button.Any new setting selected automatically cancels the existing setting stored on
the memory button. It is best to begin with memory button No. 1 for the first
driver and then assign the other memory buttons to each subsequent driver.
The seat and mirror positions are stored when the vehicle is locked with the
remote control and are assigned to the remote control key. The exterior
mirrors adjust automatically to the previous position when you unlock the
vehicle; the driver seat adjusts automatically when you open the driver door. However, this does not delete the settings stored in memory buttons 1 to 4.
These settings can be enabled at any time.
Activating settings
Stored settings can be recalled using either the memory
buttons or the remote control (remote control key).Using the memory buttons
– If the driver door is open, press the desired memory button
briefly.
– If the driver door is closed, press and hold down the appropriate memory button until the seat an d exterior mirrors reach their
programmed positions.
Using the remote control
– Unlock the vehicle using the remote control and open the driver door within the next ten minutes.The seat adjustment will have to be call ed up using the memory buttons if the
driver door is not opened within 10 minutes after unlocking the vehicle with
the remote control.
WARNING
•For safety reasons, the seat must only be adjusted when the vehicle is
at a standstill. Failure to do so could result in an accident.•In an emergency, the memory function can be stopped at any time by
pressing the STOP button or by briefly pressing any of the memory
buttons.
STOP
STOP
MEMO
exeo_EN.book Seite 139 Montag, 30. August 2010 4:45 16
Page 174 of 319
Driving
172SEAT Parking System*
SEAT Parking System is an acoustic parking aid.Sensors are located in the rear bumper. When the sensors detect an obstacle,
you are alerted by acoustic signals. The measuring range of the sensors starts
at approximately:
The acoustic signals sound with increasing frequency as you approach the
obstacle. When the vehicle is less than 0.30 m away from the obstacle, the
warning tone will sound continuously. Do not drive on!
The volume of the warning beeps will be gradually reduced after about 4
seconds if the vehicle remains at a constant distance from a detected
obstacle (it does not affect the permanent acoustic signal).
The parking aid is switched on automatically when reverse gear is engaged.
You will hear a brief confirmation tone.
WARNING
•The parking aid is not a replacement for driver awareness. The driver is
personally responsible for safe parking and other manoeuvres.•The sensors have blind spots in which obstacles are not registered.
Always look out for small children and animals because the system will not
always detect them. Always pay attention when reversing to avoid acci-
dents.•Always keep a close eye on the area around the vehicle and make full
use of the rear view mirrors.
Caution
Please note that low obstacles detected by the system may no longer be
registered by the sensors as the vehicle moves closer, so the system will not
give any further warning. Certain kinds of obstacles (such as wire fences,
chains, thin painted posts or trailer draw bars, etc) may not always be
detected by the system, so take care not to damage the vehicle in such cases.
Note
•Please refer to the notes on towing ⇒page 173.SEAT Parking System Plus*
SEAT Parking System Plus is an acoustic parking aid.Sensors are located in the front and rear bumpers. When the sensors detect
an obstacle, you are alerted by acoustic signals. The measuring range of the
sensors starts at approximately:
The acoustic signals sound with increasing frequency as you approach the
obstacle. When the vehicle is less than 0.30 m from the obstacle the warning
tone will sound continuously. Stop moving immediately!
The volume of the warning beeps will be gradually reduced after about 4
seconds if the vehicle remains at a constant distance from a detected
obstacle (it does not affect the permanent acoustic signal).
Rear
Side
0.60 m
Centre
1.60 m
Front
Side
0.90 m
Centre
1.20 m
Rear
Side
0.60 m
Centre
1.60 m
exeo_EN.book Seite 172 Montag, 30. August 2010 4:45 16
Page 175 of 319
Driving173
Safety First
Operating Instructions
Practical Tips
Technical Specifications
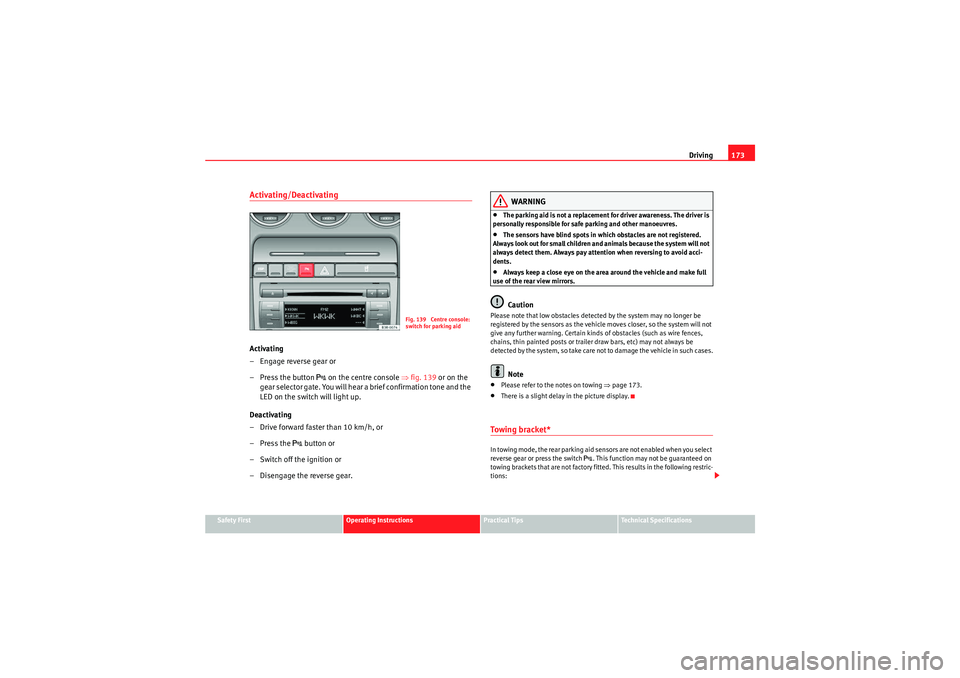
Activating/DeactivatingActivating
– Engage reverse gear or
– Press the button
on the centre console ⇒fig. 139 or on the
gear selector gate. You will hear a brief confirmation tone and the
LED on the switch will light up.
Deactivating
– Drive forward faster than 10 km/h, or
–Press the
button or
– Switch off the ignition or
– Disengage the reverse gear.
WARNING
•The parking aid is not a replacement for driver awareness. The driver is
personally responsible for safe parking and other manoeuvres.•The sensors have blind spots in which obstacles are not registered.
Always look out for small children and animals because the system will not
always detect them. Always pay attention when reversing to avoid acci-
dents.•Always keep a close eye on the area around the vehicle and make full
use of the rear view mirrors.Caution
Please note that low obstacles detected by the system may no longer be
registered by the sensors as the vehicle moves closer, so the system will not
give any further warning. Certain kinds of obstacles (such as wire fences,
chains, thin painted posts or trailer draw bars, etc) may not always be
detected by the system, so take care not to damage the vehicle in such cases.
Note
•Please refer to the notes on towing ⇒page 173.•There is a slight delay in the picture display.To w i n g b r a c k e t *In towing mode, the rear parking aid sensors are not enabled when you select
reverse gear or press the switch
. This function may not be guaranteed on
towing brackets that are not factory fitted. This results in the following restric-
tions:
Fig. 139 Centre console:
switch for parking aid
exeo_EN.book Seite 173 Montag, 30. August 2010 4:45 16
Page 201 of 319

Trailer towing199
Safety First
Operating Instructions
Practical Tips
Technical Specifications
Where possible, operate the trailer with the maximum permitted
drawbar
load on the ball joint of the towing bracket, but do not exceed the specified
limit.
Tyre pressure
Check the tyre pressures on your vehicle, and adjust for “full load” conditions
(refer to the sticker listing the tyre pressures on the door pillar). It may also be
necessary to adjust the tyre pressures on the trailer according to the recom-
mendations of the trailer manufacturer.
Exterior mirrors
Check whether you can see enough of the road behind the trailer with the
standard mirrors. If this is not the case you should have additional mirrors
fitted. The two exterior mirrors should be fitted on folding arms. Adjust the
mirrors to give sufficient rear vision.
Headlights
Before starting a journey, check the headlight beam settings with the trailer
hitched up. If necessary, alter the height of the headlight beams by means of
the headlight range control. See ⇒page 119.
Power supply
When you remove the ignition key, the power supply to the trailer is inter-
rupted.
Removable ball joint coupling
Vehicles with a factory-fitted towing bracket are equipped with a removable
ball joint coupling. This is stored in the spare wheel well in the luggage
compartment together with the necessary fitting instructions.
Note
If you frequently tow, we recommend you also have the vehicle serviced
between services.
Notes on towing
Towing a trailer involves additional attention by the driver.Weight distribution
The weight distribution of a loaded trailer with an unladen vehicle is very
unfavourable. However, if this cannot be avoided, drive extra slow to allow for
the unbalanced weight distribution.
Speed
The stability of the vehicle and trailer is reduced with increasing speed. There-
fore, it is advisable not to drive at the maximum permissible speed in unfa-
vourable road, weather or wind condit ions. This especially applies when
driving downhill.
You should always reduce speed immediately if the trailer shows the slightest
sign of swaying . Never try to stabilise the trailer by accelerating.
Anticipate hazards and brake in good time. If towing a trailer with an inertia
brake , first brake gently and then harder. This will prevent brake tapping by
the trailer wheels when they lock. Select a low gear in due course before
going down a steep downhill. This enables you to use the engine braking to
slow down the vehicle.
Swaying and pitching can be reduced by stabiliser aids. We recommend
having stabiliser aids installed when towing trailers with a high trailer weight.
They can be purchased and installed at a Technical Service.
Reheating
When climbing long hills in hot weather with the engine running fast in low
gear, you should keep an eye on the coolant temperature gauge ⇒page 60.
Reduce speed immediately if the needle moves to the right end of the scale.
If the temperature warning lamp
�v in the instrument panel should start
flashing, stop the vehicle and let the engine cool down by running it at idling
speed for a few minutes.
exeo_EN.book Seite 199 Montag, 30. August 2010 4:45 16
Page 214 of 319
Vehicle maintenance and cleaning
212Regular wax applications help to protect the paintwork from environmental
contaminants ⇒page 209. It is also effective in protecting against minor
scratches.
Even if a wax solution is used regularly in the vehicle washing tunnel, it is
advisable to protect the paint with a hard wax coating at least twice a year.Polishing the paintwork
Polishing brings back gloss to the paintwork.Polishing is only necessary if the paint has lost its shine, and the gloss cannot
be brought back by applying wax. Polishing products can be purchased in
your Authorised Service Centre.
The vehicle must be waxed after polishing if the polish used does not contain
wax compounds to seal the paint ⇒page 211, “Vehicle paint maintenance”.
Caution
To prevent damage to the paintwork:•Do not use polishes and hard wax on painted parts with a matte finish or
on plastic parts.•Do not polish your vehicle in a sandy or dusty environment.Caring for plastic parts
Solvents damage plastic parts.If normal washing fails to clean plastic parts, clean them with approved
solvent-free plastic cleaning and care products.
Caution
•The use of liquid air freshener directly over the air vents of the vehicle may
damage the plastic parts if the liquid is accidentally spilled.•Cleaning products which contain solvents will damage the material.Cleaning windows and exterior mirrorsCleaning windows
– Moisten the windows with commercially available, alcohol based glass cleaner.
– Dry the windows with a clean chamois leather or a lint-free cloth.
Removing snow
– Use a small brush to remove sn ow from the windows and mirrors.
Removing ice
–Use a de-icer spray.Use a clean cloth or chamois leather to dry the windows. The chamois
leathers used on painted surfaces are not suitable to clean windows because
they are soiled with wax deposits which could smear the windows.
If possible, use a de-icing spray to remove ice. If you use an ice scraper, push
it in one direction only without swinging it.
Use window cleaner or a silicone remover to clean rubber, oil, grease and sili-
cone deposits off.
Wax deposits can be removed with a special cleaner available in your Author-
ised Service Centre. Wax deposits on the windscreen could cause the wiper
blades to judder. Adding a window clea ner that dissolves wax to the wind-
exeo_EN.book Seite 212 Montag, 30. August 2010 4:45 16
Page 215 of 319
Vehicle maintenance and cleaning213
Safety First
Operating Instructions
Practical Tips
Technical Specifications
screen washer fluid prevents wiper blades from juddering, but wax deposits
are not removed.
Caution
•Never use warm or hot water to remove snow and ice from windows and
mirrors. This could cause the glass to crack!•The heating element for the rear window is located on the inner side of the
window. To prevent damage, do not put stickers on the heating elements
inside the window.Cleaning windscreen wiper bladesClean wiper blades are essent ial to provide clear vision.
1. Use a soft cloth to remove dust and dirt from the windscreen wiper blades.
2. Use window cleaner to clean the windscreen wiper blades. Use a sponge or a cloth to remove stubborn dirt.Rubber seals maintenance
If rubber seals are well looked after, they will not freeze so
quickly.1. Use a soft cloth to remove dust and dirt from the rubber seals.
2. Apply a specialist care product to the rubber seals.
The rubber strips on the doors, windows, bonnet and tailgate will remain
pliable and last longer if they are treated with a suitable care product (for
example silicone spray).
Caring for rubber seals will also prevent premature ageing and leaks. The
doors will be easier to open. If rubber seals are well looked after, they will not
freeze so quickly in winter.Door lock cylinders
The door lock cylinders can freeze up in winter.To de-ice the lock cylinders you should only use spray with lubricating and
anti-corrosive properties.Cleaning chrome parts1. Clean chrome parts with a damp cloth.
2. Polish chrome parts with a soft, dry cloth.If this does not provide satisfying results, use a specialist chrome cleaning
product . Chrome cleaning products will remove stains from the surface.
Caution
To prevent scratching chrome surfaces:•Never use an abrasive cleaning product on chrome.•Do not clean or polish chrome parts in a sandy or dusty environment.
exeo_EN.book Seite 213 Montag, 30. August 2010 4:45 16
Page 312 of 319
Index
310Electronic Stability Programme
Description . . . . . . . . . . . . . . . . . . . . . . . . . 166
How the system works . . . . . . . . . . . . . . . . 185
Warning lamp . . . . . . . . . . . . . . . . . . . . . . . 167
Emergencies Changing a wheel . . . . . . . . . . . . . . . . . . . . 249
Disconnecting the battery . . . . . . . . . . . . . 234
Jack . . . . . . . . . . . . . . . . . . . . . . . . . . . . 247, 252
Sunroof emergency activation . . . . . . . . . . 113
Tools . . . . . . . . . . . . . . . . . . . . . . . . . . . . . . . 247
Tyre mobility system . . . . . . . . . . . . . . . . . . 248
Engine Running in . . . . . . . . . . . . . . . . . . . . . . . . . . 192
Starting . . . . . . . . . . . . . . . . . . . . . . . . . . . . 168
Stop . . . . . . . . . . . . . . . . . . . . . . . . . . . . . . . 169
Engine compartment Safety instructions . . . . . . . . . . . . . . . . . . . 224
Engine oil . . . . . . . . . . . . . . . . . . . . . . . . . . . . . . 225 Checking oil level . . . . . . . . . . . . . . . . . . . . 226
Consumption . . . . . . . . . . . . . . . . . . . . . . . . 226
Oil pressure too low . . . . . . . . . . . . . . . . . . . 78
Oil properties . . . . . . . . . . . . . . . . . . . . . . . . 226
Oil sensor defective . . . . . . . . . . . . . . . . . . . 80
Topping up . . . . . . . . . . . . . . . . . . . . . . . . . . 227
Engine speed governing . . . . . . . . . . . . . . . . . . . 80
Environment . . . . . . . . . . . . . . . . . . . . . . . . . . . 194 Environmental friendliness . . . . . . . . . . . . 196
Roof racks . . . . . . . . . . . . . . . . . . . . . . . . . . 147
Environmental tip Avoiding pollution . . . . . . . . . . . . . . . . . . . . 221
Environmentally friendly driving . . . . . . . . . . . 194 ESP
See Electronic Stability Programme . . . . . . 166
Exhaust gas purification system . . . . . . . . . . . 193
Exterior mirrors . . . . . . . . . . . . . . . . . . . . . . . . . 212
FFabric trim cleaning . . . . . . . . . . . . . . . . . . . . . 216
Floor mats . . . . . . . . . . . . . . . . . . . . . . . . . . . . . . 16
Fog lights . . . . . . . . . . . . . . . . . . . . . . . . . . . . . . 117
Front airbags . . . . . . . . . . . . . . . . . . . . . . . . . . . . 32 Description . . . . . . . . . . . . . . . . . . . . . . . . . . 32
Operation . . . . . . . . . . . . . . . . . . . . . . . . . . . . 33
Safety notes . . . . . . . . . . . . . . . . . . . . . . . . . . 35
Front drink holder . . . . . . . . . . . . . . . . . . . . . . . 147
Front passenger airbag deactivation . . . . . . . . . 44
Fuel Diesel . . . . . . . . . . . . . . . . . . . . . . . . . . . . . . 222
Fuel gauge . . . . . . . . . . . . . . . . . . . . . . . . . . . 63
Fuel level low . . . . . . . . . . . . . . . . . . . . . . . . . 80
Instantaneous fuel consumption . . . . . . . . . 85
Petrol . . . . . . . . . . . . . . . . . . . . . . . . . . . . . . 221
Fuel tank opening the fuel tank flap . . . . . . . . . . . . . 220
Fuel: save . . . . . . . . . . . . . . . . . . . . . . . . . . . . . . 194
Fuse Assignment . . . . . . . . . . . . . . . . . . . . . . . . . 259
Changing . . . . . . . . . . . . . . . . . . . . . . . . . . . 258
GGear display . . . . . . . . . . . . . . . . . . . . . . . . . . . . 73
Gear shift pattern . . . . . . . . . . . . . . . . . . . . . . . 177
General overview of the engine compartment 295
Glove compartment . . . . . . . . . . . . . . . . . . . . . 153Light . . . . . . . . . . . . . . . . . . . . . . . . . . . . . . . 123
GRA . . . . . . . . . . . . . . . . . . . . . . . . . . . . . . . . . . 174HHandbrake . . . . . . . . . . . . . . . . . . . . . . . . . . . . . 170
Hazard warning lights . . . . . . . . . . . . . . . . . . . . 121
Head restraint Rear seat . . . . . . . . . . . . . . . . . . . . . . . . . . . 142
Head restraints Front seats . . . . . . . . . . . . . . . . . . . . . . . . . . 140
Rear seats . . . . . . . . . . . . . . . . . . . . . . . . . . 141
Removing and fitting . . . . . . . . . . . . . . . . . 141
Headlight range control . . . . . . . . . . . . . . . . . . 119 Dynamic . . . . . . . . . . . . . . . . . . . . . . . . . . . . 120
Faulty . . . . . . . . . . . . . . . . . . . . . . . . . . . . . . . 81
Headlights Adaptive headlights . . . . . . . . . . . . . . . . . . 121
Automatic headlight control . . . . . . . . . . . 116
Automatic headlight control photosensors 116
Coming home function . . . . . . . . . . . . . . . . 118
Driving abroad . . . . . . . . . . . . . . . . . . . . . . . 197
Front fog lights . . . . . . . . . . . . . . . . . . . . . . 117
Headlight range control . . . . . . . . . . . . . . . 119
exeo_EN.book Seite 310 Montag, 30. August 2010 4:45 16
Page 314 of 319
Index
312Mirrors
Activating stored settings . . . . . . . . . . . . . . 139
Automatic exterior mirror adjustment . . . . 138
Heated exterior mirrors . . . . . . . . . . . . . . . . 132
Storing settings . . . . . . . . . . . . . . . . . . . . . . 139
Vanity mirrors . . . . . . . . . . . . . . . . . . . . . . . 126
Mobile phones and two-way radios . . . . . . . . . 219
multitronic® . . . . . . . . . . . . . . . . . . . . . . . . . . . 177 Driving with multitronic® . . . . . . . . . . . . . . 178NNumber of seats . . . . . . . . . . . . . . . . . . . . . . . . . 18OObservations . . . . . . . . . . . . . . . . . . . . . . . . . . . 196
Octane number . . . . . . . . . . . . . . . . . . . . . . . . . 221
Odometer . . . . . . . . . . . . . . . . . . . . . . . . . . . . . . . 63
Oil consumption . . . . . . . . . . . . . . . . . . . . . . . . 226
Oil dipstick . . . . . . . . . . . . . . . . . . . . . . . . . . . . 226
Oil level
Check level . . . . . . . . . . . . . . . . . . . . . . . . . . 80
Oil properties . . . . . . . . . . . . . . . . . . . . . . . . . . . 226
Onboard computer . . . . . . . . . . . . . . . . . . . . . . . 85
Outside temperature display . . . . . . . . . . . . . . . 72
Overview Cockpit . . . . . . . . . . . . . . . . . . . . . . . . . . . . . . 57
PPaddle leverstiptronic . . . . . . . . . . . . . . . . . . . . . . . . . . . . 184
Paintwork Polishing . . . . . . . . . . . . . . . . . . . . . . . . . . . 212
Parking . . . . . . . . . . . . . . . . . . . . . . . . . . . . . . . . 171 multitronic® . . . . . . . . . . . . . . . . . . . . . . . . 178
Parking aid SEAT Parking System . . . . . . . . . . . . . . . . . 172
SEAT Parking System plus . . . . . . . . . . . . . 172
Parking aid acoustic system . . . . . . . . . . . . . . . 171
Passenger See Correct sitting position . . . . . . . . . . 11, 12
Pedals . . . . . . . . . . . . . . . . . . . . . . . . . . . . . . . . . 15
Petrol . . . . . . . . . . . . . . . . . . . . . . . . . . . . . . . . . 221 Driving abroad . . . . . . . . . . . . . . . . . . . . . . . 196
Petrol additives . . . . . . . . . . . . . . . . . . . . . . . . . 222
Photosensor faulty . . . . . . . . . . . . . . . . . . . . . . . 81
Physical principles of a frontal collision . . . . . . 19
Plastic parts . . . . . . . . . . . . . . . . . . . . . . . . . . . . 212
Plastic parts cleaning . . . . . . . . . . . . . . . . . . . . 215
Power socket . . . . . . . . . . . . . . . . . . . . . . . 149, 150
Power steering . . . . . . . . . . . . . . . . . . . . . . . . . . 190
Products for vehicle maintenance . . . . . . . . . . 209QQuartz clock . . . . . . . . . . . . . . . . . . . . . . . . . . . . . 61
RRadiator fan . . . . . . . . . . . . . . . . . . . . . . . . . . . . 230
Radio display . . . . . . . . . . . . . . . . . . . . . . . . . . . . 72
Rain sensor . . . . . . . . . . . . . . . . . . . . . . . . . . . . 129
Rain sensor faulty . . . . . . . . . . . . . . . . . . . . . . . . 81
Reading lights Front . . . . . . . . . . . . . . . . . . . . . . . . . . . . . . . 123
Rear . . . . . . . . . . . . . . . . . . . . . . . . . . . . . . . 125
Rear drink holder . . . . . . . . . . . . . . . . . . . . . . . . 148
Rear fog light . . . . . . . . . . . . . . . . . . . . . . . . . . . 117
Rear side window sun blind . . . . . . . . . . . . . . . 128
Rear view mirrors Anti-dazzle interior mirror with automatic adjustment . . . . . . . . . . . . . . . . . . . . . . . . 131
Anti-dazzle setting . . . . . . . . . . . . . . . . . . . 131
Interior mirror . . . . . . . . . . . . . . . . . . . . . . . 131
Rear window sun blind . . . . . . . . . . . . . . . . . . . 128
Refuelling . . . . . . . . . . . . . . . . . . . . . . . . . . . . . 220
Registration light . . . . . . . . . . . . . . . . . . . . . . . 283
Remote control key Indicator light . . . . . . . . . . . . . . . . . . . . . . . . 97
Locking and unlocking . . . . . . . . . . . . . . . . 105
Locking and unlocking the vehicle . . . . . . 105
Replacing the battery . . . . . . . . . . . . . . . . . . 97
Remote control keys . . . . . . . . . . . . . . . . . . . . . . 96 Re-synchronising . . . . . . . . . . . . . . . . . . . . 106
Removing and fitting the wheel . . . . . . . . . . . . 253
Repairs Airbags . . . . . . . . . . . . . . . . . . . . . . . . . . . . . . 30
Replacement of parts . . . . . . . . . . . . . . . . . . . . 218
exeo_EN.book Seite 312 Montag, 30. August 2010 4:45 16