audio Seat Exeo 2011 MEDIA SYSTEM 1.0
[x] Cancel search | Manufacturer: SEAT, Model Year: 2011, Model line: Exeo, Model: Seat Exeo 2011Pages: 124, PDF Size: 6.35 MB
Page 6 of 124
Overview5
Operating
RADIO, CD/MP3
TEL (telephone)
NAV, INFO
SETUP
Display control knob (
) . . . . . . . . . . . . . . . . . . . . . . . . . . . . . .
Function buttons . . . . . . . . . . . . . . . . . . . . . . . . . . . . . . . . . . . . .
Eject button . . . . . . . . . . . . . . . . . . . . . . . . . . . . . . . . . . . . . . . . .
Display . . . . . . . . . . . . . . . . . . . . . . . . . . . . . . . . . . . . . . . . . . . . .
CD slot
Forward/reverse buttons . . . . . . . . . . . . . . . . . . . . . . . . . . . . . .
Rotary pushbutton . . . . . . . . . . . . . . . . . . . . . . . . . . . . . . . . . . .
Control buttons . . . . . . . . . . . . . . . . . . . . . . . . . . . . . . . . . . . . . . button . . . . . . . . . . . . . . . . . . . . . . . . . . . . . . . . . . . . . .
Note
•Please note that this instruction manual only describes the SEAT naviga-
tion system and its components. For more information about the features and
equipment fitted on your vehicle, please refer to the owner's manual.•Some of the equipment shown is found only in certain model versions or
is not supplied as standard.Switching on and offAutomatic switching on and offThe navigation system switches on automatically after you turn the ignition
on . When you remove your key from the ignition lock , the navigation system
will automatically switch off.
What happens when it is switched on?
When the system is switched on, the start screen appears. Then the last
selected main function is switched on automatically. The last selected
audio/video source is automatically switched on. What happens when it is switched off?
When the equipment is switched off, the display darkens and the audio
source is silenced. Settings made are stored.
Switching on and off manually
The navigation system can also be turned on and off manu-
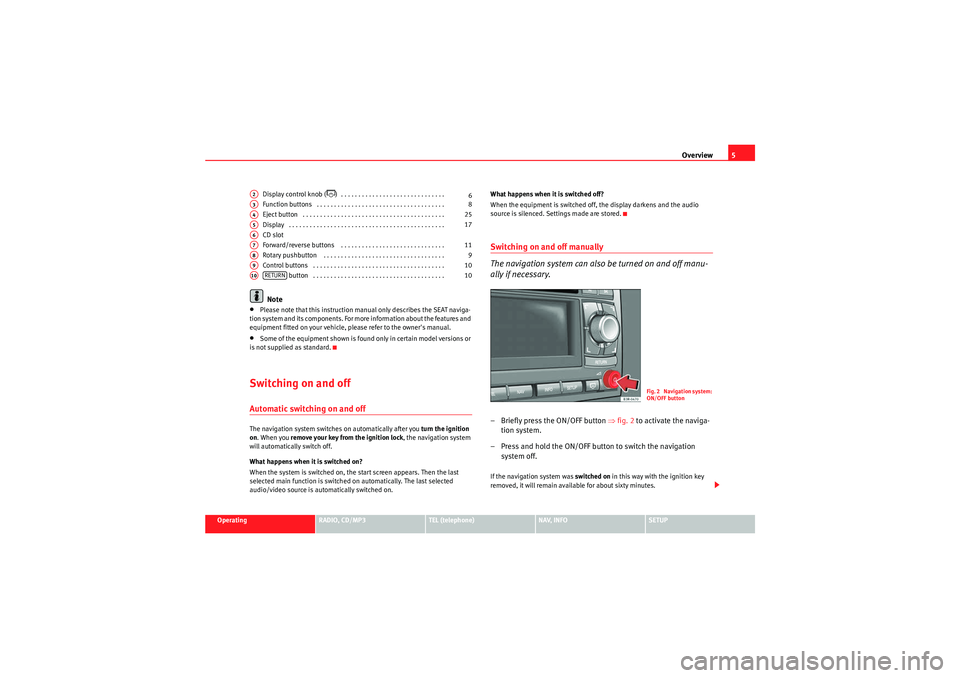
ally if necessary.– Briefly press the ON/OFF button
⇒fig. 2 to activate the naviga-
tion system.
– Press and hold the ON/OFF button to switch the navigation system off.If the navigation system was switched on in this way with the ignition key
removed, it will remain available for about sixty minutes.
A2
6
A3
8
A4
25
A5
17
A6A7
11
A8
9
A9
10
A10
RETURN
10
Fig. 2 Navigation system:
ON/OFF button
Media System 1.0_EN.book Seite 5 Donnerstag, 10. September 2009 1:52 13
Page 7 of 124
Overview
6If the system was switched off manually, it will not be switched on again auto-
matically the next time the ignition is turned on.
Note
•Where the battery level does not reach a pre-established value and the
engine is not running, the navigation system will switch off automatically. You
should therefore start the engine if you wish to continue using the function.•Briefly press the ON/OFF button to activate or deactivate the MUTE func-
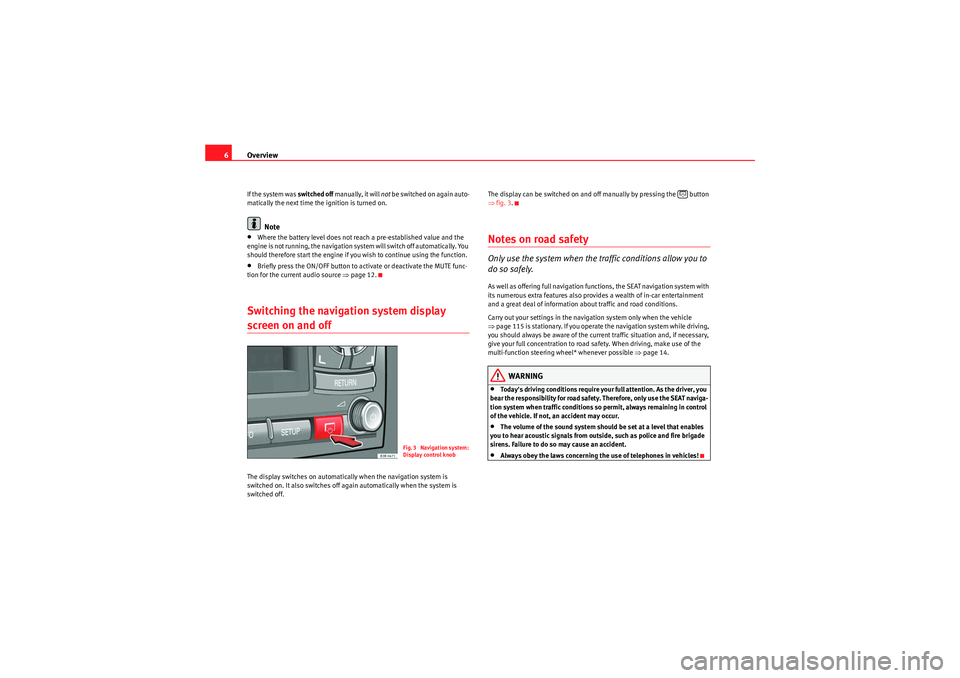
tion for the current audio source ⇒page 12.Switching the navigation system display screen on and offThe display switches on automatically when the navigation system is
switched on. It also switches off again automatically when the system is
switched off. The display can be switched on and off manually by pressing the button
⇒
fig. 3.
Notes on road safetyOnly use the system when the traffic conditions allow you to
do so safely.As well as offering full navigation functions, the SEAT navigation system with
its numerous extra features also provides a wealth of in-car entertainment
and a great deal of information about traffic and road conditions.
Carry out your settings in the navigation system only when the vehicle
⇒page 115 is stationary. If you operate the navigation system while driving,
you should always be aware of the current traffic situation and, if necessary,
give your full concentration to road safety. When driving, make use of the
multi-function steering wheel* whenever possible ⇒page 14.
WARNING
•Today's driving conditions require your full attention. As the driver, you
bear the responsibility for road safety. Therefore, only use the SEAT naviga-
tion system when traffic conditions so permit, always remaining in control
of the vehicle. If not, an accident may occur.•The volume of the sound system should be set at a level that enables
you to hear acoustic signals from outside, such as police and fire brigade
sirens. Failure to do so may cause an accident.•Always obey the laws concerning the use of telephones in vehicles!
Fig. 3 Navigation system:
Display control knob
Media System 1.0_EN.book Seite 6 Donnerstag, 10. September 2009 1:52 13
Page 13 of 124
Handling: General information
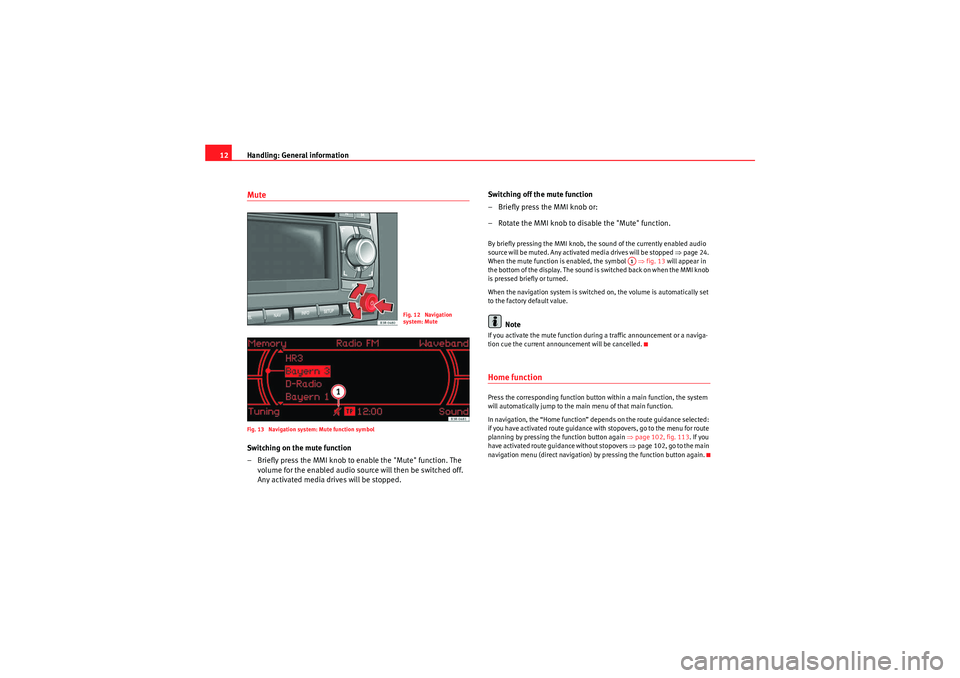
12MuteFig. 13 Navigation system: Mute function symbolSwitching on the mute function
– Briefly press the MMI knob to enable the "Mute" function. The
volume for the enabled audio source will then be switched off.
Any activated media drives will be stopped. Switching off the mute function
– Briefly press the MMI knob or:
– Rotate the MMI knob to disable the "Mute" function.
By briefly pressing the MMI knob, the sound of the currently enabled audio
source will be muted. Any activated media drives will be stopped
⇒page 24.
When the mute function is enabled, the symbol ⇒fig. 13 will appear in
the bottom of the display. The sound is switched back on when the MMI knob
is pressed briefly or turned.
When the navigation system is switched on, the volume is automatically set
to the factory default value.
Note
If you activate the mute function during a traffic announcement or a naviga-
tion cue the current announcement will be cancelled.Home functionPress the corresponding function button within a main function, the system
will automatically jump to the main menu of that main function.
In navigation, the “Home function” depends on the route guidance selected:
if you have activated route guidance with stopovers, go to the menu for route
planning by pressing the function button again ⇒page 102, fig. 113 . If you
have activated route guidance without stopovers ⇒page 102, go to the main
navigation menu (direct navigation) by pressing the function button again.
Fig. 12 Navigation
system: Mute
A1
Media System 1.0_EN.book Seite 12 Donnerstag, 10. September 2009 1:52 13
Page 15 of 124
Handling: General information
14The multi-function steering wheelIntroduction
The multi-function steering wheel enables quick and easy
operation of selected functions of the navigation system.
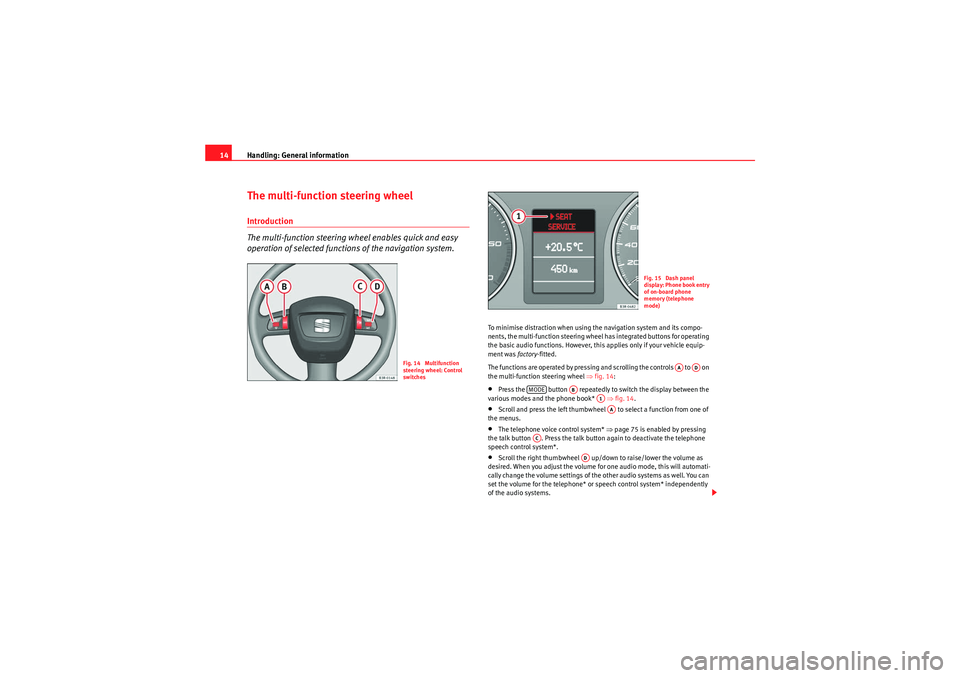
To minimise distraction when using the navigation system and its compo-
nents, the multi-function steering wheel has integrated buttons for operating
the basic audio functions. However, this applies only if your vehicle equip-
ment was factory-fitted.
The functions are operated by pressing and scrolling the controls to on
the multi-function steering wheel ⇒fig. 14 :•Press the button repeatedly to switch the display between the
various modes and the phone book* ⇒fig. 14 .•Scroll and press the left thumbwheel to select a function from one of
the menus.•The telephone voice control system* ⇒page 75 is enabled by pressing
the talk button . Press the talk button again to deactivate the telephone
speech control system*.•Scroll the right thumbwheel up/down to raise/lower the volume as
desired. When you adjust the volume for one audio mode, this will automati-
cally change the volume settings of the other audio systems as well. You can
set the volume for the telephone* or speech control system* independently
of the audio systems.
Fig. 14 Multifunction
steering wheel: Control
switches
Fig. 15 Dash panel
display: Phone book entry
of on-board phone
memory (telephone
mode)
AA
AD
MODE
AB
A1AA
AC
AD
Media System 1.0_EN.book Seite 14 Donnerstag, 10. September 2009 1:52 13
Page 17 of 124
Handling: General information
16
– Press the left thumbwheel . The number is dialled and the audio system is muted automatically.
Answering or ending calls
–Press the left thumbwheel ⇒ page 14, fig. 14.
Rejecting a call
– Press and hold the left thumbwheel ⇒page 14, fig. 14 .
Replacing a call
– If a second call is received (ca ll waiting), briefly press the left
thumbwheel ⇒page 14, fig. 14 . The current call will be
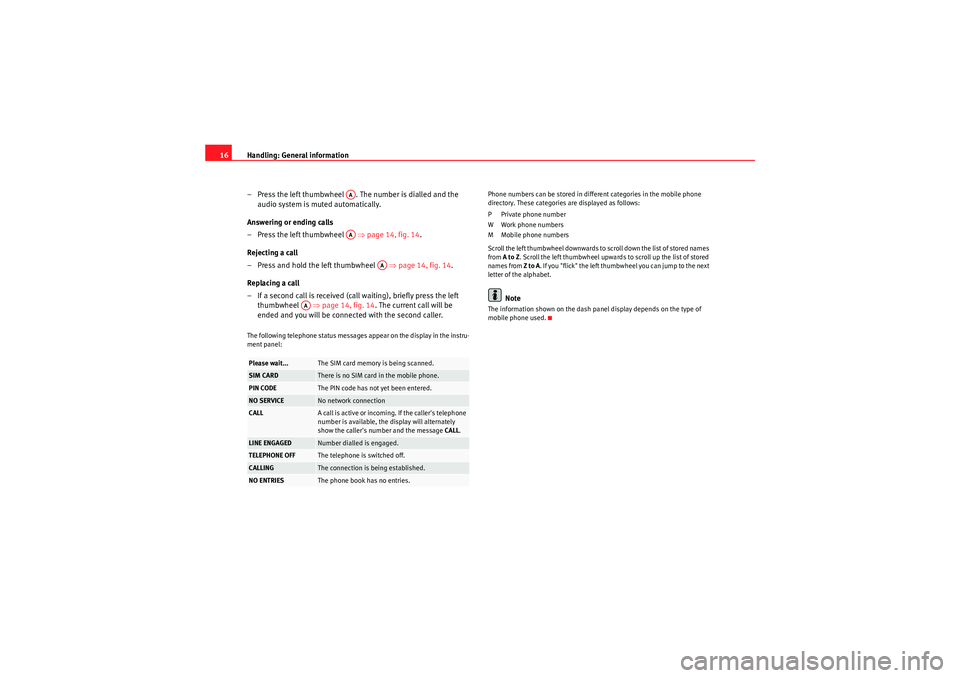
ended and you will be connected with the second caller.The following telephone status messages appear on the display in the instru-
ment panel: Phone numbers can be stored in different categories in the mobile phone
directory. These categories are displayed as follows:
P Private phone number
W Work phone numbers
M Mobile phone numbers
Scroll the left thumbwheel downwards to scroll down the list of stored names
from
A to Z . Scroll the left thumbwheel upwards to scroll up the list of stored
names from Z to A. If you "flick" the left thumbwheel you can jump to the next
letter of the alphabet.
Note
The information shown on the dash panel display depends on the type of
mobile phone used.
Please wait...
The SIM card memory is being scanned.
SIM CARD
There is no SIM card in the mobile phone.
PIN CODE
The PIN code has not yet been entered.
NO SERVICE
No network connection
CALL
A call is active or incoming. If the caller's telephone
number is available, the display will alternately
show the caller's number and the message CALL.
LINE ENGAGED
Number dialled is engaged.
TELEPHONE OFF
The telephone is switched off.
CALLING
The connection is being established.
NO ENTRIES
The phone book has no entries.
AAAA
AA
AA
Media System 1.0_EN.book Seite 16 Donnerstag, 10. September 2009 1:52 13
Page 19 of 124
Display
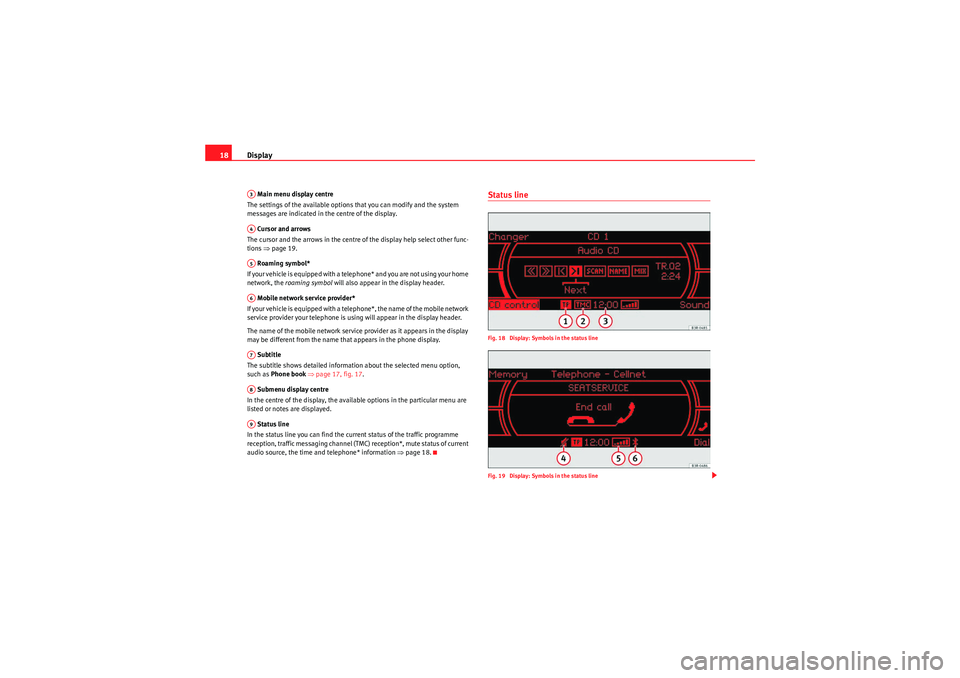
18 Main menu display centre
The settings of the available options that you can modify and the system
messages are indicated in the centre of the display.
Cursor and arrows
The cursor and the arrows in the centre of the display help select other func-
tions ⇒page 19.
Roaming symbol*
If your vehicle is equipped with a telephone* and you are not using your home
network, the roaming symbol will also appear in the display header.
Mobile network service provider*
If your vehicle is equipped with a telephone*, the name of the mobile network
service provider your telephone is using will appear in the display header.
The name of the mobile network service provider as it appears in the display
may be different from the name that appears in the phone display.
Subtitle
The subtitle shows detailed information about the selected menu option,
such as Phone book ⇒ page 17, fig. 17 .
Submenu display centre
In the centre of the display, the available options in the particular menu are
listed or notes are displayed.
Status line
In the status line you can find the current status of the traffic programme
reception, traffic messaging channel (TMC) reception*, mute status of current
audio source, the time and telephone* information ⇒ page 18.
Status lineFig. 18 Display: Symbols in the status line
Fig. 19 Display: Symbols in the status line
A3A4A5A6A7A8A9
Media System 1.0_EN.book Seite 18 Donnerstag, 10. September 2009 1:52 13
Page 20 of 124
Display19
Operating
RADIO, CD/MP3
TEL (telephone)
NAV, INFO
SETUP
The symbols in the status line are displayed regardless of the menu selected.
For example, you can easily see in every menu if the mute function is acti-
vated
⇒page 12.
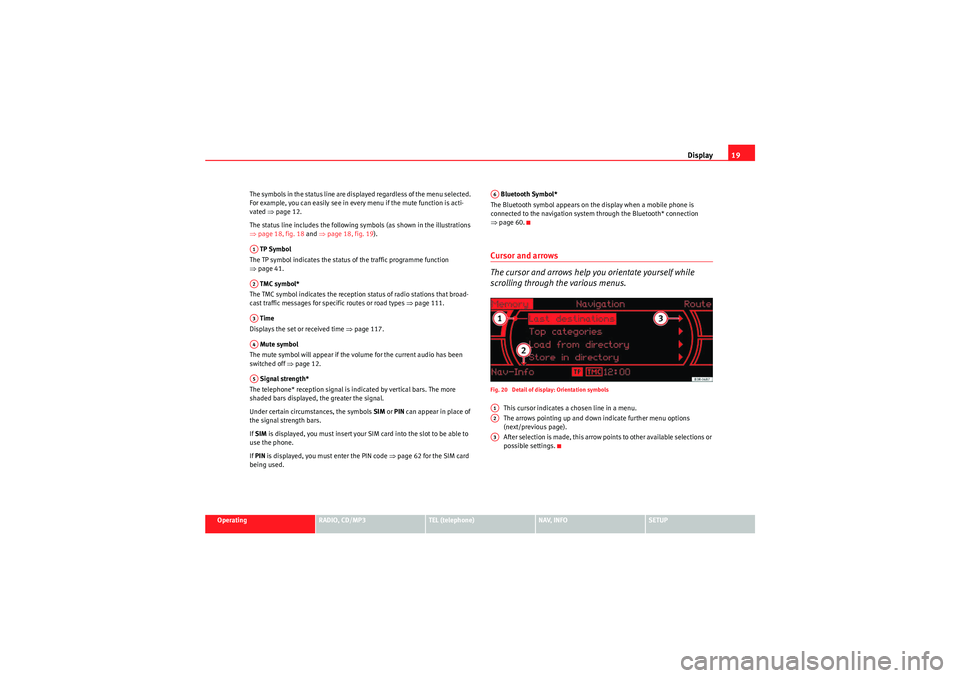
The status line includes the following symbols (as shown in the illustrations
⇒ page 18, fig. 18 and ⇒page 18, fig. 19 ).
TP Symbol
The TP symbol indicates the status of the traffic programme function
⇒ page 41.
TMC symbol*
The TMC symbol indicates the reception status of radio stations that broad-
cast traffic messages for specific routes or road types ⇒page 111.
Time
Displays the set or received time ⇒page 117.
Mute symbol
The mute symbol will appear if the volume for the current audio has been
switched off ⇒page 12.
Signal strength*
The telephone* reception signal is indicated by vertical bars. The more
shaded bars displayed, the greater the signal.
Under certain circumstances, the symbols SIM or PIN can appear in place of
the signal strength bars.
If SIM is displayed, you must insert your SIM card into the slot to be able to
use the phone.
If PIN is displayed, you must enter the PIN code ⇒page 62 for the SIM card
being used. Bluetooth Symbol*
The Bluetooth symbol appears on the display when a mobile phone is
connected to the navigation system through the Bluetooth* connection
⇒ page 60.
Cursor and arrows
The cursor and arrows help you orientate yourself while
scrolling through the various menus.Fig. 20 Detail of display: Orientation symbols
This cursor indicates a chosen line in a menu.
The arrows pointing up and down indicate further menu options
(next/previous page).
After selection is made, this arrow points to other available selections or
possible settings.
A1A2A3A4A5
A6A1A2A3
Media System 1.0_EN.book Seite 19 Donnerstag, 10. September 2009 1:52 13
Page 25 of 124
Drives
24DrivesCD playerIntroductionThe navigation system is equipped with an internal CD player. The CD player
can be used to play navigation, audio or MP3 CDs.
Audio/MP3 CDs inserted into the drive are played using the CD function
⇒ page 44. If your vehicle is equipped with a CD changer*, you can select the
inserted audio CD via the CD position. The CDs in the CD changer take up
positions CD1 to CD6 .
A navigation CD is selected using the NAV function ⇒page 85.
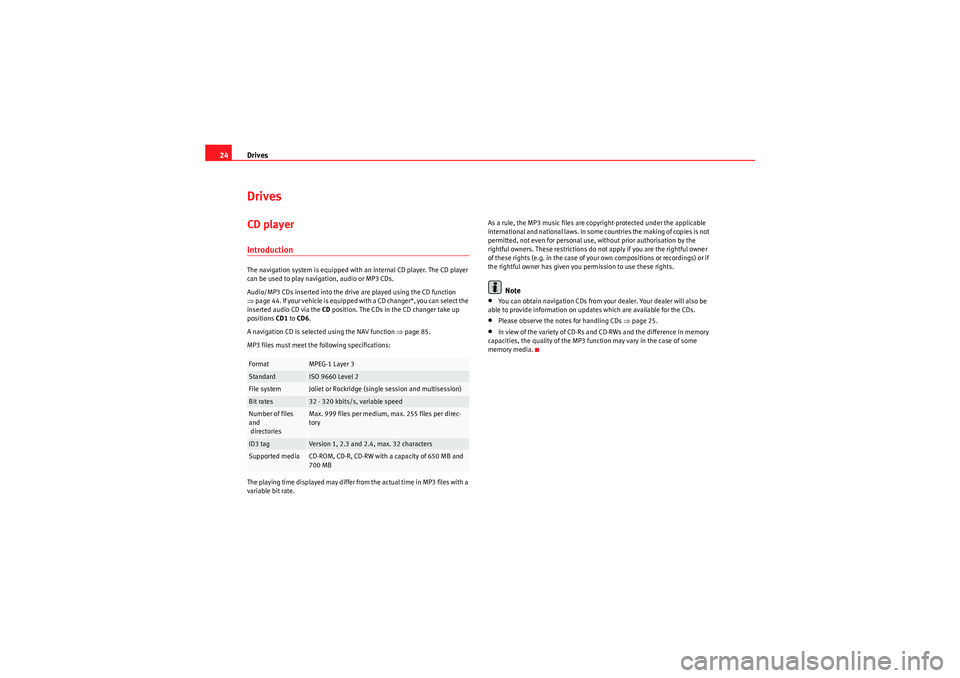
MP3 files must meet the following specifications:
The playing time displayed may differ from the actual time in MP3 files with a
variable bit rate. As a rule, the MP3 music files are copyright-protected under the applicable
international and national laws. In some countries the making of copies is not
permitted, not even for personal use, without prior authorisation by the
rightful owners. These restrictions do not apply if you are the rightful owner
of these rights (e.g. in the case of your own compositions or recordings) or if
the rightful owner has given you permission to use these rights.
Note
•You can obtain navigation CDs from your dealer. Your dealer will also be
able to provide information on updates which are available for the CDs.•Please observe the notes for handling CDs ⇒page 25.•In view of the variety of CD-Rs and CD-RWs and the difference in memory
capacities, the quality of the MP3 function may vary in the case of some
memory media.
Format
MPEG-1 Layer 3
Standard
ISO 9660 Level 2
File system
Joliet or Rockridge (single session and multisession)
Bit rates
32 - 320 kbits/s, variable speed
Number of files
and
directories
Max. 999 files per medium, max. 255 files per direc-
tory
ID3 tag
Version 1, 2.3 and 2.4, max. 32 characters
Supported media
CD-ROM, CD-R, CD-RW with a capacity of 650 MB and
700 MB
Media System 1.0_EN.book Seite 24 Donnerstag, 10. September 2009 1:52 13
Page 27 of 124
Drives
26Requirements for good sound reproduction
It is possible that you may not be able to play CDs which are copy-protected
or CDs containing CD ROM format that do not correspond to the standard for
audio CDs in your player. Only CDs that comply with this standard have the
logo “Compact Disc Digital Audio” printed on the CD.
Please note the following in order to ensure perfect high-quality sound repro-
duction and avoid damage to media drives:•Do not use dirty CDs•Do not use damaged or scratched CDs•Do not use labels•Do not use protective rings•Do not use a CD cover or a stabiliser•Do not use non-circular CDs (shape CDs)•Do not use single CDs (8 cm / 3" in diameter)
Always store unused CDs in a suitable CD case and do not expose them to
direct sunlight.
Cleaning media drives and CDs
Never use a CD player cleaning disc to clean drives.
Clean CDs with a soft lint-free cloth. Wipe the disc in a straight line from the
centre outwards. If necessary, stubborn stains can be removed with a
commercially available CD cleaner or with isopropyl alcohol. Please never use
petrol, paint thinner or record cleaner, as these can damage the CDs.
Error messages
The following may be the reason for a read error on the display:
Note
•In the case of extreme hot or cold outside temperatures, it is possible that
the playback of a CD will temporarily not function. A thermostat switch is
installed to protect the CDs and the reading laser.•Never remove the cover of the equipment. The equipment has no compo-
nents that can be serviced by the owner.Problem
Solution
CD is dirty.
Clean the CD.
CD is scratched.
Check the CD for scratches.
CD was inserted upside down.
Insert the CD with the printed side
upwards.
Condensation has formed on the CD.
Wait until the equipment is dry.
The drive mechanism is malfunction-
ing.
Contact a Dealer or qualified work-
shop.
Media System 1.0_EN.book Seite 26 Donnerstag, 10. September 2009 1:52 13
Page 28 of 124
Drives27
Operating
RADIO, CD/MP3
TEL (telephone)
NAV, INFO
SETUP
iPod interface*General notes
The iPod interface can be used to connect an iPod to your
navigation system and allows you to play audio files directly
over the vehicle's sound system.The iPod interface is located in the vehicle glove box. It is compatible with 3rd
generation or higher iPod
3) devices (made from about 2003 onwards), with
the exception of the iPod Shuffle.
The iPod is controlled using the CD function ⇒page 44.
•The navigation system orders (first numerically and then alphabetically)
the playlists with the tracks stored in the iPod and then assigns them in the
sequence CD 1 to CD 5. For easier playing of these playlists through the
vehicle's sound system, we recommend you create five playlists (e.g. 1.... to
5....) in your iPod.•If you select CD 6, all the tracks on the iPod will be played even if they are
stored in different playlists.
Information stored on the iPod, such as artist, track, album and genre, or the
name of a playlist, does not appear on the navigation system display.Caution
Very high or very low temperatures (a common occurrence in a vehicle's inte-
rior) can cause damage to the iPod and/or impair its performance.•Please do not leave your iPod in the vehicle in case of extreme tempera-
tures.
Note
Please refer to the iPod operating instructions for important information on
how to use your iPod.Choosing the adapter
The iPod interface is supplied with a choice of adapters for
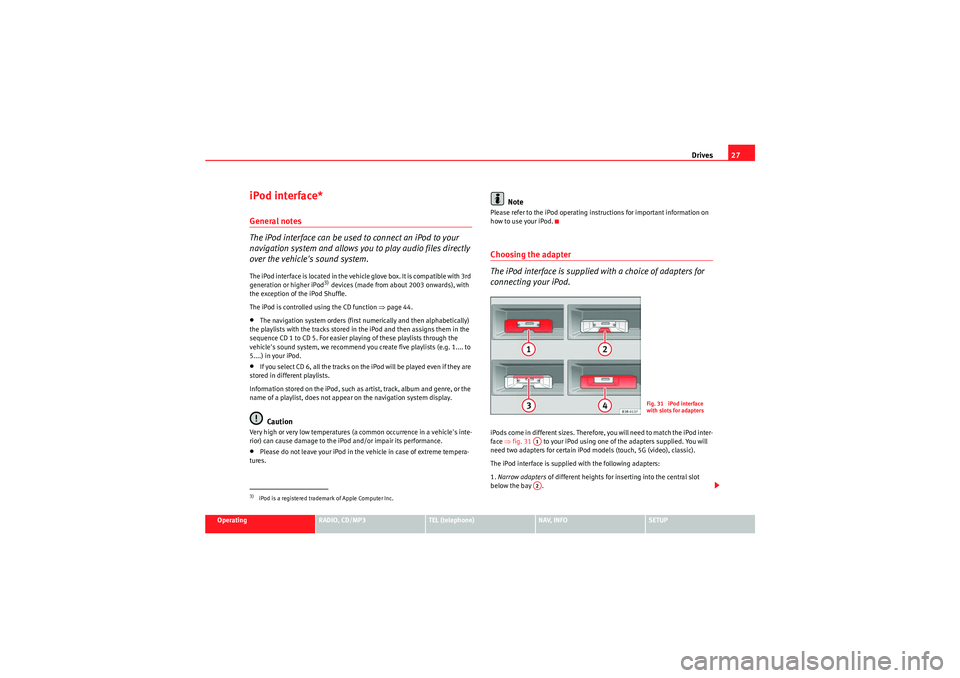
connecting your iPod.iPods come in different sizes. Therefore, you will need to match the iPod inter-
face ⇒fig. 31 to your iPod using one of the adapters supplied. You will
need two adapters for certain iPod models (touch, 5G (video), classic).
The iPod interface is supplied with the following adapters:
1. Narrow adapters of different heights for inserting into the central slot
below the bay .
3)iPod is a registered trademark of Apple Computer Inc.
Fig. 31 iPod interface
with slots for adapters
A1A2
Media System 1.0_EN.book Seite 27 Donnerstag, 10. September 2009 1:52 13