ECO mode Seat Exeo 2011 MEDIA SYSTEM E
[x] Cancel search | Manufacturer: SEAT, Model Year: 2011, Model line: Exeo, Model: Seat Exeo 2011Pages: 167, PDF Size: 5.48 MB
Page 2 of 167
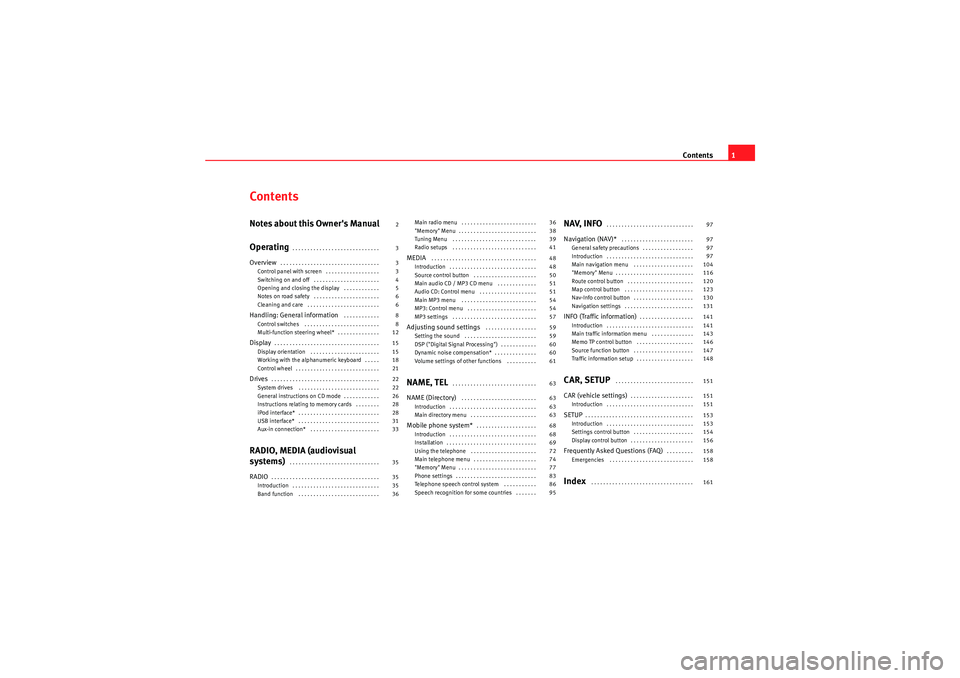
Contents1
ContentsNotes about this Owner's Manual
Operating
. . . . . . . . . . . . . . . . . . . . . . . . . . . . .
Overview
. . . . . . . . . . . . . . . . . . . . . . . . . . . . . . . . .
Control panel with screen . . . . . . . . . . . . . . . . . .
Switching on and off . . . . . . . . . . . . . . . . . . . . . .
Opening and closing the display . . . . . . . . . . . .
Notes on road safety . . . . . . . . . . . . . . . . . . . . . .
Cleaning and care . . . . . . . . . . . . . . . . . . . . . . . .
Handling: General information
. . . . . . . . . . . .
Control switches . . . . . . . . . . . . . . . . . . . . . . . . .
Multi-function steering wheel* . . . . . . . . . . . . . .
Display
. . . . . . . . . . . . . . . . . . . . . . . . . . . . . . . . . . .
Display orientation . . . . . . . . . . . . . . . . . . . . . . .
Working with the alphanumeric keyboard . . . . .
Control wheel . . . . . . . . . . . . . . . . . . . . . . . . . . . .
Drives
. . . . . . . . . . . . . . . . . . . . . . . . . . . . . . . . . . . .
System drives . . . . . . . . . . . . . . . . . . . . . . . . . . .
General instructions on CD mode . . . . . . . . . . . .
Instructions relating to memory cards . . . . . . . .
iPod interface* . . . . . . . . . . . . . . . . . . . . . . . . . . .
USB interface* . . . . . . . . . . . . . . . . . . . . . . . . . . .
Aux-in connection* . . . . . . . . . . . . . . . . . . . . . . .
RADIO, MEDIA (audiovisual
systems)
. . . . . . . . . . . . . . . . . . . . . . . . . . . . . .
RADIO
. . . . . . . . . . . . . . . . . . . . . . . . . . . . . . . . . . . .
Introduction . . . . . . . . . . . . . . . . . . . . . . . . . . . . .
Band function . . . . . . . . . . . . . . . . . . . . . . . . . . . Main radio menu . . . . . . . . . . . . . . . . . . . . . . . . .
"Memory" Menu . . . . . . . . . . . . . . . . . . . . . . . . . .
Tuning Menu . . . . . . . . . . . . . . . . . . . . . . . . . . . .
Radio setups . . . . . . . . . . . . . . . . . . . . . . . . . . . .
MEDIA
. . . . . . . . . . . . . . . . . . . . . . . . . . . . . . . . . . .
Introduction . . . . . . . . . . . . . . . . . . . . . . . . . . . . .
Source control button . . . . . . . . . . . . . . . . . . . . .
Main audio CD / MP3 CD menu . . . . . . . . . . . . .
Audio CD: Control menu . . . . . . . . . . . . . . . . . . .
Main MP3 menu . . . . . . . . . . . . . . . . . . . . . . . . .
MP3: Control menu . . . . . . . . . . . . . . . . . . . . . . .
MP3 settings . . . . . . . . . . . . . . . . . . . . . . . . . . . .
Adjusting sound settings
. . . . . . . . . . . . . . . . .
Setting the sound . . . . . . . . . . . . . . . . . . . . . . . .
DSP ("Digital Signal Processing") . . . . . . . . . . . .
Dynamic noise compensation* . . . . . . . . . . . . . .
Volume settings of other functions . . . . . . . . . .
NAME, TEL
. . . . . . . . . . . . . . . . . . . . . . . . . . . .
NAME (Directory)
. . . . . . . . . . . . . . . . . . . . . . . . .
Introduction . . . . . . . . . . . . . . . . . . . . . . . . . . . . .
Main directory menu . . . . . . . . . . . . . . . . . . . . . .
Mobile phone system*
. . . . . . . . . . . . . . . . . . . .
Introduction . . . . . . . . . . . . . . . . . . . . . . . . . . . . .
Installation . . . . . . . . . . . . . . . . . . . . . . . . . . . . . .
Using the telephone . . . . . . . . . . . . . . . . . . . . . .
Main telephone menu . . . . . . . . . . . . . . . . . . . . .
"Memory" Menu . . . . . . . . . . . . . . . . . . . . . . . . . .
Phone settings . . . . . . . . . . . . . . . . . . . . . . . . . . .
Telephone speech control system . . . . . . . . . . .
Speech recognition for some countries . . . . . . .
NAV, INFO
. . . . . . . . . . . . . . . . . . . . . . . . . . . . .
Navigation (NAV)*
. . . . . . . . . . . . . . . . . . . . . . . .
General safety precautions . . . . . . . . . . . . . . . . .
Introduction . . . . . . . . . . . . . . . . . . . . . . . . . . . . .
Main navigation menu . . . . . . . . . . . . . . . . . . . .
"Memory" Menu . . . . . . . . . . . . . . . . . . . . . . . . . .
Route control button . . . . . . . . . . . . . . . . . . . . . .
Map control button . . . . . . . . . . . . . . . . . . . . . . .
Nav-Info control button . . . . . . . . . . . . . . . . . . . .
Navigation settings . . . . . . . . . . . . . . . . . . . . . . .
INFO (Traffic information)
. . . . . . . . . . . . . . . . . .
Introduction . . . . . . . . . . . . . . . . . . . . . . . . . . . . .
Main traffic information menu . . . . . . . . . . . . . .
Memo TP control button . . . . . . . . . . . . . . . . . . .
Source function button . . . . . . . . . . . . . . . . . . . .
Traffic information setup . . . . . . . . . . . . . . . . . . .
CAR, SETUP
. . . . . . . . . . . . . . . . . . . . . . . . . .
CAR (vehicle settings)
. . . . . . . . . . . . . . . . . . . . .
Introduction . . . . . . . . . . . . . . . . . . . . . . . . . . . . .
SETUP
. . . . . . . . . . . . . . . . . . . . . . . . . . . . . . . . . . . .
Introduction . . . . . . . . . . . . . . . . . . . . . . . . . . . . .
Settings control button . . . . . . . . . . . . . . . . . . . .
Display control button . . . . . . . . . . . . . . . . . . . . .
Frequently Asked Questions (FAQ)
. . . . . . . . .
Emergencies . . . . . . . . . . . . . . . . . . . . . . . . . . . .
Index
. . . . . . . . . . . . . . . . . . . . . . . . . . . . . . . . . .
2
3
3
3
4
5
6
6
8
8
12
15
15
18
21
22
22
26
28
28
31
33
35
35
35
36 36
38
39
41
48
48
50
51
51
54
54
57
59
59
60
60
61
63
63
63
63
68
68
69
72
74
77
83
86
95
97
97
97
97
104
116
120
123
130
131
141
141
143
146
147
148
151
151
151
153
153
154
156
158
158
161
media_systemE_EN.book Seite 1 Montag, 21. September 2009 1:48 13
Page 9 of 167
Handling: General information
8Handling: General informationControl switchesConcept for handling
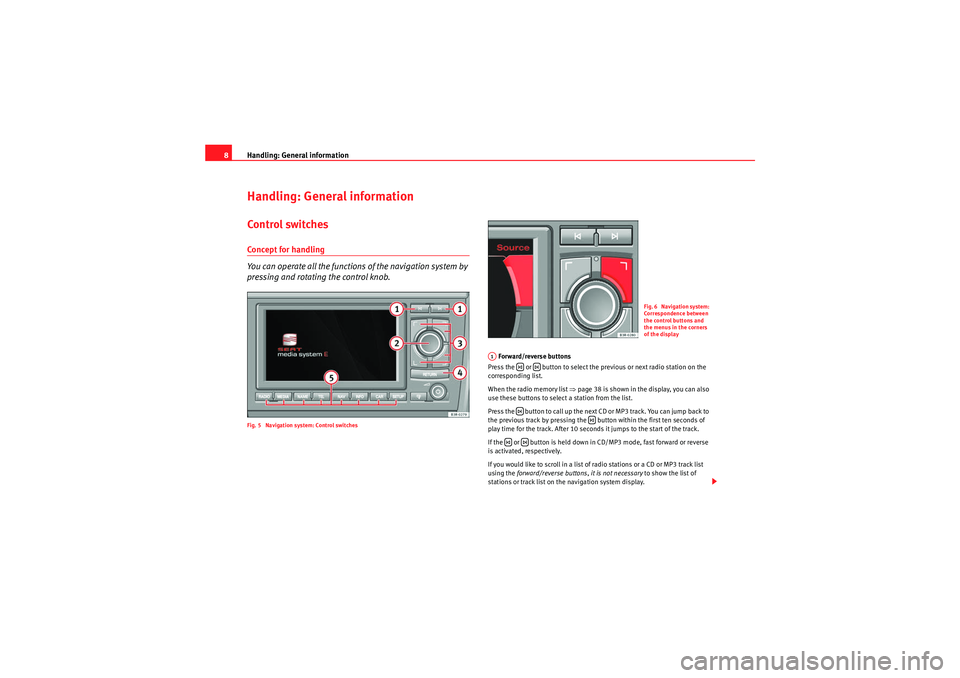
You can operate all the functions of the navigation system by
pressing and rotating the control knob.Fig. 5 Navigation system: Control switches
Forward/reverse buttons
Press the or button to select the previous or next radio station on the
corresponding list.
When the radio memory list ⇒ page 38 is shown in the display, you can also
use these buttons to select a station from the list.
Press the button to call up the next CD or MP3 track. You can jump back to
the previous track by pressing the button within the first ten seconds of
play time for the track. After 10 seconds it jumps to the start of the track.
If the or button is held down in CD/MP3 mode, fast forward or reverse
is activated, respectively.
If you would like to scroll in a list of radio stations or a CD or MP3 track list
using the forward/reverse buttons, it is not necessary to show the list of
stations or track list on the navigation system display.
Fig. 6 Navigation system:
Correspondence between
the control buttons and
the menus in the corners
of the display
A1
media_systemE_EN.book Seite 8 Montag, 21. September 2009 1:48 13
Page 12 of 167
Handling: General information11
Operating
RADIO, MEDIA (audiovisual
systems)
NAME, TEL
NAV, INFO
CAR, SETUP
History function
The system recalls the previous settings.When a function button is pressed, the system will switch to the most recently
accessed menu level for the specific main function. This includes any
sublevels that were opened. This excludes the Setup menus.
The history memory is erased when the system moves into standby mode.
An example: You are currently in radio mode and have selected the Control
menu. You switch to the navigation menu by pressing the button. If you
then press the button, you will return to the menu selected before
leaving radio mode. In this case, the Control menu of the radio is shown in the
display.Resetting the navigation system
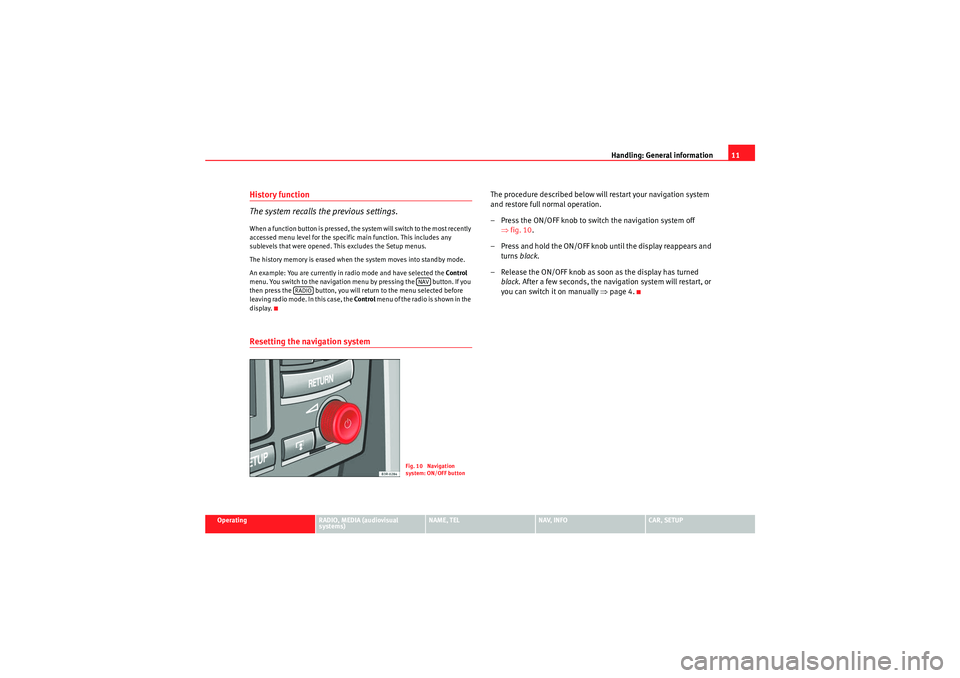
The procedure described below will restart your navigation system
and restore full normal operation.
– Press the ON/OFF knob to switch the navigation system off ⇒fig. 10 .
– Press and hold the ON/OFF knob until the display reappears and turns black.
– Release the ON/OFF knob as soon as the display has turned black . After a few seconds, the navigation system will restart, or
you can switch it on manually ⇒page 4.
NAV
RADIO
Fig. 10 Navigation
system: ON/OFF button
media_systemE_EN.book Seite 11 Montag, 21. September 2009 1:48 13
Page 31 of 167
Drives
30•Make sure that the iPod is fixed in place with one of the adapters
supplied.Note
•Your Dealer also offers appropriate adapters for iPods that are not latest
generation.•For further information on adapter adaptation, please see the information
enclosed with the adapters supplied.Inserting the iPod into the iPod interface– Switch on the navigation system ⇒ page 4.
– With the display facing upwards and the contact towards the front, slide the iPod into the bay until you hear it engages. The
iPod will switch on automatically and the battery will be charged.
– If the navigation system does not detect the iPod after you insert it, please “reset” the iPod (refer to the iPod operating instruc-
tions).To start the iPod, press the button ⇒page 48.
The iPod is switched off automatically when you switch off the navigation
system or the ignition.
Note
•To ensure optimum sound quality, you should enable the “sound check”
setting on the iPod and disable the “EQ” (equaliser) before inserting the iPod
(please refer to the iPod operating instructions).•Slight scoring marks may occur on the iPod when used with the adapter.
Functions
The iPod is operated using the navigation system controls.– To start the iPod, press the button.The following functions are available:•Play all tracks stored on the iPod•Select directly and play up to five track lists•Switch between the different track lists•Fast forward and rewind within a track•Change tracks within a playlist•Play tracks in shuffle mode ("shuffle")•SCAN function
For further information on handling, please refer to the “MEDIA” chapter
⇒ page 48.TipsHere are some tips and points to remember when using the iPod in the
vehicle:•Track numbers appear with a maximum of two digits in the navigation
system display. The first digit is suppressed if you select a track with a three-
digit number, i.e. track 125 and track 25 are both displayed as track “25”. For
this reason we do not recommend allocating more than 99 tracks to each
playlist.•If you reach the end of a playlist when selecting a track directly
(forward/reverse), the count is resumed at track “1”.
MEDIA
MEDIA
media_systemE_EN.book Seite 30 Montag, 21. September 2009 1:48 13
Page 32 of 167
Drives31
Operating
RADIO, MEDIA (audiovisual
systems)
NAME, TEL
NAV, INFO
CAR, SETUP
•The track numbers are counted up sequentially in the navigation system
display when you play tracks in shuffle mode (MIX).•99 tracks are permanently shown on the navigation system display. This
is even valid when the list contains a smaller number of tracks.•When selecting a track, we recommend you not to jump forward or back
more than 49 tracks at a time. If you jump further than this, the iPod interface
may not select the track you intended.USB interface*Introduction
You can connect a memory stick or an MP3 player to the
vehicle's on-board navigation system via the USB port.The USB port is located in your vehicle's glove box. It is compatible with all
memory sticks and MP3 players approved by SEAT. Problems can occur if you
use a memory stick or MP3 player not listed in the table. Your memory device
must be USB-certified as a minimum requirement.
Caution
Very high or very low temperatures (a common occurrence in a vehicle's inte-
rior) can cause damage to the memory stick or MP3 player and/or impair its
performance.•Never leave your memory stick or MP3 player in the vehicle in case of
extreme temperatures.Note
Please refer to the manufacturer's operating instructions for important infor-
mation on how to use your memory stick or MP3 player.
Connecting a memory stick / MP3 player
For problem-free operation, use only approved memory sticks
and MP3 players.– Switch on your vehicle's sound system.
– Enable radio mode.
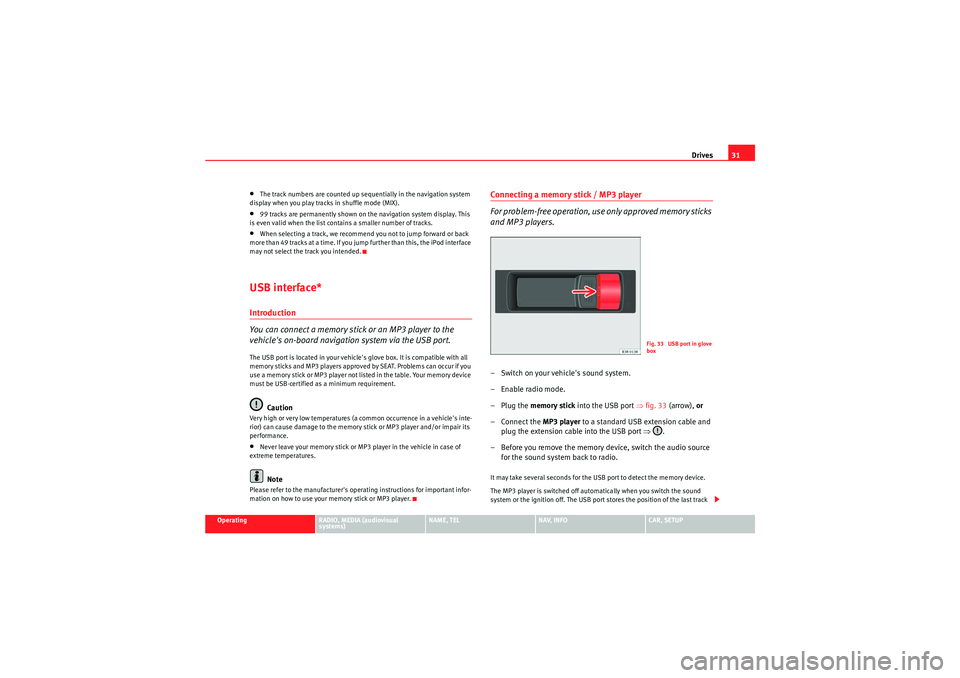
–Plug the memory stick into the USB port ⇒fig. 33 (arrow), or
– Connect the MP3 player to a standard USB extension cable and plug the extension cable into the USB port ⇒.
– Before you remove the memory device, switch the audio source for the sound system back to radio.It may take several seconds for the USB port to detect the memory device.
The MP3 player is switched off automatically when you switch the sound
system or the ignition off. The USB port stores the position of the last track
Fig. 33 USB port in glove
box
media_systemE_EN.book Seite 31 Montag, 21. September 2009 1:48 13
Page 33 of 167
Drives
32you were playing. If you do not alter the contents of your memory device, the
music will be continued at the point where you stopped playing.
MP3 players and USB sticks which are not explicitly approved must have
“CERTIFIED USB
TM” or “CERTIFIED HIGH SPEED USB
TM” status.
Caution
•Do not connect a device other than a memory stick or MP3 player to the
USB port. It is not possible to operate hard discs or USB hubs, etc. via the USB
port.•Do not connect the MP3 player directly to the USB port. This could
damage the device.•Never remove a memory device when the USB port is selected as source
(CD). This could damage your memory device.Note
For up-to-date information on compatible MP3 players and USB sticks, please
ask a SEAT dealer or visit www.seat.es.Functions
Music files are played just like on a CD changer using the
controls on your car's sound system.To start the memory stick or MP3 player, select the “CD changer” function on
the sound system.
The following functions are available:•Play all tracks stored on the memory device (if no folders are stored on the
memory device)
•Select and play up to six main folders with music files (just like selecting
CD 1 to 6 on a CD changer)•Change between main folders with music files (just like changing the CD
on a CD changer)•Change tracks within a main folder•Fast forward and rewind within a track•SCAN function•Play tracks in random or shuffle mode
For more information on how to operate the system, please refer to the “CD”
chapter in the operating manual for your sound system.TipsHere are some tips and points to remember when playing music files in the
car:•We recommend that, instead of storing music files in the main directory of
the memory stick or MP3 player, you create separate folders e.g. for tracks
belonging to the same genre or artist. Your sound system can display and
play a maximum of six folders, however. The folders are allocated first in
numerical order and then in alphabetical order as CD 1 to CD 6. Folders that
do not contain music files are automatically ignored. You can create any
number of subfolders.•If there are no folders on your memory device, the sound system will allo-
cate all the music files it finds to CD 1.•Track numbers appear with a maximum of two digits in the sound system
display. The first digit is suppressed if you select a track with a three-digit
number, i.e. track 125 and track 25 are both displayed as track “25”. We
therefore do not recommend allocating more than 99 tracks to each folder.•We recommend you not to use the “Name CD” function on vehicles with
the BNS 5.0 navigation system, as the folders may not be named correctly.
media_systemE_EN.book Seite 32 Montag, 21. September 2009 1:48 13
Page 42 of 167
RADIO41
Operating
RADIO, MEDIA (audiovisual
systems)
NAME, TEL
NAV, INFO
CAR, SETUP
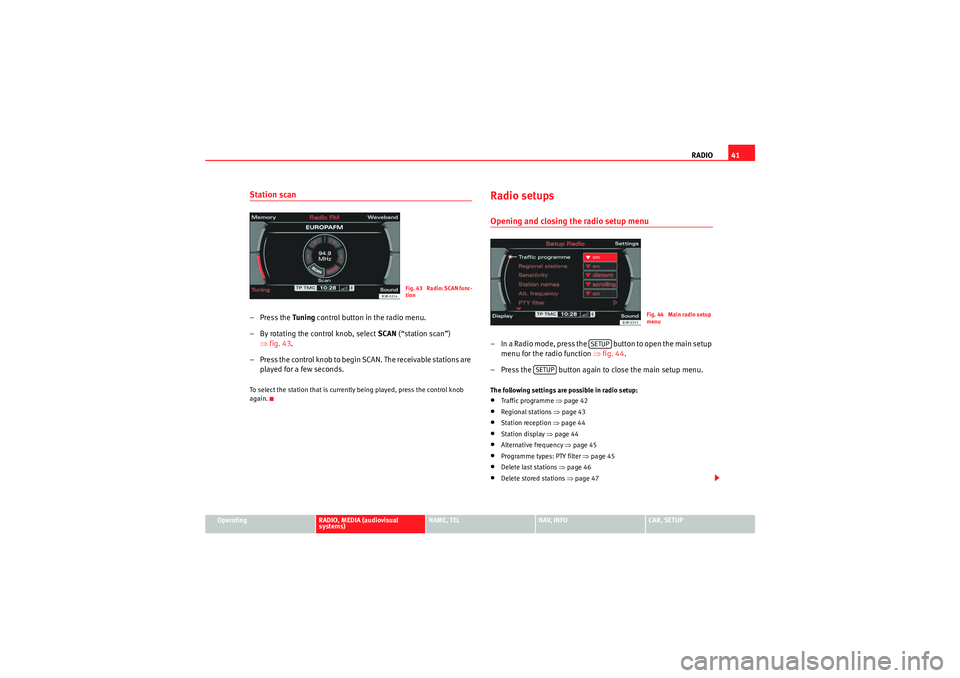
Station scan– Press the Tuning control button in the radio menu.
– By rotating the control knob, select SCAN (“station scan”)
⇒ fig. 43 .
– Press the control knob to begin SCAN. The receivable stations are played for a few seconds.To select the station that is currently being played, press the control knob
again.
Radio setupsOpening and closing the radio setup menu– In a Radio mode, press the button to open the main setup menu for the radio function ⇒fig. 44 .
– Press the button again to close the main setup menu.The following settings are possible in radio setup:•Traffic programme ⇒ page 42•Regional stations ⇒page 43•Station reception ⇒page 44•Station display ⇒page 44•Alternative frequency ⇒page 45•Programme types: PTY filter ⇒page 45•Delete last stations ⇒page 46•Delete stored stations ⇒page 47
Fig. 43 Radio: SCAN func-
tion
Fig. 44 Main radio setup
menu
SETUP
SETUP
media_systemE_EN.book Seite 41 Montag, 21. September 2009 1:48 13
Page 49 of 167
MEDIA
48MEDIAIntroductionIntroduction
CD and MP3 modes are selected by using the function
button.Depending on the equipment in your vehicle, you can use the func-
tion to play audio CDs (in the navigation DVD drive) or the MP3 player
⇒ page 54 integrated into the navigation system.
You can switch between the CD and MP3 function by using the control button
with the Source ⇒ page 50 function.Traffic programme
Audio/video* playback can be interrupted for traffic news
announcements.Switching traffic programme on and off
– In the Radio Setup menu, switch the option Traffic programme on
or off as desired ⇒page 42. The TP symbol is lit in the status line
when the traffic programme is activated and a suitable radio
station has been selected.
Cancelling a traffic announcement
– Select Cancel in the display to cancel a running traffic announce-
ment. The audio/video* playback will then be continued.
If the traffic programme function is activated, the audio/video playback will
be interrupted for traffic news announcements.
All following traffic announcements will cut in even after cancelling a running
announcement.
Note
A traffic announcement will not be recorded if you use the Cancel function
while it is playing. This means you will not be able to access the announce-
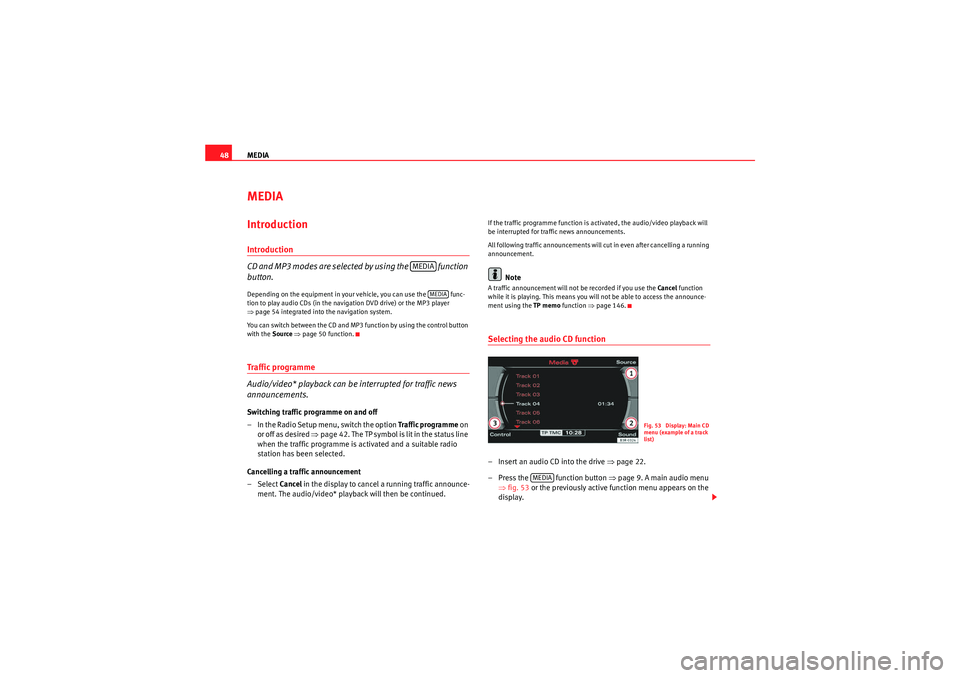
ment using the TP memo function ⇒page 146.Selecting the audio CD function– Insert an audio CD into the drive ⇒ page 22.
– Press the function button ⇒page 9. A main audio menu
⇒ fig. 53 or the previously active function menu appears on the
display.
MEDIA
MEDIA
Fig. 53 Display: Main CD
menu (example of a track
list)
MEDIA
media_systemE_EN.book Seite 48 Montag, 21. September 2009 1:48 13
Page 83 of 167
Mobile phone system*
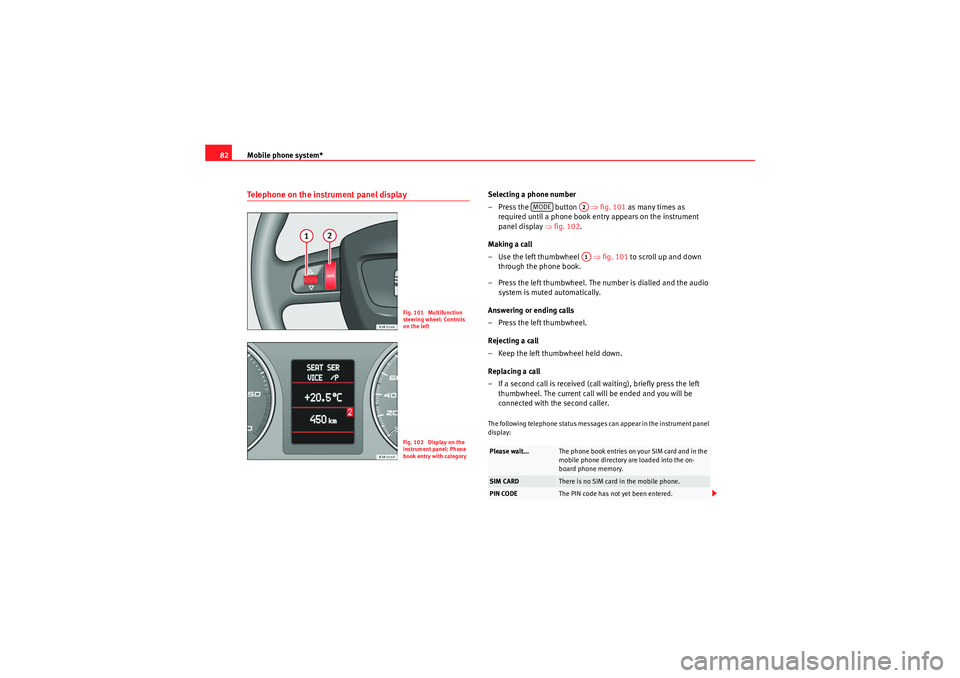
82Telephone on the instrument panel display
Selecting a phone number
– Press the button ⇒fig. 101 as many times as
required until a phone book entry appears on the instrument
panel display ⇒fig. 102 .
Making a call
– Use the left thumbwheel ⇒fig. 101 to scroll up and down
through the phone book.
– Press the left thumbwheel. The number is dialled and the audio system is muted automatically.
Answering or ending calls
–Press the left thumbwheel.
Rejecting a call
– Keep the left thumbwheel held down.
Replacing a call
– If a second call is received (call waiting), briefly press the left thumbwheel. The current call will be ended and you will be
connected with the second caller.The following telephone status messages can appear in the instrument panel
display:
Fig. 101 Multifunction
steering wheel: Controls
on the leftFig. 102 Display on the
instrument panel: Phone
book entry with category
Please wait...
The phone book entries on your SIM card and in the
mobile phone directory are loaded into the on-
board phone memory.
SIM CARD
There is no SIM card in the mobile phone.
PIN CODE
The PIN code has not yet been entered.
MODE
A2A1
media_systemE_EN.book Seite 82 Montag, 21. September 2009 1:48 13
Page 96 of 167
Mobile phone system*95
Operating
RADIO, MEDIA (audiovisual
systems)
NAME, TEL
NAV, INFO
CAR, SETUP
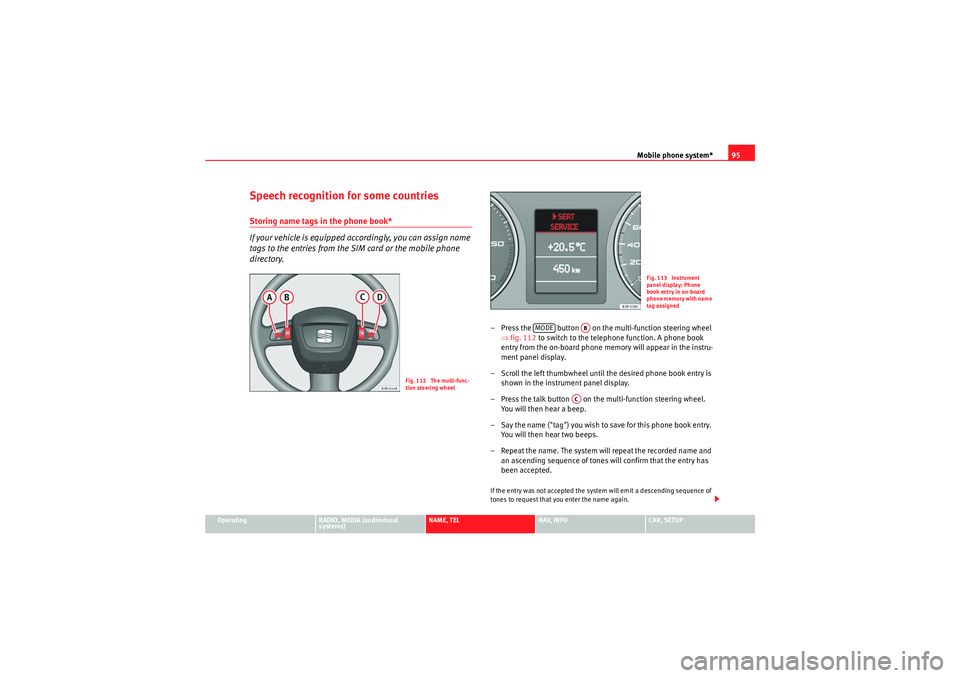
Speech recognition for some countriesStoring name tags in the phone book*
If your vehicle is equipped accordingly, you can assign name
tags to the entries from the SIM card or the mobile phone
directory.
– Press the button on the multi-function steering wheel
⇒fig. 112 to switch to the telephone function. A phone book
entry from the on-board phone memory will appear in the instru-
ment panel display.
– Scroll the left thumbwheel until the desired phone book entry is shown in the instrument panel display.
– Press the talk button on the multi-function steering wheel. You will then hear a beep.
– Say the name ("tag") you wish to save for this phone book entry. You will then hear two beeps.
– Repeat the name. The system will repeat the recorded name and an ascending sequence of tones will confirm that the entry has
been accepted.If the entry was not accepted the system will emit a descending sequence of
tones to request that you enter the name again.
Fig. 112 The multi-func-
tion steering wheel
Fig. 113 Instrument
panel display: Phone
book entry in on-board
phone memory with name
tag assigned
MODE
AB
AC
media_systemE_EN.book Seite 95 Montag, 21. September 2009 1:48 13