check engine Seat Exeo 2011 User Guide
[x] Cancel search | Manufacturer: SEAT, Model Year: 2011, Model line: Exeo, Model: Seat Exeo 2011Pages: 313, PDF Size: 5.02 MB
Page 76 of 313
74Cockpit
Door and tailgate warning
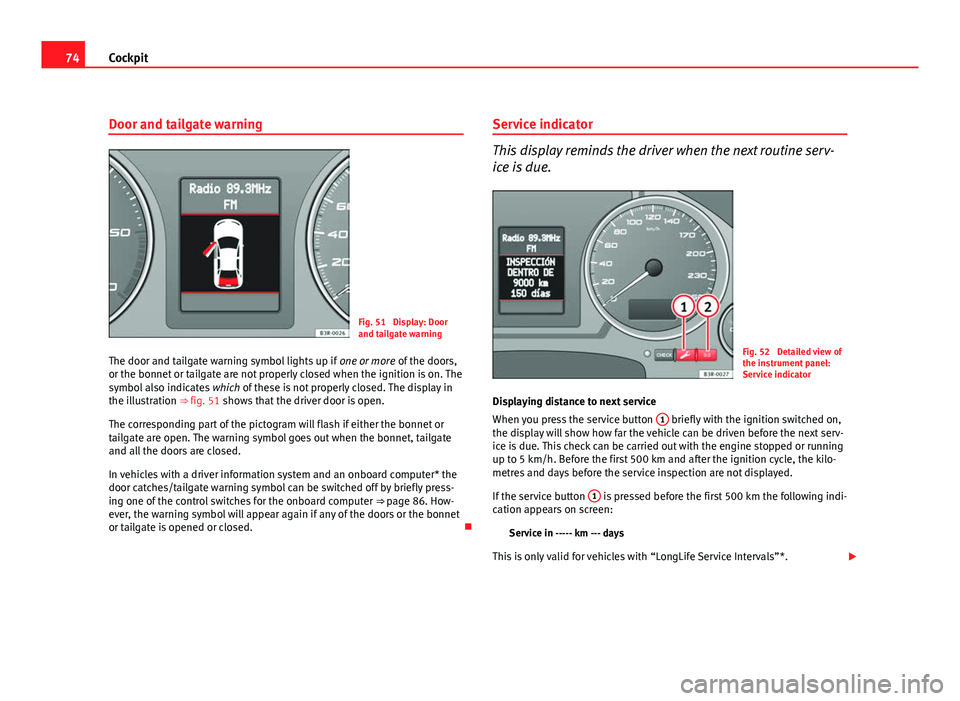
Fig. 51 Display: Door
and tailgate warning
The door and tailgate warning symbol lights up if one or more of the doors,
or the bonnet or tailgate are not properly closed when the ignition is on. The
symbol also indicates which of these is not properly closed. The display in
the illustration ⇒ fig. 51 shows that the driver door is open.
The corresponding part of the pictogram will flash if either the bonnet or
tailgate are open. The warning symbol goes out when the bonnet, tailgate
and all the doors are closed.
In vehicles with a driver information system and an onboard computer* the
door catches/tailgate warning symbol can be switched off by briefly press-
ing one of the control switches for the onboard computer ⇒ page 86. How-
ever, the warning symbol will appear again if any of the doors or the bonnet
or tailgate is opened or closed. Service indicator
This display reminds the driver when the next routine serv-
ice is due.
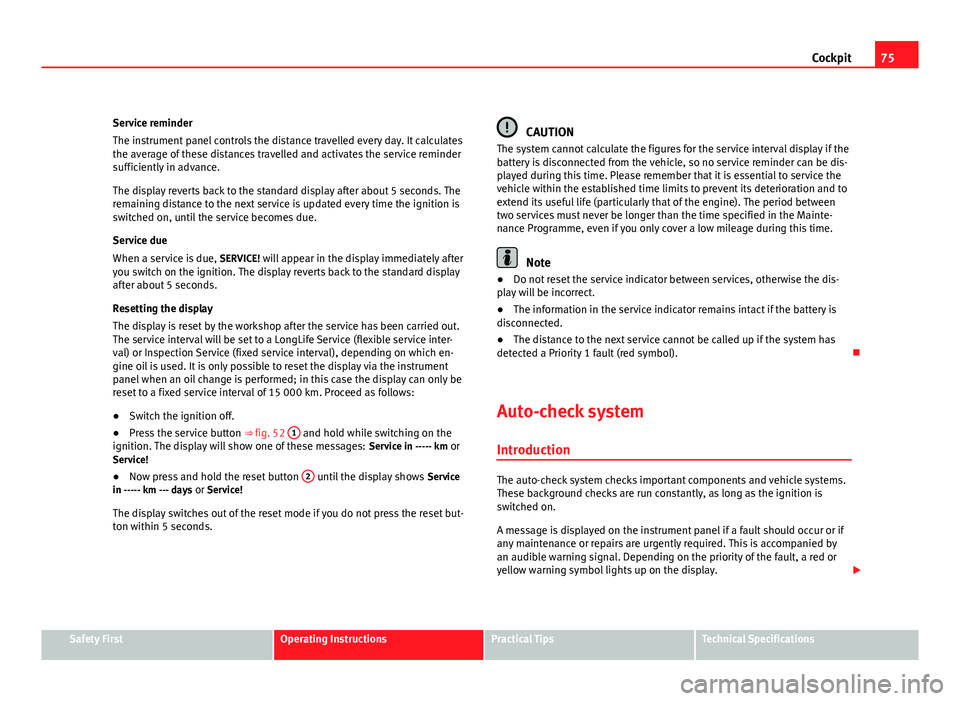
Fig. 52 Detailed view of
the instrument panel:
Service indicator
Displaying distance to next service
When you press the service button 1
briefly with the ignition switched on,
the display will show how far the vehicle can be driven before the next serv-
ice is due. This check can be carried out with the engine stopped or running
up to 5 km/h. Before the first 500 km and after the ignition cycle, the kilo-
metres and days before the service inspection are not displayed.
If the service button 1
is pressed before the first 500 km the following indi-
cation appears on screen:
Service in ----- km --- days
This is only valid for vehicles with “LongLife Service Intervals”*.
Page 77 of 313
75
Cockpit
Service reminder
The instrument panel controls the distance travelled every day. It calculates
the average of these distances travelled and activates the service reminder
sufficiently in advance.
The display reverts back to the standard display after about 5 seconds. The
remaining distance to the next service is updated every time the ignition is
switched on, until the service becomes due.
Service due
When a service is due, SERVICE! will appear in the display immediately after
you switch on the ignition. The display reverts back to the standard display
after about 5 seconds.
Resetting the display
The display is reset by the workshop after the service has been carried out.
The service interval will be set to a LongLife Service (flexible service inter-
val) or Inspection Service (fixed service interval), depending on which en-
gine oil is used. It is only possible to reset the display via the instrument
panel when an oil change is performed; in this case the display can only be
reset to a fixed service interval of 15 000 km. Proceed as follows:
● Switch the ignition off.
● Press the service button ⇒ fig. 52 1
and hold while switching on the
ignition. The display will show one of these messages: Service in ----- km or
Service!
● Now press and hold the reset button 2
until the display shows
Service
in ----- km --- days or Service!
The display switches out of the reset mode if you do not press the reset but-
ton within 5 seconds.
CAUTION
The system cannot calculate the figures for the service interval display if the
battery is disconnected from the vehicle, so no service reminder can be dis-
played during this time. Please remember that it is essential to service the
vehicle within the established time limits to prevent its deterioration and to
extend its useful life (particularly that of the engine). The period between
two services must never be longer than the time specified in the Mainte-
nance Programme, even if you only cover a low mileage during this time.
Note
● Do not reset the service indicator between services, otherwise the dis-
play will be incorrect.
● The information in the service indicator remains intact if the battery is
disconnected.
● The distance to the next service cannot be called up if the system has
detected a Priority 1 fault (red symbol).
Auto-check system Introduction
The auto-check system checks important components and vehicle systems.
These background checks are run constantly, as long as the ignition is
switched on.
A message is displayed on the instrument panel if a fault should occur or if
any maintenance or repairs are urgently required. This is accompanied by
an audible warning signal. Depending on the priority of the fault, a red or
yellow warning symbol lights up on the display.
Safety FirstOperating InstructionsPractical TipsTechnical Specifications
Page 78 of 313
76Cockpit
The red symbol indicates danger, whereas the yellow one represents a
warning. Additional messages for the driver may be shown with the red or
yellow symbols.
Driver messages
Additional messages for the driver are displayed together
with the warning symbols on the instrument panel.
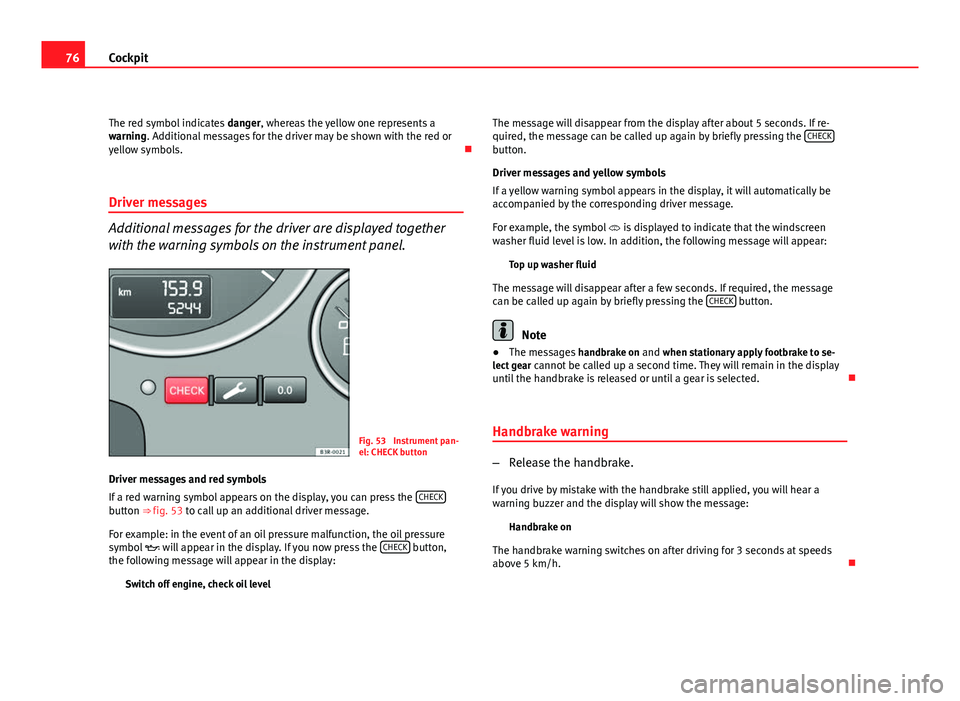
Fig. 53 Instrument pan-
el: CHECK button
Driver messages and red symbols
If a red warning symbol appears on the display, you can press the CHECK
button ⇒ fig. 53 to call up an additional driver message.
For example: in the event of an oil pressure malfunction, the oil pressure
symbol
will appear in the display. If you now press the CHECK
button,
the following message will appear in the display:
Switch off engine, check oil level The message will disappear from the display after about 5 seconds. If re-
quired, the message can be called up again by briefly pressing the
CHECK
button.
Driver messages and yellow symbols
If a yellow warning symbol appears in the display, it will automatically be
accompanied by the corresponding driver message.
For example, the symbol
is displayed to indicate that the windscreen
washer fluid level is low. In addition, the following message will appear:
Top up washer fluid
The message will disappear after a few seconds. If required, the message
can be called up again by briefly pressing the CHECK
button.
Note
● The messages handbrake on and when stationary apply footbrake to se-
lect gear cannot be called up a second time. They will remain in the display
until the handbrake is released or until a gear is selected.
Handbrake warning
– Release the handbrake.
If you drive by mistake with the handbrake still applied, you will hear a
warning buzzer and the display will show the message: Handbrake on
The handbrake warning switches on after driving for 3 seconds at speeds
above 5 km/h.
Page 79 of 313
77
Cockpit
Red symbols
A red symbol warns of a danger.
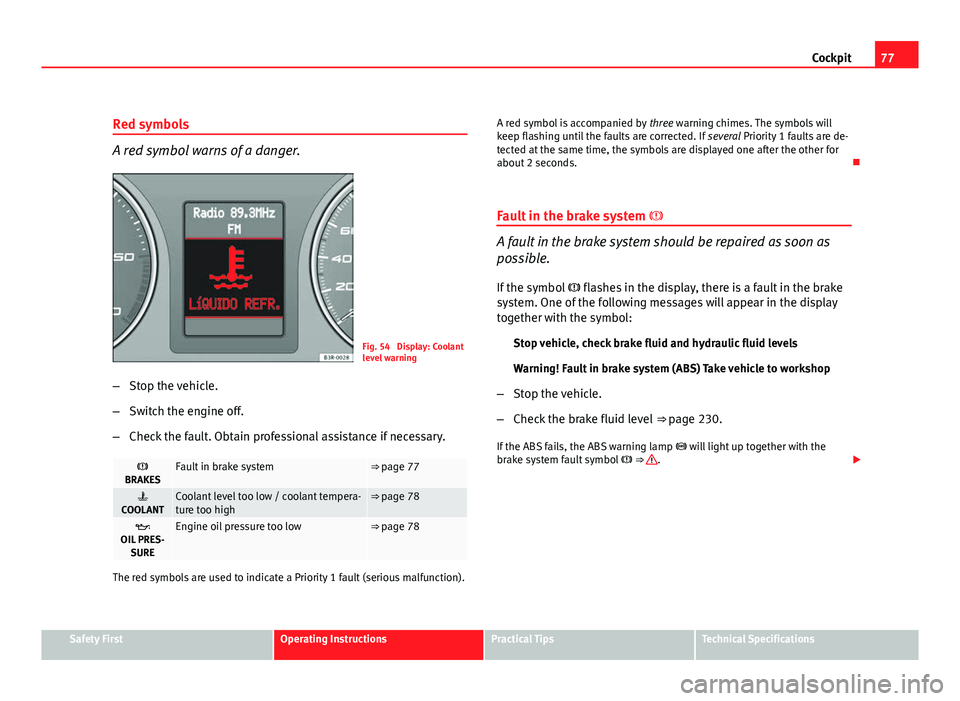
Fig. 54 Display: Coolant
level warning
– Stop the vehicle.
– Switch the engine off.
– Check the fault. Obtain professional assistance if necessary.
BRAKESFault in brake system⇒ page 77
COOLANTCoolant level too low / coolant tempera-
ture too high⇒ page 78
OIL PRES- SUREEngine oil pressure too low⇒ page 78
The red symbols are used to indicate a Priority 1 fault (serious malfunction). A red symbol is accompanied by
three warning chimes. The symbols will
keep flashing until the faults are corrected. If several Priority 1 faults are de-
tected at the same time, the symbols are displayed one after the other for
about 2 seconds.
Fault in the brake system
A fault in the brake system should be repaired as soon as
possible.
If the symbol flashes in the display, there is a fault in the brake
system. One of the following messages will appear in the display
together with the symbol:
Stop vehicle, check brake fluid and hydraulic fluid levels
Warning! Fault in brake system (ABS) Take vehicle to workshop
– Stop the vehicle.
– Check the brake fluid level ⇒ page 230.
If the ABS fails, the ABS warning lamp will light up together with the
brake system fault symbol ⇒
.
Safety FirstOperating InstructionsPractical TipsTechnical Specifications
Page 80 of 313
78Cockpit
WARNING
● Before opening the bonnet and checking the brake fluid level, ob-
serve the warning information in ⇒ page 221, Work in the engine com-
partment.
● If the brake fluid level in the reservoir is too low, this could result in
an accident. Do not drive on! Obtain technical assistance.
● If the brake warning lamp lights up together with the ABS warning
lamp, this can mean that there is a fault in the ABS control function. As a
result, the rear wheels can lock relatively easily when braking. Under cer-
tain circumstances, the rear of the vehicle could suddenly sway from side
to side, with the subsequent danger of skidding. Drive carefully to the
nearest specialised workshop and have the fault repaired.
Fault in the cooling system
Faults in the cooling system must be repaired immediately.
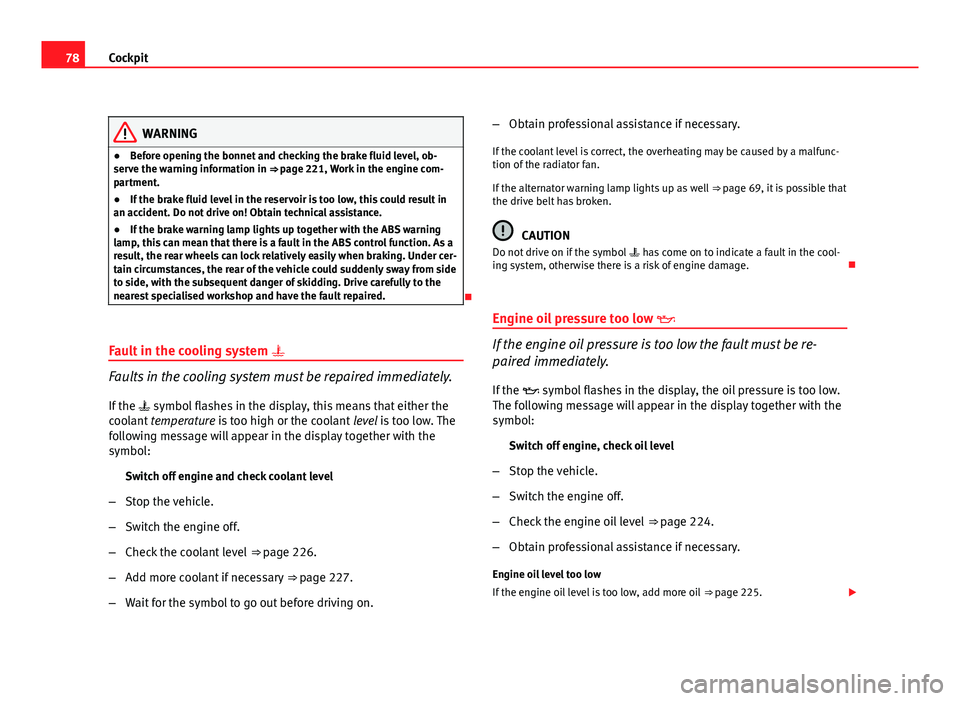
If the symbol flashes in the display, this means that either the
coolant temperature is too high or the coolant level is too low. The
following message will appear in the display together with the
symbol:
Switch off engine and check coolant level
– Stop the vehicle.
– Switch the engine off.
– Check the coolant level ⇒ page 226.
– Add more coolant if necessary ⇒ page 227.
– Wait for the symbol to go out before driving on. –
Obtain professional assistance if necessary.
If the coolant level is correct, the overheating may be caused by a malfunc-
tion of the radiator fan.
If the alternator warning lamp lights up as well ⇒ page 69, it is possible that
the drive belt has broken.
CAUTION
Do not drive on if the symbol has come on to indicate a fault in the cool-
ing system, otherwise there is a risk of engine damage.
Engine oil pressure too low
If the engine oil pressure is too low the fault must be re-
paired immediately.
If the symbol flashes in the display, the oil pressure is too low.
The following message will appear in the display together with the
symbol:
Switch off engine, check oil level
– Stop the vehicle.
– Switch the engine off.
– Check the engine oil level ⇒ page 224.
– Obtain professional assistance if necessary.
Engine oil level too low
If the engine oil level is too low, add more oil ⇒ page 225.
Page 81 of 313
79
Cockpit
Engine oil level correct
If the symbol flashes and the engine oil level is correct, obtain profes-
sional assistance. Do not drive on! Do not continue to run the engine, even
at idle speed .
Note
The oil pressure warning lamp is not an indicator for the oil level. The oil
level should therefore be checked regularly, preferably every time you fill
the tank.
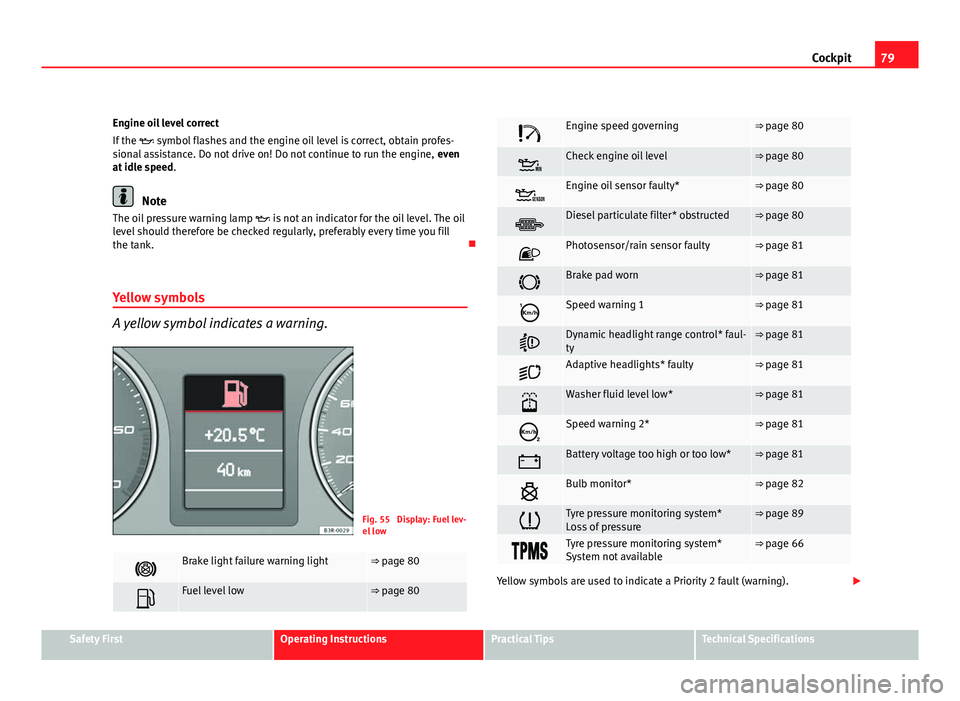
Yellow symbols
A yellow symbol indicates a warning.
Fig. 55 Display: Fuel lev-
el low
Brake light failure warning light⇒ page 80
Fuel level low⇒ page 80
Engine speed governing⇒ page 80
Check engine oil level⇒ page 80
Engine oil sensor faulty*⇒ page 80
Diesel particulate filter* obstructed⇒ page 80
Photosensor/rain sensor faulty⇒ page 81
Brake pad worn⇒ page 81
Speed warning 1⇒ page 81
Dynamic headlight range control* faul-
ty⇒ page 81
Adaptive headlights* faulty⇒ page 81
Washer fluid level low*⇒ page 81
Speed warning 2*⇒ page 81
Battery voltage too high or too low*⇒ page 81
Bulb monitor*⇒ page 82
Tyre pressure monitoring system*
Loss of pressure⇒ page 89
Tyre pressure monitoring system*
System not available⇒ page 66
Yellow symbols are used to indicate a Priority 2 fault (warning).
Safety FirstOperating InstructionsPractical TipsTechnical Specifications
Page 82 of 313
80Cockpit
Yellow symbols are accompanied by one warning buzzer. The function indi-
cated should be checked as soon as possible. If several Priority 2 faults are
detected at the same time, the symbols are displayed one after the other for
about 2 seconds at a time.
Brake light failure
This warning light will appear on the upper part of the display if any of the
brake lights has failed. A text message in the central part of the display indi-
cates which brake light has failed (left or right).
Fuel level low
When this symbol comes on for the first time, there are about 8 to 10 li-
tres of fuel left in the tank. You should fill up as soon as possible
⇒ page 217.
Engine speed governing
Max. engine speed XXXX rpm
There is a fault in the engine management. In addition, the warning lamp
on the instrument panel will light up. The engine speed will be governed to
the speed displayed in the driver information system. Please ensure that
the engine speed does not exceed the speed shown (for example, when
changing down a gear).
Take the vehicle to a qualified workshop immediately to have the fault re-
paired. Checking the engine oil level
If the symbol lights up, please check the engine oil level as soon as pos-
sible ⇒ page 224. Top up the oil at the next opportunity ⇒ page 225.
Engine oil sensor defective*
If the symbol lights up, take the vehicle to a qualified workshop and
have the oil level sensor checked. Until then it is advisable to check the oil
level every time you fill up with fuel ⇒ page 224.
Diesel particulate filter obstructed
If the symbol lights up, you can contribute towards automatic filter
cleaning by driving in the right manner. To do this, drive about 15 minutes
in 4th or 5th gear (automatic gearbox: S gear range) at a speed of 60 km/h,
with the engine running at approximately 2000 rpm. The increase in temper-
ature will burn off any soot in the filter. When cleaning is successful, the
symbol switches off.
If the symbol does not turn off, or the three lamps turn on (particulate
filter , emission control system fault and heaters ), take the vehicle
to a qualified workshop to repair the fault.
For further information on the diesel particulate filter, see ⇒ page 193.
WARNING
It is essential that you adjust your speed to suit the weather, road, ter-
rain and traffic conditions. The recommended driving speed must never
lead to the driver disregarding the traffic regulations.
Page 109 of 313
107
Unlocking and locking
in unlocking all the doors, they unlock simultaneously.
When combining locking using the remote control key and unlocking using
the key but without the remote control: when unlocking, only the driver door will unlock.
When does the system trigger the alarm?
The following parts of the vehicle are monitored when the vehicle is locked:
● Engine compartment (bonnet)
● Luggage compartment
● Doors
● Tilt angle (tow-away protection)
● Ignition
● Radio (only with a factory-fitted SEAT radio)
● Interior ⇒ page 107
If any of these areas are entered, the alarm will be triggered.
How is the alarm disabled?
The alarm can be switched off by unlocking the vehicle using the remote
control, or by switching on the ignition with the key, thus “disabling” the
alarm system. The alarm will also switch off when it comes to the end of its
cycle.
Turn signals
The turn signals flash briefly when the vehicle is locked to confirm that the
doors, the engine bonnet and the tailgate are properly closed and locked.
If the turn signals do not flash, check the doors, the bonnet and the tailgate
to make sure they are properly closed. The turn signals will also flash briefly
if one of the doors or the tailgate or engine bonnet is closed after the alarm
system has been enabled. –
– LED
When the vehicle is locked, the LED on the top of the driver door trim will
flash rapidly for about 30 seconds and then continue flashing slowly. This is
to indicate that the anti-theft alarm system (including the
interior monitor-
ing and tow-away protection ) is operative. If the LED lights up continuously
for about 30 seconds when the vehicle is locked instead of flashing, this
means the alarm system is not working properly.
Note
● To make sure that the alarm is fully operative when leaving the vehicle,
briefly check that all the doors and windows and the sunroof* are closed.
● The alarm is triggered immediately if one of the battery cables is discon-
nected while the alarm system is enabled.
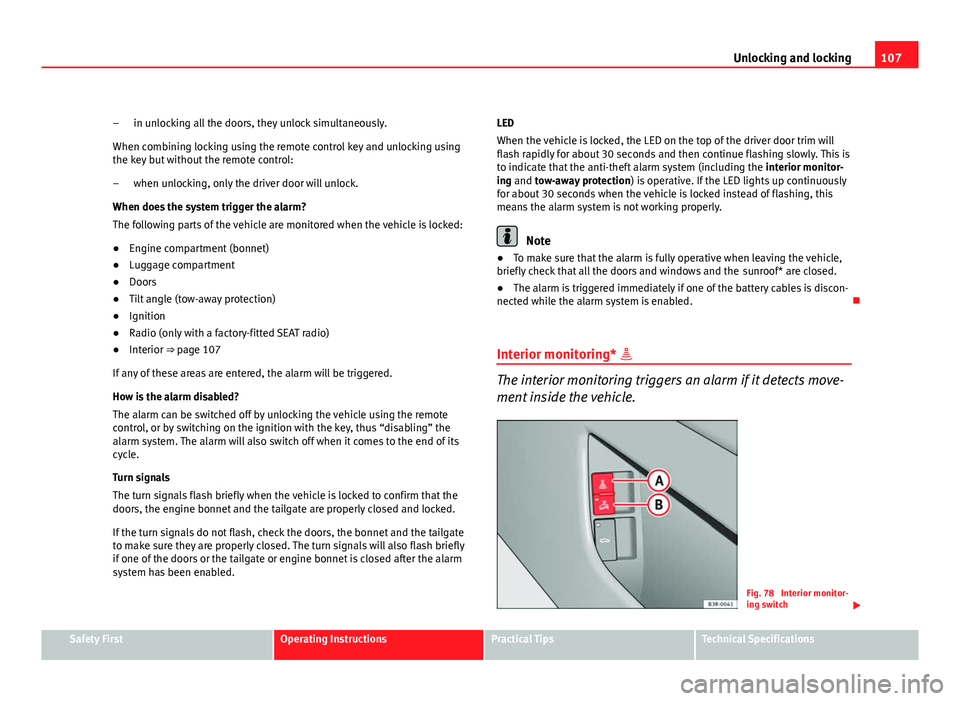
Interior monitoring*
The interior monitoring triggers an alarm if it detects move-
ment inside the vehicle.
Fig. 78 Interior monitor-
ing switch
Safety FirstOperating InstructionsPractical TipsTechnical Specifications
Page 153 of 313

151
Seats and storage compartments
WARNING
● Heavy appliances or connectors (for example, adapters) which hang
down directly from the Europlug socket may damage the socket with the
resultant risk of injury.
● Ensure that appliances connected to the socket are secure to prevent
them from being thrown around the vehicle in the event of sharp braking
or an accident. This could result in severe injury or loss of life ⇒ page 16,
Storing objects.
● Never spill liquid over the socket – there is a risk of death. If any
moisture enters the socket, ensure that it is thoroughly dry before using.
● Improper use of the sockets or electrical accessories can lead to seri-
ous injuries or cause a fire, with the resultant risk of injury.
● Children must never be left alone in the vehicle with the engine run-
ning. They could cause an accident.
● Appliances connected to the socket do not behave in the same way as
when they are connected to the mains power supply. They may overheat
during use and cause injury.
● When using adapters and extension leads, the childproof safety de-
vice on the 230 volt socket is disconnected and the socket is live. Risk of
injury!.
● Never insert objects which conduct electricity, such as a needle, in
the pins of the 230 volt socket. There is a risk of death.
● Always switch off electrical appliances connected to the socket if the
inverter goes off as a result of overheating. Failure to comply could result
in injuries.
CAUTION
● The instructions for handling appliances connected to the socket must
be observed.
● If the power consumption of the appliances connected exceeds 150
watts, the socket inverter will overheat. If the temperature exceeds a certain
value, the inverter will switch off. It may also switch off if the outside tem- perature is very high, even if the power consumption is normal. The inverter
will switch on again automatically after it has cooled down. Appliances con-
nected to the socket, and which have been left switched on, will automati-
cally come back on
⇒
.
● Do not connect neon lamps to the socket. For technical reasons, these
could break down.
● Do not connect 115 volt appliances to the 230 volt power socket, as
they could be damaged. If you have any queries, please check the manufac-
turer's label for details of the power supply accepted by the appliance.
● With some adapters, for example for laptops, their built-in overload dis-
connection system prevents the equipment from switching on in the event
of an excessive start-up current. In this case, disconnect the adapter from
the power supply and try to reconnect after ten seconds.
Note
● Non-insulated equipment may cause interference to the radio or vehicle
electronics.
● The Europlug socket has a built-in childproof device and only carries live
current when the Europlug is correctly plugged in.
● Some appliances may not operate correctly in the absence of adequate
power (watts).
● In some countries this socket is 115 volts. Therefore the socket should
have a different inverter installed at the factory. You can obtain retrofit kits
from your Authorised Technical Service. Do not connect 115 Volt appliances
to the 230 Volt socket.
● The use of electrical equipment in the vicinity of the aerial in the rear
window may cause interference to the reception of stations broadcasting in
AM.
Safety FirstOperating InstructionsPractical TipsTechnical Specifications
Page 191 of 313
189
Intelligent technology
Note
If you wish to equip the vehicle with accessories such as a front spoiler or
wheel covers, it is important that the flow of air to the front wheels is not
obstructed, otherwise the brakes can overheat.
Brake servo
The brake servo assists the driver when braking
The brake servo increases the pressure you apply to the brake pedal. The
brake servo works only when the engine is running.
WARNING
Ensure the vehicle does not move while in neutral, when the engine is
stopped. Failure to do so could result in an accident.
Note
If the brake servo is not working, e.g. because the vehicle has to be towed
or because it is broken, you will have to press the brake pedal considerably
harder to make up for the lack of servo assistance.
Power steering
Power steering makes it easier to turn the steering wheel
when the engine is running. Power steering assists the driver by reducing the force needed to turn the
steering wheel. Power steering does not work if the engine is off. In this case the steering
wheel requires much more force to turn.
If the steering is held at its
turning limit when the vehicle is stationary, this
will place an excessive load on the power steering system. Turning the
steering wheel to its limit places a load on the system, which causes noise.
It will also reduce the idling speed of the engine.
CAUTION
When the engine is running, do not turn the steering wheel to its limit for
more than 15 seconds. Otherwise, there is a risk of damaging the power
steering.
Note
● If the power steering should fail at any time or the engine is switched off
(for instance when being towed), the vehicle can still be steered. However,
more effort will be required to turn the steering wheel.
● If the system is leaking or malfunctioning, please take the vehicle to a
specialised workshop as soon as possible.
● The power steering system requires a special hydraulic fluid. The fluid
reservoir is located at the front of the engine compartment on the left
⇒ page 290. The correct fluid level in the reservoir is important for the pow-
er steering to function properly. The hydraulic fluid level is checked at the
Inspection Service.
Servotronic*
The servotronic system electronically adjusts the power as-
sisted steering.
In vehicles equipped with servotronic power steering the degree of power
assistance ⇒ page 189 is adjusted
electronically according to road speed.
Safety FirstOperating InstructionsPractical TipsTechnical Specifications