change wheel Seat Exeo 2011 Owner's manual
[x] Cancel search | Manufacturer: SEAT, Model Year: 2011, Model line: Exeo, Model: Seat Exeo 2011Pages: 313, PDF Size: 5.02 MB
Page 95 of 313

93
Steering wheel controls
Steering wheel Audio + Telephone version controls
AB(Mode)C(PTT)D+-Press+-Press
Radio modeStation search.
Increase frequen- cyStation search.Decrease fre- quencyPress once: starts the search.
Press twice: can- cels the search
Change to phone
Enable voicerecognition
Volume upVolume downMUTE
CD/
iPod-USB ModeCD mode: next track.
iPod/USB Mode: next trackCD mode: previ-ous track.
iPod/USB Mode: previous trackCD mode: fast for- ward.
iPod/USB Mode: fast forward
Volume upVolume downMUTE
MP3 modeNext trackPrevious trackFast forwardVolume upVolume downMUTE
Phone modeNext name inphone bookPrevious name in phone bookAccept
Change to ra-dio / CD /
iPod-USB / MP3
Volume upVolume downNo functionspecified
Incoming call modeNo functionspecifiedNo functionspecifiedOne press: accept call.
Held down: reject callNo functionspecifiedNo function specifiedVolume upVolume downNo functionspecified
Active call modeNo functionspecifiedNo functionspecifiedEnd callNo functionspecifiedNo function specifiedVolume upVolume downNo functionspecified
Voice activation modeNo functionspecifiedNo functionspecifiedNo function speci- fiedNo functionspecifiedCancelVolume upVolume downNo function specified
Safety FirstOperating InstructionsPractical TipsTechnical Specifications
Page 97 of 313

95
Steering wheel controls
Steering wheel controls, Navigation System + Telephone* version
AB(Mode)C(PTT)D+-Press+-Press
Radio modeStation search.
Increase frequen- cyStation search.Decrease fre- quencyPress once: starts the search.
Press twice: can- cels the search
Change to phone
Enable voicerecognition
Volume upVolume down
Repetition of
the last naviga- tion order (only if active)
CD/
iPod-USB ModeCD mode: next track.
iPod/USB Mode: next trackCD mode: previ-ous track.
iPod/USB Mode: previous trackCD mode: fast for- ward.
iPod/USB Mode: fast forward
Volume upVolume down
Repetition of
the last naviga- tion order (only if active)
MP3 modeNext trackPrevious trackFast forwardVolume upVolume down
Repetition of
the last naviga- tion order (only if active)
Phone modeNext name inphone bookPrevious name in phone bookAccept
Change to ra-dio / CD /
iPod-USB / MP3
Volume upVolume down
Repetition of
the last naviga- tion order (only if active)
Incoming call modeNo functionspecifiedNo functionspecifiedOne press: accept call.
Held down: reject callNo functionspecifiedNo function specifiedVolume upVolume down
Repetition of
the last naviga- tion order (only if active)
Active callmodeNo functionspecifiedNo functionspecifiedEnd callNo functionspecifiedNo function specifiedVolume upVolume down
Repetition of
the last naviga- tion order (only if active)
Voice activation modeNo functionspecifiedNo functionspecifiedNo function speci- fiedNo functionspecifiedCancelVolume upVolume downNo function specified
Safety FirstOperating InstructionsPractical TipsTechnical Specifications
Page 123 of 313
121
Lights and visibility
– Press the knob in again to prevent the setting from being
changed unintentionally.
This button activates or deactivates the daytime running lights function.
With the function activated, when the ignition is switched on the daytime
running lights are turned on automatically.
Note
Please observe any relevant legal requirements which may apply in your
country.
Adaptive headlights* (for driving around bends)
When driving around bends, the headlights will light the
most important areas of the road.
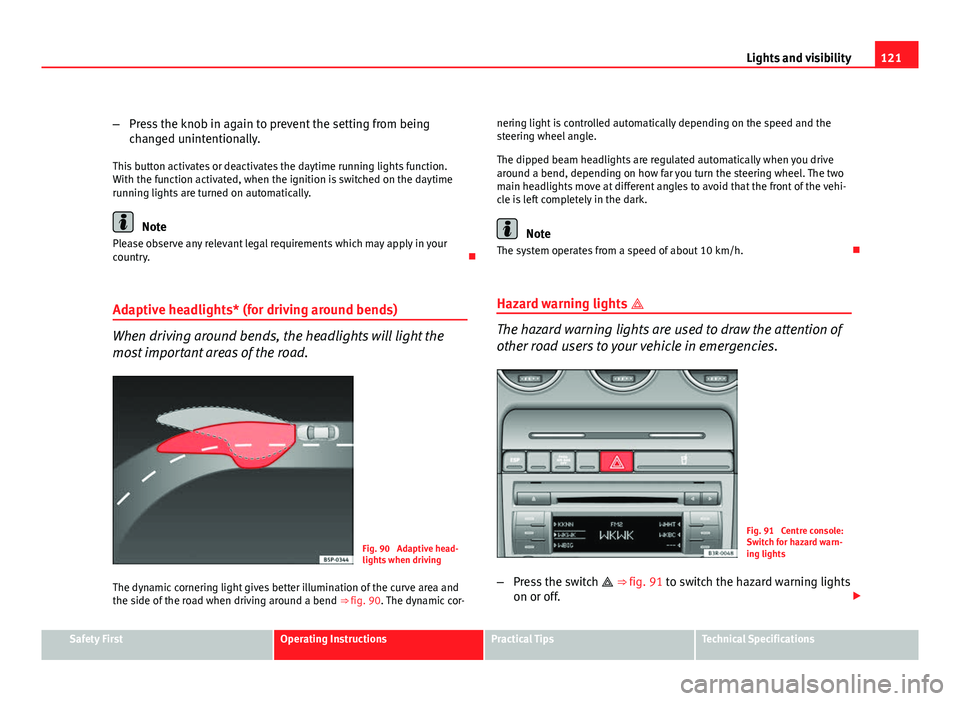
Fig. 90 Adaptive head-
lights when driving
The dynamic cornering light gives better illumination of the curve area and
the side of the road when driving around a bend ⇒ fig. 90. The dynamic cor-nering light is controlled automatically depending on the speed and the
steering wheel angle.
The dipped beam headlights are regulated automatically when you drive
around a bend, depending on how far you turn the steering wheel. The two
main headlights move at different angles to avoid that the front of the vehi-
cle is left completely in the dark.
Note
The system operates from a speed of about 10 km/h.
Hazard warning lights
The hazard warning lights are used to draw the attention of
other road users to your vehicle in emergencies.
Fig. 91 Centre console:
Switch for hazard warn-
ing lights
– Press the switch
⇒ fig. 91 to switch the hazard warning lights
on or off.
Safety FirstOperating InstructionsPractical TipsTechnical Specifications
Page 183 of 313
181
Driving
Vehicles with tiptronic gearbox
When the accelerator pedal is pressed right down past the point of resist-
ance at full throttle, the gearbox will shift down to a lower gear, depending
on road speed and engine speed. The upshift to the next higher gear is de-
layed until the engine reaches maximum rpm.
WARNING
Please note that if the road surface is slippery or wet, the kick-down fea-
ture could cause the driving wheels to spin, which could result in skid-
ding.
Dynamic gear control programme (DCP)
The automatic gearbox is controlled electronically.
The vehicle is equipped with an electronically controlled gearbox. The gear
ratios are selected automatically according to preset gearshift programmes.
When you drive at moderate speeds the gearbox will select the most eco-
nomical shift programme. It will then change up early and delay the down-
shifts to give better fuel economy.
If you drive at higher speeds with heavy acceleration, if you open the throt-
tle quickly, or if you use the kick-down or the vehicle's maximum speed, the
gearbox will automatically select the sport programme.
The gearbox is self-adapting, and continuously selects the most suitable
shift programme. At the same time, the driver can also make the gearbox
switch to the sport programme by pressing the accelerator quickly. This
makes the gearbox shift down into a lower gear ratio, allowing a more rapid
acceleration (for instance to pass another vehicle), without having to press
the accelerator all the way down into the kick-down position. After the gear-
box has shifted back up it returns to the original programme, depending on
your style of driving. Vehicles with multitronic® gearbox: the gearbox continuously adapts the
gear ratios to gradients. If the brake pedal is pressed on a downhill gradient
the gearbox automatically shifts to a lower gear ratio. This increases the en-
gine braking effect.
Vehicles with tiptronic gearbox: in mountainous areas, the gearbox adapts
the gears for uphill and downhill gradients. This helps to avoid constant
gear changes on uphill gradients.
Safety FirstOperating InstructionsPractical TipsTechnical Specifications
Page 185 of 313

183
Driving
Back-up programme
A back-up system is in place if a fault should occur in the
control system.
The automatic gearbox switches to the back-up programme if a fault should
occur in the control system. This is indicated by a gear pinion symbol which
lights up on the instrument panel display.
It is still possible to move the selector lever to all positions. The manual
shift programme (tiptronic) is not available when the back-up programme is
active.
Vehicles with tiptronic gearbox: When the selector lever is in position D or S
or in the manual shift programme, the gearbox will remain in 3rd gear if 1st,
2nd or 3rd gears were engaged when the fault occurred. The gearbox will
remain in 5th gear if 4th, 5th or 6th gears were engaged. The gearbox will
then engage 3rd gear when you drive away from a standstill or after the en-
gine is restarted.
It will still be possible to use reverse gear in the normal way. However, the
electronic lock for reverse gear will be switched off.
CAUTION
Should the gearbox ever switch into the back-up programme, you should
take the vehicle to a technical service or qualified workshop as soon as pos-
sible. Steering wheel with paddle levers
The paddle levers on the steering wheel enable the driver to
manually select pre-programmed ratios or gears.
Fig. 148 Steering wheel:
tiptronic controls
– Briefly pull the left-hand paddle lever –
to change down to a
lower gear.
– Briefly pull the right-hand paddle lever +
to change up to a
higher gear.
The paddle levers are activated when the selector lever is in position D or S,
or the position for the manual shift programme (tiptronic).
The manual shift programme can, of course, still be operated using the gear
lever in the centre console.
Safety FirstOperating InstructionsPractical TipsTechnical Specifications
Page 186 of 313
184Intelligent technology
Practical Tips
Intelligent technology
Electronic Stability Programme (ESP) General notes
The Electronic Stability Programme increases the vehicle's
stability on the road.
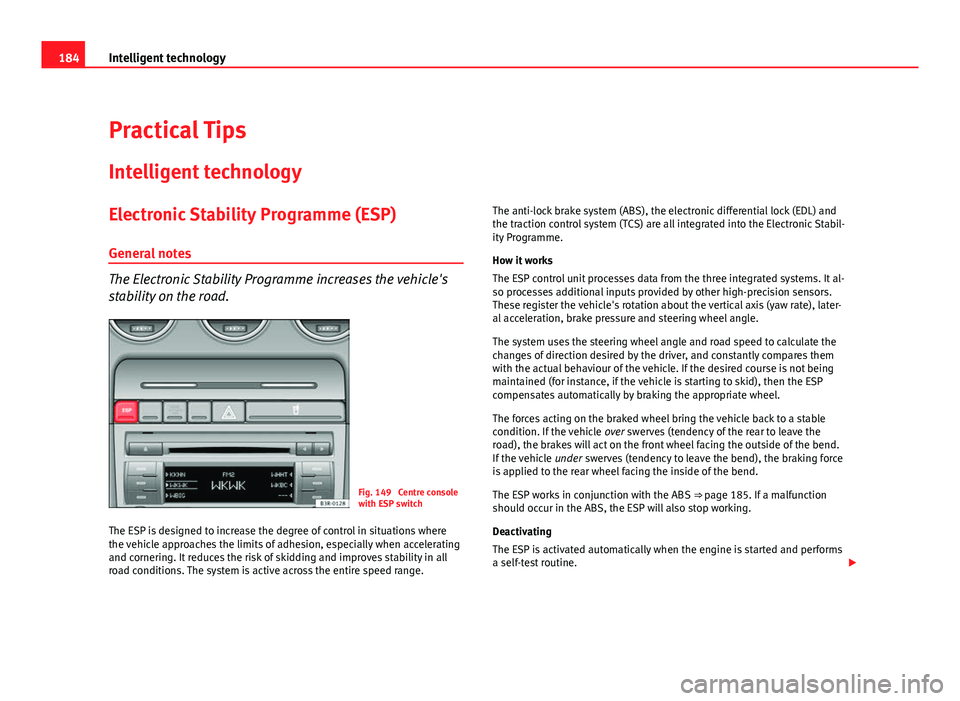
Fig. 149 Centre console
with ESP switch
The ESP is designed to increase the degree of control in situations where
the vehicle approaches the limits of adhesion, especially when accelerating
and cornering. It reduces the risk of skidding and improves stability in all
road conditions. The system is active across the entire speed range. The anti-lock brake system (ABS), the electronic differential lock (EDL) and
the traction control system (TCS) are all integrated into the Electronic Stabil-
ity Programme.
How it works
The ESP control unit processes data from the three integrated systems. It al-
so processes additional inputs provided by other high-precision sensors.
These register the vehicle's rotation about the vertical axis (yaw rate), later-
al acceleration, brake pressure and steering wheel angle.
The system uses the steering wheel angle and road speed to calculate the
changes of direction desired by the driver, and constantly compares them
with the actual behaviour of the vehicle. If the desired course is not being
maintained (for instance, if the vehicle is starting to skid), then the ESP
compensates automatically by braking the appropriate wheel.
The forces acting on the braked wheel bring the vehicle back to a stable
condition. If the vehicle
over swerves (tendency of the rear to leave the
road), the brakes will act on the front wheel facing the outside of the bend.
If the vehicle under swerves (tendency to leave the bend), the braking force
is applied to the rear wheel facing the inside of the bend.
The ESP works in conjunction with the ABS ⇒ page 185. If a malfunction
should occur in the ABS, the ESP will also stop working.
Deactivating
The ESP is activated automatically when the engine is started and performs
a self-test routine.
Page 239 of 313
237
Wheels and tyres
Significant tyre pressure loss
The tyre symbol is displayed and indicates that the tyre pressure
of at least one tyre is insufficient.
– Stop the vehicle.
– Switch the engine off.
– Check the tyre(s).
– Change the wheel if necessary.
Tyre pressure monitoring (RKA+)*
The tyre pressure monitor display on the instrument panel
indicates if the pressure is too low.
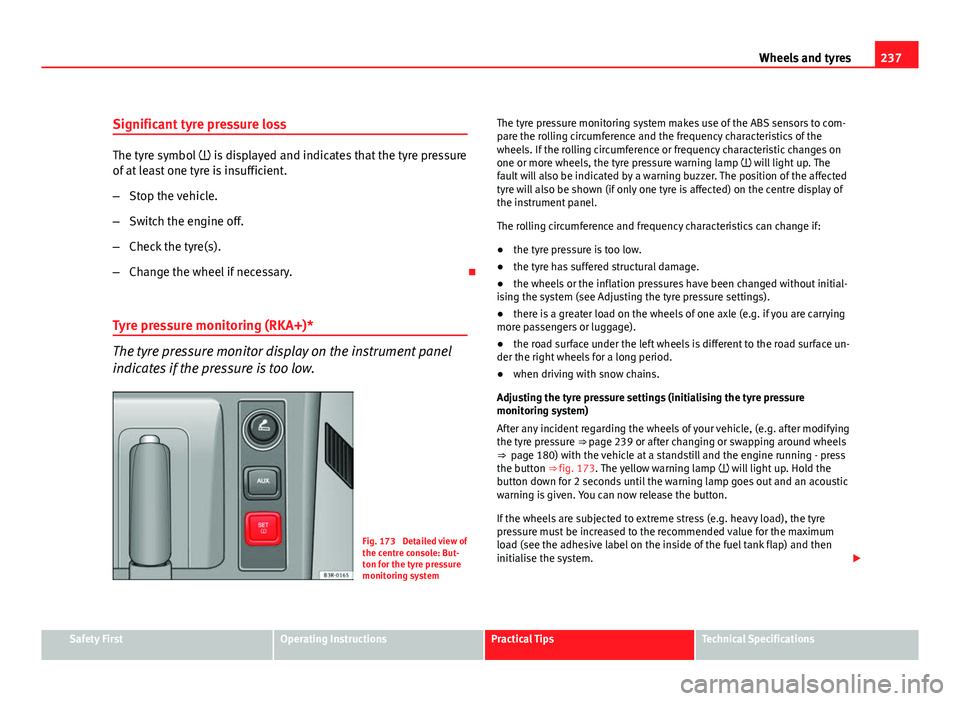
Fig. 173 Detailed view of
the centre console: But-
ton for the tyre pressure
monitoring system The tyre pressure monitoring system makes use of the ABS sensors to com-
pare the rolling circumference and the frequency characteristics of the
wheels. If the rolling circumference or frequency characteristic changes on
one or more wheels, the tyre pressure warning lamp will light up. The
fault will also be indicated by a warning buzzer. The position of the affected
tyre will also be shown (if only one tyre is affected) on the centre display of
the instrument panel.
The rolling circumference and frequency characteristics can change if:
●
the tyre pressure is too low.
● the tyre has suffered structural damage.
● the wheels or the inflation pressures have been changed without initial-
ising the system (see Adjusting the tyre pressure settings).
● there is a greater load on the wheels of one axle (e.g. if you are carrying
more passengers or luggage).
● the road surface under the left wheels is different to the road surface un-
der the right wheels for a long period.
● when driving with snow chains.
Adjusting the tyre pressure settings (initialising the tyre pressure
monitoring system)
After any incident regarding the wheels of your vehicle, (e.g. after modifying
the tyre pressure ⇒ page 239 or after changing or swapping around wheels
⇒ page 180) with the vehicle at a standstill and the engine running - press
the button ⇒ fig. 173. The yellow warning lamp will light up. Hold the
button down for 2 seconds until the warning lamp goes out and an acoustic
warning is given. You can now release the button.
If the wheels are subjected to extreme stress (e.g. heavy load), the tyre
pressure must be increased to the recommended value for the maximum
load (see the adhesive label on the inside of the fuel tank flap) and then
initialise the system.
Safety FirstOperating InstructionsPractical TipsTechnical Specifications
Page 240 of 313

238Wheels and tyres
Tyre pressure warning lamp on
When you switch on the ignition, the tyre pressure warning lamp will
light up for about 2 seconds. There is a fault in the system if the indicator
stays on permanently after switching on the ignition. The instrument panel
also display TMPS (Tyre Pressure Monitoring System). Please contact the
nearest qualified workshop as soon as possible.
The tyre pressure warning lamp lights up if the tyre pressure on one or
more wheels is significantly lower than the tyre pressure setting which was
confirmed by the driver ⇒
.
WARNING
● If the tyre pressure warning lamp lights up you must slow down
immediately and avoid any severe braking or steering manoeuvres. Stop
the vehicle as soon as possible and check the tyres and their pressure.
● The driver is responsible for maintaining correct tyre pressures.
Therefore, the tyre pressure must be regularly checked.
● Under certain conditions (e.g. driving at high speeds, on ice and snow
or on poor road surfaces) the tyre pressure warning lamp may not light
up immediately or not at all.
● Please ask your Dealer or qualified workshop whether run-flat tyres
can be used on your vehicle. Fitting this type of tyre in an undue manner
could lead to your driving licence being taken away from you. Further-
more, it may led to damage to the vehicle or, under certain circumstan-
ces, may cause accidents.
● If you change normal tyres for run-flat tyres or vice versa, the control
unit must be reprogrammed by the Dealer or a qualified workshop.
Note
If you did not press the button for the tyre pressure monitoring system to
confirm a new tyre pressure setting after making changes to the tyre pres-
sures or changing one or more wheels, the warning lamp may light up
although the tyre pressures are correct. In this case, stop the vehicle as
soon as possible and, after examining the tyres, press the button for the
tyre pressure monitoring system.
Page 241 of 313
239
Wheels and tyres
Tyre service life
The service life of tyres is dependent on tyre pressure, driv-
ing style and fitting.
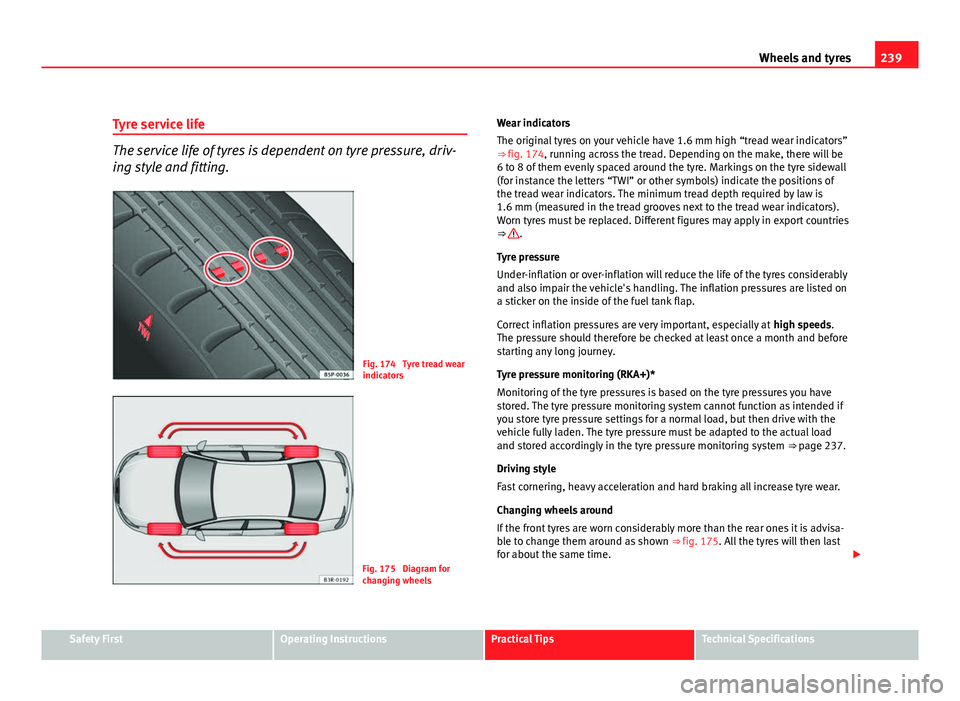
Fig. 174 Tyre tread wear
indicators
Fig. 175 Diagram for
changing wheels Wear indicators
The original tyres on your vehicle have 1.6 mm high “tread wear indicators”
⇒ fig. 174, running across the tread. Depending on the make, there will be
6 to 8 of them evenly spaced around the tyre. Markings on the tyre sidewall
(for instance the letters “TWI” or other symbols) indicate the positions of
the tread wear indicators. The minimum tread depth required by law is
1.6 mm (measured in the tread grooves next to the tread wear indicators).
Worn tyres must be replaced. Different figures may apply in export countries
⇒
.
Tyre pressure
Under-inflation or over-inflation will reduce the life of the tyres considerably
and also impair the vehicle's handling. The inflation pressures are listed on
a sticker on the inside of the fuel tank flap.
Correct inflation pressures are very important, especially at high speeds.
The pressure should therefore be checked at least once a month and before
starting any long journey.
Tyre pressure monitoring (RKA+)*
Monitoring of the tyre pressures is based on the tyre pressures you have
stored. The tyre pressure monitoring system cannot function as intended if
you store tyre pressure settings for a normal load, but then drive with the
vehicle fully laden. The tyre pressure must be adapted to the actual load
and stored accordingly in the tyre pressure monitoring system ⇒ page 237.
Driving style
Fast cornering, heavy acceleration and hard braking all increase tyre wear.
Changing wheels around
If the front tyres are worn considerably more than the rear ones it is advisa-
ble to change them around as shown ⇒ fig. 175. All the tyres will then last
for about the same time.
Safety FirstOperating InstructionsPractical TipsTechnical Specifications
Page 242 of 313
240Wheels and tyres
Wheel balance
The wheels on new vehicles are balanced. However, various factors encoun-
tered in normal driving can cause them to become unbalanced, which re-
sults in steering vibration.
Unbalanced wheels should be rebalanced, as they otherwise cause exces-
sive wear on steering, suspension and tyres. A wheel must also be reba-
lanced when a new tyre is fitted.
Incorrect wheel alignment
Incorrect wheel alignment causes excessive tyre wear, impairing the safety
of the vehicle. If tyres show excessive wear, you should have the wheel
alignment checked by an Authorised Service Centre.
WARNING
There is a serious danger of accidents if a tyre bursts during driving!
● The tyres must be replaced at the latest when the tread wear indica-
tors are worn ⇒ page 239. Failure to do so could result in an accident.
Worn tyres do not grip well at high speeds on wet roads. There is also a
greater risk of aquaplaning.
● At continuously high speeds, a tyre with insufficient pressure flexes
more. This causes it to overheat. This can cause tread separation and tyre
blow-out. Risk of accident. Always observe the recommended tyre pres-
sures.
● If tyres show excessive wear, you should have the running gear
checked by an Authorised Service Centre.
● Keep chemicals such as oil, fuel and brake fluid away from tyres.
● Damaged wheels and tyres must be replaced immediately!
For the sake of the environment
Under-inflated tyres will increase fuel consumption. Run-flat tyres*
Run-flat tyres allow you to continue driving even with a
punctured tyre, in the majority of cases.
In vehicles that are factory-fitted with run-flat tyres 1)
the loss of tyre
pressure is indicated on the instrument panel.
Driving with run-flat tyres (emergency running)
– Leave the ESP/TCS (Electronic Stability Programme) switched
on, or switch on ⇒ page 68.
– Continue driving carefully and slowly (80 km/h maximum).
– Avoid sudden manoeuvres and sharp turns.
– Avoid driving over obstacles (for example kerbs) or potholes.
– Look out for the ESP/TCS intervening often, smoke coming from
the tyres or the smell of rubber, the vehicle vibrating or a clat-
tering noise. If any of these occur, stop the vehicle.
The run-flat tyres have a tag on the side of the tyre, with the description:
“DSST”, “Eufonia”, “RFT”, “ROF”, “RSC”, “SSR” or “ZP”.
The sides of this type of tyre are reinforced. When the tyres lose air they are
supported on the sides (emergency driving).
The loss of pressure in the tyre is shown on the instrument panel. You can
then drive a maximum of 80 km and if the circumstances are favourable (for
example, low load), even more.
The damaged tyre should be changed as soon as possible. The rim should
be checked in a specialist workshop to detect possible damage and replace
1)
Depending upon version and country.