ESP Seat Exeo 2012 MEDIA SYSTEM E
[x] Cancel search | Manufacturer: SEAT, Model Year: 2012, Model line: Exeo, Model: Seat Exeo 2012Pages: 167, PDF Size: 5.48 MB
Page 7 of 167
Overview
6
– Press the
button ⇒page 5, fig. 3 to open or close the display
⇒ page 5, fig. 4 .
Opening the display provides access to the DVD drives and the two card
readers for MP3 (SD and MMC) memory cards ⇒page 5, fig. 4 .
The display can also be closed using the control knob, the control buttons,
the button or the forward/reverse buttons ⇒page 8.
The open display is automatically closed after approximately one minute.
Caution
•If the display cannot be closed, it may be obstructed by some object (e.g.
an MP3 memory card may not have been correctly inserted in the reader). Do
not attempt to close the display by force.•To prevent damage to the navigation system, no foreign bodies should be
inserted into the DVD drive or into the memory card readers.Note
For more information regarding the various media drives, please refer to
⇒ page 22.Notes on road safetyOnly use the system when the traffic conditions allow you to
do so safely.As well as offering full navigation functions, the SEAT navigation system with
its numerous extra features also provides a wealth of in-car entertainment
and a great deal of information about traffic and road conditions. Carry out your settings in the navigation system only when the vehicle
⇒
page 153 is stationary. If you operate the navigation system while driving,
you should always be aware of the current traffic situation and, if necessary,
give your full concentration to road safety. When driving, make use of the
multi-function steering wheel* whenever possible ⇒page 12.
WARNING
•Today's driving conditions require your full attention. As the driver, you
bear the responsibility for road safety. Therefore, only use the SEAT naviga-
tion system when traffic conditions allow as such, remaining in control of
the vehicle. If not, an accident may occur.•The volume of the sound system should be set at a level that enables
you to hear acoustic signals from outside, such as police and fire brigade
sirens. Failure to do so may cause an accident.•Always obey the laws controlling the use of telephones in vehicles!
Cleaning and careThe controls and display of the navigation system require
care and cleaning from time to time.Cleaning the display
– Use a soft, clean cloth and an LCD cleaner to clean the navigation system display.
Cleaning the control panel
– First clean the control panel with a brush to remove dust.
– Then wipe the controls with a clean, soft and slightly damp cloth.
RETURN
media_systemE_EN.book Seite 6 Montag, 21. September 2009 1:48 13
Page 9 of 167
Handling: General information
8Handling: General informationControl switchesConcept for handling
You can operate all the functions of the navigation system by
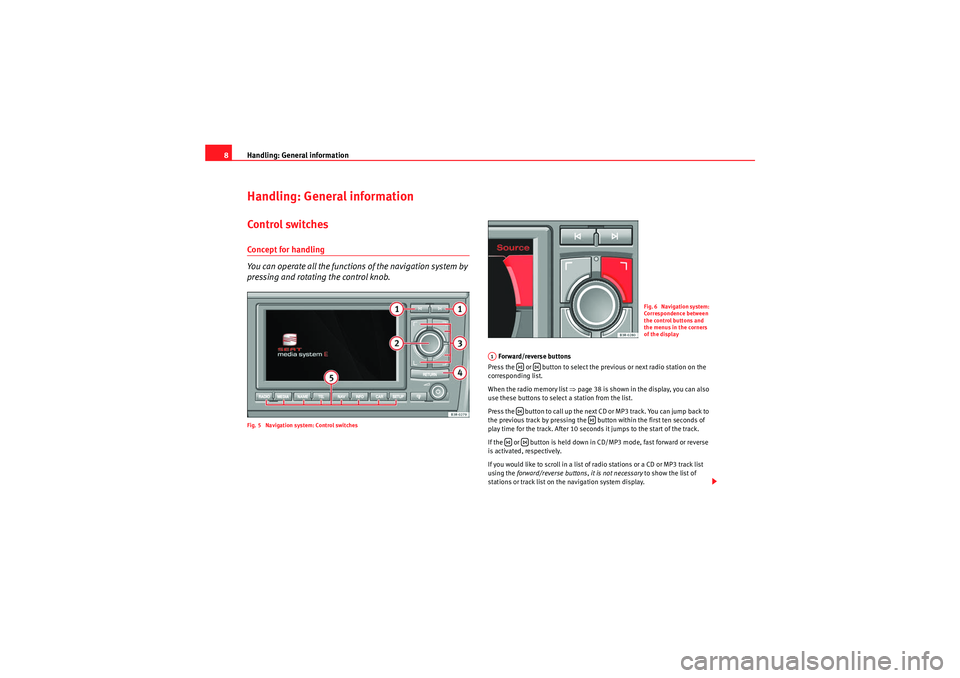
pressing and rotating the control knob.Fig. 5 Navigation system: Control switches
Forward/reverse buttons
Press the or button to select the previous or next radio station on the
corresponding list.
When the radio memory list ⇒ page 38 is shown in the display, you can also
use these buttons to select a station from the list.
Press the button to call up the next CD or MP3 track. You can jump back to
the previous track by pressing the button within the first ten seconds of
play time for the track. After 10 seconds it jumps to the start of the track.
If the or button is held down in CD/MP3 mode, fast forward or reverse
is activated, respectively.
If you would like to scroll in a list of radio stations or a CD or MP3 track list
using the forward/reverse buttons, it is not necessary to show the list of
stations or track list on the navigation system display.
Fig. 6 Navigation system:
Correspondence between
the control buttons and
the menus in the corners
of the display
A1
media_systemE_EN.book Seite 8 Montag, 21. September 2009 1:48 13
Page 10 of 167
Handling: General information9
Operating
RADIO, MEDIA (audiovisual
systems)
NAME, TEL
NAV, INFO
CAR, SETUP
Main control
To select a menu option in the display, turn the rotary pushbutton in the
required direction and then press it.
Control buttons
To activate a function indicated in one of the four corners of the display, press
the corresponding control button for that corner of the display. For instance,
the top right control button corresponds with the top right corner of the
display ⇒page 8, fig. 6 .
RETURN button
Press the button to cancel an entry that has not yet been confirmed
or to return to the previous menu level. You can also use this button when you
have activated the side menu for the navigation map depiction.
Function selector buttons
Press one of the function selector buttons to activate the function shown on
the button. For example, the Radio function is started by pressing the
function button.
The button only works when you have pressed one of the other func-
tion buttons. You can use it to make new settings for the function that you
have selected.
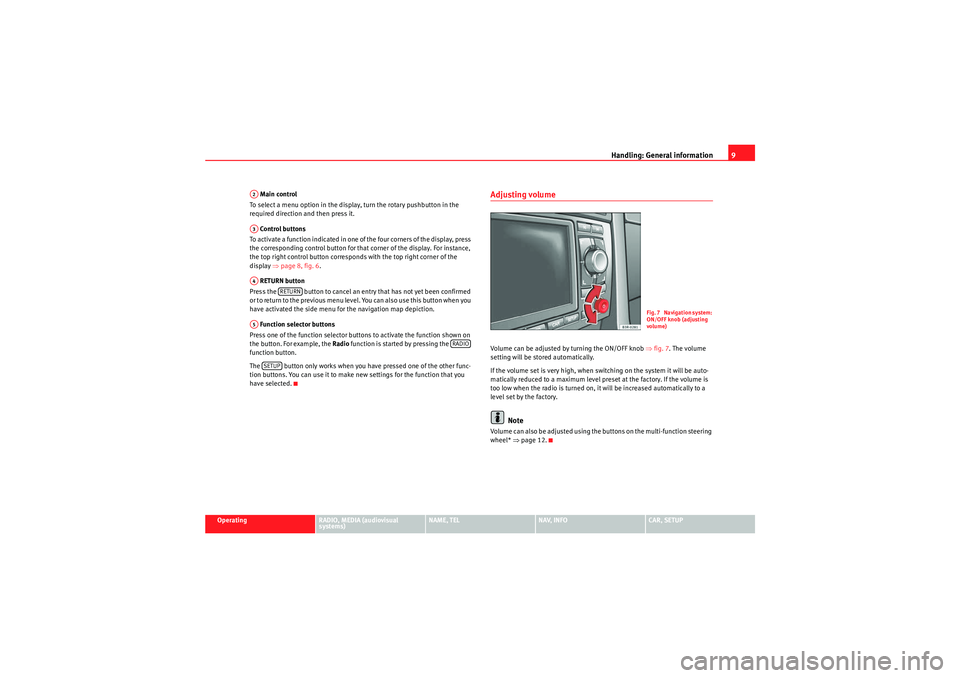
Adjusting volumeVolume can be adjusted by turning the ON/OFF knob ⇒fig. 7 . The volume
setting will be stored automatically.
If the volume set is very high, when switching on the system it will be auto-
matically reduced to a maximum level preset at the factory. If the volume is
too low when the radio is turned on, it will be increased automatically to a
level set by the factory.
Note
Volume can also be adjusted using the buttons on the multi-function steering
wheel* ⇒page 12.
A2A3A4
RETURN
A5
RADIO
SETUP
Fig. 7 Navigation system:
ON/OFF knob (adjusting
volume)
media_systemE_EN.book Seite 9 Montag, 21. September 2009 1:48 13
Page 11 of 167
Handling: General information
10MuteSwitching on the mute function
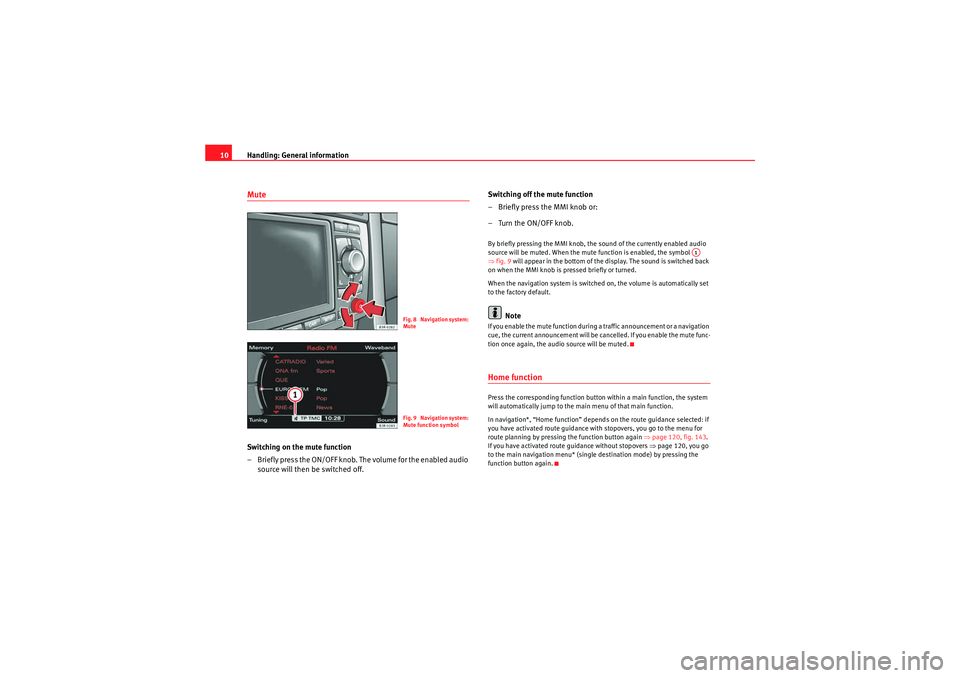
– Briefly press the ON/OFF knob. The volume for the enabled audio
source will then be switched off. Switching off the mute function
– Briefly press the MMI knob or:
–Turn the ON/OFF knob.
By briefly pressing the MMI knob, the sound of the currently enabled audio
source will be muted. When the mute function is enabled, the symbol
⇒
fig. 9 will appear in the bottom of the display. The sound is switched back
on when the MMI knob is pressed briefly or turned.
When the navigation system is switched on, the volume is automatically set
to the factory default.
Note
If you enable the mute function during a traffic announcement or a navigation
cue, the current announcement will be cancelled. If you enable the mute func-
tion once again, the audio source will be muted.Home functionPress the corresponding function button within a main function, the system
will automatically jump to the main menu of that main function.
In navigation*, “Home function” depends on the route guidance selected: if
you have activated route guidance with stopovers, you go to the menu for
route planning by pressing the function button again ⇒page 120, fig. 143 .
If you have activated route guidance without stopovers ⇒page 120, you go
to the main navigation menu* (single destination mode) by pressing the
function button again.
Fig. 8 Navigation system:
MuteFig. 9 Navigation system:
Mute function symbol
A1
media_systemE_EN.book Seite 10 Montag, 21. September 2009 1:48 13
Page 20 of 167

Display19
Operating
RADIO, MEDIA (audiovisual
systems)
NAME, TEL
NAV, INFO
CAR, SETUP
manually from numbers to letters using button or from letters to numbers
using .
The table below lists the symbols appearing in the illustrations
⇒page 18,
fig. 19 and ⇒page 18, fig. 20 , together with their corresponding functions.
Legend
Sym bol /
Name
Action
Pointer
The selected element has a white back-
ground and is shown larger in the entry
ring.
DEL
The symbol to the left of the cursor with
the white fill is deleted.
Cursor movement in entry field back-
wards and forwards
Switch between caps/no caps.
OK
Confirms an entry.
A...Z
Switches from number to letter key-
board.CursorEntry fieldLarge image of the selected charac-
ter/function.
LIST
Selects a suggestion from the list.
0..9
Switches from letter keyboard to number
keyboard.
A6
A11A1A2A3A4A5A6A7A8A9A10A11
Space
Reference to list elements that match the
current entries in the entry field, show-
ing the number of list elementsList of entries ordered alphabetically.
Legend
Symbol /
Name
Action
A12A13A14
media_systemE_EN.book Seite 19 Montag, 21. September 2009 1:48 13
Page 22 of 167
Display21
Operating
RADIO, MEDIA (audiovisual
systems)
NAME, TEL
NAV, INFO
CAR, SETUP
Control wheelOperating the control wheel
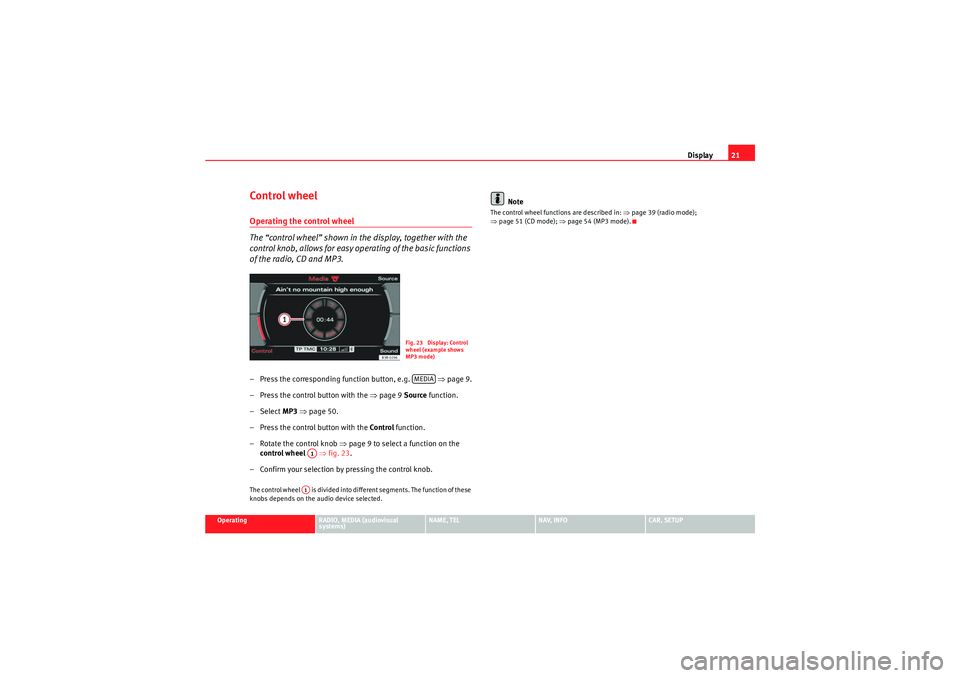
The “control wheel” shown in the display, together with the
control knob, allows for easy operating of the basic functions
of the radio, CD and MP3.– Press the corresponding function button, e.g. ⇒page 9.
– Press the control button with the ⇒page 9 Source function.
–Select MP3 ⇒ page 50.
– Press the control button with the Control function.
– Rotate the control knob ⇒ page 9 to select a function on the
control wheel ⇒fig. 23 .
– Confirm your selection by pressing the control knob.The control wheel is divided into different segments. The function of these
knobs depends on the audio device selected.
Note
The control wheel functions are described in: ⇒page 39 (radio mode);
⇒ page 51 (CD mode); ⇒page 54 (MP3 mode).
Fig. 23 Display: Control
wheel (example shows
MP3 mode)MEDIA
A1A1
media_systemE_EN.book Seite 21 Montag, 21. September 2009 1:48 13
Page 28 of 167
Drives27
Operating
RADIO, MEDIA (audiovisual
systems)
NAME, TEL
NAV, INFO
CAR, SETUP
Do not use dirty CDs or navigation DVDs
Do not use CD covers/stabilisers
Always keep unused CDs or navigation DVDs in a suitable case and never
expose them to direct sunlight.
Cleaning drives and CDs or navigation DVDs
Never use a CD player cleaning disc to clean drives.
Clean CDs or navigation DVDs with a soft lint-free cloth. Wipe the disc in a
straight line from the centre outwards. If necessary, stubborn stains can be
removed with a commercially available CD cleaner or with isopropyl alcohol.
Please never use petrol, paint thinner or vinyl record cleaner, as these can
damage the CDs or the navigation DVDs.
Use of laser equipment
Laser devices are categorised according to DIN IEC 76 (CO) 6/VDE 0837 into
four safety classes. The audio devices used in your vehicle are classified as
safety class 1. Lasers used in devices that fall into this category are very weak
and well shielded, so there is no danger if used correctly.
Error messages
The following may be the reason for a read error on the display:
Note
•It is possible that you may not be able to play CDs which are copy-
protected or CDs containing CD ROM format that do not correspond to the
standard for audio CDs in your player. Only CDs that comply with this
standard have the logo “Compact Disc Digital Audio” printed on the CD.•At extremely high or low outside temperatures, it is possible that the play-
back of a DVD/CD will temporarily not function. A thermostat switch is
installed to protect the DVD/CDs and the reading laser.•Never remove the cover of the equipment. The equipment has no compo-
nents that can be serviced by the owner.Problem
Solution
The navigation DVD, audio CD or
MP3 CD is dirty.
Clean the CD.
The navigation DVD, audio CD or
MP3 CD is scratched.
Check the CD for scratches.
The navigation DVD, audio CD or
MP3 CD has been inserted upside
down.
Insert the CD with the printed side
upwards.
There is condensation on the naviga-
tion DVD, audio CD or MP3 CD.
Wait until the equipment is dry.
The drive mechanism is malfunction-
ing.
Contact a Dealer or qualified work-
shop.
media_systemE_EN.book Seite 27 Montag, 21. September 2009 1:48 13
Page 35 of 167
Drives
34
WARNING
Today's driving conditions require your full attention. As the driver, you
bear the responsibility for road safety. Never operate a portable player
while driving, as this could result in an accident.
Note
•We recommend setting the output level of the portable player to about
70 percent of maximum. Before adjusting the volume using the sound system
in your vehicle, you should first use the volume adjuster of the portable
player.•Using a portable player with the engine switched off will drain the
battery.
media_systemE_EN.book Seite 34 Montag, 21. September 2009 1:48 13
Page 46 of 167
RADIO45
Operating
RADIO, MEDIA (audiovisual
systems)
NAME, TEL
NAV, INFO
CAR, SETUP
If you have set the station display to
moving ⇒ page 44, fig. 49, the ticker
text will be shown when you tune into a station broadcasting this type of
information.
Alternative frequencies– Starting from any one of the radio menus, press the ⇒page 9 button.
– Switch on the Alt. frequency function (on) ⇒ page 41, fig. 44 to
automatically change frequency within the same station.Because of the limited range of FM (VHF) signals, a radio station may broad-
cast from several transmitters on different frequencies. If the Alt. frequency
function is switched on (on), the radio-navigation system searches for the
strongest frequency signal and tunes into it.
The radio switches from one frequency to another inaudibly. The programme
name appearing on the display is not changed. The control wheel ⇒page 39
displays the corresponding frequency.
Note
To ensure optimum reception, the alternative frequency function will auto-
matically be set to on when you switch on the navigation system or switch to
another station.
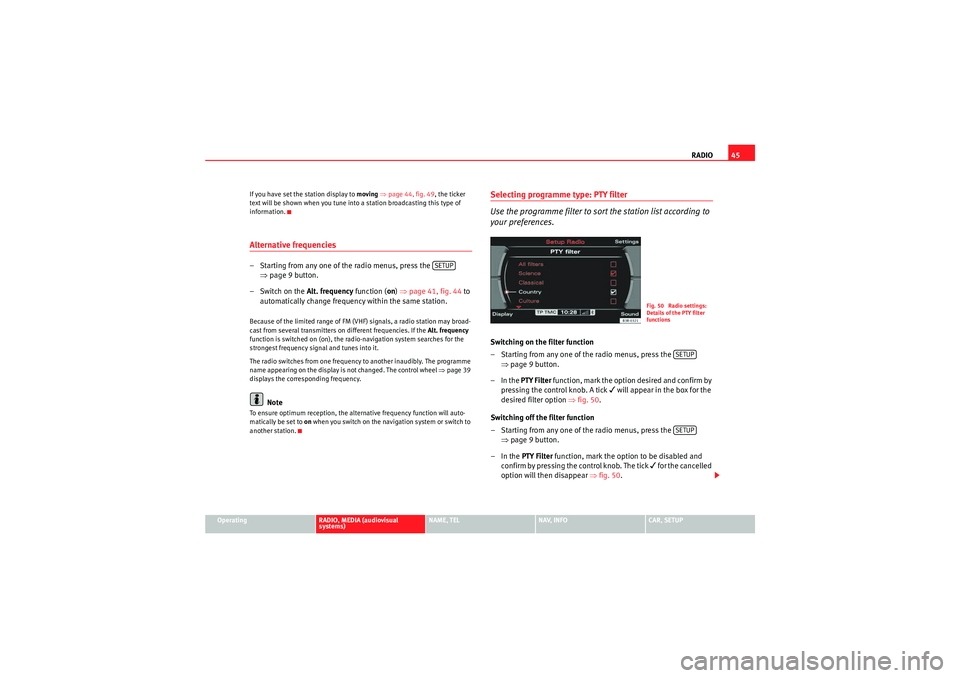
Selecting programme type: PTY filter
Use the programme filter to sort the station list according to
your preferences.Switching on the filter function
– Starting from any one of the radio menus, press the ⇒page 9 button.
–In the PTY Filter function, mark the option desired and confirm by
pressing the control knob. A tick
will appear in the box for the
desired filter option ⇒fig. 50 .
Switching off the filter function
– Starting from any one of the radio menus, press the ⇒page 9 button.
–In the PTY Filter function, mark the option to be disabled and
confirm by pressing the control knob. The tick
for the cancelled
option will then disappear ⇒fig. 50 .
SETUP
Fig. 50 Radio settings:
Details of the PTY filter
functions
SETUPSETUP
media_systemE_EN.book Seite 45 Montag, 21. September 2009 1:48 13
Page 50 of 167
MEDIA49
Operating
RADIO, MEDIA (audiovisual
systems)
NAME, TEL
NAV, INFO
CAR, SETUP
– Press the control button with the Source function.
–Select audio CD.
– Press one of the control buttons ⇒page 9 ( to ⇒page 48,
fig. 53 ) to move to the appropriate submenus.The CD Menu has the following options:
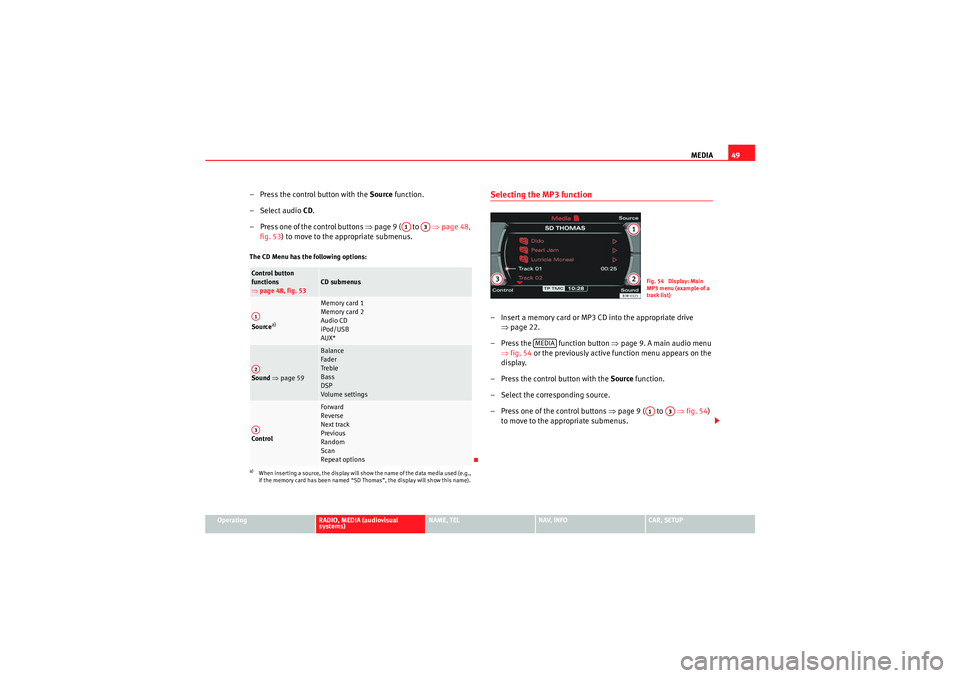
Selecting the MP3 function– Insert a memory card or MP3 CD into the appropriate drive
⇒page 22.
– Press the function button ⇒ page 9. A main audio menu
⇒ fig. 54 or the previously active function menu appears on the
display.
– Press the control button with the Source function.
– Select the corresponding source.
– Press one of the control buttons ⇒page 9 ( to ⇒ fig. 54)
to move to the appropriate submenus.
Co n tro l but to n
functions
⇒ page 48, fig. 53
CD submenus
Source
a)
a)When inserting a source, the display will show the name of the data media used (e.g.,
if the memory card has been named “SD Thomas”, the display will show this name).
Memory card 1
Memory card 2
Audio CD
iPod/USB
AUX*
Sound ⇒ page 59
Balance
Fader
Treble
Bass
DSP
Volume settings
Co n tro l
Forward
Reverse
Next track
Previous
Random
Scan
Repeat options
A1
A3
A1A2A3
Fig. 54 Display: Main
MP3 menu (example of a
track list)
MEDIA
A1
A3
media_systemE_EN.book Seite 49 Montag, 21. September 2009 1:48 13