phone Seat Exeo 2013 Owner's manual
[x] Cancel search | Manufacturer: SEAT, Model Year: 2013, Model line: Exeo, Model: Seat Exeo 2013Pages: 319, PDF Size: 4.81 MB
Page 6 of 319
Trailer towing . . . . . . . . . . . . . . . . . . . . . . . . . . . . . . 200
Trailer towing . . . . . . . . . . . . . . . . . . . . . . . . . . . . . 200
Removable towing bracket . . . . . . . . . . . . . . . . . . 203
Vehicle maintenance and cleaning . . . . . . . . . 210
General notes . . . . . . . . . . . . . . . . . . . . . . . . . . . . 210
Care of the vehicle exterior . . . . . . . . . . . . . . . . . . 211
Vehicle interior maintenance . . . . . . . . . . . . . . . . 216
Accessories, replacement of parts and
modifications . . . . . . . . . . . . . . . . . . . . . . . . . . . . . 222
Accessories and spare parts . . . . . . . . . . . . . . . . 222
Technical modifications . . . . . . . . . . . . . . . . . . . . 222
Mobile phones and two-way radios . . . . . . . . . . . 223
Athermic windscreen* . . . . . . . . . . . . . . . . . . . . . 223
Checking and refilling levels . . . . . . . . . . . . . . . 224
Refuelling . . . . . . . . . . . . . . . . . . . . . . . . . . . . . . . 224
Petrol . . . . . . . . . . . . . . . . . . . . . . . . . . . . . . . . . . . 225
Diesel . . . . . . . . . . . . . . . . . . . . . . . . . . . . . . . . . . . 226
Bonnet . . . . . . . . . . . . . . . . . . . . . . . . . . . . . . . . . . 227
Engine oil . . . . . . . . . . . . . . . . . . . . . . . . . . . . . . . . 229
Cooling system . . . . . . . . . . . . . . . . . . . . . . . . . . . 232
Washer fluid and windscreen wiper blades . . . . 235
Brake fluid . . . . . . . . . . . . . . . . . . . . . . . . . . . . . . . 237
Vehicle battery . . . . . . . . . . . . . . . . . . . . . . . . . . . 238
Wheels and tyres . . . . . . . . . . . . . . . . . . . . . . . . . . 242
Wheels . . . . . . . . . . . . . . . . . . . . . . . . . . . . . . . . . . 242
If and when . . . . . . . . . . . . . . . . . . . . . . . . . . . . . . . 252
Tools, tyre repair kit and spare wheel . . . . . . . . . 252
Changing a wheel . . . . . . . . . . . . . . . . . . . . . . . . . 254
Tyre repair* (Tyre-Mobility-System) . . . . . . . . . . . 259
Fuses . . . . . . . . . . . . . . . . . . . . . . . . . . . . . . . . . . . 263
Bulbs . . . . . . . . . . . . . . . . . . . . . . . . . . . . . . . . . . . 265
Changing bulbs. Halogen headlights . . . . . . . . . 266
Changing bulbs. Bi-Xenon AFS headlights . . . . . 272
Changing tail light bulbs (on side panel) . . . . . . 276
Changing tail light bulbs (on rear lid) . . . . . . . . . 281
Side turn signals . . . . . . . . . . . . . . . . . . . . . . . . . . 284 Luggage compartment lights . . . . . . . . . . . . . . . . 285
Registration light . . . . . . . . . . . . . . . . . . . . . . . . . . 285
Sun visor light . . . . . . . . . . . . . . . . . . . . . . . . . . . . 286
Jump-starting . . . . . . . . . . . . . . . . . . . . . . . . . . . . . 286
Towing and tow-starting . . . . . . . . . . . . . . . . . . . . 290
Technical Specifications . . . . . . . . . . . 293
Description of specifications . . . . . . . . . . . . . . . 293
Important information . . . . . . . . . . . . . . . . . . . . . 293
Information on fuel consumption . . . . . . . . . . . . 294
Towing a trailer . . . . . . . . . . . . . . . . . . . . . . . . . . . 296
Wheels . . . . . . . . . . . . . . . . . . . . . . . . . . . . . . . . . . 296
Technical specifications . . . . . . . . . . . . . . . . . . . . 297
Engine specifications . . . . . . . . . . . . . . . . . . . . . . 297
Dimensions and capacities . . . . . . . . . . . . . . . . . 305
Index . . . . . . . . . . . . . . . . . . . . . . . . . . . . . . . . . . . 307
4Table of Contents
Page 10 of 319
8Safe driving
Therefore, this chapter explains why these safety features are so important,
how they can protect you, what you need to remember when using them
and how you and your passengers can gain the most benefit from them.
There are also a number of important safety warnings that you and your
passengers should always observe in order to minimise the risk of injury.
Safety is everyone's responsibility!
Before setting off
The driver is responsible for the safety of the passengers
and the safe operation of the vehicle at all times. For your own safety and the safety of your passengers, always note
the following points before setting off:
– Make sure that all lights and indicators are working properly.
– Check tyre pressure.
– Make sure that all windows are clean and give good visibility to
the outside.
– Secure all luggage and other items carefully ⇒ page 16.
– Make sure that no objects can interfere with the pedals.
– Adjust the front seat, head restraint and mirrors correctly.
– Make sure that the head restraints for all passengers are adjus-
ted to the correct position.
– Make sure that children are protected with suitable safety seats
and properly worn seat belts ⇒ page 46. –
Sit in a correct position. Inform your passengers as to how they
should sit ⇒ page 10.
– Fasten your seat belt correctly. Make sure that your passengers
do the same ⇒ page 18.
What affects safe driving?
Safety on the road is directly related to how you drive, and
can also be affected by the passengers in the vehicle. The driver is responsible for the safety of the vehicle and all its oc-
cupants. If your ability to drive is impaired in any way, you endan-
ger yourself and other road users ⇒
. Therefore:
– Do not let yourself be distracted by passengers or by using a
mobile phone, etc.
– Never drive when your driving ability is impaired (by medica-
tion, alcohol, drugs, etc.).
– Obey all traffic regulations and speed limits and always main-
tain a safe distance to the vehicle in front.
– Always adjust your speed to suit the road, traffic and weather
conditions.
– Take frequent breaks on long trips. Do not drive for more than
two hours without a stop.
– If possible, avoid driving when you are tired or stressed.
Page 11 of 319
9
Safe driving
WARNING
When driving safety is impaired during a trip, the risk of injury and acci-
dents increases.
What affects driving safety?
Driving safety is largely determined by your driving style
and the personal behaviour of all vehicle occupants.
As a driver, you are responsible for yourself and your passengers.
When your concentration or driving safety is affected by any cir-
cumstance, you endanger yourself as well as others on the road
⇒
, for this reason:
– Always pay attention to traffic and do not get distracted by pas-
sengers or telephone calls.
– Never drive when your driving ability is impaired (e.g. by medi-
cation, alcohol, drugs).
– Observe traffic laws and speed limits.
– Always reduce your speed as appropriate for road, traffic and
weather conditions.
– When travelling long distances, take breaks regularly - at least
every two hours.
– If possible, avoid driving when you are tired or stressed.
WARNING
When driving safety is impaired during a trip, the risk of injury and acci-
dents increases.
Safety FirstOperating instructionsPractical TipsTechnical Specifications
Page 32 of 319
30Airbag system
Control lamp for airbag and seat belt tensioner
This control lamp monitors the airbag and seat belt tension-
er system.
The control lamp monitors all airbags and seat belt tensioners in the vehi-
cle, including control units and wiring connections.
Monitoring of airbag and belt tensioner system
Both the airbag and belt tensioner systems operation is constantly moni-
tored electronically. The control lamp will light every time the ignition is
switched on until you attach your seatbelt.
The system must be checked when the control lamp :
● does not light up when the ignition is switched on
● turns off and then lights up again after the ignition is switched on
● lights up or flashes while the vehicle is moving
In the event of a malfunction, the warning lamp remains on continuously.
Have the system inspected immediately by a specialised workshop.
If any of the airbags are disabled by a Technical Service, the warning lamp
lights for several seconds more after the verification and will turn off if there
is no fault.
WARNING
● If there is a malfunction, the airbag and belt tensioner system cannot
properly perform its protective function.
● If a malfunction occurred, have the system checked immediately by a
specialised workshop. Otherwise, in the event of an accident, the airbag
system and belt tensioners may not be triggered, or may not be triggered
correctly.
Repairs, maintenance and disposal of airbags
The parts of the airbag system are installed in various places in your vehi-
cle. If work is carried out on the airbag system or parts have to be removed
and fitted on the system when performing other repair work, parts of the air-
bag system may be damaged. In the event of an accident this could cause
the airbag to inflate incorrectly or not inflate at all.
The relevant safety requirements must be observed when the vehicle or
components of the airbag are
scrapped. Specialised workshops and vehicle
disposal centres are familiar with these requirements.
WARNING
● If repairs are not carried out by a professional, or if the airbags are
used incorrectly, the risk of severe or fatal injuries is increased. The air-
bags may fail to inflate, or could inflate in the wrong circumstances.
● Do not cover or stick anything on the steering wheel hub or the sur-
face of the airbag unit on the passenger side of the dash panel, and do
not obstruct or modify them in any way.
● It is important not to attach any objects such as cup holders or tele-
phone mountings to the surfaces covering the airbag units.
● To clean the steering wheel or dash panel, you may use only a dry or a
water-moistened cloth. Never clean the dash panel and the airbag mod-
ule surface with cleaners containing solvents. Solvents cause the surface
to become porous. If the airbag triggered, plastic parts could become de-
tached and cause injuries.
● Never attempt to repair, adjust, remove or install parts of the airbag
system.
Page 37 of 319
35
Airbag system
Safety notes on the front airbag system
If you use airbags correctly, they can considerably reduce
the risk of injury in many kinds of accident.
WARNING
● It is important for the driver and front passenger to keep a distance of
at least 25 cm from the steering wheel and dash panel. If the minimum
distance is not observed then the airbags do not correctly protect the ve-
hicle occupants; risk of fatal injuries! In addition, the front seats and
head restraints must always be positioned correctly for the height of the
occupant.
● If you are not wearing a seat belt, if you lean forward or to the side
while travelling or assume an incorrect sitting position, there is a sub-
stantially increased risk of injury. This increased risk of injury will be fur-
ther increased if you are struck by an inflating airbag.
● Never let a child travel on the front seat without an appropriate re-
straint system. If the airbag is triggered in an accident, children can sus-
tain serious or fatal injuries from the airbag as it inflates ⇒ page 46,
Child safety.
● The deployment space between the front passengers and the airbags
must not in any case be occupied by other passenger, pets and objects.
● The airbags provide protection for just one accident; replace them
once they have deployed.
● It is also important not to attach any objects such as cup holders or
telephone mountings to the surfaces covering the airbag units.
● Do not attempt to modify components of the airbag system in any
way.
Knee airbag*
Description of the knee airbag
The airbag system provides additional protection to front
seat passengers if they are properly secured.
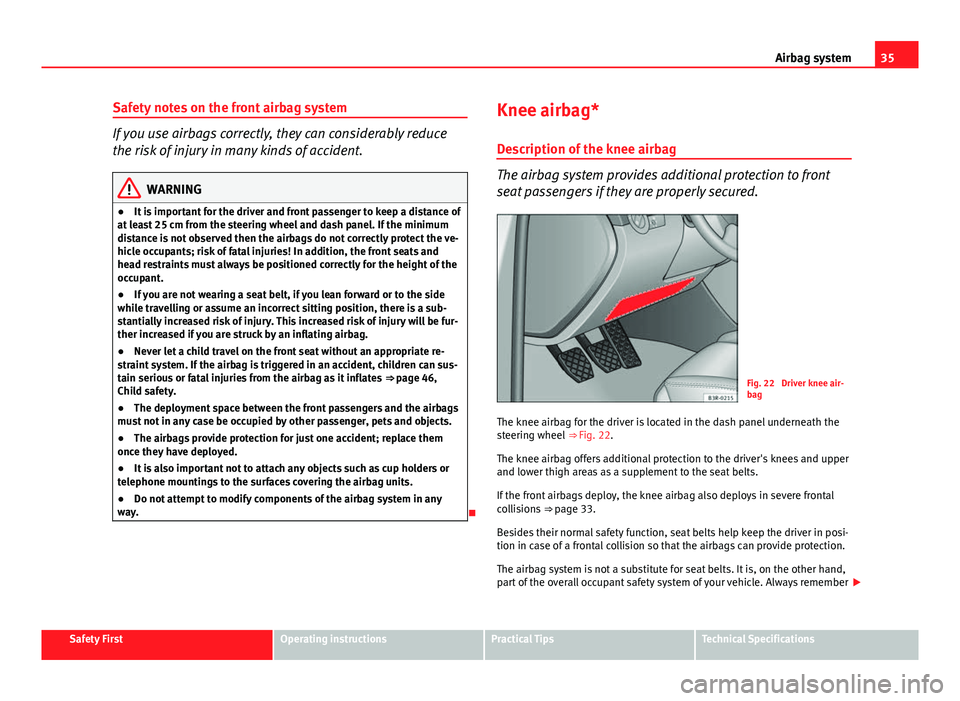
Fig. 22 Driver knee air-
bag
The knee airbag for the driver is located in the dash panel underneath the
steering wheel ⇒ Fig. 22.
The knee airbag offers additional protection to the driver's knees and upper
and lower thigh areas as a supplement to the seat belts.
If the front airbags deploy, the knee airbag also deploys in severe frontal
collisions ⇒ page 33.
Besides their normal safety function, seat belts help keep the driver in posi-
tion in case of a frontal collision so that the airbags can provide protection.
The airbag system is not a substitute for seat belts. It is, on the other hand,
part of the overall occupant safety system of your vehicle. Always remember
Safety FirstOperating instructionsPractical TipsTechnical Specifications
Page 60 of 319
58Cockpit
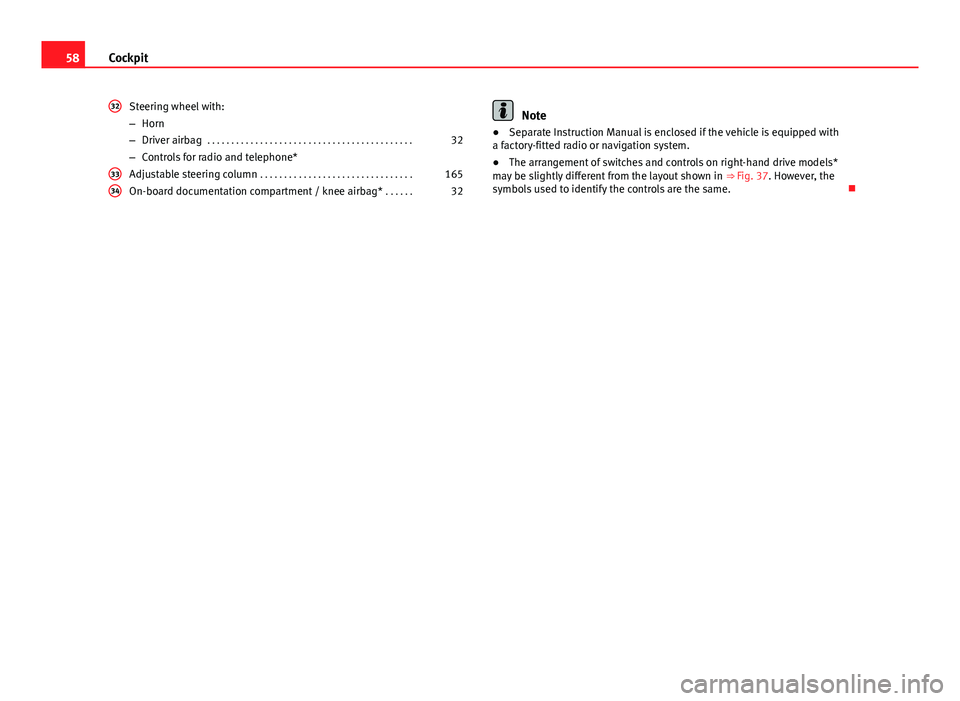
Steering wheel with:
–Horn
– Driver airbag . . . . . . . . . . . . . . . . . . . . . . . . . . . . . . . . . . . . . . . . . . . 32
– Controls for radio and telephone*
Adjustable steering column . . . . . . . . . . . . . . . . . . . . . . . . . . . . . . . . 165
On-board documentation compartment / knee airbag* . . . . . .32
32
3334
Note
● Separate Instruction Manual is enclosed if the vehicle is equipped with
a factory-fitted radio or navigation system.
● The arrangement of switches and controls on right-hand drive models*
may be slightly different from the layout shown in ⇒ Fig. 37. However, the
symbols used to identify the controls are the same.
Page 74 of 319
72Cockpit
Driver information system
General notes
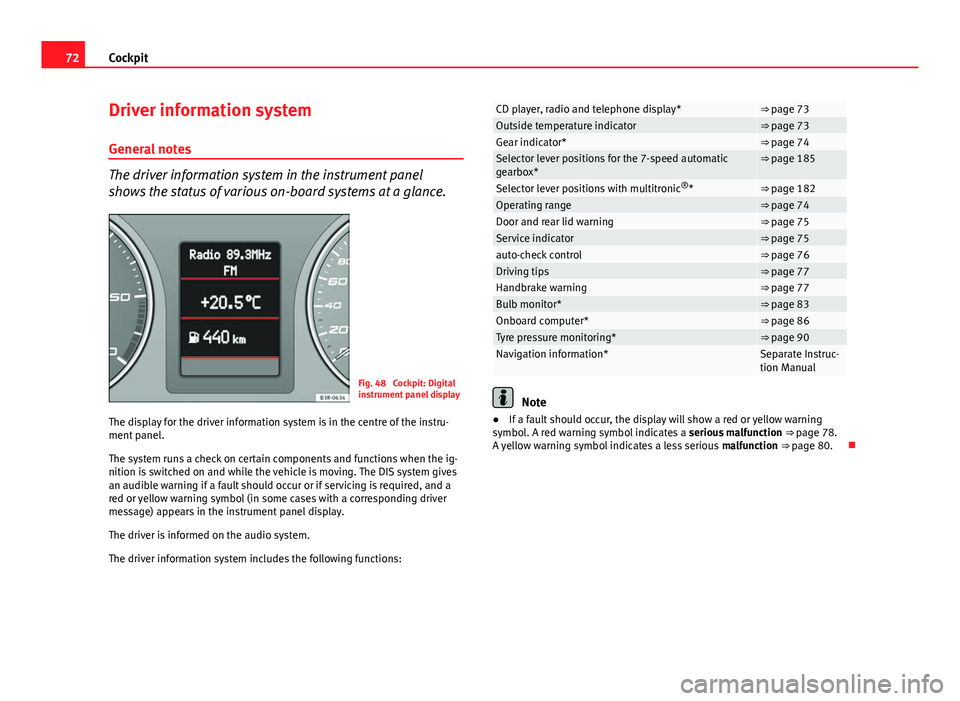
The driver information system in the instrument panel
shows the status of various on-board systems at a glance.
Fig. 48 Cockpit: Digital
instrument panel display
The display for the driver information system is in the centre of the instru-
ment panel.
The system runs a check on certain components and functions when the ig-
nition is switched on and while the vehicle is moving. The DIS system gives
an audible warning if a fault should occur or if servicing is required, and a
red or yellow warning symbol (in some cases with a corresponding driver
message) appears in the instrument panel display.
The driver is informed on the audio system.
The driver information system includes the following functions:
CD player, radio and telephone display*⇒ page 73Outside temperature indicator⇒ page 73Gear indicator*⇒ page 74Selector lever positions for the 7-speed automatic
gearbox*⇒ page 185
Selector lever positions with multitronic ®
*⇒ page 182Operating range⇒ page 74Door and rear lid warning⇒ page 75Service indicator⇒ page 75auto-check control⇒ page 76Driving tips⇒ page 77Handbrake warning⇒ page 77Bulb monitor*⇒ page 83Onboard computer*⇒ page 86Tyre pressure monitoring*⇒ page 90Navigation information*Separate Instruc-
tion Manual
Note
● If a fault should occur, the display will show a red or yellow warning
symbol. A red warning symbol indicates a serious malfunction ⇒ page 78.
A yellow warning symbol indicates a less serious malfunction ⇒ page 80.
Page 75 of 319
73
Cockpit
CD, radio and telephone display*
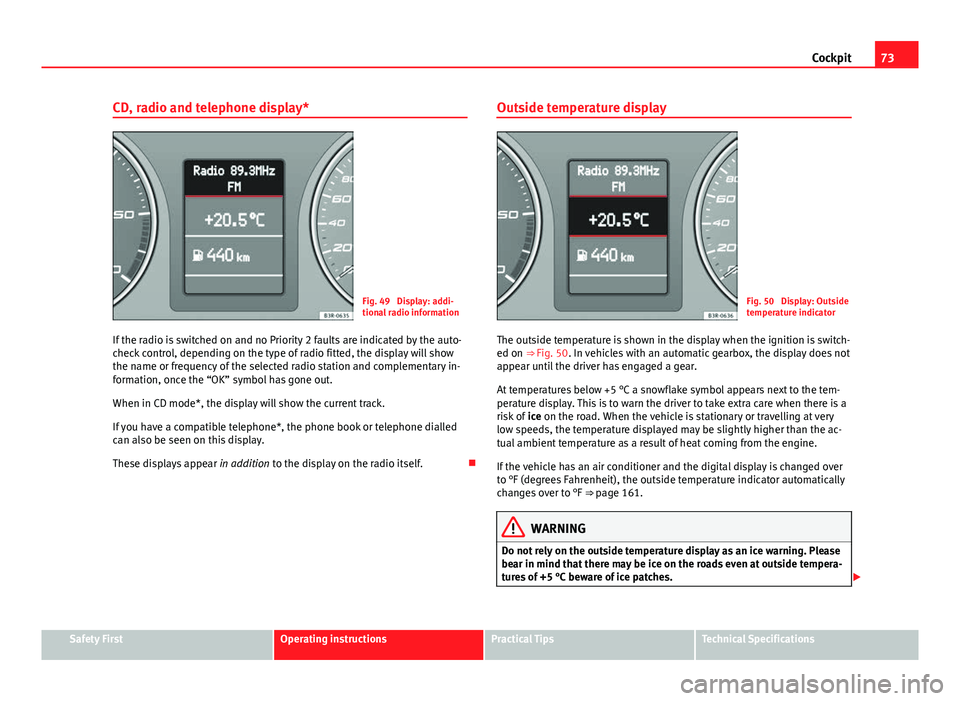
Fig. 49 Display: addi-
tional radio information
If the radio is switched on and no Priority 2 faults are indicated by the auto-
check control, depending on the type of radio fitted, the display will show
the name or frequency of the selected radio station and complementary in-
formation, once the “OK” symbol has gone out.
When in CD mode*, the display will show the current track.
If you have a compatible telephone*, the phone book or telephone dialled
can also be seen on this display.
These displays appear in addition to the display on the radio itself. Outside temperature displayFig. 50 Display: Outside
temperature indicator
The outside temperature is shown in the display when the ignition is switch-
ed on ⇒ Fig. 50. In vehicles with an automatic gearbox, the display does not
appear until the driver has engaged a gear.
At temperatures below +5 °C a snowflake symbol appears next to the tem-
perature display. This is to warn the driver to take extra care when there is a
risk of ice on the road. When the vehicle is stationary or travelling at very
low speeds, the temperature displayed may be slightly higher than the ac-
tual ambient temperature as a result of heat coming from the engine.
If the vehicle has an air conditioner and the digital display is changed over
to °F (degrees Fahrenheit), the outside temperature indicator automatically
changes over to °F ⇒ page 161.
WARNING
Do not rely on the outside temperature display as an ice warning. Please
bear in mind that there may be ice on the roads even at outside tempera-
tures of +5 °C beware of ice patches.
Safety FirstOperating instructionsPractical TipsTechnical Specifications
Page 94 of 319
92Steering wheel controls
Steering wheel controls
Multifunction steering wheel* Introduction
You can use the multifunction steering wheel to quickly and
easily operate selected functions of the radio, CD, and tele-
phone*.
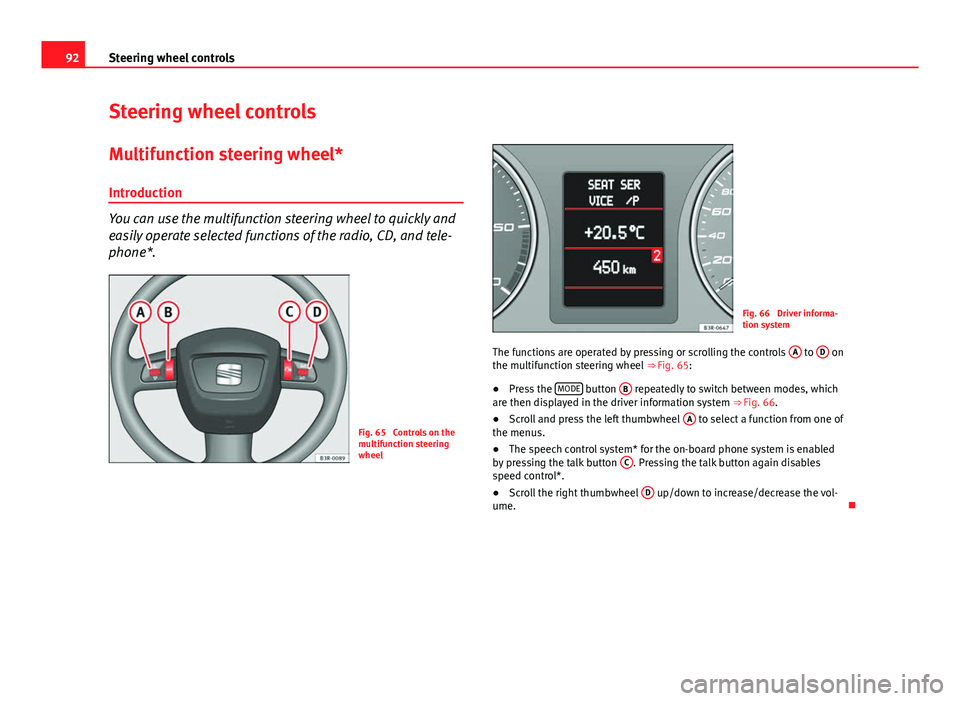
Fig. 65 Controls on the
multifunction steering
wheel
Fig. 66 Driver informa-
tion system
The functions are operated by pressing or scrolling the controls A
to D on
the multifunction steering wheel ⇒ Fig. 65:
● Press the MODE
button
B repeatedly to switch between modes, which
are then displayed in the driver information system ⇒ Fig. 66.
● Scroll and press the left thumbwheel A
to select a function from one of
the menus.
● The speech control system* for the on-board phone system is enabled
by pressing the talk button C
. Pressing the talk button again disables
speed control*.
● Scroll the right thumbwheel D
up/down to increase/decrease the vol-
ume.
Page 96 of 319
94Steering wheel controls
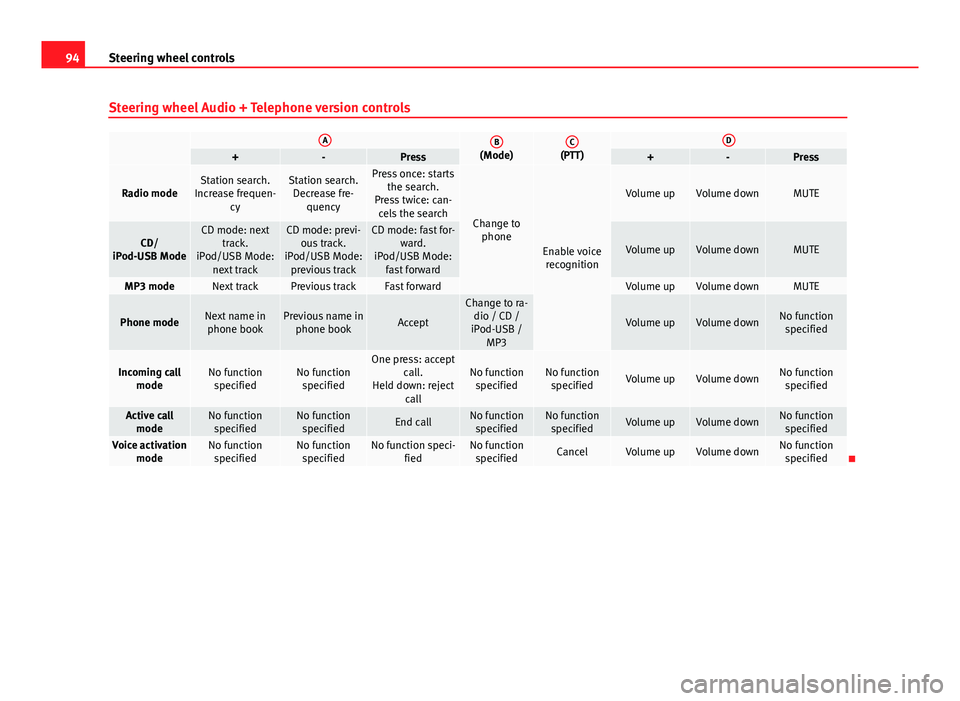
Steering wheel Audio + Telephone version controls
AB(Mode)C(PTT)D+-Press+-Press
Radio modeStation search.
Increase frequen- cyStation search.Decrease fre- quencyPress once: starts the search.
Press twice: can- cels the search
Change to phone
Enable voicerecognition
Volume upVolume downMUTE
CD/
iPod-USB ModeCD mode: next track.
iPod/USB Mode: next trackCD mode: previ-ous track.
iPod/USB Mode: previous trackCD mode: fast for- ward.
iPod/USB Mode: fast forward
Volume upVolume downMUTE
MP3 modeNext trackPrevious trackFast forwardVolume upVolume downMUTE
Phone modeNext name inphone bookPrevious name in phone bookAccept
Change to ra-dio / CD /
iPod-USB / MP3
Volume upVolume downNo functionspecified
Incoming call modeNo functionspecifiedNo functionspecifiedOne press: accept call.
Held down: reject callNo functionspecifiedNo function specifiedVolume upVolume downNo functionspecified
Active call modeNo functionspecifiedNo functionspecifiedEnd callNo functionspecifiedNo function specifiedVolume upVolume downNo functionspecified
Voice activation modeNo functionspecifiedNo functionspecifiedNo function speci- fiedNo functionspecifiedCancelVolume upVolume downNo function specified