fuse Seat Exeo ST 2009 Owner's manual
[x] Cancel search | Manufacturer: SEAT, Model Year: 2009, Model line: Exeo ST, Model: Seat Exeo ST 2009Pages: 316, PDF Size: 8.83 MB
Page 6 of 316
Contents
4Economical and environmentally friendly driving
Driving abroad . . . . . . . . . . . . . . . . . . . . . . . . . . . Trailer towing
. . . . . . . . . . . . . . . . . . . . . . . . . . . . .
Trailer towing . . . . . . . . . . . . . . . . . . . . . . . . . . . .
Removable towing bracket . . . . . . . . . . . . . . . . .
Your vehicle maintenance and cleaning
. . . .
General notes . . . . . . . . . . . . . . . . . . . . . . . . . . .
Vehicle exterior maintenance . . . . . . . . . . . . . . .
Vehicle interior maintenance . . . . . . . . . . . . . . .
Accessories, replacement of parts and
modifications
. . . . . . . . . . . . . . . . . . . . . . . . . . . .
Accessories and spare parts . . . . . . . . . . . . . . . .
Technical modifications . . . . . . . . . . . . . . . . . . .
Mobile telephones and radiotelephones . . . . .
Athermic windscreen* . . . . . . . . . . . . . . . . . . . . .
Checking and refilling levels
. . . . . . . . . . . . . .
Refuelling . . . . . . . . . . . . . . . . . . . . . . . . . . . . . . .
Releasing the tank flap manually . . . . . . . . . . . .
Petrol . . . . . . . . . . . . . . . . . . . . . . . . . . . . . . . . . .
Diesel . . . . . . . . . . . . . . . . . . . . . . . . . . . . . . . . . .
The bonnet . . . . . . . . . . . . . . . . . . . . . . . . . . . . . .
Engine oil . . . . . . . . . . . . . . . . . . . . . . . . . . . . . . .
Cooling system . . . . . . . . . . . . . . . . . . . . . . . . . .
Washer fluid and windscreen wiper blades . . . .
Brake fluid . . . . . . . . . . . . . . . . . . . . . . . . . . . . . .
Battery . . . . . . . . . . . . . . . . . . . . . . . . . . . . . . . . .
Wheels and tyres
. . . . . . . . . . . . . . . . . . . . . . . . .
Wheels . . . . . . . . . . . . . . . . . . . . . . . . . . . . . . . . .
If and when
. . . . . . . . . . . . . . . . . . . . . . . . . . . . . .
Tools, tyre repair kit and spare wheel . . . . . . . .
Changing a wheel . . . . . . . . . . . . . . . . . . . . . . . .
Tyre repair* (Tyre-Mobility-System) . . . . . . . . . .
Fuses . . . . . . . . . . . . . . . . . . . . . . . . . . . . . . . . . .
Bulbs . . . . . . . . . . . . . . . . . . . . . . . . . . . . . . . . . .
Changing bulbs Halogen headlights . . . . . . . . . Changing bulbs. Bi-Xenon AFS headlights . . . .
Changing bulbs for rear lights (in side panel) . .
Changing rear light bulbs (in boot lid) . . . . . . . .
Side indicators . . . . . . . . . . . . . . . . . . . . . . . . . .
Luggage compartment lights . . . . . . . . . . . . . . .
Registration light . . . . . . . . . . . . . . . . . . . . . . . . .
Sunroof light . . . . . . . . . . . . . . . . . . . . . . . . . . . .
Jump-starting . . . . . . . . . . . . . . . . . . . . . . . . . . . .
Towing and tow-starting . . . . . . . . . . . . . . . . . . .
Technical Data
. . . . . . . . . . . . . . . . . . . . . . .
General notes on the technical data
. . . . . . .
Outstanding information . . . . . . . . . . . . . . . . . .
Data on fuel consumption . . . . . . . . . . . . . . . . .
Towing a trailer . . . . . . . . . . . . . . . . . . . . . . . . . .
Wheels . . . . . . . . . . . . . . . . . . . . . . . . . . . . . . . . .
Te chni cal Data
. . . . . . . . . . . . . . . . . . . . . . . . . . . .
Checking fluid levels . . . . . . . . . . . . . . . . . . . . . .
Petrol engine 1.6l 75 kW (102 HP) . . . . . . . . . . .
Petrol engine 1.8l 110 kW (150 HP) . . . . . . . . .
Petrol engine 2.0l 147 kW (200 HP) . . . . . . . . .
Diesel engine 2.0 l 88 kW (120 HP) CR . . . . . . .
Diesel engine 2.0l 105 kW (143 HP) . . . . . . . . .
Diesel engine 2.0l 125 kW (170 HP) . . . . . . . . .
Dimensions and capacities . . . . . . . . . . . . . . . .
Index
. . . . . . . . . . . . . . . . . . . . . . . . . . . . . . . . . .
197
199
200
200
203
211
211
212
217
220
220
220
221
221
222
222
223
224
224
226
228
231
234
237
238
242
242
251
251
254
259
262
264
264 271
277
281
283
283
284
285
285
288
291
291
291
293
294
294
295
295
296
297
298
299
301
302
304
305
ExeoST_EN.book Seite 4 Donnerstag, 3. September 2009 12:24 12
Page 84 of 316

Cockpit
82If the display indicates that one of the lights is not working, this can have a
number of causes:•Bulb failure ⇒page 264.•A “blown” fuse ⇒ page 262, “Changing fuses”.•Faulty electrical wiring.
Have the components replaced or the wiring repaired as necessary by a
specialist garage.WARNING
•Bulbs are highly sensitive to pressure. The glass can break when you
touch the bulb, causing injury.•The high voltage element of gas discharge lamps* (xenon light) must
be handled correctly. Otherwise, there is a risk of death.
Speed warning
Introduction
The speed warning function can help prevent you exceeding
a particular pre-set maximum speed.The speed warning function will warn the driver if a pre-set maximum speed
is exceeded. The system gives an audible warning signal if the set speed is
exceeded by about 10 km/h. A warning symbol will also appear in the display
⇒ fig. 56.
The speed warning function has two different warning speeds, which operate
independently and serve slig htly different purposes:
Speed limit warning 1
With speed limit warning 1, the maximum speed can be changed while
driving. The speed limit that has been set remains stored until the ignition is
switched off, or until it is changed or cleared.
Fig. 56 Display: Speed
warning function
ExeoST_EN.book Seite 82 Donnerstag, 3. September 2009 12:24 12
Page 117 of 316
Unlocking and locking115
Safety First
Controls and equipment
Practical tips
Technical Data
– Carefully insert the flat end of a screwdriver (from the car's tool
kit) at the rear of the glass cover on the interior light ⇒page 114,
fig. 83 .
– Carefully lever off the glass cover.
– Take the crank handle from its mounting on the inside of the fuse box cover ⇒ page 262.
– Insert the crank handle all the way into the hexagonal socket ⇒ page 114, fig. 84.
– Hold the crank handle in position and turn it to close the sun roof.
– Reinstall the glass cover: insert the plastic lugs first and then press the cover upwards.
– Have the fault repaired.
NoteYou can use the screwdriver handle to make it easier to turn the crank. Detach
the handle from the screwdriver and then fit the handle onto the crank.
A1
A2
ExeoST_EN.book Seite 115 Donnerstag, 3. September 2009 12:24 12
Page 264 of 316
If and when
262
Note•Do not use the compressor for longer than 6 minutes. Otherwise, it might
overheat. When the compressor has cooled down, you can use it again.•If tyre sealant should leak out, leave it to dry and then pull it off like foil.•After carrying out a tyre repair remember to buy a new tyre sealant can at
a qualified workshop. This will ensure that the Tyre Mobility System is opera-
tive again.•Please observe legal requirements when doing so.FusesChanging fuses
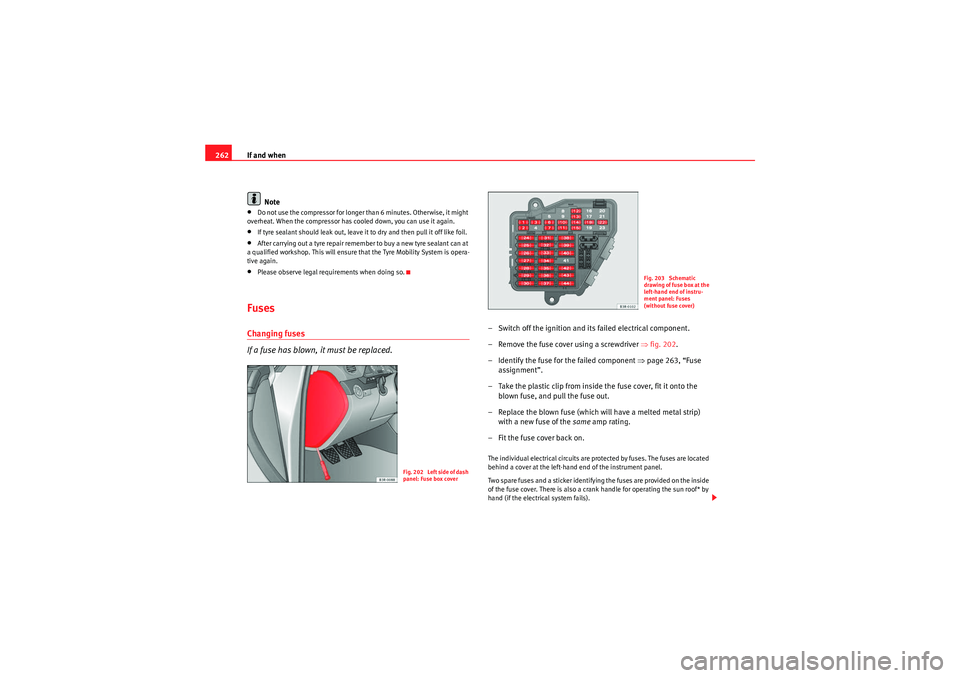
If a fuse has blown, it must be replaced.
– Switch off the ignition and its failed electrical component.
– Remove the fuse cover using a screwdriver ⇒fig. 202 .
– Identify the fuse for the failed component ⇒ page 263, “Fuse
assignment”.
– Take the plastic clip from inside the fuse cover, fit it onto the blown fuse, and pull the fuse out.
– Replace the blown fuse (which will have a melted metal strip) with a new fuse of the same amp rating.
–Fit the fuse cover back on.The individual electrical circuits are protected by fuses. The fuses are located
behind a cover at the left-hand end of the instrument panel.
Two spare fuses and a sticker identifying the fuses are provided on the inside
of the fuse cover. There is also a crank handle for operating the sun roof* by
hand (if the electrical system fails).
Fig. 202 Left side of dash
panel: Fuse box cover
Fig. 203 Schematic
drawing of fuse box at the
left-hand end of instru-
ment panel: Fuses
(without fuse cover)
ExeoST_EN.book Seite 262 Donnerstag, 3. September 2009 12:24 12
Page 265 of 316
If and when263
Safety First
Controls and equipment
Practical tips
Technical Data
Caution
Never “repair” damaged fuses and never replace them with fuses with a
higher rating. Failure to comply could result in fire. It could also cause
damage to other parts of the electrical system.
Note
If a newly replaced fuse blows again after a short time, the electrical system
must be checked by a qualified workshop as soon as possible.Fuse assignment
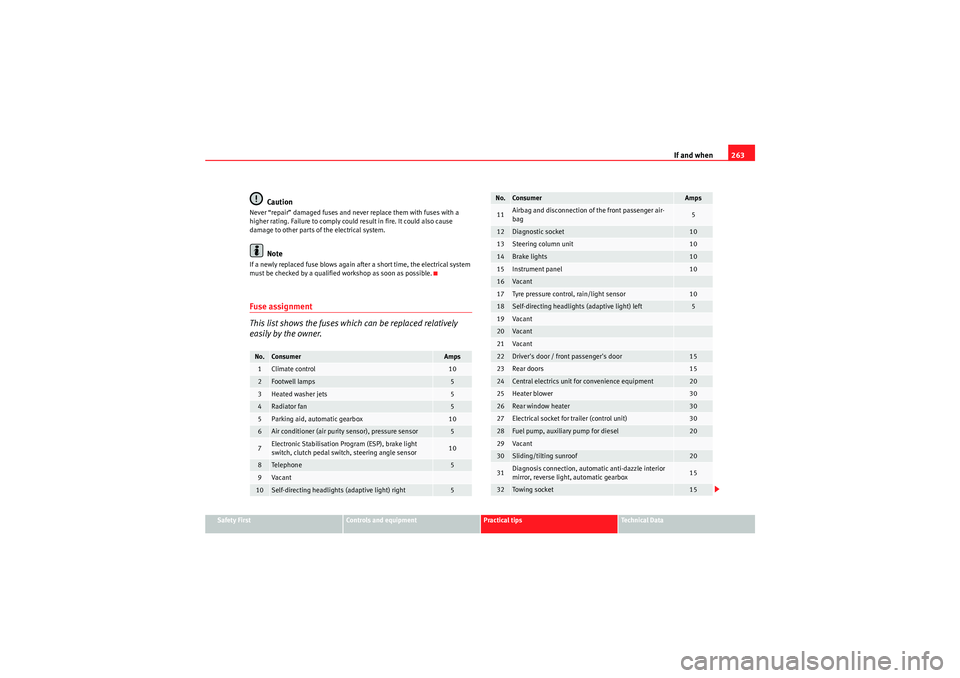
This list shows the fuses which can be replaced relatively
easily by the owner.No.
Consumer
Amps
1
Climate control
10
2
Footwell lamps
5
3
Heated washer jets
5
4
Radiator fan
5
5
Parking aid, automatic gearbox
10
6
Air conditioner (air purity sensor), pressure sensor
5
7
Electronic Stabilisation Program (ESP), brake light
switch, clutch pedal switch, steering angle sensor
10
8
Te le p hon e
5
9
Va can t
10
Self-directing headlights (adaptive light) right
5
11
Airbag and disconnection of the front passenger air-
bag
5
12
Diagnostic socket
10
13
Steering column unit
10
14
Brake lights
10
15
Instrument panel
10
16
Va can t
17
Tyre pressure control, rain/light sensor
10
18
Self-directing headlights (adaptive light) left
5
19
Va can t
20
Va can t
21
Va can t
22
Driver's door / front passenger's door
15
23
Rear doors
15
24
Central electrics unit for convenience equipment
20
25
Heater blower
30
26
Rear window heater
30
27
Electrical socket for trailer (control unit)
30
28
Fuel pump, auxiliary pump for diesel
20
29
Va can t
30
Sliding/tilting sunroof
20
31
Diagnosis connection, automatic anti-dazzle interior
mirror, reverse light, automatic gearbox
15
32
Towi ng s ocke t
15
No.
Consumer
Amps
ExeoST_EN.book Seite 263 Donnerstag, 3. September 2009 12:24 12
Page 266 of 316
If and when
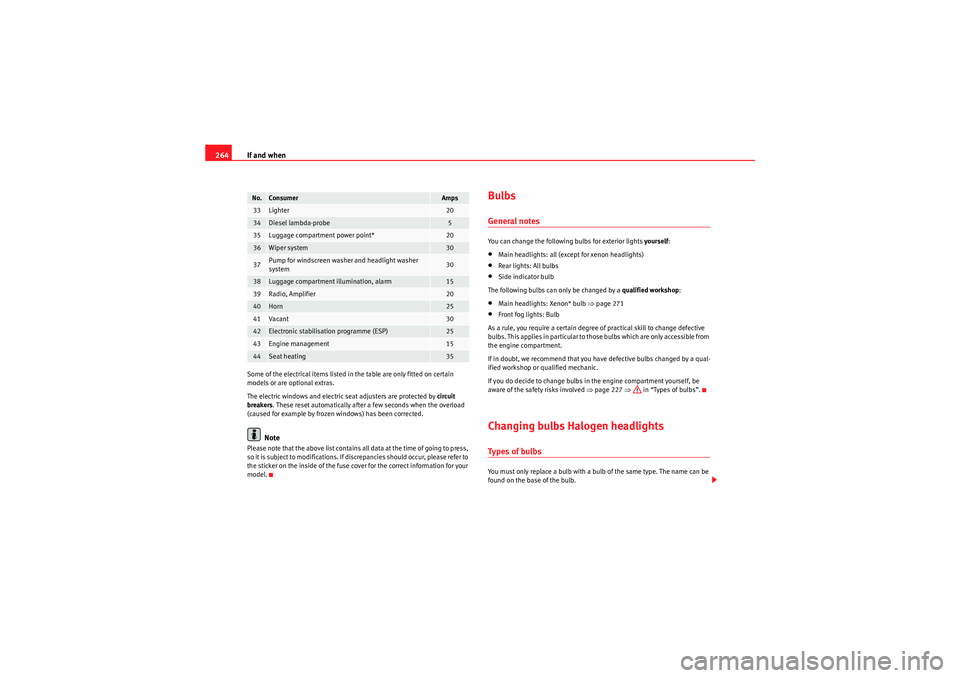
264Some of the electrical items listed in the table are only fitted on certain
models or are optional extras.
The electric windows and electric seat adjusters are protected by circuit
breakers . These reset automatically after a few seconds when the overload
(caused for example by frozen windows) has been corrected.
Note
Please note that the above list contains all data at the time of going to press,
so it is subject to modifications. If discrepancies should occur, please refer to
the sticker on the inside of the fuse cover for the correct information for your
model.
BulbsGeneral notesYou can change the following bulbs for exterior lights yourself:•Main headlights: all (except for xenon headlights)•Rear lights: All bulbs•Side indicator bulb
The following bulbs can only be changed by a qualified workshop:•Main headlights: Xenon* bulb ⇒page 271•Front fog lights: Bulb
As a rule, you require a certain degree of practical skill to change defective
bulbs. This applies in particular to those bulbs which are only accessible from
the engine compartment.
If in doubt, we recommend that you have defective bulbs changed by a qual-
ified workshop or qualified mechanic.
If you do decide to change bulbs in the engine compartment yourself, be
aware of the safety risks involved ⇒page 227 ⇒ in “Types of bulbs”.Changing bulbs Halogen headlightsTypes of bulbsYou must only replace a bulb with a bulb of the same type. The name can be
found on the base of the bulb.
33
Lighter
20
34
Diesel lambda-probe
5
35
Luggage compartment power point*
20
36
Wiper system
30
37
Pump for windscreen washer and headlight washer
system
30
38
Luggage compartment illumination, alarm
15
39
Radio, Amplifier
20
40
Horn
25
41
Va can t
30
42
Electronic stabilisation programme (ESP)
25
43
Engine management
15
44
Seat heating
35
No.
Consumer
Amps
ExeoST_EN.book Seite 264 Donnerstag, 3. September 2009 12:24 12
Page 310 of 316
Index
308Engine oil . . . . . . . . . . . . . . . . . . . . . . . . . . . . . . 228
Checking oil level . . . . . . . . . . . . . . . . . . . . 230
Consumption . . . . . . . . . . . . . . . . . . . . . . . . 230
Oil pressure too low . . . . . . . . . . . . . . . . . . . 78
Oil properties . . . . . . . . . . . . . . . . . . . . . . . . 229
Oil sensor defective . . . . . . . . . . . . . . . . . . . 80
Topping up . . . . . . . . . . . . . . . . . . . . . . . . . . 230
Environment . . . . . . . . . . . . . . . . . . . . . . . . . . . 197 Environmental friendliness . . . . . . . . . . . . 198
Environmental tip Avoiding pollution . . . . . . . . . . . . . . . . . . . . 223
Environmentally friendly driving . . . . . . . . . . . 197
Exhaust gas purification system . . . . . . . . . . . 196
Exterior mirrors . . . . . . . . . . . . . . . . . . . . . . . . . 214FFabric trim cleaning . . . . . . . . . . . . . . . . . . . . . 218
Fastening rings . . . . . . . . . . . . . . . . . . . . . . . . . . 17
Filling the tank Releasing the tank flap manually . . . . . . . 223
Floor mats . . . . . . . . . . . . . . . . . . . . . . . . . . . . . . 16
Fog lights . . . . . . . . . . . . . . . . . . . . . . . . . . . . . . 118
Front airbags . . . . . . . . . . . . . . . . . . . . . . . . . . . . 31 Description . . . . . . . . . . . . . . . . . . . . . . . . . . 31
Front drink holders . . . . . . . . . . . . . . . . . . . . . . 153
Front passenger airbag deactivation . . . . . . . . . 44
Frontal airbags Operation . . . . . . . . . . . . . . . . . . . . . . . . . . . . 32
safety notes . . . . . . . . . . . . . . . . . . . . . . . . . . 34 Fuel
Diesel . . . . . . . . . . . . . . . . . . . . . . . . . . . . . . 224
Fuel gauge . . . . . . . . . . . . . . . . . . . . . . . . . . . 63
Fuel level low . . . . . . . . . . . . . . . . . . . . . . . . . 80
Instantaneous fuel consumption . . . . . . . . . 85
Petrol . . . . . . . . . . . . . . . . . . . . . . . . . . . . . . 224
Fuel range . . . . . . . . . . . . . . . . . . . . . . . . . . . 73, 85
Fuel tank opening the fuel tank flap . . . . . . . . . . . . . 222
Fuel: save . . . . . . . . . . . . . . . . . . . . . . . . . . . . . . 197
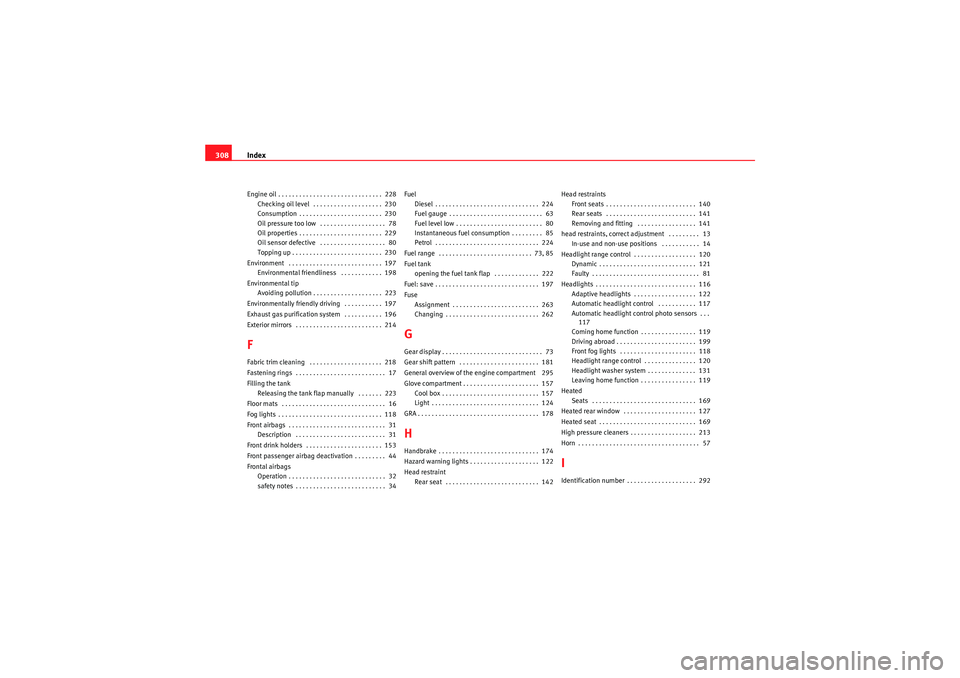
Fuse Assignment . . . . . . . . . . . . . . . . . . . . . . . . . 263
Changing . . . . . . . . . . . . . . . . . . . . . . . . . . . 262
GGear display . . . . . . . . . . . . . . . . . . . . . . . . . . . . . 73
Gear shift pattern . . . . . . . . . . . . . . . . . . . . . . . 181
General overview of the engine compartment 295
Glove compartment . . . . . . . . . . . . . . . . . . . . . . 157Cool box . . . . . . . . . . . . . . . . . . . . . . . . . . . . 157
Light . . . . . . . . . . . . . . . . . . . . . . . . . . . . . . . 124
GRA . . . . . . . . . . . . . . . . . . . . . . . . . . . . . . . . . . . 178HHandbrake . . . . . . . . . . . . . . . . . . . . . . . . . . . . . 174
Hazard warning lights . . . . . . . . . . . . . . . . . . . . 122
Head restraint Rear seat . . . . . . . . . . . . . . . . . . . . . . . . . . . 142 Head restraints
Front seats . . . . . . . . . . . . . . . . . . . . . . . . . . 140
Rear seats . . . . . . . . . . . . . . . . . . . . . . . . . . 141
Removing and fitting . . . . . . . . . . . . . . . . . 141
head restraints, correct adjustment . . . . . . . . . 13 In-use and non-use positions . . . . . . . . . . . 14
Headlight range control . . . . . . . . . . . . . . . . . . 120 Dynamic . . . . . . . . . . . . . . . . . . . . . . . . . . . . 121
Faulty . . . . . . . . . . . . . . . . . . . . . . . . . . . . . . . 81
Headlights . . . . . . . . . . . . . . . . . . . . . . . . . . . . . 116 Adaptive headlights . . . . . . . . . . . . . . . . . . 122
Automatic headlight control . . . . . . . . . . . 117
Automatic headlight control photo sensors . . .117
Coming home function . . . . . . . . . . . . . . . . 119
Driving abroad . . . . . . . . . . . . . . . . . . . . . . . 199
Front fog lights . . . . . . . . . . . . . . . . . . . . . . 118
Headlight range control . . . . . . . . . . . . . . . 120
Headlight washer system . . . . . . . . . . . . . . 131
Leaving home function . . . . . . . . . . . . . . . . 119
Heated Seats . . . . . . . . . . . . . . . . . . . . . . . . . . . . . . 169
Heated rear window . . . . . . . . . . . . . . . . . . . . . 127
Heated seat . . . . . . . . . . . . . . . . . . . . . . . . . . . . 169
High pressure cleaners . . . . . . . . . . . . . . . . . . . 213
Horn . . . . . . . . . . . . . . . . . . . . . . . . . . . . . . . . . . . 57
IIdentification number . . . . . . . . . . . . . . . . . . . . 292
ExeoST_EN.book Seite 308 Donnerstag, 3. September 2009 12:24 12