key Seat Exeo ST 2010 MEDIA SYSTEM 1.0
[x] Cancel search | Manufacturer: SEAT, Model Year: 2010, Model line: Exeo ST, Model: Seat Exeo ST 2010Pages: 124, PDF Size: 6.27 MB
Page 71 of 124
Mobile phone system
70
–Press the Dial control button.Loading the phone book entries
Provided your mobile phone supports this function, the phone book entries
will be automatically scanned into the memory of the mobile phone adapter
after you have switched on the ignition and inserted the mobile phone in the
adapter. This process may take several minutes, depending on how many
entries are stored on the mobile phone. The message Please wait... will
appear on the instrument panel display during this process.
The last four phone books loaded into the mobile phone adapter remain
stored there. When you link a fifth mobile phone to the mobile phone
adapter, the phone book from the mobile phone which has not been used for
the longest time is deleted from the mobile phone adapter. Up to 500 phone
book entries per phone book can be stored in the memory.
Using the mobile phone again later
If the SIM card is identical, the phone book entries are already stored in the
mobile phone adapter. You can use the phone book almost immediately.
The system searches for changes or new entries and stores them automati-
cally. This process can take several minutes. If your vehicle is equipped with
the speech control system* ⇒page 75, you cannot record any spoken names
in the phone book for the speech control system while phone book entries are
being loaded from the mobile phone.
Displaying the phone book entries
The phone book entries are displayed in alphabetical order together with a
category symbol ⇒page 69, fig. 81, e.g. SIM card, private, business, mobile
phone or telephone symbol.
Note
•Which phone book entries are displayed by the navigation system will
depend on the mobile phone you are using.
•In certain cases, phone book entries from a mobile phone may not be
transmitted in alphabetical order. If more than 500 phone book entries exist,
entries with certain initial letters may not appear on the navigation system
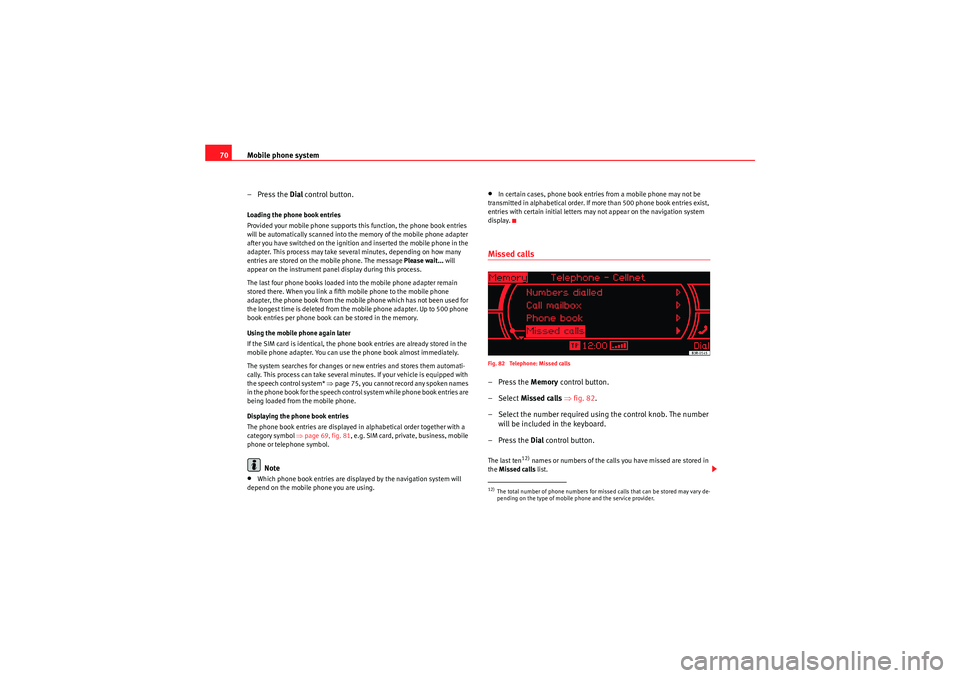
display.Missed callsFig. 82 Telephone: Missed calls–Press the Memory control button.
– Select Missed calls ⇒fig. 82 .
– Select the number required using the control knob. The number will be included in the keyboard.
–Press the Dial control button.The last ten
12) names or numbers of the calls you have missed are stored in
the Missed calls list.
12)The total number of phone numbers for missed calls that can be stored may vary de-
pending on the type of mobile phone and the service provider.
Media System 1.0_EN.book Seite 70 Donnerstag, 10. September 2009 1:52 13
Page 72 of 124
Mobile phone system71
Operating
RADIO, CD/MP3
TEL (telephone)
NAV, INFO
SETUP
Depending on your mobile phone type, the telephone number and name of
the most recently missed call will appear either at the first position or last
position in the list.
Received calls–Press the Memory
control button in a telephone menu.
– Select Received calls ⇒ page 68, fig. 79 . The last ten calls that
have been answered will be stored.
– Select the number required using the control knob. The number will be included in the keyboard.
–Press the Dial control button.The last ten
13) names or numbers of the calls you have answered are stored
in the Calls received list.
Depending on your mobile phone type, the telephone number and name of
the most recently received call will appear either in the first position or last
position in the list.
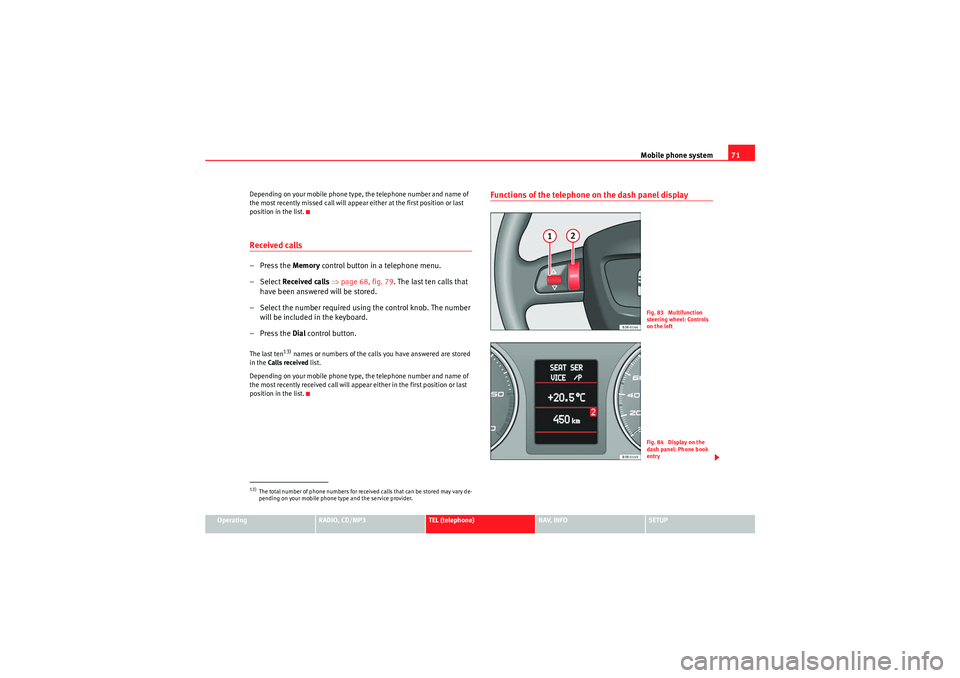
Functions of the telephone on the dash panel display
13)The total number of phone numbers for received calls that can be stored may vary de-
pending on your mobile phone type and the service provider.
Fig. 83 Multifunction
steering wheel: Controls
on the leftFig. 84 Display on the
dash panel: Phone book
entry
Media System 1.0_EN.book Seite 71 Donnerstag, 10. September 2009 1:52 13
Page 75 of 124
Mobile phone system
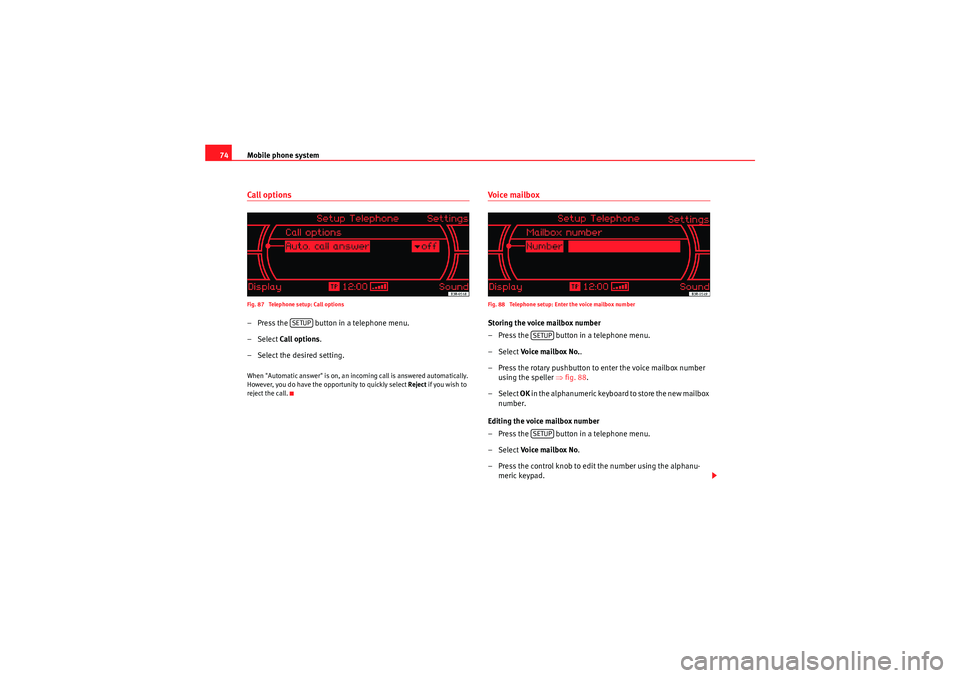
74Call optionsFig. 87 Telephone setup: Call options– Press the button in a telephone menu.
– Select Call options .
– Select the desired setting.When "Automatic answer" is on, an incoming call is answered automatically.
However, you do have the opportunity to quickly select Reject if you wish to
reject the call.
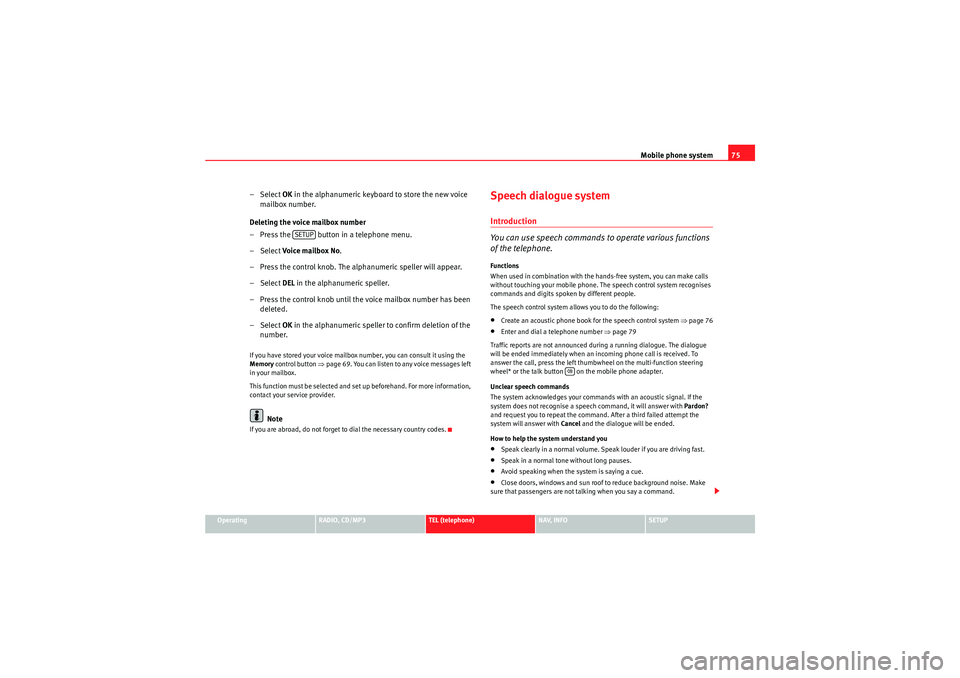
Voice mailboxFig. 88 Telephone setup: Enter the voice mailbox numberStoring the voice mailbox number
– Press the button in a telephone menu.
– Select Voice mailbox No. .
– Press the rotary pushbutton to enter the voice mailbox number using the speller ⇒fig. 88 .
– Select OK in the alphanumeric keyboard to store the new mailbox
number.
Editing the voice mailbox number
– Press the button in a telephone menu.
– Select Voi ce ma ilbox N o .
– Press the control knob to edit the number using the alphanu- meric keypad.
SETUP
SETUPSETUP
Media System 1.0_EN.book Seite 74 Donnerstag, 10. September 2009 1:52 13
Page 76 of 124
Mobile phone system75
Operating
RADIO, CD/MP3
TEL (telephone)
NAV, INFO
SETUP
– Select OK in the alphanumeric keyboard to store the new voice
mailbox number.
Deleting the voice mailbox number
– Press the button in a telephone menu.
– Select Voice mailbox No.
– Press the control knob. The alphanumeric speller will appear.
– Select DEL in the alphanumeric speller.
– Press the control knob until the voice mailbox number has been deleted.
– Select OK in the alphanumeric speller to confirm deletion of the
number.If you have stored your voice mailbox number, you can consult it using the
Memory control button ⇒page 69. You can listen to any voice messages left
in your mailbox.
This function must be selected and set up beforehand. For more information,
contact your service provider.
Note
If you are abroad, do not forget to dial the necessary country codes.
Speech dialogue systemIntroduction
You can use speech commands to operate various functions
of the telephone.Functions
When used in combination with the hands-free system, you can make calls
without touching your mobile phone. The speech control system recognises
commands and digits spoken by different people.
The speech control system allows you to do the following:•Create an acoustic phone book for the speech control system ⇒page 76•Enter and dial a telephone number ⇒page 79
Traffic reports are not announced during a running dialogue. The dialogue
will be ended immediately when an incoming phone call is received. To
answer the call, press the left thumbwheel on the multi-function steering
wheel* or the talk button on the mobile phone adapter.
Unclear speech commands
The system acknowledges your commands with an acoustic signal. If the
system does not recognise a speech command, it will answer with Pardon?
and request you to repeat the command. After a third failed attempt the
system will answer with Cancel and the dialogue will be ended.
How to help the system understand you•Speak clearly in a normal volume. Speak louder if you are driving fast.•Speak in a normal tone without long pauses.•Avoid speaking when the system is saying a cue.•Close doors, windows and sun roof to reduce background noise. Make
sure that passengers are not talking when you say a command.
SETUP
Media System 1.0_EN.book Seite 75 Donnerstag, 10. September 2009 1:52 13
Page 80 of 124
Mobile phone system79
Operating
RADIO, CD/MP3
TEL (telephone)
NAV, INFO
SETUP
During the dialogue, you can use the commands
REPEAT, BACK , and
DELETE .
Entering a PIN
You can change the PIN code for the SIM card via the speech
control system.– Switch on the speech control system ⇒page 77.
–Give the command ENTER PIN .
– Say the individual digits of your PIN code.
– Say the command STORE.If the PIN code is more than 8 digits long, the speech control system will
decline and give the cue The PIN is too long. If the specified PIN code is incor-
rect, the system will say The PIN is incorrect. If the wrong PIN code is entered
three times, the SIM card will be blocked. The SIM card can be unblocked with the PUK (personal unblocking key). The unblocking key can only be entered
on the mobile phone keypad and not via the speech control system.
Dialling a number
A telephone number can be specified to the system and then
dialled.– Switch on the speech control system
⇒page 77.
–Say the command DIAL NUMBER. The speech control system will
ask you to enter a telephone number.
– Say the digits of the telephone number individually or in groups. After each block of digits you specify (separated by a brief pause)
the system will repeat the digits.
–Say DIAL when you have completed the number entry. The tele-
phone number will be dialled.Redial– Switch on the speech control system ⇒page 77.
–Say the command REDIAL. The last telephone number you used
will be dialled.
delete a name tag from the
phone book for the speech
control system.
DELETE NAME ⇒ page 81, or
DELETE PHONE BOOK ⇒ page 82
play back name tags from the
phone book of the speech con-
trol system.
PLAY PHONE BOOK ⇒ page 82
delete name tags from the
phone book for the speech
control system.
DELETE PHONE BOOK ⇒ page 82
To . . .
Speak this command:
Media System 1.0_EN.book Seite 79 Donnerstag, 10. September 2009 1:52 13
Page 92 of 124
NAV (navigation system)91
Operating
RADIO, CD/MP3
TEL (telephone)
NAV, INFO
SETUP
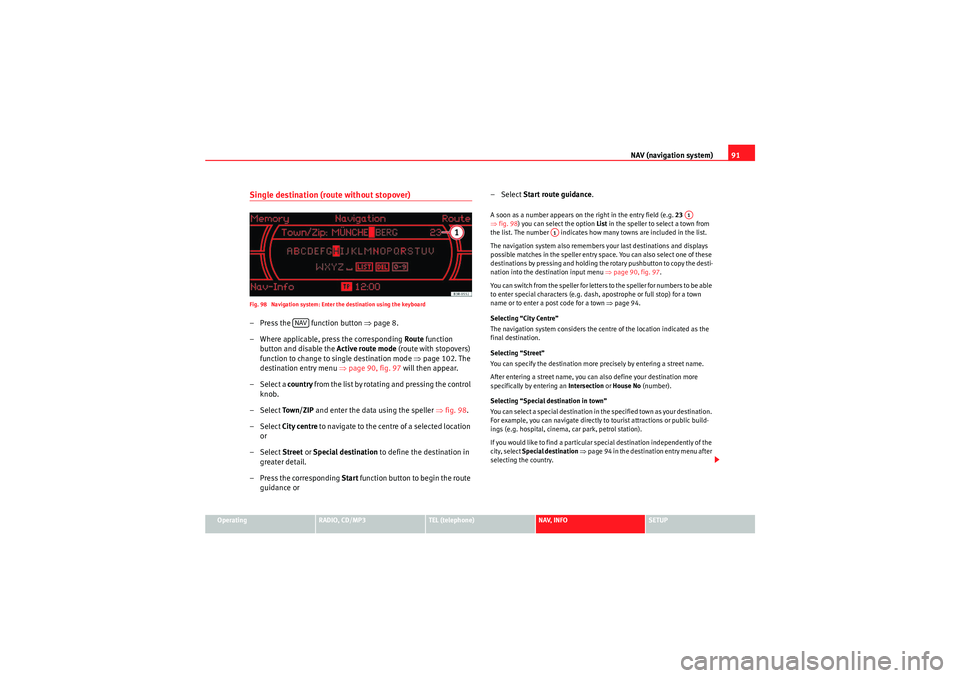
Single destination (route without stopover)Fig. 98 Navigation system: Enter the destination using the keyboard– Press the function button ⇒page 8.
– Where applicable, press the corresponding Route function
button and disable the Active route mode (route with stopovers)
function to change to single destination mode ⇒page 102. The
destination entry menu ⇒page 90, fig. 97 will then appear.
– Select a country f r o m t h e l ist b y r o ta t i n g a n d p r e ssi n g t h e co n t ro l
knob.
– Select To w n / Z I P and enter the data using the speller ⇒fig. 98 .
– Select City centre to navigate to the centre of a selected location
or
– Select Street or Special destination to define the destination in
greater detail.
– Press the corresponding Start function button to begin the route
guidance or – Select
Start route guidance .
A soon as a number appears on the right in the entry field (e.g. 23
⇒ fig. 98 ) you can select the option List in the speller to select a town from
the list. The number indicates how many towns are included in the list.
The navigation system also remembers your last destinations and displays
possible matches in the speller entry space. You can also select one of these
destinations by pressing and holding the rotary pushbutton to copy the desti-
nation into the destination input menu ⇒page 90, fig. 97.
You can switch from the speller for letters to the speller for numbers to be able
to enter special characters (e.g. dash, apostrophe or full stop) for a town
name or to enter a post code for a town ⇒page 94.
Selecting “City Centre”
The navigation system considers the centre of the location indicated as the
final destination.
Selecting “Street”
You can specify the destination more precisely by entering a street name.
After entering a street name, you can also define your destination more
specifically by entering an Intersection or House No (number).
Selecting “Special destination in town”
You can select a special destination in the specified town as your destination.
For example, you can navigate directly to tourist attractions or public build-
ings (e.g. hospital, cinema, car park, petrol station).
If you would like to find a particular special destination independently of the
city, select Special destination ⇒ page 94 in the destination entry menu after
selecting the country.
NAV
A1
A1
Media System 1.0_EN.book Seite 91 Donnerstag, 10. September 2009 1:52 13
Page 93 of 124
NAV (navigation system)
92
Note•Once you have entered a city in the keyboard, you can confirm the entry
by pressing and holding down the control knob. When you have entered the
first few letters of a place name and can already see the place you wish to
select listed in the speller display, you can press the rotary pushbutton (long
press) to switch to the list of places.•Once they have been entered, you can store destinations in the directory
⇒ page 98 and then navigate to them again later, using the “Load from direc-
tory” function ⇒page 99.•Navigation to the destination can be modified or cancelled ⇒page 95.Route plan (route with stopover)
In the route with stopover mode you can enter up to six inter-
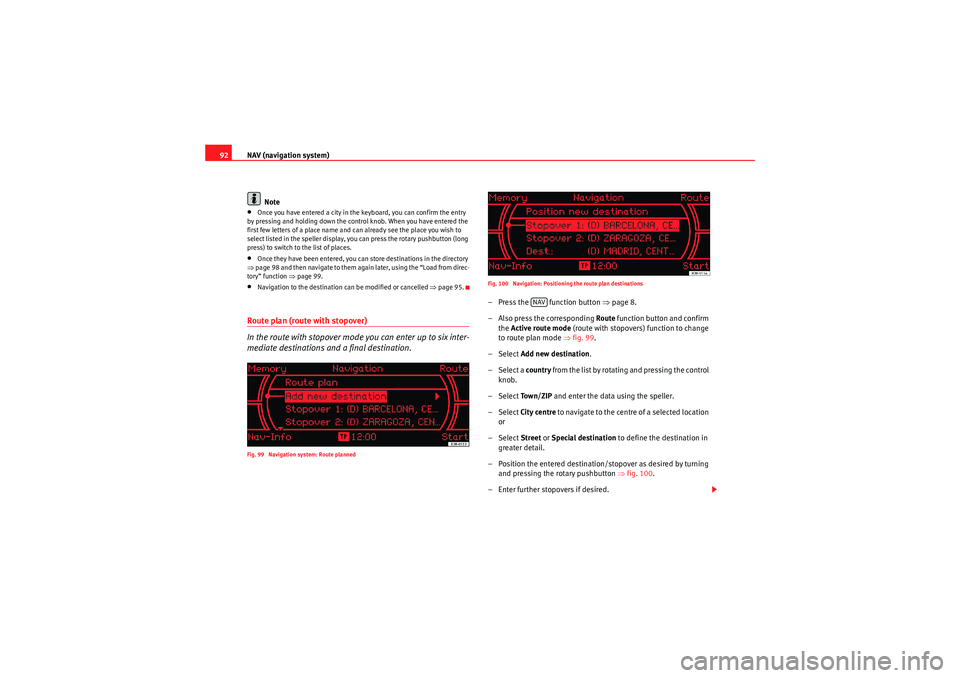
mediate destinations and a final destination.Fig. 99 Navigation system: Route planned Fig. 100 Navigation: Positioning the route plan destinations
– Press the function button
⇒page 8.
– Also press the corresponding Route function button and confirm
the Active route mode (route with stopovers) function to change
to route plan mode ⇒fig. 99 .
– Select Add new destination .
– Select a country from the list by rotating and pressing the control
knob.
– Select To w n / Z I P and enter the data using the speller.
– Select City centre to navigate to the centre of a selected location
or
– Select Street or Special destination to define the destination in
greater detail.
– Position the entered destination/ stopover as desired by turning
and pressing the rotary pushbutton ⇒fig. 100 .
– Enter further stopovers if desired.
NAV
Media System 1.0_EN.book Seite 92 Donnerstag, 10. September 2009 1:52 13
Page 94 of 124
NAV (navigation system)93
Operating
RADIO, CD/MP3
TEL (telephone)
NAV, INFO
SETUP
– Press the control button Start ⇒ page 92, fig. 99 to begin the
route guidance.A soon as a number appears on the right in the entry field (e.g. 23
⇒ page 91, fig. 98) you can select the option List in the speller to select a
town from the list. The number indicates how many towns are included in
the list.
The navigation system also remembers your last destinations and displays
possible matches in the speller entry space. You can also select one of these
destinations by pressing and holding the rotary pushbutton to copy the desti-
nation into the destination input menu ⇒ page 90, fig. 97.
You can switch from the speller for letters to the speller for numbers to be able
to enter special characters (e.g. dash, apostrophe or full stop) for a town
name or to enter a post code for a town ⇒page 94.
Follow the directions shown in the dash panel display ⇒page 88 and the
spoken cues ⇒page 87.
Selecting “City Centre”
The navigation system considers the centre of the location indicated as the
final destination.
Selecting “Street”
You can specify the destination more precisely by entering a street name.
After entering a street name, you can also define your destination more
specifically by entering an Intersection or House No (number).
Selecting “Special destination in town”
You can select a special destination in the specified city. For example, you can
navigate directly to tourist attractions or public facilities (e.g. hospital,
cinema, recreation areas). If you would like to find a particular special destination independently of the
city, select
Special destination ⇒ page 94 in the destination entry menu after
selecting the country.
Note
•Once you have entered a city in the keyboard, you can confirm the entry
by pressing and holding down the control knob. When you have entered the
first few letters of a place name and can already see the place you wish to
select listed in the speller display, you can press the rotary pushbutton (long
press) to switch to the list of places.•Once the destinations have been entered, they can be stored in the direc-
tory ⇒ page 100 from where they can be loaded (using the “Load route”
⇒ page 99 function) for reuse as a navigation destination.•Route options can be changed at any time during the route guidance; the
system will then recalculate the route accordingly ⇒page 95.
A1
A1
Media System 1.0_EN.book Seite 93 Donnerstag, 10. September 2009 1:52 13
Page 120 of 124
Index119
Index
AAccept call . . . . . . . . . . . . . . . . . . . . . . . . . . . . . . 74
Alphanumeric keyboard . . . . . . . . . . . . . . . . . . . 21
Answering a call . . . . . . . . . . . . . . . . . . . . . . . . . . 65
Answering the phone . . . . . . . . . . . . . . . . . . . . . 65
Audio source
AUX-IN connection . . . . . . . . . . . . . . . . . . . . . 45
CD . . . . . . . . . . . . . . . . . . . . . . . . . . . . . . . . . . 45
Automatic seek mode . . . . . . . . . . . . . . . . . . . . . 38
Aux-in . . . . . . . . . . . . . . . . . . . . . . . . . . . . . . . . . . 32
AUX-IN connection Connecting portable player . . . . . . . . . . . . . . 32
Selecting source . . . . . . . . . . . . . . . . . . . . . . 45BBluetooth . . . . . . . . . . . . . . . . . . . . . . . . . . . . . . . 60CCall optionsAccept call . . . . . . . . . . . . . . . . . . . . . . . . . . . 74
CD CD/MP3 function selector button . . . . . . . . . 44
CD - General notes Control button: Source . . . . . . . . . . . . . . . . . 45
CD - Source Selecting . . . . . . . . . . . . . . . . . . . . . . . . . . . . 45 CD changer . . . . . . . . . . . . . . . . . . . . . . . . . . . . . . 47
CD player
Ejecting CDs . . . . . . . . . . . . . . . . . . . . . . . . . . 25
Loading navigation CD . . . . . . . . . . . . . . . . . 25
CD Setup MP3 track display . . . . . . . . . . . . . . . . . . . . . 52
CD/TV (function button) See "Compact discs" . . . . . . . . . . . . . . . . . . . 46
CDs Pausing/Resuming playback . . . . . . . . . . . . 46
Compact discs Basic functions . . . . . . . . . . . . . . . . . . . . . . . 48
Main menu . . . . . . . . . . . . . . . . . . . . . . . . . . . 46
Selecting a track . . . . . . . . . . . . . . . . . . . . . . 46
Setup menu . . . . . . . . . . . . . . . . . . . . . . . . . . 52
Control buttons . . . . . . . . . . . . . . . . . . . . . . . . . . 10 RETURN button . . . . . . . . . . . . . . . . . . . . . . . . 10
Control Panel Function selector buttons . . . . . . . . . . . . . . . . 8
Control panel Cleaning and care . . . . . . . . . . . . . . . . . . . . . . 7
Control buttons . . . . . . . . . . . . . . . . . . . . . . . 10
Forward/reverse buttons . . . . . . . . . . . . . . . . 11
RETURN button . . . . . . . . . . . . . . . . . . . . . . . . 10
Rotary pushbutton . . . . . . . . . . . . . . . . . . . . . . 9
Controls Control buttons . . . . . . . . . . . . . . . . . . . . . . . 10
Forward/reverse buttons . . . . . . . . . . . . . . . . 11 Function selector buttons . . . . . . . . . . . . . . . . 8
Rotary pushbutton . . . . . . . . . . . . . . . . . . . . . . 9
DDeleting data . . . . . . . . . . . . . . . . . . . . . . . . . . . . 22
Display
A guide to the display . . . . . . . . . . . . . . . . . . 17
Cleaning and care . . . . . . . . . . . . . . . . . . . . . . 7
Elements: alphanumeric keyboard . . . . . . . 21
Elements: cursor and arrows . . . . . . . . . . . . 19
Elements: function symbols . . . . . . . . . . . . . 23
Elements: selection boxes . . . . . . . . . . . . . . 20
Elements: status line . . . . . . . . . . . . . . . . . . . 18
Elements: tick boxes . . . . . . . . . . . . . . . . . . . 20
Overview . . . . . . . . . . . . . . . . . . . . . . . . . . . . 17
Selected option . . . . . . . . . . . . . . . . . . . . . . . 21
Drives iPod: interface . . . . . . . . . . . . . . . . . . . . . . . . 27
USB: interface . . . . . . . . . . . . . . . . . . . . . . . . 29
DTMF tones . . . . . . . . . . . . . . . . . . . . . . . . . . . . . 63
Dynamic navigation . . . . . . . . . . . . . . . . . . . . . . . 87EEnding a call . . . . . . . . . . . . . . . . . . . . . . . . . . . . 66
Entering data . . . . . . . . . . . . . . . . . . . . . . . . . . . . 22
Media System 1.0_EN.book Seite 119 Donnerstag, 10. September 2009 1:52 13