navigation update Seat Exeo ST 2011 MEDIA SYSTEM E
[x] Cancel search | Manufacturer: SEAT, Model Year: 2011, Model line: Exeo ST, Model: Seat Exeo ST 2011Pages: 167, PDF Size: 5.48 MB
Page 100 of 167
Navigation (NAV)*99
Operating
RADIO, MEDIA (audiovisual
systems)
NAME, TEL
NAV, INFO
CAR, SETUP
– Wait until you reach one of the countries that is covered by both
DVDs. These countries serve as an overlap zone where you can
change the DVDs.
– Without stopping the route guidance, put the DVD for the country of your destination into the navigation drive once again
⇒page 23. Route guidance will be continued automatically.When navigating with two different DVDs, please note the following:•The destination flag will be displayed to indicate the direct line between
your starting point and your destination.•The system does not process the detailed navigation information on the
DVD which is not being used.•Some countries are covered by both DVDs. We recommend that you
change over the DVDs in good time before leaving this overlap zone.Note
•The packaging of the navigation DVD will indicate which countries are
covered by the DVD.•The traffic infrastructure is subject to changes. Therefore, the information
stored on the navigation DVD may not always correspond exactly to the roads
and other features that you encounter.•You can obtain navigation DVDs from your dealer. Your dealer will also be
able to provide information on updates which are available for the CDs.
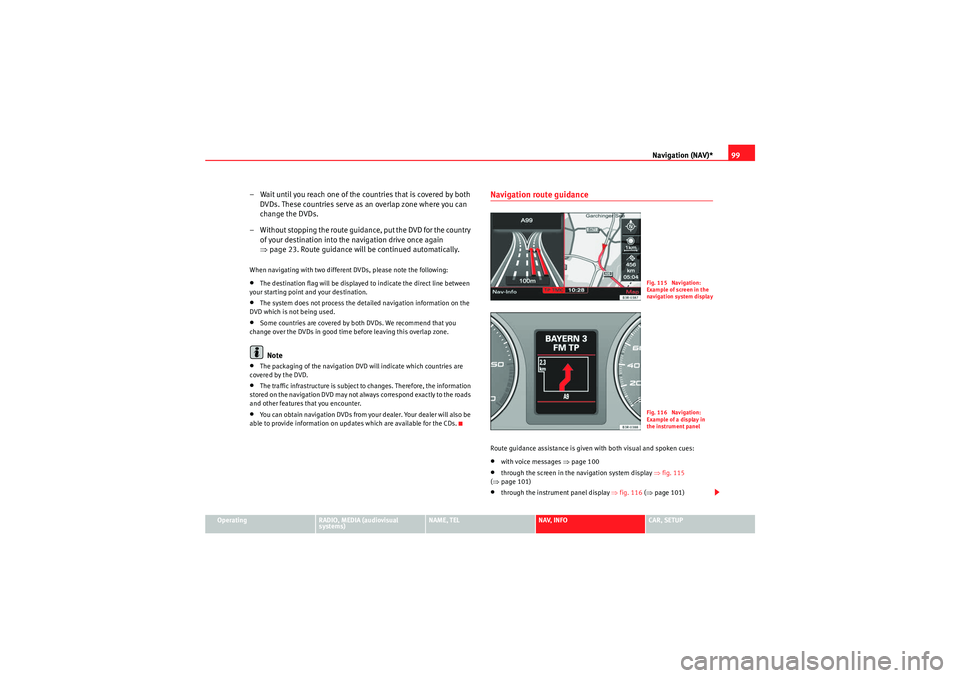
Navigation route guidanceRoute guidance assistance is given with both visual and spoken cues:•with voice messages ⇒page 100•through the screen in the navigation system display ⇒fig. 115
( ⇒ page 101)•through the instrument panel display ⇒fig. 116 (⇒ page 101)
Fig. 115 Navigation:
Example of screen in the
navigation system displa
y
Fig. 116 Navigation:
Example of a display in
the instrument panel
media_systemE_EN.book Seite 99 Montag, 21. September 2009 1:48 13
Page 117 of 167
Navigation (NAV)*
116
– In the main navigation menu ⇒ page 104, fig. 121, select the
top destination from the “Start route guidance” list.
– Select Start route guidance ⇒ page 112.If you have activated the Display as top destination function when making
entries in the directory ( ⇒page 117 or ⇒page 66) ⇒page 115, fig. 135 ,
they are listed in a destination entry menu ⇒page 104, fig. 121 under the
menu item “Start route guidance” ⇒page 118.
You can choose to have entries which are stored in the directory as top desti-
nations displayed with a “push pin” on the map ⇒ page 115, fig. 136; to
activate this function, call up the “Map contents” submenu and place a
checkmark
next to Top destinations ⇒ page 134.
"Memory" MenuLast destinations
The last entered destinations are stored and can be loaded
directly as a new destination.
–Press the Memory control button in the navigation menu.
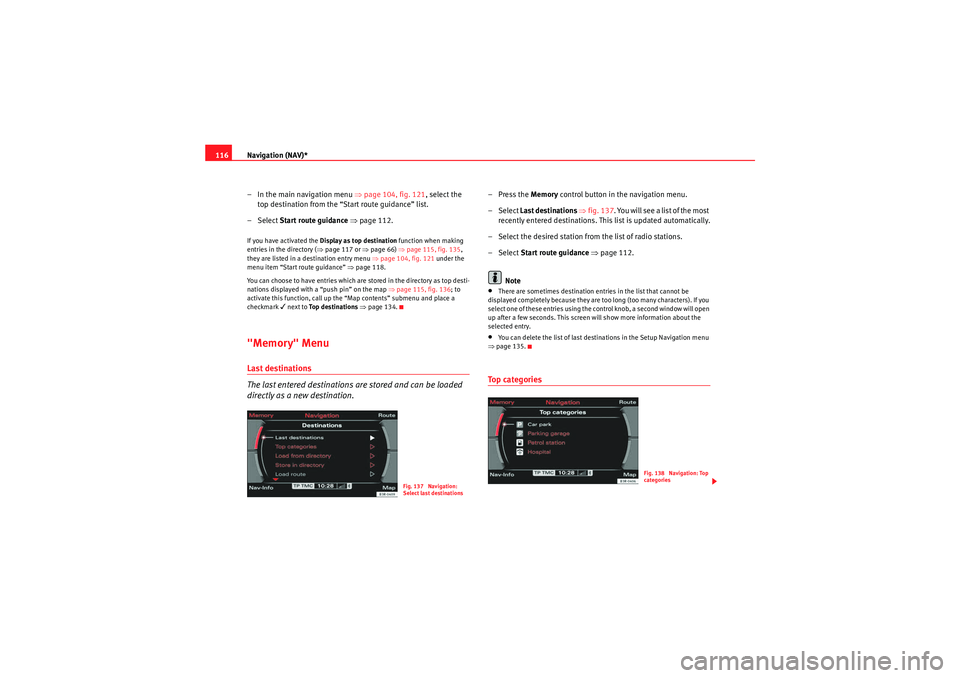
– Select Last destinations ⇒ fig. 137 . You will see a list of the most
recently entered destinations. This list is updated automatically.
– Select the desired station from the list of radio stations.
– Select Start route guidance ⇒ page 112.
Note•There are sometimes destination entries in the list that cannot be
displayed completely because they are too long (too many characters). If you
select one of these entries using the control knob, a second window will open
up after a few seconds. This screen will show more information about the
selected entry.•You can delete the list of last destinations in the Setup Navigation menu
⇒ page 135.To p c a te g o r i e s
Fig. 137 Navigation:
Select last destinations
Fig. 138 Navigation: Top
categories
media_systemE_EN.book Seite 116 Montag, 21. September 2009 1:48 13
Page 140 of 167
Navigation (NAV)*139
Operating
RADIO, MEDIA (audiovisual
systems)
NAME, TEL
NAV, INFO
CAR, SETUP
The software version of the current navigation DVD will be displayed.
Note
You can obtain information on updates for the navigation DVD from your
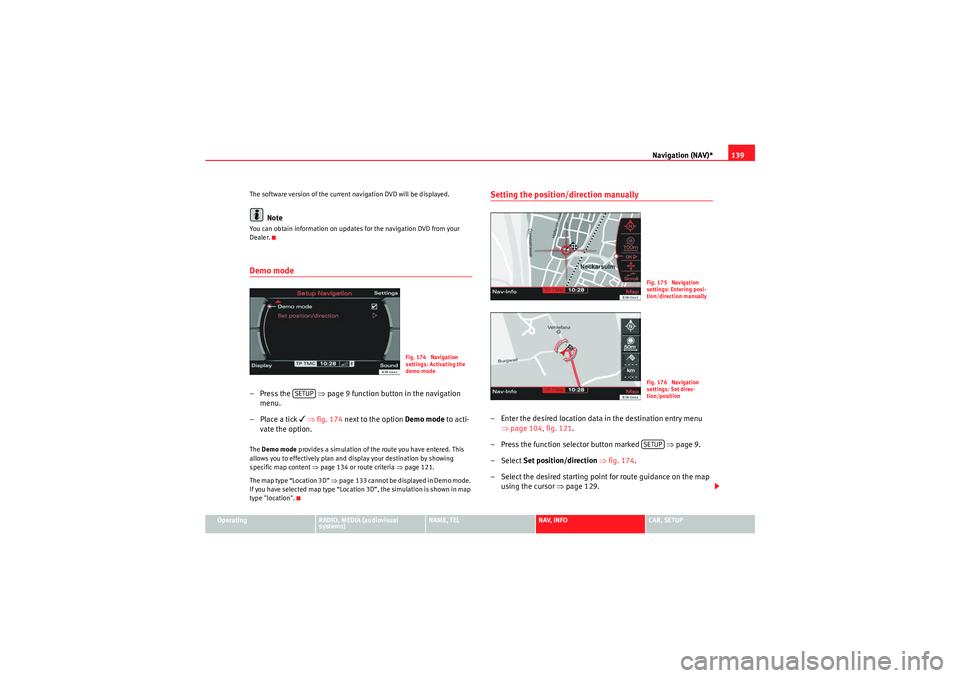
Dealer.Demo mode– Press the
⇒page 9 function button in the navigation
menu.
– Place a tick
⇒ fig. 174 next to the option Demo mode to acti-
vate the option.
The Demo mode provides a simulation of the route you have entered. This
allows you to effectively plan and display your destination by showing
specific map content ⇒page 134 or route criteria ⇒page 121.
The map type “Location 3D” ⇒page 133 cannot be displayed in Demo mode.
If you have selected map type “Location 3D”, the simulation is shown in map
type "location".
Setting the position/direction manually– Enter the desired location data in the destination entry menu ⇒page 104, fig. 121 .
– Press the function selector button marked ⇒page 9.
– Select Set position/direction ⇒ fig. 174.
– Select the desired starting point for route guidance on the map using the cursor ⇒page 129.
Fig. 174 Navigation
settings: Activating the
demo mode
SETUP
Fig. 175 Navigation
settings: Entering posi-
tion/direction manuallyFig. 176 Navigation
settings: Set direc-
tion/positionSETUP
media_systemE_EN.book Seite 139 Montag, 21. September 2009 1:48 13
Page 152 of 167
CAR (vehicle settings)151
Operating
RADIO, MEDIA (audiovisual
systems)
NAME, TEL
NAV, INFO
CAR, SETUP
CAR, SETUPCAR (vehicle settings)IntroductionSelecting CAR function– Press the function button ⇒page 9. The main Car menu or
the menu for the Version function will be displayed.If you select the Ve rsi o n function in the main Car menu, the hardware and
software status for the “SEAT Media System E” will be displayed.
Note
If you press the button within the Car function, you can programme
sound and tuning settings and adjust the brightness of the display.
Software update
CARSETUP
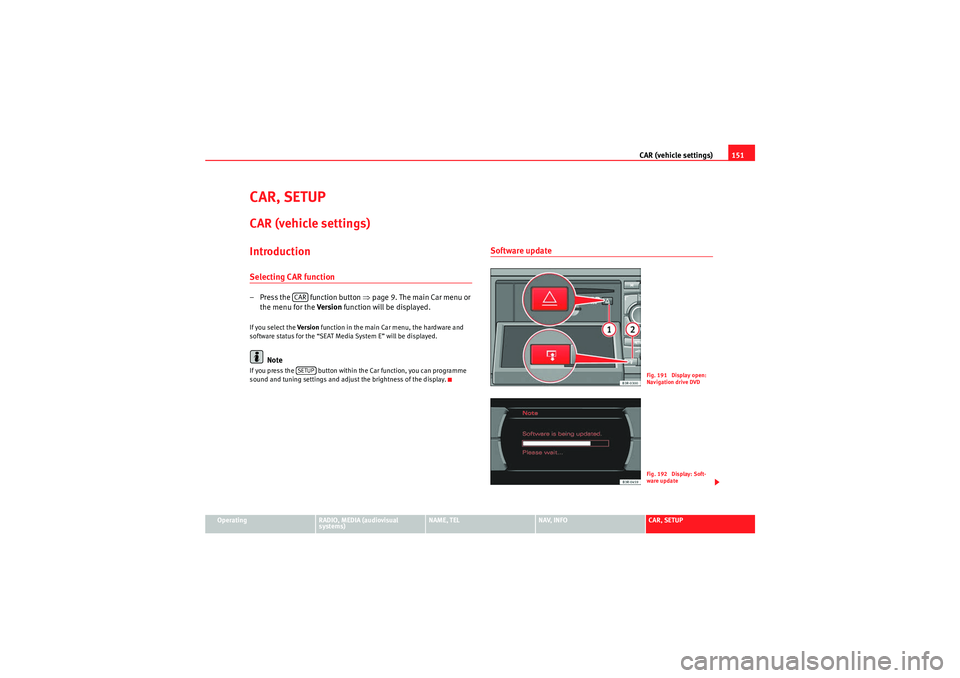
Fig. 191 Display open:
Navigation drive DVDFig. 192 Display: Soft-
ware update
media_systemE_EN.book Seite 151 Montag, 21. September 2009 1:48 13
Page 153 of 167
CAR (vehicle settings)
152
– Press the button ⇒ page 151, fig. 191 to fold open the
display.
– Check whether there is already a DVD or CD in the drive. If there is a DVD or CD in the drive, press the eject button and remove it
⇒page 24.
– Insert the up-to-date navigation DVD into the drive, keeping it level (printed side faces up). Hold the navigation DVD at the
centre hole and at the outer ri m. The navigation DVD will be
drawn into the drive automatically. The update will start automat-
ically ⇒page 151, fig. 192 .
– Switch the navigation system on manually ⇒page 4 once the
update has been completed.When it is inserted the navigation DVD will first be checked. When the check
has been completed you can monitor the progress of the software update by
means of the graph shown in the display ⇒ page 151, fig. 192. The graph will
show approx. 10% ⇒ page 151, fig. 192 while it is deleting the old software.
Once the software update has been completed the navigation system will re-
start automatically. If necessary the audio software will then also be updated.
The display will show a message. When the complete software update has
been finalised the navigation system will be switched off. Switch the naviga-
tion system on manually ⇒ page 4.
Note
•Switch on the engine before you start the update in order to avoid
draining the battery.•When you insert the DVD for the first time, new software for the navigation
system will automatically be installed.
A2
media_systemE_EN.book Seite 152 Montag, 21. September 2009 1:48 13