stop start Seat Exeo ST 2012 Owner's Guide
[x] Cancel search | Manufacturer: SEAT, Model Year: 2012, Model line: Exeo ST, Model: Seat Exeo ST 2012Pages: 325, PDF Size: 5.56 MB
Page 189 of 325
187
Driving
WARNING
● When the engine is running, the vehicle will start to move as soon as
a gear is engaged and the clutch released.
● Never select the reverse gear when the vehicle is in motion. Risk of
accident.
Note
● Do not rest your hand on the gear lever while driving. The pressure of
your hand could cause premature wear on the selector forks in the gearbox.
● When changing gear, you should always depress the clutch fully to
avoid unnecessary wear and damage.
● Do not hold the car “on the clutch” on hills. This causes premature wear
and damage to the clutch.
● Do not leave your foot on the clutch pedal; although the pressure may
seem insignificant, it can cause the premature wear of the clutch plate. Use
the foot rest when you do not need to change gear.
Automatic gearbox* Introduction
multitronic ®
, tiptronic (7-speed gearbox)
Vehicles with multitronic ®
gearbox
The vehicle is equipped with an electronically controlled continuously varia-
ble transmission (multitronic ®
). Unlike conventional automatics, the gear
ratios are not shifted in fixed steps but continuously variable. This gives
smoother transmission and makes for better fuel economy. The gearbox selects the gear ratio and shifts up or down automatically ac-
cording to the gear change programmes stored in the control unit
⇒ page 191.
If desired, you can also select the gears
manually (tiptronic mode)
⇒ page 192.
Please note that in vehicles with a multitronic® gearbox, torque is transmit-
ted via a multi-plate clutch, and not via a torque converter as on convention-
al automatics. This means that the vehicle will not “creep” as much as con-
ventional automatics when the engine is idling if you stop temporarily with
the selector lever in position D, S or R.
Vehicles with tiptronic gearbox
The vehicle is equipped with an electronically controlled 7-speed automatic
gearbox. The gearbox changes up and down automatically.
If desired, you can also select the gears manually (tiptronic mode)
⇒ page 192.
Safety FirstOperating InstructionsPractical TipsTechnical Specifications
Page 190 of 325

188Driving
Driving instructions
The gears are changed automatically.
Fig. 157 Detailed view of
the centre console: Se-
lector lever with lock but-
ton
Starting the vehicle
– Press and hold the brake pedal.
– Press and hold the interlock button (the button on the selector
lever handle), move the selector lever to the required position,
for instance D, and release the interlock button.
– Wait for the gearbox to engage the gear (a slight movement can
be felt).
– Release the brake and press the accelerator ⇒
.
Stopping briefly
– Apply the foot brake to hold the vehicle when stationary (for in-
stance at traffic lights). –
To prevent the vehicle from rolling away, apply the parking
brake before moving off on steep gradients ⇒
.
Parking the vehicle
– Press and hold the brake pedal ⇒
.
– Apply the parking brake.
– Press and hold the interlock button, move the selector lever to P
and release the interlock button.
The engine can only be started when the selector lever is at P or N.
On level ground it is sufficient to move the selector lever to P. On slopes,
first engage the parking brake and then put the selection lever into the P
position. This avoids overloading the locking mechanism and it will be eas-
ier to move the selector lever from position P.
Vehicles with multitronic® gearbox: Your vehicle is equipped with the hill
hold assist function which makes it easier to start off on a slope. The sys-
tem is activated when you press and hold the brake pedal for a few sec-
onds. When you release the brake pedal the braking force will be main-
tained for a short moment in order to prevent the vehicle rolling back when
you drive away.
WARNING
● While you are selecting a gear and the vehicle is stopped with the en-
gine running, do not accelerate. Failure to do so could result in an acci-
dent.
● Please note that some power will still be transmitted when you stop
temporarily with the selector lever in position D, S or R. Therefore, when
stopping you will need to press the brake with the force required to hold
the vehicle still. Failure to do so could result in an accident.
● Never move the selector lever to R or P when driving, as this could
cause an accident.
Page 195 of 325
193
Driving
If you select a gear which is lower than the gear shown on the instrument
panel display ⇒ Fig. 161, the gearbox will only shift down when there is no
longer a risk of over-revving the engine.
When the vehicle slows down (for instance when braking), the gearbox au-
tomatically shifts down into the next gear when the minimum engine speed
is reached.
Changing down to a lower gear increases the engine braking effect on
downhill gradients.
When the accelerator pedal is pressed right down past the point of resist-
ance at full throttle, the gearbox will select a lower gear ratio, depending on
road speed and engine speed.
Back-up programme
A back-up system is in place if a fault should occur in the
control system.
The automatic gearbox switches to the back-up programme if a fault should
occur in the control system. This is indicated by a gear pinion symbol which
lights up on the instrument panel display.
It is still possible to move the selector lever to all positions. The manual
shift programme (tiptronic) is not available when the back-up programme is
active.
Vehicles with tiptronic gearbox: When the selector lever is in position D or S
or in the manual shift programme, the gearbox will remain in 3rd gear if 1st,
2nd or 3rd gears were engaged when the fault occurred. The gearbox will
remain in 5th gear if 4th, 5th or 6th gears were engaged. The gearbox will
then engage 3rd gear when you drive away from a standstill or after the en-
gine is restarted. It will still be possible to use reverse gear in the normal way. However, the
electronic lock for reverse gear will be switched off.
CAUTION
Should the gearbox ever switch into the back-up programme, you should
take the vehicle to a technical service or specialised workshop as soon as
possible.
Steering wheel with paddle levers
The paddle levers on the steering wheel enable the driver to
manually select pre-programmed ratios or gears.
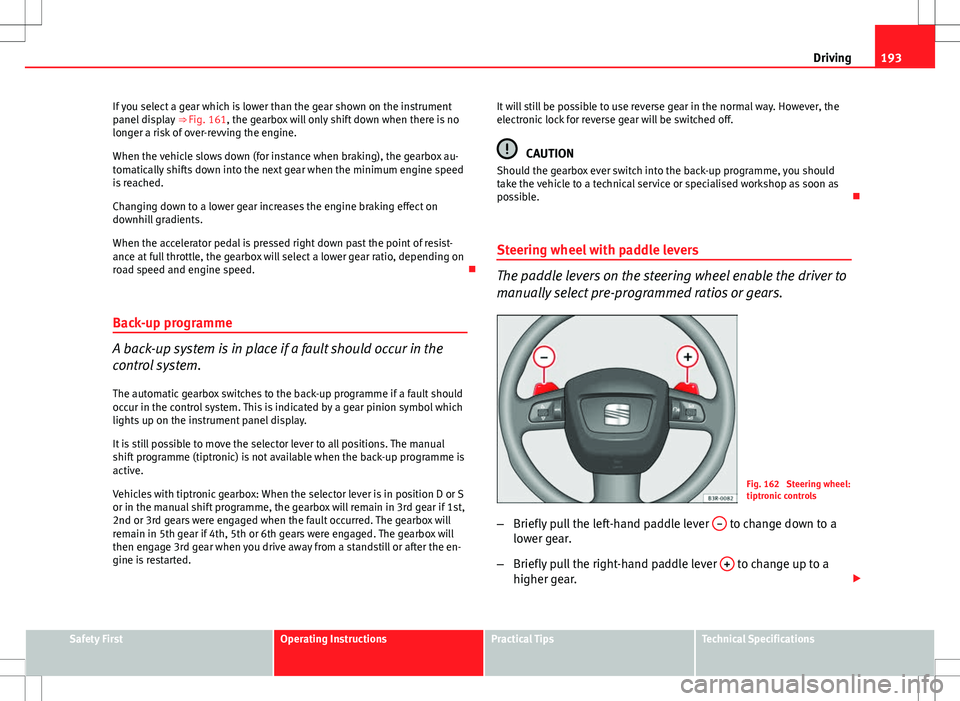
Fig. 162 Steering wheel:
tiptronic controls
– Briefly pull the left-hand paddle lever –
to change down to a
lower gear.
– Briefly pull the right-hand paddle lever +
to change up to a
higher gear.
Safety FirstOperating InstructionsPractical TipsTechnical Specifications
Page 197 of 325
195
Intelligent technology
Practical Tips Intelligent technology
Electronic Stability Control (ESC)
General Observations
The Electronic Stability Control increases the vehicle's stabil-
ity on the road.
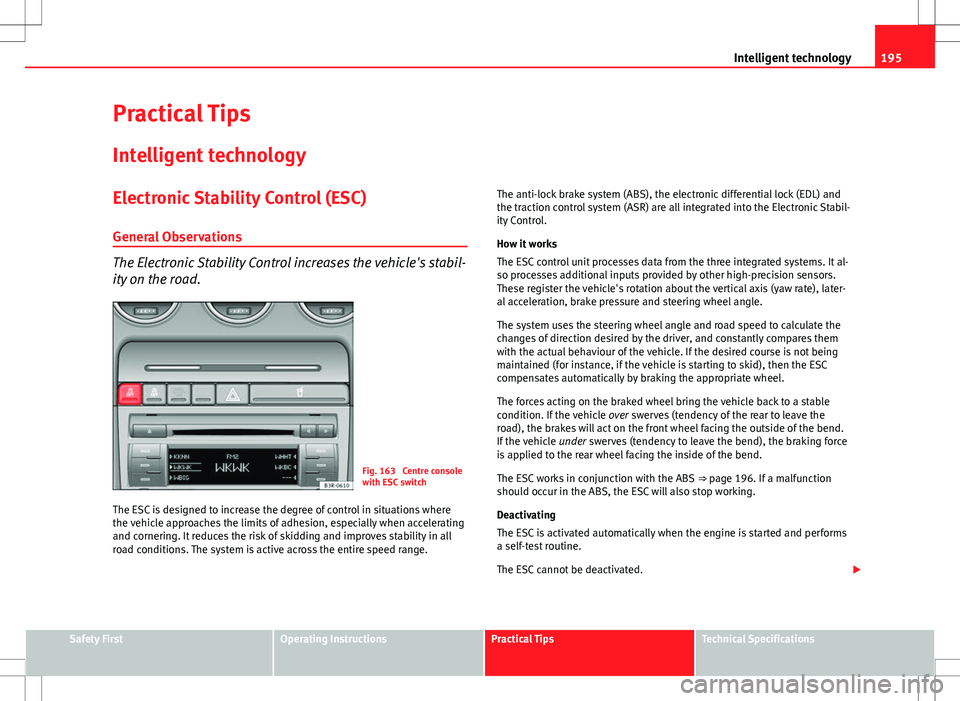
Fig. 163 Centre console
with ESC switch
The ESC is designed to increase the degree of control in situations where
the vehicle approaches the limits of adhesion, especially when accelerating
and cornering. It reduces the risk of skidding and improves stability in all
road conditions. The system is active across the entire speed range. The anti-lock brake system (ABS), the electronic differential lock (EDL) and
the traction control system (ASR) are all integrated into the Electronic Stabil-
ity Control.
How it works
The ESC control unit processes data from the three integrated systems. It al-
so processes additional inputs provided by other high-precision sensors.
These register the vehicle's rotation about the vertical axis (yaw rate), later-
al acceleration, brake pressure and steering wheel angle.
The system uses the steering wheel angle and road speed to calculate the
changes of direction desired by the driver, and constantly compares them
with the actual behaviour of the vehicle. If the desired course is not being
maintained (for instance, if the vehicle is starting to skid), then the ESC
compensates automatically by braking the appropriate wheel.
The forces acting on the braked wheel bring the vehicle back to a stable
condition. If the vehicle
over swerves (tendency of the rear to leave the
road), the brakes will act on the front wheel facing the outside of the bend.
If the vehicle under swerves (tendency to leave the bend), the braking force
is applied to the rear wheel facing the inside of the bend.
The ESC works in conjunction with the ABS ⇒ page 196. If a malfunction
should occur in the ABS, the ESC will also stop working.
Deactivating
The ESC is activated automatically when the engine is started and performs
a self-test routine.
The ESC cannot be deactivated.
Safety FirstOperating InstructionsPractical TipsTechnical Specifications
Page 199 of 325
197
Intelligent technology
WARNING
Please remember that the accident risk always increases if you drive too
fast, especially in corners or on a slippery road, or if you follow too close
behind the vehicle in front of you. An increased accident risk cannot be
compensated even by the brake assist system. Risk of accident.
Electronic differential lock (EDL)
The electronic differential lock prevents the loss of traction
caused if one wheel starts spinning. General notes
The electronic differential lock (EDL) helps the vehicle to start moving, ac-
celerate and climb a gradient in slippery conditions where this may other-
wise be difficult or even impossible.
How it works
The EDL works automatically, without the driver's involvement. With the aid
of the ABS sensors, the system monitors the rotational speed of the drive
wheels ⇒ page 196. If a considerable difference in revs is detected (approx.
100 rpm) in the speed of the drive wheels, e.g. when only one part of the
surface supporting the wheels is slippery, the system applies the brake to
slow down the skidding wheel so that more of the power is directed to the
other wheels. The systems works up to a speed of approx. 80 km/h. The
system will make noise while it is working.
Starting the vehicle
If one wheel has less grip and starts spinning (for instance, if one of the
drive wheels is on ice), keep pressing the accelerator gradually until the ve-
hicle starts moving. Overheating of the brakes
To prevent the brake disk of the braked wheel from overheating, the EDL
cuts out automatically if subjected to excessive loads. In this case, the vehi-
cle will continue to run and will have the same running properties as those
of another without EDL.
The EDL will switch on again automatically when the brake has cooled
down.
WARNING
● When accelerating on a uniformly slippery surface (for instance all
four wheels on ice or snow), press the accelerator gradually and careful-
ly. Despite EDL, the drive wheels may otherwise start to spin. This could
impair the vehicle's stability. Risk of accident.
● Even with EDL, you should always adjust your speed to suit the road
and traffic conditions. Do not let the extra safety features tempt you into
taking any risks when driving. Failure to do so could result in an accident.
Note
If the ABS warning lamp lights up, this can also mean there is a fault in the
EDL. Take the vehicle to a specialised workshop as soon as possible.
Traction control system (ASR)
The traction control system prevents the drive wheels from
spinning when the vehicle is accelerating. General notes
The traction control system (ASR) is one of the functions incorporated in the
Electronic Stability Control (ESC)
Safety FirstOperating InstructionsPractical TipsTechnical Specifications
Page 200 of 325
198Intelligent technology
The traction control system (ASR) helps the car to start moving, accelerate
and climb a gradient in slippery conditions where this may otherwise be dif-
ficult or even impossible.
How it works
The ASR works automatically, i.e. without the driver's involvement. With the
aid of the ABS sensors , the ASR monitors the speed of the driven wheels
⇒ page 196. If the wheels start to spin, the engine speed is reduced auto-
matically to match the amount of grip available. The system is active across
the entire speed range.
The ASR works in conjunction with the ABS. If a failure occurs in the ABS,
the ASR will also stop working.
In general, the ASR should be left switched on at all times. It should only be
switched off manually in particular circumstances where a certain amount of
wheel slip may be desirable. Examples:
● when driving with snow chains
● when driving in deep snow or on loose surfaces
● when rocking the vehicle backwards and forwards to free it.
The ASR should be switched on again afterwards as soon as possible.
Note
To ensure that the ASR works properly, all four wheels must be fitted with
identical tyres. The difference in size of the wheels may lead to an unde-
sired reduction in engine power. Also see ⇒ page 255.Brakes
General notes
New brake pads
New brake pads do not provide optimal performance during the first
200 km; first they must be “run in”. However, the reduced braking capacity
may be compensated by pressing on the brake pedal a little harder. Avoid
overloading the brakes during run-in.
Wear
The rate of wear on the brake pads depends a great deal on how you drive
and the conditions in which the vehicle is operated. Negative factors are, for
instance, city traffic, frequent short trips or hard driving with abrupt starts
and stops.
Wet roads or road salt
In certain conditions, such as in heavy rain, or after washing the vehicle or
driving through water, the full braking effect can be delayed by moisture (or
in winter by ice) on the discs and brake pads. In this case the brakes should
be dried by pressing the brake pedal several times.
The effectiveness of the brakes can also be temporarily reduced if the vehi-
cle is driven for some distance without using the brakes when there is a lot
of salt on the road in winter. In this case, the layer of salt on the brake discs
and pads has to wear off before braking.
Corrosion
There may be a tendency for corrosion to form on the discs and dirt to build
up on the brake pads if the vehicle is used infrequently or the brakes are
not used very often.
If the brakes are not used frequently, or if rust has formed on the disks, it is
advisable to clean off the pads and disks by braking firmly a few times at a
moderately high speed ⇒
.
Page 206 of 325

204Driving and the environment
Avoid idling
It is worthwhile switching off the engine when waiting in a traffic jam, at lev-
el crossings or at traffic lights with a long red phase. The fuel saved after
only 30 - 40 seconds is greater than the amount of fuel needed to restart
the engine.
The engine takes a long time to warm up when it is idling. Mechanical wear
and pollutant emissions are also especially high during this initial warm-up
phase. It is therefore best to drive off immediately after starting the engine.
Avoid running the engine at high speed.
Periodic maintenance
Periodic maintenance work guarantees that, before beginning a journey,
you will not consume more than the required amount of fuel. A well-serviced
engine gives you the benefit of improved fuel efficiency as well as maxi-
mum reliability and an enhanced resale value.
A badly serviced engine can consume up to 10% more fuel than necessary.
Avoid short journeys
To reduce the consumption and emission of polluting gases, the engine and
the exhaust filtration systems should reach the optimum service tempera-
ture.
With the engine cold, fuel consumption is proportionally higher. The engine
does not warm up and fuel consumption does not normalise until having
driven approximately four kilometres. This is why we recommend avoiding
short trips whenever possible.
Maintain the correct tyre pressures
Bear in mind that keeping the tyres at an adequate pressure saves fuel. If
the tyre pressure is just one bar too low, fuel consumption can increase by
as much as 5%. Due to the greater rolling resistance, under-inflation also
increases tyre wear and impairs handling.
The tyre pressures should always be checked when the tyres are cold.Do not use
winter tyres all year round as they increase fuel consumption by
up to 10%.
Avoid unnecessary weight
Every kilo of extra weight will put up the fuel consumption, so it is worth
checking the luggage compartment occasionally to make sure that no un-
necessary loads are being transported.
A roof rack is often left in place for the sake of convenience, even when it is
no longer needed. At a speed of 100-120 km/h your vehicle will use about
12% more fuel as a result of the extra wind resistance caused by the roof
rack even when it is not in use.
Save electricity
The engine activates the alternator, which produces electricity. With the
need for electricity, fuel consumption is also increased. Because of this, al-
ways turn off electrical components when you do not need them. Examples
of components that use a lot of electricity are: the fan at high speeds, the
rear window heating or the seat heaters*.
Note
● If you vehicle has Start-Stop, it is not recommended to disconnect this
function.
● It is recommended to close the windows when driving at more than
60 km/h
● Do not drive with your foot resting on the clutch pedal, as the pressure
can make the plate spin, more fuel will be used and it can burn the clutch
plate lining, causing a serious fault.
● Do not hold the vehicle on a hill with the clutch, use the foot brake or
hand brake, using the latter to start. The fuel consumption will be lower and
you will prevent the clutch plate from being damaged.
● On descents, use the engine brake, changing to the gear that is more
suitable for the slope. The fuel consumption will be lower and the brakes
will not suffer.
Page 209 of 325
207
Trailer towing
Where possible, operate the trailer with the maximum permitted drawbar
load on the ball joint of the towing bracket, but do not exceed the specified
limit.
Tyre pressure
Check the tyre pressures on your vehicle, and adjust for “full load” condi-
tions (refer to the sticker listing the tyre pressures on the door pillar). It may
also be necessary to adjust the tyre pressures on the trailer according to the
recommendations of the trailer manufacturer.
Exterior mirrors
Check whether you can see enough of the road behind the trailer with the
standard mirrors. If this is not the case you should have additional mirrors
fitted. The two exterior mirrors should be fitted on folding arms. Adjust the
mirrors to give sufficient rear vision.
Headlights
Before starting a journey, check the headlight beam settings with the trailer
hitched up. If necessary, alter the height of the headlight beams by means
of the headlight range control. See ⇒ page 121.
Power supply
When you remove the ignition key, the power supply to the trailer is inter-
rupted.
Removable ball joint coupling
Vehicles with a factory-fitted towing bracket are equipped with a removable
ball joint coupling. This is stored in the spare wheel well in the luggage
compartment together with the necessary fitting instructions.
Note
If you frequently tow, we recommend you also have the vehicle serviced be-
tween services. Notes on towing
Towing a trailer involves additional attention by the driver.
Weight distribution
The weight distribution of a loaded trailer with an unladen vehicle is very
unfavourable. However, if this cannot be avoided, drive extra slow to allow
for the unbalanced weight distribution.
Speed
The stability of the vehicle and trailer is reduced with increasing speed.
Therefore, it is advisable not to drive at the maximum permissible speed in
unfavourable road, weather or wind conditions. This especially applies
when driving downhill.
You should always reduce speed immediately if the trailer shows the slight-
est sign of swaying. Never try to stabilise the trailer by accelerating.
Anticipate hazards and brake in good time. If towing a trailer with an inertia
brake, first brake gently and then harder. This will prevent brake tapping by
the trailer wheels when they lock. Select a low gear in due course before go-
ing down a steep downhill. This enables you to use the engine braking to
slow down the vehicle.
Swaying and pitching can be reduced by stabiliser aids. We recommend
having stabiliser aids installed when towing trailers with a high trailer
weight. They can be purchased and installed at a Technical Service.
Reheating
When climbing long hills in hot weather with the engine running fast in low
gear, you should keep an eye on the coolant temperature gauge ⇒ page 62.
Reduce speed immediately if the needle moves to the right end of the scale.
If the temperature warning lamp in the instrument panel should start
flashing, stop the vehicle and let the engine cool down by running it at
idling speed for a few minutes.
Safety FirstOperating InstructionsPractical TipsTechnical Specifications
Page 223 of 325

221
Vehicle maintenance and cleaning
Use an industrial cleaner to remove brake dust. Any damage to the paint on
steel wheel rims should be repaired before starting to rust.
WARNING
● Never wash tyres with a cylindrical jet. Even at large spraying distan-
ces and short cleaning times, visible and invisible damage can occur to
the tyres. This may cause an accident.
● Water, ice and salt on the brakes can reduce braking efficiency. Risk
of accident. Directly after washing, avoid sudden and sharp braking.
“Dry” the brakes by braking several times ⇒ page 201.
Alloy wheel rims
Every two weeks
– Wash salt and brake dust from alloy wheels.
– Use an acid free detergent to clean the wheel rims.
Every three months
– Apply a hard wax compound to the wheels.
Alloy wheels require regular attention to preserve their appearance. If road
salt and brake dust are not often removed, the aluminium finish will be im-
paired.
Always use an acid-free detergent for alloy wheel rims.
Car polish or other abrasive agents should not be used. If the protective
coating is damaged, e.g. by flying stones, the damaged area should be re-
paired immediately.
WARNING
● Never wash tyres with a cylindrical jet. Even at large spraying distan-
ces and short cleaning times, visible and invisible damage can occur to
the tyres. This may cause an accident.
● Water, ice and salt on the brakes can reduce braking efficiency. Risk
of accident. Directly after washing, avoid sudden and sharp braking.
“Dry” the brakes by braking several times ⇒ page 201.
Underbody protection
The vehicle underbody is coated to protect it from chemical
and mechanical damage.
The protective coating can be damaged when driving. We recommend you
to check the protective coating under the body and on the running gear, and
reinstated if necessary, before and after the winter season.
We recommend you to go to your Technical Service to carry out repair work
and additional anti-corrosion work.
WARNING
Do not apply underseal or anti-corrosion coatings to the exhaust pipes,
catalytic converter or the heat shields on the exhaust system. The heat of
the exhaust system or the engine could cause them to ignite. Risk of fire.
Safety FirstOperating InstructionsPractical TipsTechnical Specifications
Page 233 of 325
231
Checking and refilling levels
WARNING
● Fuel is highly flammable and can cause serious burns and other inju-
ries.
–Never smoke or use an open flame when filling the fuel tank of the
vehicle, or a spare fuel canister, with fuel. This is an explosion haz-
ard.
– Follow legal requirements for the use of spare fuel canisters.
– For safety reasons we do not recommend carrying a spare fuel can-
ister in the vehicle. The canister could be damaged in an accident and
leak.
● If, in exceptional circumstances, you have to carry a spare fuel canis-
ter, please observe the following points:
–Never fill the spare fuel canister inside the vehicle or on it. An elec-
trostatic charge could build up during filling, causing the fuel fumes
to ignite. This could cause an explosion. Always place the canister on
the ground to fill it.
– Insert the fuel nozzle into the mouth of the canister as far as possi-
ble.
– If the spare fuel canister is made of metal, the filling nozzle must
be in contact with the canister during filling. This helps prevent an
electrostatic charge building up.
– Never spill fuel in the vehicle or in the luggage compartment. Fuel
vapours are explosive. Danger of death.
CAUTION
● Fuel spills should be removed from the paintwork immediately.
● Never run the tank completely dry. An irregular fuel supply could cause
misfiring. As a result, unburnt fuel could enter the catalytic converter and
cause damage.
● When filling the fuel tank after having run it completely dry on a vehicle
with a diesel engine the ignition must be switched on for at least 30 sec-
onds without starting the engine. When you then start the engine it may take longer than normal (up to one minute) for the engine to start firing.
This is due to the fact that the fuel system has to purge itself of air before
starting.
For the sake of the environment
Do not try to put in more fuel after the automatic filler nozzle has switched
off; this may cause the fuel to overflow if it becomes warm.
Petrol Petrol types
The recommended fuel types are listed on a sticker inside
the fuel tank flap.
Only unleaded petrol conforming to standard DIN EN 228 may be used for
vehicles with catalytic converters (EN = “European Standard”).
Fuel types are differentiated by the octane rating, e.g: 91, 95, 98 RON (RON
= “Research Octane Number”, unit for determining the knock resistance of
petrol). You may use petrol with a higher octane number than the one rec-
ommended for your engine. However, this has no advantage in terms of fuel
consumption and engine power.
The correct fuel type for your vehicle is given in the technical table for the
engine, in the Technical Data section.
Safety FirstOperating InstructionsPractical TipsTechnical Specifications