oil additives Seat Exeo ST 2012 Owner's manual
[x] Cancel search | Manufacturer: SEAT, Model Year: 2012, Model line: Exeo ST, Model: Seat Exeo ST 2012Pages: 325, PDF Size: 5.56 MB
Page 234 of 325
232Checking and refilling levels
CAUTION
● Petrol with standard EN 228 may be mixed with small quantities of etha-
nol. However, bioethanol fuels available at commercial establishments with
reference E50 or E85, which contain a high percentage of ethanol, may not
be used, as they will damage the fuel system.
● Even one tankful of leaded fuel would permanently impair the efficiency
of the catalytic converter.
● High engine speed and full throttle can damage the engine when using
petrol with an octane rating lower than the correct grade for the engine.
For the sake of the environment
Just one full tank of leaded fuel would seriously impair the efficiency of the
catalytic converter.
Petrol additives
Petrol additives improve the quality of the petrol.
The quality of the petrol influences the performance, power and life of the
engine. For this reason, you should use good quality petrol containing addi-
tives. These additives will help to prevent corrosion, keep the fuel system
clean and prevent deposits from building up in the engine.
If good quality petrol with additives is not available or engine problems oc-
cur, the required additives must be added during refuelling. Diesel
Diesel*
Diesel fuel must conform to DIN EN 590 (EN = “European Standard”). It
must have a cetane number (CN) of at least 51. The cetane number indi-
cates the ignition quality of the diesel fuel.
Notes on refuelling ⇒ page 230.
Biodiesel*
CAUTION
● Your vehicle is not designed to use biodiesel fuel. Never, under any cir-
cumstances refuel with biodiesel. The use of biodiesel fuel could damage
the engine and the fuel system. The addition of biodiesel to diesel fuel by
the diesel manufacturer in accordance with standard EN 590 or DIN 51628
is authorised and will not cause damage to the engine or the fuel system.
● The diesel engine has been designed to be used exclusively with diesel
fuel conforming to standard EN 590. Never refuel or use petrol, kerosene,
fuel oil or any other type of fuel. If you accidentally fill up the vehicle with
the wrong type of fuel, do not start the engine. Seek assistance from speci-
alised personnel. The composition of these fuels may severely damage the
fuel system and the engine.
Page 239 of 325
237
Checking and refilling levels
Engine oil additives
No type of additive should be mixed with the engine oil. The deterioration
caused by these additives is not covered by the warranty.
Note
Before a long trip, we recommend finding an engine oil that conforms to the
corresponding VW specifications and keeping it in the vehicle. This way, the
correct engine oil will always be available for a top-up if needed.
Checking the oil level
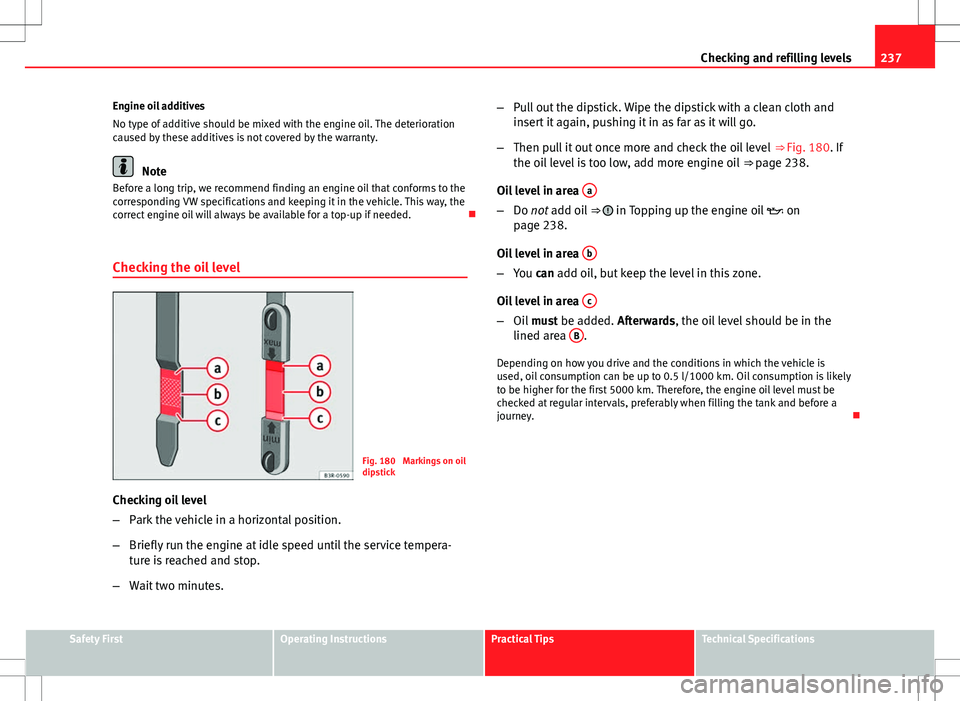
Fig. 180 Markings on oil
dipstick
Checking oil level
– Park the vehicle in a horizontal position.
– Briefly run the engine at idle speed until the service tempera-
ture is reached and stop.
– Wait two minutes. –
Pull out the dipstick. Wipe the dipstick with a clean cloth and
insert it again, pushing it in as far as it will go.
– Then pull it out once more and check the oil level ⇒ Fig. 180. If
the oil level is too low, add more engine oil ⇒ page 238.
Oil level in area a
–
Do not add oil ⇒ in Topping up the engine oil on
page 238.
Oil level in area b
–
You can add oil, but keep the level in this zone.
Oil level in area c
–
Oil must be added. Afterwards, the oil level should be in the
lined area B.
Depending on how you drive and the conditions in which the vehicle is
used, oil consumption can be up to 0.5 l/1000 km. Oil consumption is likely
to be higher for the first 5000 km. Therefore, the engine oil level must be
checked at regular intervals, preferably when filling the tank and before a
journey.
Safety FirstOperating InstructionsPractical TipsTechnical Specifications
Page 240 of 325
238Checking and refilling levels
Topping up the engine oil
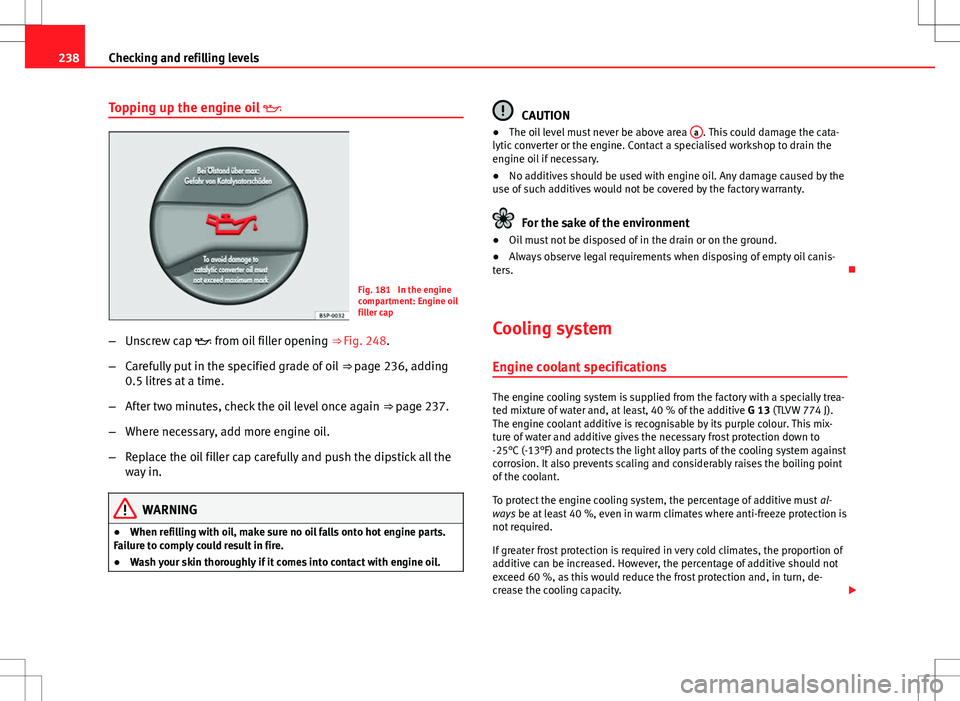
Fig. 181 In the engine
compartment: Engine oil
filler cap
– Unscrew cap from oil filler opening ⇒ Fig. 248.
– Carefully put in the specified grade of oil ⇒ page 236, adding
0.5 litres at a time.
– After two minutes, check the oil level once again ⇒ page 237.
– Where necessary, add more engine oil.
– Replace the oil filler cap carefully and push the dipstick all the
way in.
WARNING
● When refilling with oil, make sure no oil falls onto hot engine parts.
Failure to comply could result in fire.
● Wash your skin thoroughly if it comes into contact with engine oil.
CAUTION
● The oil level must never be above area a. This could damage the cata-
lytic converter or the engine. Contact a specialised workshop to drain the
engine oil if necessary.
● No additives should be used with engine oil. Any damage caused by the
use of such additives would not be covered by the factory warranty.
For the sake of the environment
● Oil must not be disposed of in the drain or on the ground.
● Always observe legal requirements when disposing of empty oil canis-
ters.
Cooling system Engine coolant specifications
The engine cooling system is supplied from the factory with a specially trea-
ted mixture of water and, at least, 40 % of the additive G 13 (TLVW 774 J).
The engine coolant additive is recognisable by its purple colour. This mix-
ture of water and additive gives the necessary frost protection down to
-25°C (-13°F) and protects the light alloy parts of the cooling system against
corrosion. It also prevents scaling and considerably raises the boiling point
of the coolant.
To protect the engine cooling system, the percentage of additive must al-
ways be at least 40 %, even in warm climates where anti-freeze protection is
not required.
If greater frost protection is required in very cold climates, the proportion of
additive can be increased. However, the percentage of additive should not
exceed 60 %, as this would reduce the frost protection and, in turn, de-
crease the cooling capacity.
Page 242 of 325
240Checking and refilling levels
Coolant fluid loss
Any loss of coolant fluid normally indicates a leak in the cooling system. In
this case the cooling system should be inspected by a specialised work-
shop without delay. It is not sufficient merely to top up the coolant fluid.
If there are no leaks in the system, a loss of coolant fluid can only occur if
the coolant boils and is forced out of the system as a result of overheating.
CAUTION
Radiator sealants must not be added to the coolant fluid. Such additives
could seriously impair the function of the cooling system.
Topping up the coolant fluid
Be careful when topping up with coolant fluid. – Switch the engine off.
– Wait for the engine to cool down.
– Cover the cap on the expansion tank ⇒ Fig. 182 with a cloth,
and carefully unscrew the cap anticlockwise ⇒
.
– Add coolant fluid.
– Screw on the cap tightly.
Make sure that the coolant fluid meets the required specifications
⇒ page 238. Do not use a different type of antifreeze if G12++antifreeze is
not available. In this case, use only water and bring the antifreeze concen-
tration back up to the correct level as soon as possible.
Always top up with new coolant fluid. Do not fill above the “max” mark. Excess coolant fluid is forced out of the
system through the valve in the filler cap when the engine gets hot.
If a lot of coolant fluid has been lost, wait for the engine to
cool down before
putting in cold coolant. Failure to do so could result in serious engine dam-
age.
WARNING
● The cooling system is under pressure. Do not unscrew the cap on the
expansion tank when the engine is hot. Failure to comply could result in
burns.
● The antifreeze and coolant fluid can be a health hazard. Therefore,
the antifreeze should be stored in the original container in a safe place
out of reach of children. Failure to comply could result in poisoning.
For the sake of the environment
Drained off coolant should not be used again. Drain off the used coolant in-
to a suitable container and dispose of it in the proper manner (observe envi-
ronmental regulations).
Radiator fan
The radiator fan can start running spontaneously. The auxiliary fan can continue to run for as long as 10 minutes after stop-
ping the engine, even after the ignition is switched off. It may also start run-
ning suddenly ⇒
after some while if
● Stored heat raises the coolant temperature, or
● The hot engine compartment is additionally heated up by the sun.
Page 320 of 325
Manual gearbox . . . . . . . . . . . . . . . . . . . . . . . . 186
MirrorsActivating stored settings . . . . . . . . . . . . . 140
Automatic exterior mirror adjustment . . . . 139
Heated exterior mirrors . . . . . . . . . . . . . . . 133
Storing settings . . . . . . . . . . . . . . . . . . . . . 140
Vanity mirrors . . . . . . . . . . . . . . . . . . . . . . . 128
Mobile phones and two-way radios . . . . . . . . 229
multitronic® . . . . . . . . . . . . . . . . . . . . . . . . . . . 187 Driving . . . . . . . . . . . . . . . . . . . . . . . . . . . . . 188
N
Net partition Removing . . . . . . . . . . . . . . . . . . . . . . . . . . 148
Number of seats . . . . . . . . . . . . . . . . . . . . . . . . . 19
O
Observations . . . . . . . . . . . . . . . . . . . . . . . . . . 205
Octane number . . . . . . . . . . . . . . . . . . . . . . . . . 231
Odometer . . . . . . . . . . . . . . . . . . . . . . . . . . . . . . 65
Oil consumption . . . . . . . . . . . . . . . . . . . . . . . . 237
Oil dipstick . . . . . . . . . . . . . . . . . . . . . . . . . . . . 237
Oil properties . . . . . . . . . . . . . . . . . . . . . . . . . . 236
Onboard computer . . . . . . . . . . . . . . . . . . . . . . . 88
Outside temperature display . . . . . . . . . . . . . . . 75
Overview Cockpit . . . . . . . . . . . . . . . . . . . . . . . . . . . . . 59 P
Paddle levers tiptronic . . . . . . . . . . . . . . . . . . . . . . . . . . . 193
Paintwork Polishing . . . . . . . . . . . . . . . . . . . . . . . . . . . 219
Parking . . . . . . . . . . . . . . . . . . . . . . . . . . . . . . . 180 multitronic® . . . . . . . . . . . . . . . . . . . . . . . . 188
Parking aid SEAT Parking System . . . . . . . . . . . . . . . . . 181
SEAT Parking System plus . . . . . . . . . . . . . 182
Parking aid acoustic system . . . . . . . . . . . . . . 181
Passenger see Correct sitting position . . . . . . . 10, 11, 12
Pedals . . . . . . . . . . . . . . . . . . . . . . . . . . . . . . . . . 16
Petrol . . . . . . . . . . . . . . . . . . . . . . . . . . . . . . . . . 231 Driving abroad . . . . . . . . . . . . . . . . . . . . . . 205
Petrol additives . . . . . . . . . . . . . . . . . . . . . . . . 232
Photosensor faulty . . . . . . . . . . . . . . . . . . . . . . . 84
Physical principles of a frontal collision . . . . . . 20
Plastic parts . . . . . . . . . . . . . . . . . . . . . . . . . . . 219
Plastic parts cleaning . . . . . . . . . . . . . . . . . . . . 226
Power socket . . . . . . . . . . . . . . . . . . . . . . . . . . 155
Power steering . . . . . . . . . . . . . . . . . . . . . . . . . 199
Products for vehicle maintenance . . . . . . . . . . 216
Q
Quartz clock . . . . . . . . . . . . . . . . . . . . . . . . . . . . 63 R
Radiator fan . . . . . . . . . . . . . . . . . . . . . . . . . . . 240
Radio display . . . . . . . . . . . . . . . . . . . . . . . . . . . 75
Rain sensor . . . . . . . . . . . . . . . . . . . . . . . . . . . . 129
Rain sensor faulty . . . . . . . . . . . . . . . . . . . . . . . . 84
Reading lights Front . . . . . . . . . . . . . . . . . . . . . . . . . . . . . . 125
Rear . . . . . . . . . . . . . . . . . . . . . . . . . . . . . . . 127
Rear drink holder . . . . . . . . . . . . . . . . . . . . . . . 154
Rear fog light . . . . . . . . . . . . . . . . . . . . . . . . . . 119
Rear lid Central locking system . . . . . . . . . . . . . . . . 106
Light . . . . . . . . . . . . . . . . . . . . . . . . . . . . . . 127
Rear seat bench . . . . . . . . . . . . . . . . . . . . . . . . 150
Rear side window sun blind . . . . . . . . . . . . . . . 129
Rear view mirrors Anti-dazzle interior mirror with automaticadjustment . . . . . . . . . . . . . . . . . . . . . . . 132
Anti-dazzle setting . . . . . . . . . . . . . . . . . . . 132
Interior mirror . . . . . . . . . . . . . . . . . . . . . . . 132
Rear window heating Heating element wires . . . . . . . . . . . . . . . . 220
Rear window sun blind . . . . . . . . . . . . . . . . . . . 129
Rear window wiper Intermittent wipe . . . . . . . . . . . . . . . . . . . . 131
Rear window automatic wash and wipe . . 131
Refuelling . . . . . . . . . . . . . . . . . . . . . . . . . . . . . 230
Registration light . . . . . . . . . . . . . . . . . . . . . . . 292
Remote control key Indicator light . . . . . . . . . . . . . . . . . . . . . . . 100
Locking and unlocking . . . . . . . . . . . . . . . . 108
318 Index