radiator Seat Exeo ST 2012 Owner's manual
[x] Cancel search | Manufacturer: SEAT, Model Year: 2012, Model line: Exeo ST, Model: Seat Exeo ST 2012Pages: 325, PDF Size: 5.56 MB
Page 83 of 325
81
Cockpit
WARNING
● Before opening the bonnet and checking the brake fluid level, ob-
serve the warning information in ⇒ page 234, Work in the engine com-
partment.
● If the brake fluid level in the reservoir is too low, this could result in
an accident. Do not drive on! Obtain technical assistance.
● If the brake warning lamp lights up together with the ABS warning
lamp, this can mean that there is a fault in the ABS control function. As a
result, the rear wheels can lock relatively easily when braking. Under cer-
tain circumstances, the rear of the vehicle could suddenly sway from side
to side, with the subsequent danger of skidding. Drive carefully to the
nearest specialised workshop and have the fault repaired.
Fault in the cooling system
Faults in the cooling system must be repaired immediately.
If the symbol flashes in the display, this means that either the
coolant temperature is too high or the coolant level is too low. The
following message will appear in the display together with the
symbol:
Switch off engine and check coolant level
– Stop the vehicle.
– Switch the engine off.
– Check the coolant level ⇒ page 239.
– Add more coolant if necessary ⇒ page 240.
– Wait for the symbol to go out before driving on. –
Obtain professional assistance if necessary.
If the coolant level is correct, the overheating may be caused by a malfunc-
tion of the radiator fan.
If the alternator warning lamp lights up as well ⇒ page 72, it is possible that
the drive belt has broken.
CAUTION
Do not drive on if the symbol has come on to indicate a fault in the cool-
ing system, otherwise there is a risk of engine damage.
Engine oil pressure too low
If the engine oil pressure is too low the fault must be re-
paired immediately.
If the symbol flashes in the display, the oil pressure is too low.
The following message will appear in the display together with the
symbol:
Switch off engine, check oil level
– Stop the vehicle.
– Switch the engine off.
– Check the engine oil level ⇒ page 237.
– Obtain professional assistance if necessary.
Engine oil level too low
If the engine oil level is too low, add more oil ⇒ page 238.
Safety FirstOperating InstructionsPractical TipsTechnical Specifications
Page 178 of 325
176Driving
WARNING
● Never switch the engine off until the vehicle is stationary.
● The brake servo and the power steering system work only when the
engine is running. You need more strength to steer and brake the vehicle
when the engine is switched off. Given that you will be unable to steer
and brake as usual, this could lead to a risk of accidents and injuries.
CAUTION
If the engine has been running under high load for a long time, there is a
risk of heat building up in the engine compartment after the engine has
been switched off; this could cause engine damage. Therefore, you should
let the engine idle for approximately 2 minutes before you switch it off.
Note
After the engine is switched off the radiator fan may run on for up to 10 mi-
nutes, even if the ignition is switched off. It may also start running again af-
ter some time if the coolant temperature rises due to a build-up of heat un-
der the bonnet, or if the engine is already warm and the engine compart-
ment is heated up further by direct sunlight.
Start-Stop function* Description and operation
The Start-Stop function stops the engine when the vehicle is stop-
ped and starts it automatically when required.
– When the vehicle is stopped, put it in neutral and release the
clutch pedal. The engine will stop. –
When the clutch pedal is pressed, the engine starts again.
– The instrument panel screen displays information about the sta-
tus of the Start-Stop function ⇒ Fig. 148.
Start-Stop function conditions
● The driver seat belt must be buckled.
● The engine hood must be closed.
● The engine must be at operating temperature
● The steering wheel must not be turned more than 270°.
● The vehicle must not be on a steep gradient.
● The vehicle must not be in reverse.
● A trailer must not be connected.
● The temperature of the passenger compartment must be within the con-
venience limits ( ECON
button should not be selected).
● The windscreen de-mist function must be off.
● Otherwise it requires more than 50% of the airflow that the fan can sup-
ply.
● The temperature must not be set to HI or LO.
● The driver door must be closed.
● The diesel particulate filter must not be in regeneration mode, for diesel
engines.
● The battery charge must not be low for the next start.
● The battery temperature must be between –1°C and 60°C.
Start-Stop function interruption
In the following situations, the Start-Stop function will be interrupted and
the engine will automatically start:
● The vehicle starts moving.
● The brake pedal is pressed several times in a row.
● The battery has been discharged excessively.
Page 224 of 325
222Vehicle maintenance and cleaning
Cleaning the engine compartment
Take special care when cleaning the engine compartment.
Anti-corrosion treatment
The engine compartment and the surface of the power unit are given anti-
corrosion treatment at the factory.
Good corrosion protection is particularly important in winter when the vehi-
cle is frequently driven on salted roads. To prevent the salt corroding the ve-
hicle, the entire engine compartment should be thoroughly cleaned before
and after winter.
Your Technical Service has got the necessary equipment to provide the cor-
rect cleaning and preserving products. For this reason, we recommend hav-
ing this work performed by them.
The anti-corrosion protection is usually removed if the engine compartment
is cleaned with grease removing solutions, or if you have the engine
cleaned. On commissioning this work, ensure that all surfaces, seams,
joints and components in the engine compartment are given anti-corrosion
treatment.
WARNING
● When working in the engine compartment, always observe the safety
warnings ⇒ page 234.
● Before opening the bonnet, switch the engine off, apply the hand-
brake firmly and always remove the key from the ignition.
● Allow the engine to cool before you clean the engine compartment.
● Do not clean the vehicle underbody, wheel arches or wheel trims
without protecting your hands and arms. You may cut yourself on sharp-
edged metal parts. Failure to comply could result in injury.
WARNING (Continued)
● Moisture, ice and salt on the brakes may affect braking efficiency.
Risk of accident. Directly after washing, avoid sudden and sharp braking.
● Never touch the radiator fan. It is temperature-controlled and could
start automatically, even when the key is removed from the ignition!
For the sake of the environment
Fuel, grease and oil deposits could be removed when the engine is washed.
The polluted water must be cleaned in an oil separator. For this reason, en-
gine washing should be carried out only by a specialised workshop or a pet-
rol station.
Vehicle interior maintenance Introduction
The dye used in many modern garments, for example dark jeans, is not al-
ways sufficiently colour-fast. Seat upholstery (material and leather), espe-
cially when light-coloured, may visibly discolour if the dye comes out of
clothing (even when used correctly). This is not an upholstery defect but in-
dicates that the dye in the item of clothing is not sufficiently colour-fast.
The longer stains or dirt remain on the vehicle surfaces, especially the fab-
rics covering the padded upholstery, the more difficult it becomes to clean
and maintain them. If stains and dirt are left for a long time, it may be that
they are impossible to remove.
Page 236 of 325
234Checking and refilling levels
Opening the bonnet
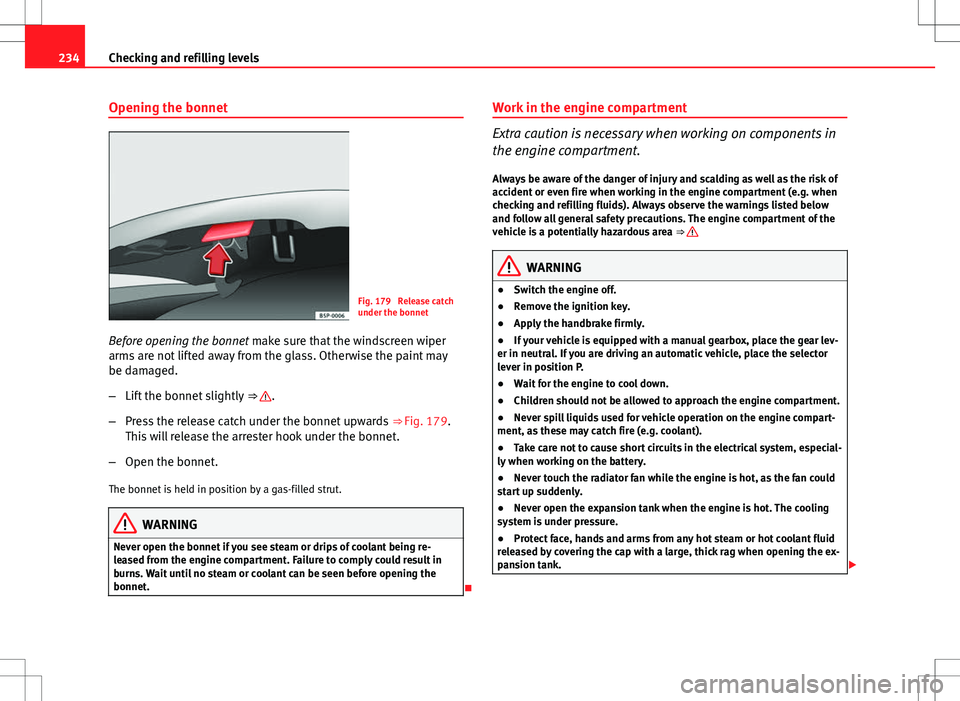
Fig. 179 Release catch
under the bonnet
Before opening the bonnet make sure that the windscreen wiper
arms are not lifted away from the glass. Otherwise the paint may
be damaged.
– Lift the bonnet slightly ⇒
.
– Press the release catch under the bonnet upwards ⇒ Fig. 179.
This will release the arrester hook under the bonnet.
– Open the bonnet.
The bonnet is held in position by a gas-filled strut.
WARNING
Never open the bonnet if you see steam or drips of coolant being re-
leased from the engine compartment. Failure to comply could result in
burns. Wait until no steam or coolant can be seen before opening the
bonnet.
Work in the engine compartment
Extra caution is necessary when working on components in
the engine compartment.
Always be aware of the danger of injury and scalding as well as the risk of
accident or even fire when working in the engine compartment (e.g. when
checking and refilling fluids). Always observe the warnings listed below
and follow all general safety precautions. The engine compartment of the
vehicle is a potentially hazardous area ⇒
WARNING
● Switch the engine off.
● Remove the ignition key.
● Apply the handbrake firmly.
● If your vehicle is equipped with a manual gearbox, place the gear lev-
er in neutral. If you are driving an automatic vehicle, place the selector
lever in position P.
● Wait for the engine to cool down.
● Children should not be allowed to approach the engine compartment.
● Never spill liquids used for vehicle operation on the engine compart-
ment, as these may catch fire (e.g. coolant).
● Take care not to cause short circuits in the electrical system, especial-
ly when working on the battery.
● Never touch the radiator fan while the engine is hot, as the fan could
start up suddenly.
● Never open the expansion tank when the engine is hot. The cooling
system is under pressure.
● Protect face, hands and arms from any hot steam or hot coolant fluid
released by covering the cap with a large, thick rag when opening the ex-
pansion tank.
Page 242 of 325
240Checking and refilling levels
Coolant fluid loss
Any loss of coolant fluid normally indicates a leak in the cooling system. In
this case the cooling system should be inspected by a specialised work-
shop without delay. It is not sufficient merely to top up the coolant fluid.
If there are no leaks in the system, a loss of coolant fluid can only occur if
the coolant boils and is forced out of the system as a result of overheating.
CAUTION
Radiator sealants must not be added to the coolant fluid. Such additives
could seriously impair the function of the cooling system.
Topping up the coolant fluid
Be careful when topping up with coolant fluid. – Switch the engine off.
– Wait for the engine to cool down.
– Cover the cap on the expansion tank ⇒ Fig. 182 with a cloth,
and carefully unscrew the cap anticlockwise ⇒
.
– Add coolant fluid.
– Screw on the cap tightly.
Make sure that the coolant fluid meets the required specifications
⇒ page 238. Do not use a different type of antifreeze if G12++antifreeze is
not available. In this case, use only water and bring the antifreeze concen-
tration back up to the correct level as soon as possible.
Always top up with new coolant fluid. Do not fill above the “max” mark. Excess coolant fluid is forced out of the
system through the valve in the filler cap when the engine gets hot.
If a lot of coolant fluid has been lost, wait for the engine to
cool down before
putting in cold coolant. Failure to do so could result in serious engine dam-
age.
WARNING
● The cooling system is under pressure. Do not unscrew the cap on the
expansion tank when the engine is hot. Failure to comply could result in
burns.
● The antifreeze and coolant fluid can be a health hazard. Therefore,
the antifreeze should be stored in the original container in a safe place
out of reach of children. Failure to comply could result in poisoning.
For the sake of the environment
Drained off coolant should not be used again. Drain off the used coolant in-
to a suitable container and dispose of it in the proper manner (observe envi-
ronmental regulations).
Radiator fan
The radiator fan can start running spontaneously. The auxiliary fan can continue to run for as long as 10 minutes after stop-
ping the engine, even after the ignition is switched off. It may also start run-
ning suddenly ⇒
after some while if
● Stored heat raises the coolant temperature, or
● The hot engine compartment is additionally heated up by the sun.
Page 243 of 325
241
Checking and refilling levels
WARNING
When working in the engine compartment be aware that the radiator fan
may start running suddenly, leading to the risk of injury.
Washer fluid and windscreen wiper blades Windscreen washer system
Plain water is not sufficient for the windscreen washer sys-
tem.
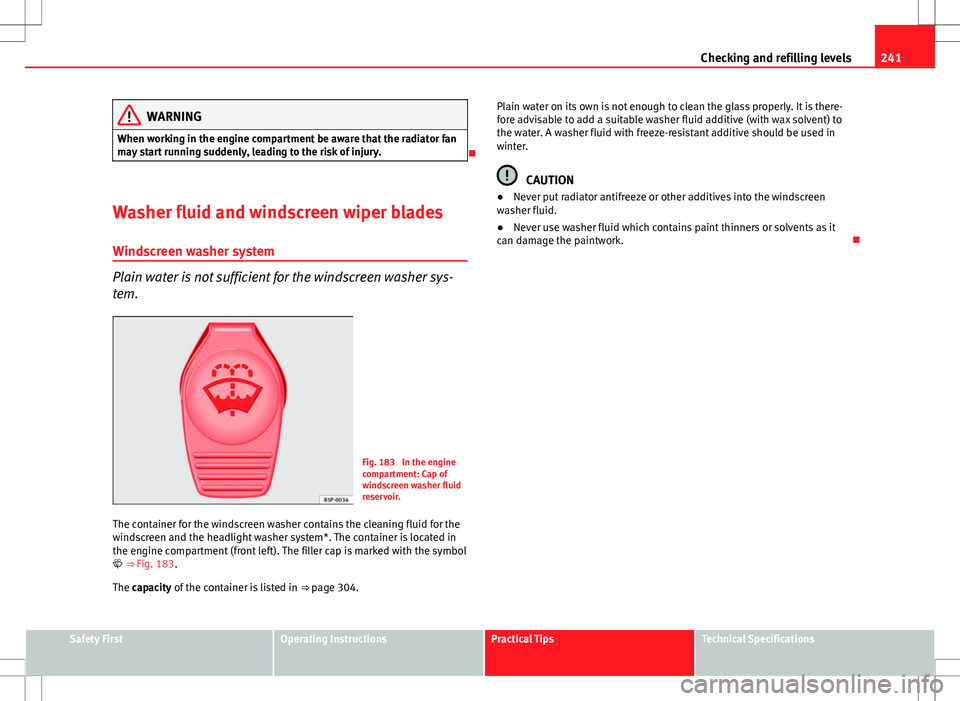
Fig. 183 In the engine
compartment: Cap of
windscreen washer fluid
reservoir.
The container for the windscreen washer contains the cleaning fluid for the
windscreen and the headlight washer system*. The container is located in
the engine compartment (front left). The filler cap is marked with the symbol
⇒ Fig. 183. The capacity of the container is listed in ⇒ page 304. Plain water on its own is not enough to clean the glass properly. It is there-
fore advisable to add a suitable washer fluid additive (with wax solvent) to
the water. A washer fluid with freeze-resistant additive should be used in
winter.
CAUTION
● Never put radiator antifreeze or other additives into the windscreen
washer fluid.
● Never use washer fluid which contains paint thinners or solvents as it
can damage the paintwork.
Safety FirstOperating InstructionsPractical TipsTechnical Specifications
Page 273 of 325

271
If and when
Fuse assignment
This list shows the fuses which can be replaced relatively
easily by the owner.
No.ConsumerAmps1Air conditioner102Footwell lamps53Heated washer jets54Radiator fan55Parking aid, automatic gearbox106Air conditioner (air purity sensor), pressure sensor5
7Electronic Stability Control (ESC), brake light switch,
clutch pedal switch, steering angle sensor10
8Telephone59Lambda probe heater1010Adaptive headlights right5
11Airbag and disconnection of the front passenger air-
bag5
12Diagnostic socket1013Steering column unit1014Brake lights1015Instrument panel1016Vacant 17Tyre pressure control, rain/light sensor1018Adaptive headlights left519Start-Stop control unit1020Engine management1521Start/Stop battery power management522Vacant 23Vacant
No.ConsumerAmps24Central electrics unit for convenience equipment2025Heater blower3026Rear window heater3027Power socket for trailer (control unit)3028Fuel pump, auxiliary pump for diesel2029Radio, amplifier (with Start-Stop)2030Sliding/tilting sunroof20
31Diagnosis connection, automatic anti-dazzle interior
mirror, reverse light, automatic gearbox15
32Towing socket1533Lighter2034Rear electric windows3035Luggage compartment power socket*2036Wiper system30
37Pump for windscreen washer and headlight washer
system30
38Luggage compartment illumination, alarm1539Radio, amplifier (without Start-Stop)2040Horn2541230 volt socket3042Electronic Stability Control (ESC)2543Front electric windows3044Seat heating35
Some of the electrical items listed in the table are only fitted on certain
models or are optional extras.
Safety FirstOperating InstructionsPractical TipsTechnical Specifications
Page 320 of 325
Manual gearbox . . . . . . . . . . . . . . . . . . . . . . . . 186
MirrorsActivating stored settings . . . . . . . . . . . . . 140
Automatic exterior mirror adjustment . . . . 139
Heated exterior mirrors . . . . . . . . . . . . . . . 133
Storing settings . . . . . . . . . . . . . . . . . . . . . 140
Vanity mirrors . . . . . . . . . . . . . . . . . . . . . . . 128
Mobile phones and two-way radios . . . . . . . . 229
multitronic® . . . . . . . . . . . . . . . . . . . . . . . . . . . 187 Driving . . . . . . . . . . . . . . . . . . . . . . . . . . . . . 188
N
Net partition Removing . . . . . . . . . . . . . . . . . . . . . . . . . . 148
Number of seats . . . . . . . . . . . . . . . . . . . . . . . . . 19
O
Observations . . . . . . . . . . . . . . . . . . . . . . . . . . 205
Octane number . . . . . . . . . . . . . . . . . . . . . . . . . 231
Odometer . . . . . . . . . . . . . . . . . . . . . . . . . . . . . . 65
Oil consumption . . . . . . . . . . . . . . . . . . . . . . . . 237
Oil dipstick . . . . . . . . . . . . . . . . . . . . . . . . . . . . 237
Oil properties . . . . . . . . . . . . . . . . . . . . . . . . . . 236
Onboard computer . . . . . . . . . . . . . . . . . . . . . . . 88
Outside temperature display . . . . . . . . . . . . . . . 75
Overview Cockpit . . . . . . . . . . . . . . . . . . . . . . . . . . . . . 59 P
Paddle levers tiptronic . . . . . . . . . . . . . . . . . . . . . . . . . . . 193
Paintwork Polishing . . . . . . . . . . . . . . . . . . . . . . . . . . . 219
Parking . . . . . . . . . . . . . . . . . . . . . . . . . . . . . . . 180 multitronic® . . . . . . . . . . . . . . . . . . . . . . . . 188
Parking aid SEAT Parking System . . . . . . . . . . . . . . . . . 181
SEAT Parking System plus . . . . . . . . . . . . . 182
Parking aid acoustic system . . . . . . . . . . . . . . 181
Passenger see Correct sitting position . . . . . . . 10, 11, 12
Pedals . . . . . . . . . . . . . . . . . . . . . . . . . . . . . . . . . 16
Petrol . . . . . . . . . . . . . . . . . . . . . . . . . . . . . . . . . 231 Driving abroad . . . . . . . . . . . . . . . . . . . . . . 205
Petrol additives . . . . . . . . . . . . . . . . . . . . . . . . 232
Photosensor faulty . . . . . . . . . . . . . . . . . . . . . . . 84
Physical principles of a frontal collision . . . . . . 20
Plastic parts . . . . . . . . . . . . . . . . . . . . . . . . . . . 219
Plastic parts cleaning . . . . . . . . . . . . . . . . . . . . 226
Power socket . . . . . . . . . . . . . . . . . . . . . . . . . . 155
Power steering . . . . . . . . . . . . . . . . . . . . . . . . . 199
Products for vehicle maintenance . . . . . . . . . . 216
Q
Quartz clock . . . . . . . . . . . . . . . . . . . . . . . . . . . . 63 R
Radiator fan . . . . . . . . . . . . . . . . . . . . . . . . . . . 240
Radio display . . . . . . . . . . . . . . . . . . . . . . . . . . . 75
Rain sensor . . . . . . . . . . . . . . . . . . . . . . . . . . . . 129
Rain sensor faulty . . . . . . . . . . . . . . . . . . . . . . . . 84
Reading lights Front . . . . . . . . . . . . . . . . . . . . . . . . . . . . . . 125
Rear . . . . . . . . . . . . . . . . . . . . . . . . . . . . . . . 127
Rear drink holder . . . . . . . . . . . . . . . . . . . . . . . 154
Rear fog light . . . . . . . . . . . . . . . . . . . . . . . . . . 119
Rear lid Central locking system . . . . . . . . . . . . . . . . 106
Light . . . . . . . . . . . . . . . . . . . . . . . . . . . . . . 127
Rear seat bench . . . . . . . . . . . . . . . . . . . . . . . . 150
Rear side window sun blind . . . . . . . . . . . . . . . 129
Rear view mirrors Anti-dazzle interior mirror with automaticadjustment . . . . . . . . . . . . . . . . . . . . . . . 132
Anti-dazzle setting . . . . . . . . . . . . . . . . . . . 132
Interior mirror . . . . . . . . . . . . . . . . . . . . . . . 132
Rear window heating Heating element wires . . . . . . . . . . . . . . . . 220
Rear window sun blind . . . . . . . . . . . . . . . . . . . 129
Rear window wiper Intermittent wipe . . . . . . . . . . . . . . . . . . . . 131
Rear window automatic wash and wipe . . 131
Refuelling . . . . . . . . . . . . . . . . . . . . . . . . . . . . . 230
Registration light . . . . . . . . . . . . . . . . . . . . . . . 292
Remote control key Indicator light . . . . . . . . . . . . . . . . . . . . . . . 100
Locking and unlocking . . . . . . . . . . . . . . . . 108
318 Index