seat adjustment Seat Exeo ST 2012 Owner's manual
[x] Cancel search | Manufacturer: SEAT, Model Year: 2012, Model line: Exeo ST, Model: Seat Exeo ST 2012Pages: 325, PDF Size: 5.56 MB
Page 5 of 325
Table of Contents
Manual structure . . . . . . . . . . . . . . . . . . . . 5
Content . . . . . . . . . . . . . . . . . . . . . . . . . . . . . . . . 6
Safety First . . . . . . . . . . . . . . . . . . . . . . . . . . . . 7
Safe driving . . . . . . . . . . . . . . . . . . . . . . . . . . . . . . . 7
Brief introduction . . . . . . . . . . . . . . . . . . . . . . . . . 7
Proper sitting position for occupants . . . . . . . . . 10
Pedal area . . . . . . . . . . . . . . . . . . . . . . . . . . . . . . . 16
Storing objects . . . . . . . . . . . . . . . . . . . . . . . . . . . 16
Seat belts . . . . . . . . . . . . . . . . . . . . . . . . . . . . . . . . . 19
Brief introduction . . . . . . . . . . . . . . . . . . . . . . . . . 19
Why wear seat belts? . . . . . . . . . . . . . . . . . . . . . . 20
Seat belts . . . . . . . . . . . . . . . . . . . . . . . . . . . . . . . 24
Seat belt tensioners . . . . . . . . . . . . . . . . . . . . . . . 28
Airbag system . . . . . . . . . . . . . . . . . . . . . . . . . . . . . 29
Brief introduction . . . . . . . . . . . . . . . . . . . . . . . . . 29
Front airbags . . . . . . . . . . . . . . . . . . . . . . . . . . . . . 33
Knee airbag* . . . . . . . . . . . . . . . . . . . . . . . . . . . . . 36
Side airbags* . . . . . . . . . . . . . . . . . . . . . . . . . . . . 39
Curtain airbags . . . . . . . . . . . . . . . . . . . . . . . . . . . 42
Deactivating airbags . . . . . . . . . . . . . . . . . . . . . . . 45
Child safety . . . . . . . . . . . . . . . . . . . . . . . . . . . . . . . 47
Brief introduction . . . . . . . . . . . . . . . . . . . . . . . . . 47
Child seats . . . . . . . . . . . . . . . . . . . . . . . . . . . . . . . 49
Securing child seats . . . . . . . . . . . . . . . . . . . . . . . 52 Operating Instructions
. . . . . . . . . . . . . 59
Cockpit . . . . . . . . . . . . . . . . . . . . . . . . . . . . . . . . . . . 59
Overview . . . . . . . . . . . . . . . . . . . . . . . . . . . . . . . . 59
Instruments . . . . . . . . . . . . . . . . . . . . . . . . . . . . . . 61
Warning and indicator lamps . . . . . . . . . . . . . . . . 67
Driver information system . . . . . . . . . . . . . . . . . . 74
Auto-check system . . . . . . . . . . . . . . . . . . . . . . . . 78
Speed warning* . . . . . . . . . . . . . . . . . . . . . . . . 85
Onboard computer . . . . . . . . . . . . . . . . . . . . . . . . 88
Menu display . . . . . . . . . . . . . . . . . . . . . . . . . . . . . 91
Tyre pressure monitoring* . . . . . . . . . . . . . . . . . . 92
Steering wheel controls . . . . . . . . . . . . . . . . . . . . 94
Multifunction steering wheel* . . . . . . . . . . . . . . . 94
Unlocking and locking . . . . . . . . . . . . . . . . . . . . . 99
Remote control keys . . . . . . . . . . . . . . . . . . . . . . . 99
Central locking . . . . . . . . . . . . . . . . . . . . . . . . . . . 101
Rear lid . . . . . . . . . . . . . . . . . . . . . . . . . . . . . . . . . . 106
Childproof lock . . . . . . . . . . . . . . . . . . . . . . . . . . . 107
Remote control key . . . . . . . . . . . . . . . . . . . . . . . . 108
Anti-theft alarm system* . . . . . . . . . . . . . . . . . . . 110
Electric windows . . . . . . . . . . . . . . . . . . . . . . . . . . 112
Sliding/tilting sunroof* . . . . . . . . . . . . . . . . . . . . 114
Lights and visibility . . . . . . . . . . . . . . . . . . . . . . . . 117
Lights . . . . . . . . . . . . . . . . . . . . . . . . . . . . . . . . . . . 117
Interior lights . . . . . . . . . . . . . . . . . . . . . . . . . . . . . 125
Visibility . . . . . . . . . . . . . . . . . . . . . . . . . . . . . . . . . 128
Windscreen wipers . . . . . . . . . . . . . . . . . . . . . . . . 129
Rear view mirrors . . . . . . . . . . . . . . . . . . . . . . . . . . 132
Seats and storage compartments . . . . . . . . . . 135
Manual adjustment of the front seats . . . . . . . . . 135
Electric adjustment of front seats* . . . . . . . . . . . 137
Lumbar support* . . . . . . . . . . . . . . . . . . . . . . . . . . 138
Driver seat memory* . . . . . . . . . . . . . . . . . . . . . . . 139 Head restraints . . . . . . . . . . . . . . . . . . . . . . . . . . . 141
Armrests . . . . . . . . . . . . . . . . . . . . . . . . . . . . . . . . 143
Luggage compartment . . . . . . . . . . . . . . . . . . . . . 144
Roof rack / roof rails* . . . . . . . . . . . . . . . . . . . . . . 152
Drink holder . . . . . . . . . . . . . . . . . . . . . . . . . . . . . . 153
Ashtray*, cigarette lighter* and electric sockets* . .154
Compartments . . . . . . . . . . . . . . . . . . . . . . . . . . . . 159
Air conditioning . . . . . . . . . . . . . . . . . . . . . . . . . . . 162
2C-Climatronic . . . . . . . . . . . . . . . . . . . . . . . . . . . . 162
Driving . . . . . . . . . . . . . . . . . . . . . . . . . . . . . . . . . . . . 172
Steering . . . . . . . . . . . . . . . . . . . . . . . . . . . . . . . . . 172
Safety . . . . . . . . . . . . . . . . . . . . . . . . . . . . . . . . . . . 172
Ignition lock . . . . . . . . . . . . . . . . . . . . . . . . . . . . . . 173
Starting and stopping the engine . . . . . . . . . . . . 174
Start-Stop function* . . . . . . . . . . . . . . . . . . . . . . . 176
Handbrake . . . . . . . . . . . . . . . . . . . . . . . . . . . . . . . 179
Parking aid acoustic system . . . . . . . . . . . . . . . . . 181
Cruise speed* (Cruise control system) . . . . . . . . 183
Manual gearbox . . . . . . . . . . . . . . . . . . . . . . . . . . 186
Automatic gearbox* . . . . . . . . . . . . . . . . . . . . . . . 187
Practical Tips . . . . . . . . . . . . . . . . . . . . . . . . . 195
Intelligent technology . . . . . . . . . . . . . . . . . . . . . 195
Electronic Stability Control (ESC) . . . . . . . . . . . . . 195
Brakes . . . . . . . . . . . . . . . . . . . . . . . . . . . . . . . . . . 198
Power steering . . . . . . . . . . . . . . . . . . . . . . . . . . . 199
Servotronic* . . . . . . . . . . . . . . . . . . . . . . . . . . . . . 200
Driving and the environment . . . . . . . . . . . . . . . 201
Running-in . . . . . . . . . . . . . . . . . . . . . . . . . . . . . . . 201
Exhaust gas purification system . . . . . . . . . . . . . 202
Economical and environmentally friendly driving 203
Driving abroad . . . . . . . . . . . . . . . . . . . . . . . . . . . . 205
3
Table of Contents
Page 8 of 325
6Content
Content
This manual is structured to provide the information you need in an organ-
ised way. The content of this Manual is divided into sections which belong
to chapters (e.g. “Air conditioning”). The entire manual is divided into five
large parts which are:
1. Safety First Information on the vehicle equipment relating to passive safety such as
seat belts, airbags, seats, etc.
2. Operating instructions
Information about the distribution of controls in the driver position of your
vehicle, about the seat adjustment possibilities, about how to create a suit-
able climate in the passenger compartment, etc.
3. Practical Tips
Advice relating to the driving, caring and maintenance of your vehicle and
certain problems you can solve yourself.
4. Technical specifications
Figures, values and the dimensions of your vehicle.
5. Alphabetic index
At the end of this manual there is a detailed alphabetical index, this will
help you to rapidly find the information you require.
Page 12 of 325
10Safe driving
Proper sitting position for occupants
Proper sitting position for driver
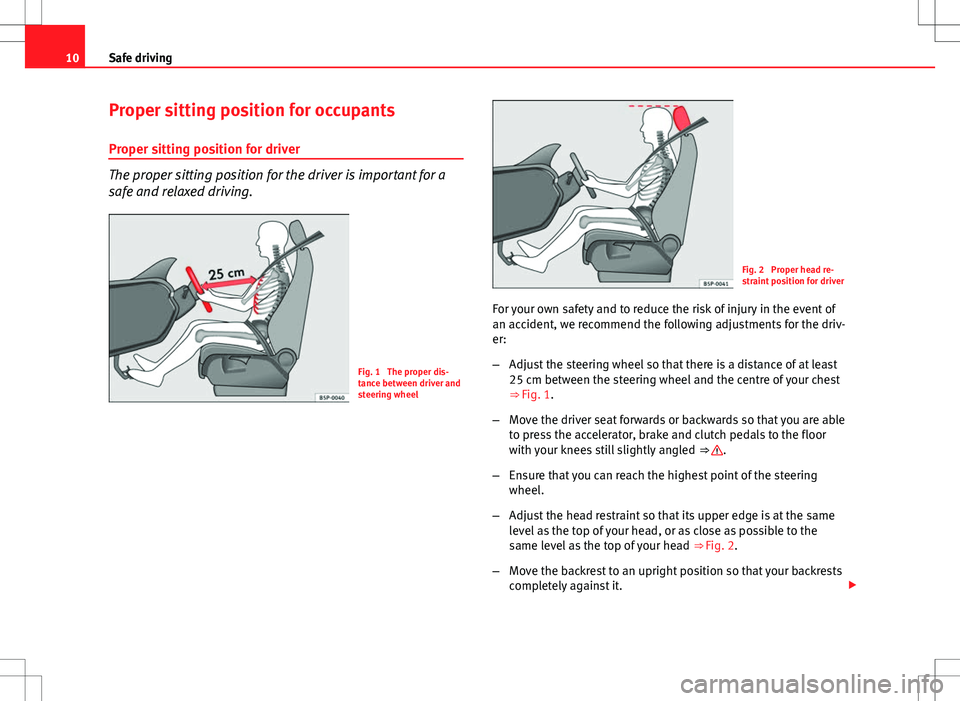
The proper sitting position for the driver is important for a
safe and relaxed driving.
Fig. 1 The proper dis-
tance between driver and
steering wheel
Fig. 2 Proper head re-
straint position for driver
For your own safety and to reduce the risk of injury in the event of
an accident, we recommend the following adjustments for the driv-
er:
– Adjust the steering wheel so that there is a distance of at least
25 cm between the steering wheel and the centre of your chest
⇒ Fig. 1.
– Move the driver seat forwards or backwards so that you are able
to press the accelerator, brake and clutch pedals to the floor
with your knees still slightly angled ⇒
.
– Ensure that you can reach the highest point of the steering
wheel.
– Adjust the head restraint so that its upper edge is at the same
level as the top of your head, or as close as possible to the
same level as the top of your head ⇒ Fig. 2.
– Move the backrest to an upright position so that your backrests
completely against it.
Page 13 of 325
11
Safe driving
– Fasten your seat belt securely ⇒ page 19.
– Keep both feet in the footwell so that you have the vehicle un-
der control at all times.
Adjustment of the driver seat ⇒ page 135.
WARNING
● An incorrect sitting position of the driver can lead to severe injuries.
● Adjust the driver seat so that there is at least 25 cm distance between
the centre of the chest and the centre of the steering wheel ⇒ Fig. 1. If
you are sitting closer than 25 cm, the airbag system cannot protect you
properly.
● If your physical constitution prevents you from maintaining the mini-
mum distance of 25 cm, contact a specialised workshop. The workshop
will help you decide if special specific modifications are necessary.
● When driving, always hold the steering wheel with both hands on the
outside of the ring at the 9 o'clock and 3 o'clock positions. This reduces
the risk of injury when the driver airbag is triggered.
● Never hold the steering wheel at the 12 o'clock position, or in any
other manner (e.g. in the centre of the steering wheel). In such cases, if
the airbag is triggered, you may sustain injuries to the arms, hands and
head.
● To reduce the risk of injury to the driver during sudden braking ma-
noeuvres or an accident, never drive with the backrest tilted far back! The
airbag system and seat belts can only provide optimal protection when
the backrest is in an upright position and the driver is wearing his or her
seat belt properly. The further the backrests are tilted to the rear, the
greater the risk of injury due to incorrect positioning of the belt web or to
the incorrect sitting position!
● Adjust the head restraint properly to achieve optimal protection.
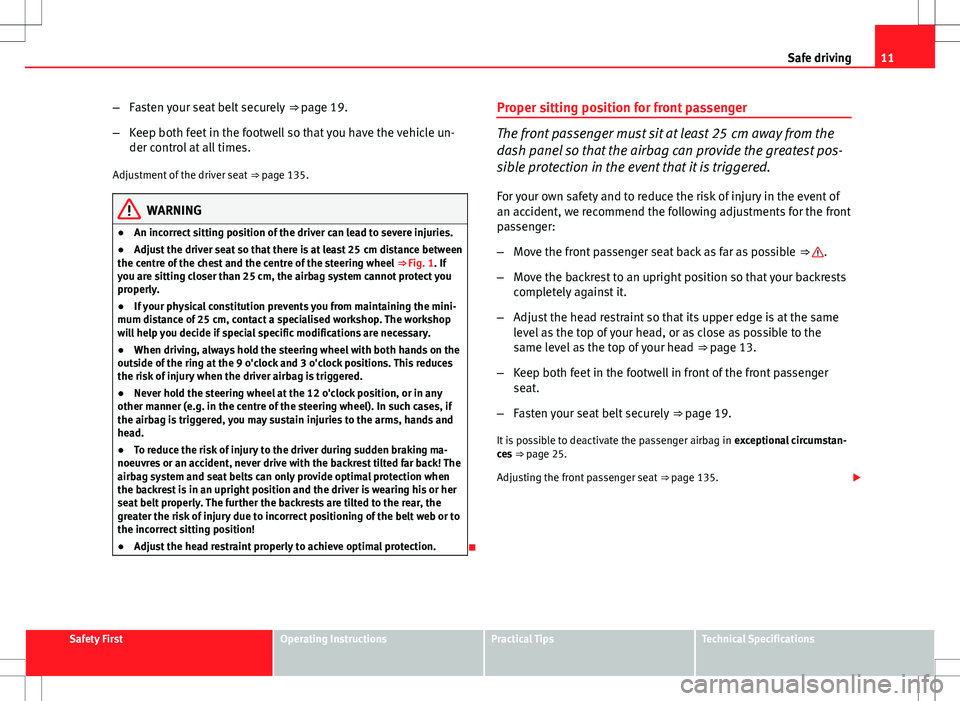
Proper sitting position for front passenger
The front passenger must sit at least 25 cm away from the
dash panel so that the airbag can provide the greatest pos-
sible protection in the event that it is triggered.
For your own safety and to reduce the risk of injury in the event of
an accident, we recommend the following adjustments for the front
passenger:
– Move the front passenger seat back as far as possible ⇒
.
– Move the backrest to an upright position so that your backrests
completely against it.
– Adjust the head restraint so that its upper edge is at the same
level as the top of your head, or as close as possible to the
same level as the top of your head ⇒ page 13.
– Keep both feet in the footwell in front of the front passenger
seat.
– Fasten your seat belt securely ⇒ page 19.
It is possible to deactivate the passenger airbag in exceptional circumstan-
ces ⇒ page 25.
Adjusting the front passenger seat ⇒ page 135.
Safety FirstOperating InstructionsPractical TipsTechnical Specifications
Page 15 of 325
13
Safe driving
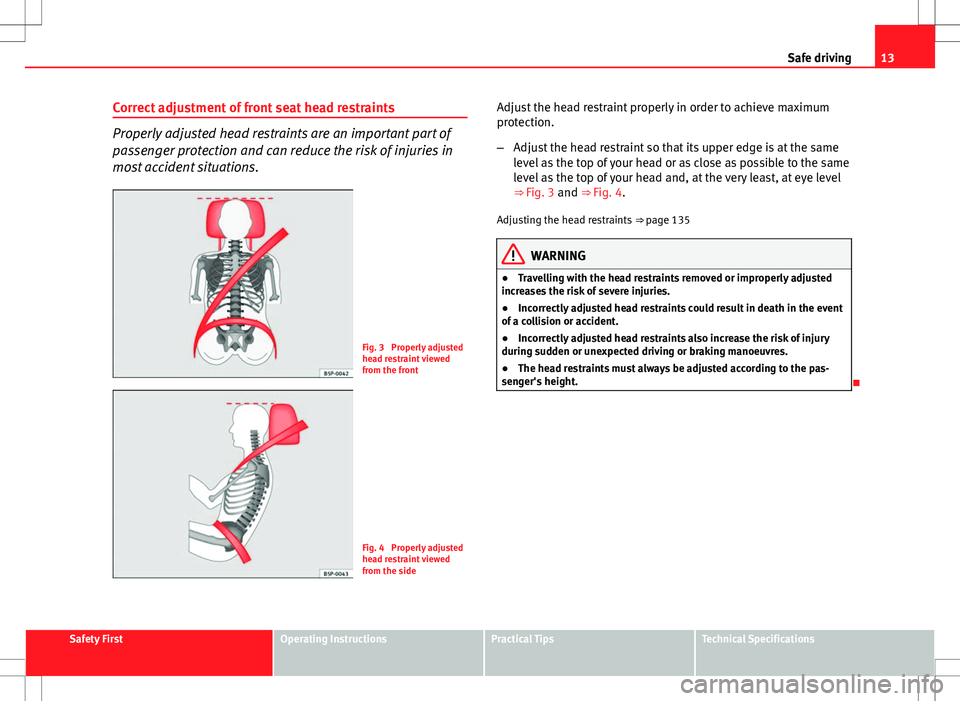
Correct adjustment of front seat head restraints
Properly adjusted head restraints are an important part of
passenger protection and can reduce the risk of injuries in
most accident situations.
Fig. 3 Properly adjusted
head restraint viewed
from the front
Fig. 4 Properly adjusted
head restraint viewed
from the side Adjust the head restraint properly in order to achieve maximum
protection.
–
Adjust the head restraint so that its upper edge is at the same
level as the top of your head or as close as possible to the same
level as the top of your head and, at the very least, at eye level
⇒ Fig. 3 and ⇒ Fig. 4.
Adjusting the head restraints ⇒ page 135
WARNING
● Travelling with the head restraints removed or improperly adjusted
increases the risk of severe injuries.
● Incorrectly adjusted head restraints could result in death in the event
of a collision or accident.
● Incorrectly adjusted head restraints also increase the risk of injury
during sudden or unexpected driving or braking manoeuvres.
● The head restraints must always be adjusted according to the pas-
senger's height.
Safety FirstOperating InstructionsPractical TipsTechnical Specifications
Page 16 of 325
14Safe driving
Correct adjustment of rear seat head restraints
Properly adjusted head restraints are an important part of
the passenger protection and can reduce the risk of injuries
in most accident situations
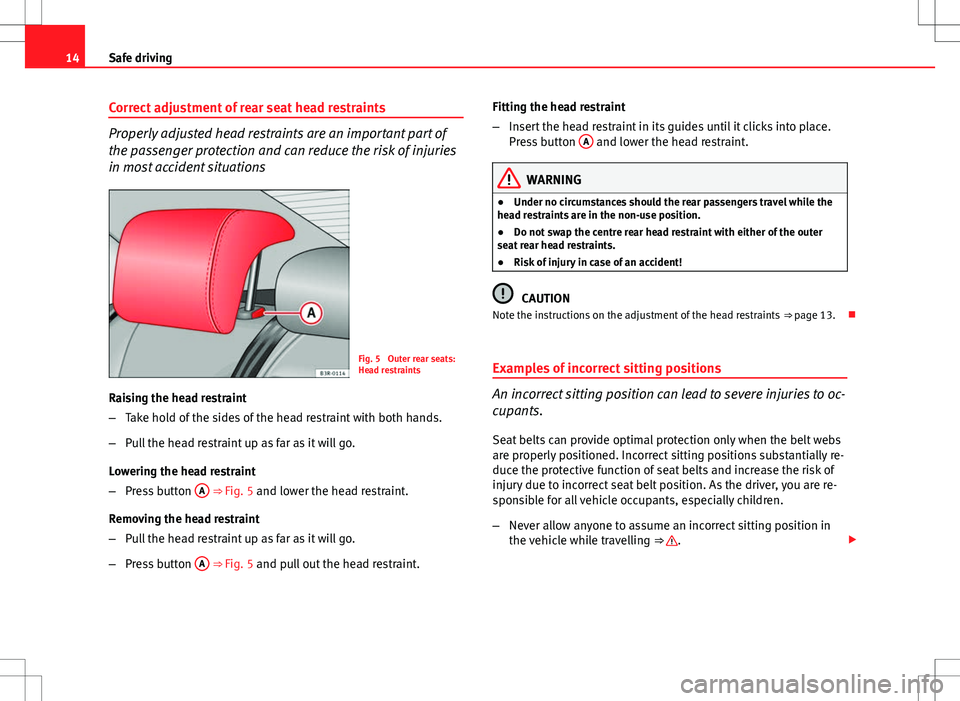
Fig. 5 Outer rear seats:
Head restraints
Raising the head restraint
– Take hold of the sides of the head restraint with both hands.
– Pull the head restraint up as far as it will go.
Lowering the head restraint
– Press button A
⇒ Fig. 5 and lower the head restraint.
Removing the head restraint
– Pull the head restraint up as far as it will go.
– Press button A
⇒ Fig. 5 and pull out the head restraint. Fitting the head restraint
–
Insert the head restraint in its guides until it clicks into place.
Press button A
and lower the head restraint.
WARNING
● Under no circumstances should the rear passengers travel while the
head restraints are in the non-use position.
● Do not swap the centre rear head restraint with either of the outer
seat rear head restraints.
● Risk of injury in case of an accident!
CAUTION
Note the instructions on the adjustment of the head restraints ⇒ page 13.
Examples of incorrect sitting positions
An incorrect sitting position can lead to severe injuries to oc-
cupants.
Seat belts can provide optimal protection only when the belt webs
are properly positioned. Incorrect sitting positions substantially re-
duce the protective function of seat belts and increase the risk of
injury due to incorrect seat belt position. As the driver, you are re-
sponsible for all vehicle occupants, especially children.
– Never allow anyone to assume an incorrect sitting position in
the vehicle while travelling ⇒
.
Page 26 of 325
24Seat belts
Seat belts
Seat belt adjustment
The seat belts for the front and rear occupants are locked in-
to position by a latch.
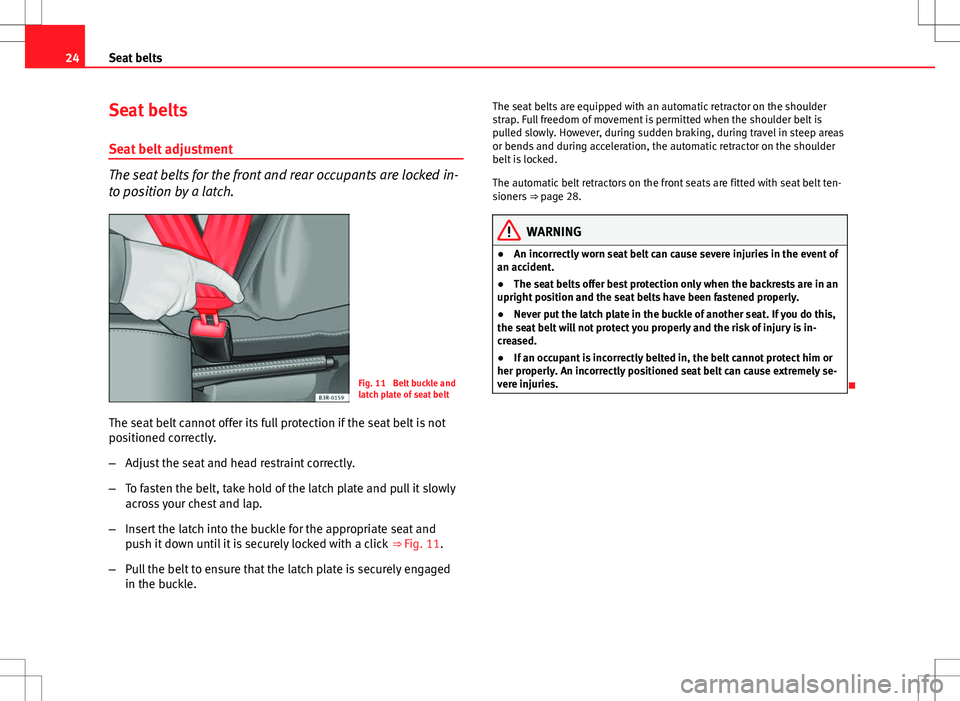
Fig. 11 Belt buckle and
latch plate of seat belt
The seat belt cannot offer its full protection if the seat belt is not
positioned correctly.
– Adjust the seat and head restraint correctly.
– To fasten the belt, take hold of the latch plate and pull it slowly
across your chest and lap.
– Insert the latch into the buckle for the appropriate seat and
push it down until it is securely locked with a click ⇒ Fig. 11.
– Pull the belt to ensure that the latch plate is securely engaged
in the buckle. The seat belts are equipped with an automatic retractor on the shoulder
strap. Full freedom of movement is permitted when the shoulder belt is
pulled slowly. However, during sudden braking, during travel in steep areas
or bends and during acceleration, the automatic retractor on the shoulder
belt is locked.
The automatic belt retractors on the front seats are fitted with seat belt ten-
sioners
⇒ page 28.
WARNING
● An incorrectly worn seat belt can cause severe injuries in the event of
an accident.
● The seat belts offer best protection only when the backrests are in an
upright position and the seat belts have been fastened properly.
● Never put the latch plate in the buckle of another seat. If you do this,
the seat belt will not protect you properly and the risk of injury is in-
creased.
● If an occupant is incorrectly belted in, the belt cannot protect him or
her properly. An incorrectly positioned seat belt can cause extremely se-
vere injuries.
Page 27 of 325
25
Seat belts
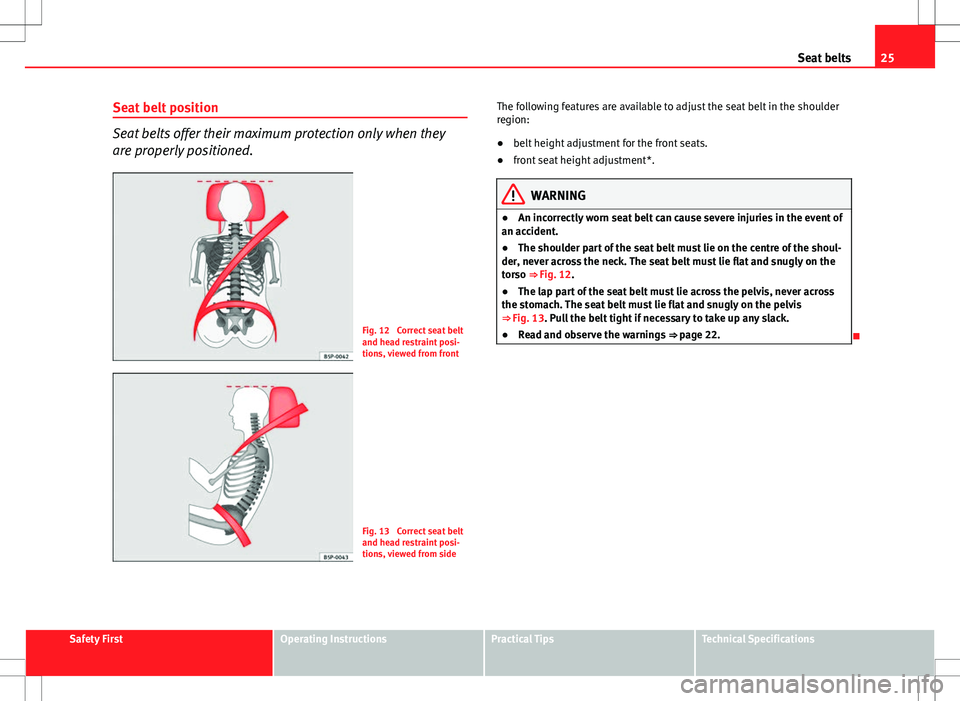
Seat belt position
Seat belts offer their maximum protection only when they
are properly positioned.
Fig. 12 Correct seat belt
and head restraint posi-
tions, viewed from front
Fig. 13 Correct seat belt
and head restraint posi-
tions, viewed from side The following features are available to adjust the seat belt in the shoulder
region:
●
belt height adjustment for the front seats.
● front seat height adjustment*.
WARNING
● An incorrectly worn seat belt can cause severe injuries in the event of
an accident.
● The shoulder part of the seat belt must lie on the centre of the shoul-
der, never across the neck. The seat belt must lie flat and snugly on the
torso ⇒ Fig. 12.
● The lap part of the seat belt must lie across the pelvis, never across
the stomach. The seat belt must lie flat and snugly on the pelvis
⇒ Fig. 13. Pull the belt tight if necessary to take up any slack.
● Read and observe the warnings ⇒ page 22.
Safety FirstOperating InstructionsPractical TipsTechnical Specifications
Page 29 of 325
27
Seat belts
– Guide the belt back by hand so that it rolls up easily and the
trim is not damaged
WARNING
Never unbuckle a seat belt while the vehicle is in motion. If you do, you
increase the risk of sustaining severe or fatal injuries.
Seat belt height adjustment
Seat belt height adjusters can be used to adjust the height
of the shoulder area of the seat belt.
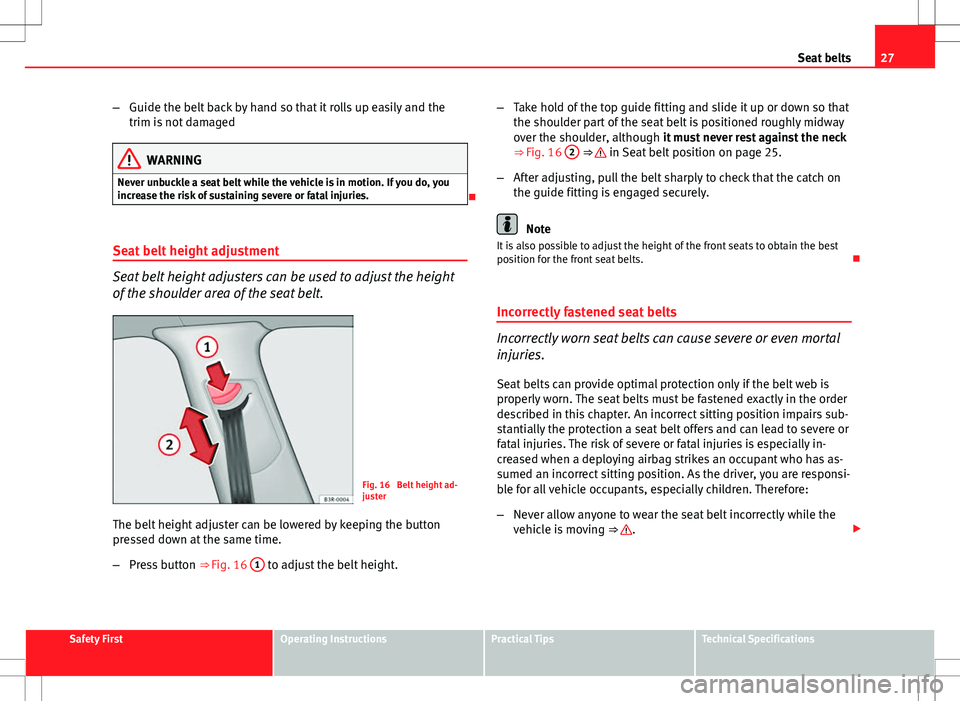
Fig. 16 Belt height ad-
juster
The belt height adjuster can be lowered by keeping the button
pressed down at the same time.
– Press button ⇒
Fig. 16 1
to adjust the belt height. –
Take hold of the top guide fitting and slide it up or down so that
the shoulder part of the seat belt is positioned roughly midway
over the shoulder, although it must never rest against the neck
⇒ Fig. 16 2
⇒ in Seat belt position on page 25.
– After adjusting, pull the belt sharply to check that the catch on
the guide fitting is engaged securely.
Note
It is also possible to adjust the height of the front seats to obtain the best
position for the front seat belts.
Incorrectly fastened seat belts
Incorrectly worn seat belts can cause severe or even mortal
injuries. Seat belts can provide optimal protection only if the belt web is
properly worn. The seat belts must be fastened exactly in the order
described in this chapter. An incorrect sitting position impairs sub-
stantially the protection a seat belt offers and can lead to severe or
fatal injuries. The risk of severe or fatal injuries is especially in-
creased when a deploying airbag strikes an occupant who has as-
sumed an incorrect sitting position. As the driver, you are responsi-
ble for all vehicle occupants, especially children. Therefore:
– Never allow anyone to wear the seat belt incorrectly while the
vehicle is moving ⇒
.
Safety FirstOperating InstructionsPractical TipsTechnical Specifications
Page 45 of 325
43
Airbag system
Operation of curtain airbags
Fully inflated airbags reduce the risk of head or chest injury
in a side collision.
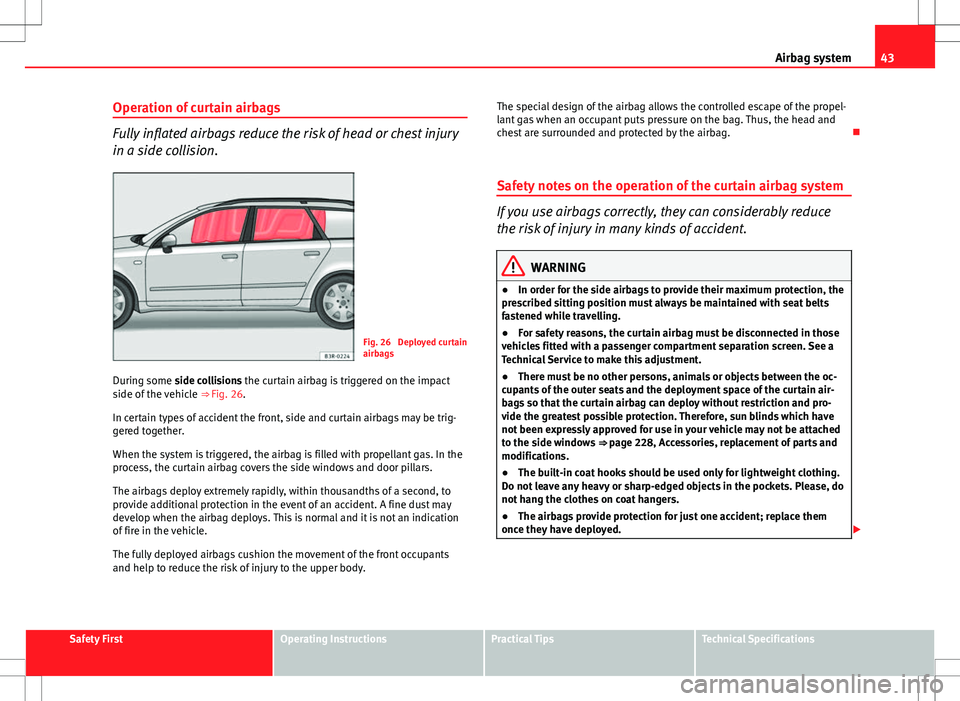
Fig. 26 Deployed curtain
airbags
During some side collisions the curtain airbag is triggered on the impact
side of the vehicle ⇒ Fig. 26.
In certain types of accident the front, side and curtain airbags may be trig-
gered together.
When the system is triggered, the airbag is filled with propellant gas. In the
process, the curtain airbag covers the side windows and door pillars.
The airbags deploy extremely rapidly, within thousandths of a second, to
provide additional protection in the event of an accident. A fine dust may
develop when the airbag deploys. This is normal and it is not an indication
of fire in the vehicle.
The fully deployed airbags cushion the movement of the front occupants
and help to reduce the risk of injury to the upper body. The special design of the airbag allows the controlled escape of the propel-
lant gas when an occupant puts pressure on the bag. Thus, the head and
chest are surrounded and protected by the airbag.
Safety notes on the operation of the curtain airbag system
If you use airbags correctly, they can considerably reduce
the risk of injury in many kinds of accident.
WARNING
● In order for the side airbags to provide their maximum protection, the
prescribed sitting position must always be maintained with seat belts
fastened while travelling.
● For safety reasons, the curtain airbag must be disconnected in those
vehicles fitted with a passenger compartment separation screen. See a
Technical Service to make this adjustment.
● There must be no other persons, animals or objects between the oc-
cupants of the outer seats and the deployment space of the curtain air-
bags so that the curtain airbag can deploy without restriction and pro-
vide the greatest possible protection. Therefore, sun blinds which have
not been expressly approved for use in your vehicle may not be attached
to the side windows ⇒ page 228, Accessories, replacement of parts and
modifications.
● The built-in coat hooks should be used only for lightweight clothing.
Do not leave any heavy or sharp-edged objects in the pockets. Please, do
not hang the clothes on coat hangers.
● The airbags provide protection for just one accident; replace them
once they have deployed.
Safety FirstOperating InstructionsPractical TipsTechnical Specifications