display Seat Ibiza 2017 Edition 11.17 Repair Manual
[x] Cancel search | Manufacturer: SEAT, Model Year: 2017, Model line: Ibiza, Model: Seat Ibiza 2017Pages: 312, PDF Size: 6.51 MB
Page 232 of 312

Operation
Description
Ther e ar
e sen
sors integrated in the rear
bumper. When the sensors detect an obsta-
cle, you are alerted by audible warnings.
Make particularly sure that the sensors are
not covered by adhesives, residues and the
like, as this could affect the system's opera-
tion. Cleaning instructions ››› page 251.
The approximate measurement range of the
rear sensors is:
side area0.60 m
central area1.60 m As you approach the obstacle, the time inter-
v
al
betw
een the audible warnings will be re-
duced. When you reach around 0.30 m the
warning will be constant: Do not continue to
move forward (or backward) ››› in General
inf orm
ation on p
age 228, ››› in General in-
f orm
ation on p
age 229 !
If you maintain separation from the obstacle,
the volume of the warning begins to reduce
after four seconds (does not affect the tone
of the constant warning).
Activating/Deactivating
When engaging reverse gear, the parking aid
is automatically switched on. This is con-
firmed with a short warning. On disengaging reverse gear, the Parking Aid
syst
em is disconnected immediately.
Parking Aid Plus* Fig. 206
Represented area. During parking, P
ark
in
g System Plus assists
the driver by visually and audibly warning
them about obstacles detected in front of
and behind the vehicle.
There are ultrasound sensors integrated in
the front and rear bumpers. When they detect
an obstacle, you are alerted by audible warn-
ings and visually on the Easy Connect sys-
tem.
In the event of danger of a frontal collision,
the audible warnings come from the front of
the vehicle, and in the event of the danger of
a rear-end collision they come from the rear. Make particularly sure that the sensors are
not co
vered by adhesives, residues and the
like, as this could affect the system's opera-
tion. Cleaning instructions ››› page 251.
The approximate measurement range of the
sensors is:
1.20 m
1.60 m
0.90 m
As you approach the obstacle, the time inter-
val between the audible warnings will be re-
duced. When you reach around 0.30 m the
warning will be constant: do not continue to
move forward (or backward)!
If you maintain separation from the obstacle,
the volume of the warning begins to reduce
after four seconds (does not affect the tone
of the constant warning).
In order to view the entire periphery of the ve-
hicle, the vehicle must be moved a few me-
tres forwards and backwards. Thus, the miss-
ing areas are screened and obstacles at the
sides of the vehicle are displayed
››› Fig. 206 C .
A B
C
230
Page 233 of 312

Driver assistance systems
Parking Aid operation Fig. 207
Centre console: parking aid button. Manual connection of Parking Aid
● Press the butt
on once. The symbol on
the button will light up yellow.
Manual disconnection of Parking Aid
● Press the button
again.
Manual disconnection of Parking Aid display
(the audible sounds remain active)
● Press a button on the main menu of the fac-
tory
-assembled infotainment system.
● OR: press the fu
nction button in the top
right corner.
Automatic connection of Parking Aid
● Engage reverse gear or turn the selector
lever t
o position R. ●
OR: If the v
ehicle approaches an obstacle
that is in its forwards path at a speed below
10 km/h (6 mph) ››› page 231, Automatic ac-
tivation. The obstacle is detected as of a dis-
tance of approx. 95 cm if the automatic con-
nection is activated in the infotainment sys-
tem. A reduced display is shown.
● OR: the vehicle moves backwards.
Autom
atic disconnection of Parking Aid
● Move the selector lever to position P.
● OR: accelerate to more than approx.
10 km/h (6 mph) for
ward.
Temporary suppression of sound in Parking
Aid
● Press the function b
utton on the info-
tainment system display.
Change from reduced view to full view
● Engage reverse gear or turn the selector
lever t
o position R.
● OR: press the car icon in reduced view.
If nec
essary, switch to the rear-assist image
(Rear View Camera “RVC”)
● Engage reverse gear or turn the selector
lever t
o position R.
● OR: Press the RVC fu
nction button
››› page 236. A short confirmation signal will be heard and
the button symbo
l will light up yellow when
the system is switched on.
Automatic activation Fig. 208
Miniature indication of automatic ac-
tiv ation. When the Parking System Plus is switched on
aut
om
atic
ally, a miniature of the vehicle will
be displayed and the segments will be
shown on the left side of the screen
››› Fig. 208.
Automatic activation occurs when slowly ap-
proaching an obstacle located in front of the
vehicle. It only operates every time the speed
is reduced below approximately 10 km/h (6
mph) for the first time.
If the parking aid is switched off using the
button, the following actions must be carried
out in order for it to automatically switch on: »
231
Technical data
Advice
Operation
Emergencies
Safety
Page 234 of 312
 be-
for
e reducing speed below this number
again.
● OR: place the selector lever in positio")
Operation
● Sw it
c
h off the ignition and switch it on
again.
● OR: accelerate above 10 km/h (6 mph) be-
for
e reducing speed below this number
again.
● OR: place the selector lever in position P
and then mov
e it from this position.
● OR: switch on and off the automatic activa-
tion in the Ea
sy Connect system menu.
The automatic activation with parking aid
miniature indication can be switched on and
off from the Easy Connect system menu
››› page 34:
● Switch the ignition on.
● Select: button > Settings
> Parking
and manoeuvring .
● Select the Automatic activation op-
tion. When the f
u
nction button check box is
activated , the function is on.
If the system has been activated automatical-
ly, an audible sound warning will only be giv-
en when obstacles in front are at a distance
of less than 50 cm. CAUTION
The automatic connection of the Parking Aid
only w
orks when you are driving slowly. If
driving style is not adapted to the circum-
stances, an accident and serious injury or
damage may be caused. Segments of the visual indication
Fig. 209
Parking Aid display on the Easy Con-
nect sy
s
tem screen. The distance of separation from the obstacle
c
an be e
s
timated using the segments around
the vehicle.
The optical indication of the segments works
as follows:
a white segment is dis-
played when the obstacle is not within
the vehicle's trajectory or the direction
of travel is in the opposite direction to
its location, and it is more than 30 cm
from the vehicle.
obstacles located in the
vehicle's trajectory and which are more
than 30 cm away from the vehicle are
displayed in yellow.
White segments:
Yellow segments: obstacles that are less than
30 cm aw
ay from the vehicle are dis-
played in red.
Moreover, with the SEAT Media System
Plus/Navi System radios, a yellow trail indi-
cates the vehicle's expected journey based
on the steering wheel angle.
Whenever the obstacle is located in the vehi-
cle’s direction of travel, the corresponding
audible warning will sound.
As the vehicle approaches an obstacle, the
segments are displayed closer to the vehicle.
When the penultimate segment is displayed,
this means that the vehicle has reached the
collision zone. In the collision zone, the ob-
stacles are represented in red, including
those out of the path. Do not continue to
move forward (or backward) ››› in General
inf orm
ation on p
age 228, ››› in General in-
f orm
ation on p
age 229 !
Adjusting the display and audible
warning
s The settings for the display and audible
w
arnin
g
s are controlled via the Easy Con-
nect*.
Automatic activation
on – activates the Automatic activa-
tion option ››› page 231.
Red segments:
232
Page 235 of 312

Driver assistance systems
off – deactiv
at es the Automatic ac-
tivation option ››› page 231.
Front volume*
Volume in the front and rear area.
Front sound settings/sharpness*
Frequency (tone) of the sound in the front
area.
Rear volume*
Volume in the rear area.
Rear sound settings/sharpness*
Frequency (tone) of the sound in the rear
area.
Adjust volume
With the parking aid switched on, the active
audio/video source volume will be reduced
to the intensity of the selected setting.
Error messages When the Parking Aid is activated or when it
i
s
sw
itched on, if a message reporting a Park-
ing aid error is displayed on the instrument
panel, there is a fault in the system.
If the fault does not disappear before discon-
necting the ignition, the next time that the
parking aid is engaged in reverse, no audible signal of the existence of a fault will be is-
sued.
Park
ing System Plus*
If there is a fault in the parking aid system a
message will appear on the instrument panel
indicating the error. In addition the key
LED will blink.
If there is a fault in a sensor, the symbol is
displayed on the Easy Connect display in
front of/behind the vehicle. If a rear sensor is
faulty, only the obstacles in area A are dis-
p l
a
yed ››› Fig. 206. If a front sensor is faulty,
only the obstacles in area B are displayed.
Hav e the f
au
lt corrected by a specialised
workshop without delay.
Towing bracket In vehicles equipped with a towing bracket
dev
ic
e fr
om the factory, when the trailer is
connected electrically, the Parking Aid rear
sensors will not be activated when reverse
gear is engaged, when the selector lever is
turned to position R or when the button is
pressed.
Parking System Plus
The distance to possible obstacles at the rear
of the vehicle will not be displayed on the screen and nor will it be indicated by means
of audibl
e sound signals.
The Easy Connect system screen will only dis-
play objects detected at the front, and the ve-
hicle's trajectory will be hidden.
Braking while manoeuvring function* 3 Only valid with Parking System Plus
The emer
g
ency braking function is used to
minimise damage in the event of a collision.
Depending on the equipment, if the Parking
Aid is active, the braking while manoeuvring
function activates emergency braking when it
detects an obstacle in the vehicle’s path that
could cause a collision, driving forwards or in
reverse.
The function will not brake if the Parking Aid
is activated automatically. For the system to
operate, manoeuvring speed must be be-
tween 2.5 and 10 km/h (between 1.5 and 6
mph) for the front area and between 1.5 and
10 km/h (between 1 and 6 mph) for the rear.
Following an intervention, the braking while
manoeuvring function will be inactive in the
same direction of travel for 5 metres. Once
the gear is changed, or the selector lever’s
position is changed, the function will be ac-
tive again. The Parking Aid’s limitations ap-
ply. »
233
Technical data
Advice
Operation
Emergencies
Safety
Page 236 of 312

Operation
The braking while manoeuvring function is
c ontr
o
lled in the Easy Connect system with
the menu and the
S
ET
TINGS and
P ark
and m
anoeuvre function buttons.
● on – permits the u
se of the braking
while manoeuvring function.
● off – does not
permit the use of the
braking while manoeuvring function.
Temporary suppression of emergency brak-
ing
● When the function is deactivated with the
Brak in
g while manoeuvring button that appears
on the P ark
in
g System screen of the Easy
Connect system.
● Whenever any of the car doors, rear lid or
bonnet are opened.
R
ear Assist “Rear View Cam-
era”*
Rel
ated video Fig. 210
Safety Operating and safety warnings
WARNING
● The Re ar As
sist does not make it possible
to precisely calculate the distance from ob-
stacles (people, vehicles, etc.) and nor can it
overcome the system's own limits, hence us-
ing it may cause serious accidents and inju-
ries if used negligently or without due care.
The driver should be aware of his/her sur-
roundings at all times to ensure safe driving.
● The camera lens expands and distorts the
field of
vision and displays the objects on the
screen in a different, vague manner. The per-
ception of distances is also distorted by this
effect.
● Due to the screen resolution or insufficient
light condition
s, some items may be dis-
played in an unsatisfactory manner or not at
all. Take special care with thin posts, fences,
railings or trees that might not be displayed
on screen and could damage the vehicle.
● The rear assist has blind spots where it is
not pos
sible to represent people or objects
(small children, animals and certain objects
cannot be detected in its field of vision). Mon-
itor the vehicle's surrounding area at all
times.
● Keep the camera lens clean, free of ice and
snow
, and do not cover it.
● The system is not a replacement for driver
awar
eness. Supervise the parking operation
at all times, as well as the vehicle's surround-
ing area. Adapt your speed and driving style at all times to suit visibility, weather, road
and traffic
c
onditions.
● Do not be distracted from the traffic by
looking at
the screen.
● The images on the rear assist screen are
only tw
o-dimensional. Due to a lack of spatial
depth, protruding parts or holes in the road,
for example, are more difficult to detect or
may not be seen at all.
● Vehicle load modifies the representation of
the orientation lines
displayed. The width
represented by the lines diminishes with ve-
hicle load. Pay special attention to the vehi-
cle's surroundings when the inside of the ve-
hicle of the luggage compartment is carrying
a heavy load.
● In the following situations, the objects or
other vehic
les shown in the navigation sys-
tem display appear to be further away or
closer than they really are: Pay special atten-
tion:
– On moving from a horizontal plane to a
slope.
– On moving from a slope to a horizontal
plane.
– If the vehicle is heavily loaded at the
rear.
– When the vehicle approaches objects
that are not on the ground surface or are
jutting out from it. These objects may al-
so be outside the camera's angle of vi-
sion when reversing. 234
Page 237 of 312
Driver assistance systems
Note
● It i s
important to take great care and pay
special attention if you are not yet familiar
with the system.
● Rear assist will not be available if the vehi-
cle's
rear lid is open. Instructions for use
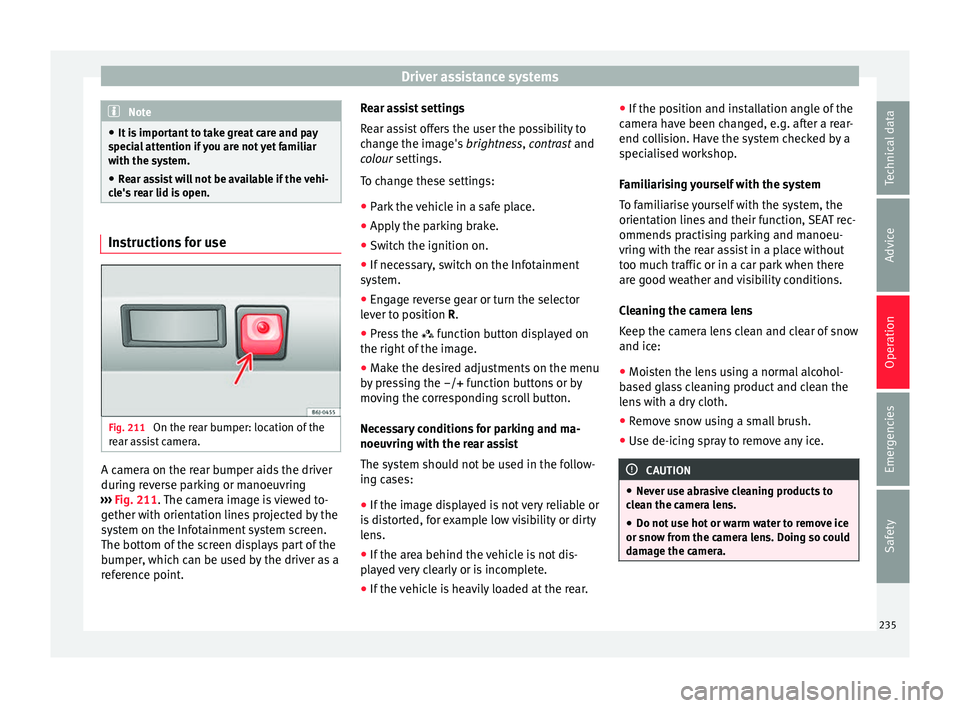
Fig. 211
On the rear bumper: location of the
r e
ar a
ssist camera. A camera on the rear bumper aids the driver
durin
g r
ev
erse parking or manoeuvring
››› Fig. 211. The camera image is viewed to-
gether with orientation lines projected by the
system on the Infotainment system screen.
The bottom of the screen displays part of the
bumper, which can be used by the driver as a
reference point. Rear assist settings
Rear a
ssist offers the user the possibility to
change the image's brightness, contrast and
colour settings.
To change these settings:
● Park the vehicle in a safe place.
● Apply the parking brake.
● Switch the ignition on.
● If necessary, switch on the Infotainment
syst
em.
● Engage reverse gear or turn the selector
lever t
o position R.
● Press the function b
utton displayed on
the right of the image.
● Make the desired adjustments on the menu
by pr
essing the –/+ function buttons or by
moving the corresponding scroll button.
Necessary conditions for parking and ma-
noeuvring with the rear assist
The system should not be used in the follow-
ing cases:
● If the image displayed is not very reliable or
is di
storted, for example low visibility or dirty
lens.
● If the area behind the vehicle is not dis-
pla
yed very clearly or is incomplete.
● If the vehicle is heavily loaded at the rear. ●
If the pos
ition and installation angle of the
camera have been changed, e.g. after a rear-
end collision. Have the system checked by a
specialised workshop.
Familiarising yourself with the system
To familiarise yourself with the system, the
orientation lines and their function, SEAT rec-
ommends practising parking and manoeu-
vring with the rear assist in a place without
too much traffic or in a car park when there
are good weather and visibility conditions.
Cleaning the camera lens
Keep the camera lens clean and clear of snow
and ice:
● Moisten the lens using a normal alcohol-
based gl
ass cleaning product and clean the
lens with a dry cloth.
● Remove snow using a small brush.
● Use de-icing spray to remove any ice. CAUTION
● Never u se abr
asive cleaning products to
clean the camera lens.
● Do not use hot or warm water to remove ice
or snow fr
om the camera lens. Doing so could
damage the camera. 235
Technical data
Advice
Operation
Emergencies
Safety
Page 238 of 312

Operation
Parking and manoeuvring with the
r e
ar a
ssist Fig. 212
Display on the Infotainment system
s c
r
een: orientation lines. Switching the system on and off
●
The rear assist will switch on when the igni-
tion i s
on or the en
gine running, on engaging
reverse gear (manual gearbox) or on chang-
ing the selector lever to the R position (auto-
matic gearbox).
● The system switches off 8 seconds after
diseng
aging reverse gear (manual gearbox)
or removing the selector lever from the R po-
sition (automatic gearbox). The system will
also disconnect immediately after the igni-
tion is switched off. ●
The camera w
ill stop transmitting images
above the speed of 15 km/h (9 mph) with re-
verse engaged.
In combination with the Parking System Plus
››› page 228, the camera image will cease to
be transmitted immediately when reverse
gear is disengaged or when the selector lever
is moved from the R position, and the optical
information provided by the Parking Aid sys-
tem will be displayed.
Also in combination with the system, the rear
assist image can also be concealed:
● By pressing one of the Infotainment system
button
s on the display.
● OR: By pressing the miniature vehicle that
appe
ars on the left of the screen (which
switches to the full-screen mode of the Park-
ing System Plus's optical system).
If you wish to display the rear assist image
again:
● Disengage reverse, or change the selector
lever's
position, engage reverse again or
move the selector lever to position R.
● OR: Press the RVC fu
nction button1)Meaning of the orientation lines
›››
Fig. 212
Side lines: extension of the vehicle (the
approximate width of the vehicle plus the
rear view mirrors) on the road surface.
End of the side lines: the area marked in
green ends approximately 2 m behind
the vehicle on the road surface.
Intermediate line: indicates a distance of
approximately 1 m behind the vehicle on
the road surface.
Red horizontal line: indicates a safe dis-
tance of approximately 40 cm at the rear
of the vehicle on the road surface.
Parking manoeuvre
● Place the vehicle in front of the parking
spac
e and engage reverse gear (manual
gearbox) or move the selector to the R posi-
tion (automatic gearbox).
● Reverse slowly, and turn the steering wheel
so that the s
ide orientation lines lead to-
wards the parking space.
● Guide the vehicle into the parking space so
that the s
ide orientation lines run parallel to
it. 1
2
3
4
1)
WARNING: the RVC (Rear
View Camera) function
button will only be activated and available when the
reverse gear is engaged or the selector lever is set to
position R.
236
Page 256 of 312

Advice
have the engine cleaned. On commissioning
thi s
w
ork, ensure that all surfaces, seams,
joints and components in the engine com-
partment are given anti-corrosion treatment. WARNING
● When work in
g in the engine compartment,
always observe the safety warnings
››› page 263.
● Before opening the bonnet, switch the en-
gine off, app
ly the handbrake firmly and al-
ways remove the key from the ignition.
● Allow the engine to cool before you clean
the engine comp
artment.
● Do not clean, for example, the vehicle un-
derbody, wheel ar
ches or wheel trims without
protecting your hands and arms. You may cut
yourself on sharp-edged metal parts. Failure
to comply could result in injury.
● Moisture, ice and salt on the brake system
may
affect braking effectiveness. Risk of acci-
dent. Directly after washing, avoid sudden
and sharp braking.
● Never touch the radiator fan. It is tempera-
ture-c
ontrolled and could start automatically,
even when the key is removed from the igni-
tion! For the sake of the environment
Fuel, grease and oil deposits can be removed
when the engine i s
washed. The polluted wa-
ter must be cleaned in an oil separator. For
this reason, engine washing should be car- ried out only by a specialised workshop or a
petro
l
station. Caring for the vehicle interior
Scr een f
or the radio/Easy Connect*
and control panel* The display can be cleaned with a soft cloth
and a prof
e
ssionally available “LCD cleaner”.
Moisten the cloth with a small amount of the
cleaning fluid.
The Easy Connect control panel* should first
be cleaned with a brush so that no dirt goes
into the device or between the keys and
housing. Next, we recommend cleaning the
Easy Connect control panel* using a cloth
dampened with water and washing-up liquid. CAUTION
● To av oid s
cratching the screen, do not wipe
the display with a dry cloth.
● To avoid damage, ensure that no liquid
goes
into the Easy Connect control panel*. Cleaning plastic parts and the dash
p
anel –
Use a clean, damp cloth to clean plastic
par ts
and the dash panel. –
If this
does not provide satisfactory results,
use a special solvent-free plastic cleaning
product. WARNING
Never clean the dash panel and the airbag
modul e s
urface with cleaners containing sol-
vents. Solvents cause the surface to become
porous. If the airbag triggered, plastic parts
could become detached and cause injuries. CAUTION
Cleaning products which contain solvents will
dam ag
e the material. Cleaning wooden trim*
–
Clean the wooden trim with a water-mois-
tened c
l
ean cloth.
– If this does not provide satisfactory results,
use a gen
tle soap solution. CAUTION
Cleaning products which contain solvents will
dam ag
e the material. Cleaning textile covers and trim parts
Textile covers and trim parts (e.g. seats, door
trim) shou
l
d be c
leaned regularly with a
254
Page 262 of 312

Advice
Diesel fuel Please note the information on the inside of
the fuel
t
ank flap.
We recommend the use of diesel fuel which
complies to European standard EN 590. If
diesel fuel which meets European standard
EN 590 is not available, the Cetane number
(CZ) must, at minimum, be 51. If the engine
is equipped with a particulate filter, the sul-
phur content of the fuel must be below 50
parts per million.
Winter-grade diesel
Summer fuel becomes thicker in winter and it
is more difficult to start the engine. For this
reason, petrol stations in some countries al-
so offer winter diesel with improved fluidity
when cold (winter-grade diesel). CAUTION
● The v ehic
le is not designed for the use of
FAME fuel (biodiesel). The fuel system would
be damaged if you used biodiesel.
● Do not mix fuel additives, the so-called
“thinners”, petro
l or similar additives with
diesel fuel.
● If poor-quality diesel fuel is used, it may be
neces
sary to drain the fuel filter more fre-
quently than is specified in the Maintenance
Programme. We recommend having this done
by a specialised workshop. If water is allowed to collect in the filter, this can cause engine
perf
orm
ance problems. Natural gas
Natural gas can be compressed or in liquid
form, a
d
dition to others.
Liquefied natural gas (LNG) is the result of
heavy cooling of natural gas. Therefore its
volume is considerably reduced compared
with compressed natural gas (CNG). In vehi-
cles with a natural gas engine, liquefied nat-
ural gas cannot be directly refilled, as the gas
would expand excessively in the vehicle gas
tank.
Therefore, vehicles with a natural gas engine
must only be refuelled using compressed
natural gas ››› .
Nat ur
a
l gas quality and consumption
Natural gas is divided into the groups H and
L depending on its quality.
Gas type H has a superior heating power and
inferior nitrogen and carbon dioxide content
than type L. The higher the heating power of
the natural gas, the lower the consumption
will be.
However, the heating power and the propor-
tion of nitrogen and carbon dioxide can fluc-
tuate within the quality groups. Therefore, ve- hicle consumption can also vary when using
a singl
e type of gas only.
The engine management automatically
adapts to the natural gas used according to
its quality. Therefore, different quality gases
can be mixed in the tank, without the need
for comprehensive draining before applying a
different quality gas.
Updated information relating to natural gas
quality is displayed on the instrument panel
››› page 37.
Natural gas and safety
If you can smell gas or suspect that there is a
leak ››› :
● Stop the vehicle immediately.
● Switch the ignition off.
● Open the doors to appropriately ventilate
the v
ehic
le.
● Extinguish cigarettes immediately.
● Move away from the vehicle or switch off
obj
ects that may cause sparks or a fire.
● If you continue to smell gas, do not contin-
ue driving!
● Seek
specialist assistance. Have the fault
repair
ed.
Regular checks of the natural gas system
The natural gas tanks may be damaged or
corroded by external factors. The walls of the
260
Page 263 of 312

Checking and refilling levels
gas tanks are weakened by deformations,
d am
ag
e or corrosion. As a result, the tanks
could burst and result in serious injuries or
even death. For this reason, the vehicle own-
er must have a specialised workshop check
(visual check) the gas system every 4 years
at least . The vehicle owner must have a spe-
cialised workshop replace the natural gas
tanks before they reach the end of their serv-
ice life. For further information about the
service life of gas tanks, go to a SEAT dealer
service or a specialised workshop WARNING
Failure to act when you can smell gas in the
vehic l
e or when refuelling can cause serious
injuries.
● Carry out the necessary operations.
● Leave the danger zone.
● If necessary, warn the emergency services. WARNING
The vehicle is not prepared to use liquefied
nat ur
al gas (LNG) and this fuel must not be
added under any circumstances. Liquefied
natural gas can cause the natural gas tank to
explode, resulting in serious injury. WARNING
Damaged, corroded or rusted tanks can result
in serious injur
y or even death. ●
Have the n at
ural gas deposits checked at
least every 4 years (visual check).
● Natural gas tanks have a limited service
life. Have the n
atural gas tanks replaced
when required. You can obtain further infor-
mation about this at SEAT dealers or special-
ised workshops. WARNING
If the vehicle underbody touches the ground
or in the ev ent of
a rear collision, there could
be damage to the natural gas tanks.
● Check whether there is a smell of gas.
● If you notice a smell of gas, take the vehicle
to a spec
ialised workshop immediately and
have the natural gas system checked. Note
Have the natural gas system checked regular-
ly b y
a specialised workshop, according to
the Maintenance Programme. AdBlue
®
Inf orm
ation on AdBlue ® The consumption of AdBlue
®
depend s
on
y
our personal driving style, the temperature
of the system and on the outdoor tempera-
ture when the vehicle is used. AdBlue
®
freezes at temperatures of -11°C
(+13°F). The sy
stem has heating elements
that guarantee its operation even at low tem-
peratures.
The AdBlue ®
tank level capacity is approxi-
mately 10.4 litres.
The AdBlue ®
tank should never be empty.
When the distance to empty drops below
2400 km, a warning to refill the AdBlue ®
tank
will appear on the dash panel display
››› page 262. If this information is ignored,
later on it will not be possible to re-start the
engine. If this warning does not appear, it is
not necessary to refill the AdBlue ®
tank.
AdBlue ®
is a registered brand of the German
Association of the Automotive Industry (VDA)
and is also known as AUS32 or DEF (Diesel
Exhaust Fluid). CAUTION
Filling the AdBlue ®
tank e
xcessively can
cause damage to the tank. 261
Technical data
Advice
Operation
Emergencies
Safety