display Seat Ibiza 5D 2006 User Guide
[x] Cancel search | Manufacturer: SEAT, Model Year: 2006, Model line: Ibiza 5D, Model: Seat Ibiza 5D 2006Pages: 268, PDF Size: 8.14 MB
Page 62 of 268
Cockpit
60
WARNING
•
Failure to observe warning lamps and warning messages can result in
serious personal injury or damage to your vehicle.
•
The risk of an accident increases if your vehicle breaks down. Use a
warning triangle to draw the attention of other road users to your
stationary vehicle so that it does not represent a danger.
•
The engine compartment of any motor vehicle is a dangerous area!
Before you open the bonnet to work on the engine or in the engine compart-
ment, you must switch off the engine and allow it to cool to reduce the risk
of scalding or other injuries. Read and observe the relevant warnings
⇒ page 176.Note
•
The appropriate warning lamp for a fa ult will light up in vehicles without
warning or information texts in the display.
•
In vehicles with warning or information texts in the display, the appro-
priate warning lamp for a fault will ligh t up and a warning or information text
will also appear in the display.
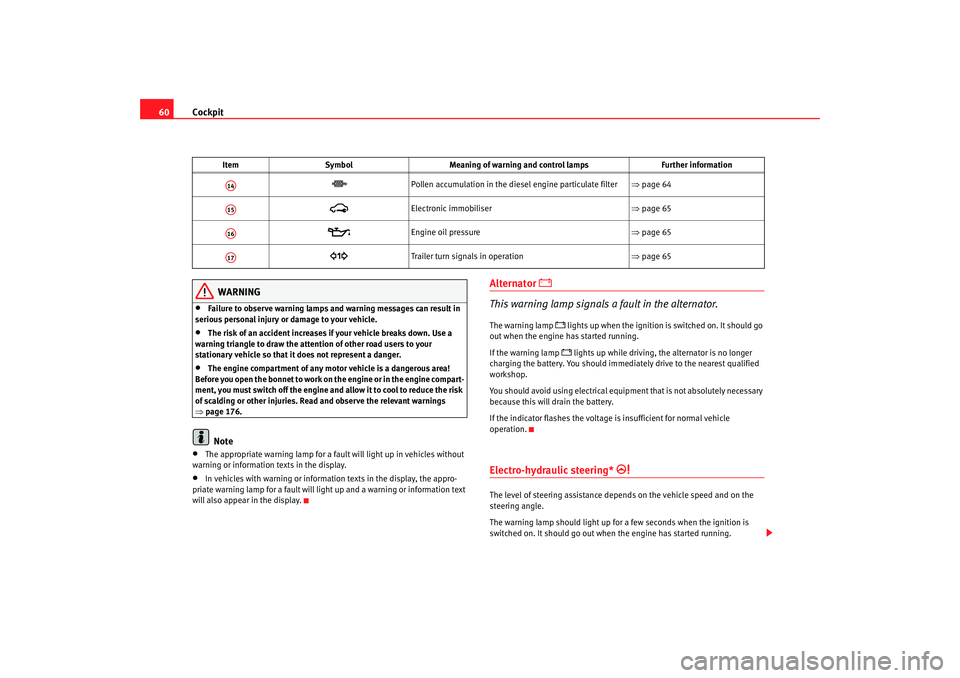
Alternator
This warning lamp signals a fault in the alternator.
The warning lamp
lights up when the ignition is switched on. It should go
out when the engine has started running.
If the warning lamp lights up while driving, the alternator is no longer
charging the battery. You should immediately drive to the nearest qualified
workshop.
You should avoid using electrical equipment that is not absolutely necessary
because this will drain the battery.
If the indicator flashes the voltage is insufficient for normal vehicle
operation.
Electro-hydraulic steering*
The level of steering assistance depends on the vehicle speed and on the
steering angle.
The warning lamp should li ght up for a few seconds when the ignition is
switched on. It should go out when the engine has started running.
Pollen accumulation in the diesel engine particulate filter
⇒page 64
Electronic immobiliser ⇒page 65
Engine oil pressure ⇒page 65
Trailer turn signals in operation ⇒page 65
Item
Symbol Meaning of warning and control lamps Further information
A14A15A16A17
ibiza_angles_0706_DEF Seite 60 Freitag, 1. September 2006 1:18 13
Page 126 of 268
Heating, Ventilation and Air conditioning
124
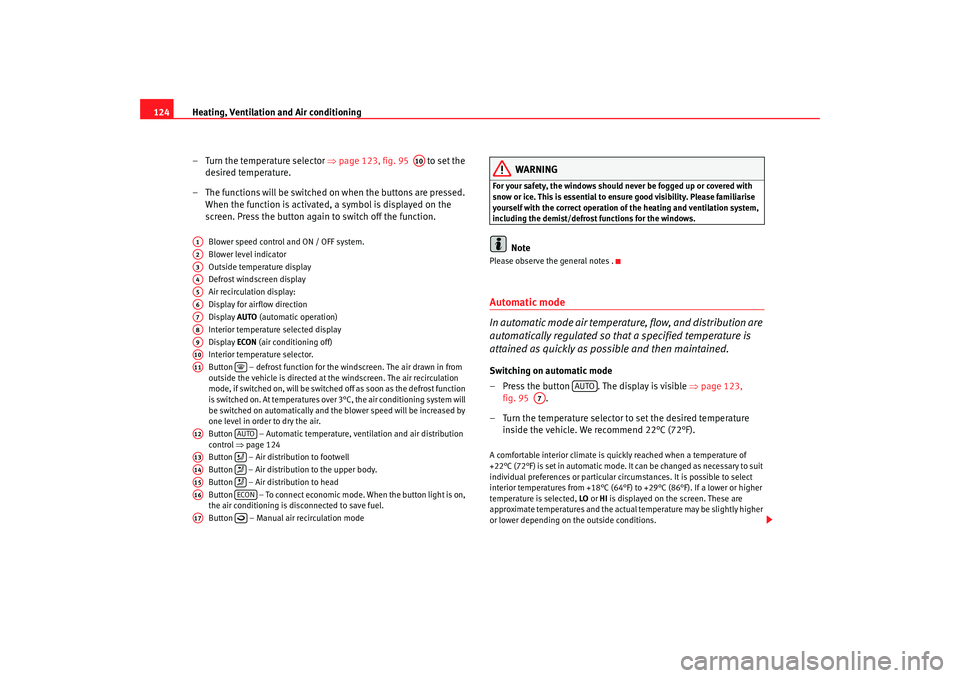
– Turn the temperature selector ⇒page 123, fig. 95 to set the
desired temperature.
– The functions will be switched on when the buttons are pressed. When the function is activated, a symbol is displayed on the
screen. Press the button again to switch off the function.
Blower speed control and ON / OFF system.
Blower level indicator
Outside temperature display
Defrost windscreen display
Air recirculation display:
Display for airflow direction
Display AUTO (automatic operation)
Interior temperature selected display
Display ECON (air conditioning off)
Interior temperature selector.
Button – defrost function for the windscreen. The air drawn in from
outside the vehicle is directed at the windscreen. The air recirculation
mode, if switched on, will be switched off as soon as the defrost function
is switched on. At temperatures over 3°C, the air conditioning system will
be switched on automatically and the blower speed will be increased by
one level in order to dry the air.
Button – Automatic temperature, ventilation and air distribution
control ⇒page 124
Button – Air distribution to footwell
Button – Air distribution to the upper body.
Button – Air distribution to head
Button – To connect economic mode. When the button light is on,
the air conditioning is disconnected to save fuel.
Button – Manual air recirculation mode
WARNING
For your safety, the windows should never be fogged up or covered with
snow or ice. This is essential to ensure good visibility. Please familiarise
yourself with the correct operation of the heating and ventilation system,
including the demist/defrost functions for the windows.
Note
Please observe the general notes .Automatic mode
In automatic mode air temperature, flow, and distribution are
automatically regulated so that a specified temperature is
attained as quickly as possible and then maintained.Switching on automatic mode
– Press the button . The display is visible ⇒page 123,
fig. 95 .
– Turn the temperature selector to set the desired temperature inside the vehicle. We recommend 22°C (72°F).A comfortable interior climate is quickly reached when a temperature of
+22°C (72°F) is set in automatic mode. It can be changed as necessary to suit
individual preferences or particular cir cumstances. It is possible to select
interior temperatures from +18°C (64°F) to +29°C (86°F). If a lower or higher
temperature is selected, LO or HI is displayed on the screen. These are
approximate temperatures and the actual temperature may be slightly higher
or lower depending on the outside conditions.
A10
A1A2A3A4A5A6A7A8A9A10A11
A12
AUTO
A13
A14
A15
A16
ECON
A17
AUTO
A7
ibiza_angles_0706_DEF Seite 124 Freitag, 1. September 2006 1:18 13
Page 127 of 268
Heating, Ventilation and Air conditioning 125
Safety First
Operating instructions
Tips and Maintenance
Te c h n i c a l D a t a
Climatronic maintains a constant temperature. The temperature of the air
supplied to the interior, the blower speed and the air distribution are regu-
lated automatically. The system also allows for the effect of strong sunlight,
so there is no need for manual adjustment. Therefore,
automatic mode
provides the best comfort for the vehicle occupants in virtually all conditions
throughout the year.
Automatic mode is switched off whenever an adjustment is made using the
buttons for the air distribution, blower or . The temperature continues
to be regulated.
Manual mode
In manual mode you can adjust the air temperature, flow, and
distribution yourself.Switching on manual mode
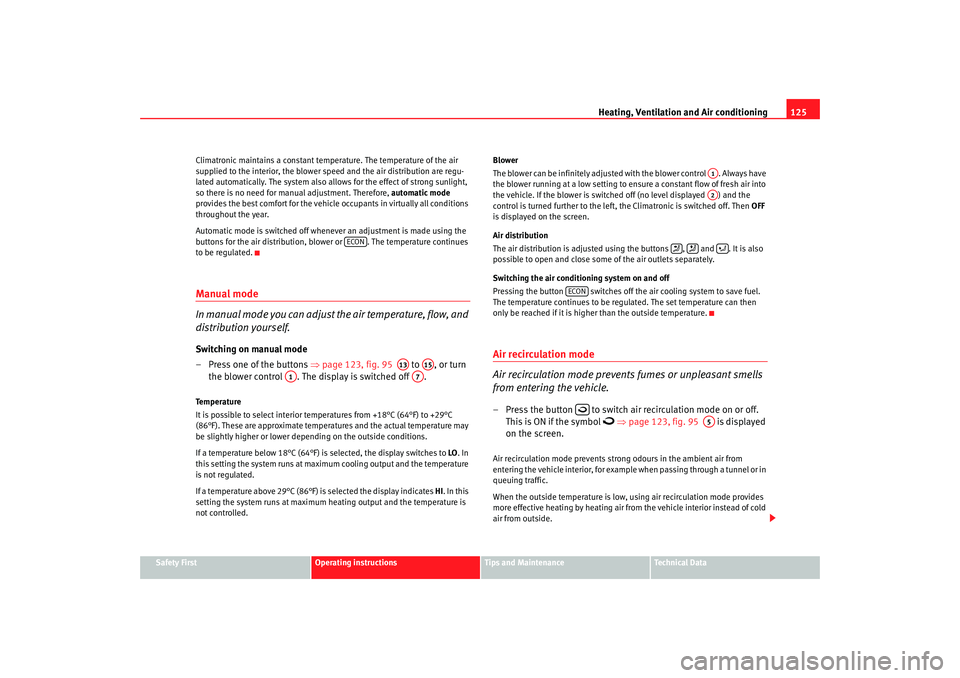
– Press one of the buttons ⇒page 123, fig. 95 to , or turn
the blower control . The display is switched off .Temperature
It is possible to select interior te mperatures from +18°C (64°F) to +29°C
(86°F). These are approximate temperat ures and the actual temperature may
be slightly higher or lower depending on the outside conditions.
If a temperature below 18°C (64°F) is selected, the display switches to LO. In
this setting the system runs at maximum cooling output and the temperature
is not regulated.
If a temperature above 29°C (86°F) is selected the display indicates HI. In this
setting the system runs at maximum heating output and the temperature is
not controlled. Blower
The blower can be infinitely adjusted with the blower control . Always have
the blower running at a low setting to ensure a constant flow of fresh air into
the vehicle. If the blower is switched off (no level displayed ) and the
control is turned further to the left, the Climatronic is switched off. Then
OFF
is displayed on the screen.
Air distribution
The air distribution is adjusted using the buttons , and . It is also
possible to open and close some of the air outlets separately.
Switching the air conditioning system on and off
Pressing the button switches off the air cooling system to save fuel.
The temperature continues to be regulated. The set temperature can then
only be reached if it is higher than the outside temperature.
Air recirculation mode
Air recirculation mode prevents fumes or unpleasant smells
from entering the vehicle.– Press the button to switch air recirculation mode on or off.
This is ON if the symbol
⇒ page 123, fig. 95 is displayed
on the screen.
Air recirculation mode prevents strong odours in the ambient air from
entering the vehicle interior, for example when passing through a tunnel or in
queuing traffic.
When the outside temperature is low, using air recirculation mode provides
more effective heating by heating air from the vehicle interior instead of cold
air from outside.
ECON
A13
A15
A1
A7
A1A2
ECON
A5
ibiza_angles_0706_DEF Seite 125 Freitag, 1. September 2006 1:18 13
Page 128 of 268
Heating, Ventilation and Air conditioning
126When the outside temperature is high, using air recirculation mode provides
more effective cooling by cooling air from the vehicle interior instead of warm
air from outside.
For reasons of safety, air recirculation is not possible when the control for air
distribution is set to the windscreen setting
.
WARNING
In air recirculation mode, no ambient ai r enters the vehicle interior. If the
air conditioning system is switched off, the windows can quickly mist over.
Therefore, you should never leave the air recirculation mode switched on
for longer periods, as this increases the risk of an accident.
Note
When reverse gear is engaged the air recirculation connects automatically to
prevent the entrance of exhaust fumes in the vehicle on travelling backwards.
In this case the symbol for air recirculation is not displayed.General notesThe pollen filter
The pollution filter (a combined partic ulate filter and activated carbon filter)
serves as a barrier against impurities in the outside air, including dust and
pollen.
For the air conditioning system to work with maximum efficiency, the pollen
filter must be replaced at the intervals specified in the Inspections and Main-
tenance Schedule.
If the filter loses efficiency prematurely due to use in areas with very high
levels of air pollution, the pollen filte r must be changed more frequently than
stated in the Service Schedule.
Caution
•
If you suspect that the air conditioner is damaged, switch off the air condi-
tioner with button to prevent further damage and have it checked by a
qualified workshop.
•
Repairs to the air conditioning system require specialist knowledge and
special tools. Therefore, we recommend that you take the vehicle to a quali-
fied workshop should problems occur.Note
•
If the humidity and temperature outside the vehicle are high, condensa-
tion can drip off the evaporator in the cooling system and form a pool under-
neath the vehicle, this is completely no rmal and there is no need to suspect
a leak.
•
Keep the air intake slots in front of the windscreen free of snow, ice and
leaves to ensure heating and cooling is not impaired, and to prevent the
windows misting over.
•
The air from the vents flows through the passenger compartment and is
extracted by slots designed for this purpose. Do not cover these slots with
articles of clothing or other objects.
•
The air conditioning system operates most effectively with the windows
and the sliding/tilting roof* closed. Howe ver, if the sun has heated up the
vehicle, the air inside can be cooled more quickly by opening the windows for
a short period.
•
Do not smoke while air recirculation mode is on, as smoke drawn into the
air conditioning system leaves a r esidue on the evaporator, producing a
permanent unpleasant odour.
•
At low outside temperatures the compressor switches off automatically.
The button cannot be switched on either.
•
The air conditioning should be turned on at least once a month, to lubri-
cate the system gaskets and prevent leaks. If a decrease in the cooling
capacity is detected, an Authorised Service Centre should be consulted to
check the system.
ECON
AUTO
ibiza_angles_0706_DEF Seite 126 Freitag, 1. September 2006 1:18 13
Page 138 of 268
Driving
136Selector lever lock functions
The selector lever lock in positi on P or N prevents gears from
being engaged inadvertently, which would cause the vehicle
to move.
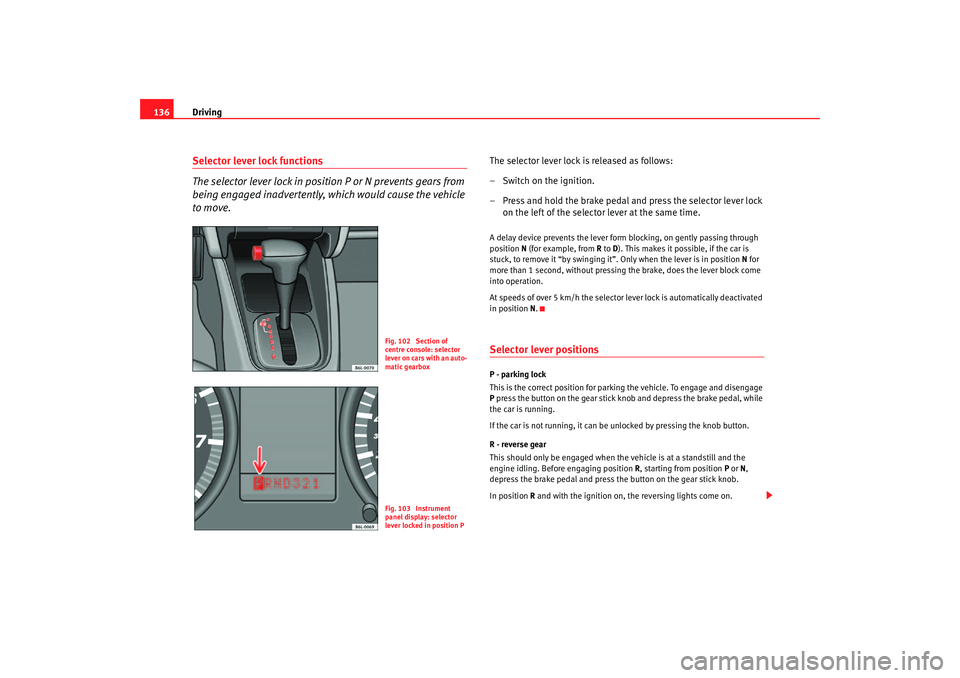
The selector lever lock is released as follows:
– Switch on the ignition.
– Press and hold the brake pedal and press the selector lever lock
on the left of the selector lever at the same time.A delay device prevents the lever form blocking, on gently passing through
position N (for example, from R to D). This makes it possible, if the car is
stuck, to remove it “by swinging it”. Only when the lever is in position N for
more than 1 second, without pressing th e brake, does the lever block come
into operation.
At speeds of over 5 km/h the selector lever lock is automatically deactivated
in position N.Selector lever positionsP - parking lock
This is the correct position for parki ng the vehicle. To engage and disengage
P press the button on the gear stick knob and depress the brake pedal, while
the car is running.
If the car is not running, it can be unlocked by pressing the knob button.
R - reverse gear
This should only be engaged when the vehicle is at a standstill and the
engine idling. Before engaging position R, starting from position P or N,
depress the brake pedal and press the button on the gear stick knob.
In position R and with the ignition on, th e reversing lights come on.
Fig. 102 Section of
centre console: selector
lever on cars with an auto-
matic gearboxFig. 103 Instrument
panel display: selector
lever locked in position P
ibiza_angles_0706_DEF Seite 136 Freitag, 1. September 2006 1:18 13
Page 181 of 268
Checking and refilling levels179
Safety First
Operating instructions
Tips and Maintenance
Te c h n i c a l D a t a
Engine oilEngine oil specifications
The engine oil used must conform with exact specifications.Specifications
The engine comes with a special, high quality, multi grade oil that can be
used in all seasons of the year except for those regions affected by extreme
cold.
As the use of good quality oil is necessary for the correct operation and long
service life of the engine, when it becomes necessary to replenish or change
the oil, always use an oil that complies to the VW standards. If it is not possible to find oil co
nforming to the VW standards then oil
conforming to the ACEA or API standa rds with an appropriate viscosity at
atmospheric temperature should be used instead. The use of this type of oil
may have some repercussions on the performance of the engine for example,
long starting time, increased consumption and a higher emission level.
If a top up is required, then different oils may be mixed as long as they all
conform to the VW standards.
The specifications (VW standards) set out in the following page should
appear on the container of the service oil; the container will display together
the different standards for petrol and diesel engines, the oil can be used for
both types of engines.Oil properties
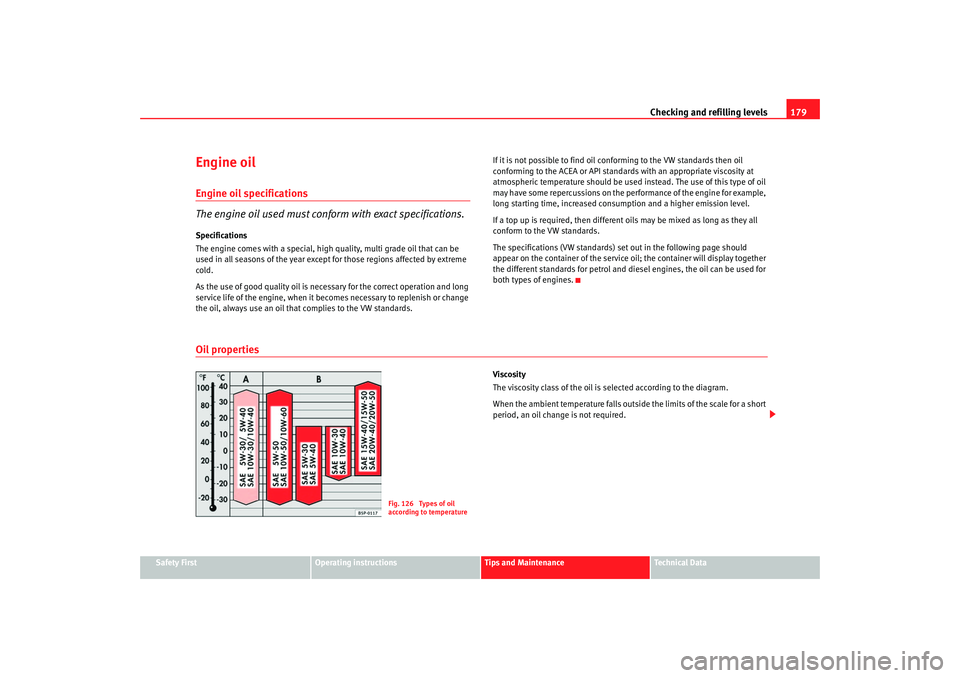
Viscosity
The viscosity class of the oil is selected according to the diagram.
When the ambient temperature falls outside the limits of the scale for a short
period, an oil change is not required.
Fig. 126 Types of oil
according to temperature
ibiza_angles_0706_DEF Seite 179 Freitag, 1. September 2006 1:18 13
Page 191 of 268
Checking and refilling levels189
Safety First
Operating instructions
Tips and Maintenance
Te c h n i c a l D a t a
However, if the level goes down noticeably in a short time, or drops below the
“MIN” mark, there may be a leak in the brake system. A display on the instru-
ment panel will warn you if the brake fluid level is too low
⇒page 58.
WARNING
Before opening the bonnet to check the brake fluid level, read and observe
the warnings ⇒page 176.Changing the brake fluid
The brake fluid must be renewed every two years.We recommend that you have the brake fluid changed by an Authorised
Service Centre.
Before opening the bonnet, please read and follow the warnings ⇒ in
“Safety instructions on working in the engine compartment” on page 176 in
“Working in the engine compartment”.
Brake fluid absorbs moisture. In the cour se of time, it will absorb water from
the ambient air. If the water content in the brake fluid is too high, the brake
system could corrode. This also considerably reduces the boiling point of the
brake fluid. Heavy use of the brakes may then cause a vapour lock which
could impair the braking effect.
For this reason the brake fluid must be renewed every two years.
It is important that you use only use brake fluid compliant with the US
standard FMVSS 116 DOT 4. We recommend the use of Genuine SEAT brake
fluid.
WARNING
Brake fluid is poisonous. Old brake fluid impairs the braking effect.
•
Before opening the bonnet to check the brake fluid level, read and
observe the warnings ⇒page 176.
•
Brake fluid should be stored in the closed original container in a safe
place out of reach of children. There is a toxic risk.
•
Have the brake fluid changed every two years at the latest. Heavy use
of the brakes may cause a vapour lock if the brake fluid is left in the system
for too long. This would seriously affect the efficiency of the brakes and the
safety of the vehicle. This may cause an accident.Caution
Brake fluid could damage the paintwork. Wipe off any brake fluid from the
paintwork immediately.
For the sake of the environment
Brake fluid must be drained and disposed of in the proper manner observing
environmental regulations.
WARNING (continued)
ibiza_angles_0706_DEF Seite 189 Freitag, 1. September 2006 1:18 13
Page 193 of 268
Checking and refilling levels191
Safety First
Operating instructions
Tips and Maintenance
Te c h n i c a l D a t a
•
If the vehicle is left standing in cold conditions for a long period, protect
the battery from frost. If it “freezes” it will be damaged.
Checking the electrolyte level
The electrolyte level should be checked regularly in high-
mileage vehicles, in hot countries and in older batteries.– Open the bonnet and open the battery cover at the front ⇒ in
“Safety instructions on working in the engine compartment” on
page 176 ⇒ in “Warnings on handling the battery” on
page 190.
– Check the colour display in the "magic eye" on the top of the battery.
– If there are air bubbles in the window, tap the window gently until they disperse.The position of the battery is shown in the corresponding engine compart-
ment diagram ⇒page 238.
The round window (“magic eye”) on the top of the battery changes colour,
depending on the charge level and electrolyte level of the battery.
If the colour in the window is colourless or bright yellow, the electrolyte level
of the battery is too low. Have the battery checked by a qualified workshop.
The colours green and black are used by the workshops for diagnostic
purposes.
Charging and changing the vehicle battery
The battery is maintenance-free and is checked during the
inspection service. All work on the vehicle battery requires
specialist knowledge.If you often drive short distances or if the vehicle is not driven for long
periods, the battery should be checked by a qualified workshop between the
scheduled services.
If the battery has discharged and you have problems starting the vehicle, the
battery might be damaged. If this happens, we recommend you have the
vehicle battery checked by an Authorised Service Centre where it will be re-
charged or replaced.
Charging the battery
The vehicle battery should be charged by a qualified workshop only, as
batteries using special technology have been installed and they must be
charged in a controlled environment.
Replacing a vehicle battery
The battery has been developed to suit the conditions of its location and has
special safety features.
Genuine SEAT batteries fulfil the maintenance, performance and safety spec-
ifications of your vehicle.
WARNING
•
We recommend you use only maintenance-free or cycle free leak-proof
batteries that comply with the standards T 825 06 and VW 7 50 73. This
standard applies as of 2001.
•
Before starting any work on the batteries, you must read and observe
the warnings ⇒ in “Warnings on handling the battery” on page 190.
ibiza_angles_0706_DEF Seite 191 Freitag, 1. September 2006 1:18 13
Page 259 of 268
Index257
Index
AABS . . . . . . . . . . . . . . . . . . . . . . . . . . . . . . . . . . . 146
Warning lamp . . . . . . . . . . . . . . . . . . . . . . . . . 62
Accessories . . . . . . . . . . . . . . . . . . . . . . . . . . . . 169
Acoustic signal . . . . . . . . . . . . . . . . . . . . . . . . . . 16
Acoustic warning . . . . . . . . . . . . . . . . . . . . . . . . 130
Adjustable service interval display . . . . . . . . . . 56
Adjusting simp le headlights
driving on the left . . . . . . . . . . . . . . . . . . . . 152
driving on the right . . . . . . . . . . . . . . . . . . . 152
Air conditioning system Climatronic . . . . . . . . . . . . . . . . . . . . . . . . . . 123
General notes . . . . . . . . . . . . . . . . . . . . . . . . 126
Air conditioning* . . . . . . . . . . . . . . . . . . . . . . . . 120
Air outlets . . . . . . . . . . . . . . . . . . . . . . . . . . . . . . 119
Air recirculation Semi-automatic air conditi oning . . . . . . . . 122
Air recirculation mode Climatronic . . . . . . . . . . . . . . . . . . . . . . . . . . 125
Airbag covers . . . . . . . . . . . . . . . . . . . . . . . . . . . . 30
Airbag system . . . . . . . . . . . . . . . . . . . . . . . . . . . 25 Curtain airbags . . . . . . . . . . . . . . . . . . . . . . . 35
Front airbags . . . . . . . . . . . . . . . . . . . . . . . . . 28
Side airbags . . . . . . . . . . . . . . . . . . . . . . . . . . 31
Warning lamp . . . . . . . . . . . . . . . . . . . . . . . . . 26 Airbags
Care . . . . . . . . . . . . . . . . . . . . . . . . . . . . . . . . 27
Disposal . . . . . . . . . . . . . . . . . . . . . . . . . . . . . 27
Safety notes . . . . . . . . . . . . . . . . . . . . . . . . . . 27
Alarm system Switching off . . . . . . . . . . . . . . . . . . . . . . . . . 79
Alterations to the vehicle . . . . . . . . . . . . . . . . . 169
Alternator Warning lamp . . . . . . . . . . . . . . . . . . . . . . . . . 60
Ambient temperature display . . . . . . . . . . . . 53, 55
Anti-freeze . . . . . . . . . . . . . . . . . . . . . . . . . . . . . 183
Anti-lock brake system . . . . . . . . . . . . . . . . . . . 146 Warning lamp . . . . . . . . . . . . . . . . . . . . . . . . . 62
Anti-theft alarm system . . . . . . . . . . . . . . . . . . . . 78 Switching off . . . . . . . . . . . . . . . . . . . . . . . . . 79
Anti-theft wheel bolts . . . . . . . . . . . . . . . . . . . . 203
Apple iPod connector . . . . . . . . . . . . . . . . . . . . 113
Aquaplaning . . . . . . . . . . . . . . . . . . . . . . . . . . . 194
Atermic windscreen* . . . . . . . . . . . . . . . . . . . . . . 98
Automatic anti-dazzle interior mirror* Activating the anti-dazzle function . . . . . . . 99
Deactivating anti-dazzle function . . . . . . . . . 99
Automatic car washes . . . . . . . . . . . . . . . . . . . . 161
Automatic gearbox . . . . . . . . . . . . . . . . . . . . . . 135 Instructions for driving . . . . . . . . . . . . . . . . 137
Kick-down feature . . . . . . . . . . . . . . . . . . . . 137
Selector lever positions . . . . . . . . . . . . . . . . 136 Automatic wiper/wash function for the rear window
97
Auxiliary audio connection: AUX-IN . . . . . . . . . 113
BBall coupling . . . . . . . . . . . . . . . . . . . . . . . . . . . 157
BAS . . . . . . . . . . . . . . . . . . . . . . . . . . . . . . . . . . . 145
Battery Changing . . . . . . . . . . . . . . . . . . . . . . . . . . . 191
Charging . . . . . . . . . . . . . . . . . . . . . . . . . . . . 191
Winter conditions . . . . . . . . . . . . . . . . . . . . 190
Belt tension device Disposal . . . . . . . . . . . . . . . . . . . . . . . . . . . . . 24
Warning lamp . . . . . . . . . . . . . . . . . . . . . . . . 26
Belt tension devices . . . . . . . . . . . . . . . . . . . . . . 24
Biodiesel . . . . . . . . . . . . . . . . . . . . . . . . . . . . . . 175
Bonnet . . . . . . . . . . . . . . . . . . . . . . . . . . . . . . . . 178
Boot* . . . . . . . . . . . . . . . . . . . . . . . . . . . . . . 94, 225
Brake assist system . . . . . . . . . . . . . . . . . . . . . 145
Brake fluid . . . . . . . . . . . . . . . . . . . . . . . . . . . . . 188 Changing . . . . . . . . . . . . . . . . . . . . . . . . . . . 189
Brake pads . . . . . . . . . . . . . . . . . . . . . . . . 149, 150
Brake servo . . . . . . . . . . . . . . . . . . . . . . . 145, 150
Brake system . . . . . . . . . . . . . . . . . . . . . . . . . . . 188 Warning lamp . . . . . . . . . . . . . . . . . . . . . . . . 63
Brakes . . . . . . . . . . . . . . . . . . . . . . . . . . . . . . . . 150
Braking distance . . . . . . . . . . . . . . . . . . . . . . . . 150
ibiza_angles_0706_DEF Seite 257 Freitag, 1. September 2006 1:18 13
Page 261 of 268
Index259
Convenience opening
Windows . . . . . . . . . . . . . . . . . . . . . . . . . . . . . 84
Coolant . . . . . . . . . . . . . . . . . . . . . . . . . . . 183, 184
Coolant Level . . . . . . . . . . . . . . . . . . . . . . . . . . . 184
Coolant level warning light . . . . . . . . . . . . . . . . . . . . . . . . . 61
Coolant Loss . . . . . . . . . . . . . . . . . . . . . . . . . . . 184
Coolant temperature Display . . . . . . . . . . . . . . . . . . . . . . . . . . . . . . 51
Safety instructions . . . . . . . . . . . . . . . . . . . . . 62
Correct adjustment of front head restraints . . . . 12
Cruise control system . . . . . . . . . . . . . . . . . . . . 140
Curtain airbags . . . . . . . . . . . . . . . . . . . . . . . . . . 35 Description . . . . . . . . . . . . . . . . . . . . . . . . . . . 35
Function . . . . . . . . . . . . . . . . . . . . . . . . . . . . . 36
Safety notes . . . . . . . . . . . . . . . . . . . . . . . . . . 36DDanger of fitting a child seat on the front passenger seat . . . . . . . . . . . . . . . . . . . . . . . . . . . . . . . 26
Deep Water in Cupra version . . . . . . . . . . . . . . 149
Diesel . . . . . . . . . . . . . . . . . . . . . . . . . . . . . . . . . 175
Diesel engine Winter driving . . . . . . . . . . . . . . . . . . . . . . . . 175
Diesel engine particulate filter* . . . . . . . . . . . . 151
Differential lock . . . . . . . . . . . . . . . . . . . . . . . . . 148
Differential lock fault (EDL) warning lamp . . . . . . . . . . . . . . . . . . . . . . . . . 65
Digital clock . . . . . . . . . . . . . . . . . . . . . . . . . . . . . 52
Dipped headlights . . . . . . . . . . . . . . . . . . . . . . . . 88 Disabling front passenger airbag
Safety notes . . . . . . . . . . . . . . . . . . . . . . . . . . 39
Disabling the airbag Disabling front passenger airbag . . . . . . . . . 38
Displays in the Mult i-function display
Memory displays . . . . . . . . . . . . . . . . . . . . . . 54
Door lock cylinders . . . . . . . . . . . . . . . . . . . . . . 164
Door release lever . . . . . . . . . . . . . . . . . . . . . . . . 49
Doors Childproof locks . . . . . . . . . . . . . . . . . . . . . . . 72
Unlocking and locking . . . . . . . . . . . . . . . . . 68
Drive wheels traction control system . . . . . . . . 146
Driving Driving abroad . . . . . . . . . . . . . . . . . . . . . . . 151
With a trailer . . . . . . . . . . . . . . . . . . . . . . . . . 157
with a trailer . . . . . . . . . . . . . . . . . . . . . . . . . 156
Driving abroad . . . . . . . . . . . . . . . . . . . . . . . . . . 151 Headlights . . . . . . . . . . . . . . . . . . . . . . . . . . 152
Driving economically . . . . . . . . . . . . . . . . . . . . . 158
Driving safety . . . . . . . . . . . . . . . . . . . . . . . . . . . . . 8
Driving with respect for the environment . . . . . 158
Duplicate keys . . . . . . . . . . . . . . . . . . . . . . . . . . . 75
Dust filter . . . . . . . . . . . . . . . . . . . . . . . . . . . . . . 126
Dynamic headlight range control . . . . . . . . . . . . 89
EEDL . . . . . . . . . . . . . . . . . . . . . . . . . . . . . . . . . . . 148
EDS Warning lamp . . . . . . . . . . . . . . . . . . . . . . . . . 62
Electrical sockets . . . . . . . . . . . . . . . . . . . . . . . . 112 Electrohydraulic steering
warning lamp . . . . . . . . . . . . . . . . . . . . . . . . . 60
Electronic differential lock . . . . . . . . . . . . . . . . 148 Warning lamp . . . . . . . . . . . . . . . . . . . . . . . . 62
Electronic immobiliser . . . . . . . . . . . . . . . . 65, 131
Electronic stabilisation program . . . . . . . . . . . . 64 Description . . . . . . . . . . . . . . . . . . . . . . . . . . 129
Warning lamp . . . . . . . . . . . . . . . . . . . . . . . 130
Electronic stabilisation program (ESP) warning lamp . . . . . . . . . . . . . . . . . . . . . . . . . 64
Electronic stabilisation programme . . . . . . . . . 147
Emission control system warning lamp . . . . . . . . . . . . . . . . . . . . . . . . . 63
Engine Running-in . . . . . . . . . . . . . . . . . . . . . . . . . . 149
Engine compartment Working in the engine compartment . . . . . 176
Engine coolant . . . . . . . . . . . . . . . . . . . . . . . . . . 183
Engine fault warning lamp . . . . . . . . . . . . . . . . . . . . . . . . . 61
Engine management Warning lamp . . . . . . . . . . . . . . . . . . . . . . . . 61
Engine oil . . . . . . . . . . . . . . . . . . . . . . . . . . . . . . 179 Changing . . . . . . . . . . . . . . . . . . . . . . . . . . . 182
Checking level . . . . . . . . . . . . . . . . . . . . . . . 180
Oil properties . . . . . . . . . . . . . . . . . . . . . . . . 179
Specifications . . . . . . . . . . . . . . . . . . . . . . . 179
Topping up . . . . . . . . . . . . . . . . . . . . . . . . . . 181
Engine oil dipstick . . . . . . . . . . . . . . . . . . . . . . . 180
Engine oil pressure Warning lamp . . . . . . . . . . . . . . . . . . . . . . . . 65
ibiza_angles_0706_DEF Seite 259 Freitag, 1. September 2006 1:18 13