ESP Seat Ibiza 5D 2007 Radio System ALANA
[x] Cancel search | Manufacturer: SEAT, Model Year: 2007, Model line: Ibiza 5D, Model: Seat Ibiza 5D 2007Pages: 70, PDF Size: 0.97 MB
Page 4 of 70
Foreword
This owner's manual and the corresponding supplements should be read carefully to familiarise yourself with
your vehicle.
Also, the regular care and maintenance and correct handling of the vehicle will contribute to preserve its value.
For safety reasons, note the information concerning accessories, modifications and parts exchange.
If selling the vehicle, give all of the onboard documentation to the new owner as this should be kept with the
vehicle.
Page 7 of 70
General information 4
General information
Before reading this manual it must be understood
This manual contains important information, tips, suggestions and warnings
on using your radio. The other publications in the vehicle wallet contain
further information which you should be aware of for your own safety and for
the safety of your passengers.
Ensure that the complete vehicle wallet is always in the vehicle. This is espe-
cially important when you lend or sell the vehicle to others.
This manual describes the vehicle equipment at the time of publication.
Some of the equipment described here will not be available until a later date,
or is available only in certain markets.
Illustrations are intended as a general guide, and may vary from the equip-
ment fitted in your vehicle in some details.
Directions and positions (e.g. right, left, front, rear) are always relative to the
direction of travel of the vehicle unless otherwise stated.
The equipment marked with an asterisk* is fitted as standard only in deter-
mined model versions, are supplied as optional only for some versions or
model year, or are only offered in different countries.
®All registered marks are indicated with ®. Even if the copyright symbol
does not appear this does not mean that the mark is not copyrighted.
�bThe section is continued on the following page.
�žIndicates the end of a section.
WARNING
Texts with this symbol contain safety information. They warn you of serious
dangers, possibly involving accident or injury.
Caution
Texts with this symbol draw your attention to a possible risk of damage to
your vehicle.
For the sake of the environment
Texts with this symbol refer to points relevant to the protection of the environ-
ment.
Note
Texts with this symbol contain additional information of a more general
nature. In certain countries there may be different units of measurement than
the ones used in this manual. For example, miles and gallons may be used
instead of kilometres and litres.
Page 12 of 70
Brief instructions9
Brief instructions
Amplifier
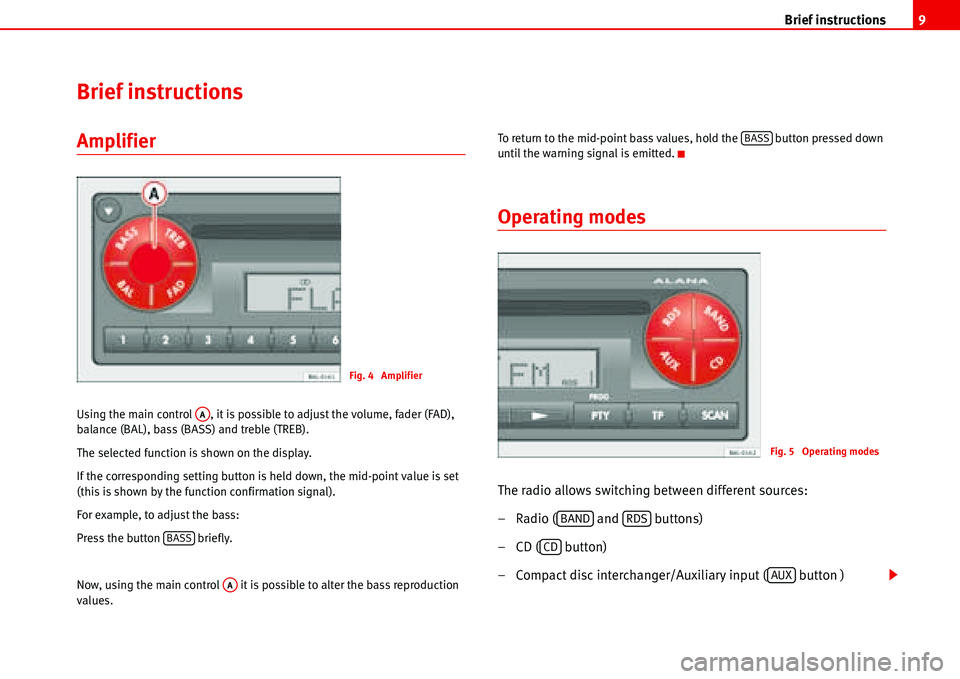
Using the main control , it is possible to adjust the volume, fader (FAD),
balance (BAL), bass (BASS) and treble (TREB).
The selected function is shown on the display.
If the corresponding setting button is held down, the mid-point value is set
(this is shown by the function confirmation signal).
For example, to adjust the bass:
Press the button briefly.
Now, using the main control it is possible to alter the bass reproduction
values.To return to the mid-point bass values, hold the button pressed down
until the warning signal is emitted.
Operating modes
The radio allows switching between different sources:
– Radio ( and buttons)
– CD ( button)
– Compact disc interchanger/Auxiliary input ( button )
Fig. 4 Amplifier
AA
BASS
AA
BASS
Fig. 5 Operating modes
BANDRDS
CD
AUX
Page 13 of 70
Brief instructions 10
If there is a compact disc interchanger or Auxiliary device connected to the car
radio and a CD is inserted, it is possible to switch directly between these two
sound sources using the keys and .
For example:
You are listening to the radio. If the button is pressed briefly the CD will
start to play. By pressing the button the CD stops and the compact disc
interchanger or device is activated.
To return to the radio function, press or .
Security
To prevent your car radio from being stolen, when leaving the
vehicle check:
–the code has been activated
–and you are carrying the removable control panel.
Display
This gives visual information about all the major functions when in radio, CD
or AUX mode.
With the PROG system selected, the functions of the corresponding level are
viewed.
Numerical keypad
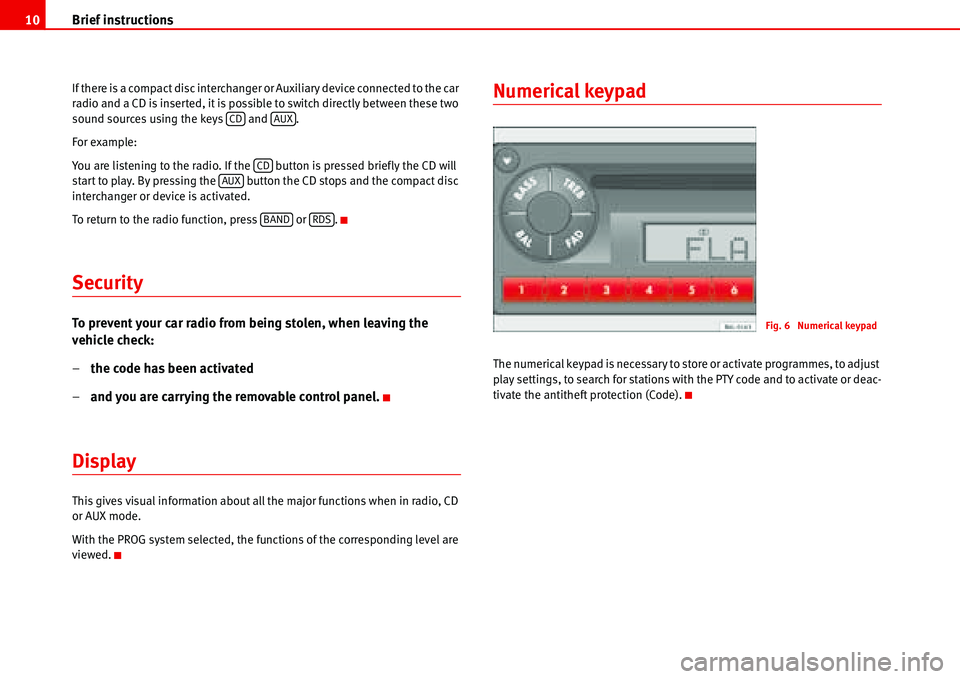
The numerical keypad is necessary to store or activate programmes, to adjust
play settings, to search for stations with the PTY code and to activate or deac-
tivate the antitheft protection (Code).
CDAUX
CDAUX
BANDRDS
Fig. 6 Numerical keypad
Page 26 of 70
Radio23
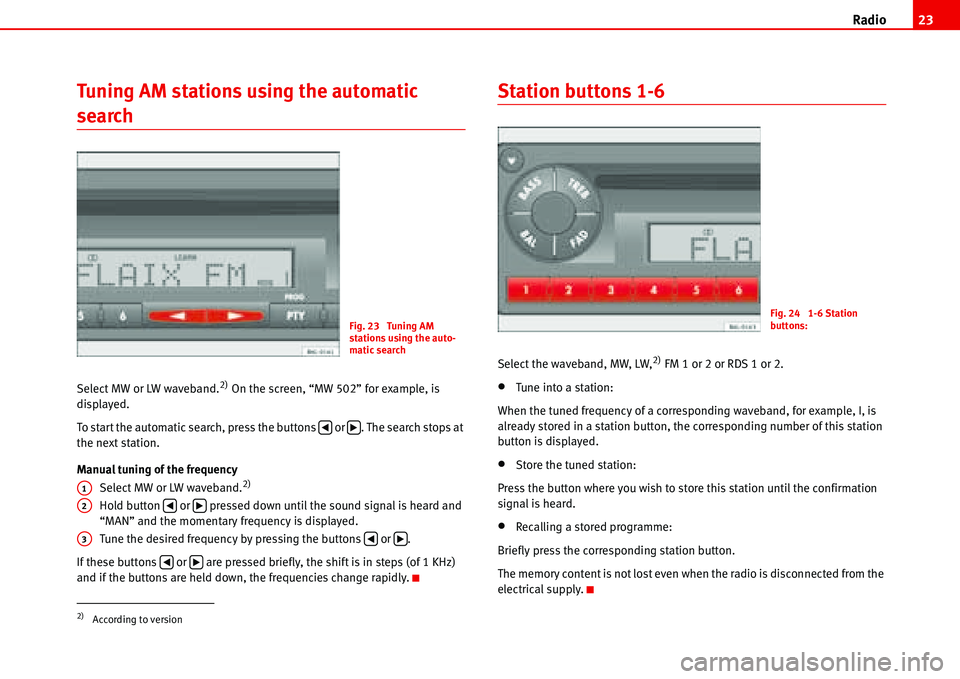
Tuning AM stations using the automatic
search
Select MW or LW waveband.2) On the screen, “MW 502” for example, is
displayed.
To start the automatic search, press the buttons or . The search stops at
the next station.
Manual tuning of the frequency
Select MW or LW waveband.
2)
Hold button or pressed down until the sound signal is heard and
“MAN” and the momentary frequency is displayed.
Tune the desired frequency by pressing the buttons or .
If these buttons or are pressed briefly, the shift is in steps (of 1 KHz)
and if the buttons are held down, the frequencies change rapidly.
Station buttons 1-6
Select the waveband, MW, LW,2) FM 1 or 2 or RDS 1 or 2.
•Tune into a station:
When the tuned frequency of a corresponding waveband, for example, I, is
already stored in a station button, the corresponding number of this station
button is displayed.
•Store the tuned station:
Press the button where you wish to store this station until the confirmation
signal is heard.
•Recalling a stored programme:
Briefly press the corresponding station button.
The memory content is not lost even when the radio is disconnected from the
electrical supply.
2)According to version
Fig. 23 Tuning AM
stations using the auto-
matic search
�‚�b
A1
A2�‚�b
A3�‚�b
�‚�b
Fig. 24 1-6 Station
buttons:
Page 29 of 70
Radio 26
2 Choose the programme class.
- With the pre-set station buttons: NEWS), (SPORT), (POP),
(ROCK M), (CLASSICS) or (PERS). When the desired programme
button is pressed, the radio starts to search for the nearest programme
in the selected class, as long as “PTY..” is displayed.
- Briefly press or until the desired programme class is displayed,
then press or again until the confirmation signal is heard. The PTY
search starts until finding the next station which broadcasts the desired
class of programme, in which case the corresponding abbreviation is
displayed, e.g.: “POP”.
To search for the next station, hold the button down until the confirmation
signal is heard.
If there is no available station broadcasting this class of programme, at the
end of the search the last station to have been tuned will be heard and the
PTY function is automatically deactivated.
3 Leave the PTY function.
Briefly press the button or wait approximately 9 seconds until it is
deactivated automatically.
123456
�‚�b�‚�b
PTY
Page 30 of 70
Compact Disc27
Compact Disc
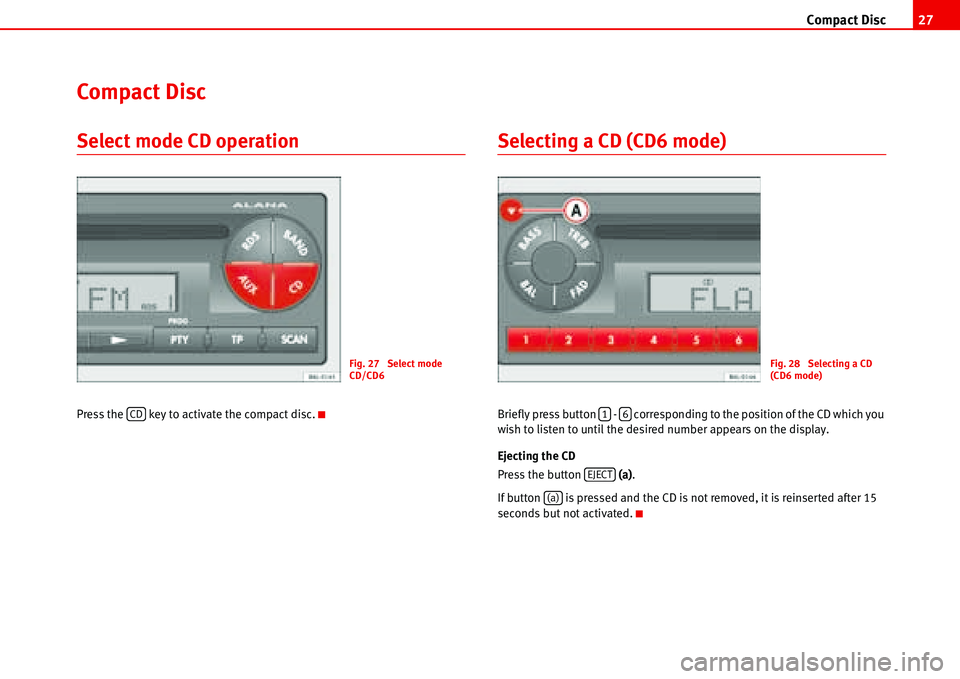
Select mode CD operation
Press the key to activate the compact disc.
Selecting a CD (CD6 mode)
Briefly press button - corresponding to the position of the CD which you
wish to listen to until the desired number appears on the display.
Ejecting the CD
Press the button (a).
If button is pressed and the CD is not removed, it is reinserted after 15
seconds but not activated.
Fig. 27 Select mode
CD/CD6
CD
Fig. 28 Selecting a CD
(CD6 mode)
16
EJECT
(a)
Page 38 of 70
Apple* iPod ® connection35
•Random playback (MIX play)
Ideal operating temperature for iPod
®
The ideal ambient temperature for an iPod® is between 0° and 35°. The
iPod® can be damaged by prolonged exposure to high or low temperatures,
for example, during the night.
Therefore, it is recommended that the iPod
® is not left in the vehicle �Ÿ
Check the iPod
® manufacturer's instructions for more information about
“temperatures”
Caution
•The excessively high or low temperatures that can occur inside vehicles
may damage the iPod®.
•Only use the iPods® and sound systems authorized by SEAT.
•Do not store vital information on the iPod®. SEAT will not accept any
responsibility for data or files that are corrupted or lost.
Note
•To obtain the best sound quality we recommend using an iPod® of the 5th
generation with a fully charged battery.
•To avoid interference in data transfer or when loading, keep the contact
surfaces of the adaptor and the iPod® clean.
•THe iPod® is optional equipment.
•Changes in the software or firmware of the iPod® may modify the proper-
ties and functions described herein.
•When selling the vehicle hand these instructions to the new owner.
iPod® adaptor
The adaptor connects the iPod® to the vehicle sound system. So both share
the stored information and the controls.
The properties and functions of the iPod
® adaptor correspond with the soft-
ware version when delivered.
Caution
Never insert metal objects into the iPod ® adaptor, as it may shortcircuit.
Note
The simultaneous use of the iPod ® adaptor and a CD changer is not
possible.
Battery charging
The iPod ® battery is charged when placed onto the adaptor and the sound
system turned on. When the battery is charged it will maintain this charge and
the iPod
® will be “powered” from the vehicle battery.
The charge will be interrupted when the sound system is turned off.
Apple iPod® connector
Select adaptor
Various iPod® adaptors are included to guarantee the safe attachment of the
connector.
Page 40 of 70
Apple* iPod ® connection37
•If the iPod® does not work correctly despite being a compatible model,
we recommend updating the firmware. For more information, consult the
Apple Computer Inc webpage.
•The iPod® controls will not work when it is attached to the adaptor.
Remove the iPod® from the adaptor
– First change the input source for the sound system, for example
from CD to FM or to the radio.
– Open the compartment where the iPod
® adaptor is fitted.
– Remove the iPod
® from the adaptor �Ÿ
– Close the compartment.
WARNING
It is vital that attention is not diverted from the traffic. Use the iPod ® only
when the situation allows. Any distraction may lead to an accident, with
the risk of injury.
•Never lose visual contact with the road in order to adjust or use the
iPod® and the sound system.
•Use the iPod® only when the state of the road, the weather and traffic
conditions permit.
•Never detach the iPod ® while driving.
Caution
•Detaching the iPod ® from the adaptor will leave marks.
•Never detach the iPod® when the sound source selected is the adaptor
(CD). Otherwise the iPod® memory could be damaged.
Apple iPod® connector
Select adaptor
Various iPod® adaptors are included to guarantee the safe attachment of the
connector.
Use the large adaptor for the smallest iPod
®. Insert the adaptor into the
connector and then place the iPod®.
The larger iPods
® use the smaller adaptors when necessary. These adaptors
can be entered with the widest side upwards in the central connector dock. If
necessary use a lateral spacer to stabilise it.
Check which of the adaptors supplied is best for your iPod
® and position it
safely.
Page 41 of 70
Apple* iPod ® connection 38
Attach the iPod®
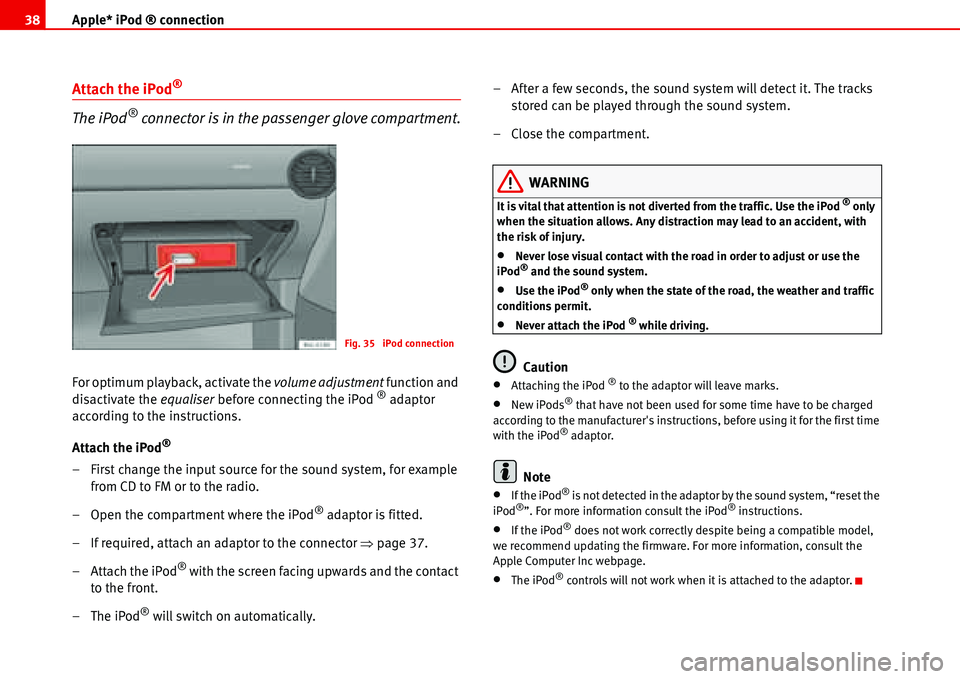
The iPod® connector is in the passenger glove compartment.
For optimum playback, activate the volume adjustment function and
disactivate the equaliser before connecting the iPod ® adaptor
according to the instructions.
Attach the iPod
®
– First change the input source for the sound system, for example
from CD to FM or to the radio.
– Open the compartment where the iPod
® adaptor is fitted.
– If required, attach an adaptor to the connector �Ÿpage 37.
– Attach the iPod
® with the screen facing upwards and the contact
to the front.
–The iPod
® will switch on automatically.– After a few seconds, the sound system will detect it. The tracks
stored can be played through the sound system.
– Close the compartment.
WARNING
It is vital that attention is not diverted from the traffic. Use the iPod ® only
when the situation allows. Any distraction may lead to an accident, with
the risk of injury.
•Never lose visual contact with the road in order to adjust or use the
iPod® and the sound system.
•Use the iPod® only when the state of the road, the weather and traffic
conditions permit.
•Never attach the iPod ® while driving.
Caution
•Attaching the iPod ® to the adaptor will leave marks.
•New iPods® that have not been used for some time have to be charged
according to the manufacturer's instructions, before using it for the first time
with the iPod
® adaptor.
Note
•If the iPod® is not detected in the adaptor by the sound system, “reset the
iPod®”. For more information consult the iPod® instructions.
•If the iPod® does not work correctly despite being a compatible model,
we recommend updating the firmware. For more information, consult the
Apple Computer Inc webpage.
•The iPod® controls will not work when it is attached to the adaptor.
Fig. 35 iPod connection