heating Seat Ibiza 5D 2011 Owner's manual
[x] Cancel search | Manufacturer: SEAT, Model Year: 2011, Model line: Ibiza 5D, Model: Seat Ibiza 5D 2011Pages: 278, PDF Size: 3.83 MB
Page 5 of 278
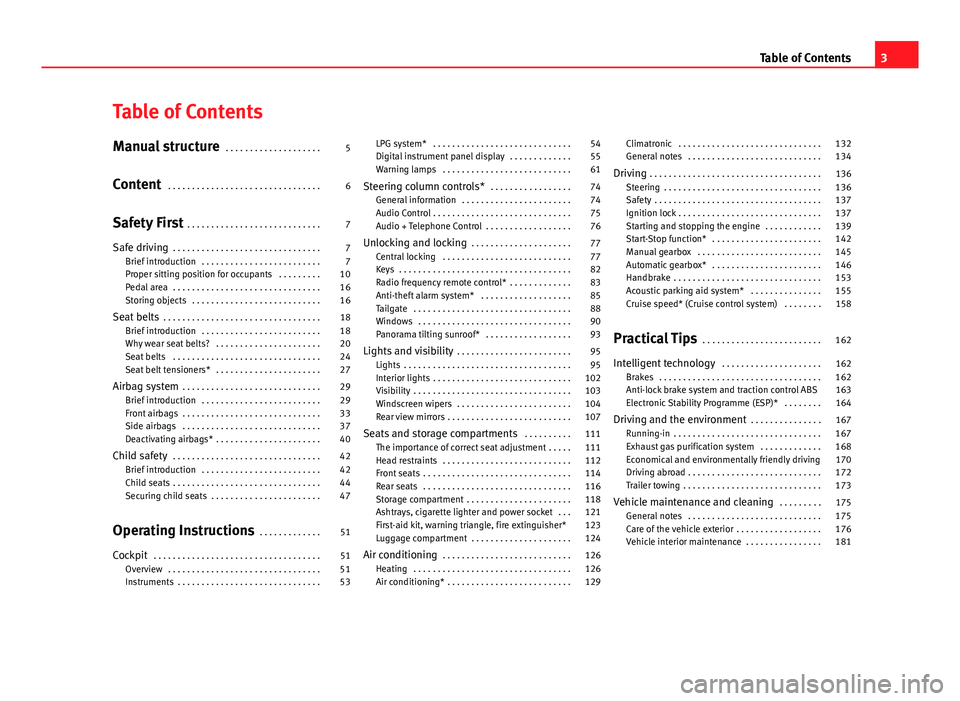
Table of Contents
Manual structure . . . . . . . . . . . . . . . . . . . . 5
Content . . . . . . . . . . . . . . . . . . . . . . . . . . . . . . . . 6
Safety First . . . . . . . . . . . . . . . . . . . . . . . . . . . . 7
Safe driving . . . . . . . . . . . . . . . . . . . . . . . . . . . . . . . 7
Brief introduction . . . . . . . . . . . . . . . . . . . . . . . . . 7
Proper sitting position for occupants . . . . . . . . . 10
Pedal area . . . . . . . . . . . . . . . . . . . . . . . . . . . . . . . 16
Storing objects . . . . . . . . . . . . . . . . . . . . . . . . . . . 16
Seat belts . . . . . . . . . . . . . . . . . . . . . . . . . . . . . . . . . 18
Brief introduction . . . . . . . . . . . . . . . . . . . . . . . . . 18
Why wear seat belts? . . . . . . . . . . . . . . . . . . . . . . 20
Seat belts . . . . . . . . . . . . . . . . . . . . . . . . . . . . . . . 24
Seat belt tensioners* . . . . . . . . . . . . . . . . . . . . . . 27
Airbag system . . . . . . . . . . . . . . . . . . . . . . . . . . . . . 29
Brief introduction . . . . . . . . . . . . . . . . . . . . . . . . . 29
Front airbags . . . . . . . . . . . . . . . . . . . . . . . . . . . . . 33
Side airbags . . . . . . . . . . . . . . . . . . . . . . . . . . . . . 37
Deactivating airbags* . . . . . . . . . . . . . . . . . . . . . . 40
Child safety . . . . . . . . . . . . . . . . . . . . . . . . . . . . . . . 42
Brief introduction . . . . . . . . . . . . . . . . . . . . . . . . . 42
Child seats . . . . . . . . . . . . . . . . . . . . . . . . . . . . . . . 44
Securing child seats . . . . . . . . . . . . . . . . . . . . . . . 47
Operating Instructions . . . . . . . . . . . . . 51
Cockpit . . . . . . . . . . . . . . . . . . . . . . . . . . . . . . . . . . . 51
Overview . . . . . . . . . . . . . . . . . . . . . . . . . . . . . . . . 51
Instruments . . . . . . . . . . . . . . . . . . . . . . . . . . . . . . 53 LPG system* . . . . . . . . . . . . . . . . . . . . . . . . . . . . . 54
Digital instrument panel display . . . . . . . . . . . . . 55
Warning lamps . . . . . . . . . . . . . . . . . . . . . . . . . . . 61
Steering column controls* . . . . . . . . . . . . . . . . . 74
General information . . . . . . . . . . . . . . . . . . . . . . . 74
Audio Control . . . . . . . . . . . . . . . . . . . . . . . . . . . . . 75
Audio + Telephone Control . . . . . . . . . . . . . . . . . . 76
Unlocking and locking . . . . . . . . . . . . . . . . . . . . . 77
Central locking . . . . . . . . . . . . . . . . . . . . . . . . . . . 77
Keys . . . . . . . . . . . . . . . . . . . . . . . . . . . . . . . . . . . . 82
Radio frequency remote control* . . . . . . . . . . . . . 83
Anti-theft alarm system* . . . . . . . . . . . . . . . . . . . 85
Tailgate . . . . . . . . . . . . . . . . . . . . . . . . . . . . . . . . . 88
Windows . . . . . . . . . . . . . . . . . . . . . . . . . . . . . . . . 90
Panorama tilting sunroof* . . . . . . . . . . . . . . . . . . 93
Lights and visibility . . . . . . . . . . . . . . . . . . . . . . . . 95
Lights . . . . . . . . . . . . . . . . . . . . . . . . . . . . . . . . . . . 95
Interior lights . . . . . . . . . . . . . . . . . . . . . . . . . . . . . 102
Visibility . . . . . . . . . . . . . . . . . . . . . . . . . . . . . . . . . 103
Windscreen wipers . . . . . . . . . . . . . . . . . . . . . . . . 104
Rear view mirrors . . . . . . . . . . . . . . . . . . . . . . . . . . 107
Seats and storage compartments . . . . . . . . . . 111
The importance of correct seat adjustment . . . . . 111
Head restraints . . . . . . . . . . . . . . . . . . . . . . . . . . . 112
Front seats . . . . . . . . . . . . . . . . . . . . . . . . . . . . . . . 114
Rear seats . . . . . . . . . . . . . . . . . . . . . . . . . . . . . . . 116
Storage compartment . . . . . . . . . . . . . . . . . . . . . . 118
Ashtrays, cigarette lighter and power socket . . . 121
First-aid kit, warning triangle, fire extinguisher* 123
Luggage compartment . . . . . . . . . . . . . . . . . . . . . 124
Air conditioning . . . . . . . . . . . . . . . . . . . . . . . . . . . 126
Heating . . . . . . . . . . . . . . . . . . . . . . . . . . . . . . . . . 126
Air conditioning* . . . . . . . . . . . . . . . . . . . . . . . . . . 129 Climatronic . . . . . . . . . . . . . . . . . . . . . . . . . . . . . . 132
General notes . . . . . . . . . . . . . . . . . . . . . . . . . . . . 134
Driving . . . . . . . . . . . . . . . . . . . . . . . . . . . . . . . . . . . . 136
Steering . . . . . . . . . . . . . . . . . . . . . . . . . . . . . . . . . 136
Safety . . . . . . . . . . . . . . . . . . . . . . . . . . . . . . . . . . . 137
Ignition lock . . . . . . . . . . . . . . . . . . . . . . . . . . . . . . 137
Starting and stopping the engine . . . . . . . . . . . . 139
Start-Stop function* . . . . . . . . . . . . . . . . . . . . . . . 142
Manual gearbox . . . . . . . . . . . . . . . . . . . . . . . . . . 145
Automatic gearbox* . . . . . . . . . . . . . . . . . . . . . . . 146
Handbrake . . . . . . . . . . . . . . . . . . . . . . . . . . . . . . . 153
Acoustic parking aid system* . . . . . . . . . . . . . . . 155
Cruise speed* (Cruise control system) . . . . . . . . 158
Practical Tips . . . . . . . . . . . . . . . . . . . . . . . . . 162
Intelligent technology . . . . . . . . . . . . . . . . . . . . . 162
Brakes . . . . . . . . . . . . . . . . . . . . . . . . . . . . . . . . . . 162
Anti-lock brake system and traction control ABS 163
Electronic Stability Programme (ESP)* . . . . . . . . 164
Driving and the environment . . . . . . . . . . . . . . . 167
Running-in . . . . . . . . . . . . . . . . . . . . . . . . . . . . . . . 167
Exhaust gas purification system . . . . . . . . . . . . . 168
Economical and environmentally friendly driving 170
Driving abroad . . . . . . . . . . . . . . . . . . . . . . . . . . . . 172
Trailer towing . . . . . . . . . . . . . . . . . . . . . . . . . . . . . 173
Vehicle maintenance and cleaning . . . . . . . . . 175
General notes . . . . . . . . . . . . . . . . . . . . . . . . . . . . 175
Care of the vehicle exterior . . . . . . . . . . . . . . . . . . 176
Vehicle interior maintenance . . . . . . . . . . . . . . . . 181
3
Table of Contents
Page 53 of 278
51
Cockpit
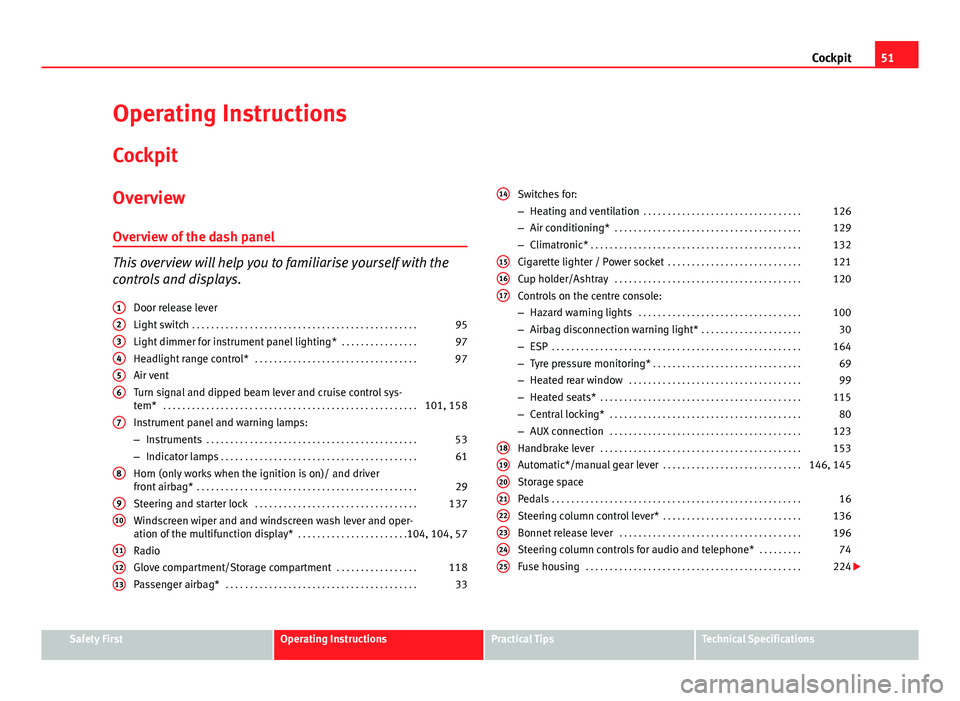
Operating Instructions Cockpit
Overview Overview of the dash panel
This overview will help you to familiarise yourself with the
controls and displays. Door release lever
Light switch . . . . . . . . . . . . . . . . . . . . . . . . . . . . . . . . . . . . . . . . . . . . . . . 95
Light dimmer for instrument panel lighting* . . . . . . . . . . . . . . . .97
Headlight range control* . . . . . . . . . . . . . . . . . . . . . . . . . . . . . . . . . . 97
Air vent
Turn signal and dipped beam lever and cruise control sys-
tem* . . . . . . . . . . . . . . . . . . . . . . . . . . . . . . . . . . . . . . . . . . . . . . . . . . . . . 101, 158
Instrument panel and warning lamps:
– Instruments . . . . . . . . . . . . . . . . . . . . . . . . . . . . . . . . . . . . . . . . . . . . 53
– Indicator lamps . . . . . . . . . . . . . . . . . . . . . . . . . . . . . . . . . . . . . . . . . 61
Horn (only works when the ignition is on)/ and driver
front airbag* . . . . . . . . . . . . . . . . . . . . . . . . . . . . . . . . . . . . . . . . . . . . . . 29
Steering and starter lock . . . . . . . . . . . . . . . . . . . . . . . . . . . . . . . . . . 137
Windscreen wiper and and windscreen wash lever and oper-
ation of the multifunction display* . . . . . . . . . . . . . . . . . . . . . . . . .104, 104, 57
Radio
Glove compartment/Storage compartment . . . . . . . . . . . . . . . . .118
Passenger airbag* . . . . . . . . . . . . . . . . . . . . . . . . . . . . . . . . . . . . . . . . 33
1
23456
7
8
910
111213
Switches for:
–
Heating and ventilation . . . . . . . . . . . . . . . . . . . . . . . . . . . . . . . . . 126
– Air conditioning* . . . . . . . . . . . . . . . . . . . . . . . . . . . . . . . . . . . . . . . 129
– Climatronic* . . . . . . . . . . . . . . . . . . . . . . . . . . . . . . . . . . . . . . . . . . . . 132
Cigarette lighter / Power socket . . . . . . . . . . . . . . . . . . . . . . . . . . . . 121
Cup holder/Ashtray . . . . . . . . . . . . . . . . . . . . . . . . . . . . . . . . . . . . . . . 120
Controls on the centre console:
– Hazard warning lights . . . . . . . . . . . . . . . . . . . . . . . . . . . . . . . . . . 100
– Airbag disconnection warning light* . . . . . . . . . . . . . . . . . . . . .30
– ESP . . . . . . . . . . . . . . . . . . . . . . . . . . . . . . . . . . . . . . . . . . . . . . . . . . . . 164
– Tyre pressure monitoring* . . . . . . . . . . . . . . . . . . . . . . . . . . . . . . . 69
– Heated rear window . . . . . . . . . . . . . . . . . . . . . . . . . . . . . . . . . . . . 99
– Heated seats* . . . . . . . . . . . . . . . . . . . . . . . . . . . . . . . . . . . . . . . . . . 115
– Central locking* . . . . . . . . . . . . . . . . . . . . . . . . . . . . . . . . . . . . . . . . 80
– AUX connection . . . . . . . . . . . . . . . . . . . . . . . . . . . . . . . . . . . . . . . . 123
Handbrake lever . . . . . . . . . . . . . . . . . . . . . . . . . . . . . . . . . . . . . . . . . . 153
Automatic*/manual gear lever . . . . . . . . . . . . . . . . . . . . . . . . . . . . . 146, 145
Storage space
Pedals . . . . . . . . . . . . . . . . . . . . . . . . . . . . . . . . . . . . . . . . . . . . . . . . . . . . 16
Steering column control lever* . . . . . . . . . . . . . . . . . . . . . . . . . . . . . 136
Bonnet release lever . . . . . . . . . . . . . . . . . . . . . . . . . . . . . . . . . . . . . . 196
Steering column controls for audio and telephone* . . . . . . . . .74
Fuse housing . . . . . . . . . . . . . . . . . . . . . . . . . . . . . . . . . . . . . . . . . . . . . 224
14
151617
1819202122232425
Safety FirstOperating InstructionsPractical TipsTechnical Specifications
Page 68 of 278
66Cockpit
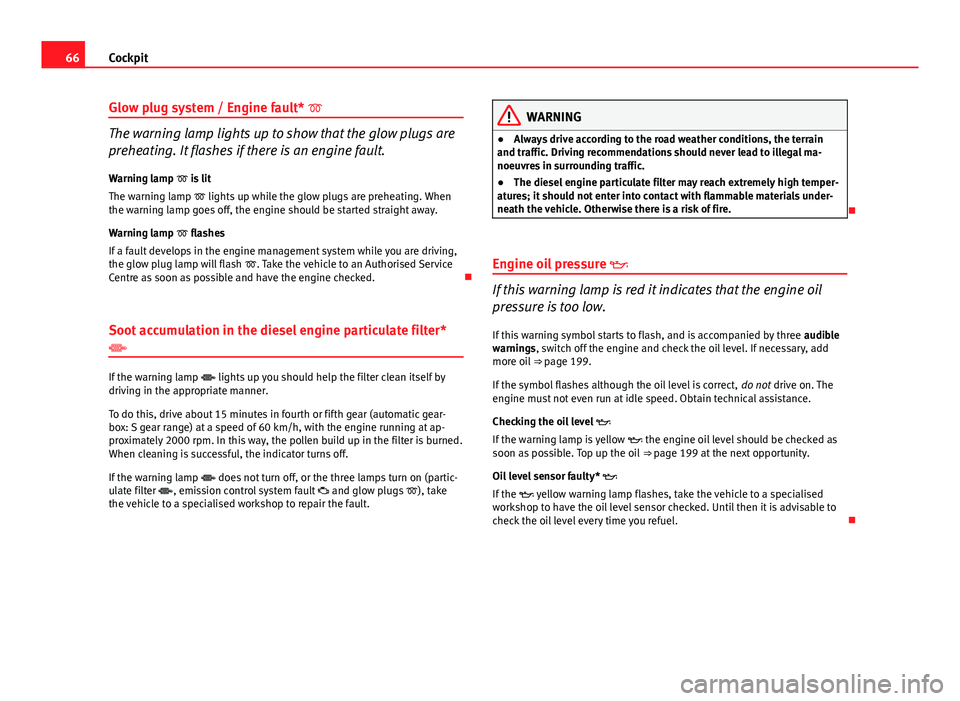
Glow plug system / Engine fault*
The warning lamp lights up to show that the glow plugs are
preheating. It flashes if there is an engine fault.
Warning lamp is lit
The warning lamp lights up while the glow plugs are preheating. When
the warning lamp goes off, the engine should be started straight away.
Warning lamp flashes
If a fault develops in the engine management system while you are driving,
the glow plug lamp will flash . Take the vehicle to an Authorised Service
Centre as soon as possible and have the engine checked.
Soot accumulation in the diesel engine particulate filter*
If the warning lamp lights up you should help the filter clean itself by
driving in the appropriate manner.
To do this, drive about 15 minutes in fourth or fifth gear (automatic gear-
box: S gear range) at a speed of 60 km/h, with the engine running at ap-
proximately 2000 rpm. In this way, the pollen build up in the filter is burned.
When cleaning is successful, the indicator turns off.
If the warning lamp does not turn off, or the three lamps turn on (partic-
ulate filter , emission control system fault and glow plugs ), take
the vehicle to a specialised workshop to repair the fault.
WARNING
● Always drive according to the road weather conditions, the terrain
and traffic. Driving recommendations should never lead to illegal ma-
noeuvres in surrounding traffic.
● The diesel engine particulate filter may reach extremely high temper-
atures; it should not enter into contact with flammable materials under-
neath the vehicle. Otherwise there is a risk of fire.
Engine oil pressure
If this warning lamp is red it indicates that the engine oil
pressure is too low.
If this warning symbol starts to flash, and is accompanied by three audible
warnings, switch off the engine and check the oil level. If necessary, add
more oil ⇒ page 199.
If the symbol flashes although the oil level is correct, do not drive on. The
engine must not even run at idle speed. Obtain technical assistance.
Checking the oil level
If the warning lamp is yellow the engine oil level should be checked as
soon as possible. Top up the oil ⇒ page 199 at the next opportunity.
Oil level sensor faulty*
If the yellow warning lamp flashes, take the vehicle to a specialised
workshop to have the oil level sensor checked. Until then it is advisable to
check the oil level every time you refuel.
Page 73 of 278
71
Cockpit
Main beam headlights
This warning lamp lights up when the main beams are on.
The warning lamp is switched on once main beams are on or once the
headlight flasher is operating.
For further information see ⇒ page 101.
Electro-hydraulic steering*
The level of steering assistance depends on the vehicle speed and on the
steering wheel turning speed.
The warning lamp should light up for a few seconds when the ignition is
switched on. It should go out once the engine is started.
There is a fault in the electro-hydraulic steering system if the lamp does not
go out or lights up whilst the vehicle is in motion. Take the vehicle to the
Authorised Service Centre as soon as possible.
Note
When towing the vehicle with the engine stopped or due to a fault in the
power steering, this will not operate. The vehicle can still be steered, but it
will require greater force to turn the steering wheel. Emission control system*
This warning lamp monitors the exhaust system.
Warning lamp flashes:
When there is misfiring that can damage the catalytic converter. Reduce
speed and drive carefully to the nearest specialised workshop to have the
engine checked.
Warning lamp is lit:
If a fault has developed during driving which has reduced the quality of the
exhaust gas (e.g. lambda probe fault). Reduce speed and drive carefully to
the nearest specialised workshop to have the engine checked.
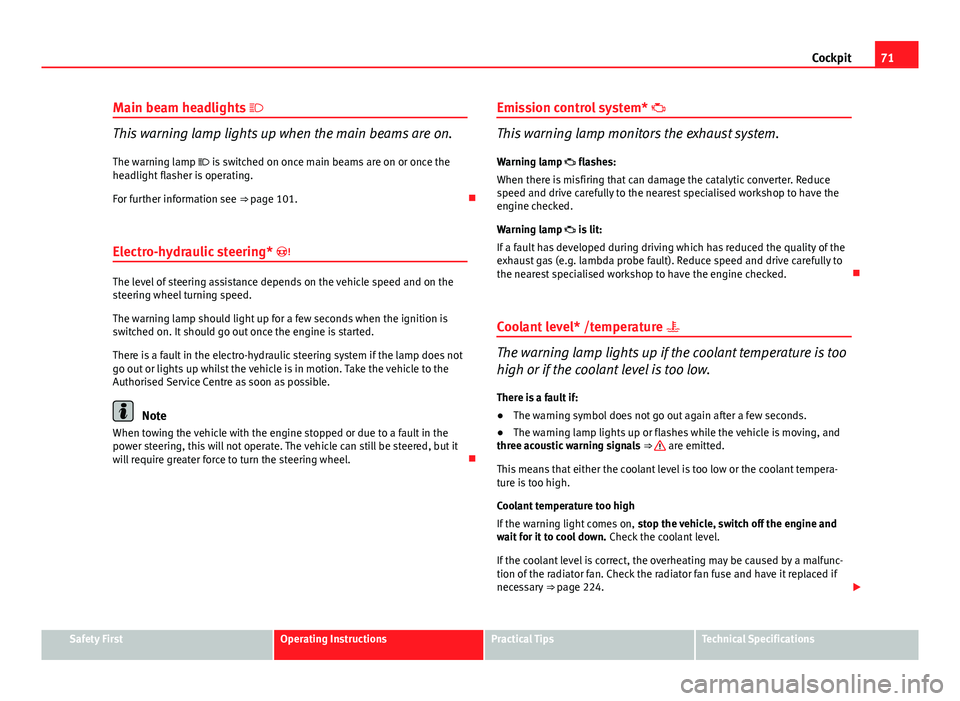
Coolant level* /temperature
The warning lamp lights up if the coolant temperature is too
high or if the coolant level is too low.
There is a fault if:
● The warning symbol does not go out again after a few seconds.
● The warning lamp lights up or flashes while the vehicle is moving, and
three acoustic warning signals ⇒
are emitted.
This means that either the coolant level is too low or the coolant tempera-
ture is too high.
Coolant temperature too high
If the warning light comes on, stop the vehicle, switch off the engine and
wait for it to cool down. Check the coolant level.
If the coolant level is correct, the overheating may be caused by a malfunc-
tion of the radiator fan. Check the radiator fan fuse and have it replaced if
necessary ⇒ page 224.
Safety FirstOperating InstructionsPractical TipsTechnical Specifications
Page 101 of 278
99
Lights and visibility
Home lighting comes on. If the driver door is already open when the lights
are flashed briefly, the Coming Home lighting comes on immediately.
When the last door of the vehicle or the tailgate is closed, the Coming Home
function starts and the switching off the headlights is delayed.
The Coming Home lighting switches off in the following cases:
● On completion of the time period established for the delay in switching
off the lights after all the vehicle doors and the tailgate have been closed.
● If, 30 seconds after being connected, any doors or the tailgate remain
open.
● If the light switch is turned to position .
● If the ignition is switched on.
Leaving home function
The Leaving Home function is activated when the vehicle is unlocked if:
● the light control is in position and
● the photosensor detects “darkness”.
The Leaving Home lighting switches off in the following cases:
● If the time period for the delay in switching off the headlights has ended
● If the vehicle is locked again.
● If the light switch is turned to position .
● If the ignition is switched on.
Note
● To activate the coming/leaving home function, the rotary light switch
must be in position and the light sensor must detect darkness.
● If the ignition key is removed while the lights are on, and the lights are
flashed briefly and the driver door opened, no acoustic signal is heard, as
when the Coming Home function is on, the lights are automatically switched
off after a period of time (except when the light switch is in position or
.
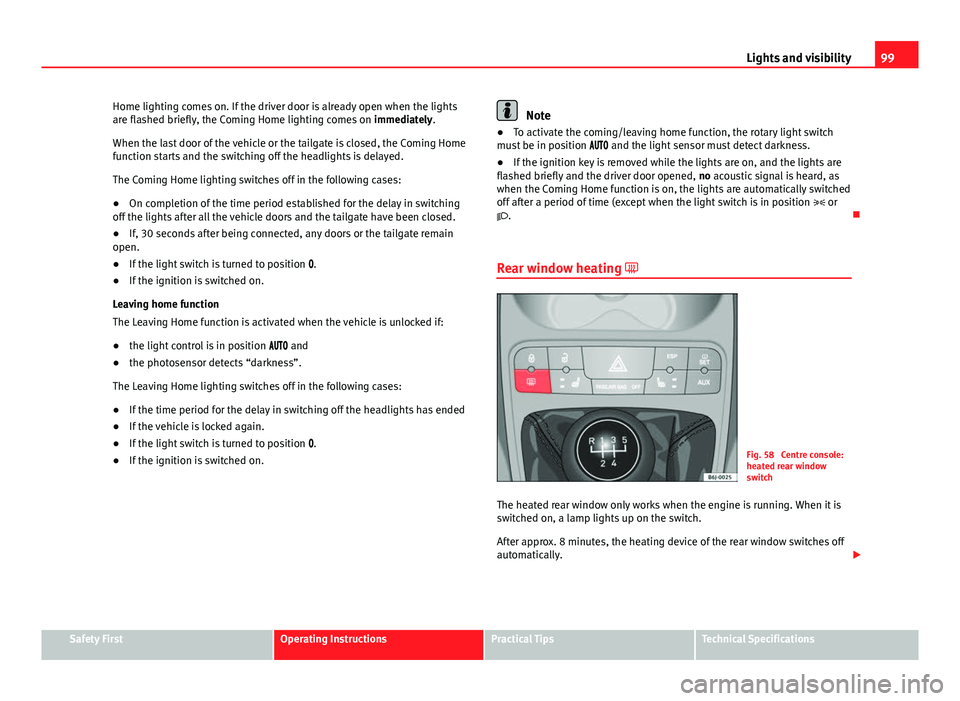
Rear window heating
Fig. 58 Centre console:
heated rear window
switch
The heated rear window only works when the engine is running. When it is
switched on, a lamp lights up on the switch.
After approx. 8 minutes, the heating device of the rear window switches off
automatically.
Safety FirstOperating InstructionsPractical TipsTechnical Specifications
Page 107 of 278
105
Lights and visibility
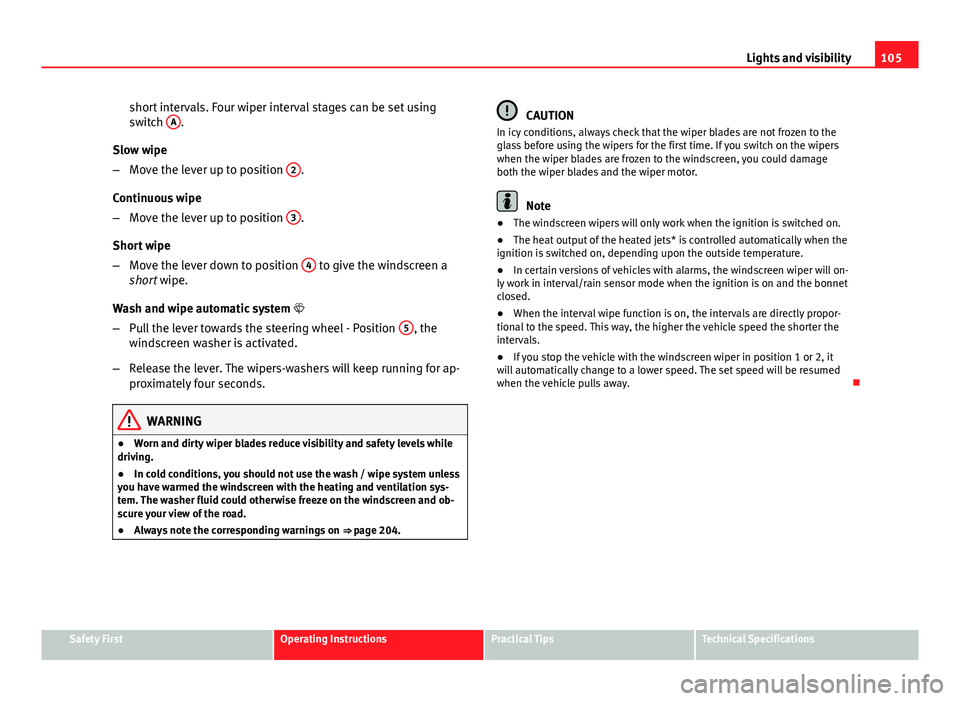
short intervals. Four wiper interval stages can be set using
switch A
.
Slow wipe
– Move the lever up to position 2
.
Continuous wipe
– Move the lever up to position 3
.
Short wipe
– Move the lever down to position 4
to give the windscreen a
short wipe.
Wash and wipe automatic system
– Pull the lever towards the steering wheel - Position 5
, the
windscreen washer is activated.
– Release the lever. The wipers-washers will keep running for ap-
proximately four seconds.
WARNING
● Worn and dirty wiper blades reduce visibility and safety levels while
driving.
● In cold conditions, you should not use the wash / wipe system unless
you have warmed the windscreen with the heating and ventilation sys-
tem. The washer fluid could otherwise freeze on the windscreen and ob-
scure your view of the road.
● Always note the corresponding warnings on ⇒ page 204.
CAUTION
In icy conditions, always check that the wiper blades are not frozen to the
glass before using the wipers for the first time. If you switch on the wipers
when the wiper blades are frozen to the windscreen, you could damage
both the wiper blades and the wiper motor.
Note
● The windscreen wipers will only work when the ignition is switched on.
● The heat output of the heated jets* is controlled automatically when the
ignition is switched on, depending upon the outside temperature.
● In certain versions of vehicles with alarms, the windscreen wiper will on-
ly work in interval/rain sensor mode when the ignition is on and the bonnet
closed.
● When the interval wipe function is on, the intervals are directly propor-
tional to the speed. This way, the higher the vehicle speed the shorter the
intervals.
● If you stop the vehicle with the windscreen wiper in position 1 or 2, it
will automatically change to a lower speed. The set speed will be resumed
when the vehicle pulls away.
Safety FirstOperating InstructionsPractical TipsTechnical Specifications
Page 111 of 278
109
Lights and visibility
Electric exterior mirrors*
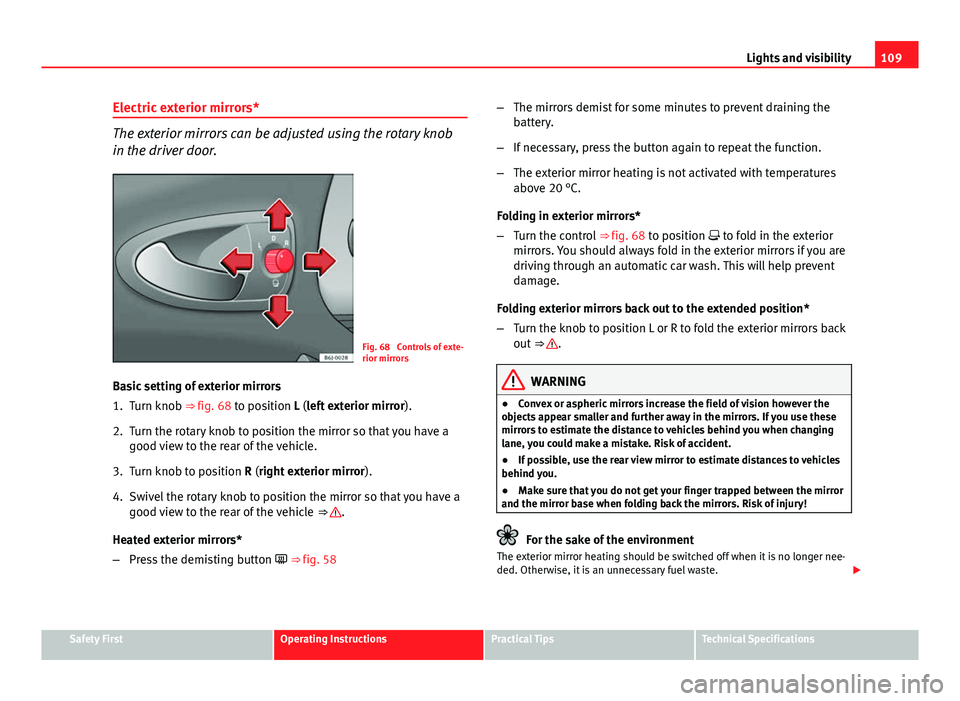
The exterior mirrors can be adjusted using the rotary knob
in the driver door.
Fig. 68 Controls of exte-
rior mirrors
Basic setting of exterior mirrors
1. Turn knob ⇒ fig. 68 to position L (left exterior mirror ).
2. Turn the rotary knob to position the mirror so that you have a good view to the rear of the vehicle.
3. Turn knob to position R (right exterior mirror ).
4. Swivel the rotary knob to position the mirror so that you have a good view to the rear of the vehicle ⇒
.
Heated exterior mirrors*
– Press the demisting button
⇒
fig. 58 –
The mirrors demist for some minutes to prevent draining the
battery.
– If necessary, press the button again to repeat the function.
– The exterior mirror heating is not activated with temperatures
above 20 °C.
Folding in exterior mirrors*
– Turn the control ⇒ fig. 68 to position to fold in the exterior
mirrors. You should always fold in the exterior mirrors if you are
driving through an automatic car wash. This will help prevent
damage.
Folding exterior mirrors back out to the extended position*
– Turn the knob to position L or R to fold the exterior mirrors back
out ⇒
.
WARNING
● Convex or aspheric mirrors increase the field of vision however the
objects appear smaller and further away in the mirrors. If you use these
mirrors to estimate the distance to vehicles behind you when changing
lane, you could make a mistake. Risk of accident.
● If possible, use the rear view mirror to estimate distances to vehicles
behind you.
● Make sure that you do not get your finger trapped between the mirror
and the mirror base when folding back the mirrors. Risk of injury!
For the sake of the environment
The exterior mirror heating should be switched off when it is no longer nee-
ded. Otherwise, it is an unnecessary fuel waste.
Safety FirstOperating InstructionsPractical TipsTechnical Specifications
Page 117 of 278
115
Seats and storage compartments
Heated seats*
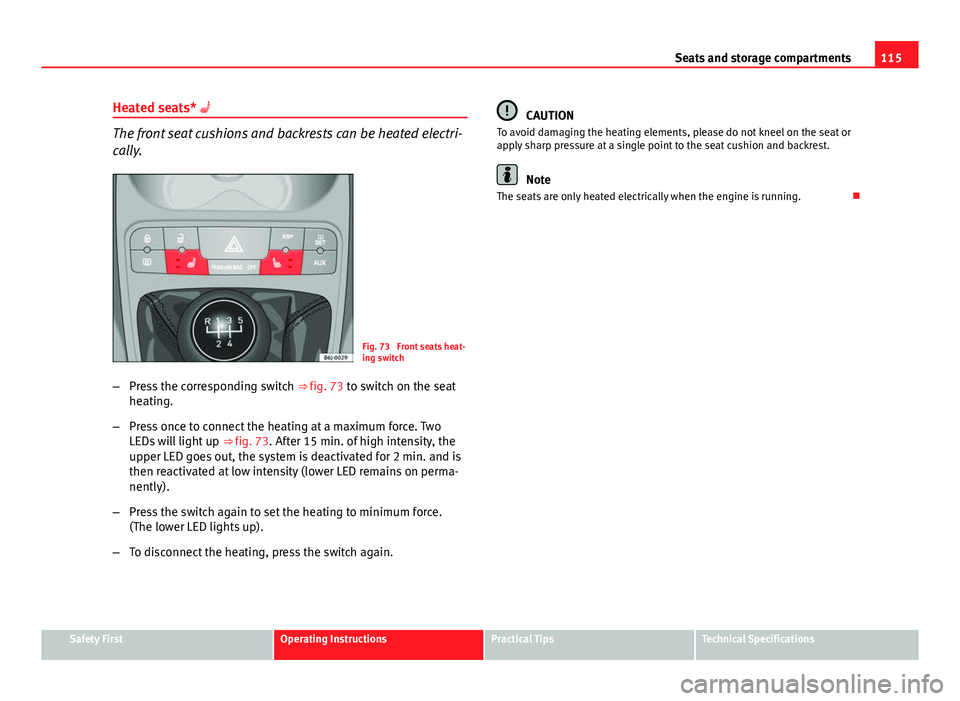
The front seat cushions and backrests can be heated electri-
cally.
Fig. 73 Front seats heat-
ing switch
– Press the corresponding switch ⇒ fig. 73 to switch on the seat
heating.
– Press once to connect the heating at a maximum force. Two
LEDs will light up ⇒ fig. 73. After 15 min. of high intensity, the
upper LED goes out, the system is deactivated for 2 min. and is
then reactivated at low intensity (lower LED remains on perma-
nently).
– Press the switch again to set the heating to minimum force.
(The lower LED lights up).
– To disconnect the heating, press the switch again.
CAUTION
To avoid damaging the heating elements, please do not kneel on the seat or
apply sharp pressure at a single point to the seat cushion and backrest.
Note
The seats are only heated electrically when the engine is running.
Safety FirstOperating InstructionsPractical TipsTechnical Specifications
Page 126 of 278
124Seats and storage compartments
The warning triangle may be located in the rear of the luggage compartment
secured by rubber bands.
Note
● The first aid kit, the warning triangles and the fire extinguisher are not
supplied with the vehicle as standard.
● The first aid kit, the warning triangles and the fire extinguisher should
meet legal requirements.
● The expiry date of the content of the first aid kit should be checked.
● Ensure that the fire extinguisher is fully functional. The fire extinguisher
should, therefore, be checked regularly. The sticker on the fire extinguisher
will inform you of the next date for checking.
● Before purchasing accessories and spare parts, see the instructions in
⇒ page 184, Accessories, replacement of parts and modifications.
Luggage compartment
Storing objects
All luggage must be securely stowed. Please observe the following points to ensure the vehicle handles
well at all times:
– Distribute the load as evenly as possible.
– Place heavy objects as far forward in the luggage compartment
as possible.
WARNING
● Loose luggage and other loose items in the vehicle may cause serious
injuries.
● Loose objects in the luggage compartment can suddenly move and
change the way the vehicle handles.
● In case of sudden manoeuvres or accidents, loose objects in the pas-
senger compartment can be flung forward, injuring passengers.
● Always put objects in the luggage compartment.
● When you transport heavy objects, always take in account that a
change in the centre of gravity can also cause changes in vehicle han-
dling.
● Please observe information on safe driving ⇒ page 7, Safe driving.
CAUTION
Hard objects on the shelf could chafe against the wires of the heating ele-
ment in the rear window and cause damage.
Note
The ventilation slots in front of the rear side windows must not be covered
as this would prevent stale air being extracted from the vehicle.
Page 128 of 278
126Air conditioning
Air conditioning
Heating
Controls
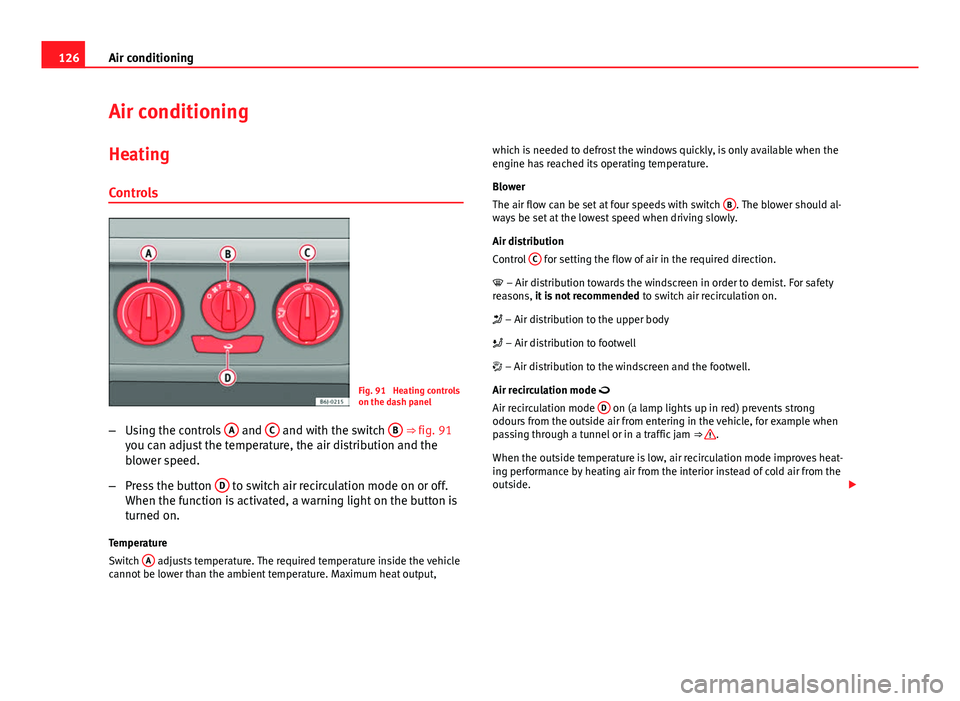
Fig. 91 Heating controls
on the dash panel
– Using the controls A
and C and with the switch B ⇒ fig. 91
you can adjust the temperature, the air distribution and the
blower speed.
– Press the button D
to switch air recirculation mode on or off.
When the function is activated, a warning light on the button is
turned on.
Temperature
Switch A
adjusts temperature. The required temperature inside the vehicle
cannot be lower than the ambient temperature. Maximum heat output, which is needed to defrost the windows quickly, is only available when the
engine has reached its operating temperature.
Blower
The air flow can be set at four speeds with switch
B
. The blower should al-
ways be set at the lowest speed when driving slowly.
Air distribution
Control C
for setting the flow of air in the required direction.
– Air distribution towards the windscreen in order to demist. For safety
reasons, it is not recommended to switch air recirculation on.
– Air distribution to the upper body
– Air distribution to footwell
– Air distribution to the windscreen and the footwell.
Air recirculation mode
Air recirculation mode D
on (a lamp lights up in red) prevents strong
odours from the outside air from entering in the vehicle, for example when
passing through a tunnel or in a traffic jam ⇒
.
When the outside temperature is low, air recirculation mode improves heat-
ing performance by heating air from the interior instead of cold air from the
outside.