turn signal Seat Ibiza SC 2012 User Guide
[x] Cancel search | Manufacturer: SEAT, Model Year: 2012, Model line: Ibiza SC, Model: Seat Ibiza SC 2012Pages: 280, PDF Size: 3.67 MB
Page 101 of 280
99
Lights and visibility
Instrument and switch lighting / Headlight range control
Fig. 55 Dash panel: reg-
ulation for instrument
and switch lighting and
headlight range control
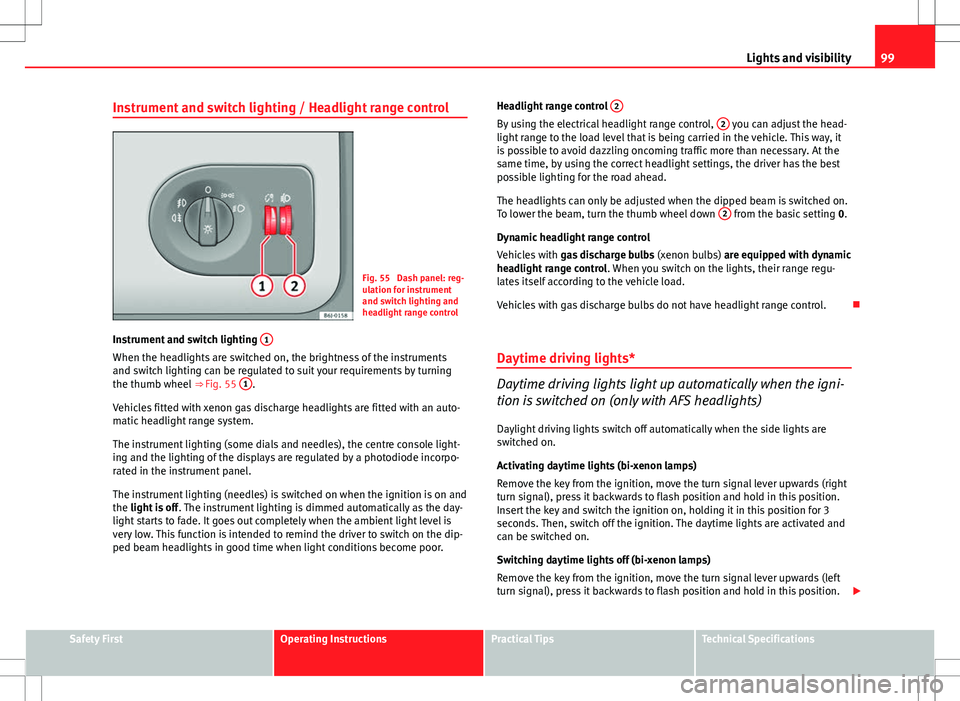
Instrument and switch lighting 1
When the headlights are switched on, the brightness of the instruments
and switch lighting can be regulated to suit your requirements by turning
the thumb wheel
⇒ Fig. 55 1
.
Vehicles fitted with xenon gas discharge headlights are fitted with an auto-
matic headlight range system.
The instrument lighting (some dials and needles), the centre console light-
ing and the lighting of the displays are regulated by a photodiode incorpo-
rated in the instrument panel.
The instrument lighting (needles) is switched on when the ignition is on and
the light is off . The instrument lighting is dimmed automatically as the day-
light starts to fade. It goes out completely when the ambient light level is
very low. This function is intended to remind the driver to switch on the dip-
ped beam headlights in good time when light conditions become poor. Headlight range control
2
By using the electrical headlight range control, 2 you can adjust the head-
light range to the load level that is being carried in the vehicle. This way, it
is possible to avoid dazzling oncoming traffic more than necessary. At the
same time, by using the correct headlight settings, the driver has the best
possible lighting for the road ahead.
The headlights can only be adjusted when the dipped beam is switched on.
To lower the beam, turn the thumb wheel down 2
from the basic setting
0.
Dynamic headlight range control
Vehicles with gas discharge bulbs (xenon bulbs) are equipped with dynamic
headlight range control . When you switch on the lights, their range regu-
lates itself according to the vehicle load.
Vehicles with gas discharge bulbs do not have headlight range control.
Daytime driving lights*
Daytime driving lights light up automatically when the igni-
tion is switched on (only with AFS headlights)
Daylight driving lights switch off automatically when the side lights are
switched on.
Activating daytime lights (bi-xenon lamps)
Remove the key from the ignition, move the turn signal lever upwards (right
turn signal), press it backwards to flash position and hold in this position.
Insert the key and switch the ignition on, holding it in this position for 3
seconds. Then, switch off the ignition. The daytime lights are activated and
can be switched on.
Switching daytime lights off (bi-xenon lamps)
Remove the key from the ignition, move the turn signal lever upwards (left
turn signal), press it backwards to flash position and hold in this position.
Safety FirstOperating InstructionsPractical TipsTechnical Specifications
Page 102 of 280

100Lights and visibility
Insert the key and switch the ignition on, holding it in this position for 3
seconds. Then, switch off the ignition. The daytime lights are deactivated
and cannot be switched on.
Note
See legal requirements for each country.
Adaptive headlights* (for driving round bends)
When driving around bends, the headlights will light the
most important areas of the road.
Fig. 56 Cornering light-
ing using adaptive head-
lights
This cornering light gives better illumination of the side of the road and the
corner area. The dynamic lighting is controlled automatically according to
speed and the steering wheel angle.
The two main headlights move at different angles to avoid that the front of
the vehicle is left completely in the dark.
Note
The system operates from a speed of about 10 km/h (6 mph).
Fog lights with cornering function*
This is an additional light source to dipped beam headlights
to light up the road as a bend is taken.
The cornering light operates with the lights switched on and when driving at
less than 40 Km/h (25 mph). They light up when the steering wheel is
turned or the flashers are operated.
Forward gear
● If the steering wheel is turned to the right, or the right-hand turn signal
operated, the right-hand headlight lights up.
● If the steering wheel is turned to the left, or the left-hand flasher operat-
ed, the left-hand headlight lights up.
In reverse gear both headlights light up.
Note
When the fog lamps are on, the cornering function is activated and both
headlights are continuously on.
Page 104 of 280
102Lights and visibility
For the sake of the environment
The heated rear window should be switched off as soon as the glass is dem-
isted. By saving electrical power you can also save fuel.
Note
To avoid possible damage to the battery, an automatic temporary discon-
nection of this function is possible, coming back on when normal operating
conditions are re-established.
Hazard warning lights
The hazard warning lights are used to draw the attention of
other road users to your vehicle in emergencies.
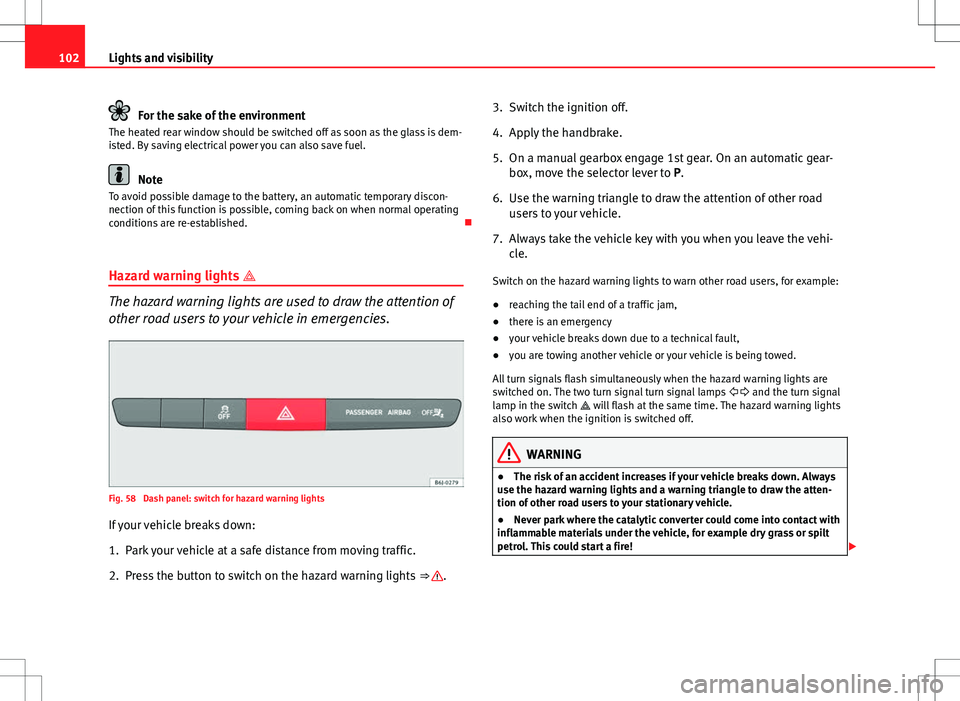
Fig. 58 Dash panel: switch for hazard warning lights
If your vehicle breaks down:
1. Park your vehicle at a safe distance from moving traffic.
2. Press the button to switch on the hazard warning lights ⇒
.3. Switch the ignition off.
4. Apply the handbrake.
5. On a manual gearbox engage 1st gear. On an automatic gear-
box, move the selector lever to P.
6. Use the warning triangle to draw the attention of other road users to your vehicle.
7. Always take the vehicle key with you when you leave the vehi- cle.
Switch on the hazard warning lights to warn other road users, for example:
● reaching the tail end of a traffic jam,
● there is an emergency
● your vehicle breaks down due to a technical fault,
● you are towing another vehicle or your vehicle is being towed.
All turn signals flash simultaneously when the hazard warning lights are
switched on. The two turn signal turn signal lamps and the turn signal
lamp in the switch will flash at the same time. The hazard warning lights
also work when the ignition is switched off.
WARNING
● The risk of an accident increases if your vehicle breaks down. Always
use the hazard warning lights and a warning triangle to draw the atten-
tion of other road users to your stationary vehicle.
● Never park where the catalytic converter could come into contact with
inflammable materials under the vehicle, for example dry grass or spilt
petrol. This could start a fire!
Page 105 of 280
103
Lights and visibility
Note
● The battery will run down if the hazard warning lights are left on for a
long time, even if the ignition is switched off.
● The use of the hazard warning lights described here is subject to the rel-
evant statutory requirements.
Turn signal and main beam headlight lever
The turn signal and main beam lever also operates the park-
ing lights and the headlight flasher.
Fig. 59 Turn signal and
main beam headlight lev-
er
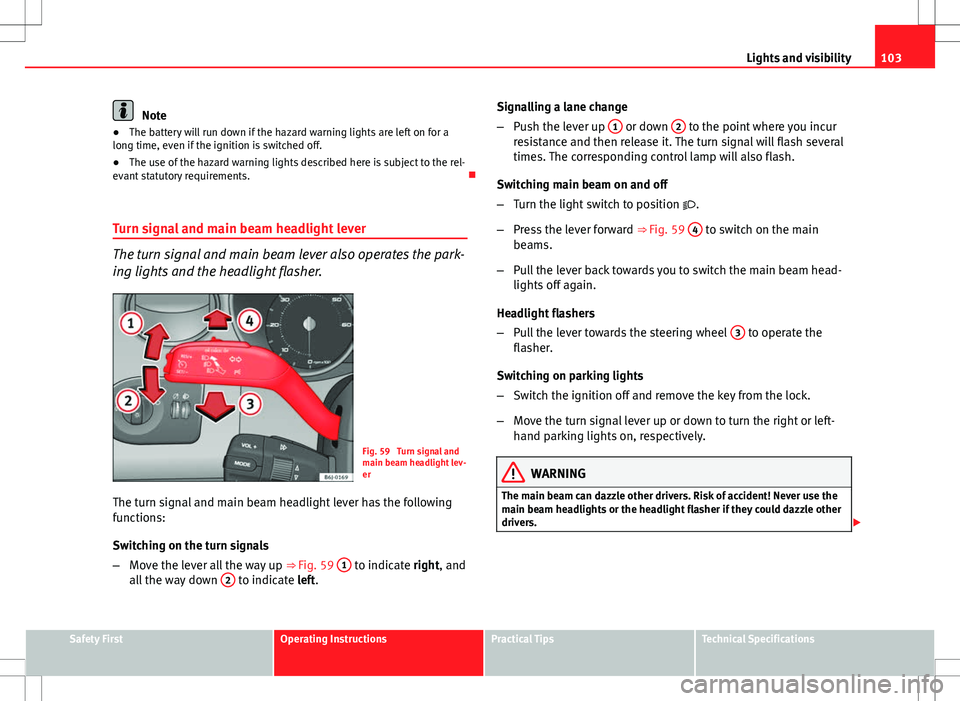
The turn signal and main beam headlight lever has the following
functions:
Switching on the turn signals
– Move the lever all the way up ⇒
Fig. 59 1
to indicate right, and
all the way down 2 to indicate left. Signalling a lane change
–
Push the lever up 1
or down 2 to the point where you incur
resistance and then release it. The turn signal will flash several
times. The corresponding control lamp will also flash.
Switching main beam on and off
– Turn the light switch to position .
– Press the lever forward ⇒ Fig. 59 4
to switch on the main
beams.
– Pull the lever back towards you to switch the main beam head-
lights off again.
Headlight flashers
– Pull the lever towards the steering wheel 3
to operate the
flasher.
Switching on parking lights
– Switch the ignition off and remove the key from the lock.
– Move the turn signal lever up or down to turn the right or left-
hand parking lights on, respectively.
WARNING
The main beam can dazzle other drivers. Risk of accident! Never use the
main beam headlights or the headlight flasher if they could dazzle other
drivers.
Safety FirstOperating InstructionsPractical TipsTechnical Specifications
Page 106 of 280
104Lights and visibility
Note
● The turn signals only work when the ignition is switched on. The corre-
sponding warning lamp or flashes in the instrument panel. The control
lamp flashes when the turn signals are operated, provided a trailer is
correctly attached and connected to the vehicle. If a turn signal bulb is de-
fective, the control lamp flashes at double speed. If the trailer turn signal
bulbs are damaged, control lamp does not light up. Change the bulb.
● The main beam headlights can only be switched on if the dipped beam
headlights are already on. The warning lamp then comes on in the instru-
ment panel.
● The headlight flasher comes on for as long as you pull the lever – even if
no other lights are switched on. The warning lamp then comes on in the
instrument panel.
● When the parking lights are switched on, the headlight and the tail light
on the corresponding side of the vehicle light up. The parking lights will on-
ly work if the key is removed from the ignition. If the lights are switched on,
an audible warning will be emitted while the driver door is open.
● If the turn signal lever is left on after the key has been taken out of the
ignition lock, an acoustic signal sounds when the driver door is opened.
This is a reminder to switch off the turn signal, unless of course you wish to
leave the parking light on. Interior lights
Front interior light
Fig. 60 Interior roof trim:
front interior lighting
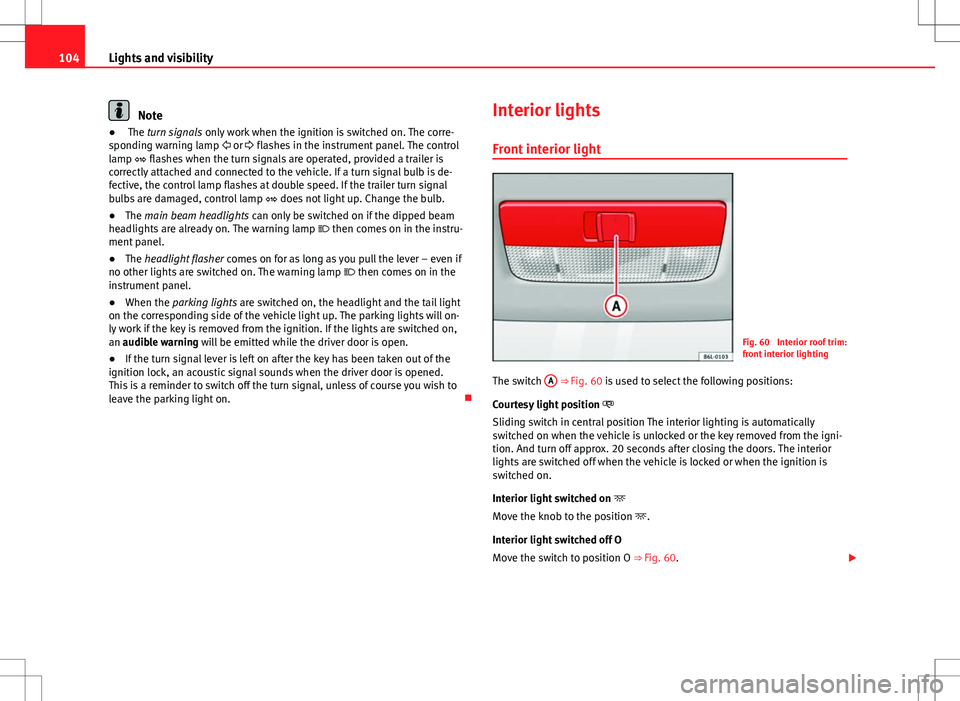
The switch A
⇒ Fig. 60 is used to select the following positions:
Courtesy light position
Sliding switch in central position The interior lighting is automatically
switched on when the vehicle is unlocked or the key removed from the igni-
tion. And turn off approx. 20 seconds after closing the doors. The interior
lights are switched off when the vehicle is locked or when the ignition is
switched on.
Interior light switched on
Move the knob to the position .
Interior light switched off O
Move the switch to position O ⇒ Fig. 60.
Page 158 of 280
156Driving
WARNING
● If you do not start the vehicle immediately after taking your foot off
the brake pedal, the vehicle may start to roll back under certain condi-
tions. Depress the brake pedal or use the handbrake immediately.
● If the engine stalls, depress the brake pedal or use the handbrake im-
mediately.
● When following a line of traffic uphill, if you want to prevent the vehi-
cle from rolling back accidentally when starting off, hold the brake pedal
down for a few seconds before starting off.
Note
The Official Service or a specialised workshop can tell you if your vehicle is
equipped with this system.
Acoustic parking aid system* Rear parking aid
The parking aid system will use an audible warning to indi-
cate of the approach of any object towards the rear of the ve-
hicle. Description
The acoustic parking aid system will measure the distance between the rear
of the vehicle and any possible obstacle using four ultrasonic sensors loca-
ted on the rear bumper. The measuring range of the sensors starts approxi-
mately and depending on the nature of the obstacle at a distance of:
● side of the rear bumper: 0.6 m
● middle of the rear bumper: 1.6 m Activation
The system is activated by engagement of the reverse gear. A brief audible
warning confirms the activation and correct function of the system.
Reverse gear
The distance warning will begin as soon as an obstacle is detected by the
system. The frequency of the bleeps emitted by the system will increase rap-
idly as the vehicle approaches the obstacle.
Within a short distance of about 30cm, a continuous signal sounds (stop
signal). The driver should not reverse any further.
Models with a factory-fitted towing bracket: When the vehicle is less than
0.35 m away from the obstacle the warning tone will sound continuously.
The driver should then not reverse any further.
The warning tone decreases by 30% after 3 seconds from the start of the
system.
Provided that it is not in continuous mode, the tone on the parking aid sys-
tem stops when it detects a wall parallel to the vehicle.
Trailer towing
For vehicles factory-fitted with a towing bar, the parking aid system will not
be activated by the engagement of the reverse gear when pulling a trailer,
as the trailer's electric connector will be plugged into the vehicle.
Possible faults
If a continuous beep sounds for some seconds when the reverse gear is en-
gaged, this indicates that there is a fault in the parking aid system.
If the fault continues until the ignition is turned off, the audible warning of
the fault will not be emitted every time the system is reactivated (by engag-
ing the reverse gear). Thus, the system ready indication will not sound ei-
ther. Have the fault repaired by a Technical Service as soon as possible.
If there is no ready signal or no acoustic warning signal, then the parking
aid loudspeaker is faulty and may not warn of obstacles.
Page 160 of 280
158Driving
Cruise speed* (Cruise control system)
Description
The cruise control system is able to maintain the set speed
in the range of 30 km/h (20 mph) to 180 km/h (110 mph).
Once the speed setting has been saved, you may take your foot off the ac-
celerator.
WARNING
It could be dangerous to use the cruise control system if it is not possible
to drive at constant speed.
● Do not use the cruise control system when driving in dense traffic, on
roads with lots of bends or on roads with poor conditions (with ice, slip-
pery surfaces, loose grit or gravel), as this could cause an accident.
● Always switch the cruise control system off after using it in order to
avoid an involuntary use.
● It is dangerous to use a set speed which is too high for the current
road, traffic or weather conditions. Risk of accident.
Note
The cruise control cannot maintain a constant speed when descending
downhill. The vehicle will accelerate due to its own weight. Use the foot
brake to slow the vehicle. Switching the cruise control system on and off
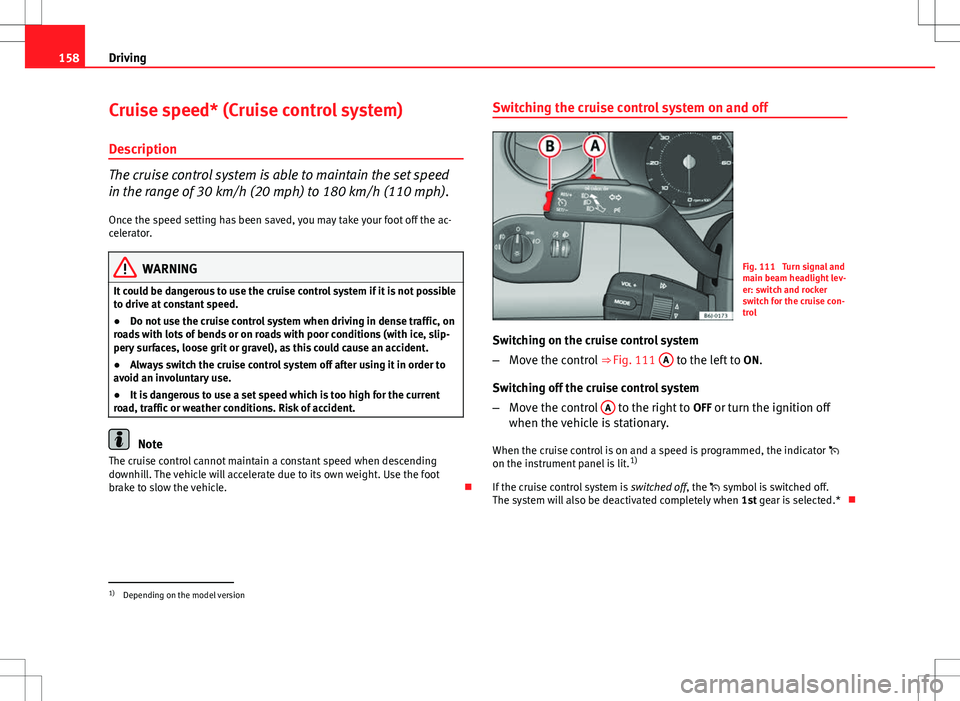
Fig. 111 Turn signal and
main beam headlight lev-
er: switch and rocker
switch for the cruise con-
trol
Switching on the cruise control system
– Move the control ⇒ Fig. 111 A
to the left to
ON.
Switching off the cruise control system
– Move the control A
to the right to
OFF or turn the ignition off
when the vehicle is stationary.
When the cruise control is on and a speed is programmed, the indicator
on the instrument panel is lit. 1)
If the cruise control system is switched off, the symbol is switched off.
The system will also be deactivated completely when 1st gear is selected.*
1)
Depending on the model version
Page 161 of 280
159
Driving
Setting speed*
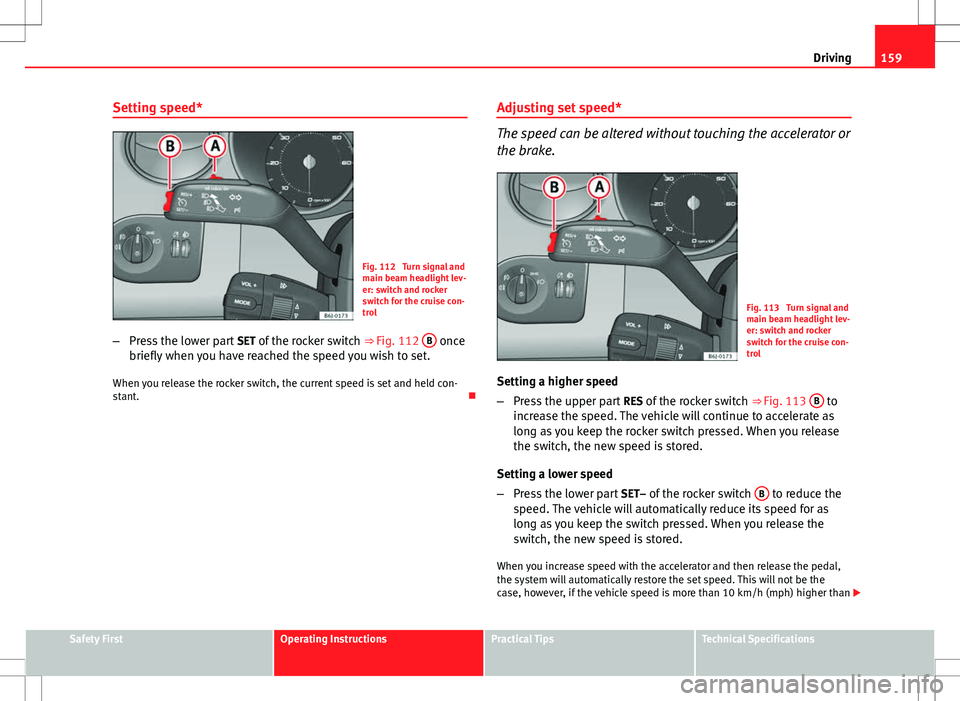
Fig. 112 Turn signal and
main beam headlight lev-
er: switch and rocker
switch for the cruise con-
trol
– Press the lower part SET of the rocker switch ⇒ Fig. 112 B
once
briefly when you have reached the speed you wish to set.
When you release the rocker switch, the current speed is set and held con-
stant. Adjusting set speed*
The speed can be altered without touching the accelerator or
the brake.
Fig. 113 Turn signal and
main beam headlight lev-
er: switch and rocker
switch for the cruise con-
trol
Setting a higher speed
– Press the upper part RES of the rocker switch ⇒ Fig. 113 B
to
increase the speed. The vehicle will continue to accelerate as
long as you keep the rocker switch pressed. When you release
the switch, the new speed is stored.
Setting a lower speed
– Press the lower part SET– of the rocker switch B
to reduce the
speed. The vehicle will automatically reduce its speed for as
long as you keep the switch pressed. When you release the
switch, the new speed is stored.
When you increase speed with the accelerator and then release the pedal,
the system will automatically restore the set speed. This will not be the
case, however, if the vehicle speed is more than 10 km/h (mph) higher than
Safety FirstOperating InstructionsPractical TipsTechnical Specifications
Page 162 of 280
160Driving
the stored speed for longer than 5 minutes. The speed will have to be stor-
ed again.
Cruise control is switched off if you reduce speed by depressing the brake
pedal. Reactivate the control by pressing once on the upper part of the rock-
er switch RES+ ⇒ Fig. 113 B
.
WARNING
It is dangerous to use a set speed which is too high for the current road,
traffic or weather conditions. Risk of accident.
Switching off cruise control temporarily*
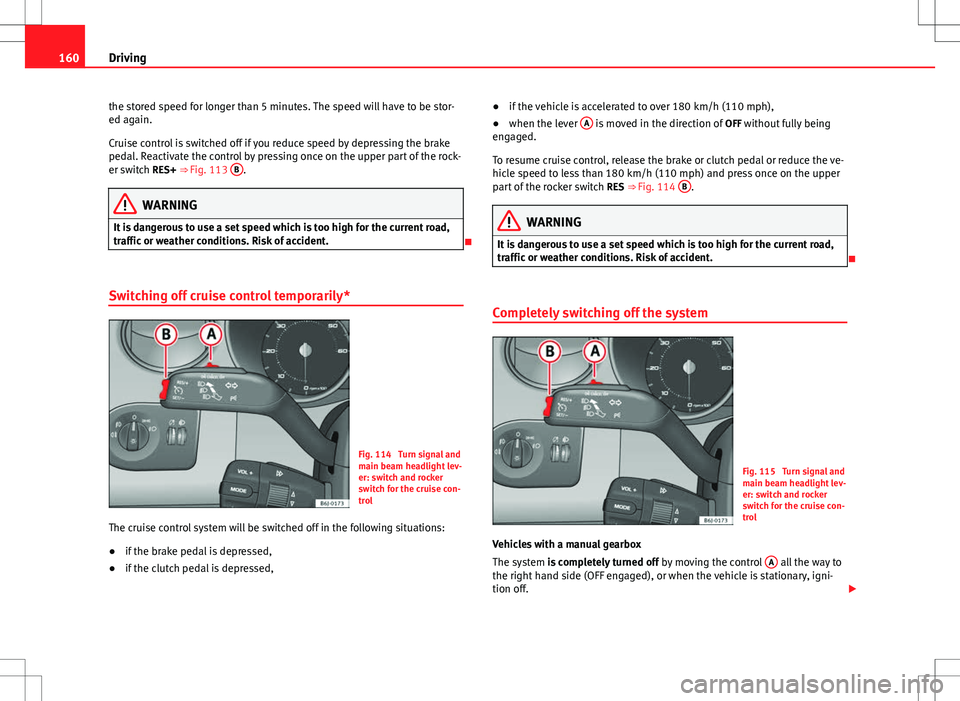
Fig. 114 Turn signal and
main beam headlight lev-
er: switch and rocker
switch for the cruise con-
trol
The cruise control system will be switched off in the following situations:
● if the brake pedal is depressed,
● if the clutch pedal is depressed, ●
if the vehicle is accelerated to over 180 km/h (110 mph),
● when the lever A
is moved in the direction of
OFF without fully being
engaged.
To resume cruise control, release the brake or clutch pedal or reduce the ve-
hicle speed to less than 180 km/h (110 mph) and press once on the upper
part of the rocker switch RES ⇒ Fig. 114 B
.
WARNING
It is dangerous to use a set speed which is too high for the current road,
traffic or weather conditions. Risk of accident.
Completely switching off the system
Fig. 115 Turn signal and
main beam headlight lev-
er: switch and rocker
switch for the cruise con-
trol
Vehicles with a manual gearbox
The system is completely turned off by moving the control A
all the way to
the right hand side (OFF engaged), or when the vehicle is stationary, igni-
tion off.
Page 227 of 280
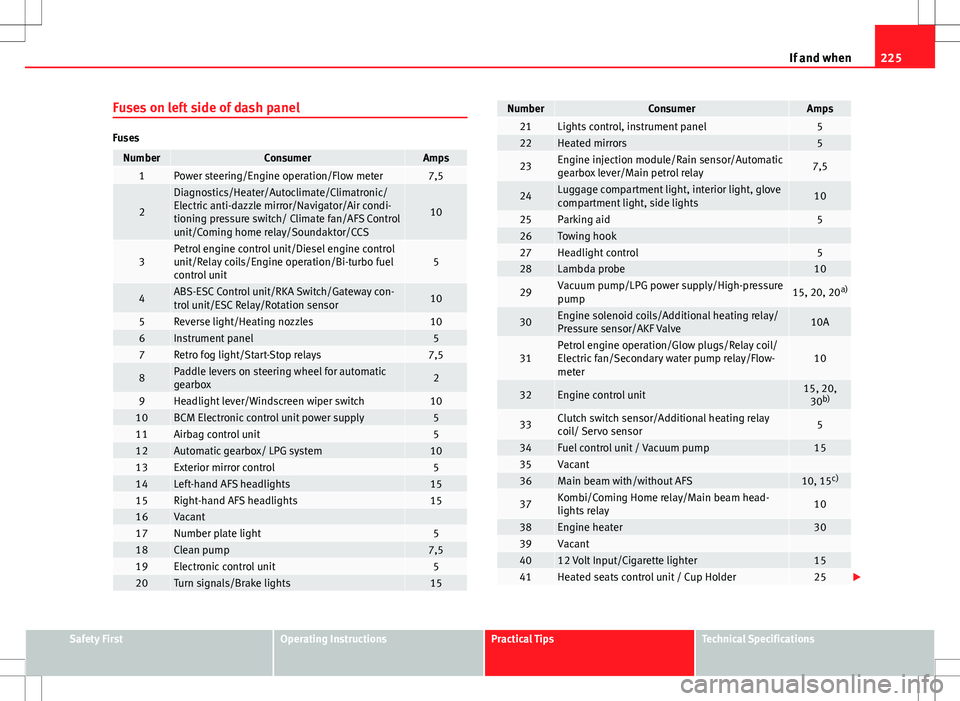
225
If and when
Fuses on left side of dash panel
Fuses
NumberConsumerAmps1Power steering/Engine operation/Flow meter7,5
2
Diagnostics/Heater/Autoclimate/Climatronic/
Electric anti-dazzle mirror/Navigator/Air condi-
tioning pressure switch/ Climate fan/AFS Control
unit/Coming home relay/Soundaktor/CCS
10
3Petrol engine control unit/Diesel engine control
unit/Relay coils/Engine operation/Bi-turbo fuel
control unit5
4ABS-ESC Control unit/RKA Switch/Gateway con-
trol unit/ESC Relay/Rotation sensor10
5Reverse light/Heating nozzles106Instrument panel57Retro fog light/Start-Stop relays7,5
8Paddle levers on steering wheel for automatic
gearbox2
9Headlight lever/Windscreen wiper switch1010BCM Electronic control unit power supply511Airbag control unit512Automatic gearbox/ LPG system1013Exterior mirror control514Left-hand AFS headlights1515Right-hand AFS headlights1516Vacant 17Number plate light518Clean pump7,519Electronic control unit520Turn signals/Brake lights15
NumberConsumerAmps21Lights control, instrument panel522Heated mirrors5
23Engine injection module/Rain sensor/Automatic
gearbox lever/Main petrol relay7,5
24Luggage compartment light, interior light, glove
compartment light, side lights10
25Parking aid526Towing hook 27Headlight control528Lambda probe10
29Vacuum pump/LPG power supply/High-pressure
pump15, 20, 20 a)
30Engine solenoid coils/Additional heating relay/
Pressure sensor/AKF Valve10A
31Petrol engine operation/Glow plugs/Relay coil/
Electric fan/Secondary water pump relay/Flow-
meter10
32Engine control unit15, 20,
30 b)
33Clutch switch sensor/Additional heating relay
coil/ Servo sensor5
34Fuel control unit / Vacuum pump1535Vacant 36Main beam with/without AFS10, 15 c)
37Kombi/Coming Home relay/Main beam head-
lights relay10
38Engine heater3039Vacant 4012 Volt Input/Cigarette lighter1541Heated seats control unit / Cup Holder25
Safety FirstOperating InstructionsPractical TipsTechnical Specifications