lights Seat Ibiza SC 2016 Owner's Guide
[x] Cancel search | Manufacturer: SEAT, Model Year: 2016, Model line: Ibiza SC, Model: Seat Ibiza SC 2016Pages: 248, PDF Size: 5.25 MB
Page 120 of 248
Operation
mph), a warning will appear on the
ins
trument
panel: Turn off the fog
light! .
● The use of the lighting described here is
subj
ect to the relevant statutory require-
ments. Automatic lighting*
Activation
– Rotate the switch to the po
s
ition, this
indication will light up.
Deactivation
– Turn the light switch to .
Automatic
lighting
If automatic headlight control is switched on,
dipped beam headlights are automatically
switched on by a photosensor if you drive in-
to a tunnel, for example. WARNING
● Ev en if
the automatic headlight control is
switched on, the dipped beam headlights will
not be switched on with fog. Therefore, the
dipped beam must be switched on manually. Note
● For tho se
vehicles with the automatic head-
light system, when the key is removed from the ignition, the audible warning will only
sound if
the light
knob is in position or .
● If the daylight driving automatic light func-
tion is sw
itched on, the front fog lights or
rear fog light cannot be switched on in addi-
tion.
● The use of the lighting described here is
subj
ect to the relevant statutory require-
ments.
● Do not put stickers on the windscreen in
front of
the sensor. This may cause disrup-
tions or faults in the automatic lighting sys-
tem.
● The rain sensor switches on the dipped
beam hea
dlights when the windscreen wipers
have been operating continuously for a few
seconds and it switches the lights off when
the continuous or interval wipe is switched
off for some minutes. Daytime running lights
›› ›
table on page 2
The daytime running lights are enabled auto-
matically when the ignition is switched on.
Daytime running lights are signalling devices
for improving road safety. The lights are built
into the headlights and come on each time
the ignition is turned on if the light switch is
in position 0 or . It is automatically
switched off when the dipped beam lights
are turned on. WARNING
The side lights or daytime driving lights are
not bright enough t
o illuminate the road
ahead and to ensure that other road users are
able to see you.
● Always use your dipped beam head lights if
it is
raining or if visibility is poor.
● The rear lights do not come on with the
daytime driv
ing light. A vehicle which does
not have the rear lights on may not be visible
to other drivers in the darkness, if it is rain-
ing or in conditions of poor visibility. Note
See legal requirements for each country. Fog lights
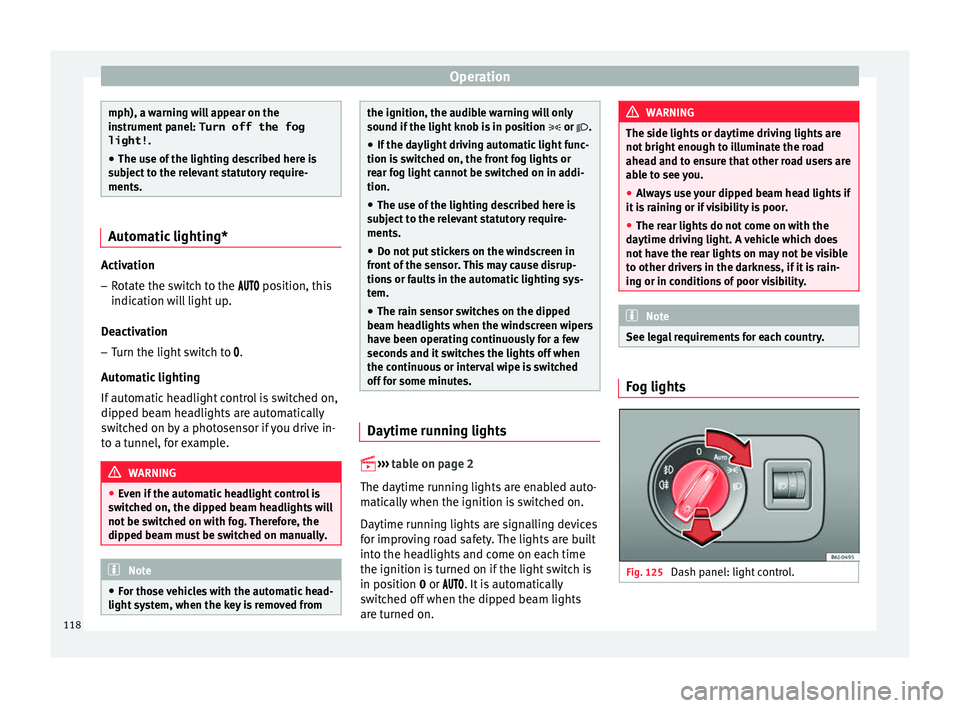
Fig. 125
Dash panel: light control.118
Page 121 of 248
Lights and visibility
Switching on the front fog lights*
● Turn the switch from position
or
to the first stop and pull it. The symbol in
the light switch lights up.
Switching on the rear fog light (vehicles with
front fog lights)
● Turn the lights control from position
or to the second stop and pull it ››› in
Sw it
c
hing lights on and off on page 117. A
lamp on the control and warning lamps panel
lights up.
Switching on the rear fog light (vehicles with
no front fog lights)
● Turn the light control to the end from posi-
tion or and pul
l it. A lamp on the con-
trol and warning lamps panel lights up.
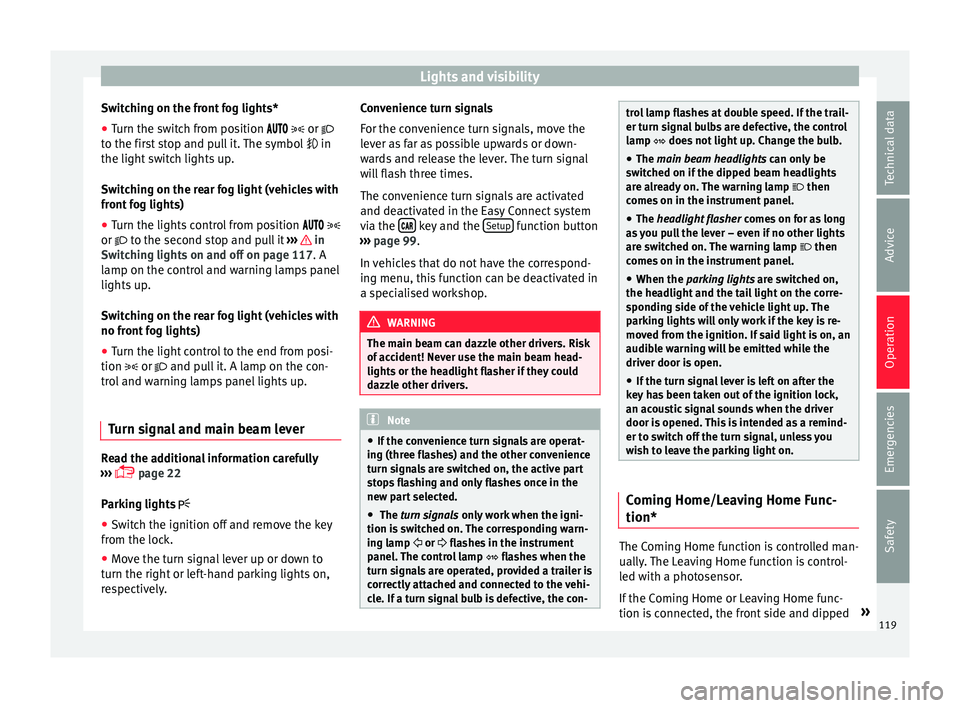
Turn signal and main beam lever Read the additional information carefully
› ›
›
page 22
Parking lights
● Switch the ignition off and remove the key
from the lock.
● Mo
ve the turn signal lever up or down to
turn the right or l
eft-hand parking lights on,
respectively. Convenience turn signals
For the con
venience turn signals, move the
lever as far as possible upwards or down-
wards and release the lever. The turn signal
will flash three times.
The convenience turn signals are activated
and deactivated in the Easy Connect system
via the key and the
Set
up function button
› ›
›
page 99.
In vehicles that do not have the correspond-
ing menu, this function can be deactivated in
a specialised workshop. WARNING
The main beam can dazzle other drivers. Risk
of ac c
ident! Never use the main beam head-
lights or the headlight flasher if they could
dazzle other drivers. Note
● If the c on
venience turn signals are operat-
ing (three flashes) and the other convenience
turn signals are switched on, the active part
stops flashing and only flashes once in the
new part selected.
● The turn signals only
work when the igni-
tion is switched on. The corresponding warn-
ing lamp or flashes in the instrument
panel. The control lamp flashes when the
turn signals are operated, provided a trailer is
correctly attached and connected to the vehi-
cle. If a turn signal bulb is defective, the con- trol lamp flashes at double speed. If the trail-
er turn s
ign
al bulbs are defective, the control
lamp does not light up. Change the bulb.
● The main beam headligh
ts can only be
switched on if the dipped beam headlights
are already on. The warning lamp then
comes on in the instrument panel.
● The headlight flasher come
s on for as long
as you pull the lever – even if no other lights
are switched on. The warning lamp then
comes on in the instrument panel.
● When the parking ligh
ts are switched on,
the headlight and the tail light on the corre-
sponding side of the vehicle light up. The
parking lights will only work if the key is re-
moved from the ignition. If said light is on, an
audible warning will be emitted while the
driver door is open.
● If the turn signal lever is left on after the
key h
as been taken out of the ignition lock,
an acoustic signal sounds when the driver
door is opened. This is intended as a remind-
er to switch off the turn signal, unless you
wish to leave the parking light on. Coming Home/Leaving Home Func-
tion*
The Coming Home function is controlled man-
ual
ly
.
The Leaving Home function is control-
led with a photosensor.
If the Coming Home or Leaving Home func-
tion is connected, the front side and dipped »
119
Technical data
Advice
Operation
Emergencies
Safety
Page 122 of 248
Operation
lights, the tail lights and the number plate
light w
i
ll light up to provide assistance.
Coming home function
The Coming Home function is activated by
switching off the ignition and briefly flashing
the lights. When the driver door is opened,
the Coming Home lighting comes on. If the
driver door is already open when the lights
are flashed briefly, the Coming Home lighting
comes on immediately.
When the last door of the vehicle or the rear
lid is closed, the Coming Home function
starts and the switching off the headlights is
delayed.
The Coming Home lighting switches off in the
following cases:
● On completion of the time period establish-
ed for the dela
y in switching off the lights af-
ter all the vehicle doors and the rear lid have
been closed.
● If, 30 seconds after being connected, any
doors or the r
ear lid remain open.
● If the light switch is turned to position .
● If the ignition is switched on.
Automatic
Leaving Home function
The Leaving Home function is activated when
the vehicle is unlocked if:
● the light control is in position and●
the photosen
sor detects “darkness”.
The Leaving Home lighting switches off in the
following cases: ● If the time period for the delay in switching
off the hea
dlights has ended
● If the vehicle is locked again.
● If the light switch is turned to position .
● If the ignition is switched on.
Manual
Leaving Home function
In vehicles without an automatic headlight
system (light sensor), if the manual Coming
Home function is activated when leaving the
car, upon returning to the car and unlocking
it the manual Leaving Home function will be
activated automatically. Note
● To activ at
e the Coming/Leaving home func-
tion, the rotary light switch must be in posi-
tion and the light sensor must detect
darkness.
● If the ignition key is removed while the
lights ar
e on, the lights flash briefly and the
driver door opens, no audible warning is
heard, since with the Coming Home function
on, the lights are automatically switched off
after a period of time (except when the light
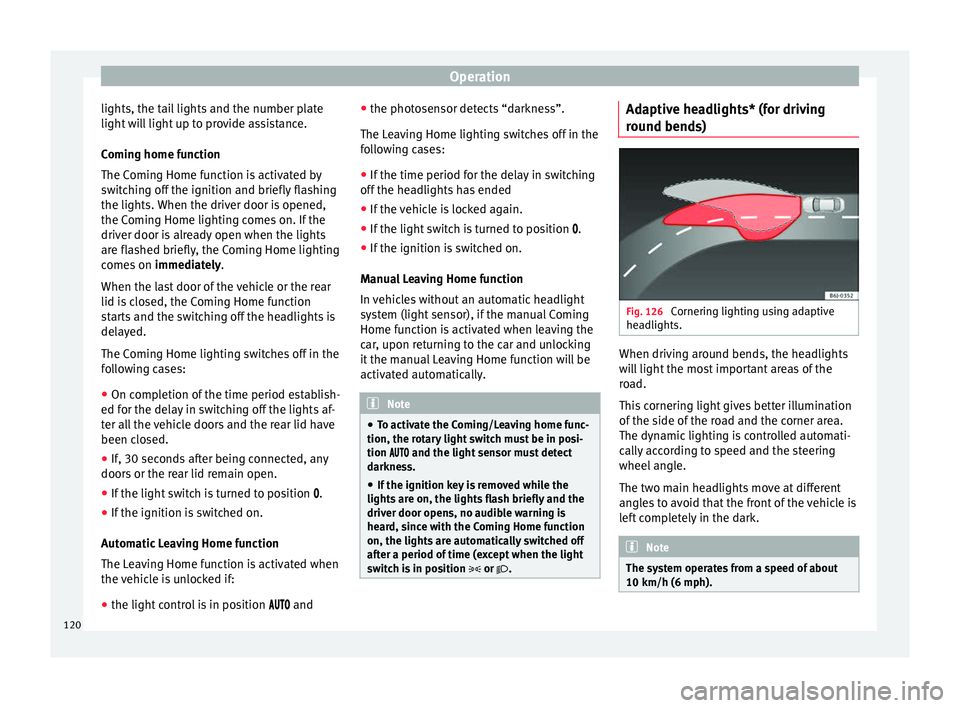
switch is in position or . Adaptive headlights* (for driving
r
ou
nd bend
s) Fig. 126
Cornering lighting using adaptive
he a
dlights. When driving around bends, the headlights
w
i
l
l light the most important areas of the
road.
This cornering light gives better illumination
of the side of the road and the corner area.
The dynamic lighting is controlled automati-
cally according to speed and the steering
wheel angle.
The two main headlights move at different
angles to avoid that the front of the vehicle is
left completely in the dark. Note
The system operates from a speed of about
10 km/h (6 mph). 120
Page 123 of 248
Lights and visibility
Fog lights with cornering function* This is an additional light source to dipped
beam he
a
dlights to light up the road as a
bend is taken.
The cornering light operates with the lights
switched on and when driving at less than
40 Km/h (25 mph). Ignition occurs by turning
the steering or connecting the turn signal.
Forward gear
● If the steering wheel is turned to the right,
or the right-h and t
urn signal operated, the
right-hand fog light turns on.
● If the steering wheel is turned to the left, or
the left
-hand turn signal operated, the left-
hand fog light turns on.
In reverse, both fog lights turn on. Note
When the fog lamps are on, the cornering
fu nction i
s activated and both headlights are
continuously on. Instrument and switch lighting, head-
light
r
an
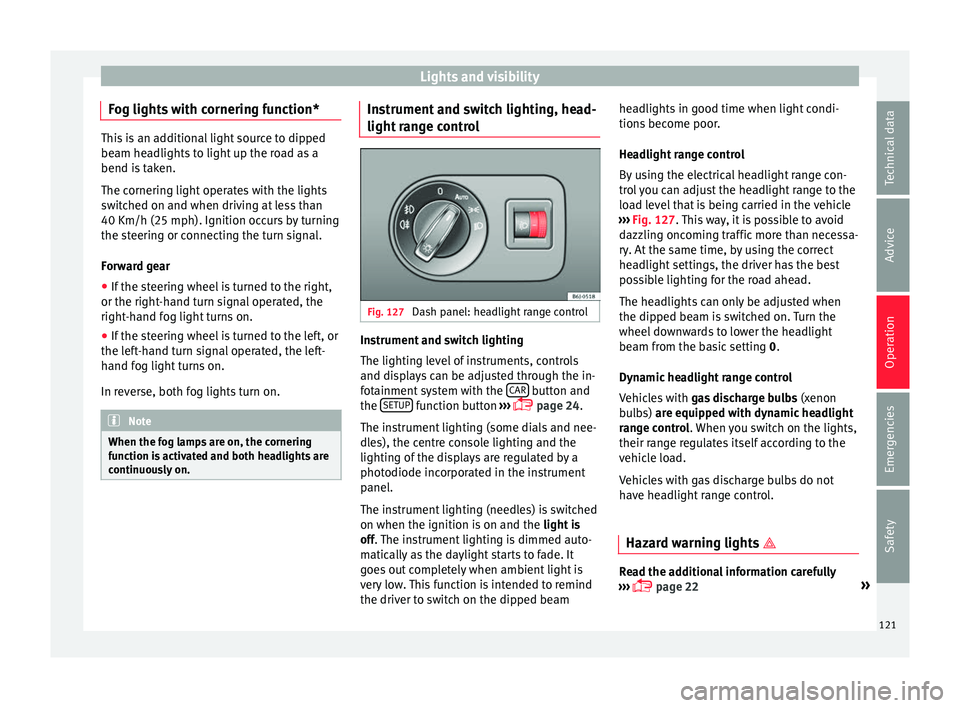
ge control Fig. 127
Dash panel: headlight range control Instrument and switch lighting
The lightin
g l
ev
el of instruments, controls
and displays can be adjusted through the in-
fotainment system with the CAR button and
the S
ETUP function button
››
›
page 24.
The instrument lighting (some dials and nee-
dles), the centre console lighting and the
lighting of the displays are regulated by a
photodiode incorporated in the instrument
panel.
The instrument lighting (needles) is switched
on when the ignition is on and the light is
off. The instrument lighting is dimmed auto-
matically as the daylight starts to fade. It
goes out completely when ambient light is
very low. This function is intended to remind
the driver to switch on the dipped beam headlights in good time when light condi-
tions bec
ome poor.
Headlight range control
By using the electrical headlight range con-
trol you can adjust the headlight range to the
load level that is being carried in the vehicle
››› Fig. 127. This way, it is possible to avoid
dazzling oncoming traffic more than necessa-
ry. At the same time, by using the correct
headlight settings, the driver has the best
possible lighting for the road ahead.
The headlights can only be adjusted when
the dipped beam is switched on. Turn the
wheel downwards to lower the headlight
beam from the basic setting 0.
Dynamic headlight range control
Vehicles with gas discharge bulbs (xenon
bulbs) are equipped with dynamic headlight
range control. When you switch on the lights,
their range regulates itself according to the
vehicle load.
Vehicles with gas discharge bulbs do not
have headlight range control.
Hazard warning lights Read the additional information carefully
› ››
page 22 »
121
Technical data
Advice
Operation
Emergencies
Safety
Page 124 of 248
Operation
The hazard warning lights are used to draw
the att ention of
other r
oad users to your vehi-
cle in emergencies.
If your vehicle breaks down:
1. Park your vehicle at a safe distance from movin
g traffic.
2. Press the button to switch on the hazard warning lights
››› .
3. Switch the ignition off.
4. Apply the handbrake.
5. For a manual gearbox, engage 1st gear; for an aut
om
atic gearbox, move the gear
lever to P.
6. Use the warning triangle to draw the atten- tion of other ro
ad users to your vehicle.
7. Always take the vehicle key with you when you le
ave the vehicle.
All turn signals flash simultaneously when
the hazard warning lights are switched on.
The two turn signal turn signal lamps
and the turn signal lamp in the switch will
flash at the same time. The simultaneous
hazard warning lights also work when the ig-
nition is switched off. WARNING
● The risk of
an accident increases if your ve-
hicle breaks down. Always use the hazard
warning lights and a warning triangle to draw the attention of other road users to your sta-
tionar
y
vehicle.
● Due to the high temperatures that the cata-
lytic con
verter can reach, never park in an
area where the catalytic converter could come
into contact with highly inflammable materi-
als, for example dry grass or spilt petrol. This
could start a fire. Note
● The b atter
y will run down if the hazard
warning lights are left on for a long time,
even if the ignition is switched off.
● The use of the hazard warning lights de-
scribed her
e is subject to the relevant statu-
tory requirements. Interior lights
Int erior and r e
ading lights Read the additional information carefully
› ›
›
page 23
Luggage compartment lighting
The light is activated when the rear lid is
open, even when the ignition and lights are
turned off. For this reason, ensure that the
rear lid is always closed. Glove compartment light
When opening the glov
e compartment on the
passenger side, the glove compartment light
will automatically turn on and will turn off
upon closure.
Ambient light*
››› table on page 2
The ambient lighting lights up the central
console area and the footwell area.
They will switch on fully when the doors are
opened and will decrease in intensity while
driving when the dipped beam headlight is
on.
The intensity of the ambient light* can be ad-
justed using the Easy Connect menu (see
Adjusting Lights > Interior light-
ing ›››
page 24). Note
If not all the vehicle doors are closed, the in-
terior light s
will be switched off after approx.
10 minutes, providing the ignition key has
been removed and the courtesy light position
selected. This prevents the battery from dis-
charging. 122
Page 125 of 248
Lights and visibility
Visibility He at
ed r
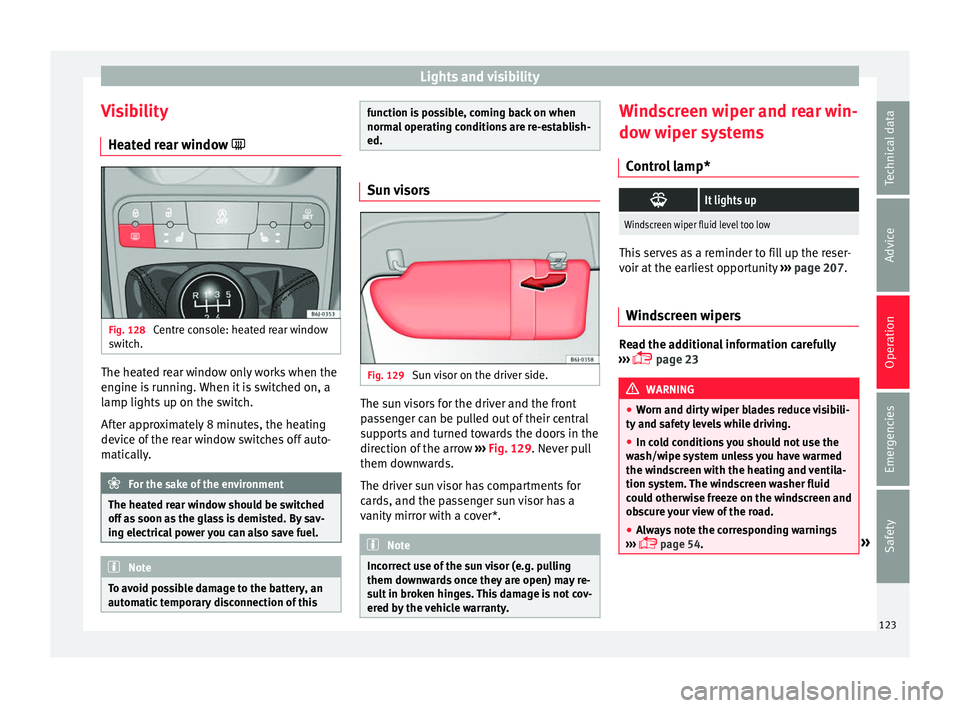
ear window Fig. 128
Centre console: heated rear window
sw it
c
h. The heated rear window only works when the
en
gine i
s
running. When it is switched on, a
lamp lights up on the switch.
After approximately 8 minutes, the heating
device of the rear window switches off auto-
matically. For the sake of the environment
The heated rear window should be switched
off a s
soon as the glass is demisted. By sav-
ing electrical power you can also save fuel. Note
To avoid possible damage to the battery, an
autom atic
temporary disconnection of this function is possible, coming back on when
norma
l
operating conditions are re-establish-
ed. Sun visors
Fig. 129
Sun visor on the driver side. The sun visors for the driver and the front
p
a
s
senger can be pulled out of their central
supports and turned towards the doors in the
direction of the arrow ››› Fig. 129. Never pull
them downwards.
The driver sun visor has compartments for
cards, and the passenger sun visor has a
vanity mirror with a cover*. Note
Incorrect use of the sun visor (e.g. pulling
them down w
ards once they are open) may re-
sult in broken hinges. This damage is not cov-
ered by the vehicle warranty. Windscreen wiper and rear win-
do
w w
iper sy
stems
Control lamp*
It lights up
Windscreen wiper fluid level too low
This serves as a reminder to fill up the reser-
voir at
the e
arliest opportunity ››› page 207.
Windscreen wipers Read the additional information carefully
› ›
›
page 23 WARNING
● Worn and dir ty
wiper blades reduce visibili-
ty and safety levels while driving.
● In cold conditions you should not use the
wash/w
ipe system unless you have warmed
the windscreen with the heating and ventila-
tion system. The windscreen washer fluid
could otherwise freeze on the windscreen and
obscure your view of the road.
● Always note the corresponding warnings
›››
page 54. » 123
Technical data
Advice
Operation
Emergencies
Safety
Page 127 of 248
Lights and visibility
CAUTION
In icy conditions, always check that the wiper
bl a
de is not frozen to the glass before using
the wiper for the first time. If you switch on
the wiper when the wiper blade is frozen to
the glass, this could damage both the wiper
blade and the wiper motor. Note
● The re ar w
indow wiper will only work when
the ignition is switched on.
● Depending on the version of the model,
when you en
gage reverse gear and with the
headlight wiper activated, this can start a
wipe. Headlight washer*
The headlight washers clean the headlight
l
en
se
s.
The headlight washers are activated auto-
matically when the windscreen washer is
used and the window wiper lever is pulled to-
wards the steering wheel for at least 1.5 sec-
onds – provided the dipped beam headlights
or main beams are switched on. Clean off
stubborn dirt (insects, etc.) from the head-
lights at regular intervals, for instance when
filling the fuel tank. Note
● To en s
ure that the headlight washers work
properly in winter, keep the nozzle holders in
the bumper free of snow and remove any ice
with a de-icer spray.
● To remove water, the windscreen wipers
wil
l be activated from time to time, the head-
light washers will be activated every three cy-
cles. Rear view mirrors
Int erior mirr
or It is dangerous to drive if you cannot see
c
l
e
arly through the rear window.
Interior mirror with automatic anti-dazzle
function*
The anti-dazzle function is activated every
time the ignition is switched on.
When the anti-dazzle function is enabled, the
interior rear vision mirror will darken auto-
matically according to the amount of light it
receives. The anti-dazzle function is cancel-
led if reverse gear is engaged. Note
● The autom atic
anti-dazzle function will only
work properly if the sun blind* for the rear window is retracted and there are no other
ob
j
ects preventing light from reaching the in-
terior rear vision mirror.
● If you have to stick any type of sticker on
the winds
creen, do not do so in front of the
sensors. Doing so could prevent the anti-daz-
zle function from working well or even from
working at all. Folding in the exterior mirrors man-
ual
ly The exterior mirrors of the vehicle may be fol-
ded in. F
or thi
s, pr
ess the mirror housing to-
wards the vehicle. Note
Before washing the vehicle with an automatic
car w a
sh, fold in the exterior mirrors to avoid
damage. 125
Technical data
Advice
Operation
Emergencies
Safety
Page 131 of 248
Seats and head restraints
intensity, the upper LED goes out, the sys-
t em i
s
deactivated for 2 minutes and is
then reactivated at low intensity (the lower
LED remains on permanently).
– Press the switch again to set the heating to
minimum forc
e. (The lower LED lights up).
– To disconnect the heating, press the switch
again. CAUTION
To avoid damaging the heating elements,
pl e
ase do not kneel on the seat or apply
sharp pressure at a single point to the seat
cushion and backrest. Note
The seats are only heated electrically when
the engine i s
running. Folding down the back seat
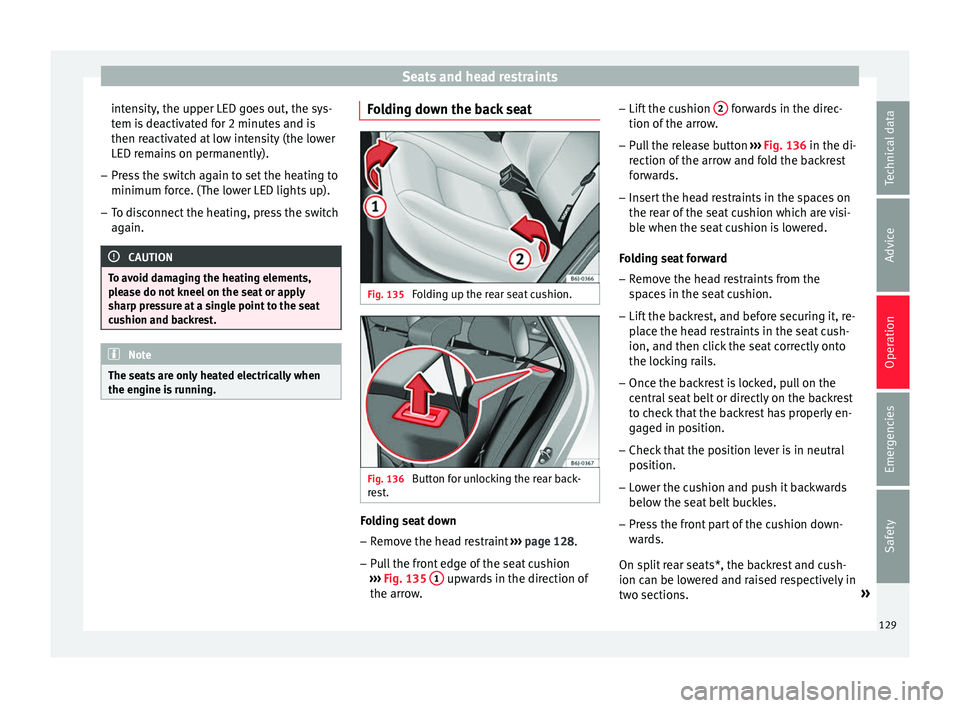
Fig. 135
Folding up the rear seat cushion. Fig. 136
Button for unlocking the rear back-
r e
s
t. Folding seat down
– Remove the head restraint ››
›
page 128.
– Pull the front edge of the seat cushion
›››
Fig. 135 1 upwards in the direction of
the arr o
w
. –
Lift the c
ushion 2 forwards in the direc-
tion of the arr
o
w.
– Pull the release button ›››
Fig. 136 in the di-
rection of the arrow and fold the backrest forwards.
– Insert the head restraints in the spaces on
the rear of
the seat cushion which are visi-
ble when the seat cushion is lowered.
Folding seat forward
– Remove the head restraints from the
spac
es in the seat cushion.
– Lift the backrest, and before securing it, re-
plac
e the head restraints in the seat cush-
ion, and then click the seat correctly onto
the locking rails.
– Once the backrest is locked, pull on the
central
seat belt or directly on the backrest
to check that the backrest has properly en-
gaged in position.
– Check that the position lever is in neutral
position.
– L
ower the cushion and push it backwards
below the seat
belt buckles.
– Press the front part of the cushion down-
ward
s.
On split rear seats*, the backrest and cush-
ion can be lowered and raised respectively in
two sections. »
129
Technical data
Advice
Operation
Emergencies
Safety
Page 147 of 248
Driving
It is possible, however, to set the blower
s peed t
o s
uit requirements.
● Turn control 10
› ››
Fig. 155
c
ounter-clock-
wise (to lower the speed) or clockwise (to in-
crease the speed).
Climatronic will switch off when the blower
switches off. WARNING
Read and observe the safety warnings ›››
in
Genera l
notes on page 137. Windscreen defrost
Switching on windscreen defrosting
●
Press the button
12
› ›
›
Fig. 155.
Switching off windscreen defrosting
● Press button
12
› ›
›
Fig. 155 several
times or press the AUTO button.
The t emper
at
ure is regulated automatically.
The air output is increased from vents 1 and
2 ›››
page 138. Driving
Ad dr
e
ss
Introduction The power steering is not hydraulic but elec-
tromec
h
anical. The advantage of this steer-
ing is that it foes not need flexible hydraulic
pipes, hydraulic oil, pump, filter or other
parts. The electromechanical system saves
fuel. Whereas a hydraulic system needs con-
tinuous oil pressure, electromechanical
steering only needs power when it is used.
In vehicles with electromechanical steering,
the assisted steering function automatically
adjusts according to vehicle speed, steering
wheel torque and wheel orientation. The
power steering only works when the engine
is running. WARNING
If the power steering does not work, you will
need much mor e s
trength to turn the wheel.
This has a considerable effect on vehicle
safety.
● The power steering only works when the
engine is
running.
● Never allow the vehicle to move when the
engine is
switched off.
● Never remove the key from the ignition
while the
vehicle is moving. The steering lock could be engaged and vehicle steering would
not w
ork. Note
The ignition of the vehicle being towed must
be sw itc
hed on to prevent the steering wheel
from locking and also to allow the use of the
turn signals, horn, windscreen wipers and
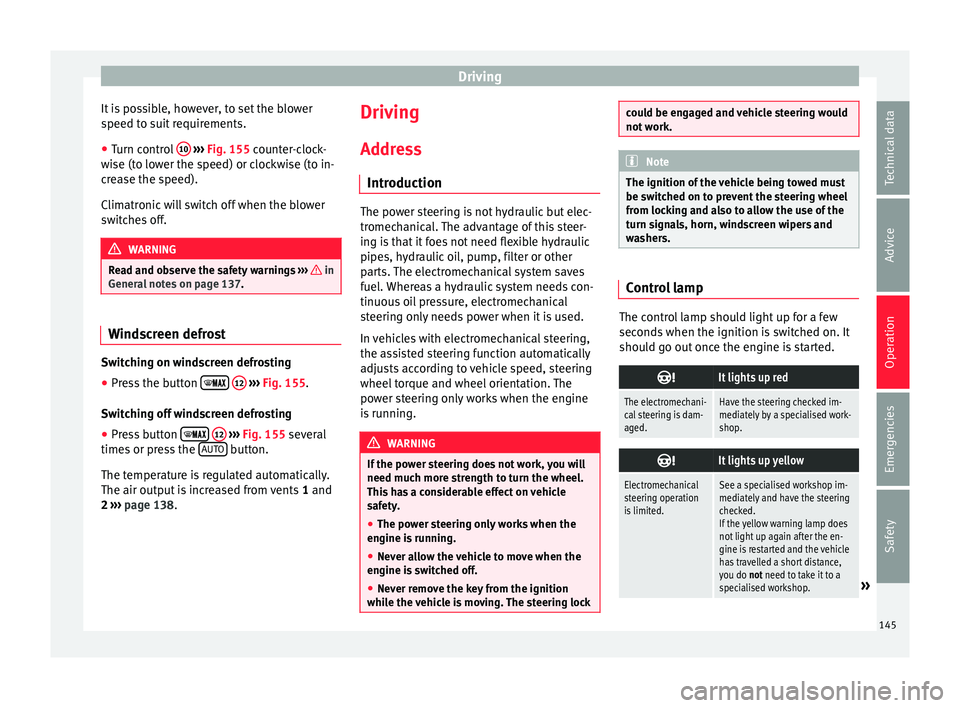
washers. Control lamp
The control lamp should light up for a few
sec
ond
s
when the ignition is switched on. It
should go out once the engine is started.
It lights up red
The electromechani-
cal steering is dam-
aged.Have the steering checked im-
mediately by a specialised work-
shop.
It lights up yellow
Electromechanical
steering operation
is limited.See a specialised workshop im-
mediately and have the steering
checked.
If the yellow warning lamp does
not light up again after the en-
gine is restarted and the vehicle
has travelled a short distance,
you do not need to take it to a
specialised workshop.
» 145
Technical data
Advice
Operation
Emergencies
Safety
Page 148 of 248
Operation
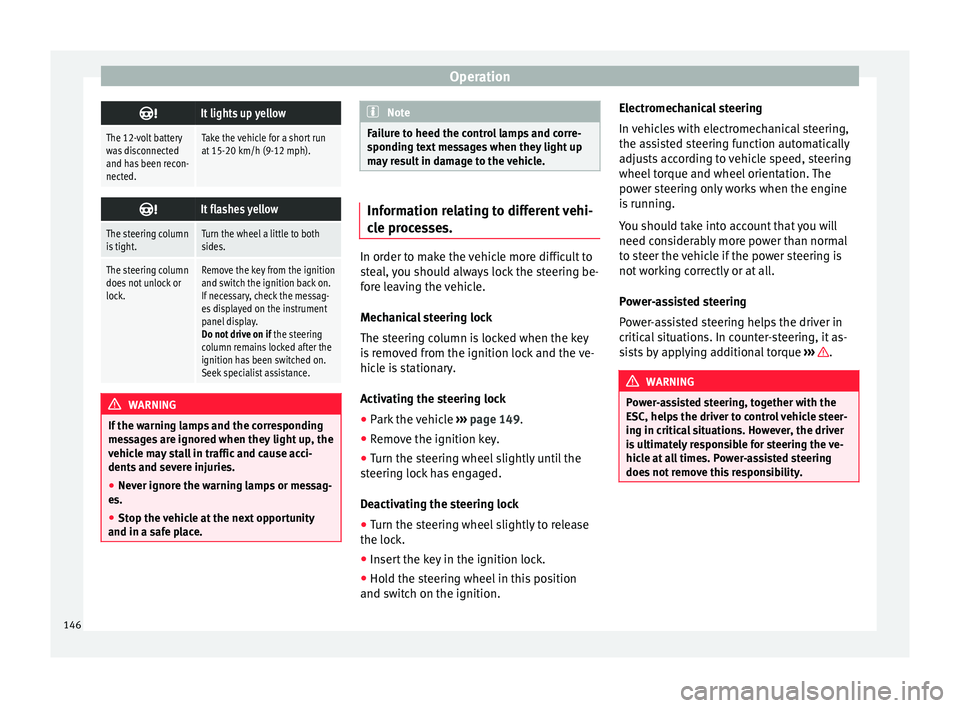
It lights up yellow
The 12-volt battery
was disconnected
and has been recon-
nected.Take the vehicle for a short run
at 15-20 km/h (9-12 mph).
It flashes yellow
The steering column
is tight.Turn the wheel a little to both
sides.
The steering column
does not unlock or
lock.Remove the key from the ignition
and switch the ignition back on.
If necessary, check the messag-
es displayed on the instrument
panel display.
Do not drive on if
the steering
column remains locked after the
ignition has been switched on.
Seek specialist assistance. WARNING
If the warning lamps and the corresponding
mes s
ages are ignored when they light up, the
vehicle may stall in traffic and cause acci-
dents and severe injuries.
● Never ignore the warning lamps or messag-
es.
● Stop the
vehicle at the next opportunity
and in a safe p
lace. Note
Failure to heed the control lamps and corre-
spondin g t
ext messages when they light up
may result in damage to the vehicle. Information relating to different vehi-
cl
e pr
ocesses. In order to make the vehicle more difficult to
st
e
al, you should always lock the steering be-
fore leaving the vehicle.
Mechanical steering lock
The steering column is locked when the key
is removed from the ignition lock and the ve-
hicle is stationary.
Activating the steering lock
● Park the vehicle ››
›
page 149.
● Remove the ignition key.
● Turn the steering wheel slightly until the
steerin
g lock has engaged.
Deactivating the steering lock
● Turn the steering wheel slightly to release
the lock.
● Inser
t the key in the ignition lock.
● Hold the steering wheel in this position
and switc
h on the ignition. Electromechanical steering
In vehic
les with electromechanical steering,
the assisted steering function automatically
adjusts according to vehicle speed, steering
wheel torque and wheel orientation. The
power steering only works when the engine
is running.
You should take into account that you will
need considerably more power than normal
to steer the vehicle if the power steering is
not working correctly or at all.
Power-assisted steering
Power-assisted steering helps the driver in
critical situations. In counter-steering, it as-
sists by applying additional torque ››› .
WARNING
Power-assisted steering, together with the
ESC, help s
the driver to control vehicle steer-
ing in critical situations. However, the driver
is ultimately responsible for steering the ve-
hicle at all times. Power-assisted steering
does not remove this responsibility. 146