technical specifications Seat Ibiza ST 2010 Workshop Manual
[x] Cancel search | Manufacturer: SEAT, Model Year: 2010, Model line: Ibiza ST, Model: Seat Ibiza ST 2010Pages: 264, PDF Size: 7.11 MB
Page 105 of 264
Lights and visibility103
Safety First
Operating Instructions
Practical Tips
Technical Specifications
Headlight washer*
The headlight washers clean the headlight lenses.The headlight washers are activated automatically when the windscreen
washer is used and the windscreen wiper lever is pulled towards the steering
wheel for at least 1.5 seconds – provided the dipped beam headlights or
main beams are switched on. Clean off stubborn dirt (insects, etc.) from the
headlights at regular intervals, for instance when filling the fuel tank.
Note
•To ensure that the headlight washers work properly in winter, keep the
nozzle holders in the bumper free of snow and remove any ice with a de-icer
spray.•To remove water, the windscreen wipers will be activated from time to
time, the headlight wipers will be activated every three cycles.Rear view mirrorsAdjusting the rear view mirrorsBefore beginning any journey, adjust the rear view mirrors for correct
visibility.
Interior mirror
It is dangerous to drive if you cannot see clearly through the
rear window.Manual anti-dazzle function for interior mirror
In the basic mirror position, the lever at the bottom edge of the mirror should
be at the front. Pull the lever to the back to select the anti-dazzle function.Automatic anti-dazzle interior mirror*
The automatic anti-dazzle function can be switched on and off
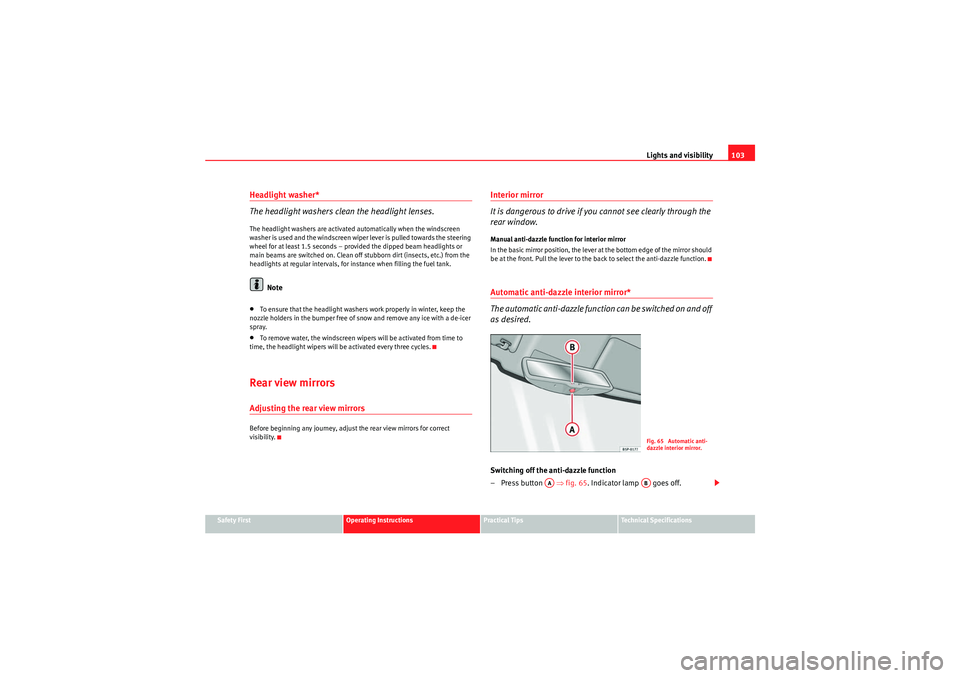
as desired.Switching off the anti-dazzle function
– Press button ⇒fig. 65 . Indicator lamp goes off.
Fig. 65 Automatic anti-
dazzle interior mirror.
AA
AB
IbizaST_EN.book Seite 103 Dienstag, 14. September 2010 1:31 13
Page 107 of 264
Lights and visibility105
Safety First
Operating Instructions
Practical Tips
Technical Specifications
– The mirrors demist for some minutes to prevent draining the
battery.
– If necessary, press the button again to repeat the function.
– The exterior mirror heating is not activated with temperatures above 20 °C.
Folding in exterior mirrors*
–Turn the control ⇒page 104, fig. 66 to position
to fold in the
exterior mirrors. You should always fold in the exterior mirrors if
you are driving through an automa tic car wash. This will help
prevent damage.
Folding exterior mirrors back out to the extended position*
– Turn the knob to position L or R to fold the exterior mirrors back out ⇒ .
WARNING
•Convex or aspheric mirrors increase the field of vision however the
objects appear smaller and further away in the mirrors. If you use these
mirrors to estimate the distance to vehicles behind you when changing
lane, you could make a mistake. Risk of accident.•If possible, use the rear view mirror to estimate distances to vehicles
behind you.•Make sure that you do not get your finger trapped between the mirror
and the mirror base when folding back the mirrors. Risk of injury!For the sake of the environment
The exterior mirror heating should be switched off when it is no longer
needed. Otherwise, it is an unnecessary fuel waste.
Note
•If the electrical adjustment ever fails to operate, the mirrors can be
adjusted by hand by lightly pressing the edge of the mirror glass.•In vehicles with electric exterior mirrors, the following points should be
observed: if, due to an external force (e.g. a knock while manoeuvring), the
adjustment of the mirror housing is altered, the mirror will have to be
completely folded electrically. D o n o t r e a d j us t t h e m i r r o r h o us i n g b y ha n d , a s
this will interfere with the mirror adjuster function.•The rear view mirrors can be adjusted separately or simultaneously, as
described before.•The fold-in function on the exterior mirrors is not active at speeds over 40
km/h.
IbizaST_EN.book Seite 105 Dienstag, 14. September 2010 1:31 13
Page 109 of 264
Seats and storage compartments107
Safety First
Operating Instructions
Practical Tips
Technical Specifications
Head restraintsCorrect adjustment of head restraints
Properly adjusted head restraints are an important part of
passenger protection and can reduce the risk of injuries in
most accident situations.
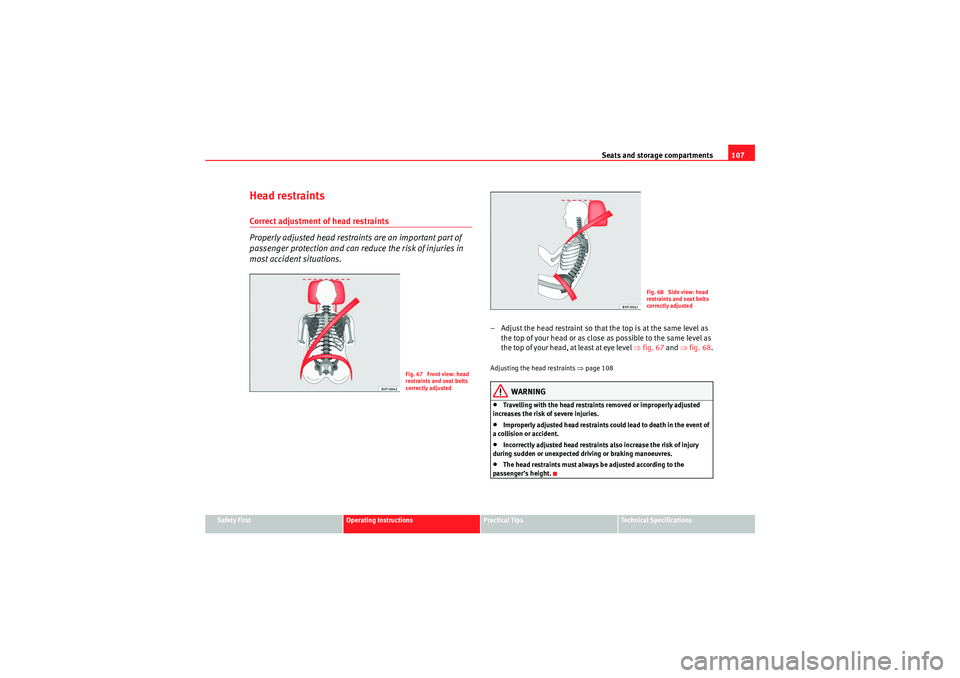
– Adjust the head restraint so that the top is at the same level as
the top of your head or as close as possible to the same level as
the top of your head, at least at eye level ⇒fig. 67 and ⇒ fig. 68.Adjusting the head restraints ⇒page 108
WARNING
•Travelling with the head restraints removed or improperly adjusted
increases the risk of severe injuries.•Improperly adjusted head restraints could lead to death in the event of
a collision or accident.•Incorrectly adjusted head restraints also increase the risk of injury
during sudden or unexpected driving or braking manoeuvres.•The head restraints must always be adjusted according to the
passenger’s height.
Fig. 67 Front view: head
restraints and seat belts
correctly adjusted
Fig. 68 Side view: head
restraints and seat belts
correctly adjusted
IbizaST_EN.book Seite 107 Dienstag, 14. September 2010 1:31 13
Page 111 of 264
Seats and storage compartments109
Safety First
Operating Instructions
Practical Tips
Technical Specifications
•When fitting the head restraints again, insert the tubes as far as possible
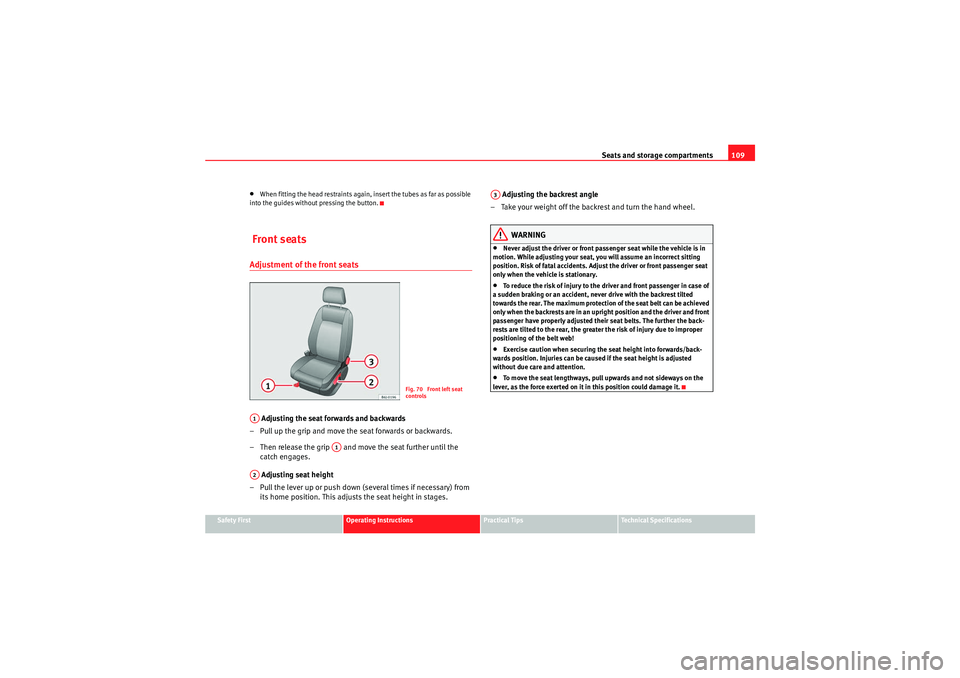
into the guides without pressing the button. Front seatsAdjustment of the front seats Adjusting the seat forwards and backwards
– Pull up the grip and move the seat forwards or backwards.
– Then release the grip and move the seat further until the catch engages.
Adjusting seat height
– Pull the lever up or push down (several times if necessary) from its home position. This adjust s the seat height in stages. Adjusting the backrest angle
– Take your weight off the backrest and turn the hand wheel.
WARNING
•Never adjust the driver or front passenger seat while the vehicle is in
motion. While adjusting your seat, you will assume an incorrect sitting
position. Risk of fatal accidents. Adjust the driver or front passenger seat
only when the vehicle is stationary.•To reduce the risk of injury to the driver and front passenger in case of
a sudden braking or an accident, ne ver drive with the backrest tilted
towards the rear. The maximum protection of the seat belt can be achieved
only when the backrests are in an upright position and the driver and front
passenger have properly adjusted their seat belts. The further the back-
rests are tilted to the rear, the greater the risk of injury due to improper
positioning of the belt web!•Exercise caution when securing the seat height into forwards/back-
wards position. Injuries can be caused if the seat height is adjusted
without due care and attention.•To move the seat lengthways, pull upwards and not sideways on the
lever, as the force exerted on it in this position could damage it.
Fig. 70 Front left seat
controls
A1
A1
A2
A3
IbizaST_EN.book Seite 109 Dienstag, 14. September 2010 1:31 13
Page 113 of 264

Seats and storage compartments111
Safety First
Operating Instructions
Practical Tips
Technical Specifications
Rear seatsFolding down rear seats
Folding seat down
– Remove the head restraint ⇒page 108.
– Pull the front edge of the seat cushion ⇒fig. 72 upwards in
the direction of the arrow.
– Lift the cushion forwards in the direction of the arrow.
– Pull the release button ⇒fig. 73 in the direction of the arrow and
fold the backrest forwards
– Insert the head restraints in the spaces on the rear of the seat cushion which are visible when the seat cushion is lowered.
Folding seat forward
– Remove the head restraints from the spaces in the seat cushion.
– Lift the backrest, before securing it, replace the head restraints in
the seat cushion, and then click the seat correctly onto the
locking rails.
– Once the backrest is locked, pull on the central seat belt or directly on the backrest to check that the backrest has properly
engaged in position.
– Check that the position lever is in neutral position.
– Lower the cushion and push it backwards below the seat belt
buckles.
– Press the front part of the cushion downwards.
Fig. 72 Folding up the
rear seat cushionFig. 73 Button for
unlocking the rear back-
rest
A1
A2
IbizaST_EN.book Seite 111 Dienstag, 14. September 2010 1:31 13
Page 115 of 264
Seats and storage compartments113
Safety First
Operating Instructions
Practical Tips
Technical Specifications
Note
•The storage compartment cooling is only activated when the air condi-
tioning is running with the cooling mode selected.•We recommend you switch off the compartment cooling if the air condi-
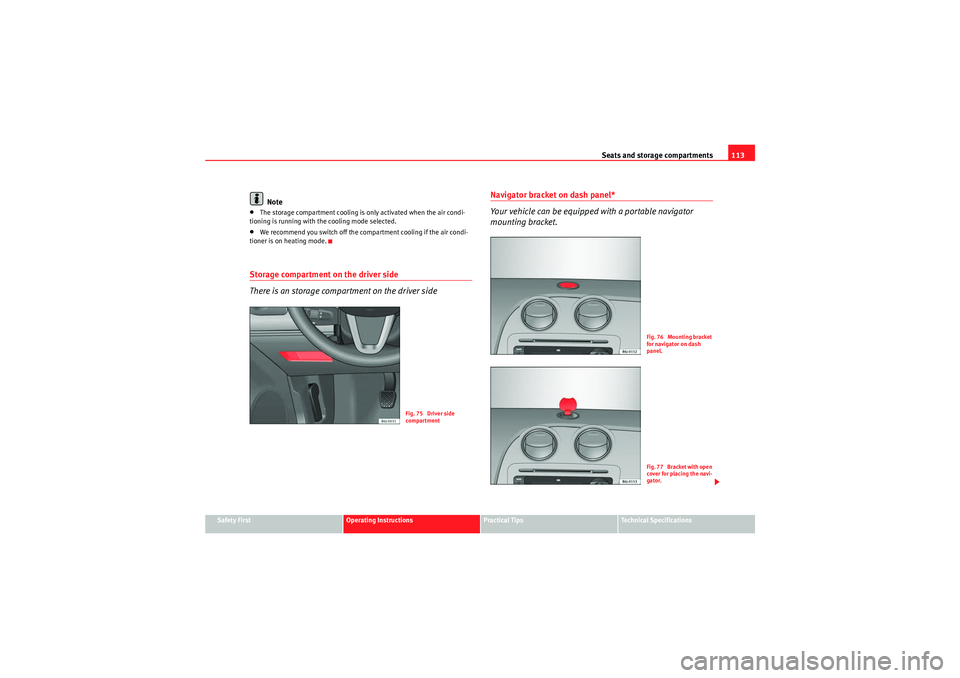
tioner is on heating mode.Storage compartment on the driver side
There is an storage compartment on the driver side
Navigator bracket on dash panel*
Your vehicle can be equipped with a portable navigator
mounting bracket.
Fig. 75 Driver side
compartment
Fig. 76 Mounting bracket
for navigator on dash
panel.F i g . 7 7 B r a c k e t w i t h o p e n
cover for placing the navi-
gator.
IbizaST_EN.book Seite 113 Dienstag, 14. September 2010 1:31 13
Page 117 of 264
Seats and storage compartments115
Safety First
Operating Instructions
Practical Tips
Technical Specifications
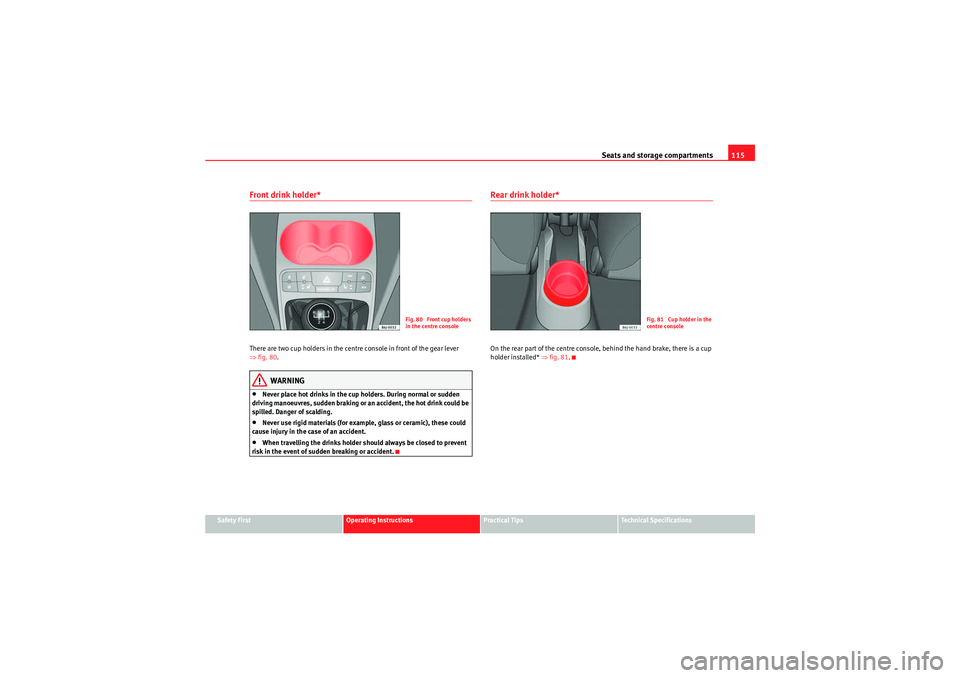
Front drink holder*There are two cup holders in the centre console in front of the gear lever
⇒fig. 80 .
WARNING
•Never place hot drinks in the cup holders. During normal or sudden
driving manoeuvres, sudden braking or an accident, the hot drink could be
spilled. Danger of scalding.•Never use rigid materials (for example, glass or ceramic), these could
cause injury in the case of an accident.•When travelling the drinks holder should always be closed to prevent
risk in the event of sudden breaking or accident.
Rear drink holder* On the rear part of the centre console, behind the hand brake, there is a cup
holder installed* ⇒fig. 81.
Fig. 80 Front cup holders
in the centre console
Fig. 81 Cup holder in the
centre console
IbizaST_EN.book Seite 115 Dienstag, 14. September 2010 1:31 13
Page 119 of 264
Seats and storage compartments117
Safety First
Operating Instructions
Practical Tips
Technical Specifications
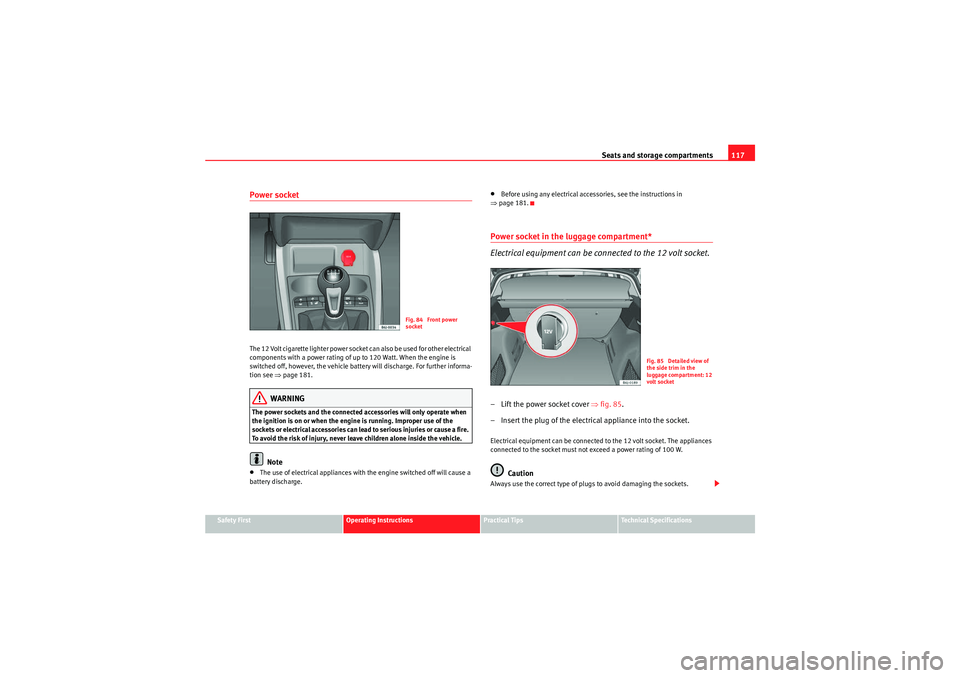
Power socketThe 12 Volt cigarette lighter power socket can also be used for other electrical
components with a power rating of up to 120 Watt. When the engine is
switched off, however, the vehicle battery will discharge. For further informa-
tion see ⇒page 181.
WARNING
The power sockets and the connected accessories will only operate when
the ignition is on or when the engine is running. Improper use of the
sockets or electrical accessories can lead to serious injuries or cause a fire.
To avoid the risk of injury, never leave children alone inside the vehicle.
Note
•The use of electrical appliances with the engine switched off will cause a
battery discharge.
•Before using any electrical accessories, see the instructions in
⇒ page 181.Power socket in the luggage compartment*
Electrical equipment can be connected to the 12 volt socket.– Lift the power socket cover ⇒fig. 85 .
– Insert the plug of the electrical appliance into the socket.Electrical equipment can be connected to the 12 volt socket. The appliances
connected to the socket must not exceed a power rating of 100 W.
Caution
Always use the correct type of plugs to avoid damaging the sockets.
Fig. 84 Front power
socket
Fig. 85 Detailed view of
the side trim in the
luggage compartment: 12
volt socket
IbizaST_EN.book Seite 117 Dienstag, 14. September 2010 1:31 13
Page 121 of 264
Seats and storage compartments119
Safety First
Operating Instructions
Practical Tips
Technical Specifications
First-aid kit, warning triangle, fire
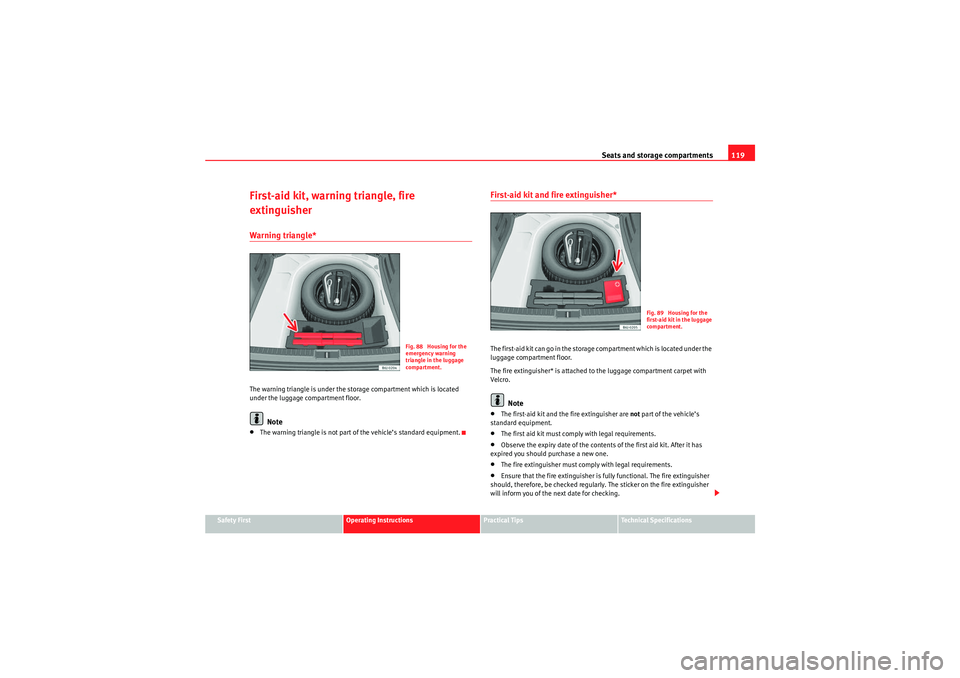
extinguisherWarning triangle*The warning triangle is under the storage compartment which is located
under the luggage compartment floor.
Note
•The warning triangle is not part of the vehicle’s standard equipment.
First-aid kit and fire extinguisher* The first-aid kit can go in the storage compartment which is located under the
luggage compartment floor.
The fire extinguisher* is attached to the luggage compartment carpet with
Vel cro.
Note
•The first-aid kit and the fire extinguisher are not part of the vehicle’s
standard equipment.•The first aid kit must comply with legal requirements.•Observe the expiry date of the contents of the first aid kit. After it has
expired you should purchase a new one.•The fire extinguisher must comply with legal requirements.•Ensure that the fire extinguisher is fully functional. The fire extinguisher
should, therefore, be checked regularly. The sticker on the fire extinguisher
will inform you of the next date for checking.
Fig. 88 Housing for the
emergency warning
triangle in the luggage
compartment.
Fig. 89 Housing for the
first-aid kit in the luggage
compartment.
IbizaST_EN.book Seite 119 Dienstag, 14. September 2010 1:31 13
Page 123 of 264
Seats and storage compartments121
Safety First
Operating Instructions
Practical Tips
Technical Specifications
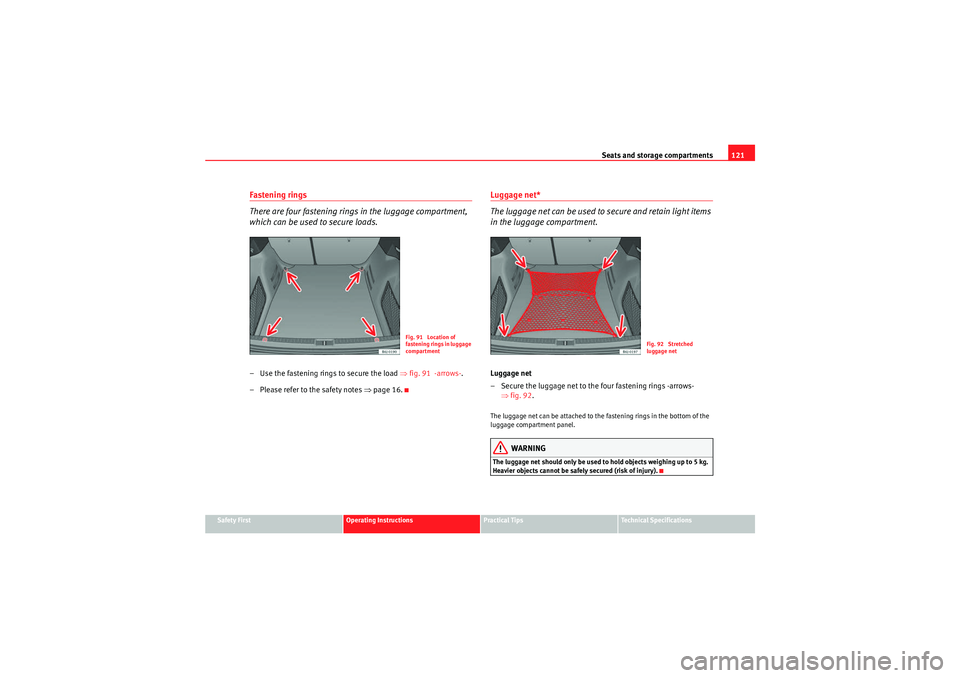
Fastening rings
There are four fastening rings in the luggage compartment,
which can be used to secure loads.– Use the fastening rings to secure the load ⇒fig. 91 -arrows-.
– Please refer to the safety notes ⇒page 16.
Luggage net*
The luggage net can be used to secure and retain light items
in the luggage compartment.Luggage net
– Secure the luggage net to the four fastening rings -arrows-
⇒fig. 92 .The luggage net can be attached to the fastening rings in the bottom of the
luggage compartment panel.
WARNING
The luggage net should only be used to hold objects weighing up to 5 kg.
Heavier objects cannot be safely secured (risk of injury).
Fig. 91 Location of
fastening rings in luggage
compartment
Fig. 92 Stretched
luggage net
IbizaST_EN.book Seite 121 Dienstag, 14. September 2010 1:31 13