engine Seat Ibiza ST 2011 Owner's Guide
[x] Cancel search | Manufacturer: SEAT, Model Year: 2011, Model line: Ibiza ST, Model: Seat Ibiza ST 2011Pages: 280, PDF Size: 4.01 MB
Page 94 of 280
92Unlocking and locking
Windows
Opening or closing the windows electrically*
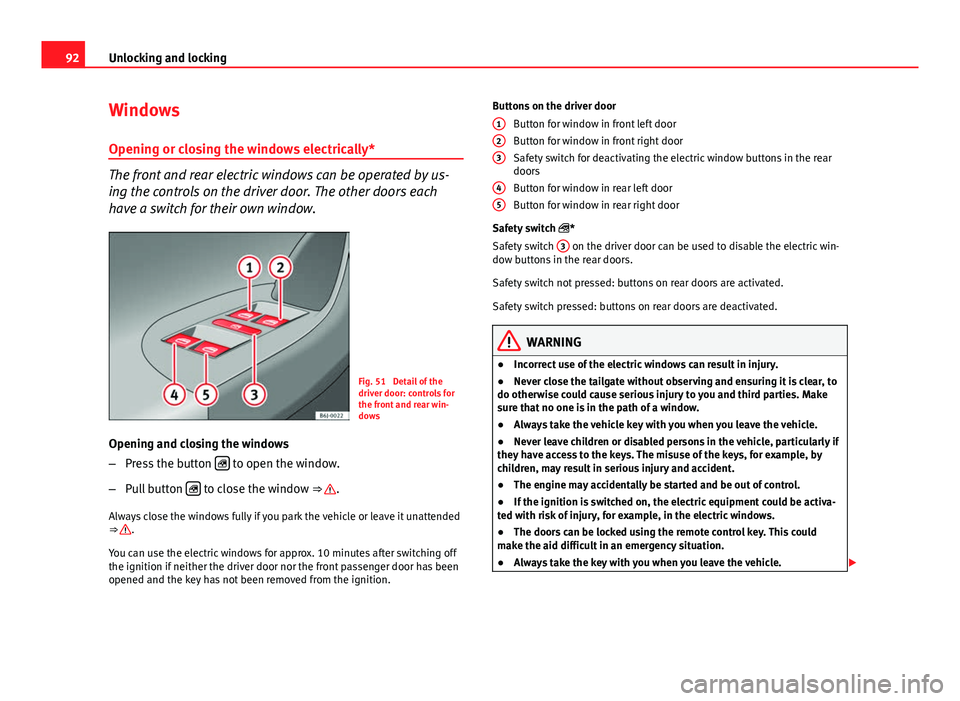
The front and rear electric windows can be operated by us-
ing the controls on the driver door. The other doors each
have a switch for their own window.
Fig. 51 Detail of the
driver door: controls for
the front and rear win-
dows
Opening and closing the windows
– Press the button
to open the window.
– Pull button
to close the window ⇒ .
Always close the windows fully if you park the vehicle or leave it unattended
⇒
.
You can use the electric windows for approx. 10 minutes after switching off
the ignition if neither the driver door nor the front passenger door has been
opened and the key has not been removed from the ignition. Buttons on the driver door
Button for window in front left door
Button for window in front right door
Safety switch for deactivating the electric window buttons in the rear
doors
Button for window in rear left door
Button for window in rear right door
Safety switch *
Safety switch 3
on the driver door can be used to disable the electric win-
dow buttons in the rear doors.
Safety switch not pressed: buttons on rear doors are activated.
Safety switch pressed: buttons on rear doors are deactivated.
WARNING
● Incorrect use of the electric windows can result in injury.
● Never close the tailgate without observing and ensuring it is clear, to
do otherwise could cause serious injury to you and third parties. Make
sure that no one is in the path of a window.
● Always take the vehicle key with you when you leave the vehicle.
● Never leave children or disabled persons in the vehicle, particularly if
they have access to the keys. The misuse of the keys, for example, by
children, may result in serious injury and accident.
● The engine may accidentally be started and be out of control.
● If the ignition is switched on, the electric equipment could be activa-
ted with risk of injury, for example, in the electric windows.
● The doors can be locked using the remote control key. This could
make the aid difficult in an emergency situation.
● Always take the key with you when you leave the vehicle.
123
45
Page 97 of 280
95
Unlocking and locking
Panorama tilting sunroof*
Opening and closing the panorama/tilting sunroof
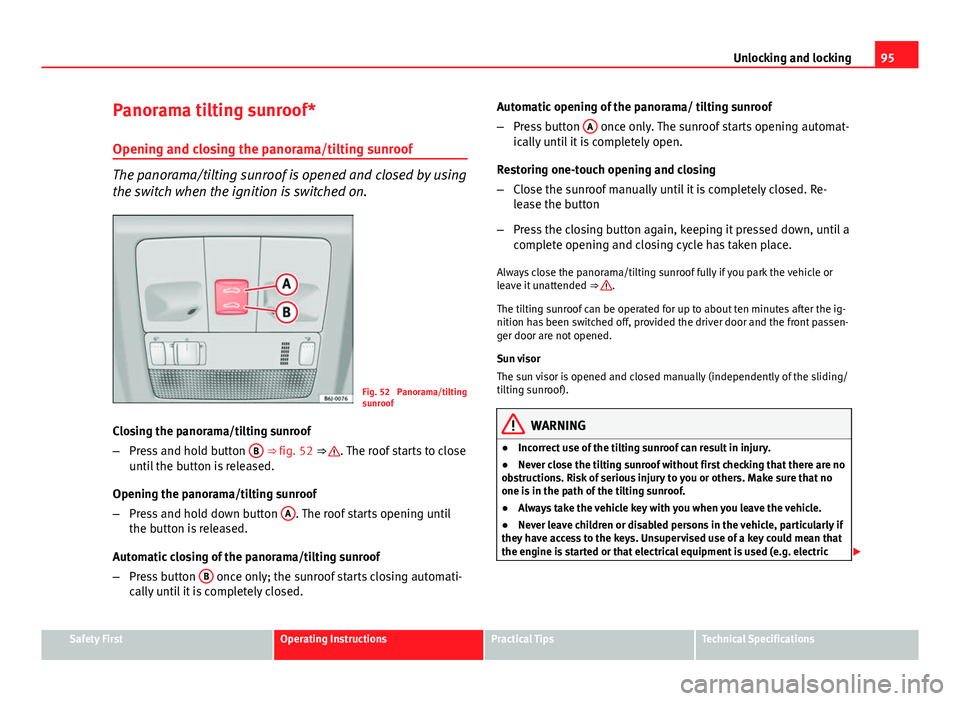
The panorama/tilting sunroof is opened and closed by using
the switch when the ignition is switched on.
Fig. 52 Panorama/tilting
sunroof
Closing the panorama/tilting sunroof
– Press and hold button B
⇒ fig. 52 ⇒ . The roof starts to close
until the button is released.
Opening the panorama/tilting sunroof
– Press and hold down button A
. The roof starts opening until
the button is released.
Automatic closing of the panorama/tilting sunroof
– Press button B
once only; the sunroof starts closing automati-
cally until it is completely closed. Automatic opening of the panorama/ tilting sunroof
–
Press button A
once only. The sunroof starts opening automat-
ically until it is completely open.
Restoring one-touch opening and closing
– Close the sunroof manually until it is completely closed. Re-
lease the button
– Press the closing button again, keeping it pressed down, until a
complete opening and closing cycle has taken place.
Always close the panorama/tilting sunroof fully if you park the vehicle or
leave it unattended ⇒
.
The tilting sunroof can be operated for up to about ten minutes after the ig-
nition has been switched off, provided the driver door and the front passen-
ger door are not opened.
Sun visor
The sun visor is opened and closed manually (independently of the sliding/
tilting sunroof).
WARNING
● Incorrect use of the tilting sunroof can result in injury.
● Never close the tilting sunroof without first checking that there are no
obstructions. Risk of serious injury to you or others. Make sure that no
one is in the path of the tilting sunroof.
● Always take the vehicle key with you when you leave the vehicle.
● Never leave children or disabled persons in the vehicle, particularly if
they have access to the keys. Unsupervised use of a key could mean that
the engine is started or that electrical equipment is used (e.g. electric
Safety FirstOperating InstructionsPractical TipsTechnical Specifications
Page 103 of 280
101
Lights and visibility
Home lighting comes on. If the driver door is already open when the lights
are flashed briefly, the Coming Home lighting comes on immediately.
When the last door of the vehicle or the tailgate is closed, the Coming Home
function starts and the switching off the headlights is delayed.
The Coming Home lighting switches off in the following cases:
● On completion of the time period established for the delay in switching
off the lights after all the vehicle doors and the tailgate have been closed.
● If, 30 seconds after being connected, any doors or the tailgate remain
open.
● If the light switch is turned to position .
● If the ignition is switched on.
Leaving home function
The Leaving Home function is activated when the vehicle is unlocked if:
● the light control is in position and
● the photosensor detects “darkness”.
The Leaving Home lighting switches off in the following cases:
● If the time period for the delay in switching off the headlights has ended
● If the vehicle is locked again.
● If the light switch is turned to position .
● If the ignition is switched on.
Note
● To activate the coming/leaving home function, the rotary light switch
must be in position and the light sensor must detect darkness.
● If the ignition key is removed while the lights are on, and the lights are
flashed briefly and the driver door opened, no acoustic signal is heard, as
when the Coming Home function is on, the lights are automatically switched
off after a period of time (except when the light switch is in position or
.
Rear window heating
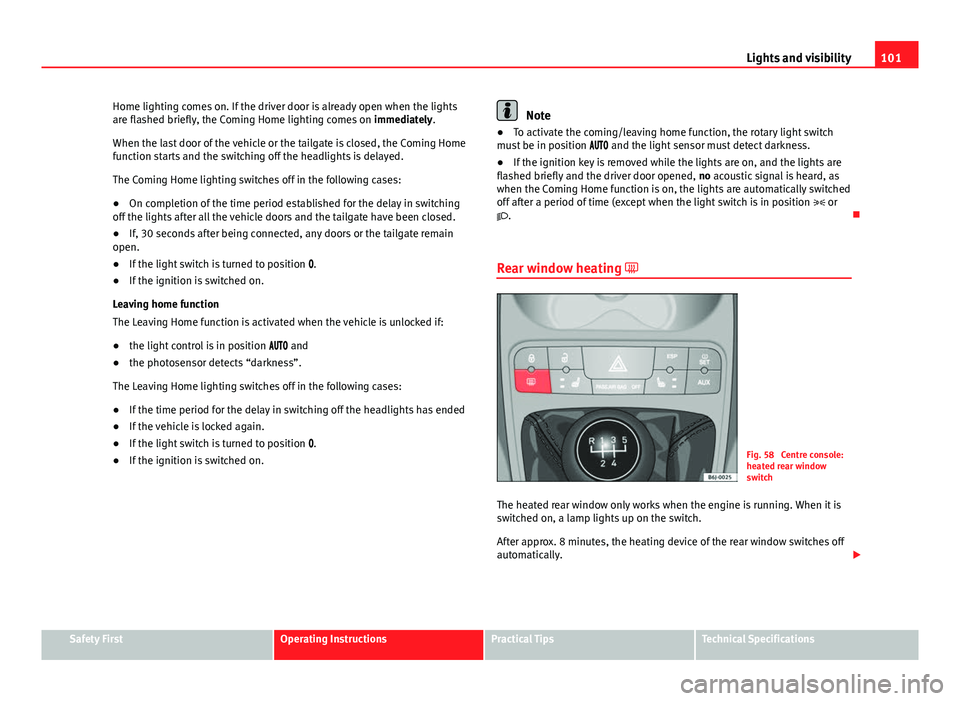
Fig. 58 Centre console:
heated rear window
switch
The heated rear window only works when the engine is running. When it is
switched on, a lamp lights up on the switch.
After approx. 8 minutes, the heating device of the rear window switches off
automatically.
Safety FirstOperating InstructionsPractical TipsTechnical Specifications
Page 104 of 280
102Lights and visibility
For the sake of the environment
The heated rear window should be disconnected as soon as the glass is
demisted. By saving electrical power you can also save fuel.
Note
To avoid possible damage to the battery, an automatic temporary discon-
nection of this function is possible, coming back on when normal operating
conditions are re-established.
Hazard warning lights
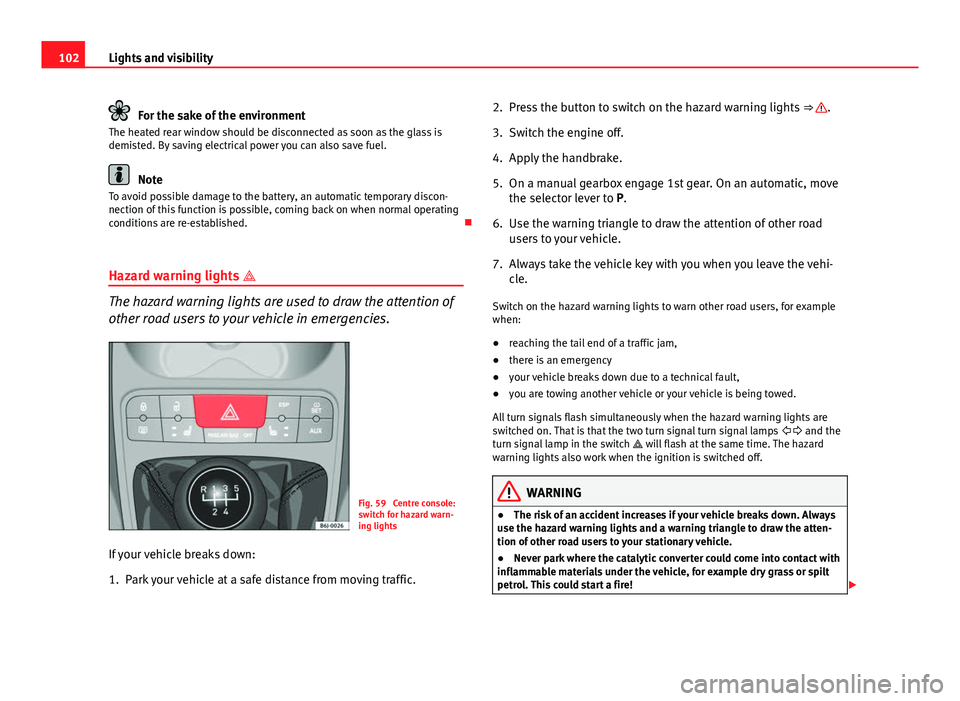
The hazard warning lights are used to draw the attention of
other road users to your vehicle in emergencies.
Fig. 59 Centre console:
switch for hazard warn-
ing lights
If your vehicle breaks down:
1. Park your vehicle at a safe distance from moving traffic. 2. Press the button to switch on the hazard warning lights
⇒
.
3. Switch the engine off.
4. Apply the handbrake.
5. On a manual gearbox engage 1st gear. On an automatic, move the selector lever to P.
6. Use the warning triangle to draw the attention of other road users to your vehicle.
7. Always take the vehicle key with you when you leave the vehi- cle.
Switch on the hazard warning lights to warn other road users, for example
when:
● reaching the tail end of a traffic jam,
● there is an emergency
● your vehicle breaks down due to a technical fault,
● you are towing another vehicle or your vehicle is being towed.
All turn signals flash simultaneously when the hazard warning lights are
switched on. That is that the two turn signal turn signal lamps and the
turn signal lamp in the switch will flash at the same time. The hazard
warning lights also work when the ignition is switched off.
WARNING
● The risk of an accident increases if your vehicle breaks down. Always
use the hazard warning lights and a warning triangle to draw the atten-
tion of other road users to your stationary vehicle.
● Never park where the catalytic converter could come into contact with
inflammable materials under the vehicle, for example dry grass or spilt
petrol. This could start a fire!
Page 119 of 280
117
Seats and storage compartments
Heated seats*
The front seat cushions and backrests can be heated electri-
cally.
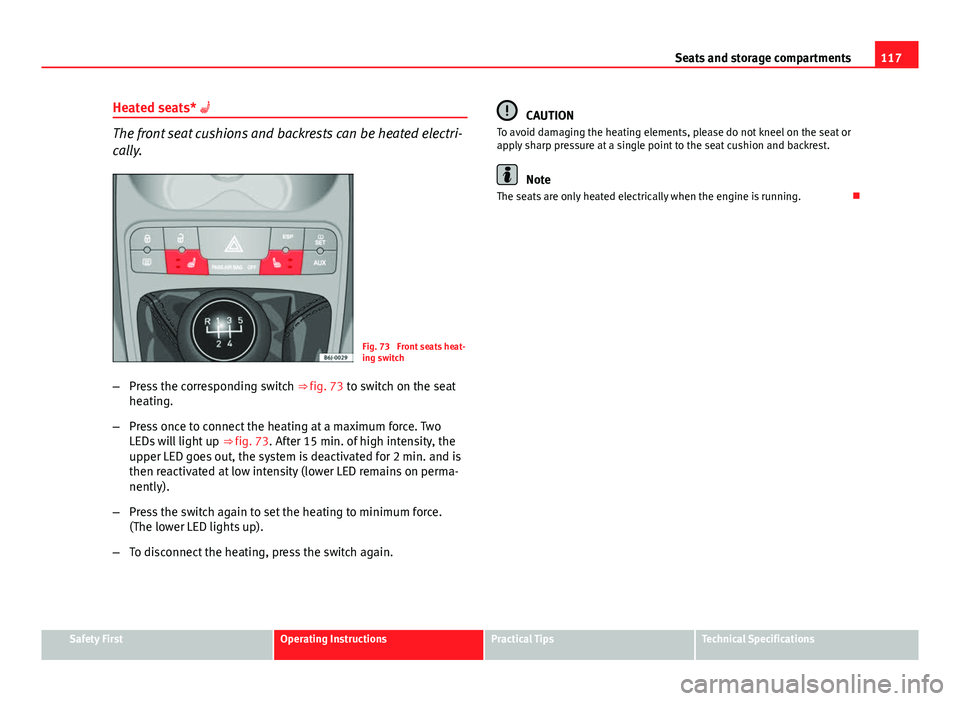
Fig. 73 Front seats heat-
ing switch
– Press the corresponding switch ⇒ fig. 73 to switch on the seat
heating.
– Press once to connect the heating at a maximum force. Two
LEDs will light up ⇒ fig. 73. After 15 min. of high intensity, the
upper LED goes out, the system is deactivated for 2 min. and is
then reactivated at low intensity (lower LED remains on perma-
nently).
– Press the switch again to set the heating to minimum force.
(The lower LED lights up).
– To disconnect the heating, press the switch again.
CAUTION
To avoid damaging the heating elements, please do not kneel on the seat or
apply sharp pressure at a single point to the seat cushion and backrest.
Note
The seats are only heated electrically when the engine is running.
Safety FirstOperating InstructionsPractical TipsTechnical Specifications
Page 126 of 280
124Seats and storage compartments
Cigarette lighter*
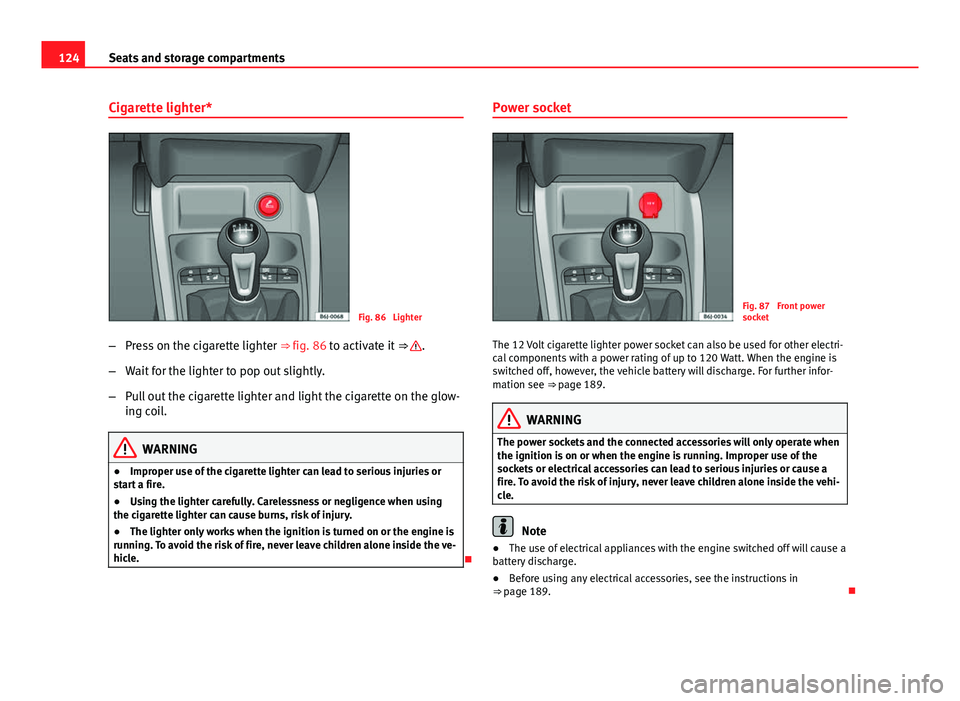
Fig. 86 Lighter
– Press on the cigarette lighter ⇒ fig. 86 to activate it ⇒
.
– Wait for the lighter to pop out slightly.
– Pull out the cigarette lighter and light the cigarette on the glow-
ing coil.
WARNING
● Improper use of the cigarette lighter can lead to serious injuries or
start a fire.
● Using the lighter carefully. Carelessness or negligence when using
the cigarette lighter can cause burns, risk of injury.
● The lighter only works when the ignition is turned on or the engine is
running. To avoid the risk of fire, never leave children alone inside the ve-
hicle.
Power socket
Fig. 87 Front power
socket
The 12 Volt cigarette lighter power socket can also be used for other electri-
cal components with a power rating of up to 120 Watt. When the engine is
switched off, however, the vehicle battery will discharge. For further infor-
mation see ⇒ page 189.
WARNING
The power sockets and the connected accessories will only operate when
the ignition is on or when the engine is running. Improper use of the
sockets or electrical accessories can lead to serious injuries or cause a
fire. To avoid the risk of injury, never leave children alone inside the vehi-
cle.
Note
● The use of electrical appliances with the engine switched off will cause a
battery discharge.
● Before using any electrical accessories, see the instructions in
⇒ page 189.
Page 127 of 280
125
Seats and storage compartments
Power socket in the luggage compartment*
Electrical equipment can be connected to the 12 volt socket.
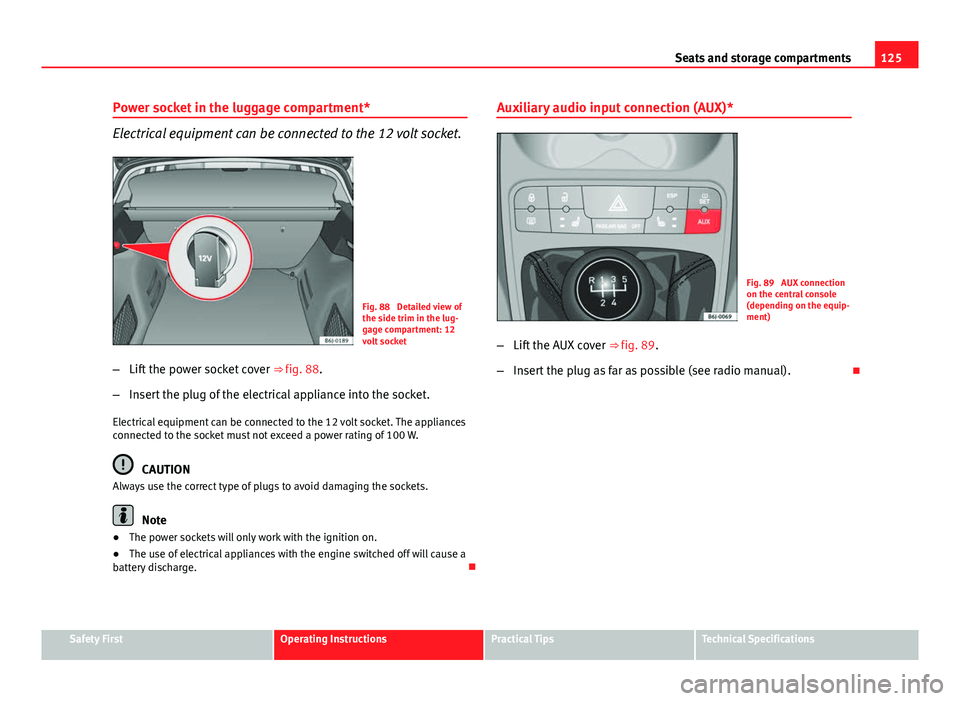
Fig. 88 Detailed view of
the side trim in the lug-
gage compartment: 12
volt socket
– Lift the power socket cover ⇒ fig. 88.
– Insert the plug of the electrical appliance into the socket.
Electrical equipment can be connected to the 12 volt socket. The appliances
connected to the socket must not exceed a power rating of 100 W.
CAUTION
Always use the correct type of plugs to avoid damaging the sockets.
Note
● The power sockets will only work with the ignition on.
● The use of electrical appliances with the engine switched off will cause a
battery discharge. Auxiliary audio input connection (AUX)*
Fig. 89 AUX connection
on the central console
(depending on the equip-
ment)
– Lift the AUX cover ⇒ fig. 89.
– Insert the plug as far as possible (see radio manual).
Safety FirstOperating InstructionsPractical TipsTechnical Specifications
Page 134 of 280
132Air conditioning
Air conditioning
Heating
Controls
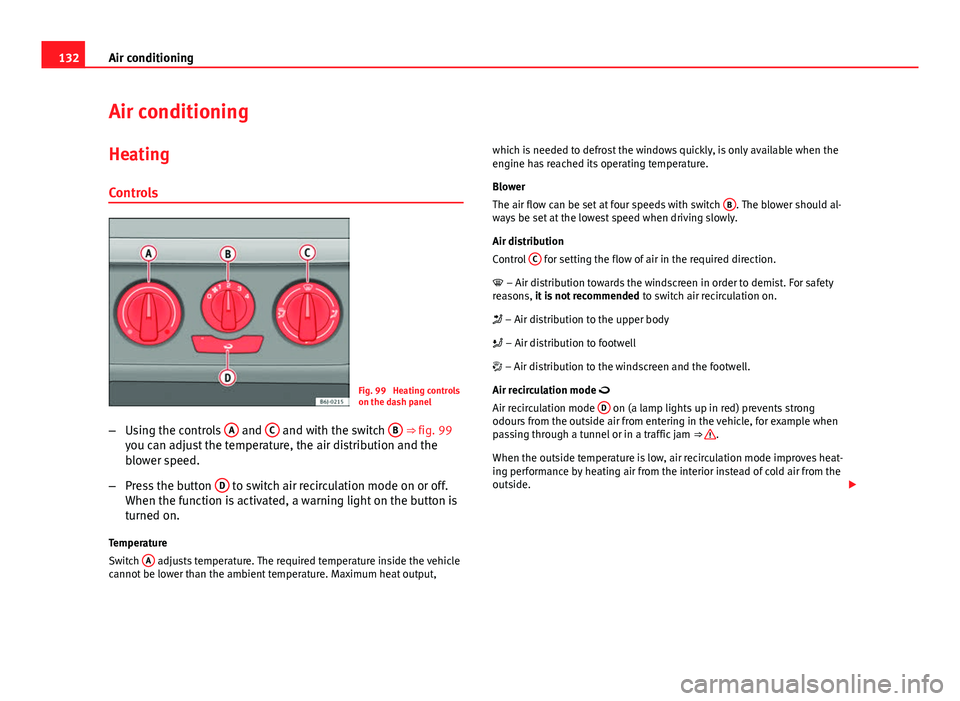
Fig. 99 Heating controls
on the dash panel
– Using the controls A
and C and with the switch B ⇒ fig. 99
you can adjust the temperature, the air distribution and the
blower speed.
– Press the button D
to switch air recirculation mode on or off.
When the function is activated, a warning light on the button is
turned on.
Temperature
Switch A
adjusts temperature. The required temperature inside the vehicle
cannot be lower than the ambient temperature. Maximum heat output, which is needed to defrost the windows quickly, is only available when the
engine has reached its operating temperature.
Blower
The air flow can be set at four speeds with switch
B
. The blower should al-
ways be set at the lowest speed when driving slowly.
Air distribution
Control C
for setting the flow of air in the required direction.
– Air distribution towards the windscreen in order to demist. For safety
reasons, it is not recommended to switch air recirculation on.
– Air distribution to the upper body
– Air distribution to footwell
– Air distribution to the windscreen and the footwell.
Air recirculation mode
Air recirculation mode D
on (a lamp lights up in red) prevents strong
odours from the outside air from entering in the vehicle, for example when
passing through a tunnel or in a traffic jam ⇒
.
When the outside temperature is low, air recirculation mode improves heat-
ing performance by heating air from the interior instead of cold air from the
outside.
Page 136 of 280
134Air conditioning
–Turn blower switch B
to any of the head settings 2 -3.
– Turn air distribution control to .
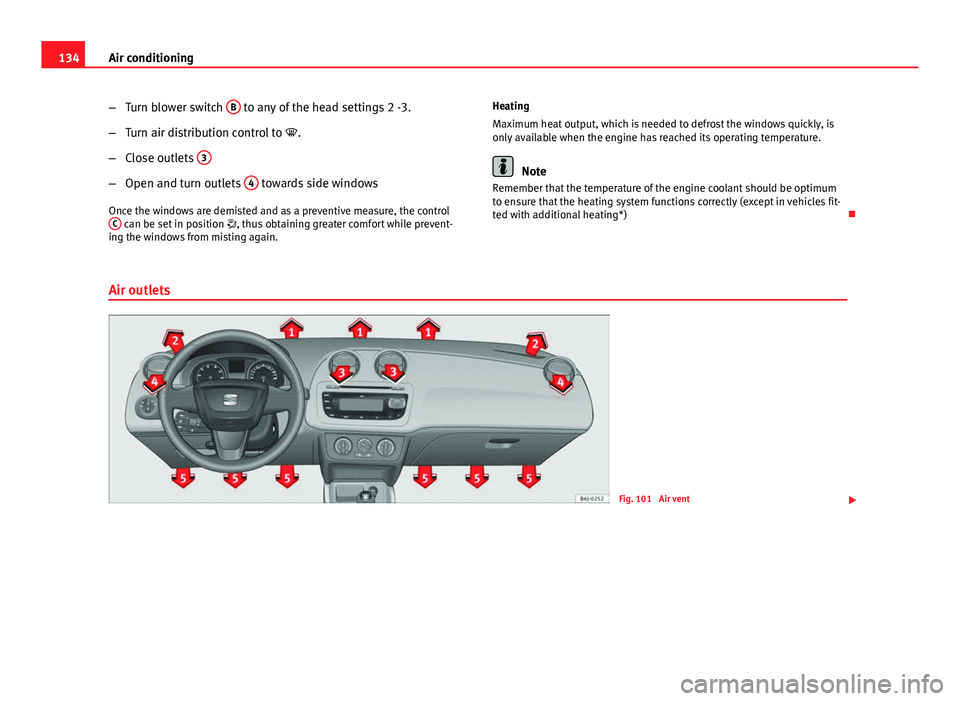
– Close outlets 3
–
Open and turn outlets 4 towards side windows
Once the windows are demisted and as a preventive measure, the control C
can be set in position , thus obtaining greater comfort while prevent-
ing the windows from misting again. Heating
Maximum heat output, which is needed to defrost the windows quickly, is
only available when the engine has reached its operating temperature.
Note
Remember that the temperature of the engine coolant should be optimum
to ensure that the heating system functions correctly (except in vehicles fit-
ted with additional heating*)
Air outlets
Fig. 101 Air vent
Page 137 of 280
135
Air conditioning
Air distribution C
Switch on symbolMain air output through outlets:
1,2
5
1, 2, 5
3, 4
Outlets 3 and 4 can be closed or opened separately and the air flow di-
rected as required.
Air conditioning* Controls
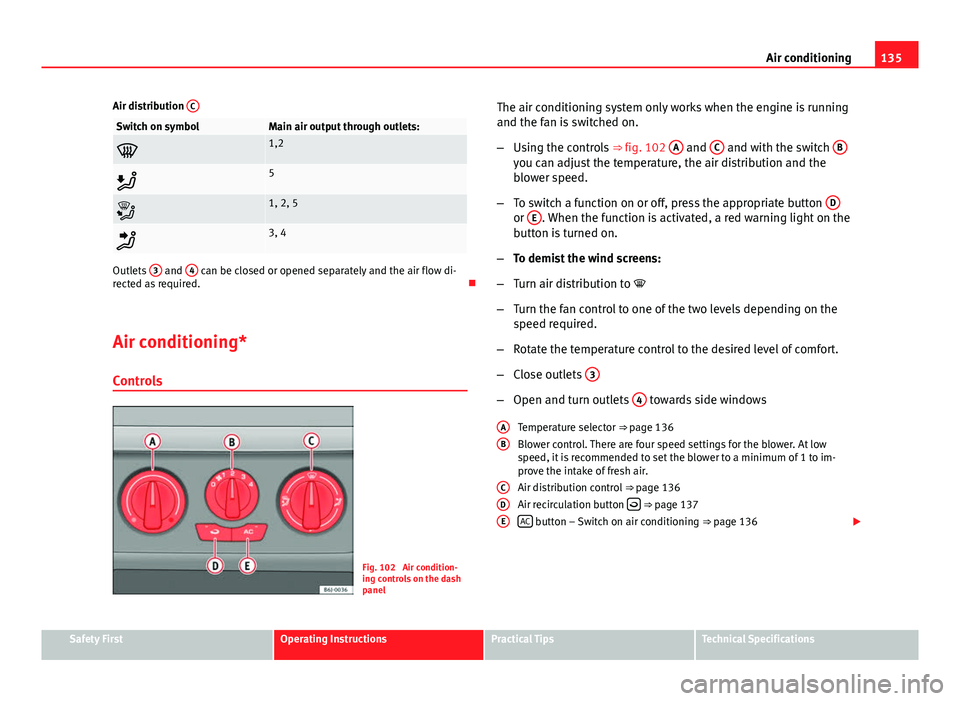
Fig. 102 Air condition-
ing controls on the dash
panel The air conditioning system only works when the engine is running
and the fan is switched on.
–
Using the controls ⇒ fig. 102 A
and C and with the switch Byou can adjust the temperature, the air distribution and the
blower speed.
– To switch a function on or off, press the appropriate button D
or E. When the function is activated, a red warning light on the
button is turned on.
– To demist the wind screens:
– Turn air distribution to
– Turn the fan control to one of the two levels depending on the
speed required.
– Rotate the temperature control to the desired level of comfort.
– Close outlets 3
–
Open and turn outlets 4 towards side windows
Temperature selector ⇒ page 136
Blower control. There are four speed settings for the blower. At low
speed, it is recommended to set the blower to a minimum of 1 to im-
prove the intake of fresh air.
Air distribution control ⇒ page 136
Air recirculation button
⇒ page 137
AC button – Switch on air conditioning ⇒ page 136
A
B
CDE
Safety FirstOperating InstructionsPractical TipsTechnical Specifications