towing Seat Ibiza ST 2011 Owner's manual
[x] Cancel search | Manufacturer: SEAT, Model Year: 2011, Model line: Ibiza ST, Model: Seat Ibiza ST 2011Pages: 280, PDF Size: 4.01 MB
Page 5 of 280
Table of Contents
Manual structure . . . . . . . . . . . . . . . . . . . . 5
Content . . . . . . . . . . . . . . . . . . . . . . . . . . . . . . . . 6
Safety First . . . . . . . . . . . . . . . . . . . . . . . . . . . . 7
Safe driving . . . . . . . . . . . . . . . . . . . . . . . . . . . . . . . 7
Brief introduction . . . . . . . . . . . . . . . . . . . . . . . . . 7
Proper sitting position for occupants . . . . . . . . . 10
Pedal area . . . . . . . . . . . . . . . . . . . . . . . . . . . . . . . 16
Storing objects . . . . . . . . . . . . . . . . . . . . . . . . . . . 16
Seat belts . . . . . . . . . . . . . . . . . . . . . . . . . . . . . . . . . 19
Brief introduction . . . . . . . . . . . . . . . . . . . . . . . . . 19
Why wear seat belts? . . . . . . . . . . . . . . . . . . . . . . 21
Seat belts . . . . . . . . . . . . . . . . . . . . . . . . . . . . . . . 25
Belt tensioners* . . . . . . . . . . . . . . . . . . . . . . . . . . 28
Airbag system . . . . . . . . . . . . . . . . . . . . . . . . . . . . . 30
Brief introduction . . . . . . . . . . . . . . . . . . . . . . . . . 30
Front airbags . . . . . . . . . . . . . . . . . . . . . . . . . . . . . 34
Side airbags . . . . . . . . . . . . . . . . . . . . . . . . . . . . . 38
Deactivating airbags* . . . . . . . . . . . . . . . . . . . . . . 41
Child safety . . . . . . . . . . . . . . . . . . . . . . . . . . . . . . . 43
Brief introduction . . . . . . . . . . . . . . . . . . . . . . . . . 43
Child seats . . . . . . . . . . . . . . . . . . . . . . . . . . . . . . . 45
Securing child seats . . . . . . . . . . . . . . . . . . . . . . . 48
Operating Instructions . . . . . . . . . . . . . 53
Cockpit . . . . . . . . . . . . . . . . . . . . . . . . . . . . . . . . . . . 53
Overview . . . . . . . . . . . . . . . . . . . . . . . . . . . . . . . . 53
Instruments . . . . . . . . . . . . . . . . . . . . . . . . . . . . . . 55 LPG system* . . . . . . . . . . . . . . . . . . . . . . . . . . . . . 56
Digital instrument panel display . . . . . . . . . . . . . 57
Warning lamps . . . . . . . . . . . . . . . . . . . . . . . . . . . 63
Steering column controls* . . . . . . . . . . . . . . . . . 76
General information . . . . . . . . . . . . . . . . . . . . . . . 76
Audio Control . . . . . . . . . . . . . . . . . . . . . . . . . . . . . 77
Audio + Telephone Control . . . . . . . . . . . . . . . . . . 78
Unlocking and locking . . . . . . . . . . . . . . . . . . . . . 79
Central locking . . . . . . . . . . . . . . . . . . . . . . . . . . . 79
Keys . . . . . . . . . . . . . . . . . . . . . . . . . . . . . . . . . . . . 84
Radio frequency remote control* . . . . . . . . . . . . . 85
Anti-theft alarm system* . . . . . . . . . . . . . . . . . . . 87
Tailgate . . . . . . . . . . . . . . . . . . . . . . . . . . . . . . . . . 90
Windows . . . . . . . . . . . . . . . . . . . . . . . . . . . . . . . . 92
Panorama tilting sunroof* . . . . . . . . . . . . . . . . . . 95
Lights and visibility . . . . . . . . . . . . . . . . . . . . . . . . 97
Lights . . . . . . . . . . . . . . . . . . . . . . . . . . . . . . . . . . . 97
Interior lights . . . . . . . . . . . . . . . . . . . . . . . . . . . . . 104
Visibility . . . . . . . . . . . . . . . . . . . . . . . . . . . . . . . . . 105
Windscreen wipers . . . . . . . . . . . . . . . . . . . . . . . . 106
Rear view mirrors . . . . . . . . . . . . . . . . . . . . . . . . . . 109
Seats and storage compartments . . . . . . . . . . 113
The importance of correct seat adjustment . . . . . 113
Head restraints . . . . . . . . . . . . . . . . . . . . . . . . . . . 114
Front seats . . . . . . . . . . . . . . . . . . . . . . . . . . . . . . . 116
Rear seats . . . . . . . . . . . . . . . . . . . . . . . . . . . . . . . 118
Storage compartment . . . . . . . . . . . . . . . . . . . . . . 120
Ashtrays, cigarette lighter and power socket . . . 123
First-aid kit, warning triangle, fire extinguisher . 126
Luggage compartment . . . . . . . . . . . . . . . . . . . . . 127
Roof rack* . . . . . . . . . . . . . . . . . . . . . . . . . . . . . . . 131
Air conditioning . . . . . . . . . . . . . . . . . . . . . . . . . . . 132
Heating . . . . . . . . . . . . . . . . . . . . . . . . . . . . . . . . . 132
Air conditioning* . . . . . . . . . . . . . . . . . . . . . . . . . . 135 Climatronic . . . . . . . . . . . . . . . . . . . . . . . . . . . . . . 138
General notes . . . . . . . . . . . . . . . . . . . . . . . . . . . . 140
Driving . . . . . . . . . . . . . . . . . . . . . . . . . . . . . . . . . . . . 142
Steering . . . . . . . . . . . . . . . . . . . . . . . . . . . . . . . . . 142
Safety . . . . . . . . . . . . . . . . . . . . . . . . . . . . . . . . . . . 143
Ignition lock . . . . . . . . . . . . . . . . . . . . . . . . . . . . . . 143
Starting and stopping the engine . . . . . . . . . . . . 145
Start-Stop function* . . . . . . . . . . . . . . . . . . . . . . . 148
Manual gearbox . . . . . . . . . . . . . . . . . . . . . . . . . . 151
Automatic gearbox* . . . . . . . . . . . . . . . . . . . . . . . 152
Handbrake . . . . . . . . . . . . . . . . . . . . . . . . . . . . . . . 159
Acoustic parking aid system* . . . . . . . . . . . . . . . 161
Cruise speed* (Cruise control system) . . . . . . . . 163
Practical Tips . . . . . . . . . . . . . . . . . . . . . . . . . 167
Intelligent technology . . . . . . . . . . . . . . . . . . . . . 167
Brakes . . . . . . . . . . . . . . . . . . . . . . . . . . . . . . . . . . 167
Anti-lock brake system and traction control ABS 168
Electronic Stability Programme (ESP)* . . . . . . . . 169
Driving and the environment . . . . . . . . . . . . . . . 172
Running-in . . . . . . . . . . . . . . . . . . . . . . . . . . . . . . . 172
Exhaust gas purification system . . . . . . . . . . . . . 173
Economical and environmentally friendly driving 175
Driving abroad . . . . . . . . . . . . . . . . . . . . . . . . . . . . 177
Trailer towing . . . . . . . . . . . . . . . . . . . . . . . . . . . . . 178
Vehicle maintenance and cleaning . . . . . . . . . 180
General notes . . . . . . . . . . . . . . . . . . . . . . . . . . . . 180
Care of the vehicle exterior . . . . . . . . . . . . . . . . . . 181
Vehicle interior maintenance . . . . . . . . . . . . . . . . 186
3
Table of Contents
Page 6 of 280
Accessories, parts replacement and
modifications . . . . . . . . . . . . . . . . . . . . . . . . . . . . . 189
Accessories and spare parts . . . . . . . . . . . . . . . . 189
Technical modifications . . . . . . . . . . . . . . . . . . . . 189
Roof aerial* . . . . . . . . . . . . . . . . . . . . . . . . . . . . . . 190
Mobile telephones and two-way radios . . . . . . . . 190
Fitting a towing bracket* . . . . . . . . . . . . . . . . . . . 191
Checking and refilling levels . . . . . . . . . . . . . . . 193
Refuelling . . . . . . . . . . . . . . . . . . . . . . . . . . . . . . . 193
LPG system* . . . . . . . . . . . . . . . . . . . . . . . . . . . . . 195
Petrol . . . . . . . . . . . . . . . . . . . . . . . . . . . . . . . . . . . 198
Diesel . . . . . . . . . . . . . . . . . . . . . . . . . . . . . . . . . . . 198
Working in the engine compartment . . . . . . . . . . 199
Engine oil . . . . . . . . . . . . . . . . . . . . . . . . . . . . . . . . 202
Coolant . . . . . . . . . . . . . . . . . . . . . . . . . . . . . . . . . 206
Washer fluid and windscreen wiper blades . . . . 208
Brake fluid . . . . . . . . . . . . . . . . . . . . . . . . . . . . . . . 211
Vehicle battery . . . . . . . . . . . . . . . . . . . . . . . . . . . 213
Wheels . . . . . . . . . . . . . . . . . . . . . . . . . . . . . . . . . . 215
If and when . . . . . . . . . . . . . . . . . . . . . . . . . . . . . . . 221
Vehicle tools, spare wheel . . . . . . . . . . . . . . . . . . 221
Wheel change . . . . . . . . . . . . . . . . . . . . . . . . . . . . 222
Tyre repair kit (Tyre-Mobility-System)* . . . . . . . . . 227
Fuses . . . . . . . . . . . . . . . . . . . . . . . . . . . . . . . . . . . 229
Bulb change . . . . . . . . . . . . . . . . . . . . . . . . . . . . . 232
Single headlight bulb change . . . . . . . . . . . . . . . 234
Double headlight bulb change . . . . . . . . . . . . . . . 236
Changing the bulbs of AFS headlights . . . . . . . . 240
Changing the fog light bulbs . . . . . . . . . . . . . . . . 241
Changing the rear lights (on the wing) . . . . . . . . 242
Changing the rear lights (on the tailgate) . . . . . . 243
Side turn signal bulbs . . . . . . . . . . . . . . . . . . . . . . 244
Number plate light . . . . . . . . . . . . . . . . . . . . . . . . 244
Interior light and front reading lights . . . . . . . . . 245
Additional brake lights* . . . . . . . . . . . . . . . . . . . . 245
Luggage compartment light . . . . . . . . . . . . . . . . . 246 Jump-starting . . . . . . . . . . . . . . . . . . . . . . . . . . . . . 246
Towing and tow-starting . . . . . . . . . . . . . . . . . . . . 249
Technical Specifications . . . . . . . . . . . 252
Description of specifications . . . . . . . . . . . . . . . 252
Important information . . . . . . . . . . . . . . . . . . . . . 252
Information on fuel consumption . . . . . . . . . . . . 254
Towing a trailer . . . . . . . . . . . . . . . . . . . . . . . . . . . 254
Wheels . . . . . . . . . . . . . . . . . . . . . . . . . . . . . . . . . . 255
Technical specifications . . . . . . . . . . . . . . . . . . . . 256
Checking fluid levels . . . . . . . . . . . . . . . . . . . . . . . 256
Petrol engine 1.2 51 kW (70 PS) . . . . . . . . . . . . . 257
Petrol engine 1.4 63 kW (85 PS) . . . . . . . . . . . . . 258
Petrol engine 1.2 TSI 77 kW (105 PS) . . . . . . . . . 259
Petrol engine 1.2 TSI 77 kW (105 PS) Start-Stop 260
Petrol engine 1.4 TSI 110 kW (150 PS) . . . . . . . . 261
Diesel engine 1.2 TDI CR 55 kW (75 PS) DPF
Start-Stop Ecomotive . . . . . . . . . . . . . . . . . . . . . . 262
Diesel engine 1.2 TDI CR 55 kW (75 PS) DPF . . . . 263
Diesel engine 1.6 TDI CR 66 kW (90 PS) DPF . . . . 264
Diesel engine 1.6 TDI CR 77 kW (105 PS) with/
without DPF . . . . . . . . . . . . . . . . . . . . . . . . . . . . . . 265
Dimensions and capacities . . . . . . . . . . . . . . . . . 267
Index . . . . . . . . . . . . . . . . . . . . . . . . . . . . . . . . . . . 269
4Table of Contents
Page 75 of 280
73
Cockpit
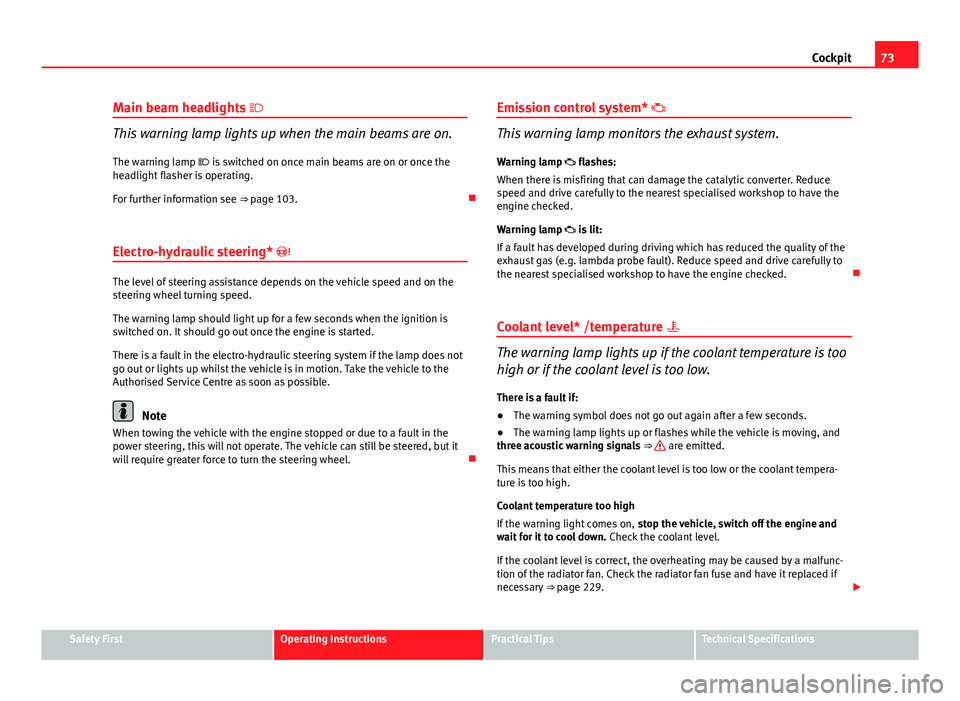
Main beam headlights
This warning lamp lights up when the main beams are on.
The warning lamp is switched on once main beams are on or once the
headlight flasher is operating.
For further information see ⇒ page 103.
Electro-hydraulic steering*
The level of steering assistance depends on the vehicle speed and on the
steering wheel turning speed.
The warning lamp should light up for a few seconds when the ignition is
switched on. It should go out once the engine is started.
There is a fault in the electro-hydraulic steering system if the lamp does not
go out or lights up whilst the vehicle is in motion. Take the vehicle to the
Authorised Service Centre as soon as possible.
Note
When towing the vehicle with the engine stopped or due to a fault in the
power steering, this will not operate. The vehicle can still be steered, but it
will require greater force to turn the steering wheel. Emission control system*
This warning lamp monitors the exhaust system.
Warning lamp flashes:
When there is misfiring that can damage the catalytic converter. Reduce
speed and drive carefully to the nearest specialised workshop to have the
engine checked.
Warning lamp is lit:
If a fault has developed during driving which has reduced the quality of the
exhaust gas (e.g. lambda probe fault). Reduce speed and drive carefully to
the nearest specialised workshop to have the engine checked.
Coolant level* /temperature
The warning lamp lights up if the coolant temperature is too
high or if the coolant level is too low.
There is a fault if:
● The warning symbol does not go out again after a few seconds.
● The warning lamp lights up or flashes while the vehicle is moving, and
three acoustic warning signals ⇒
are emitted.
This means that either the coolant level is too low or the coolant tempera-
ture is too high.
Coolant temperature too high
If the warning light comes on, stop the vehicle, switch off the engine and
wait for it to cool down. Check the coolant level.
If the coolant level is correct, the overheating may be caused by a malfunc-
tion of the radiator fan. Check the radiator fan fuse and have it replaced if
necessary ⇒ page 229.
Safety FirstOperating InstructionsPractical TipsTechnical Specifications
Page 89 of 280
87
Unlocking and locking
Anti-theft alarm system* Description of anti-theft alarm system*
The anti-theft alarm triggers if unauthorised movements are
detected around the vehicle.
The anti-theft alarm makes it more difficult to break into the vehicle or steal
it. The system will initiate acoustic and optical warning signals when your
vehicle is tried to be forced.
The anti-theft alarm system is automatically connected on locking the vehi-
cle. For this, either rotate the key in the locking position or press button
2 on the radio-frequency remote control*. The system is immediately acti-
vated and the turn signal light located on the driver door will flash along
with the turn signals, indicating that the alarm and the locking security sys-
tem (double lock) have been turned on.
If any of the doors or the bonnet are open, they will not be included in the
protection zones of the vehicle when the alarm is connected. If the door or
the bonnet are subsequently closed, they will be automatically included in
the protection areas of the vehicle and the turn signals will flash according-
ly when the doors close.
● The turn signal light will flash twice on opening and deactivating the
alarm..
● The turn signal light will flash once on closing and activating the alarm.
When does the system trigger an alarm?
The system triggers an alarm if the following unauthorised actions are car-
ried out when the car is locked: ●
Opening of vehicle with mechanical key without switching ignition on
within the next 15 seconds
● Opening a door
● Opening the bonnet
● Opening the tailgate
● Ignition switched on with a non-validated key.
● Movements in the driving compartment (vehicles with a volume sensor)
● Towing of the vehicle 1)
● Tilt angle (tow-away protection) 1)
● Undue manipulation of the alarm
● Battery handling
The acoustic signals sound and the turn signals flash for approx. 30 sec-
onds. This may be repeated up to 10 times depending on the country.
Opening all the doors in manual mode
In vehicles without alarm, when opening the driver door manually all the
doors are opened.
How to switch the alarm off
To deactivate the anti-theft alarm, turn the key in the direction, to open,
open the door and switch the ignition on, or press the unlock button
on
the remote control.
In vehicles equipped with an anti-theft alarm system, you have 15 seconds
to insert the key in the ignition lock and activate the ignition if the vehicle is
opened using the driver door key.
Otherwise, the alarm will trigger for 30 sec. and the ignition will be blocked.
1)
With vehicles fitted with a tow-away protection
Safety FirstOperating InstructionsPractical TipsTechnical Specifications
Page 90 of 280
88Unlocking and locking
Note
● After 28 days, the indicator light will be switched off to prevent the bat-
tery from exhausting if the vehicle has been left parked for a long period of
time. The alarm system remains activated.
● The alarm will trigger again if attempts are made to open another protec-
tion zone.
● The alarm system can be activated or deactivated using the remote con-
trol ⇒ page 85.
Interior monitoring and anti-towing alarm*
Monitoring or control function incorporated in the anti-theft
alarm* which detects unauthorized vehicle entry by means
of ultrasound.
Activation
– It is connected automatically when the anti-theft alarm is acti-
vated.
Deactivation
– Open the vehicle with the key, either mechanically 1)
or by press-
ing the
button on the remote control.
– Press the button
on the remote control twice. The volumetric
sensor and tilt sensors will be deactivated. The alarm system re-
mains activated. The interior monitoring and the anti-towing alarm are automatically switch-
ed on again next time the vehicle is locked.
The interior monitoring and anti-towing alarm (tilt sensor) are automatically
switched on when the anti-theft alarm is switched on. In order to activate it,
all the doors and the tailgate must be closed.
If you wish to disconnect the interior monitoring and the anti-towing sys-
tem, it must be done each time that the vehicle is locked; if not, they will
connect automatically.
The interior monitoring and the anti-towing system should be disconnected
if animals are left inside the locked vehicle (otherwise, their movements will
trigger the alarm) or when, for example, the vehicle is transported or has to
be towed with only one axle on the ground.
False alarms
The interior monitoring only operates correctly if the vehicle is completely
closed. Please observe legal requirements when doing so.
The following cases may cause a false alarm:
●
opened windows (partially or fully)
● panorama/tilting sunroof open (partially or completely).
● movement of objects inside the vehicle, such as loose papers, items
hanging from the rear view mirror (air fresheners), etc.
1)
The time period from when the door is opened until the key is inserted in the contact
should not exceed 15 sec., otherwise the alarm will be triggered.
Page 91 of 280
89
Unlocking and locking
Note
● If the vehicle is relocked and the alarm is activated without the volumet-
ric sensor function, relocking will activate the alarm with all its functions,
except the volumetric sensor. This function is reactivated when the alarm is
switched on again, unless it is deliberately switched off.
● If the alarm has been triggered by the volumetric sensor, this will be in-
dicated by a flashing of the indicator on the driver door. The flash is differ-
ent to the flash indicating the alarm is activated.
● The vibration of a mobile phone left inside the vehicle may cause the in-
terior monitoring alarm to trigger, as both sensors react to movements and
shakes inside the vehicle.
● If on activating the alarm, any door or the tailgate is open, only the
alarm will be activated. The interior monitoring and the anti-towing system
will only be activated once all the doors are closed (including the tailgate).
Safety FirstOperating InstructionsPractical TipsTechnical Specifications
Page 104 of 280
102Lights and visibility
For the sake of the environment
The heated rear window should be disconnected as soon as the glass is
demisted. By saving electrical power you can also save fuel.
Note
To avoid possible damage to the battery, an automatic temporary discon-
nection of this function is possible, coming back on when normal operating
conditions are re-established.
Hazard warning lights
The hazard warning lights are used to draw the attention of
other road users to your vehicle in emergencies.
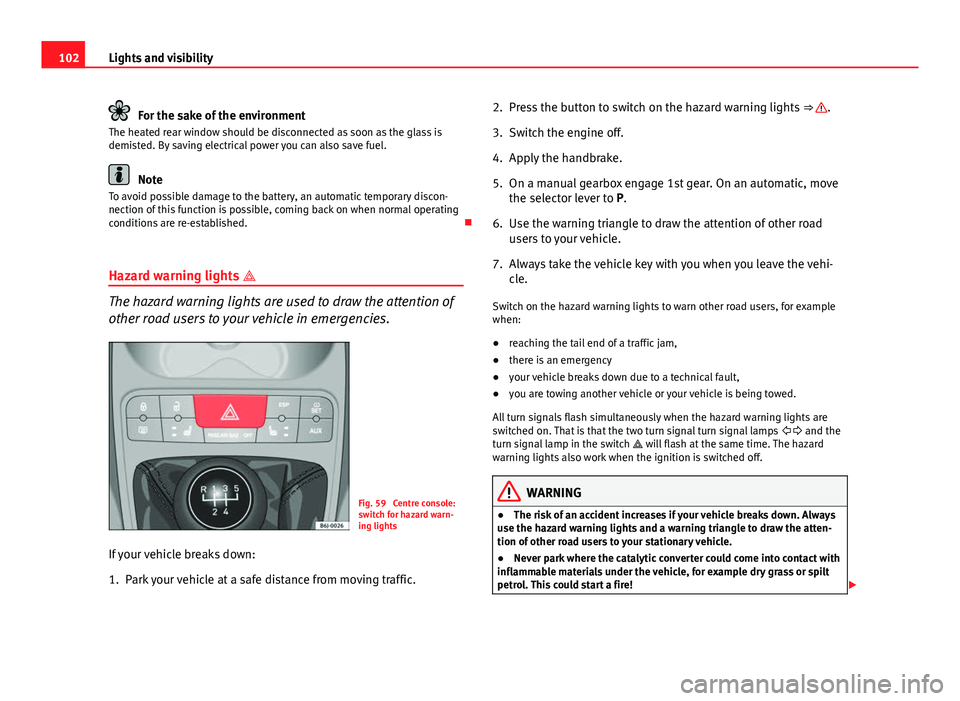
Fig. 59 Centre console:
switch for hazard warn-
ing lights
If your vehicle breaks down:
1. Park your vehicle at a safe distance from moving traffic. 2. Press the button to switch on the hazard warning lights
⇒
.
3. Switch the engine off.
4. Apply the handbrake.
5. On a manual gearbox engage 1st gear. On an automatic, move the selector lever to P.
6. Use the warning triangle to draw the attention of other road users to your vehicle.
7. Always take the vehicle key with you when you leave the vehi- cle.
Switch on the hazard warning lights to warn other road users, for example
when:
● reaching the tail end of a traffic jam,
● there is an emergency
● your vehicle breaks down due to a technical fault,
● you are towing another vehicle or your vehicle is being towed.
All turn signals flash simultaneously when the hazard warning lights are
switched on. That is that the two turn signal turn signal lamps and the
turn signal lamp in the switch will flash at the same time. The hazard
warning lights also work when the ignition is switched off.
WARNING
● The risk of an accident increases if your vehicle breaks down. Always
use the hazard warning lights and a warning triangle to draw the atten-
tion of other road users to your stationary vehicle.
● Never park where the catalytic converter could come into contact with
inflammable materials under the vehicle, for example dry grass or spilt
petrol. This could start a fire!
Page 145 of 280
143
Driving
Safety Electronic Stability Programme (ESP)*
ESP helps make driving safer in certain situations.
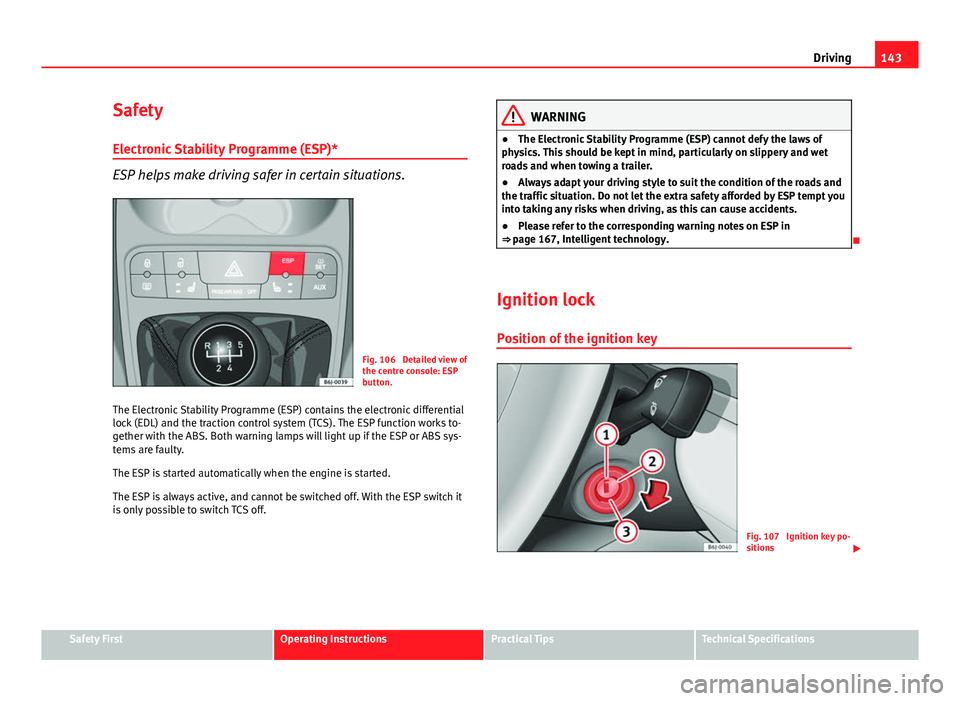
Fig. 106 Detailed view of
the centre console: ESP
button.
The Electronic Stability Programme (ESP) contains the electronic differential
lock (EDL) and the traction control system (TCS). The ESP function works to-
gether with the ABS. Both warning lamps will light up if the ESP or ABS sys-
tems are faulty.
The ESP is started automatically when the engine is started.
The ESP is always active, and cannot be switched off. With the ESP switch it
is only possible to switch TCS off.
WARNING
● The Electronic Stability Programme (ESP) cannot defy the laws of
physics. This should be kept in mind, particularly on slippery and wet
roads and when towing a trailer.
● Always adapt your driving style to suit the condition of the roads and
the traffic situation. Do not let the extra safety afforded by ESP tempt you
into taking any risks when driving, as this can cause accidents.
● Please refer to the corresponding warning notes on ESP in
⇒ page 167, Intelligent technology.
Ignition lock Position of the ignition key
Fig. 107 Ignition key po-
sitions
Safety FirstOperating InstructionsPractical TipsTechnical Specifications
Page 164 of 280
162Driving
Activation
The system is activated by engagement of the reverse gear. A brief acoustic
signal confirms the activation and correct function of the system.
Reverse gear
The distance warning will begin as soon as an obstacle is detected by the
system. The frequency of the bleeps emitted by the system will increase rap-
idly as the vehicle approaches the obstacle.
Within a short distance of about 30cm, a continuous signal sounds (stop
signal). The driver should not reverse any further.
Models with a factory-fitted towing bracket: When the vehicle is less than
0.35 m away from the obstacle the warning tone will sound continuously.
The driver should then not reverse any further.
The warning tone decreases by 30% after 3 seconds from the start of the
system.
Provided that it is not in continuous mode, the tone on the parking aid sys-
tem stops when it detects a wall parallel to the vehicle.
Trailer towing
For vehicles factory-fitted with a towing bar, the parking aid system will not
be activated by the engagement of the reverse gear when pulling a trailer,
as the trailer's electric connector will be plugged into the vehicle.
Possible faults
If a continuous beep sounds for some seconds when the reverse gear is en-
gaged, this indicates that there is a fault in the parking aid system.
If the fault continues until the ignition is turned off, the acoustic signal
warning of the fault will not be emitted every time the system is reactivated
(by engaging the reverse gear). Thus, the system ready indication will not
sound either. Have the fault repaired by an Authorised Service Centre as
soon as possible. If there is no ready signal or no acoustic warning signal, then the parking
aid loudspeaker is faulty and may not warn of obstacles.
To ensure that the system works properly, the sensors must be kept clean
and free of ice and snow.
WARNING
● The sensors have blind spots in which obstacles may not be detected.
● Always look out for small children and animals because the system
will not always detect them. Always pay attention when reversing to
avoid accidents.
● The parking aid is not a replacement for driver awareness. The driver
must take full responsibility for parking and other manoeuvres.
CAUTION
● Please note that low obstacles detected by the system may no longer be
registered by the sensors as the car moves closer, so the system will not
give any further warning. Certain kinds of obstacles (such as wire fences,
chains, thin posts or trailer draw bars, high kerbs or painted railings etc)
may not always be detected by the system, so there is a risk of damaging
the vehicle in such cases.
● In some cases, obstacles with uniform edges and bumps may not be de-
tected immediately by the system due to their geometry. Take special care
of this type of obstacle (corners, rectangular objects, etc.), as they can
cause damage to the vehicle.
● Be especially careful when manoeuvring into a corner between two per-
pendicular walls. Carefully watch the approach of the wall to the side of the
vehicle (using the mirrors).
● The parking aid system does not replace use of the mirrors for manoeu-
vres.
Page 171 of 280
169
Intelligent technology
TCS helps the vehicle to start moving, accelerate and climb a gradient in
slippery conditions where this may otherwise be difficult or even impossi-
ble.
The TCS is switched on automatically when the engine is started. If necessa-
ry, it may be turned on or off by briefly pushing the ESP button on the centre
console.
When the TCS is off, the warning lamp is lit. The TCS should normally be
left on. Only in exceptional circumstances, when the slipping of the wheels
is required, can they be disconnected using the ESP button, for example.
● With compact temporary spare wheel.
● When using the snow chains.
● When driving in deep snow or on loose surfaces
● When the vehicle is bogged-down, to free it by rocking.
The TCS should be switched on again as soon as possible.
WARNING
● It must be remembered that TCS cannot defy the laws of physics. This
should be kept in mind, particularly on slippery and wet roads and when
towing a trailer.
● Always adapt your driving style to suit the condition of the roads and
the traffic situation. Do not let the extra safety afforded by TCS tempt you
into taking any risks when driving, this can cause accidents.
CAUTION
● In order to ensure that TCS function correctly, all four wheels must be fit-
ted with the same tyres. Any differences in the rolling radius of the tyres can
cause the system to reduce engine power when this is not desired.
● Modifications to the vehicle (e.g. to the engine, the brake system, run-
ning gear or any components affecting the wheels and tyres) could affect
the efficiency of the ABS and TCS. XDS*
Driveshaft differential
When taking a bend, the driveshaft differential mechanism allows the outer
wheel to turn at a higher speed than the inner wheel. In this way, the wheel
that is turning faster (outer wheel) receives less drive torque than the inner
wheel. This may mean that in certain situations the torque delivered to the
inner wheel is too high, causing the wheels to spin. On the other hand, the
outer wheel is receiving a lower drive torque than it could transmit. This
causes an overall loss of lateral grip on the front axle, resulting in under-
steer or “lengthening” of the trajectory.
By using the ESP sensors and signals, the XDS system is able to detect and
correct this effect.
Through the ESP, the XDS brakes the inner wheel, thereby counteracting the
excess drive torque in this wheel. This means that the driver's desired tra-
jectory is much more precise,
The XDS system operates in combination with the ESP and is always active,
even when the traction control, TCS, is disconnected.
Electronic Stability Programme (ESP)* General notes
The Electronic Stability Programme increases the vehicle's
stability on the road.
The Electronic Stability Programme helps reduce the danger of skidding.
The Electronic Stability Programme (ESP) consists of ABS, EDL and TCS.
Safety FirstOperating InstructionsPractical TipsTechnical Specifications