fuel pressure Seat Ibiza ST 2012 Owner's manual
[x] Cancel search | Manufacturer: SEAT, Model Year: 2012, Model line: Ibiza ST, Model: Seat Ibiza ST 2012Pages: 282, PDF Size: 3.77 MB
Page 68 of 282
66Cockpit
ItemSymbolMeaning of control and warning
lampsFurther infor-mation
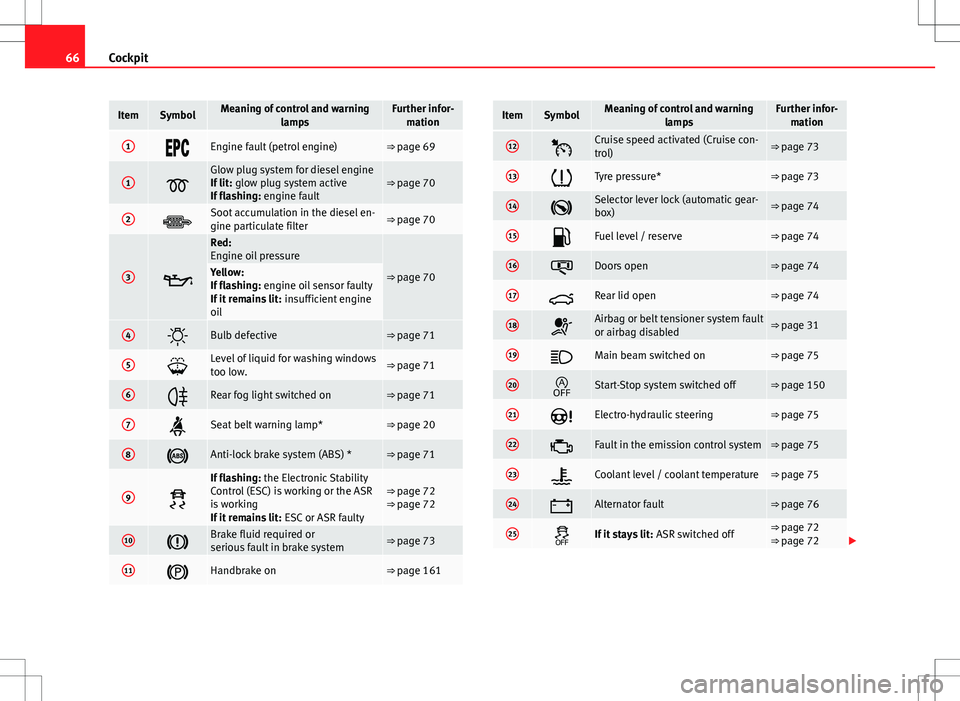
1Engine fault (petrol engine)⇒ page 69
1
Glow plug system for diesel engine
If lit: glow plug system active
If flashing: engine fault⇒ page 70
2Soot accumulation in the diesel en-
gine particulate filter⇒ page 70
3
Red:
Engine oil pressure
⇒ page 70Yellow:
If flashing: engine oil sensor faulty
If it remains lit: insufficient engine
oil
4Bulb defective⇒ page 71
5Level of liquid for washing windows
too low.⇒ page 71
6Rear fog light switched on⇒ page 71
7Seat belt warning lamp*⇒ page 20
8Anti-lock brake system (ABS) *⇒ page 71
9
If flashing: the Electronic Stability
Control (ESC) is working or the ASR
is working
If it remains lit: ESC or ASR faulty⇒ page 72
⇒ page 72
10Brake fluid required or
serious fault in brake system⇒ page 73
11Handbrake on⇒ page 161
ItemSymbolMeaning of control and warning
lampsFurther infor-mation
12Cruise speed activated (Cruise con-
trol)⇒ page 73
13Tyre pressure*⇒ page 73
14Selector lever lock (automatic gear-
box)⇒ page 74
15Fuel level / reserve⇒ page 74
16Doors open⇒ page 74
17Rear lid open⇒ page 74
18Airbag or belt tensioner system fault
or airbag disabled⇒ page 31
19Main beam switched on⇒ page 75
20Start-Stop system switched off⇒ page 150
21Electro-hydraulic steering⇒ page 75
22Fault in the emission control system⇒ page 75
23Coolant level / coolant temperature⇒ page 75
24Alternator fault⇒ page 76
25If it stays lit: ASR switched off⇒ page 72
⇒ page 72
Page 70 of 282
68Cockpit
WARNING
● Failure to observe control lamps and warning messages can result in
serious personal injury or damage to your vehicle.
● The risk of an accident increases if your vehicle breaks down. Use a
warning triangle to draw the attention of other road users in order to pre-
vent danger to third parties.
● The engine compartment is a dangerous area! Before you open the
bonnet to work on the engine or in the engine compartment, you must
switch the engine off and allow it to cool to reduce the risk of scalding or
other injuries. Read and observe the relevant warnings ⇒ page 200.
Note
● The appropriate control lamp for a fault will light up in vehicles without
warning or information messages in the display.
● In vehicles with warning or information texts on the screen, the appro-
priate control lamp for a fault will light up and a warning or information
message will also appear on the screen.
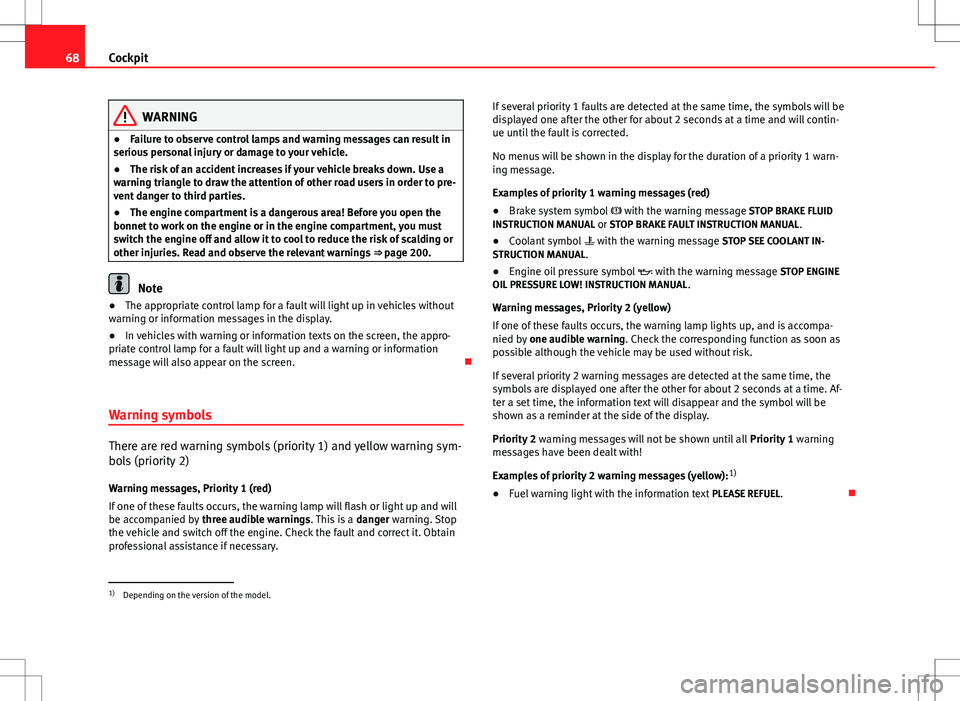
Warning symbols
There are red warning symbols (priority 1) and yellow warning sym-
bols (priority 2) Warning messages, Priority 1 (red)
If one of these faults occurs, the warning lamp will flash or light up and will
be accompanied by three audible warnings. This is a danger warning. Stop
the vehicle and switch off the engine. Check the fault and correct it. Obtain
professional assistance if necessary. If several priority 1 faults are detected at the same time, the symbols will be
displayed one after the other for about 2 seconds at a time and will contin-
ue until the fault is corrected.
No menus will be shown in the display for the duration of a priority 1 warn-
ing message.
Examples of priority 1 warning messages (red)
●
Brake system symbol with the warning message STOP BRAKE FLUID
INSTRUCTION MANUAL or STOP BRAKE FAULT INSTRUCTION MANUAL .
● Coolant symbol with the warning message STOP SEE COOLANT IN-
STRUCTION MANUAL.
● Engine oil pressure symbol with the warning message STOP ENGINE
OIL PRESSURE LOW! INSTRUCTION MANUAL .
Warning messages, Priority 2 (yellow)
If one of these faults occurs, the warning lamp lights up, and is accompa-
nied by one audible warning. Check the corresponding function as soon as
possible although the vehicle may be used without risk.
If several priority 2 warning messages are detected at the same time, the
symbols are displayed one after the other for about 2 seconds at a time. Af-
ter a set time, the information text will disappear and the symbol will be
shown as a reminder at the side of the display.
Priority 2 warning messages will not be shown until all Priority 1 warning
messages have been dealt with!
Examples of priority 2 warning messages (yellow): 1)
● Fuel warning light with the information text PLEASE REFUEL.
1)
Depending on the version of the model.
Page 72 of 282
70Cockpit
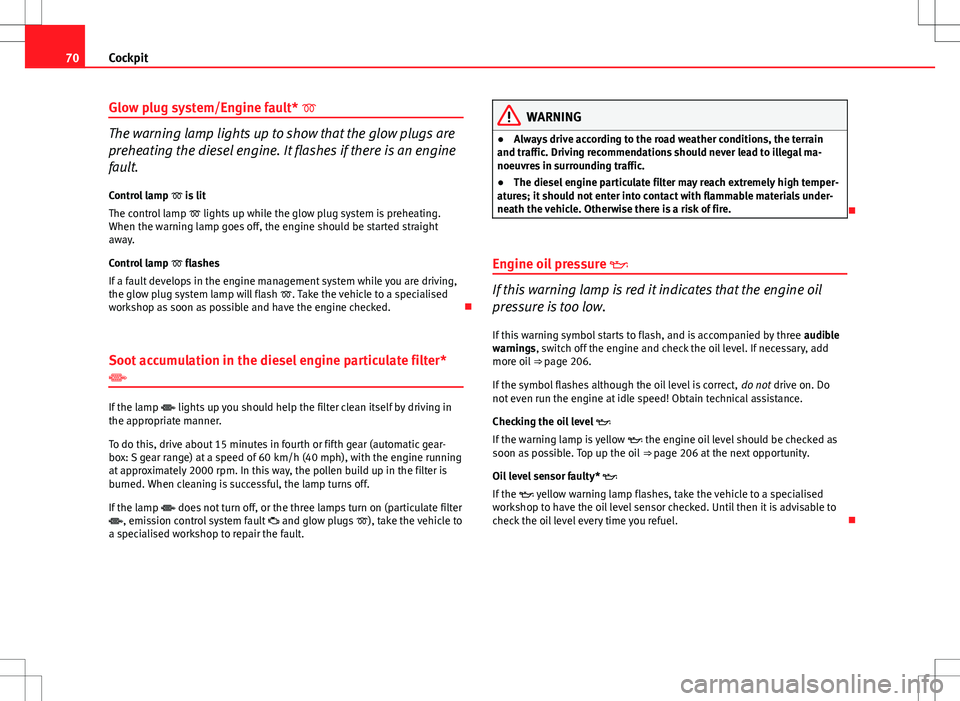
Glow plug system/Engine fault*
The warning lamp lights up to show that the glow plugs are
preheating the diesel engine. It flashes if there is an engine
fault.
Control lamp is lit
The control lamp lights up while the glow plug system is preheating.
When the warning lamp goes off, the engine should be started straight
away.
Control lamp flashes
If a fault develops in the engine management system while you are driving,
the glow plug system lamp will flash . Take the vehicle to a specialised
workshop as soon as possible and have the engine checked.
Soot accumulation in the diesel engine particulate filter*
If the lamp lights up you should help the filter clean itself by driving in
the appropriate manner.
To do this, drive about 15 minutes in fourth or fifth gear (automatic gear-
box: S gear range) at a speed of 60 km/h (40 mph), with the engine running
at approximately 2000 rpm. In this way, the pollen build up in the filter is
burned. When cleaning is successful, the lamp turns off.
If the lamp does not turn off, or the three lamps turn on (particulate filter
, emission control system fault and glow plugs ), take the vehicle to
a specialised workshop to repair the fault.
WARNING
● Always drive according to the road weather conditions, the terrain
and traffic. Driving recommendations should never lead to illegal ma-
noeuvres in surrounding traffic.
● The diesel engine particulate filter may reach extremely high temper-
atures; it should not enter into contact with flammable materials under-
neath the vehicle. Otherwise there is a risk of fire.
Engine oil pressure
If this warning lamp is red it indicates that the engine oil
pressure is too low.
If this warning symbol starts to flash, and is accompanied by three audible
warnings, switch off the engine and check the oil level. If necessary, add
more oil ⇒ page 206.
If the symbol flashes although the oil level is correct, do not drive on. Do
not even run the engine at idle speed! Obtain technical assistance.
Checking the oil level
If the warning lamp is yellow the engine oil level should be checked as
soon as possible. Top up the oil ⇒ page 206 at the next opportunity.
Oil level sensor faulty*
If the yellow warning lamp flashes, take the vehicle to a specialised
workshop to have the oil level sensor checked. Until then it is advisable to
check the oil level every time you refuel.
Page 76 of 282
74Cockpit
Tyre pressure adjustment
Following the modification to tyre pressure or changing one or more wheels,
the button ⇒ Fig. 40 must be kept pressed while the ignition is on until an
audible warning is heard.
If the wheels are under excessive load (for example, driving with a trailer or
heavy load), the tyre pressure must be increased to the recommended value
for a full load (see the sticker on the inside of the fuel flap). If the tyre moni-
tor system button is pressed down, the new tyre pressures are confirmed.
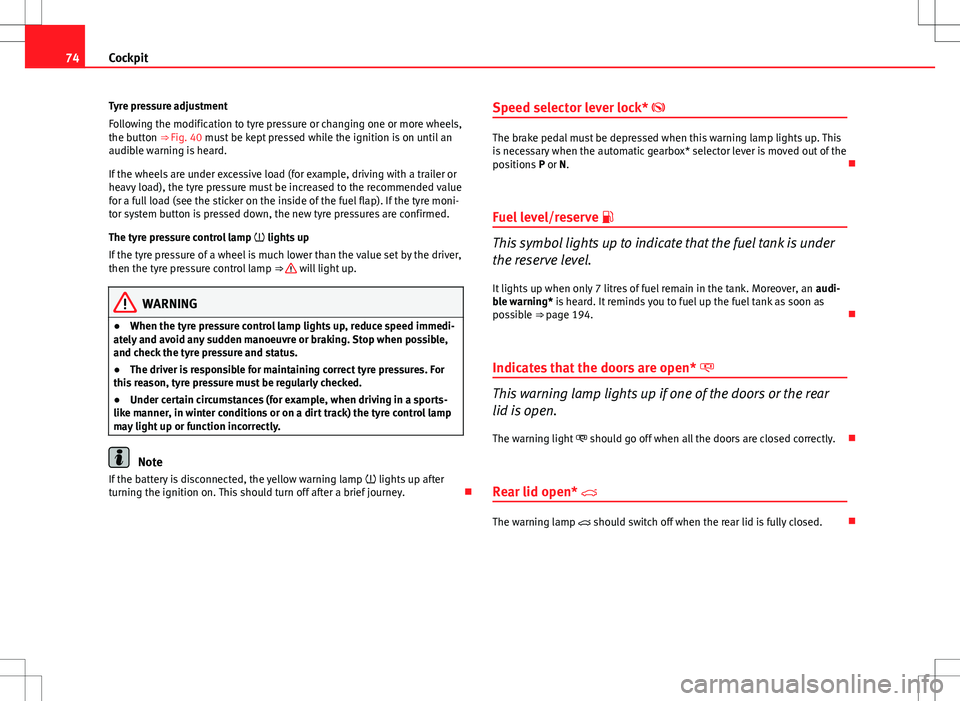
The tyre pressure control lamp lights up
If the tyre pressure of a wheel is much lower than the value set by the driver,
then the tyre pressure control lamp ⇒
will light up.
WARNING
● When the tyre pressure control lamp lights up, reduce speed immedi-
ately and avoid any sudden manoeuvre or braking. Stop when possible,
and check the tyre pressure and status.
● The driver is responsible for maintaining correct tyre pressures. For
this reason, tyre pressure must be regularly checked.
● Under certain circumstances (for example, when driving in a sports-
like manner, in winter conditions or on a dirt track) the tyre control lamp
may light up or function incorrectly.
Note
If the battery is disconnected, the yellow warning lamp lights up after
turning the ignition on. This should turn off after a brief journey. Speed selector lever lock*
The brake pedal must be depressed when this warning lamp lights up. This
is necessary when the automatic gearbox* selector lever is moved out of the
positions
P or N.
Fuel level/reserve
This symbol lights up to indicate that the fuel tank is under
the reserve level.
It lights up when only 7 litres of fuel remain in the tank. Moreover, an audi-
ble warning* is heard. It reminds you to fuel up the fuel tank as soon as
possible ⇒ page 194.
Indicates that the doors are open*
This warning lamp lights up if one of the doors or the rear
lid is open. The warning light should go off when all the doors are closed correctly.
Rear lid open*
The warning lamp should switch off when the rear lid is fully closed.
Page 131 of 282
129
Seats and storage compartments
Luggage compartment
Loading the luggage compartment
Loads in the luggage compartment should be safely se-
cured.
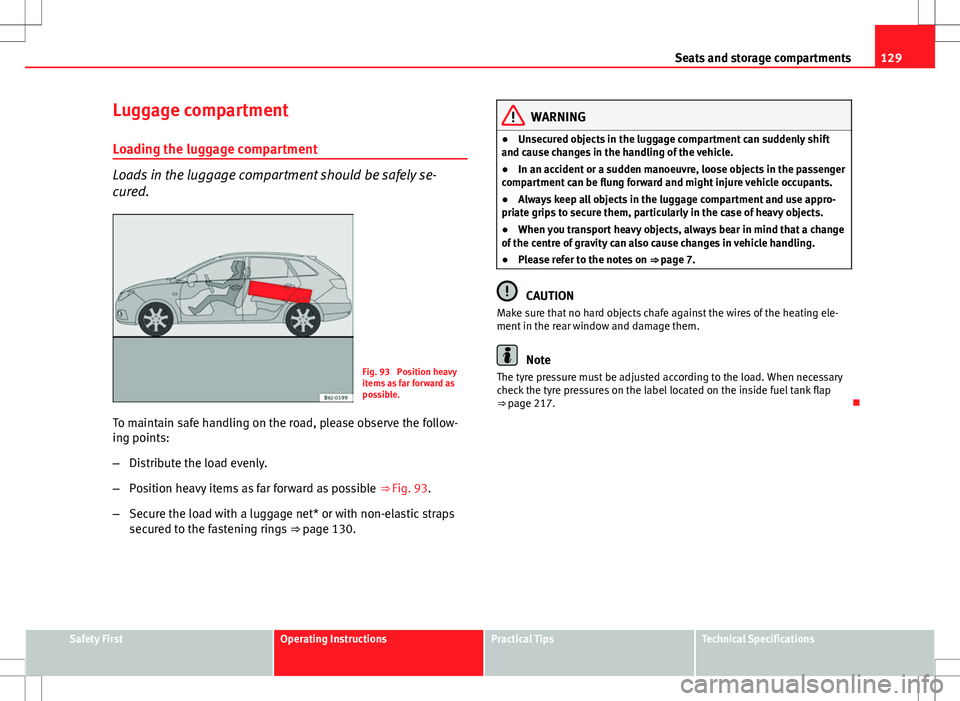
Fig. 93 Position heavy
items as far forward as
possible.
To maintain safe handling on the road, please observe the follow-
ing points:
– Distribute the load evenly.
– Position heavy items as far forward as possible ⇒ Fig. 93.
– Secure the load with a luggage net* or with non-elastic straps
secured to the fastening rings ⇒ page 130.
WARNING
● Unsecured objects in the luggage compartment can suddenly shift
and cause changes in the handling of the vehicle.
● In an accident or a sudden manoeuvre, loose objects in the passenger
compartment can be flung forward and might injure vehicle occupants.
● Always keep all objects in the luggage compartment and use appro-
priate grips to secure them, particularly in the case of heavy objects.
● When you transport heavy objects, always bear in mind that a change
of the centre of gravity can also cause changes in vehicle handling.
● Please refer to the notes on ⇒ page 7.
CAUTION
Make sure that no hard objects chafe against the wires of the heating ele-
ment in the rear window and damage them.
Note
The tyre pressure must be adjusted according to the load. When necessary
check the tyre pressures on the label located on the inside fuel tank flap
⇒ page 217.
Safety FirstOperating InstructionsPractical TipsTechnical Specifications
Page 149 of 282
147
Driving
Starting and stopping the engine Starting petrol engines
The engine can only be started using a genuine SEAT key
with its correct code.
– Move the gearbox lever to the neutral position and depress the
clutch pedal thoroughly and hold it in this position for the start-
er to turn the engine on.
– Turn the ignition key to the starting ⇒ page 145 position.
– Let go of the ignition key as soon as the engine starts; the start-
er motor must not run on with the engine.
After starting a very hot engine, you may need to slightly press down the ac-
celerator.
When starting a very cold engine, it may be a little noisy for the first few sec-
onds until oil pressure has built up in the hydraulic valve compensators.
This is quite normal, and no cause for concern.
If the engine does not start immediately, switch the starter off after 10 sec-
onds and try again after half a minute. If the engine still does not start, the
fuel pump fuse should be checked ⇒ page 231, Fuses.
WARNING
● Never start or run the engine in unventilated or closed rooms. The ex-
haust gases contain carbon monoxide, an odourless and colourless poi-
sonous gas. Risk of fatal accidents. Carbon monoxide can cause loss of
consciousness. It can also result in death.
● Never leave the vehicle unattended if the engine is running.
● Never use “cold start sprays”, they could explode or cause the engine
to run at high revs. Risk of injury.
CAUTION
● When the engine is cold, you should avoid high engine speeds, driving
at full throttle and over-loading the engine. Risk of engine damage.
● The vehicle should not be pushed or towed more than 50 metres to start
the engine. Unburnt fuel could enter the catalytic converter and damage it.
● Before attempting to push-start or tow a vehicle in order to start it, you
should first try to start it using the battery of another vehicle. Note and fol-
low the instructions in ⇒ page 248, Jump-starting.
For the sake of the environment
Do not warm-up the engine by running the engine with the vehicle station-
ary. Start off immediately, driving gently. This helps the engine reach oper-
ating temperature faster and reduces emissions.
Safety FirstOperating InstructionsPractical TipsTechnical Specifications
Page 150 of 282
148Driving
Starting diesel engines
The engine can only be started using a genuine SEAT key
with its correct code.
– Move the gearbox lever to the neutral position and depress the
clutch pedal thoroughly and hold it in this position for the start-
er to turn the engine on.
– Turn the ignition key to the starting position.
– Turn the ignition key to position ⇒ Fig. 107 2
. The warning
lamp will light for engine pre-heating.
– When the lamp turns off, turn the ignition key to position 3
to
start the engine. Do not press the accelerator.
– Let go of the ignition key as soon as the engine starts, the start-
er motor must not be allowed to run on with the engine.
When starting a very cold engine, it may be a little noisy for the first few sec-
onds until oil pressure has built up in the hydraulic valve compensators.
This is quite normal, and no cause for concern.
If there are problems starting the engine, see the ⇒ page 248.
Glow plug system for the diesel engine
To avoid unnecessary discharging of the battery, do not use any other major
electrical equipment while the glow plugs are pre-heating.
Start the engine as soon as the glow plug warning lamp goes out.
Starting the diesel engine after the fuel tank has been completely run dry
If the fuel tank has been completely run dry, it may take longer than normal
(up to one minute) to start a diesel engine after refuelling. This is because
the fuel system must eliminate air first.
WARNING
● Never start or run the engine in unventilated or closed rooms. The ex-
haust gases contain carbon monoxide, an odourless and colourless poi-
sonous gas. Risk of fatal accidents. Carbon monoxide can cause loss of
consciousness. It can also result in death.
● Never leave the vehicle unattended if the engine is running.
● Never use “cold start sprays”, they could explode or cause the engine
to run at high revs. Risk of injury.
CAUTION
● When the engine is cold, you should avoid high engine speeds, driving
at full throttle and over-loading the engine. Risk of engine damage.
● The vehicle should not be pushed or towed more than 50 metres to start
the engine. Unburnt fuel could enter the catalytic converter and damage it.
● Before attempting to push-start or tow a vehicle in order to start it, you
should first try to start it using the battery of another vehicle. Note and fol-
low the instructions in ⇒ page 248, Jump-starting.
For the sake of the environment
Do not warm-up the engine by running the engine with the vehicle station-
ary. You should drive off as soon as you start the engine. This helps the en-
gine reach operating temperature faster and reduces emissions.
Switching off the engine
– Stop the vehicle.
– Turn the ignition key to position ⇒ Fig. 107 1
.
After switching the engine off, the radiator fan may run on for up to 10 mi-
nutes. It is also possible that the fan turns itself on once more if the coolant
Page 176 of 282
174Driving and the environment
recommend that you have the thickness of your brake pads checked by a
Technical Service more frequently than recommended in the Maintenance
Programme.
If you drive with wet brakes, for example, after crossing areas of water, in
heavy rainfall or even after washing the vehicle, the effect of the brakes is
lessened as the brake discs are wet or even frozen (in winter). In this case
the brakes should be dried by pressing the brake pedal several times.
WARNING
Longer braking distances and faults in the brake system increase the risk
of accidents.
● New brake pads must be run in and do not have the correct friction
during the first 200 km (120 miles). However, the reduced braking ca-
pacity may be compensated by pressing on the brake pedal a little hard-
er. This also applies when the brake pads have to be changed further on.
● If brakes are wet or frozen, or if you are driving on roads which have
been salted, braking power may be lower than normal.
● On steep slopes, if brakes are excessively used, they will overheat.
Before driving down a long steep slope, it is advisable to reduce speed
and change down into a lower gear or range (depending on the type of
transmission). This makes use of engine braking and relieves the brakes.
● Never let the brakes “drag” by applying light pressure. Continuous
braking will cause the brakes to overheat and the braking distance will
increase. Apply and then release the brakes alternately.
● Never let the vehicle run with the engine switched off. The braking
distance is increased considerably when the brake servo is not active.
● If the brake fluid loses its viscosity and is subjected to heavy use, va-
pour bubbles can form in the brake system. This reduces the efficiency of
the brakes.
WARNING (Continued)
● Non-standard or damaged front spoilers could restrict the airflow to
the brakes and cause them to overheat. Before purchasing accessories
please observe the relevant instructions ⇒ page 190, Technical modifi-
cations.
● If a brake system circuit fails, the braking distance will be increased
considerably. Contact a specialised workshop immediately and avoid un-
necessary journeys.
Exhaust gas purification system Catalytic converter*
To maintain the useful life of the catalytic converter
– Use only unleaded petrol with petrol engines, as lead damages
the catalytic converter.
– Do not let the fuel get too low in the tank.
– For engine oil changes, do not replenish with too much engine
oil ⇒ page 206, Topping up engine oil .
– Never tow the vehicle to start it, use jump leads if necessary
⇒ page 248.
If you notice misfiring, uneven running or loss of power when the vehicle is
moving, reduce speed immediately and have the vehicle inspected at the
nearest specialised workshop. In general, the exhaust gas warning lamp
will light up when any of the described symptoms occur ⇒ page 65. If this
happens, unburnt fuel can enter the exhaust system and escape into the en-
vironment. The catalytic converter can also be damaged by overheating.
Page 179 of 282
177
Driving and the environment
Avoid short journeys
To reduce the consumption and emission of polluting exhaust gases, the
engine and the exhaust gas filtration systems should reach the optimum
service temperature.
With the engine cold, fuel consumption is proportionally higher. The engine
does not warm up and fuel consumption does not normalise until having
driven approximately four kilometres (2.5 miles). This is why we recommend
avoiding short trips whenever possible.
Maintain the correct tyre pressures
Bear in mind that keeping the tyres at an adequate pressure saves fuel. If
the tyre pressure is just one bar too low, fuel consumption can increase by
as much as 5%. Due to the greater rolling resistance, under-inflation also
increases tyre wear and impairs handling.
The tyre pressures should always be checked when the tyres are cold.
Do not use winter tyres all year round as they increase fuel consumption by
up to 10%.
Avoid unnecessary weight
Given that every kilo of extra weight will increase the fuel consumption, it is
advisable to always check the luggage compartment to make sure that no
unnecessary loads are being transported.
A roof rack is often left in place for the sake of convenience, even when it is
no longer needed. At a speed of 100-120 km/h (60-75 mph) your vehicle
will use about 12% more fuel as a result of the extra wind resistance caused
by the roof rack even when it is not in use.
Save electricity
The engine activates the alternator, which produces electricity. With the
need for electricity, fuel consumption is also increased. Because of this, al-
ways turn off electrical components when you do not need them. Examples
of components that use a lot of electricity are: the fan at high speeds, the
rear window heating or the seat heaters*.
Note
● If you vehicle has Start-Stop, it is not recommended to switch this func-
tion off.
● It is recommended to close the windows when driving at more than
60 km/h (40 mph)
● Do not drive with your foot resting on the clutch pedal, as the pressure
can make the plate spin, more fuel will be used and it can burn the clutch
plate lining, causing a serious fault.
● Do not hold the vehicle on a hill with the clutch, use the foot brake or
hand brake, using the latter to start. The fuel consumption will be lower and
you will prevent the clutch plate from being damaged.
● On descents, use the engine brake, changing to the gear that is more
suitable for the slope. The fuel consumption will be lower and the brakes
will not suffer.
Environmental friendliness
Environmental protection is a top priority in the design, choice of materials
and production of your new Seat.
Design measures for economical recycling
● Joints and connections designed for easy dismantling
● Modular construction to facilitate dismantling
● Increased use of single-grade materials
● Plastic parts and elastomers are marked in accordance with ISO 1043,
ISO 11469 and ISO 1629
Choice of materials
● Nearly all materials used can be recycled
● Similar types of plastics grouped together for easy recycling
● Recycled materials used in manufacture
Safety FirstOperating InstructionsPractical TipsTechnical Specifications
Page 181 of 282
179
Driving and the environment
If the trailer has a 7-pin plug you will need to use an adapter cable. This is
available in any Technical Service.
Trailer weight/drawbar load
Never exceed the authorised trailer weight. If you do not load the trailer up
to the maximum permitted trailer weight, you can then climb correspond-
ingly steeper slopes.
The maximum trailer weights listed are only applicable for altitudes up to
1000 m above sea level. With increasing altitude the engine power and
therefore the vehicle climbing ability are impaired because of the reduced
air density. The maximum trailer weight has to be reduced accordingly. The
weight of the vehicle and trailer combination must be reduced by 10% for
every further 1000 m (or part thereof). The gross combination weight is the
actual weight of the laden vehicle plus the actual weight of the laden trailer.
When possible, operate the trailer with the maximum permitted drawbar
load on the ball joint of the towing bracket, but do not exceed the specified
limit.
The figures for trailer weights and drawbar loads that are given on the data
plate of the towing bracket are for certification purposes only. The correct
figures for your specific model, which may be lower than these figures for
the towing bracket, are given in the vehicle documentation or in ⇒ chap-
ter Technical Data.
Distributing the load
Distribute loads in the trailer so that heavy objects are as near to the axle as
possible. Loads carried in the trailer must be secured to prevent them mov-
ing.
Tyre pressure
Set tyre pressure to the maximum permissible pressure shown on the stick-
er on the inside of the fuel tank flap. Set the tyre pressure of the trailer tyres
in accordance with the trailer manufacturer's recommendations. Exterior mirrors
Check whether you can see enough of the road behind the trailer with the
standard rear vision mirrors. If this is not the case, you should have addi-
tional exterior mirrors fitted. Both exterior mirrors should be mounted on
hinged extension brackets. Adjust the mirrors to give sufficient vision to the
rear.
WARNING
Never transport people in a trailer. This could result in fatal accidents.
Note
● Towing a trailer places additional demands on the vehicle. We recom-
mend additional services between the normal inspection intervals if the ve-
hicle is used frequently for towing a trailer.
● Find out whether special regulations apply to towing a trailer in your
country.
Ball coupling of towing bracket*
The ball coupling is provided with instructions on fitting and removing the
ball coupling of the towing bracket.
WARNING
The towing bracket ball coupling must be stored securely in the luggage
compartment to prevent them being flung through the vehicle and caus-
ing injury.
Note
● By law, the ball coupling must be removed if a trailer is not being towed
if it obscures the number plate.
Safety FirstOperating InstructionsPractical TipsTechnical Specifications