radio Seat Ibiza ST 2012 User Guide
[x] Cancel search | Manufacturer: SEAT, Model Year: 2012, Model line: Ibiza ST, Model: Seat Ibiza ST 2012Pages: 282, PDF Size: 3.77 MB
Page 129 of 282
127
Seats and storage compartments
Power socket in the luggage compartment*
Electrical equipment can be connected to the 12 volt power
socket.
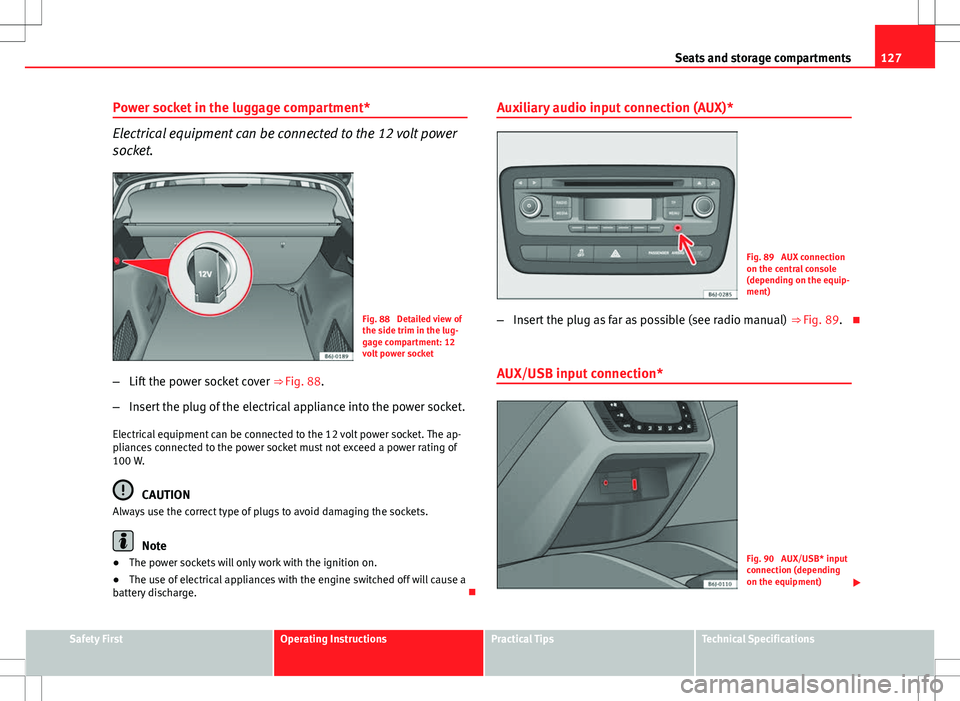
Fig. 88 Detailed view of
the side trim in the lug-
gage compartment: 12
volt power socket
– Lift the power socket cover ⇒ Fig. 88.
– Insert the plug of the electrical appliance into the power socket.
Electrical equipment can be connected to the 12 volt power socket. The ap-
pliances connected to the power socket must not exceed a power rating of
100 W.
CAUTION
Always use the correct type of plugs to avoid damaging the sockets.
Note
● The power sockets will only work with the ignition on.
● The use of electrical appliances with the engine switched off will cause a
battery discharge. Auxiliary audio input connection (AUX)*
Fig. 89 AUX connection
on the central console
(depending on the equip-
ment)
– Insert the plug as far as possible (see radio manual) ⇒ Fig. 89.
AUX/USB input connection*
Fig. 90 AUX/USB* input
connection (depending
on the equipment)
Safety FirstOperating InstructionsPractical TipsTechnical Specifications
Page 130 of 282
128Seats and storage compartments
For information concerning the use of this equipment, please see the Radio
handbook.
First-aid kit, warning triangle, fire
extinguisher Warning triangle*
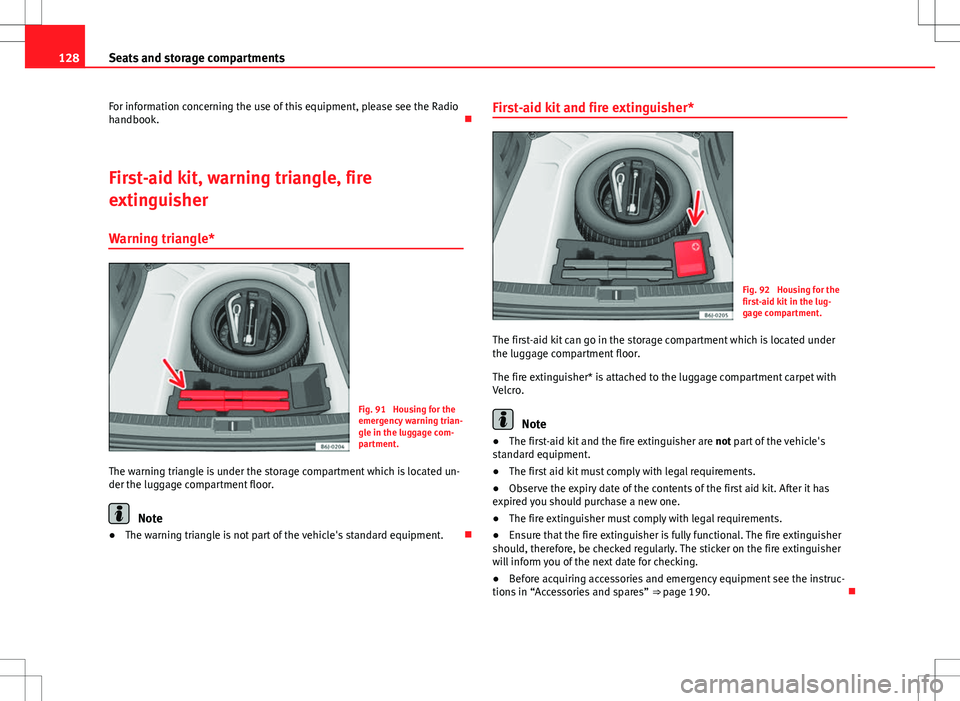
Fig. 91 Housing for the
emergency warning trian-
gle in the luggage com-
partment.
The warning triangle is under the storage compartment which is located un-
der the luggage compartment floor.
Note
● The warning triangle is not part of the vehicle's standard equipment. First-aid kit and fire extinguisher*
Fig. 92 Housing for the
first-aid kit in the lug-
gage compartment.
The first-aid kit can go in the storage compartment which is located under
the luggage compartment floor.
The fire extinguisher* is attached to the luggage compartment carpet with
Velcro.
Note
● The first-aid kit and the fire extinguisher are not part of the vehicle's
standard equipment.
● The first aid kit must comply with legal requirements.
● Observe the expiry date of the contents of the first aid kit. After it has
expired you should purchase a new one.
● The fire extinguisher must comply with legal requirements.
● Ensure that the fire extinguisher is fully functional. The fire extinguisher
should, therefore, be checked regularly. The sticker on the fire extinguisher
will inform you of the next date for checking.
● Before acquiring accessories and emergency equipment see the instruc-
tions in “Accessories and spares” ⇒ page 190.
Page 184 of 282
182Vehicle maintenance and cleaning
Care of the vehicle exterior
Automatic car washing tunnel
The vehicle paintwork is so durable that the vehicle can normally be washed
without problems in an automatic car wash tunnel. However, the paintwork
wear depends to a large extent on the kind of the car wash tunnel, the
brushes used, its water filtering and the type of cleaning and preservative
products.
Before going through a car wash, be sure to take the usual precautions such
as closing the windows and sunroof. There is nothing to note apart from
that.
If the vehicle has special accessories such as spoilers or a roof rack or two-
way radio aerial, etc., it is advisable to consult the car wash tunnel operator.
After washing, the brakes could take some time to respond as the brake
discs and pads could be wet, or even frozen in winter. Dry the brakes by
braking several times.
WARNING
Water, ice and salt on the brake system can reduce braking effectiveness.
Risk of accident.
CAUTION
Before putting the vehicle through the car washing tunnel, do not tighten
the aerial if it is folded because it can be damaged. Washing by hand
Vehicle washing
–
First soften the dirt and rinse it off with water.
– Clean your vehicle from top to bottom with a soft sponge, a
glove or a brush. Use very light pressure.
– Rinse the sponge or glove often with clean water.
– Special car shampoo should only be used for very stubborn dirt.
– Leave the wheels, sill panels etc. until last, using a different
sponge or glove.
– Rinse the vehicle thoroughly with water.
– Dry the vehicle surface gently with a chamois leather.
– In cold temperature, dry the rubber seals and their surfaces to
prevent them from freezing. Apply silicone spray to the rubber
seals.
After washing the vehicle
– After washing, avoid sudden and sharp braking. Dry the brakes
by braking several times.
Page 190 of 282
188Vehicle maintenance and cleaning
WARNING
Never clean the dash panel and the airbag module surface with cleaners
containing solvents. Solvents cause the surface to become porous. If the
airbag triggered, plastic parts could become detached and cause inju-
ries.
CAUTION
Cleaning products which contain solvents will damage the material.
Wooden trim cleaning*
– Clean the wooden trim with a water-moistened clean cloth.
– If this does not provide satisfactory results, use a gentle soap
solution.
CAUTION
Cleaning products which contain solvents will damage the material.
Cloth seat covers and fabric trim cleaning
Cloth seat covers and fabric trim on the doors, headlining etc. can be
cleaned with a special interior cleaner or with dry foam and a soft brush. Cleaning the radio and climate controls
To clean the radio and/or climate controls, use a soft damp cloth. For more
resistant dirt, a neutral soap solution may be used.
Leather cleaning*
Normal cleaning
– Moisten a cotton or woollen cloth with water and wipe over the
leather surfaces.
Cleaning stubborn stains
– More stubborn dirt can be removed using a mild soap solution
(pure liquid soap; two tablespoons diluted in one litre of water)
and a cloth.
– Do not let the water soak through the leather or soak into the
seams.
– Then wipe off with a soft, dry cloth.
Leather maintenance
– The leather should be treated twice a year with a special leath-
er-care product, available in your Technical Services.
– Apply these products very sparingly.
– Then wipe off with a soft, dry cloth.
SEAT does everything possible to preserve the genuine qualities of this nat-
ural product. Due to the natural properties of the specially selected hides
employed, the finished leather has a certain sensitivity to grease and dirt,
Page 193 of 282
191
Accessories, replacement of parts and modifications
WARNING
Incorrectly performed modifications or other kind of work on your vehicle
can lead to malfunctions and cause accidents.
Roof aerial*
The vehicle can be fitted with a foldable* and anti-theft* roof aerial, which
can be folded backwards, when, for example, going through an automatic
carwash.
To fold
Unscrew the aerial rod, tilting it backwards into a horizontal position and
then screw in again.
To return to working position
Continue in the reverse order to the previous instruction.
CAUTION
If an automatic car wash tunnel is used, before entering the tunnel, put the
aerial down parallel to the roof and do not tighten to avoid damage.
Mobile telephones and two-way radios
You will require an external aerial for mobile phones and
two-way radios. SEAT has approved for your vehicle the use of mobile telephones and two-
way radios providing under the following conditions: ●
The correct installation of an external aerial,
● transmitting power of maximum 10 watts.
The optimal reach of the equipment is only achieved with an external aerial.
First consult your Technical Service if you wish to use a mobile telephone or
a two-way radio with a transmitting power output in excess of 10 watts.
Here you will receive information concerning the technical possibilities for
retrofitting this equipment.
Mobile telephones and two-way radios should be only fitted by a special-
ised workshop, for example a SEAT dealership.
WARNING
● Always concentrate primarily on driving. If you are distracted while
driving you could have an accident.
● Never attach the telephone mountings to the surfaces covering the
airbag units or within the range of the airbags. There is a high danger of
injury if the airbag is triggered.
● Using your mobile telephones or two-way radios in the vehicle with-
out an external aerial, electromagnetic radiation in the vehicle could ex-
ceed authorised limits. This also may occur to external aerials that have
not been correctly installed.
CAUTION
Failure to consider the above-mentioned conditions could cause the elec-
tronics to malfunction. The most common causes of faults are:
● no external aerial,
● external aerial incorrectly installed,
● transmitting power output in excess of 10 watts.
Safety FirstOperating InstructionsPractical TipsTechnical Specifications
Page 194 of 282
192Accessories, replacement of parts and modifications
Note
Please observe the operating instructions of your mobile telephone/two-
way radio.
Fitting a towing bracket*
It is possible to fit a towing bracket to the rear of the vehicle.
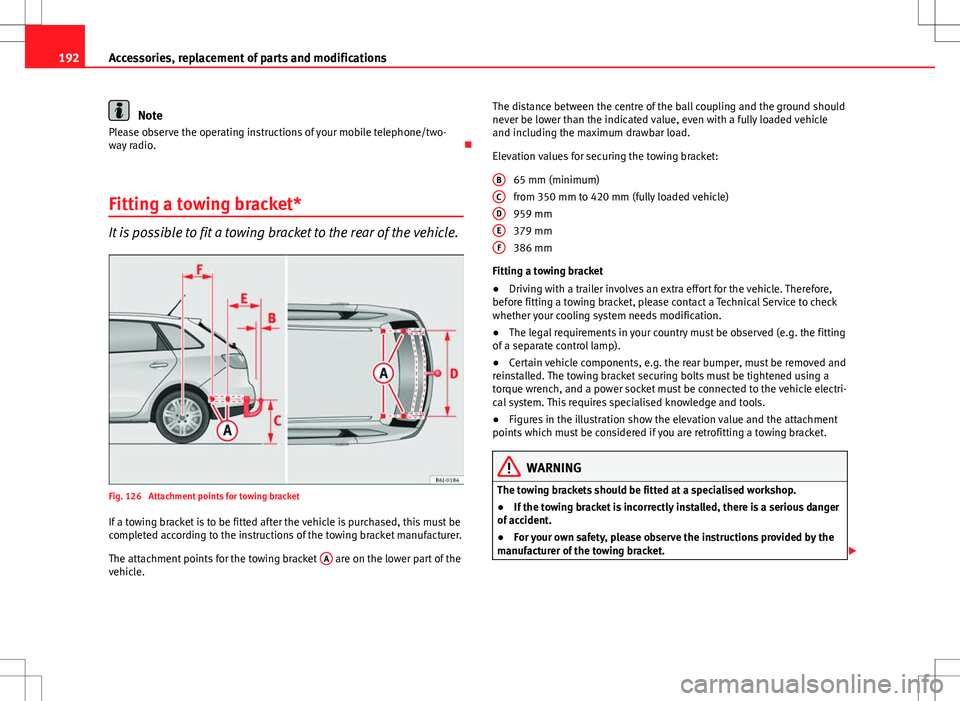
Fig. 126 Attachment points for towing bracket If a towing bracket is to be fitted after the vehicle is purchased, this must be
completed according to the instructions of the towing bracket manufacturer.
The attachment points for the towing bracket A
are on the lower part of the
vehicle. The distance between the centre of the ball coupling and the ground should
never be lower than the indicated value, even with a fully loaded vehicle
and including the maximum drawbar load.
Elevation values for securing the towing bracket:
65 mm (minimum)
from 350 mm to 420 mm (fully loaded vehicle)
959 mm
379 mm
386 mm
Fitting a towing bracket
● Driving with a trailer involves an extra effort for the vehicle. Therefore,
before fitting a towing bracket, please contact a Technical Service to check
whether your cooling system needs modification.
● The legal requirements in your country must be observed (e.g. the fitting
of a separate control lamp).
● Certain vehicle components, e.g. the rear bumper, must be removed and
reinstalled. The towing bracket securing bolts must be tightened using a
torque wrench, and a power socket must be connected to the vehicle electri-
cal system. This requires specialised knowledge and tools.
● Figures in the illustration show the elevation value and the attachment
points which must be considered if you are retrofitting a towing bracket.
WARNING
The towing brackets should be fitted at a specialised workshop.
● If the towing bracket is incorrectly installed, there is a serious danger
of accident.
● For your own safety, please observe the instructions provided by the
manufacturer of the towing bracket.
BCDEF
Page 199 of 282
197
Checking and refilling levels
The LPG tank ⇒ Fig. 129 in the spare wheel well has a capacity of 52.8 li-
tres. If the outside temperatures are very low, it may not be possible to com-
pletely fill the LPG tank.
Pump attachments
There are a variety of types of LPG pump, and the methods of use may vary.
Therefore, let the pump operator fill the tank when refuelling for the first
time or fill from another pump.
Noises when refuelling with LPG
When refuelling with LPG, noises may be heard. These noises are insignifi-
cant.
WARNING
Failure to refuel or handle LPG in the correct way could result in a fire,
cause an explosion or lead to injuries.
● LPG is a highly explosive and inflammable substance. It may cause
severe burns and other injury.
● Switch off the engine before refuelling.
● Always switch off mobile phones and any other radiophony applian-
ces, as electromagnetic waves may produce sparks and cause a fire.
● Do not remain in the vehicle while refuelling. If it is absolutely neces-
sary to enter the vehicle, close the door and touch a metal surface before
touching the attachment again. This will prevent the generation of static
electricity and any possible fires while refuelling.
● Small quantities of LPG may leak out after refuelling. If LPG comes in-
to contact with skin, there is a risk of freezing.
● Do not smoke and always keep bare flames away from the tank during
refuelling. Failure to do so may lead to an explosion.
Adapter for the liquid petroleum gas (LPG) filler neck
An adapter is required due to the existence of a range of
pumps with different nozzles.
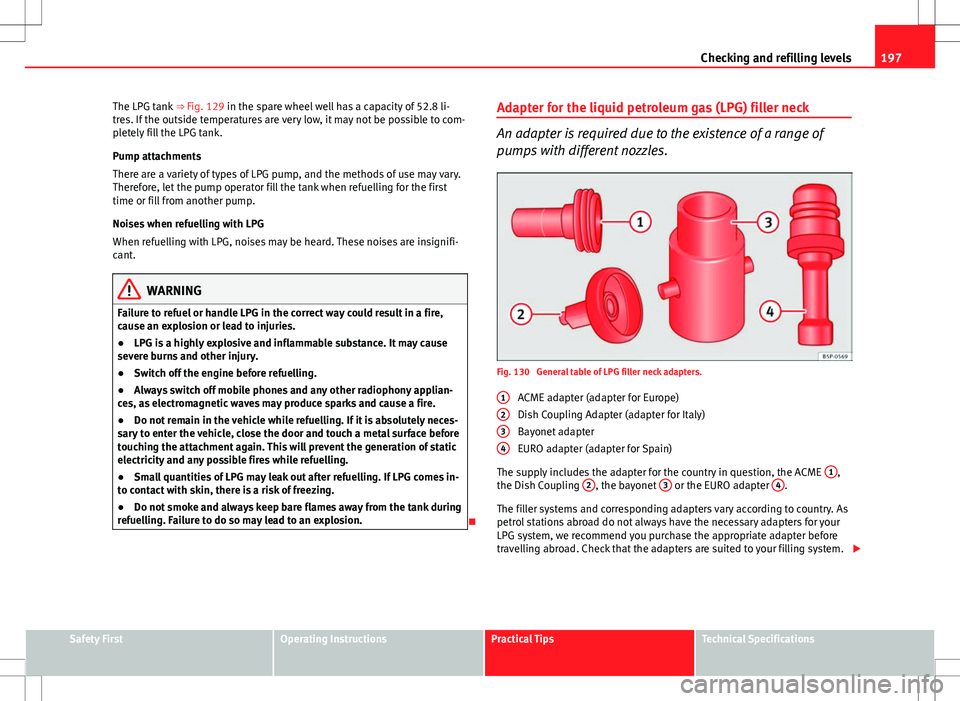
Fig. 130 General table of LPG filler neck adapters.
ACME adapter (adapter for Europe)
Dish Coupling Adapter (adapter for Italy)
Bayonet adapter
EURO adapter (adapter for Spain)
The supply includes the adapter for the country in question, the ACME 1
,
the Dish Coupling 2, the bayonet 3 or the EURO adapter 4.
The filler systems and corresponding adapters vary according to country. As
petrol stations abroad do not always have the necessary adapters for your
LPG system, we recommend you purchase the appropriate adapter before
travelling abroad. Check that the adapters are suited to your filling system.
1
234
Safety FirstOperating InstructionsPractical TipsTechnical Specifications
Page 235 of 282
233
If and when
NumberConsumerAmps42Horn2043Panoramic roof3044Windscreen wipers2045Heated rear window30
46Radio/Bluetooth/USB + AUX-In/DC-DC converter
for Start-Stop20
47Climatronic/autoclima/Diagnosis/Automatic
gearbox (ZSS lock)5
48Locking unit2549Front left window raiser2550Rear electric windows3051Right front window raiser2552Alarm15
53Electro-kinetic pump relay/bi-turbo fuel control
unit15
54Reverse light d)
/ Fog light/ Cornering light1555Transformer on15, 20 b)56Rear window wiper10
57Left daytime running light/ Turn signals/ Right
dipped beam/ Number plate light c)15
58Right daytime running light/ Rear fog light/ Left
dipped beam/ Main bean relay/ X Relay c)15
a)
If it is LPG.
b) Ampere rating according to motorisation.
c) If Start-Stop is installed, lights and/or AFS are automatically switched on.
d) Only with automatic transmission and/or Start-Stop, automatic light-on and/or AFS. Fuses below steering wheel in relay holder
PTC fuses
NumberConsumerAmps1Supplementary electrical heating using air402Supplementary electrical heating using air403Supplementary electrical heating using air40
AUX 1 Fuses
NumberConsumerAmps1Navigator, Bluetooth, MDI, radio control lever202Instrument panel/ESC Relay5
AUX 2 Fuses
NumberConsumerAmps1Headlight washer pump20
AUX 3 Fuses
NumberConsumerAmps1Trailer control unit152Trailer control unit203Trailer control unit20
Safety FirstOperating InstructionsPractical TipsTechnical Specifications
Page 278 of 282
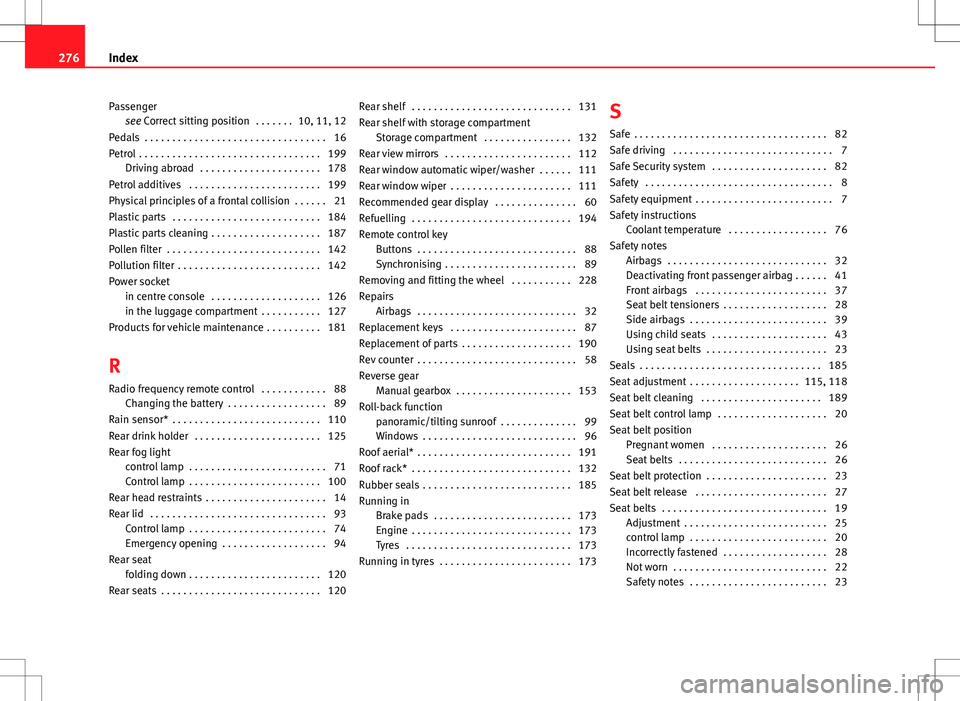
Passengersee Correct sitting position . . . . . . . 10, 11, 12
Pedals . . . . . . . . . . . . . . . . . . . . . . . . . . . . . . . . . 16
Petrol . . . . . . . . . . . . . . . . . . . . . . . . . . . . . . . . . 199 Driving abroad . . . . . . . . . . . . . . . . . . . . . . 178
Petrol additives . . . . . . . . . . . . . . . . . . . . . . . . 199
Physical principles of a frontal collision . . . . . . 21
Plastic parts . . . . . . . . . . . . . . . . . . . . . . . . . . . 184
Plastic parts cleaning . . . . . . . . . . . . . . . . . . . . 187
Pollen filter . . . . . . . . . . . . . . . . . . . . . . . . . . . . 142
Pollution filter . . . . . . . . . . . . . . . . . . . . . . . . . . 142
Power socket in centre console . . . . . . . . . . . . . . . . . . . . 126
in the luggage compartment . . . . . . . . . . . 127
Products for vehicle maintenance . . . . . . . . . . 181
R Radio frequency remote control . . . . . . . . . . . . 88 Changing the battery . . . . . . . . . . . . . . . . . . 89
Rain sensor* . . . . . . . . . . . . . . . . . . . . . . . . . . . 110
Rear drink holder . . . . . . . . . . . . . . . . . . . . . . . 125
Rear fog light control lamp . . . . . . . . . . . . . . . . . . . . . . . . . 71
Control lamp . . . . . . . . . . . . . . . . . . . . . . . . 100
Rear head restraints . . . . . . . . . . . . . . . . . . . . . . 14
Rear lid . . . . . . . . . . . . . . . . . . . . . . . . . . . . . . . . 93 Control lamp . . . . . . . . . . . . . . . . . . . . . . . . . 74
Emergency opening . . . . . . . . . . . . . . . . . . . 94
Rear seat folding down . . . . . . . . . . . . . . . . . . . . . . . . 120
Rear seats . . . . . . . . . . . . . . . . . . . . . . . . . . . . . 120 Rear shelf . . . . . . . . . . . . . . . . . . . . . . . . . . . . . 131
Rear shelf with storage compartment
Storage compartment . . . . . . . . . . . . . . . . 132
Rear view mirrors . . . . . . . . . . . . . . . . . . . . . . . 112
Rear window automatic wiper/washer . . . . . . 111
Rear window wiper . . . . . . . . . . . . . . . . . . . . . . 111
Recommended gear display . . . . . . . . . . . . . . . 60
Refuelling . . . . . . . . . . . . . . . . . . . . . . . . . . . . . 194
Remote control key Buttons . . . . . . . . . . . . . . . . . . . . . . . . . . . . . 88
Synchronising . . . . . . . . . . . . . . . . . . . . . . . . 89
Removing and fitting the wheel . . . . . . . . . . . 228
Repairs Airbags . . . . . . . . . . . . . . . . . . . . . . . . . . . . . 32
Replacement keys . . . . . . . . . . . . . . . . . . . . . . . 87
Replacement of parts . . . . . . . . . . . . . . . . . . . . 190
Rev counter . . . . . . . . . . . . . . . . . . . . . . . . . . . . . 58
Reverse gear Manual gearbox . . . . . . . . . . . . . . . . . . . . . 153
Roll-back function panoramic/tilting sunroof . . . . . . . . . . . . . . 99
Windows . . . . . . . . . . . . . . . . . . . . . . . . . . . . 96
Roof aerial* . . . . . . . . . . . . . . . . . . . . . . . . . . . . 191
Roof rack* . . . . . . . . . . . . . . . . . . . . . . . . . . . . . 132
Rubber seals . . . . . . . . . . . . . . . . . . . . . . . . . . . 185
Running in Brake pads . . . . . . . . . . . . . . . . . . . . . . . . . 173
Engine . . . . . . . . . . . . . . . . . . . . . . . . . . . . . 173
Tyres . . . . . . . . . . . . . . . . . . . . . . . . . . . . . . 173
Running in tyres . . . . . . . . . . . . . . . . . . . . . . . . 173 S
Safe . . . . . . . . . . . . . . . . . . . . . . . . . . . . . . . . . . . 82
Safe driving . . . . . . . . . . . . . . . . . . . . . . . . . . . . . 7
Safe Security system . . . . . . . . . . . . . . . . . . . . . 82
Safety . . . . . . . . . . . . . . . . . . . . . . . . . . . . . . . . . . 8
Safety equipment . . . . . . . . . . . . . . . . . . . . . . . . . 7
Safety instructions Coolant temperature . . . . . . . . . . . . . . . . . . 76
Safety notes Airbags . . . . . . . . . . . . . . . . . . . . . . . . . . . . . 32
Deactivating front passenger airbag . . . . . . 41
Front airbags . . . . . . . . . . . . . . . . . . . . . . . . 37
Seat belt tensioners . . . . . . . . . . . . . . . . . . . 28
Side airbags . . . . . . . . . . . . . . . . . . . . . . . . . 39
Using child seats . . . . . . . . . . . . . . . . . . . . . 43
Using seat belts . . . . . . . . . . . . . . . . . . . . . . 23
Seals . . . . . . . . . . . . . . . . . . . . . . . . . . . . . . . . . 185
Seat adjustment . . . . . . . . . . . . . . . . . . . . 115, 118
Seat belt cleaning . . . . . . . . . . . . . . . . . . . . . . 189
Seat belt control lamp . . . . . . . . . . . . . . . . . . . . 20
Seat belt position Pregnant women . . . . . . . . . . . . . . . . . . . . . 26
Seat belts . . . . . . . . . . . . . . . . . . . . . . . . . . . 26
Seat belt protection . . . . . . . . . . . . . . . . . . . . . . 23
Seat belt release . . . . . . . . . . . . . . . . . . . . . . . . 27
Seat belts . . . . . . . . . . . . . . . . . . . . . . . . . . . . . . 19 Adjustment . . . . . . . . . . . . . . . . . . . . . . . . . . 25
control lamp . . . . . . . . . . . . . . . . . . . . . . . . . 20
Incorrectly fastened . . . . . . . . . . . . . . . . . . . 28
Not worn . . . . . . . . . . . . . . . . . . . . . . . . . . . . 22
Safety notes . . . . . . . . . . . . . . . . . . . . . . . . . 23
276 Index
Page 279 of 282
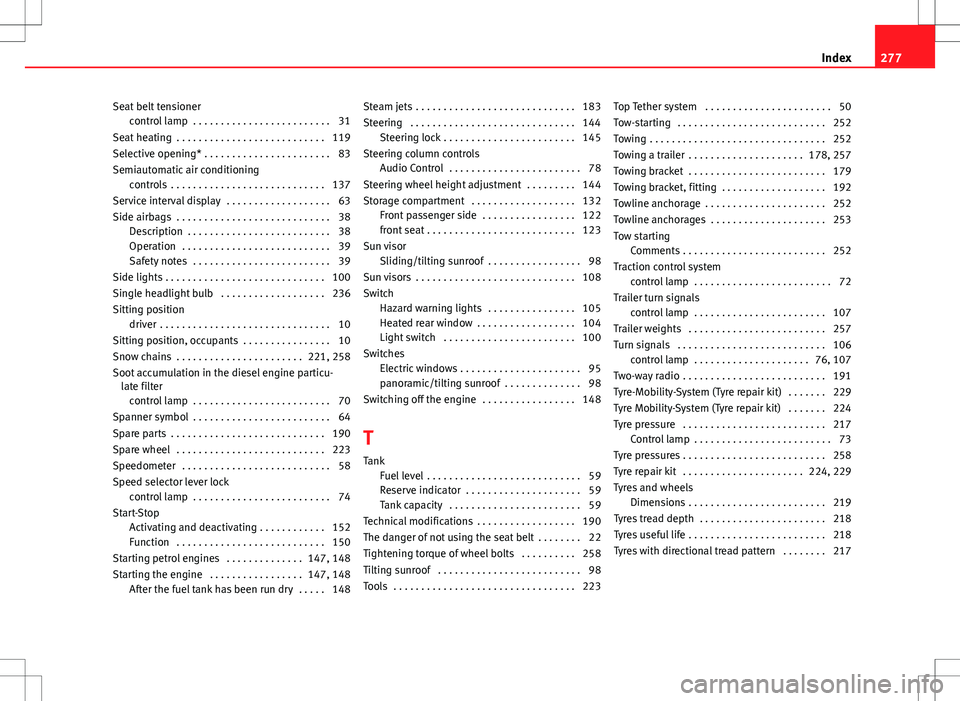
Seat belt tensionercontrol lamp . . . . . . . . . . . . . . . . . . . . . . . . . 31
Seat heating . . . . . . . . . . . . . . . . . . . . . . . . . . . 119
Selective opening* . . . . . . . . . . . . . . . . . . . . . . . 83
Semiautomatic air conditioning controls . . . . . . . . . . . . . . . . . . . . . . . . . . . . 137
Service interval display . . . . . . . . . . . . . . . . . . . 63
Side airbags . . . . . . . . . . . . . . . . . . . . . . . . . . . . 38 Description . . . . . . . . . . . . . . . . . . . . . . . . . . 38
Operation . . . . . . . . . . . . . . . . . . . . . . . . . . . 39
Safety notes . . . . . . . . . . . . . . . . . . . . . . . . . 39
Side lights . . . . . . . . . . . . . . . . . . . . . . . . . . . . . 100
Single headlight bulb . . . . . . . . . . . . . . . . . . . 236
Sitting position driver . . . . . . . . . . . . . . . . . . . . . . . . . . . . . . . 10
Sitting position, occupants . . . . . . . . . . . . . . . . 10
Snow chains . . . . . . . . . . . . . . . . . . . . . . . 221, 258
Soot accumulation in the diesel engine particu- late filter
control lamp . . . . . . . . . . . . . . . . . . . . . . . . . 70
Spanner symbol . . . . . . . . . . . . . . . . . . . . . . . . . 64
Spare parts . . . . . . . . . . . . . . . . . . . . . . . . . . . . 190
Spare wheel . . . . . . . . . . . . . . . . . . . . . . . . . . . 223
Speedometer . . . . . . . . . . . . . . . . . . . . . . . . . . . 58
Speed selector lever lock control lamp . . . . . . . . . . . . . . . . . . . . . . . . . 74
Start-Stop Activating and deactivating . . . . . . . . . . . . 152
Function . . . . . . . . . . . . . . . . . . . . . . . . . . . 150
Starting petrol engines . . . . . . . . . . . . . . 147, 148
Starting the engine . . . . . . . . . . . . . . . . . 147, 148 After the fuel tank has been run dry . . . . . 148 Steam jets . . . . . . . . . . . . . . . . . . . . . . . . . . . . . 183
Steering . . . . . . . . . . . . . . . . . . . . . . . . . . . . . . 144
Steering lock . . . . . . . . . . . . . . . . . . . . . . . . 145
Steering column controls Audio Control . . . . . . . . . . . . . . . . . . . . . . . . 78
Steering wheel height adjustment . . . . . . . . . 144
Storage compartment . . . . . . . . . . . . . . . . . . . 132 Front passenger side . . . . . . . . . . . . . . . . . 122
front seat . . . . . . . . . . . . . . . . . . . . . . . . . . . 123
Sun visor Sliding/tilting sunroof . . . . . . . . . . . . . . . . . 98
Sun visors . . . . . . . . . . . . . . . . . . . . . . . . . . . . . 108
Switch Hazard warning lights . . . . . . . . . . . . . . . . 105
Heated rear window . . . . . . . . . . . . . . . . . . 104
Light switch . . . . . . . . . . . . . . . . . . . . . . . . 100
Switches Electric windows . . . . . . . . . . . . . . . . . . . . . . 95
panoramic/tilting sunroof . . . . . . . . . . . . . . 98
Switching off the engine . . . . . . . . . . . . . . . . . 148
T Tank Fuel level . . . . . . . . . . . . . . . . . . . . . . . . . . . . 59
Reserve indicator . . . . . . . . . . . . . . . . . . . . . 59
Tank capacity . . . . . . . . . . . . . . . . . . . . . . . . 59
Technical modifications . . . . . . . . . . . . . . . . . . 190
The danger of not using the seat belt . . . . . . . . 22
Tightening torque of wheel bolts . . . . . . . . . . 258
Tilting sunroof . . . . . . . . . . . . . . . . . . . . . . . . . . 98
Tools . . . . . . . . . . . . . . . . . . . . . . . . . . . . . . . . . 223 Top Tether system . . . . . . . . . . . . . . . . . . . . . . . 50
Tow-starting . . . . . . . . . . . . . . . . . . . . . . . . . . . 252
Towing . . . . . . . . . . . . . . . . . . . . . . . . . . . . . . . . 252
Towing a trailer . . . . . . . . . . . . . . . . . . . . . 178, 257
Towing bracket . . . . . . . . . . . . . . . . . . . . . . . . . 179
Towing bracket, fitting . . . . . . . . . . . . . . . . . . . 192
Towline anchorage . . . . . . . . . . . . . . . . . . . . . . 252
Towline anchorages . . . . . . . . . . . . . . . . . . . . . 253
Tow starting
Comments . . . . . . . . . . . . . . . . . . . . . . . . . . 252
Traction control system control lamp . . . . . . . . . . . . . . . . . . . . . . . . . 72
Trailer turn signals control lamp . . . . . . . . . . . . . . . . . . . . . . . . 107
Trailer weights . . . . . . . . . . . . . . . . . . . . . . . . . 257
Turn signals . . . . . . . . . . . . . . . . . . . . . . . . . . . 106 control lamp . . . . . . . . . . . . . . . . . . . . . 76, 107
Two-way radio . . . . . . . . . . . . . . . . . . . . . . . . . . 191
Tyre-Mobility-System (Tyre repair kit) . . . . . . . 229
Tyre Mobility-System (Tyre repair kit) . . . . . . . 224
Tyre pressure . . . . . . . . . . . . . . . . . . . . . . . . . . 217 Control lamp . . . . . . . . . . . . . . . . . . . . . . . . . 73
Tyre pressures . . . . . . . . . . . . . . . . . . . . . . . . . . 258
Tyre repair kit . . . . . . . . . . . . . . . . . . . . . . 224, 229
Tyres and wheels Dimensions . . . . . . . . . . . . . . . . . . . . . . . . . 219
Tyres tread depth . . . . . . . . . . . . . . . . . . . . . . . 218
Tyres useful life . . . . . . . . . . . . . . . . . . . . . . . . . 218
Tyres with directional tread pattern . . . . . . . . 217
277
Index