gearbox Seat Ibiza ST 2012 Owner's manual
[x] Cancel search | Manufacturer: SEAT, Model Year: 2012, Model line: Ibiza ST, Model: Seat Ibiza ST 2012Pages: 282, PDF Size: 3.77 MB
Page 5 of 282
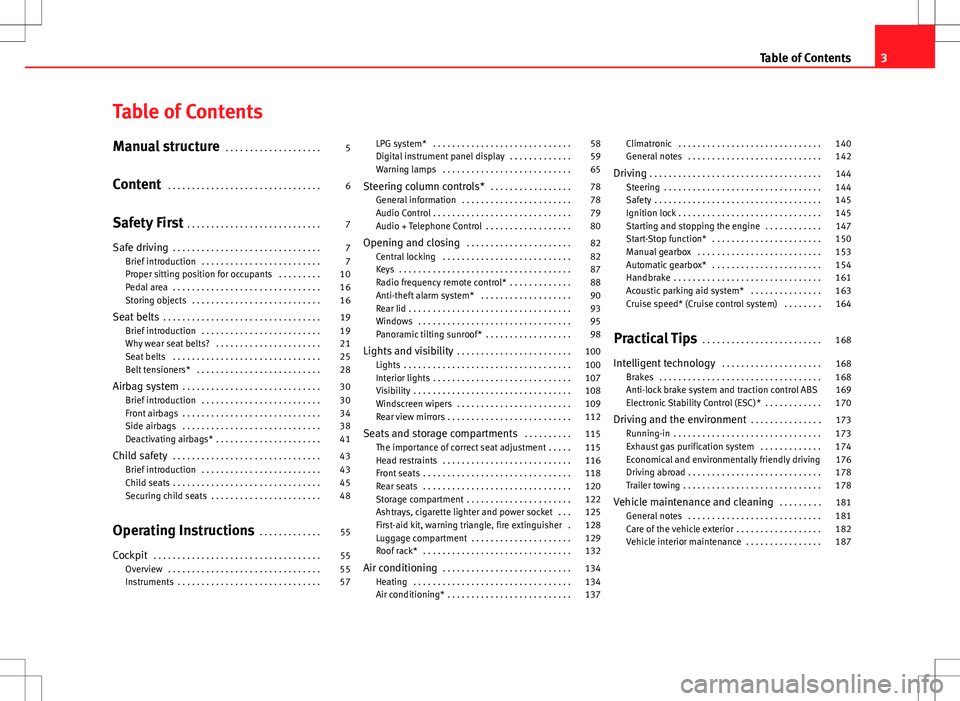
Table of Contents
Manual structure . . . . . . . . . . . . . . . . . . . . 5
Content . . . . . . . . . . . . . . . . . . . . . . . . . . . . . . . . 6
Safety First . . . . . . . . . . . . . . . . . . . . . . . . . . . . 7
Safe driving . . . . . . . . . . . . . . . . . . . . . . . . . . . . . . . 7
Brief introduction . . . . . . . . . . . . . . . . . . . . . . . . . 7
Proper sitting position for occupants . . . . . . . . . 10
Pedal area . . . . . . . . . . . . . . . . . . . . . . . . . . . . . . . 16
Storing objects . . . . . . . . . . . . . . . . . . . . . . . . . . . 16
Seat belts . . . . . . . . . . . . . . . . . . . . . . . . . . . . . . . . . 19
Brief introduction . . . . . . . . . . . . . . . . . . . . . . . . . 19
Why wear seat belts? . . . . . . . . . . . . . . . . . . . . . . 21
Seat belts . . . . . . . . . . . . . . . . . . . . . . . . . . . . . . . 25
Belt tensioners* . . . . . . . . . . . . . . . . . . . . . . . . . . 28
Airbag system . . . . . . . . . . . . . . . . . . . . . . . . . . . . . 30
Brief introduction . . . . . . . . . . . . . . . . . . . . . . . . . 30
Front airbags . . . . . . . . . . . . . . . . . . . . . . . . . . . . . 34
Side airbags . . . . . . . . . . . . . . . . . . . . . . . . . . . . . 38
Deactivating airbags* . . . . . . . . . . . . . . . . . . . . . . 41
Child safety . . . . . . . . . . . . . . . . . . . . . . . . . . . . . . . 43
Brief introduction . . . . . . . . . . . . . . . . . . . . . . . . . 43
Child seats . . . . . . . . . . . . . . . . . . . . . . . . . . . . . . . 45
Securing child seats . . . . . . . . . . . . . . . . . . . . . . . 48
Operating Instructions . . . . . . . . . . . . . 55
Cockpit . . . . . . . . . . . . . . . . . . . . . . . . . . . . . . . . . . . 55
Overview . . . . . . . . . . . . . . . . . . . . . . . . . . . . . . . . 55
Instruments . . . . . . . . . . . . . . . . . . . . . . . . . . . . . . 57 LPG system* . . . . . . . . . . . . . . . . . . . . . . . . . . . . . 58
Digital instrument panel display . . . . . . . . . . . . . 59
Warning lamps . . . . . . . . . . . . . . . . . . . . . . . . . . . 65
Steering column controls* . . . . . . . . . . . . . . . . . 78
General information . . . . . . . . . . . . . . . . . . . . . . . 78
Audio Control . . . . . . . . . . . . . . . . . . . . . . . . . . . . . 79
Audio + Telephone Control . . . . . . . . . . . . . . . . . . 80
Opening and closing . . . . . . . . . . . . . . . . . . . . . . 82
Central locking . . . . . . . . . . . . . . . . . . . . . . . . . . . 82
Keys . . . . . . . . . . . . . . . . . . . . . . . . . . . . . . . . . . . . 87
Radio frequency remote control* . . . . . . . . . . . . . 88
Anti-theft alarm system* . . . . . . . . . . . . . . . . . . . 90
Rear lid . . . . . . . . . . . . . . . . . . . . . . . . . . . . . . . . . . 93
Windows . . . . . . . . . . . . . . . . . . . . . . . . . . . . . . . . 95
Panoramic tilting sunroof* . . . . . . . . . . . . . . . . . . 98
Lights and visibility . . . . . . . . . . . . . . . . . . . . . . . . 100
Lights . . . . . . . . . . . . . . . . . . . . . . . . . . . . . . . . . . . 100
Interior lights . . . . . . . . . . . . . . . . . . . . . . . . . . . . . 107
Visibility . . . . . . . . . . . . . . . . . . . . . . . . . . . . . . . . . 108
Windscreen wipers . . . . . . . . . . . . . . . . . . . . . . . . 109
Rear view mirrors . . . . . . . . . . . . . . . . . . . . . . . . . . 112
Seats and storage compartments . . . . . . . . . . 115
The importance of correct seat adjustment . . . . . 115
Head restraints . . . . . . . . . . . . . . . . . . . . . . . . . . . 116
Front seats . . . . . . . . . . . . . . . . . . . . . . . . . . . . . . . 118
Rear seats . . . . . . . . . . . . . . . . . . . . . . . . . . . . . . . 120
Storage compartment . . . . . . . . . . . . . . . . . . . . . . 122
Ashtrays, cigarette lighter and power socket . . . 125
First-aid kit, warning triangle, fire extinguisher . 128
Luggage compartment . . . . . . . . . . . . . . . . . . . . . 129
Roof rack* . . . . . . . . . . . . . . . . . . . . . . . . . . . . . . . 132
Air conditioning . . . . . . . . . . . . . . . . . . . . . . . . . . . 134
Heating . . . . . . . . . . . . . . . . . . . . . . . . . . . . . . . . . 134
Air conditioning* . . . . . . . . . . . . . . . . . . . . . . . . . . 137 Climatronic . . . . . . . . . . . . . . . . . . . . . . . . . . . . . . 140
General notes . . . . . . . . . . . . . . . . . . . . . . . . . . . . 142
Driving . . . . . . . . . . . . . . . . . . . . . . . . . . . . . . . . . . . . 144
Steering . . . . . . . . . . . . . . . . . . . . . . . . . . . . . . . . . 144
Safety . . . . . . . . . . . . . . . . . . . . . . . . . . . . . . . . . . . 145
Ignition lock . . . . . . . . . . . . . . . . . . . . . . . . . . . . . . 145
Starting and stopping the engine . . . . . . . . . . . . 147
Start-Stop function* . . . . . . . . . . . . . . . . . . . . . . . 150
Manual gearbox . . . . . . . . . . . . . . . . . . . . . . . . . . 153
Automatic gearbox* . . . . . . . . . . . . . . . . . . . . . . . 154
Handbrake . . . . . . . . . . . . . . . . . . . . . . . . . . . . . . . 161
Acoustic parking aid system* . . . . . . . . . . . . . . . 163
Cruise speed* (Cruise control system) . . . . . . . . 164
Practical Tips . . . . . . . . . . . . . . . . . . . . . . . . . 168
Intelligent technology . . . . . . . . . . . . . . . . . . . . . 168
Brakes . . . . . . . . . . . . . . . . . . . . . . . . . . . . . . . . . . 168
Anti-lock brake system and traction control ABS 169
Electronic Stability Control (ESC)* . . . . . . . . . . . . 170
Driving and the environment . . . . . . . . . . . . . . . 173
Running-in . . . . . . . . . . . . . . . . . . . . . . . . . . . . . . . 173
Exhaust gas purification system . . . . . . . . . . . . . 174
Economical and environmentally friendly driving 176
Driving abroad . . . . . . . . . . . . . . . . . . . . . . . . . . . . 178
Trailer towing . . . . . . . . . . . . . . . . . . . . . . . . . . . . . 178
Vehicle maintenance and cleaning . . . . . . . . . 181
General notes . . . . . . . . . . . . . . . . . . . . . . . . . . . . 181
Care of the vehicle exterior . . . . . . . . . . . . . . . . . . 182
Vehicle interior maintenance . . . . . . . . . . . . . . . . 187
3
Table of Contents
Page 65 of 282
63
Cockpit
This may be deactivated by pressing the RESET
button. The speed may be
altered using the rocker switch B in steps of 5 km/h (mph) within 5 sec-
onds of the initial memory value.
WARNING
There could be black ice on the road surface even if the “snowflake sym-
bol” is not shown. For this reason you should not rely exclusively on this
display - Risk of accident!
Note
When the vehicle is stationary or travelling at very low speeds, the tempera-
ture displayed may be slightly higher than the actual outside temperature
as a result of the heat radiated from the engine.
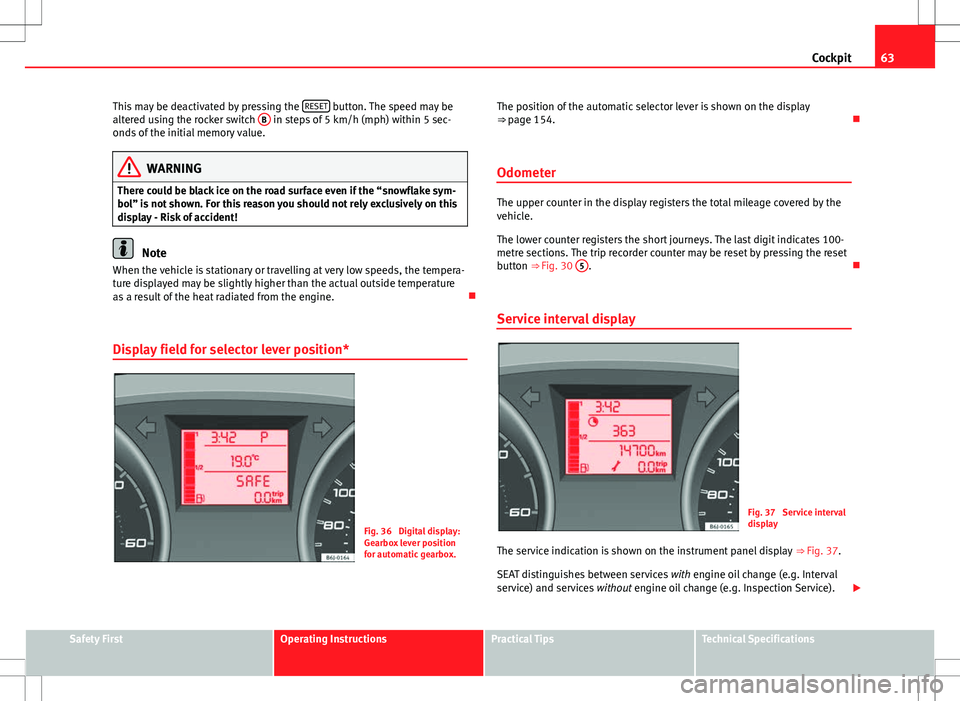
Display field for selector lever position*
Fig. 36 Digital display:
Gearbox lever position
for automatic gearbox. The position of the automatic selector lever is shown on the display
⇒ page 154.
Odometer
The upper counter in the display registers the total mileage covered by the
vehicle.
The lower counter registers the short journeys. The last digit indicates 100-
metre sections. The trip recorder counter may be reset by pressing the reset
button ⇒ Fig. 30 5
.
Service interval display
Fig. 37 Service interval
display
The service indication is shown on the instrument panel display ⇒ Fig. 37.
SEAT distinguishes between services with engine oil change (e.g. Interval
service) and services without engine oil change (e.g. Inspection Service).
Safety FirstOperating InstructionsPractical TipsTechnical Specifications
Page 71 of 282
69
Cockpit
Information messages displayed on the screen*
Message a)Description
SERVICEThe service interval has ended. Take the vehicle to a Techni-
cal Service.
IMMOBILIS-
ERImmobiliser system active. The vehicle will not start. Take
the vehicle to a Technical Service.
ERRORInstrument panel faulty. Take the vehicle to a Technical Serv-
ice.
CLEAN AIRFILTERWarning: Clean the air filter.
NO KEYWarning: Correct key cannot be found in the vehicle.KEY BATTERYWarning: Key battery low. Change the battery.
CLUTCHWarning: Press the clutch to start. In vehicles with manual
gearbox and Start/Stop system.
--> P/NWarning: Place the selector level in P/N to start. Only in ve-
hicles with automatic gearbox.
--> PWarning: Place the selector lever in position P to stop the
engine.
STARTINGWarning: The engine starts automatically. Start-Stop system
activated.
START MAN- UALLYWarning: The engine must be started manually. Start-Stop
system activated.
ERROR
START STOPWarning: Start-Stop system error.
START-STOP
IMPOSSIBLEWarning: Although the Start-Stop system is switched on, the
engine cannot be stopped automatically. Not all the neces-
sary conditions are met.
START-STOP ACTIVEWarning: Start-Stop system activated. Vehicle in Stop mode.
SWITCH OFFWarning: Start-Stop system activated. Switch off the ignition
when you leave the vehicle.
STOP TRANS-MISSIONTOO HOTWarning: Stop the engine. Gearbox overheated.
BRAKEWarning: To start the engine, press the brake pedal. Only in
vehicles with automatic gearbox.
COASTING FUNCTIONWarning: Coasting mode active. Transmission engaged. On-
ly in vehicles with automatic gearbox.
CHECK SAFE- LOCKNotification of central locking function activated.
a)These messages may vary according the version of the vehicle model.
Engine management*
This warning lamp monitors the engine management sys-
tem for petrol engines.
The warning lamp (Electronic Power Control) lights up when the ignition
is switched on to show that the lamp is working properly. It should go out
once the engine is started.
If there is a fault in the electronic engine management system while you are
driving, this warning lamp will light up. Stop the vehicle and seek technical
assistance.
Safety FirstOperating InstructionsPractical TipsTechnical Specifications
Page 76 of 282
74Cockpit
Tyre pressure adjustment
Following the modification to tyre pressure or changing one or more wheels,
the button ⇒ Fig. 40 must be kept pressed while the ignition is on until an
audible warning is heard.
If the wheels are under excessive load (for example, driving with a trailer or
heavy load), the tyre pressure must be increased to the recommended value
for a full load (see the sticker on the inside of the fuel flap). If the tyre moni-
tor system button is pressed down, the new tyre pressures are confirmed.
The tyre pressure control lamp lights up
If the tyre pressure of a wheel is much lower than the value set by the driver,
then the tyre pressure control lamp ⇒
will light up.
WARNING
● When the tyre pressure control lamp lights up, reduce speed immedi-
ately and avoid any sudden manoeuvre or braking. Stop when possible,
and check the tyre pressure and status.
● The driver is responsible for maintaining correct tyre pressures. For
this reason, tyre pressure must be regularly checked.
● Under certain circumstances (for example, when driving in a sports-
like manner, in winter conditions or on a dirt track) the tyre control lamp
may light up or function incorrectly.
Note
If the battery is disconnected, the yellow warning lamp lights up after
turning the ignition on. This should turn off after a brief journey. Speed selector lever lock*
The brake pedal must be depressed when this warning lamp lights up. This
is necessary when the automatic gearbox* selector lever is moved out of the
positions
P or N.
Fuel level/reserve
This symbol lights up to indicate that the fuel tank is under
the reserve level.
It lights up when only 7 litres of fuel remain in the tank. Moreover, an audi-
ble warning* is heard. It reminds you to fuel up the fuel tank as soon as
possible ⇒ page 194.
Indicates that the doors are open*
This warning lamp lights up if one of the doors or the rear
lid is open. The warning light should go off when all the doors are closed correctly.
Rear lid open*
The warning lamp should switch off when the rear lid is fully closed.
Page 107 of 282
105
Lights and visibility
For the sake of the environment
The heated rear window should be switched off as soon as the glass is dem-
isted. By saving electrical power you can also save fuel.
Note
To avoid possible damage to the battery, an automatic temporary discon-
nection of this function is possible, coming back on when normal operating
conditions are re-established.
Hazard warning lights
The hazard warning lights are used to draw the attention of
other road users to your vehicle in emergencies.
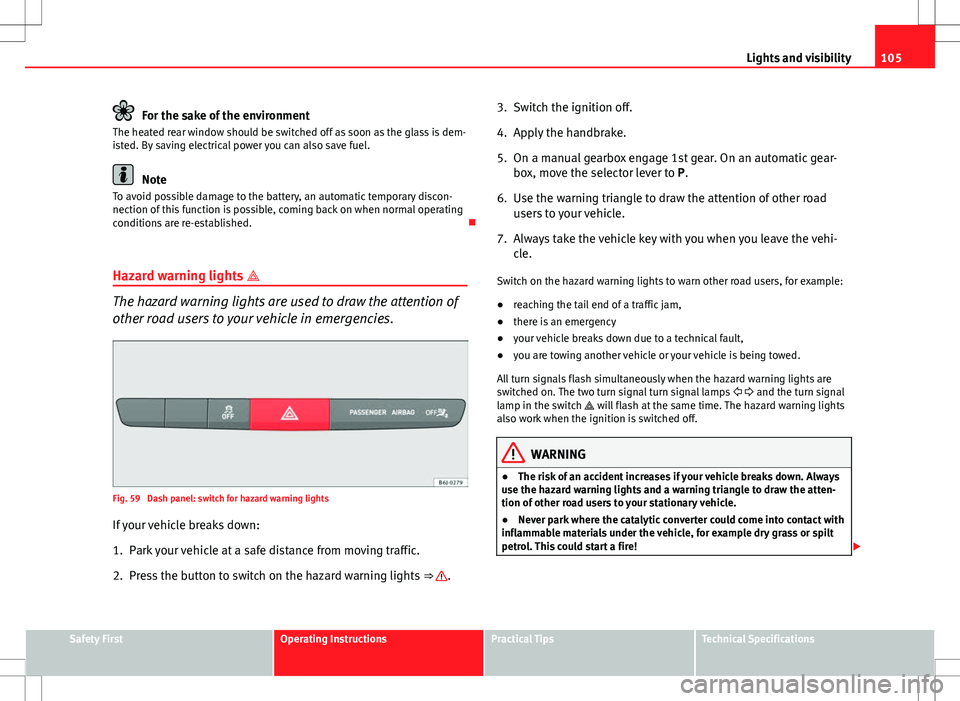
Fig. 59 Dash panel: switch for hazard warning lights
If your vehicle breaks down:
1. Park your vehicle at a safe distance from moving traffic.
2. Press the button to switch on the hazard warning lights ⇒
.3. Switch the ignition off.
4. Apply the handbrake.
5. On a manual gearbox engage 1st gear. On an automatic gear-
box, move the selector lever to P.
6. Use the warning triangle to draw the attention of other road users to your vehicle.
7. Always take the vehicle key with you when you leave the vehi- cle.
Switch on the hazard warning lights to warn other road users, for example:
● reaching the tail end of a traffic jam,
● there is an emergency
● your vehicle breaks down due to a technical fault,
● you are towing another vehicle or your vehicle is being towed.
All turn signals flash simultaneously when the hazard warning lights are
switched on. The two turn signal turn signal lamps and the turn signal
lamp in the switch will flash at the same time. The hazard warning lights
also work when the ignition is switched off.
WARNING
● The risk of an accident increases if your vehicle breaks down. Always
use the hazard warning lights and a warning triangle to draw the atten-
tion of other road users to your stationary vehicle.
● Never park where the catalytic converter could come into contact with
inflammable materials under the vehicle, for example dry grass or spilt
petrol. This could start a fire!
Safety FirstOperating InstructionsPractical TipsTechnical Specifications
Page 126 of 282
124Seats and storage compartments
Seat storage pocket*
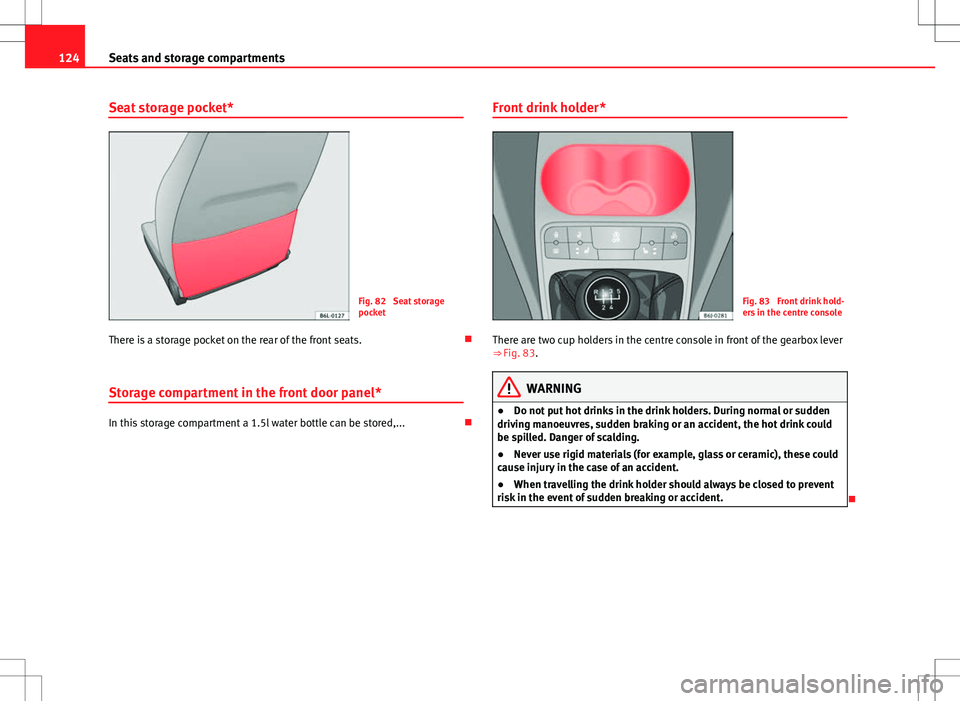
Fig. 82 Seat storage
pocket
There is a storage pocket on the rear of the front seats.
Storage compartment in the front door panel*
In this storage compartment a 1.5l water bottle can be stored,... Front drink holder*
Fig. 83 Front drink hold-
ers in the centre console
There are two cup holders in the centre console in front of the gearbox lever
⇒ Fig. 83.
WARNING
● Do not put hot drinks in the drink holders. During normal or sudden
driving manoeuvres, sudden braking or an accident, the hot drink could
be spilled. Danger of scalding.
● Never use rigid materials (for example, glass or ceramic), these could
cause injury in the case of an accident.
● When travelling the drink holder should always be closed to prevent
risk in the event of sudden breaking or accident.
Page 149 of 282
147
Driving
Starting and stopping the engine Starting petrol engines
The engine can only be started using a genuine SEAT key
with its correct code.
– Move the gearbox lever to the neutral position and depress the
clutch pedal thoroughly and hold it in this position for the start-
er to turn the engine on.
– Turn the ignition key to the starting ⇒ page 145 position.
– Let go of the ignition key as soon as the engine starts; the start-
er motor must not run on with the engine.
After starting a very hot engine, you may need to slightly press down the ac-
celerator.
When starting a very cold engine, it may be a little noisy for the first few sec-
onds until oil pressure has built up in the hydraulic valve compensators.
This is quite normal, and no cause for concern.
If the engine does not start immediately, switch the starter off after 10 sec-
onds and try again after half a minute. If the engine still does not start, the
fuel pump fuse should be checked ⇒ page 231, Fuses.
WARNING
● Never start or run the engine in unventilated or closed rooms. The ex-
haust gases contain carbon monoxide, an odourless and colourless poi-
sonous gas. Risk of fatal accidents. Carbon monoxide can cause loss of
consciousness. It can also result in death.
● Never leave the vehicle unattended if the engine is running.
● Never use “cold start sprays”, they could explode or cause the engine
to run at high revs. Risk of injury.
CAUTION
● When the engine is cold, you should avoid high engine speeds, driving
at full throttle and over-loading the engine. Risk of engine damage.
● The vehicle should not be pushed or towed more than 50 metres to start
the engine. Unburnt fuel could enter the catalytic converter and damage it.
● Before attempting to push-start or tow a vehicle in order to start it, you
should first try to start it using the battery of another vehicle. Note and fol-
low the instructions in ⇒ page 248, Jump-starting.
For the sake of the environment
Do not warm-up the engine by running the engine with the vehicle station-
ary. Start off immediately, driving gently. This helps the engine reach oper-
ating temperature faster and reduces emissions.
Safety FirstOperating InstructionsPractical TipsTechnical Specifications
Page 150 of 282
148Driving
Starting diesel engines
The engine can only be started using a genuine SEAT key
with its correct code.
– Move the gearbox lever to the neutral position and depress the
clutch pedal thoroughly and hold it in this position for the start-
er to turn the engine on.
– Turn the ignition key to the starting position.
– Turn the ignition key to position ⇒ Fig. 107 2
. The warning
lamp will light for engine pre-heating.
– When the lamp turns off, turn the ignition key to position 3
to
start the engine. Do not press the accelerator.
– Let go of the ignition key as soon as the engine starts, the start-
er motor must not be allowed to run on with the engine.
When starting a very cold engine, it may be a little noisy for the first few sec-
onds until oil pressure has built up in the hydraulic valve compensators.
This is quite normal, and no cause for concern.
If there are problems starting the engine, see the ⇒ page 248.
Glow plug system for the diesel engine
To avoid unnecessary discharging of the battery, do not use any other major
electrical equipment while the glow plugs are pre-heating.
Start the engine as soon as the glow plug warning lamp goes out.
Starting the diesel engine after the fuel tank has been completely run dry
If the fuel tank has been completely run dry, it may take longer than normal
(up to one minute) to start a diesel engine after refuelling. This is because
the fuel system must eliminate air first.
WARNING
● Never start or run the engine in unventilated or closed rooms. The ex-
haust gases contain carbon monoxide, an odourless and colourless poi-
sonous gas. Risk of fatal accidents. Carbon monoxide can cause loss of
consciousness. It can also result in death.
● Never leave the vehicle unattended if the engine is running.
● Never use “cold start sprays”, they could explode or cause the engine
to run at high revs. Risk of injury.
CAUTION
● When the engine is cold, you should avoid high engine speeds, driving
at full throttle and over-loading the engine. Risk of engine damage.
● The vehicle should not be pushed or towed more than 50 metres to start
the engine. Unburnt fuel could enter the catalytic converter and damage it.
● Before attempting to push-start or tow a vehicle in order to start it, you
should first try to start it using the battery of another vehicle. Note and fol-
low the instructions in ⇒ page 248, Jump-starting.
For the sake of the environment
Do not warm-up the engine by running the engine with the vehicle station-
ary. You should drive off as soon as you start the engine. This helps the en-
gine reach operating temperature faster and reduces emissions.
Switching off the engine
– Stop the vehicle.
– Turn the ignition key to position ⇒ Fig. 107 1
.
After switching the engine off, the radiator fan may run on for up to 10 mi-
nutes. It is also possible that the fan turns itself on once more if the coolant
Page 153 of 282
151
Driving
Start-Stop function conditions
● The driver seat belt must be buckled.
● The bonnet must be closed.
● The engine must be at operating temperature.
● The steering wheel must be straight.
● The vehicle must be on flat ground.
● The vehicle must not be in reverse.
● A trailer must not be connected.
● The temperature of the interior must be within the convenience limits
( AC
button should be selected).
● The windscreen de-mist function must be off.
● If in an increase in airflow is not requested.
● The temperature must not be set to HI or LO.
● The driver door must be closed.
● The diesel particulate filter must not be in regeneration mode, for diesel
engines.
● The battery charge must not be low for the next start.
● The battery temperature must be between –1°C and 55°C.
Start-Stop function interruption
In the following situations, the Start-Stop function will be interrupted and
the engine will automatically start:
● The vehicle starts moving.
● The brake pedal is pressed several times in a row.
● The battery has been discharged excessively.
● The Start-Stop System is manually deactivated.
● The windscreen de-mist function is turned on.
● The temperature of the interior exceeds the convenience limits ( AC
but-
ton).
● If the airflow is increased by more than 3 presses. ●
Temperature setting HI or LO is selected.
● The engine coolant temperature is insufficient.
● The alternator is faulty, for example the V-belt has ruptured.
● If any of the conditions described in the previous section are not fulfil-
led.
WARNING
Never allow the vehicle to move with the engine off for any reason. You
could lose control of your vehicle. This could cause an accident and seri-
ous injury.
● The brake servo does not work with the engine off. You need more
force to stop the vehicle.
● Power steering does not work when the engine is not running. That is
why it is much more difficult to turn the steering wheel.
● Turn off the Start-Stop system when driving through water (fording
streams, etc.).
Note
● For vehicles with the Start-Stop function and a manual gearbox, when
the engine is started, the clutch must be pressed.
● When the conditions for the Start-Stop function are not fulfilled, the in-
strument panel displays the Start-Stop indicator dimmed.
● If the steering wheel is turned more than 270°, it will not be possible to
start the vehicle again. To start the vehicle, straighten the steering wheel so
that it is turned less than 270°.
Safety FirstOperating InstructionsPractical TipsTechnical Specifications
Page 155 of 282
153
Driving
Manual gearbox
Driving with a manual gearbox
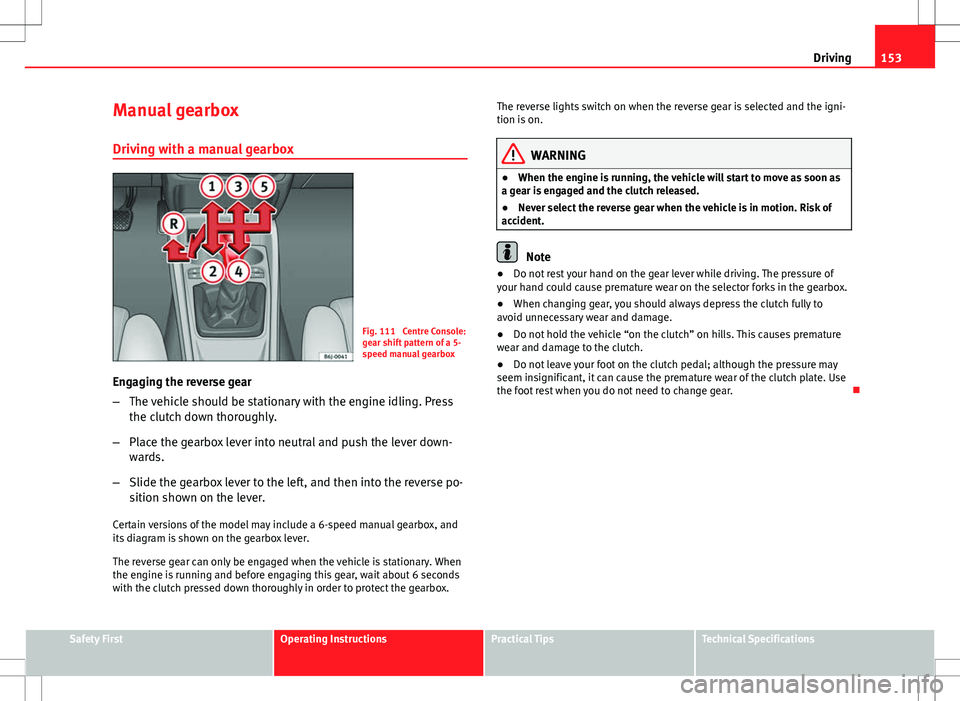
Fig. 111 Centre Console:
gear shift pattern of a 5-
speed manual gearbox
Engaging the reverse gear
– The vehicle should be stationary with the engine idling. Press
the clutch down thoroughly.
– Place the gearbox lever into neutral and push the lever down-
wards.
– Slide the gearbox lever to the left, and then into the reverse po-
sition shown on the lever.
Certain versions of the model may include a 6-speed manual gearbox, and
its diagram is shown on the gearbox lever.
The reverse gear can only be engaged when the vehicle is stationary. When
the engine is running and before engaging this gear, wait about 6 seconds
with the clutch pressed down thoroughly in order to protect the gearbox. The reverse lights switch on when the reverse gear is selected and the igni-
tion is on.
WARNING
● When the engine is running, the vehicle will start to move as soon as
a gear is engaged and the clutch released.
● Never select the reverse gear when the vehicle is in motion. Risk of
accident.
Note
● Do not rest your hand on the gear lever while driving. The pressure of
your hand could cause premature wear on the selector forks in the gearbox.
● When changing gear, you should always depress the clutch fully to
avoid unnecessary wear and damage.
● Do not hold the vehicle “on the clutch” on hills. This causes premature
wear and damage to the clutch.
● Do not leave your foot on the clutch pedal; although the pressure may
seem insignificant, it can cause the premature wear of the clutch plate. Use
the foot rest when you do not need to change gear.
Safety FirstOperating InstructionsPractical TipsTechnical Specifications