door lock Seat Ibiza ST 2015 Owner's manual
[x] Cancel search | Manufacturer: SEAT, Model Year: 2015, Model line: Ibiza ST, Model: Seat Ibiza ST 2015Pages: 248, PDF Size: 4.77 MB
Page 11 of 248
The essentials
How it works
Openin g and c
lo
sing
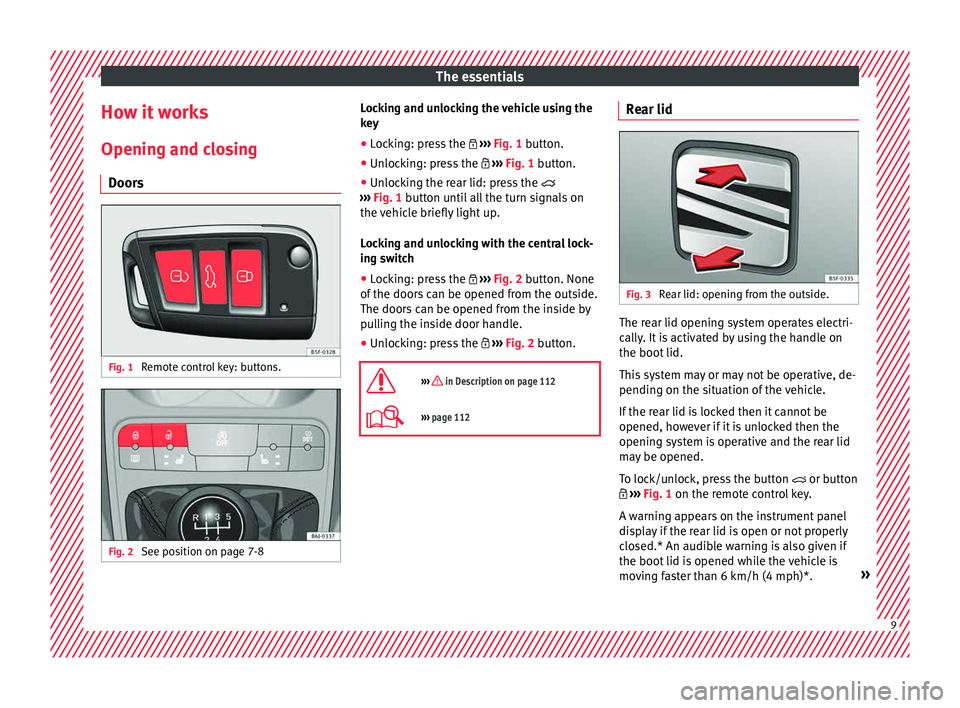
Doors Fig. 1
Remote control key: buttons. Fig. 2
See position on page 7-8 Locking and unlocking the vehicle using the
k
ey
● Loc
king: press the ›››
Fig. 1 button.
● Unlocking: press the ›››
Fig. 1 button.
● Unlocking the rear lid: press the
›››
Fig. 1 button until all the turn signals on
the vehicle briefly light up.
Locking and unlocking with the central lock-
ing switch
● Locking: press the ›››
Fig. 2 button. None
of the doors can be opened from the outside.
The doors can be opened from the inside by
pulling the inside door handle.
● Unlocking: press the ›››
Fig. 2 button.
››› in Description on page 112
››› page 112 Rear lid
Fig. 3
Rear lid: opening from the outside. The rear lid opening system operates electri-
c
al
ly
. It is activated by using the handle on
the boot lid.
This system may or may not be operative, de-
pending on the situation of the vehicle.
If the rear lid is locked then it cannot be
opened, however if it is unlocked then the
opening system is operative and the rear lid
may be opened.
To lock/unlock, press the button or button
››› Fig. 1 on the remote control key.
A warning appears on the instrument panel
display if the rear lid is open or not properly
closed.* An audible warning is also given if
the boot lid is opened while the vehicle is
moving faster than 6 km/h (4 mph)*. » 9
Page 24 of 248
The essentials
Turn signal and main beam lever Fig. 31
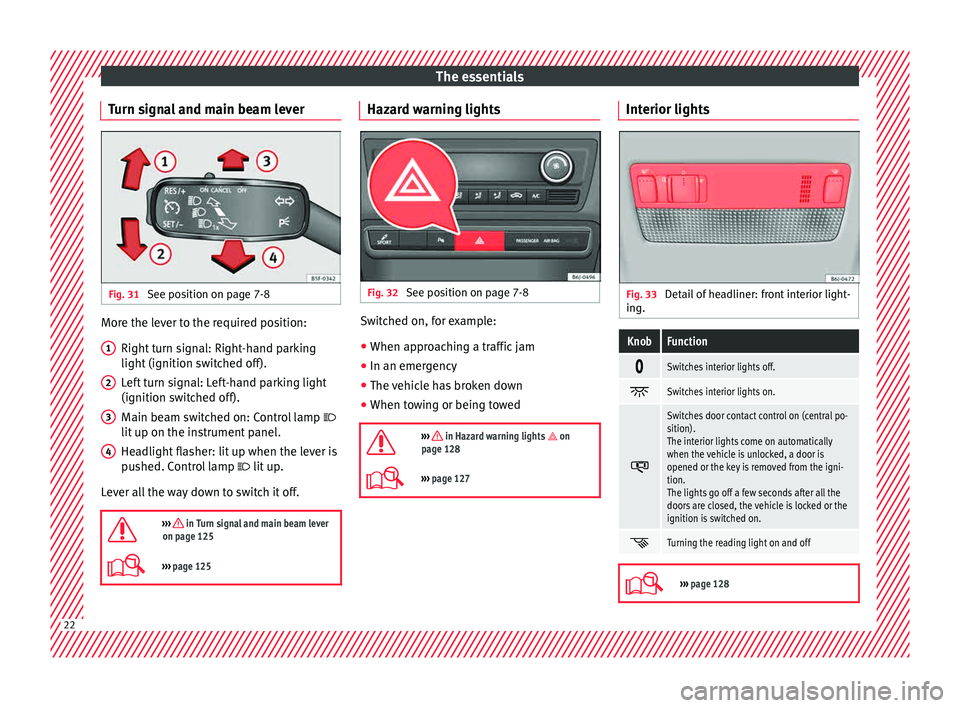
See position on page 7-8 More the lever to the required position:
Right t
urn s
ignal: Right-hand parking
light (ignition switched off).
Left turn signal: Left-hand parking light
(ignition switched off).
Main beam switched on: Control lamp
lit up on the instrument panel.
Headlight flasher: lit up when the lever is
pushed. Control lamp lit up.
Lever all the way down to switch it off.
››› in Turn signal and main beam lever
on page 125
››› page 125 1
2
3
4 Hazard warning lights
Fig. 32
See position on page 7-8 Switched on, for example:
● When approaching a traffic jam
● In an emergency
● The vehicle has broken down
● When towing or being towed
››› in Hazard warning lights on
page 128
››› page 127 Interior lights
Fig. 33
Detail of headliner: front interior light-
in g.
KnobFunction
Switches interior lights off.
Switches interior lights on.
Switches door contact control on (central po-
sition).
The interior lights come on automatically
when the vehicle is unlocked, a door is
opened or the key is removed from the igni-
tion.
The lights go off a few seconds after all the
doors are closed, the vehicle is locked or the
ignition is switched on.
Turning the reading light on and off
›››
page 128 22
Page 27 of 248
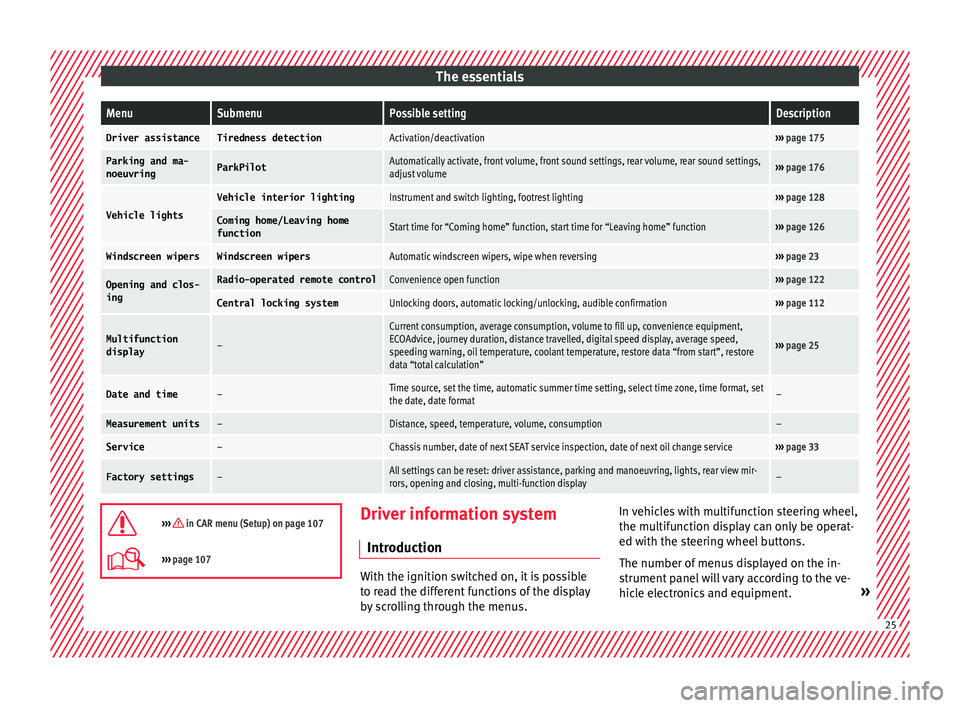
The essentialsMenuSubmenuPossible settingDescription
Driver assistanceTiredness detectionActivation/deactivation›››
page 175
Parking and ma-
noeuvringParkPilotAutomatically activate, front volume, front sound settings, rear volume, rear sound settings,
adjust volume››› page 176
Vehicle lights
Vehicle interior lightingInstrument and switch lighting, footrest lighting››› page 128
Coming home/Leaving home
functionStart time for “Coming home” function, start time for “Leaving home” function››› page 126
Windscreen wipersWindscreen wipersAutomatic windscreen wipers, wipe when reversing››› page 23
Opening and clos-
ingRadio-operated remote controlConvenience open function››› page 122
Central locking systemUnlocking doors, automatic locking/unlocking, audible confirmation››› page 112
Multifunction
display–
Current consumption, average consumption, volume to fill up, convenience equipment,
ECOAdvice, journey duration, distance travelled, digital speed display, average speed,
speeding warning, oil temperature, coolant temperature, restore data “from start”, restore
data “total calculation”
››› page 25
Date and time–Time source, set the time, automatic summer time setting, select time zone, time format, set
the date, date format–
Measurement units–Distance, speed, temperature, volume, consumption–
Service–Chassis number, date of next SEAT service inspection, date of next oil change service››› page 33
Factory settings–All settings can be reset: driver assistance, parking and manoeuvring, lights, rear view mir-
rors, opening and closing, multi-function display–
››› in CAR menu (Setup) on page 107
›››
page 107 Driver information system
Intr oduction With the ignition switched on, it is possible
to r
e
ad the different functions of the display
by scrolling through the menus. In vehicles with multifunction steering wheel,
the multif
u
nction display can only be operat-
ed with the steering wheel buttons.
The number of menus displayed on the in-
strument panel will vary according to the ve-
hicle electronics and equipment. » 25
Page 38 of 248
The essentials
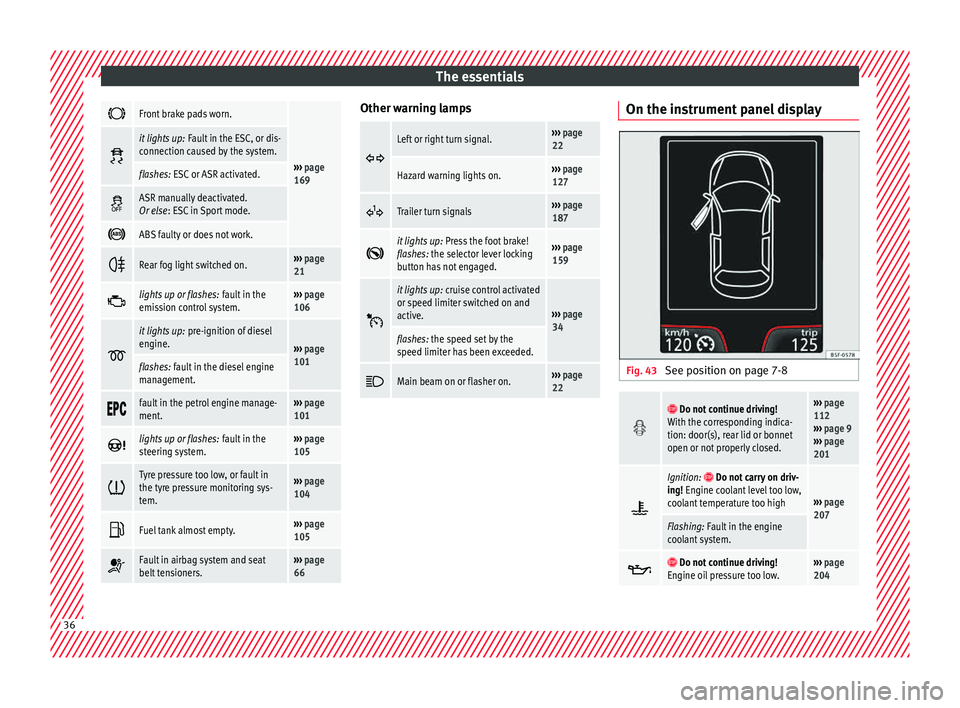
Front brake pads worn.
›››
page
169
it lights up:
Fault in the ESC, or dis-
connection caused by the system.
flashes: ESC or ASR activated.
ASR manually deactivated.
Or else
: ESC in Sport mode.
ABS faulty or does not work.
Rear fog light switched on.›››
page
21
lights up or flashes:
fault in the
emission control system.››› page
106
it lights up:
pre-ignition of diesel
engine.
››› page
101
flashes: fault in the diesel engine
management.
fault in the petrol engine manage-
ment.›››
page
101
lights up or flashes:
fault in the
steering system.››› page
105
Tyre pressure too low, or fault in
the tyre pressure monitoring sys-
tem.›››
page
104
Fuel tank almost empty.›››
page
105
Fault in airbag system and seat
belt tensioners.›››
page
66 Other warning lamps
Left or right turn signal.›››
page
22
Hazard warning lights on.››› page
127
Trailer turn signals›››
page
187
it lights up:
Press the foot brake!
flashes: the selector lever locking
button has not engaged.››› page
159
it lights up:
cruise control activated
or speed limiter switched on and
active.
››› page
34
flashes: the speed set by the
speed limiter has been exceeded.
Main beam on or flasher on.›››
page
22 On the instrument panel display
Fig. 43
See position on page 7-8
Do not continue driving!
With the corresponding indica-
tion: door(s), rear lid or bonnet
open or not properly closed.››› page
112
››› page 9
››› page
201
Ignition: Do not carry on driv-
ing! Engine coolant level too low,
coolant temperature too high
››› page
207
Flashing: Fault in the engine
coolant system.
Do not continue driving!
Engine oil pressure too low.››› page
204 36
Page 70 of 248
Safety
frontal collision the system might not trigger
corr
ectly
or may fail to trigger at all. Airbag activation
The airbags deploy extremely rapidly, within
thous
andths
of a second, to provide addi-
tional protection in the event of an accident.
A fine dust may develop when the airbag de-
ploys. This is normal and it is not an indica-
tion of fire in the vehicle.
The airbag system is only ready to function
when the ignition is on.
In special accidents instances, several air-
bags may activate at the same time.
In the event of minor head-on and side colli-
sions, rear-end collisions, overturning or roll-
over of the vehicle, airbags do not activate.
Activation factors
The conditions that lead to the airbag system
activating in each situation cannot be gener-
alised. Some factors play an important role,
such as the properties of the object the vehi-
cle hits (hard/soft), angle of impact, vehicle
speed, etc.
Deceleration trajectory is key for airbag acti-
vation. The control unit analyses the collision trajec-
tor
y
and activates the respective restraint
system.
If the deceleration rate is below the prede-
fined reference value in the control unit the
airbags will not be triggered, even though
the accident may cause extensive damage to
the car.
The following airbags are triggered in seri-
ous head-on collisions
● Driver airbag.
● Front passenger front airbag
The fol
lowing airbags are triggered in seri-
ous side-on collisions
● Front side airbag on the side of the acci-
dent.
● Re
ar side airbag on the side of the acci-
dent.
● Cur
tain (head) airbag on the side of the ac-
cident.
In an ac
cident with airbag activation:
● the interior lights switch on (if the interior
light swit
ch is in the courtesy light position);
● the hazard warning lights switch on;
● all doors are unlocked;
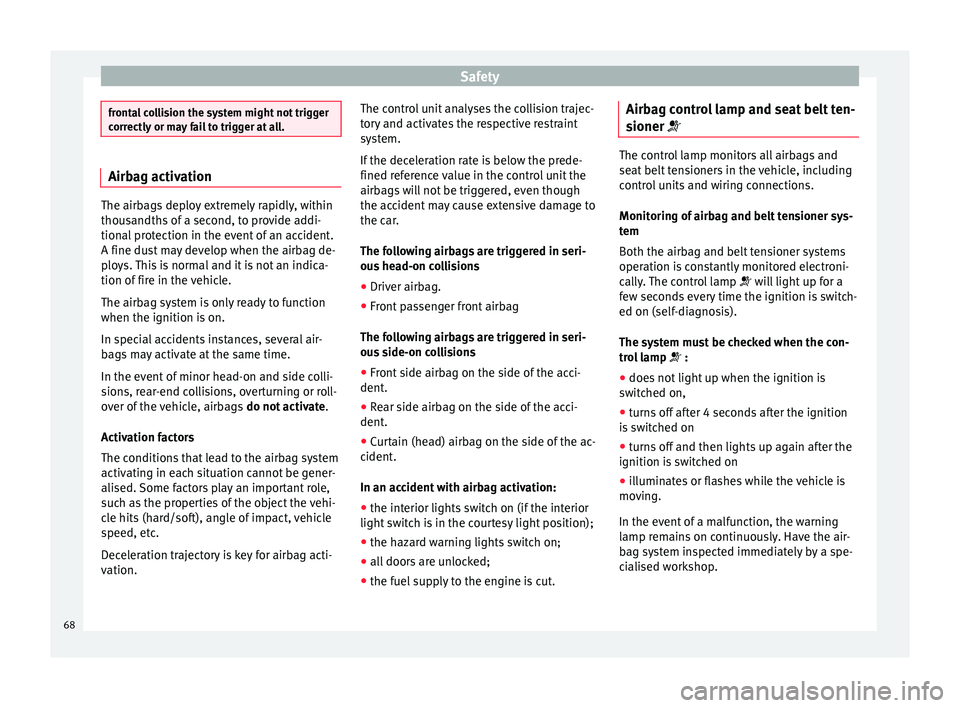
● the fuel supply to the engine is cut. Airbag control lamp and seat belt ten-
sioner The control lamp monitors all airbags and
seat
belt
tensioners in the vehicle, including
control units and wiring connections.
Monitoring of airbag and belt tensioner sys-
tem
Both the airbag and belt tensioner systems
operation is constantly monitored electroni-
cally. The control lamp will light up for a
few seconds every time the ignition is switch-
ed on (self-diagnosis).
The system must be checked when the con-
trol lamp :
● does not light up when the ignition is
swit c
hed on,
● turns off after 4 seconds after the ignition
is sw
itched on
● turns off and then lights up again after the
ignition is sw
itched on
● illuminates or flashes while the vehicle is
movin
g.
In the event of a malfunction, the warning
lamp remains on continuously. Have the air-
bag system inspected immediately by a spe-
cialised workshop.
68
Page 74 of 248
Safety
Transporting children safely Saf ety
f
or children
Introduction For safety reasons, as we have learned from
acc
ident
statistics, we recommend that chil-
dren under 12 years of age travel in the rear
seats. Depending on their age, height and
weight, children travelling in rear seats must
use a child seat or a seat belt. For safety rea-
sons, the child seat should be installed in the
rear seat, behind the front passenger seat or
in the centre back seat.
The physical laws involved and the forces
acting in a collision apply also to children
››› page 63. But unlike adults, children do not
have fully developed muscle and bone struc-
tures. This means that children are subject to
a greater risk of injury.
To reduce the risk of injuries, children must
always use special child restraint systems
when travelling in the vehicle.
We recommend the use of child safety prod-
ucts from the SEAT Original Accessories Pro-
gramme, which includes systems for all ages
made by “Peke” (not for all countries).
These systems have been especially de-
signed and approved, complying with the
ECE-R44. regulation. Follow the manufacturer's instructions and
ob
ser
ve any statutory requirements when in-
stalling and using child seats. Always read
and note ››› page 72.
We recommend you always carry the manu-
facturer's Child Seat Instruction Manual to-
gether with the on-board documentation.
Important information regarding the
front p
assenger's airbag Read the additional information carefully
› ›
›
page 16.
Read and always observe the safety informa-
tion included in the following chapters:
● Safety distance with respect to the passen-
ger airbag ›
›› page 66.
● Objects between the passenger and the
pas
senger side airbag ››› in Front airbags
on p ag
e 69
.
The passenger side front airbag, when ena-
bled, is a serious risk for a child that is facing
backward since the airbag can strike the seat
with such force that it can cause serious or
fatal injuries. Children up to 12 years old
should always travel on the rear seat.
Therefore we strongly recommend you to
transport children on the rear seats. This is
the safest location in the vehicle. Alternative-
ly, the front passenger airbag can be disa- bled with a key-operated switch
›››
page 70.
When transporting children, use a child seat
appropriate to the age and size of each child. WARNING
● If a c hi
ld seat is secured to the front pas-
senger seat, the risk to the child of sustain-
ing critical or fatal injuries in the event of an
accident increases.
● An inflating front passenger airbag can
strike the r
ear-facing child seat and project it
with great force against the door, the roof or
the backrest.
● Never install a child seat facing backwards
on the front p
assenger seat unless the front
passenger front airbag has been disabled.
Risk of potentially fatal injuries to the child!
However, if it is necessary, in exceptional ca-
ses, to transport a child in the front passen-
ger seat, the front passenger front airbag
must always be disabled ››› page 70, Deacti-
vation of front passenger front airbag*. If the
front passenger seat has a height adjustment
option, move it to the highest position.
● For those vehicles that do not include a key
lock sw
itch to deactivate the airbag, the vehi-
cle must be taken to a technical service.
● All vehicle occupants, especially children,
must
assume the proper sitting position and
be properly belted in while travelling.
● Never hold children or babies on your lap,
this c
an result in potentially fatal injuries to
the child! 72
Page 75 of 248
Transporting children safely
●
Never a l
low a child to be transported in a
vehicle without being properly secured, or to
stand up or kneel on a seat while travelling.
In an accident, the child could be flung
through the vehicle, causing possibly fatal in-
juries to themselves and to the other vehicle
occupants.
● If children assume an improper sitting posi-
tion when the vehic
le is moving, they expose
themselves to greater risk of injury in the
event of a sudden braking manoeuvre or in an
accident. This is particularly important if the
child is travelling on the front passenger seat
and the airbag system is triggered in an acci-
dent; as this could cause serious injury or
even death.
● A suitable child seat can protect your child!
● Never leave a child alone in the child seat
or inside the
vehicle because depending on
the season, very high temperatures may be
reached inside a parked vehicle, which could
be fatal.
● Children who are less than 1.5 metres tall
must
not wear a normal seat belt without a
child seat, as this could cause injuries to the
abdominal and neck areas during a sudden
braking manoeuvre or in an accident.
● Do not allow the seat belt to become twis-
ted and the seat
belt should be properly in
place ››› page 61.
● Only one child may occupy a child seat
›››
page 73, Child seats. ●
When a chi l
d seat is mounted in the rear
seats, the door child-proof lock should be ac-
tivated ››› page 115. Child seats
Safety in
structions Read the additional information carefully
›› ›
page 16. WARNING
When travelling, children must be secured in
the v ehic
le with a restraint system suitable
for age, weight and size.
● Read and always observe information and
warning
s concerning the use of child seats
››› page 72. WARNING
The retaining rings are designed only for use
with “ISOFIX” and T op
Tether* system child
seats.
● Never secure other child seats that do not
have the “ISOFIX” or T
op Tether* system, or
retaining belts or objects to the fastening
rings - this can result in potentially fatal inju-
ries to the child.
● Ensure that the child seat is secured cor-
rectly u
sing the “ISOFIX” and Top Tether* se-
curing rings. WARNING
An undue installation of the safety seat will
incr e
ase the risk of injury in the event of a
crash.
● Never tie the retainer strap to a hook in the
luggag
e compartment.
● Never secure or tie luggage or other items
to the low
er anchorages (ISOFIX) or the upper
ones (Top Tether). Categorisation of child seats into
gr
oup
s Only use child seats that are officially ap-
pr
o
v
ed and suitable for the child.
Child seats are subject to the regulation ECE-
R 44. ECE-R stands for: Economic Commis-
sion for Europe Regulation.
The child seats are grouped into 5 catego-
ries:
Group 0: Up to 10 kg (up to around 9
months)
Group 0+: Up to 13 kg (up to around 18
months)
Group 1: from 9 to 18 kg (up to approx. 4
years old)
Group 2: from 15 to 25 kg (up to approx. 7
years old) »
73
Technical data
Advice
Operation
Emergencies
Safety
Page 97 of 248
Controls and displays
Operation
C ontr
o
ls and displays
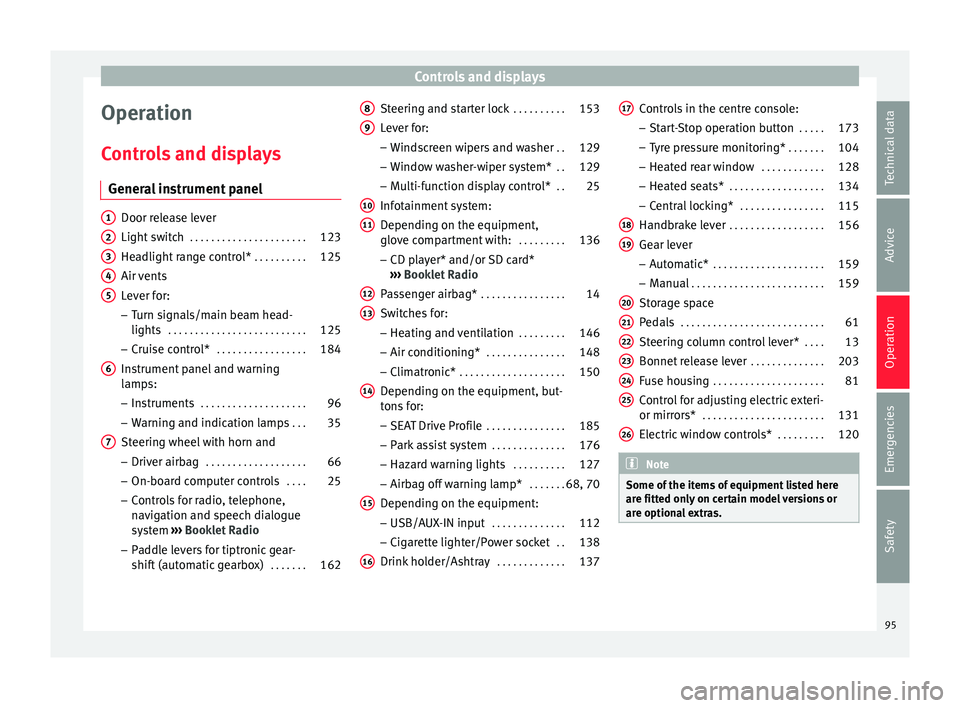
General instrument panel Door release lever
Light sw
it
ch . . . . . . . . . . . . . . . . . . . . . . 123
Headlight range control* . . . . . . . . . .125
Air vents
Lever f
or:
– Turn signals/main beam head-
lights . . . . . . . . . . . . . . . . . . . . . . . . . . 125
– Crui se c
ontrol* . . . . . . . . . . . . . . . . . 184
Instrument panel and warning
lamp s:
– In
struments . . . . . . . . . . . . . . . . . . . . 96
– Warnin g and indic
ation lamps . . .35
Steering wheel with horn and – Driver airb ag . . . . . . . . . . . . . . . . . . . 66
– On-boar d c
omputer controls . . . .25
– Contro
ls for radio, telephone,
navigation and speech dialogue
system ›››
Booklet Radio
– Paddle levers for tiptronic gear-
shift (automatic gearbox) . . . . . . .162
1 2
3
4
5
6
7 Steering and starter lock
. . . . . . . . . .153
Lever for: – Wind
s
creen wipers and washer . .129
– Window w
asher-wiper system* . .129
– Multi-f
unction display control* . .25
Infotainment system:
Depending on the equipment,
glo
ve compartment with: . . . . . . . . .136
– CD pla
yer* and/or SD card*
››› Booklet Radio
Passenger airbag* . . . . . . . . . . . . . . . . 14
Switches for:
– Heating and
ventilation . . . . . . . . . 146
– Air conditionin g* . . . . . . . . . . . . . . . 148
– C
limatr
onic* . . . . . . . . . . . . . . . . . . . . 150
Depending on the equipment, but-
ton s
for:
– SEAT Drive Profile . . . . . . . . . . . . . . . 185
– Park a
ssist system . . . . . . . . . . . . . . 176
– Hazard w
arning lights . . . . . . . . . .127
– Airbag off w
arning lamp* . . . . . . .68, 70
Depending on the equipment:
– USB/AUX -IN inp
ut . . . . . . . . . . . . . . 112
– Cig ar
ette lighter/Power socket . .138
Drink holder/Ashtray . . . . . . . . . . . . .137
8 9
10
11
12
13
14
15
16 Controls in the centre console:
– St ar
t
-Stop operation button . . . . .173
– Tyr
e pressure monitoring* . . . . . . .104
– Heated r
ear window . . . . . . . . . . . . 128
– Heated se
ats* . . . . . . . . . . . . . . . . . . 134
– Central
locking* . . . . . . . . . . . . . . . . 115
Handbrake lever . . . . . . . . . . . . . . . . . . 156
Gear lever – Automatic* . . . . . . . . . . . . . . . . . . . . . 159
– M
anual . . . . . . . . . . . . . . . . . . . . . . . . . 159
Stor
age space
Pedal
s . . . . . . . . . . . . . . . . . . . . . . . . . . . 61
Steering column control lever* . . . .13
Bonnet release lever . . . . . . . . . . . . . .203
Fuse housing . . . . . . . . . . . . . . . . . . . . . 81
Control for adjusting electric exteri-
or mirrors* . . . . . . . . . . . . . . . . . . . . . . . 131
El
ectric window controls* . . . . . . . . .120 Note
Some of the items of equipment listed here
are fitt ed on
ly on certain model versions or
are optional extras. 17
18
19
20
21
22
23
24
25
26
95
Technical data
Advice
Operation
Emergencies
Safety
Page 114 of 248
Operation
Multimedia USB/A UX
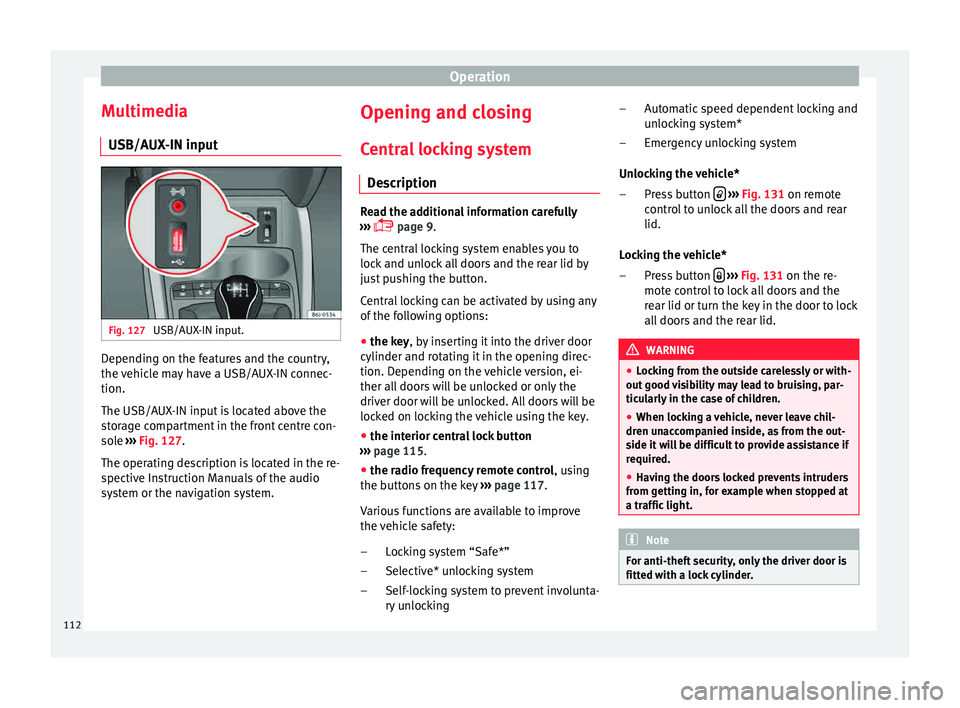
-IN inp
utFig. 127
USB/AUX-IN input. Depending on the features and the country,
the
v
ehic
le may have a USB/AUX-IN connec-
tion.
The USB/AUX-IN input is located above the
storage compartment in the front centre con-
sole ››› Fig. 127.
The operating description is located in the re-
spective Instruction Manuals of the audio
system or the navigation system. Opening and closing
C entr
a
l locking system
Description Read the additional information carefully
›› ›
page 9.
The central locking system enables you to
lock and unlock all doors and the rear lid by
just pushing the button.
Central locking can be activated by using any
of the following options:
● the key, by inserting it into the driver door
cylinder and r ot
ating it in the opening direc-
tion. Depending on the vehicle version, ei-
ther all doors will be unlocked or only the
driver door will be unlocked. All doors will be
locked on locking the vehicle using the key.
● the interior central lock button
›››
page 115.
● the radio frequency remote control , usin
g
the buttons on the key ›››
page 117.
Various functions are available to improve
the vehicle safety: Locking system “Safe*”
Selective* unlocking system
Self-locking system to prevent involunta-
ry unlocking
–
–
– Automatic speed dependent locking and
unloc
king system*
Emergency unlocking system
Unlocking the vehicle* Press button
› ››
Fig. 131
on r
emote
control to unlock all the doors and rear
lid.
Locking the vehicle* Press button
› ››
Fig. 131
on the r
e-
mote control to lock all doors and the
rear lid or turn the key in the door to lock
all doors and the rear lid. WARNING
● Loc k
ing from the outside carelessly or with-
out good visibility may lead to bruising, par-
ticularly in the case of children.
● When locking a vehicle, never leave chil-
dren un
accompanied inside, as from the out-
side it will be difficult to provide assistance if
required.
● Having the doors locked prevents intruders
from gettin
g in, for example when stopped at
a traffic light. Note
For anti-theft security, only the driver door is
fitted w ith a loc
k cylinder. –
–
–
–
112
Page 115 of 248
Opening and closing
“Safe” security system** This is an anti-theft device which consists of
a doubl
e loc
k for the door locks and a deacti-
vation function for the boot in order to pre-
vent forced entry.
Activation
The “safe” system is activated when the vehi-
cle is locked using the key or the remote con-
trol.
To activate it with the key, rotate once it is in-
serted in the door lock cylinder in the locking
direction.
To activate the system using the remote con-
trol, press the lock button once on the re-
mot e.
Onc e thi
s system is activated, opening doors
from the outside and the inside is not possi-
ble. The rear lid can not be opened. The cen-
tral lock button does not work.
When the ignition is switched off, the instru-
ment panel display indicates that the “Safe”
system is on.
Deactivation
Rotate the key inserted in the lock cylinder
twice towards the locking direction.
To activate the system using the remote con-
trol, press the lock button on the remote
twice in less than five seconds. On deactivating the “Safe” system, the alarm
v
o
lumetric
sensor is also deactivated.
With the “Safe” switched off, doors can be
opened from the interior but not from the ex-
terior.
See “Selective unlocking system*”
“Safe” status
On the driver door, there is warning lamp visi-
ble from outside the vehicle through the win-
dow which shows the “Safe” system status.
We will know that “Safe” system is activated
by the flashing warning lamp. The indicator
will flash on all vehicles, fitted and nor fitted
with an alarm, until they unlock.
Remember:
Safe activated with or without an alarm:
warning lamp flashes continuously.
Safe deactivated without an alarm: the warn-
ing lamp stays off.
Safe deactivated with an alarm: the warning
lamp stays off. WARNING
No one should remain inside the vehicle if the
“Safe” sy s
tem is activated because opening
the doors will not be possible in the event of
an emergency neither from the inside nor the
outside and help from the outside is made difficult. Danger of death. Passengers could
become tr
ap
ped inside in case of emergency. Selective unlocking system*
This system allows to unlock either just the
driver door or al
l
the vehicle.
Driver door unlock button
Unlock once. Use either the key or the remote
control.
Once the key is inserted in the lock cylinder,
rotate once in the unlock direction. The driver
door will remain without “Safe” and un-
locked. In vehicles fitted with an alarm, see
the Anti-theft Alarm section ››› page 118.
Using the remote control, press the unlock
button on the remote once. The “Safe”
sy s
t
em for all the vehicle is deactivated, only
the driver door is unlocked and both the
alarm and the warning lamp are also turned
off.
Unlocking all doors and the luggage com-
partment
The unlock button on the remote control
must be pressed twice so that all doors
and the lug g
ag
e compartment can be
opened.
Press twice within 5 seconds to deactivate
the “Safe” system for all vehicle, to unlock all »
113
Technical data
Advice
Operation
Emergencies
Safety