change wheel Seat Ibiza ST 2015 Owner's manual
[x] Cancel search | Manufacturer: SEAT, Model Year: 2015, Model line: Ibiza ST, Model: Seat Ibiza ST 2015Pages: 248, PDF Size: 4.77 MB
Page 5 of 248
Table of Contents
Table of Contents
The e s
senti
als . . . . . . . . . . . . . . . . . . . . . . . . 5
Exterior view . . . . . . . . . . . . . . . . . . . . . . . . . . . . 5
Exterior view . . . . . . . . . . . . . . . . . . . . . . . . . . . . 6
Interior view (left guide) . . . . . . . . . . . . . . . . . . 7
Interior view (right-hand drive) . . . . . . . . . . . . . 8
How it works . . . . . . . . . . . . . . . . . . . . . . . . . . . . 9
Opening and closing . . . . . . . . . . . . . . . . . . . . . 9
Before driving . . . . . . . . . . . . . . . . . . . . . . . . . . . 12
Airbags . . . . . . . . . . . . . . . . . . . . . . . . . . . . . . . . 14
Child seats . . . . . . . . . . . . . . . . . . . . . . . . . . . . . 16
Starting the vehicle . . . . . . . . . . . . . . . . . . . . . . 20
Lights and visibility . . . . . . . . . . . . . . . . . . . . . . 21
Easy Connect . . . . . . . . . . . . . . . . . . . . . . . . . . . 24
Driver information system . . . . . . . . . . . . . . . . . 25
Journey data . . . . . . . . . . . . . . . . . . . . . . . . . . . . 29
Cruise control . . . . . . . . . . . . . . . . . . . . . . . . . . . 34
Warning lamps . . . . . . . . . . . . . . . . . . . . . . . . . . 35
Gearbox lever . . . . . . . . . . . . . . . . . . . . . . . . . . . 37
Air conditioning . . . . . . . . . . . . . . . . . . . . . . . . . 39
Level control . . . . . . . . . . . . . . . . . . . . . . . . . . . . 40
Emergencies . . . . . . . . . . . . . . . . . . . . . . . . . . . . 44
Fuses . . . . . . . . . . . . . . . . . . . . . . . . . . . . . . . . . . 44
Bulbs . . . . . . . . . . . . . . . . . . . . . . . . . . . . . . . . . . 45
Action in the event of a puncture . . . . . . . . . . . 45
Changing a wheel . . . . . . . . . . . . . . . . . . . . . . . 47
Snow chains . . . . . . . . . . . . . . . . . . . . . . . . . . . . 50
Emergency towing of the vehicle . . . . . . . . . . . 51
How to jump start . . . . . . . . . . . . . . . . . . . . . . . . 52
Changing the windscreen wiper blades . . . . . . 54
Safety . . . . . . . . . . . . . . . . . . . . . . . . . . . . . . . . 56
Safe driving . . . . . . . . . . . . . . . . . . . . . . . . . . . . 56
Safety first! . . . . . . . . . . . . . . . . . . . . . . . . . . . . . 56
Advice about driving . . . . . . . . . . . . . . . . . . . . . 56 Correct position for passengers . . . . . . . . . . . . 57
Pedal area . . . . . . . . . . . . . . . . . . . . . . . . . . . . . . 61
Seat belts
. . . . . . . . . . . . . . . . . . . . . . . . . . . . . . 61
Why wear a seat belt? . . . . . . . . . . . . . . . . . . . . 61
How to properly adjust your seatbelt . . . . . . . . 64
Belt pretensioners* . . . . . . . . . . . . . . . . . . . . . . 65
Airbag system . . . . . . . . . . . . . . . . . . . . . . . . . . 66
Brief introduction . . . . . . . . . . . . . . . . . . . . . . . . 66
Airbag safety instructions . . . . . . . . . . . . . . . . . 69
Deactivating airbags . . . . . . . . . . . . . . . . . . . . . 70
Transporting children safely . . . . . . . . . . . . . . . 72
Safety for children . . . . . . . . . . . . . . . . . . . . . . . 72
Child seats . . . . . . . . . . . . . . . . . . . . . . . . . . . . . 73
Emergencies . . . . . . . . . . . . . . . . . . . . . . . . . . 75
Self-help . . . . . . . . . . . . . . . . . . . . . . . . . . . . . . . 75
Emergency equipment . . . . . . . . . . . . . . . . . . . . 75
Tyre repair . . . . . . . . . . . . . . . . . . . . . . . . . . . . . . 76
Changing the windscreen wiper blades . . . . . . 78
Towing or tow-starting . . . . . . . . . . . . . . . . . . . . 79
Fuses and bulbs . . . . . . . . . . . . . . . . . . . . . . . . . 81
Fuses . . . . . . . . . . . . . . . . . . . . . . . . . . . . . . . . . . 81
Changing bulbs . . . . . . . . . . . . . . . . . . . . . . . . . 83
Single headlight bulb change . . . . . . . . . . . . . . 84
Double headlight bulb change . . . . . . . . . . . . . 85
Changing the AFS headlight bulbs . . . . . . . . . . 87
Changing the fog light bulbs . . . . . . . . . . . . . . . 88
Changing the tail light bulbs . . . . . . . . . . . . . . . 89
Changing the side and interior bulbs . . . . . . . . 91
Operation . . . . . . . . . . . . . . . . . . . . . . . . . . . . . 95
Controls and displays . . . . . . . . . . . . . . . . . . . . 95
General instrument panel . . . . . . . . . . . . . . . . . 94
Instruments and warning/control lamps . . . . . 96
Instruments . . . . . . . . . . . . . . . . . . . . . . . . . . . . 96
Warning and indication lamps . . . . . . . . . . . . . 100
Introduction to the Easy Connect system* . . . . 107
System settings (CAR)* . . . . . . . . . . . . . . . . . . . 107 Communications and multimedia
. . . . . . . . . . . 108
Steering wheel controls* . . . . . . . . . . . . . . . . . . 108
Multimedia . . . . . . . . . . . . . . . . . . . . . . . . . . . . . 112
Opening and closing . . . . . . . . . . . . . . . . . . . . . 112
Central locking system . . . . . . . . . . . . . . . . . . . . 112
Keys . . . . . . . . . . . . . . . . . . . . . . . . . . . . . . . . . . . 116
Radio frequency remote control* . . . . . . . . . . . 117
Anti-theft alarm* . . . . . . . . . . . . . . . . . . . . . . . . 118
Boot hatch . . . . . . . . . . . . . . . . . . . . . . . . . . . . . 120
Electric windows . . . . . . . . . . . . . . . . . . . . . . . . . 120
Tilting panoramic roof* . . . . . . . . . . . . . . . . . . . 122
Lights and visibility . . . . . . . . . . . . . . . . . . . . . . 123
Lights . . . . . . . . . . . . . . . . . . . . . . . . . . . . . . . . . 123
Interior lights . . . . . . . . . . . . . . . . . . . . . . . . . . . 128
Visibility . . . . . . . . . . . . . . . . . . . . . . . . . . . . . . . 128
Windscreen wiper and rear window wiper sys-
tems . . . . . . . . . . . . . . . . . . . . . . . . . . . . . . . . . . 129
R
ear view mirrors . . . . . . . . . . . . . . . . . . . . . . . . 131
Seats and head restraints . . . . . . . . . . . . . . . . . 132
Adjusting the seat and head restraints . . . . . . 132
Seat functions . . . . . . . . . . . . . . . . . . . . . . . . . . 134
Transport and practical equipment . . . . . . . . . 136
Practical equipment . . . . . . . . . . . . . . . . . . . . . . 136
Luggage compartment . . . . . . . . . . . . . . . . . . . . 139
Roof rack/roof luggage rack* . . . . . . . . . . . . . . 142
Air conditioning . . . . . . . . . . . . . . . . . . . . . . . . . 144
Heating, ventilation and cooling . . . . . . . . . . . . 144
Heating and fresh air . . . . . . . . . . . . . . . . . . . . . 146
Air conditioning* . . . . . . . . . . . . . . . . . . . . . . . . 148
Climatronic* . . . . . . . . . . . . . . . . . . . . . . . . . . . . 150
Driving . . . . . . . . . . . . . . . . . . . . . . . . . . . . . . . . 152
Address . . . . . . . . . . . . . . . . . . . . . . . . . . . . . . . . 152
Starting and stopping the engine . . . . . . . . . . . 153
Braking and parking . . . . . . . . . . . . . . . . . . . . . 156
Manual gearbox . . . . . . . . . . . . . . . . . . . . . . . . . 159
Automatic gearbox* . . . . . . . . . . . . . . . . . . . . . . 159
Run-in and economical driving . . . . . . . . . . . . . 165
Driving abroad . . . . . . . . . . . . . . . . . . . . . . . . . . 168 3
Page 27 of 248
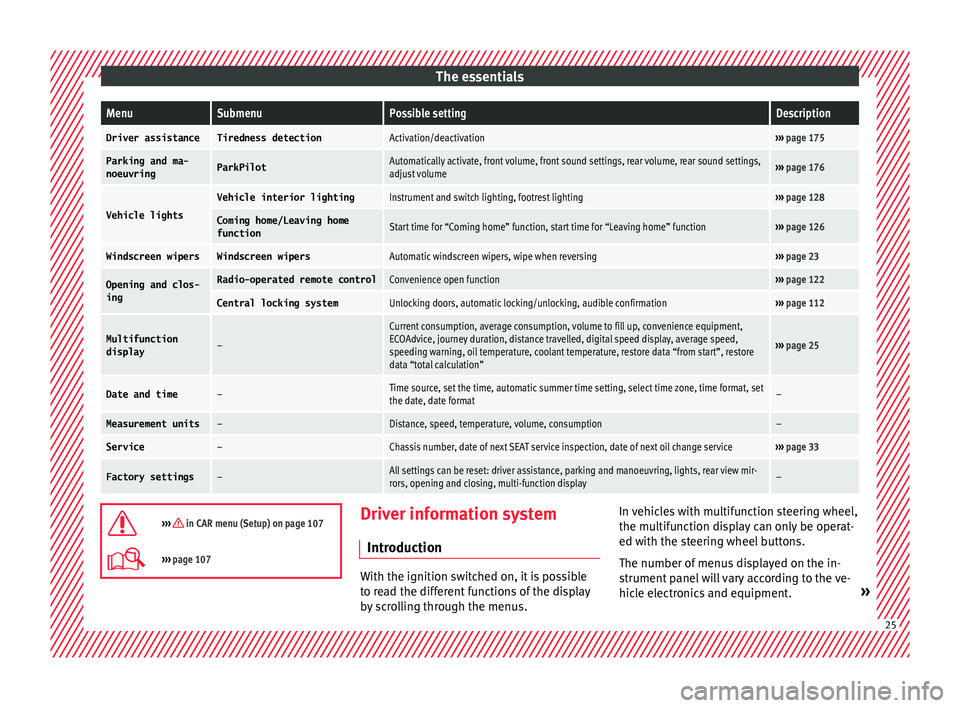
The essentialsMenuSubmenuPossible settingDescription
Driver assistanceTiredness detectionActivation/deactivation›››
page 175
Parking and ma-
noeuvringParkPilotAutomatically activate, front volume, front sound settings, rear volume, rear sound settings,
adjust volume››› page 176
Vehicle lights
Vehicle interior lightingInstrument and switch lighting, footrest lighting››› page 128
Coming home/Leaving home
functionStart time for “Coming home” function, start time for “Leaving home” function››› page 126
Windscreen wipersWindscreen wipersAutomatic windscreen wipers, wipe when reversing››› page 23
Opening and clos-
ingRadio-operated remote controlConvenience open function››› page 122
Central locking systemUnlocking doors, automatic locking/unlocking, audible confirmation››› page 112
Multifunction
display–
Current consumption, average consumption, volume to fill up, convenience equipment,
ECOAdvice, journey duration, distance travelled, digital speed display, average speed,
speeding warning, oil temperature, coolant temperature, restore data “from start”, restore
data “total calculation”
››› page 25
Date and time–Time source, set the time, automatic summer time setting, select time zone, time format, set
the date, date format–
Measurement units–Distance, speed, temperature, volume, consumption–
Service–Chassis number, date of next SEAT service inspection, date of next oil change service››› page 33
Factory settings–All settings can be reset: driver assistance, parking and manoeuvring, lights, rear view mir-
rors, opening and closing, multi-function display–
››› in CAR menu (Setup) on page 107
›››
page 107 Driver information system
Intr oduction With the ignition switched on, it is possible
to r
e
ad the different functions of the display
by scrolling through the menus. In vehicles with multifunction steering wheel,
the multif
u
nction display can only be operat-
ed with the steering wheel buttons.
The number of menus displayed on the in-
strument panel will vary according to the ve-
hicle electronics and equipment. » 25
Page 29 of 248
The essentials
press button
or
several times
› ›
›
Fig. 38.
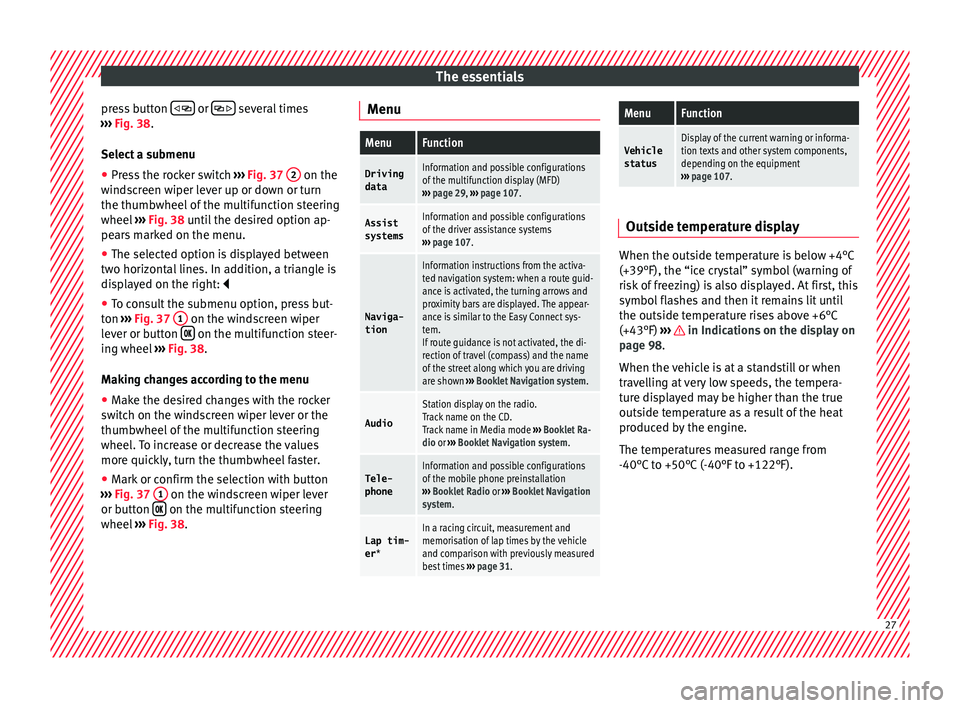
Select a submenu ● Press the rocker switch ›››
Fig. 37 2 on the
w ind
s
creen wiper lever up or down or turn
the thumbwheel of the multifunction steering
wheel ››› Fig. 38 until the desired option ap-
pears marked on the menu.
● The selected option is displayed between
two horizont
al lines. In addition, a triangle is
displayed on the right:
● To consult the submenu option, press but-
ton ››
› Fig. 37 1 on the windscreen wiper
l ev
er or b
utton on the multifunction steer-
in g wheel
›
›› Fig. 38.
Making changes according to the menu ● Make the desired changes with the rocker
switc
h on the windscreen wiper lever or the
thumbwheel of the multifunction steering
wheel. To increase or decrease the values
more quickly, turn the thumbwheel faster.
● Mark or confirm the selection with button
›››
Fig. 37 1 on the windscreen wiper lever
or b utt
on on the multifunction steering
wheel
›
›
› Fig. 38. Menu
MenuFunction
Driving
dataInformation and possible configurations
of the multifunction display (MFD)
››› page 29, ››› page 107.
Assist
systemsInformation and possible configurations
of the driver assistance systems
››› page 107.
Naviga-
tion
Information instructions from the activa-
ted navigation system: when a route guid-
ance is activated, the turning arrows and
proximity bars are displayed. The appear-
ance is similar to the Easy Connect sys-
tem.
If route guidance is not activated, the di-
rection of travel (compass) and the name
of the street along which you are driving
are shown ››› Booklet Navigation system.
Audio
Station display on the radio.
Track name on the CD.
Track name in Media mode ››› Booklet Ra-
dio or ››› Booklet Navigation system.
Tele-
phoneInformation and possible configurations
of the mobile phone preinstallation
››› Booklet Radio or ››› Booklet Navigation
system.
Lap tim-
er *In a racing circuit, measurement and
memorisation of lap times by the vehicle
and comparison with previously measured
best times ››› page 31.
MenuFunction
Vehicle
statusDisplay of the current warning or informa-
tion texts and other system components,
depending on the equipment
››› page 107. Outside temperature display
When the outside temperature is below +4°C
(+39°F), the “ice c
r
ystal” symbol (warning of
risk of freezing) is also displayed. At first, this
symbol flashes and then it remains lit until
the outside temperature rises above +6°C
(+43°F) ››› in Indications on the display on
p ag
e 98
.
When the vehicle is at a standstill or when
travelling at very low speeds, the tempera-
ture displayed may be higher than the true
outside temperature as a result of the heat
produced by the engine.
The temperatures measured range from
-40°C to +50°C (-40°F to +122°F). 27
Page 47 of 248
The essentials
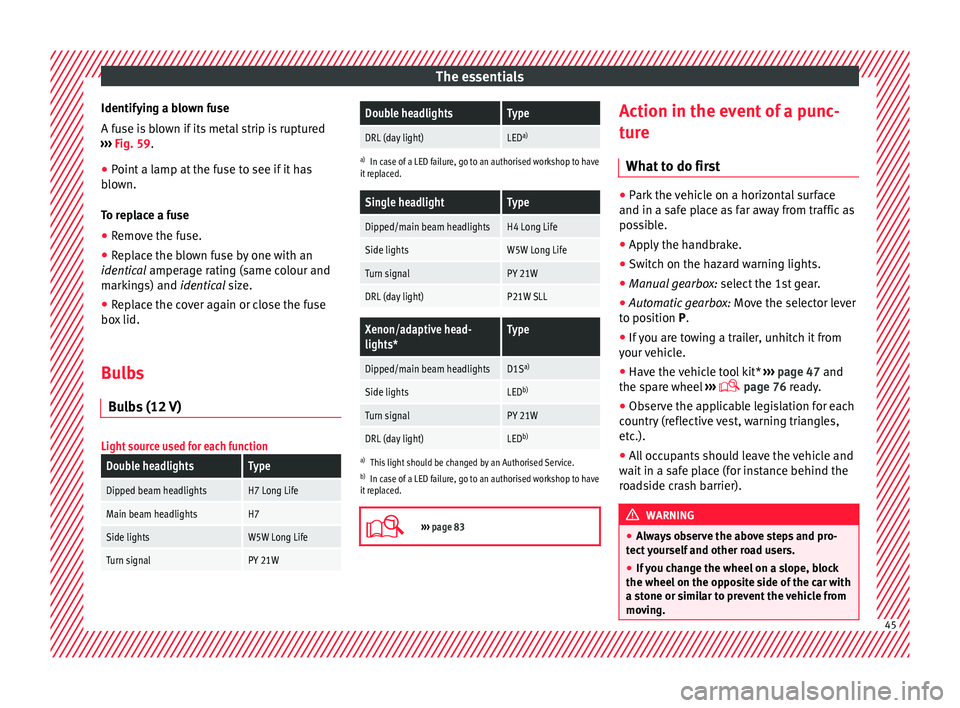
Identifying a blown fuse
A f u
se i
s blown if its metal strip is ruptured
››› Fig. 59.
● Point a lamp at the fuse to see if it has
blown.
T
o replace a fuse
● Remove the fuse.
● Replace the blown fuse by one with an
identica
l amperage rating (same colour and
markings) and identical size.
● Replace the cover again or close the fuse
box lid.
B
ulbs
Bul
bs (12 V)
Light source used for each function
Double headlightsType
Dipped beam headlightsH7 Long Life
Main beam headlightsH7
Side lightsW5W Long Life
Turn signalPY 21W
Double headlightsType
DRL (day light)LEDa)
a)
In case of a LED failure, go to an authorised workshop to have
it replaced.
Single headlightType
Dipped/main beam headlightsH4 Long Life
Side lightsW5W Long Life
Turn signalPY 21W
DRL (day light)P21W SLL
Xenon/adaptive head-
lights*Type
Dipped/main beam headlightsD1S a)
Side lightsLEDb)
Turn signalPY 21W
DRL (day light)LEDb)
a)
This light should be changed by an Authorised Service.
b) In case of a LED failure, go to an authorised workshop to have
it replaced.
››› page 83 Action in the event of a punc-
t
ur
e
Wh
at to do first ●
Park the vehicle on a horizontal surface
and in a saf e p
lace as far away from traffic as
possible.
● Apply the handbrake.
● Switch on the hazard warning lights.
● Manual gearbox: select the 1s
t gear.
● Automatic gearbox: Move the sel
ector lever
to position P.
● If you are towing a trailer, unhitch it from
your v
ehicle.
● Have the vehicle tool kit* ›››
page 47 and
the spare wheel ›››
page 76 ready.
● Observe the applicable legislation for each
countr
y (reflective vest, warning triangles,
etc.).
● All occupants should leave the vehicle and
wait in a s
afe place (for instance behind the
roadside crash barrier). WARNING
● Alw a
ys observe the above steps and pro-
tect yourself and other road users.
● If you change the wheel on a slope, block
the wheel on the oppo
site side of the car with
a stone or similar to prevent the vehicle from
moving. 45
Page 51 of 248
The essentials
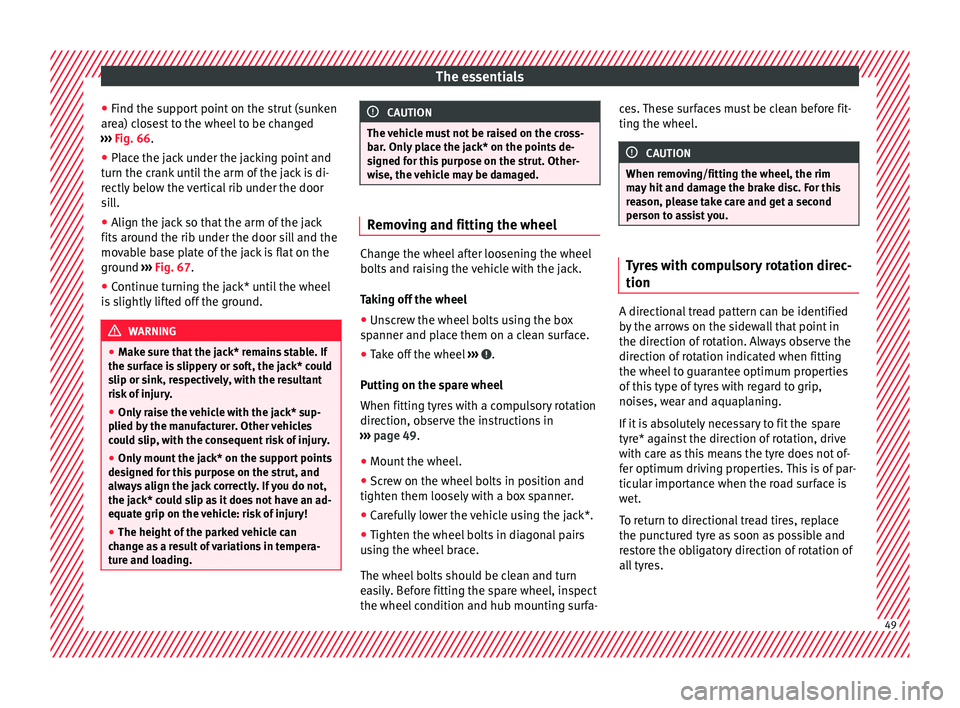
● Find the s up
por
t point on the strut (sunken
area) closest to the wheel to be changed
››› Fig. 66.
● Place the jack under the jacking point and
turn the cr
ank until the arm of the jack is di-
rectly below the vertical rib under the door
sill.
● Align the jack so that the arm of the jack
fits arou
nd the rib under the door sill and the
movable base plate of the jack is flat on the
ground ››› Fig. 67.
● Continue turning the jack* until the wheel
is s
lightly lifted off the ground. WARNING
● Mak e s
ure that the jack* remains stable. If
the surface is slippery or soft, the jack* could
slip or sink, respectively, with the resultant
risk of injury.
● Only raise the vehicle with the jack* sup-
plied by
the manufacturer. Other vehicles
could slip, with the consequent risk of injury.
● Only mount the jack* on the support points
designed f
or this purpose on the strut, and
always align the jack correctly. If you do not,
the jack* could slip as it does not have an ad-
equate grip on the vehicle: risk of injury!
● The height of the parked vehicle can
chan
ge as a result of variations in tempera-
ture and loading. CAUTION
The vehicle must not be raised on the cross-
bar . On
ly place the jack* on the points de-
signed for this purpose on the strut. Other-
wise, the vehicle may be damaged. Removing and fitting the wheel
Change the wheel after loosening the wheel
bolts
and r
aising the vehicle with the jack.
Taking off the wheel
● Unscrew the wheel bolts using the box
sp anner and p
lace them on a clean surface.
● Take off the wheel ›››
.
P uttin
g on the s
pare wheel
When fitting tyres with a compulsory rotation
direction, observe the instructions in
››› page 49.
● Mount the wheel.
● Screw on the wheel bolts in position and
tighten them loosely
with a box spanner.
● Carefully lower the vehicle using the jack*.
● Tighten the wheel bolts in diagonal pairs
usin
g the wheel brace.
The wheel bolts should be clean and turn
easily. Before fitting the spare wheel, inspect
the wheel condition and hub mounting surfa- ces. These surfaces must be clean before fit-
ting the wheel. CAUTION
When removing/fitting the wheel, the rim
ma y
hit and damage the brake disc. For this
reason, please take care and get a second
person to assist you. Tyres with compulsory rotation direc-
tion
A directional tread pattern can be identified
b
y
the arr
ows on the sidewall that point in
the direction of rotation. Always observe the
direction of rotation indicated when fitting
the wheel to guarantee optimum properties
of this type of tyres with regard to grip,
noises, wear and aquaplaning.
If it is absolutely necessary to fit the spare
tyre* against the direction of rotation, drive
with care as this means the tyre does not of-
fer optimum driving properties. This is of par-
ticular importance when the road surface is
wet.
To return to directional tread tires, replace
the punctured tyre as soon as possible and
restore the obligatory direction of rotation of
all tyres. 49
Page 60 of 248
Safety
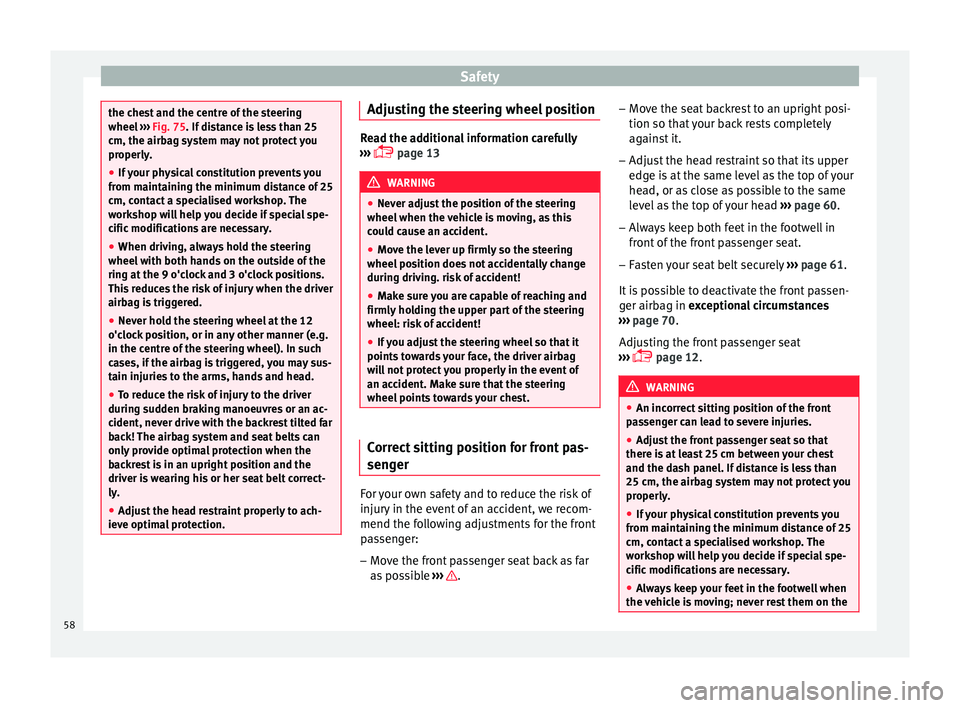
the chest and the centre of the steering
wheel
››
› Fig. 75. If distance is less than 25
cm, the airbag system may not protect you
properly.
● If your physical constitution prevents you
from maint
aining the minimum distance of 25
cm, contact a specialised workshop. The
workshop will help you decide if special spe-
cific modifications are necessary.
● When driving, always hold the steering
wheel with both h
ands on the outside of the
ring at the 9 o'clock and 3 o'clock positions.
This reduces the risk of injury when the driver
airbag is triggered.
● Never hold the steering wheel at the 12
o'clock
position, or in any other manner (e.g.
in the centre of the steering wheel). In such
cases, if the airbag is triggered, you may sus-
tain injuries to the arms, hands and head.
● To reduce the risk of injury to the driver
during sud
den braking manoeuvres or an ac-
cident, never drive with the backrest tilted far
back! The airbag system and seat belts can
only provide optimal protection when the
backrest is in an upright position and the
driver is wearing his or her seat belt correct-
ly.
● Adjust the head restraint properly to ach-
ieve optima
l protection. Adjusting the steering wheel position
Read the additional information carefully
›› ›
page 13 WARNING
● Never a dju
st the position of the steering
wheel when the vehicle is moving, as this
could cause an accident.
● Move the lever up firmly so the steering
wheel pos
ition does not accidentally change
during driving. risk of accident!
● Make sure you are capable of reaching and
firmly ho
lding the upper part of the steering
wheel: risk of accident!
● If you adjust the steering wheel so that it
points t
owards your face, the driver airbag
will not protect you properly in the event of
an accident. Make sure that the steering
wheel points towards your chest. Correct sitting position for front pas-
sen
g
er For your own safety and to reduce the risk of
injur
y
in the ev
ent of an accident, we recom-
mend the following adjustments for the front
passenger:
– Move the front passenger seat back as far
as po
ssible ››› .–
Mo v
e the se
at backrest to an upright posi-
tion so that your back rests completely
against it.
– Adjust the head restraint so that its upper
edge is
at the same level as the top of your
head, or as close as possible to the same
level as the top of your head ››› page 60.
– Always keep both feet in the footwell in
front of
the front passenger seat.
– Fasten your seat belt securely ›››
page 61.
It is possible to deactivate the front passen-
ger airbag in exceptional circumstances
››› page 70.
Adjusting the front passenger seat
››› page 12. WARNING
● An incorr ect
sitting position of the front
passenger can lead to severe injuries.
● Adjust the front passenger seat so that
there is
at least 25 cm between your chest
and the dash panel. If distance is less than
25 cm, the airbag system may not protect you
properly.
● If your physical constitution prevents you
from maint
aining the minimum distance of 25
cm, contact a specialised workshop. The
workshop will help you decide if special spe-
cific modifications are necessary.
● Always keep your feet in the footwell when
the vehic
le is moving; never rest them on the58
Page 78 of 248
Emergencies
●
Never s t
art the engine when the vehicle is
on the jack. Risk of accident.
● If work is to be carried out underneath the
vehicl
e, this must be secured by suitable
means. Otherwise, there is a risk of injury. Note
The jack does not generally require any main-
t en anc
e. If required, it should be greased us-
ing universal type grease. Spare wheel (temporary spare
wheel)*
The temporary spare wheel is stored under
the floor p
anel
in the lug
gage compartment
and is attached by a thumbnut.
How to use the temporary spare wheel
If you ever have a punctured tyre or loss of
pressure, the temporary spare wheel is only
intended for temporary use until you reach a
workshop. Change it for a duty wheel as soon
as possible.
Please note the following restrictions when
using the temporary spare wheel. This tem-
porary spare wheel has been specially de-
signed for your vehicle, thus, it cannot be
changed with the temporary spare wheel
from another vehicle. No other type of tyre (normal summer or win-
ter tyr
e) may be fitted on the compact tempo-
rary spare wheel rim.
Snow chains
For technical reasons, snow chains must not
be used on the temporary spare wheel.
If you have a puncture on one of the front
wheels when using snow chains, fit the tem-
porary spare wheel in place of one of the rear
wheels. Fit the snow chains on the rear wheel
that you have removed and replace the punc-
tured front wheel with this wheel.
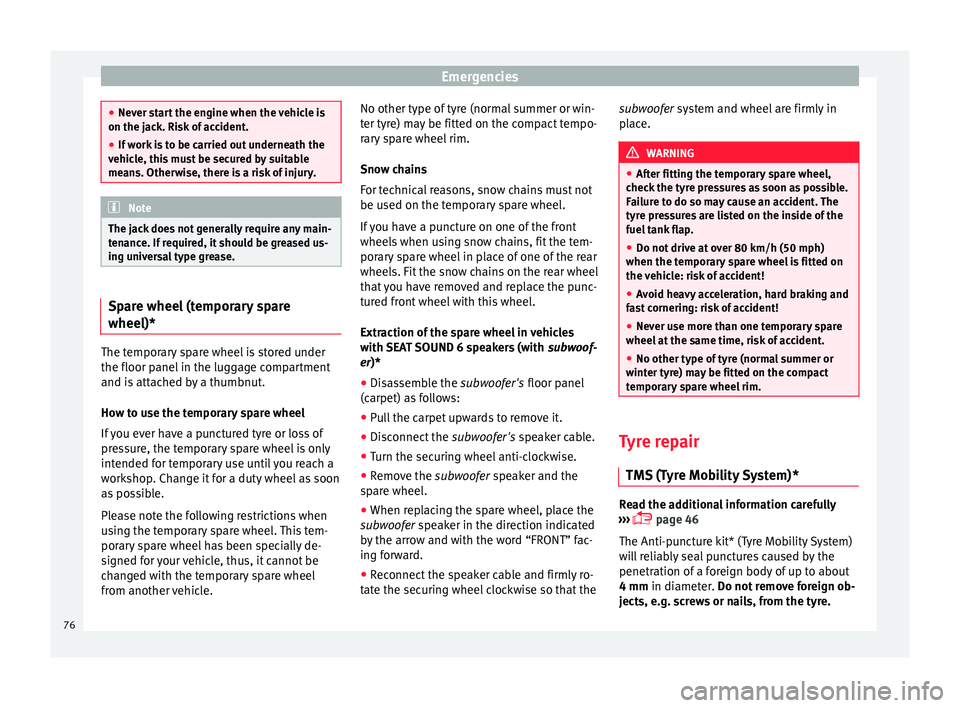
Extraction of the spare wheel in vehicles
with SEAT SOUND 6 speakers (with subwoof-
er)*
● Disassemble the subwoofer's
floor panel
(carpet) as follows:
● Pull the carpet upwards to remove it.
● Disconnect the subwoofer's
speaker cable.
● Turn the securing wheel anti-clockwise.
● Remove the subwoofer
speaker and the
spare wheel.
● When replacing the spare wheel, place the
subwoofer
speaker in the direction indicated
by the arrow and with the word “FRONT” fac-
ing forward.
● Reconnect the speaker cable and firmly ro-
tat e the sec
uring wheel clockwise so that the subwoofer sys
t
em and wheel are firmly in
place. WARNING
● Aft er fittin
g the temporary spare wheel,
check the tyre pressures as soon as possible.
Failure to do so may cause an accident. The
tyre pressures are listed on the inside of the
fuel tank flap.
● Do not drive at over 80 km/h (50 mph)
when the temporar
y spare wheel is fitted on
the vehicle: risk of accident!
● Avoid heavy acceleration, hard braking and
fas
t cornering: risk of accident!
● Never use more than one temporary spare
wheel at the s
ame time, risk of accident.
● No other type of tyre (normal summer or
winter ty
re) may be fitted on the compact
temporary spare wheel rim. Tyre repair
TM S (T
yre Mobility System)* Read the additional information carefully
› ›
›
page 46
The Anti-puncture kit* (Tyre Mobility System)
will reliably seal punctures caused by the
penetration of a foreign body of up to about
4 mm in diameter. Do not remove foreign ob-
jects, e.g. screws or nails, from the tyre.
76
Page 81 of 248
Self-help
Check the condition of the wiper blades regu-
l arly
.
If the wipers scrape across the glass ,
they should be changed if they are damaged,
or cleaned if they are dirty ››› .
If thi
s
does not produce the desired results,
the setting angle of the windscreen wiper
arms might be incorrect. They should be
checked by a specialised workshop and cor-
rected if necessary. WARNING
Do not drive unless you have good visibility
through a l
l windows!
● Clean the windscreen wiper blades and all
window
s regularly.
● The wiper blades should be changed once
or twice a
year. CAUTION
● Damag ed or dir
ty windscreen wipers could
scratch the glass.
● Never use fuel, nail varnish remover, paint
thinner or simil
ar products to clean the win-
dows. This could damage the windscreen
wiper blades.
● Never move any windscreen wiper by hand.
This c
ould cause damage.
● To prevent damage to the bonnet and the
winds
creen wiper arms, the latter should only
be lifted off the windscreen when in service
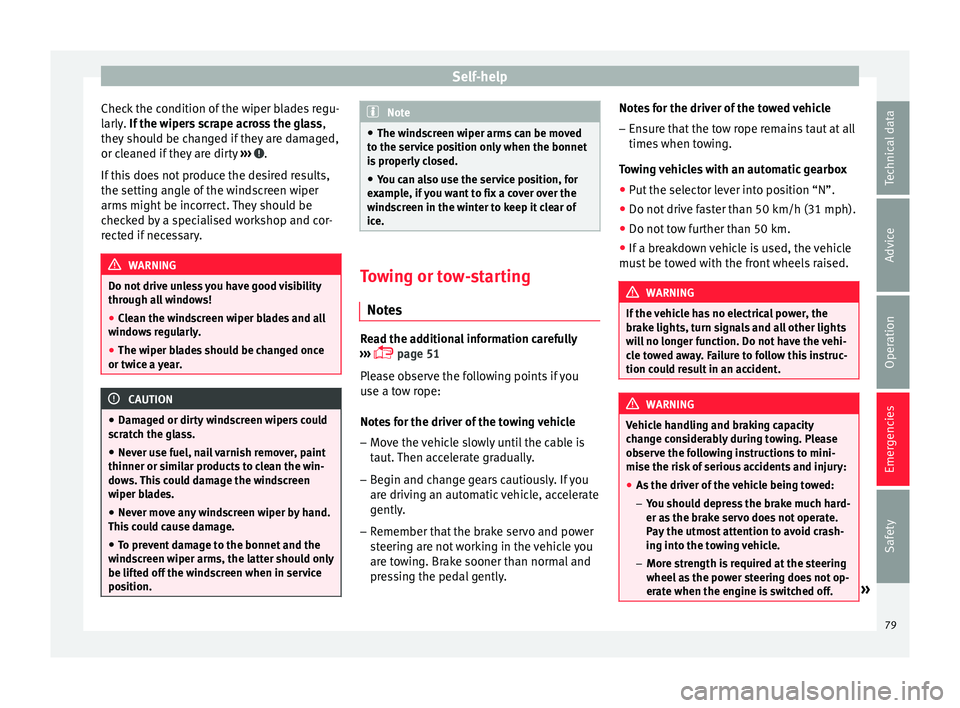
position. Note
● The wind s
creen wiper arms can be moved
to the service position only when the bonnet
is properly closed.
● You can also use the service position, for
examp
le, if you want to fix a cover over the
windscreen in the winter to keep it clear of
ice. Towing or tow-starting
Note s Read the additional information carefully
› ›
›
page 51
Please observe the following points if you
use a tow rope:
Notes for the driver of the towing vehicle
– Move the vehicle slowly until the cable is
taut.
Then accelerate gradually.
– Begin and change gears cautiously. If you
are drivin
g an automatic vehicle, accelerate
gently.
– Remember that the brake servo and power
steerin
g are not working in the vehicle you
are towing. Brake sooner than normal and
pressing the pedal gently. Notes for the driver of the towed vehicle
– Ensure that the tow rope remains taut at all
times when t
owing.
Towing vehicles with an automatic gearbox
● Put the selector lever into position “N”.
● Do not drive faster than 50 km/h (31 mph).
● Do not tow further than 50 km.
● If a breakdown vehicle is used, the vehicle
must
be towed with the front wheels raised. WARNING
If the vehicle has no electrical power, the
brak e light
s, turn signals and all other lights
will no longer function. Do not have the vehi-
cle towed away. Failure to follow this instruc-
tion could result in an accident. WARNING
Vehicle handling and braking capacity
ch an
ge considerably during towing. Please
observe the following instructions to mini-
mise the risk of serious accidents and injury:
● As the driver of the vehicle being towed:
– You shoul
d depress the brake much hard-
er as the brake servo does not operate.
Pay the utmost attention to avoid crash-
ing into the towing vehicle.
– More strength is required at the steering
wheel as the power steering does not op-
erate when the engine is switched off. » 79
Technical data
Advice
Operation
Emergencies
Safety
Page 106 of 248
Operation
The l amp provides information about the
di s
connection status of the system:
● It stays lit when the ASR is disconnected on
pres
sing the switch or if we select ESC
Sport mode, only by means of Easy Connect.
Brake system* Situations in which the warning lamp lights
up
●
the brake fluid level is too low
› ››
page 208.
● there is a fault in the brake system.
This w
arning lamp can light up together with
the ABS system warning lamp. WARNING
● If the br ak
e warning lamp does not go out
or if it lights up when driving, the brake fluid
level in the reservoir is too low so there is a
risk of an accident ››› page 208, Brake fluid.
Stop the vehicle and do not drive on. Obtain
technical assistance.
● If the brake warning lamp lights up to-
gether w
ith the ABS lamp this could be
due to an ABS fault. This could cause the rear
wheels to lock quickly when you brake. This
could cause the rear to break away. Risk of
skidding. Stop the vehicle and seek technical
assistance. Cruise speed (cruise control system)*
The warning lamp
comes
on when the
cruise control system is switched on. For fur-
ther information on the cruise control system
please see ›››
page 34.
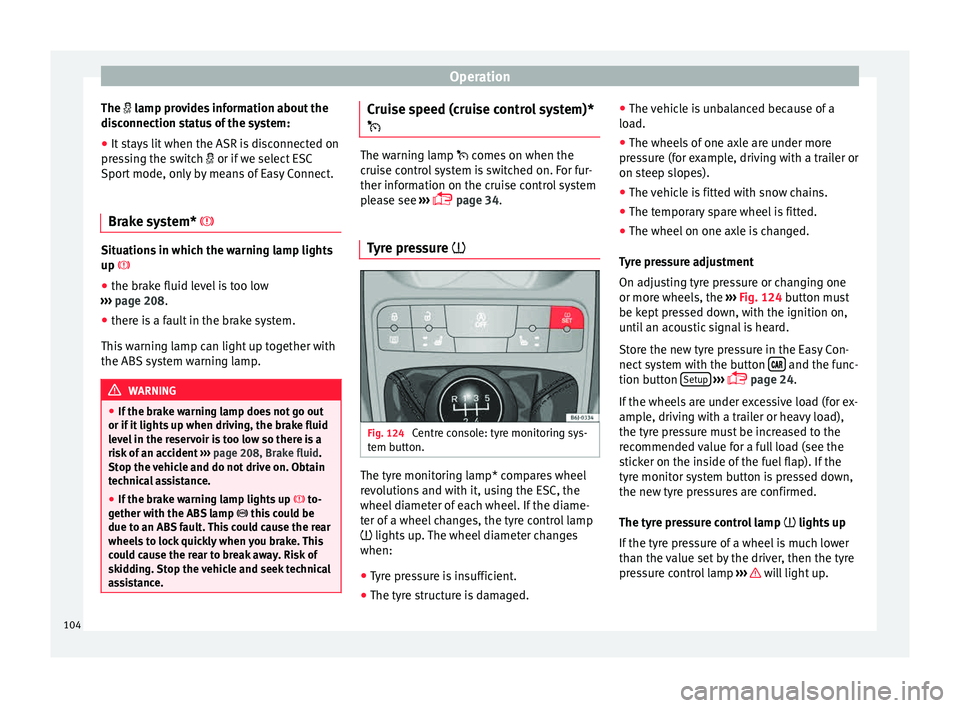
Tyre pressure Fig. 124
Centre console: tyre monitoring sys-
t em b
utt
on. The tyre monitoring lamp* compares wheel
r
ev
o
lutions and with it, using the ESC, the
wheel diameter of each wheel. If the diame-
ter of a wheel changes, the tyre control lamp
lights up. The wheel diameter changes
when:
● Tyre pressure is insufficient.
● The tyre structure is damaged. ●
The vehic
le is unbalanced because of a
load.
● The wheels of one axle are under more
pres
sure (for example, driving with a trailer or
on steep slopes).
● The vehicle is fitted with snow chains.
● The temporary spare wheel is fitted.
● The wheel on one axle is changed.
Tyr
e pressure adjustment
On adjusting tyre pressure or changing one
or more wheels, the ››› Fig. 124 button must
be kept pressed down, with the ignition on,
until an acoustic signal is heard.
Store the new tyre pressure in the Easy Con-
nect system with the button and the func-
tion b utt
on Set
up
› ›
›
page 24.
If the wheels are under excessive load (for ex-
ample, driving with a trailer or heavy load),
the tyre pressure must be increased to the
recommended value for a full load (see the
sticker on the inside of the fuel flap). If the
tyre monitor system button is pressed down,
the new tyre pressures are confirmed.
The tyre pressure control lamp lights up
If the tyre pressure of a wheel is much lower
than the value set by the driver, then the tyre
pressure control lamp ››› will light up.
104
Page 111 of 248
Communications and multimedia
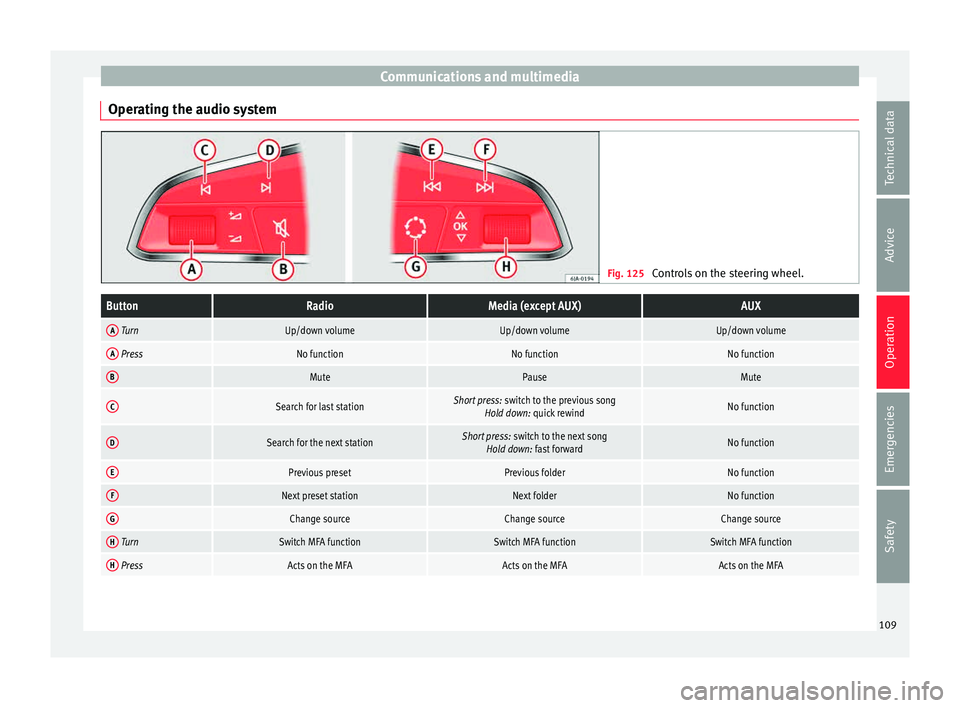
Operating the audio system Fig. 125
Controls on the steering wheel.ButtonRadioMedia (except AUX)AUX
A TurnUp/down volumeUp/down volumeUp/down volume
A PressNo functionNo functionNo function
BMutePauseMute
CSearch for last stationShort press: switch to the previous song
Hold down: quick rewindNo function
DSearch for the next stationShort press: switch to the next song
Hold down: fast forwardNo function
EPrevious presetPrevious folderNo function
FNext preset stationNext folderNo function
GChange sourceChange sourceChange source
H TurnSwitch MFA functionSwitch MFA functionSwitch MFA function
H PressActs on the MFAActs on the MFAActs on the MFA 109
Technical data
Advice
Operation
Emergencies
Safety