wipers Seat Ibiza ST 2015 Owner's manual
[x] Cancel search | Manufacturer: SEAT, Model Year: 2015, Model line: Ibiza ST, Model: Seat Ibiza ST 2015Pages: 248, PDF Size: 4.77 MB
Page 25 of 248
The essentials
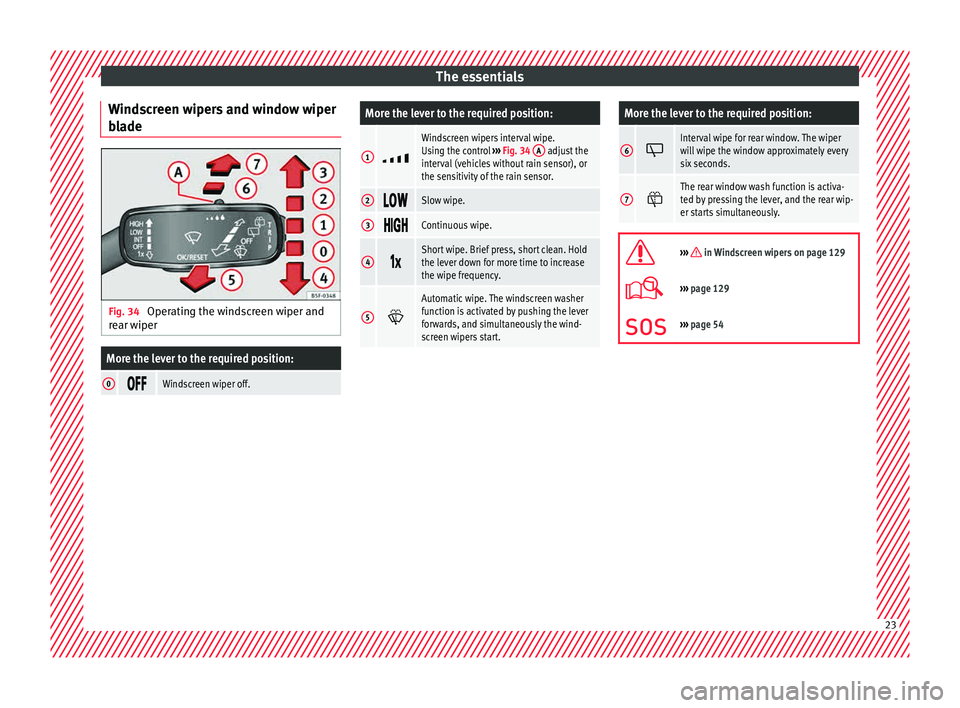
Windscreen wipers and window wiper
b l
a
de Fig. 34
Operating the windscreen wiper and
r e
ar w
iper
More the lever to the required position:
0 Windscreen wiper off.
More the lever to the required position:
1
Windscreen wipers interval wipe.
Using the control
››› Fig. 34 A adjust the
interval (vehicles without rain sensor), or
the sensitivity of the rain sensor.
2 Slow wipe.
3
Continuous wipe.
4
Short wipe. Brief press, short clean. Hold
the lever down for more time to increase
the wipe frequency.
5
Automatic wipe. The windscreen washer
function is activated by pushing the lever
forwards, and simultaneously the wind-
screen wipers start.
More the lever to the required position:
6 Interval wipe for rear window. The wiper
will wipe the window approximately every
six seconds.
7
The rear window wash function is activa-
ted by pressing the lever, and the rear wip-
er starts simultaneously.
››› in Windscreen wipers on page 129
›››
page 129
››› page 54 23
Page 27 of 248
The essentialsMenuSubmenuPossible settingDescription
Driver assistanceTiredness detectionActivation/deactivation›››
page 175
Parking and ma-
noeuvringParkPilotAutomatically activate, front volume, front sound settings, rear volume, rear sound settings,
adjust volume››› page 176
Vehicle lights
Vehicle interior lightingInstrument and switch lighting, footrest lighting››› page 128
Coming home/Leaving home
functionStart time for “Coming home” function, start time for “Leaving home” function››› page 126
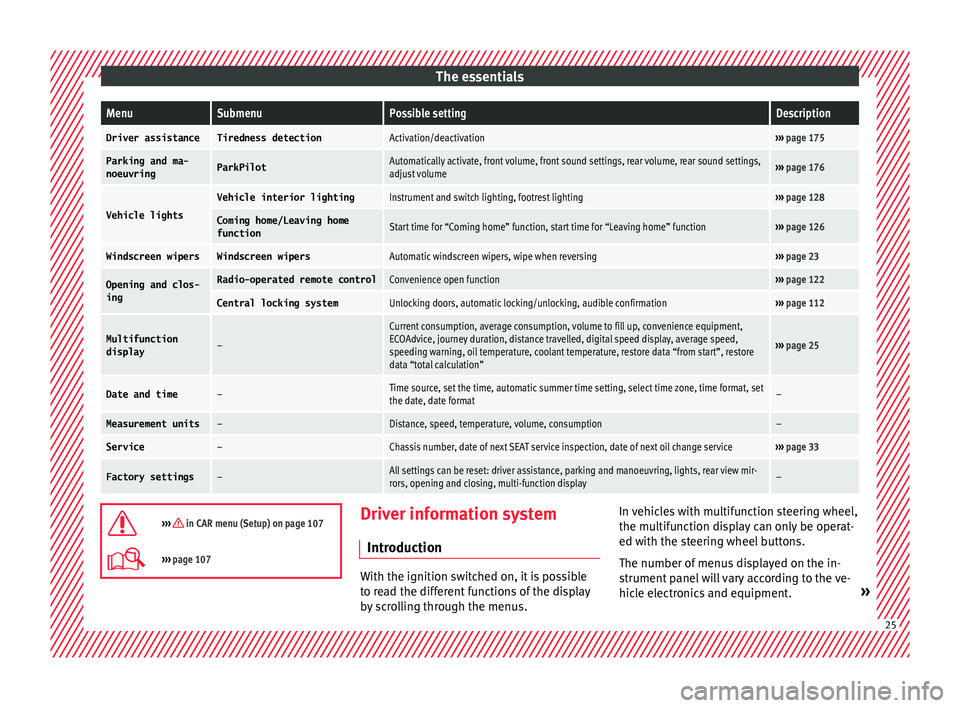
Windscreen wipersWindscreen wipersAutomatic windscreen wipers, wipe when reversing››› page 23
Opening and clos-
ingRadio-operated remote controlConvenience open function››› page 122
Central locking systemUnlocking doors, automatic locking/unlocking, audible confirmation››› page 112
Multifunction
display–
Current consumption, average consumption, volume to fill up, convenience equipment,
ECOAdvice, journey duration, distance travelled, digital speed display, average speed,
speeding warning, oil temperature, coolant temperature, restore data “from start”, restore
data “total calculation”
››› page 25
Date and time–Time source, set the time, automatic summer time setting, select time zone, time format, set
the date, date format–
Measurement units–Distance, speed, temperature, volume, consumption–
Service–Chassis number, date of next SEAT service inspection, date of next oil change service››› page 33
Factory settings–All settings can be reset: driver assistance, parking and manoeuvring, lights, rear view mir-
rors, opening and closing, multi-function display–
››› in CAR menu (Setup) on page 107
›››
page 107 Driver information system
Intr oduction With the ignition switched on, it is possible
to r
e
ad the different functions of the display
by scrolling through the menus. In vehicles with multifunction steering wheel,
the multif
u
nction display can only be operat-
ed with the steering wheel buttons.
The number of menus displayed on the in-
strument panel will vary according to the ve-
hicle electronics and equipment. » 25
Page 53 of 248
The essentials
Emergency towing of the vehi-
c l
e
T
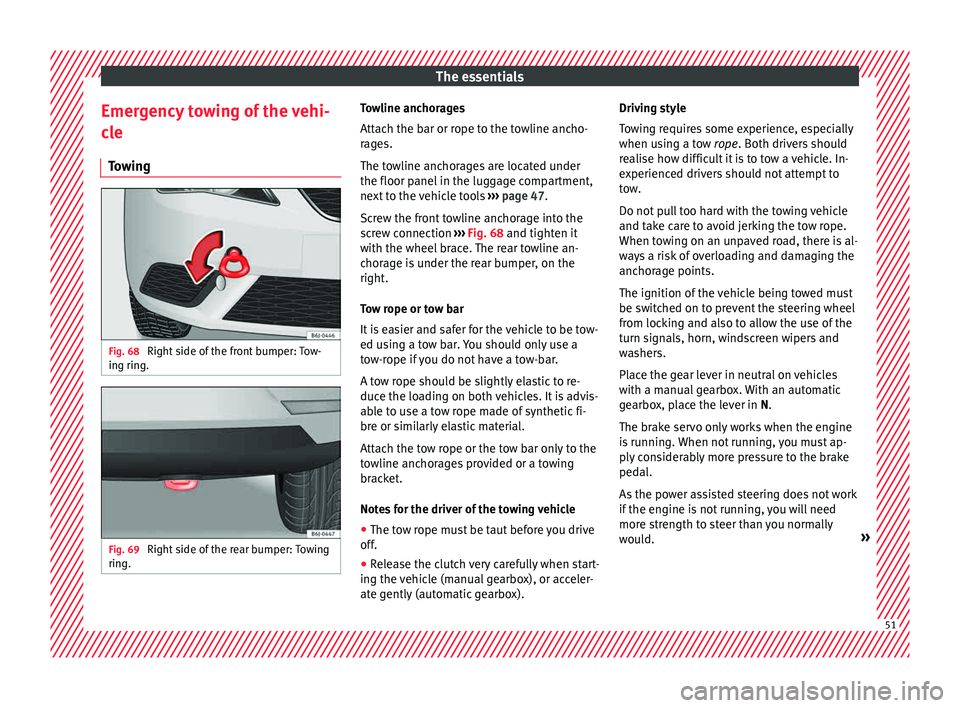
owing Fig. 68
Right side of the front bumper: Tow-
in g rin
g. Fig. 69
Right side of the rear bumper: Towing
rin g. Towline anchorages
Att
ac
h the b
ar or rope to the towline ancho-
rages.
The towline anchorages are located under
the floor panel in the luggage compartment,
next to the vehicle tools ››› page 47.
Screw the front towline anchorage into the
screw connection ››› Fig. 68 and tighten it
with the wheel brace. The rear towline an-
chorage is under the rear bumper, on the
right.
Tow rope or tow bar
It is easier and safer for the vehicle to be tow-
ed using a tow bar. You should only use a
tow-rope if you do not have a tow-bar.
A tow rope should be slightly elastic to re-
duce the loading on both vehicles. It is advis-
able to use a tow rope made of synthetic fi-
bre or similarly elastic material.
Attach the tow rope or the tow bar only to the
towline anchorages provided or a towing
bracket.
Notes for the driver of the towing vehicle
● The tow rope must be taut before you drive
off.
● Rel
ease the clutch very carefully when start-
ing the v
ehicle (manual gearbox), or acceler-
ate gently (automatic gearbox). Driving style
Tow
ing requires some experience, especially
when using a tow rope. Both drivers should
realise how difficult it is to tow a vehicle. In-
experienced drivers should not attempt to
tow.
Do not pull too hard with the towing vehicle
and take care to avoid jerking the tow rope.
When towing on an unpaved road, there is al-
ways a risk of overloading and damaging the
anchorage points.
The ignition of the vehicle being towed must
be switched on to prevent the steering wheel
from locking and also to allow the use of the
turn signals, horn, windscreen wipers and
washers.
Place the gear lever in neutral on vehicles
with a manual gearbox. With an automatic
gearbox, place the lever in N.
The brake servo only works when the engine
is running. When not running, you must ap-
ply considerably more pressure to the brake
pedal.
As the power assisted steering does not work
if the engine is not running, you will need
more strength to steer than you normally
would. » 51
Page 56 of 248
The essentials
Note
The vehicles must not touch each other, oth-
erw i
se electricity could flow as soon as the
positive terminals are connected. Changing the windscreen wiper
bl
a
des
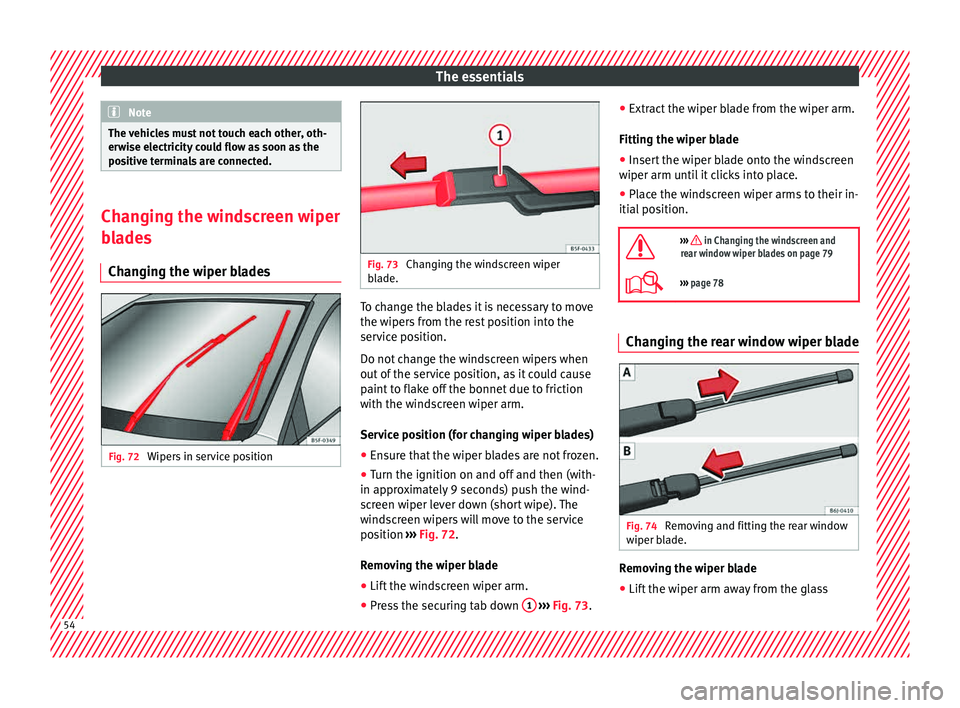
Changing the wiper blades Fig. 72
Wipers in service position Fig. 73
Changing the windscreen wiper
bl a
de. To change the blades it is necessary to move
the w
iper
s
from the rest position into the
service position.
Do not change the windscreen wipers when
out of the service position, as it could cause
paint to flake off the bonnet due to friction
with the windscreen wiper arm.
Service position (for changing wiper blades)
● Ensure that the wiper blades are not frozen.
● Turn the ignition on and off and then (with-
in appro
ximately 9 seconds) push the wind-
screen wiper lever down (short wipe). The
windscreen wipers will move to the service
position ››› Fig. 72.
Removing the wiper blade
● Lift the windscreen wiper arm.
● Press the securing tab down 1
› ›
› Fig. 73
.●
Extract the w
iper blade from the wiper arm.
Fitting the wiper blade ● Insert the wiper blade onto the windscreen
wiper arm unti
l it clicks into place.
● Place the windscreen wiper arms to their in-
itial po
sition.
››› in Changing the windscreen and
rear window wiper blades on page 79
››› page 78 Changing the rear window wiper blade
Fig. 74
Removing and fitting the rear window
w iper b
l
ade. Removing the wiper blade
● Lift the wiper arm away from the glass 54
Page 81 of 248
Self-help
Check the condition of the wiper blades regu-
l arly
.
If the wipers scrape across the glass ,
they should be changed if they are damaged,
or cleaned if they are dirty ››› .
If thi
s
does not produce the desired results,
the setting angle of the windscreen wiper
arms might be incorrect. They should be
checked by a specialised workshop and cor-
rected if necessary. WARNING
Do not drive unless you have good visibility
through a l
l windows!
● Clean the windscreen wiper blades and all
window
s regularly.
● The wiper blades should be changed once
or twice a
year. CAUTION
● Damag ed or dir
ty windscreen wipers could
scratch the glass.
● Never use fuel, nail varnish remover, paint
thinner or simil
ar products to clean the win-
dows. This could damage the windscreen
wiper blades.
● Never move any windscreen wiper by hand.
This c
ould cause damage.
● To prevent damage to the bonnet and the
winds
creen wiper arms, the latter should only
be lifted off the windscreen when in service
position. Note
● The wind s
creen wiper arms can be moved
to the service position only when the bonnet
is properly closed.
● You can also use the service position, for
examp
le, if you want to fix a cover over the
windscreen in the winter to keep it clear of
ice. Towing or tow-starting
Note s Read the additional information carefully
› ›
›
page 51
Please observe the following points if you
use a tow rope:
Notes for the driver of the towing vehicle
– Move the vehicle slowly until the cable is
taut.
Then accelerate gradually.
– Begin and change gears cautiously. If you
are drivin
g an automatic vehicle, accelerate
gently.
– Remember that the brake servo and power
steerin
g are not working in the vehicle you
are towing. Brake sooner than normal and
pressing the pedal gently. Notes for the driver of the towed vehicle
– Ensure that the tow rope remains taut at all
times when t
owing.
Towing vehicles with an automatic gearbox
● Put the selector lever into position “N”.
● Do not drive faster than 50 km/h (31 mph).
● Do not tow further than 50 km.
● If a breakdown vehicle is used, the vehicle
must
be towed with the front wheels raised. WARNING
If the vehicle has no electrical power, the
brak e light
s, turn signals and all other lights
will no longer function. Do not have the vehi-
cle towed away. Failure to follow this instruc-
tion could result in an accident. WARNING
Vehicle handling and braking capacity
ch an
ge considerably during towing. Please
observe the following instructions to mini-
mise the risk of serious accidents and injury:
● As the driver of the vehicle being towed:
– You shoul
d depress the brake much hard-
er as the brake servo does not operate.
Pay the utmost attention to avoid crash-
ing into the towing vehicle.
– More strength is required at the steering
wheel as the power steering does not op-
erate when the engine is switched off. » 79
Technical data
Advice
Operation
Emergencies
Safety
Page 85 of 248
Fuses and bulbs
Fuse arrangement in engine compart-
ment Read the additional information carefully
›› ›
page 44
Only replace fuses with a fuse of the same
amperage (same colour and markings) and
size.
No.Consumer/Amps
1Fan, condenser40
TK8 fan, condenser50
2Glow plugs50
3ABS Pump40
EMBOX2-13 (TA8)20
4PTC glow phase 250
5PTC glow phase 350
6BDM, 30 ReF5
7MSG (KL30)7.5
8Windscreen wipers30
9Automatic gear box control, AQ 160
Control box30
10ABS Ventil25
EMBOX2-11 (TA8)5
No.Consumer/Amps
12
Injectors
10TDI fuel metering adjuster, TA8 ex-
haust temperature sensor
13Servo sensor5
14coolant pump high/low temperature,
gauge (relay EKP)10
1550 controls motor diag5
16Starter motor30
17Controls motor (MSG KL87)20
18PTC Relays, TOG sensor, engine
valves, PWM fan10
19Interior AUX Fuses30
20Glow plug relay, Heizrohr5
Ignition coil20 Changing bulbs
Gener al
notes Read the additional information carefully
› ›
›
page 45
Before changing any bulb, first turn off the
failed device. Do not touch the glass part of the bulb with
your bar
e hands. The fingerprints left on the
glass will vaporise as a result of the heat gen-
erated by the bulb, reducing bulb life and
causing condensation on the reflector sur-
face, thus reducing effectiveness.
A bulb must only be replaced by one of the
same type. The type is indicated on the bulb,
either on the glass part or on the base.
Xenon headlights
With this type of headlight, the user can re-
place the turn signal bulb. Replacement of
the dipped/main beam bulb must be done by
Technical Services, given that complex ele-
ments must be removed from the vehicle and
the automatic control system that incorpo-
rates it must be reset.
The Xenon bulbs discharge 2.5 times the
light flux and have an average lifespan of 5
times more than that of halogen bulbs, this
means that, except due to unusual circum-
stances, there is no need to change the bulbs
for the whole life of the vehicle. WARNING
● Tak e p
articular care when working on com-
ponents in the engine compartment if the en-
gine is warm, there is a risk of burns.
● Bulbs are highly sensitive to pressure. The
glas
s can break when you touch the bulb,
causing injury. » 83
Technical data
Advice
Operation
Emergencies
Safety
Page 97 of 248
Controls and displays
Operation
C ontr
o
ls and displays
General instrument panel Door release lever
Light sw
it
ch . . . . . . . . . . . . . . . . . . . . . . 123
Headlight range control* . . . . . . . . . .125
Air vents
Lever f
or:
– Turn signals/main beam head-
lights . . . . . . . . . . . . . . . . . . . . . . . . . . 125
– Crui se c
ontrol* . . . . . . . . . . . . . . . . . 184
Instrument panel and warning
lamp s:
– In
struments . . . . . . . . . . . . . . . . . . . . 96
– Warnin g and indic
ation lamps . . .35
Steering wheel with horn and – Driver airb ag . . . . . . . . . . . . . . . . . . . 66
– On-boar d c
omputer controls . . . .25
– Contro
ls for radio, telephone,
navigation and speech dialogue
system ›››
Booklet Radio
– Paddle levers for tiptronic gear-
shift (automatic gearbox) . . . . . . .162
1 2
3
4
5
6
7 Steering and starter lock
. . . . . . . . . .153
Lever for: – Wind
s
creen wipers and washer . .129
– Window w
asher-wiper system* . .129
– Multi-f
unction display control* . .25
Infotainment system:
Depending on the equipment,
glo
ve compartment with: . . . . . . . . .136
– CD pla
yer* and/or SD card*
››› Booklet Radio
Passenger airbag* . . . . . . . . . . . . . . . . 14
Switches for:
– Heating and
ventilation . . . . . . . . . 146
– Air conditionin g* . . . . . . . . . . . . . . . 148
– C
limatr
onic* . . . . . . . . . . . . . . . . . . . . 150
Depending on the equipment, but-
ton s
for:
– SEAT Drive Profile . . . . . . . . . . . . . . . 185
– Park a
ssist system . . . . . . . . . . . . . . 176
– Hazard w
arning lights . . . . . . . . . .127
– Airbag off w
arning lamp* . . . . . . .68, 70
Depending on the equipment:
– USB/AUX -IN inp
ut . . . . . . . . . . . . . . 112
– Cig ar
ette lighter/Power socket . .138
Drink holder/Ashtray . . . . . . . . . . . . .137
8 9
10
11
12
13
14
15
16 Controls in the centre console:
– St ar
t
-Stop operation button . . . . .173
– Tyr
e pressure monitoring* . . . . . . .104
– Heated r
ear window . . . . . . . . . . . . 128
– Heated se
ats* . . . . . . . . . . . . . . . . . . 134
– Central
locking* . . . . . . . . . . . . . . . . 115
Handbrake lever . . . . . . . . . . . . . . . . . . 156
Gear lever – Automatic* . . . . . . . . . . . . . . . . . . . . . 159
– M
anual . . . . . . . . . . . . . . . . . . . . . . . . . 159
Stor
age space
Pedal
s . . . . . . . . . . . . . . . . . . . . . . . . . . . 61
Steering column control lever* . . . .13
Bonnet release lever . . . . . . . . . . . . . .203
Fuse housing . . . . . . . . . . . . . . . . . . . . . 81
Control for adjusting electric exteri-
or mirrors* . . . . . . . . . . . . . . . . . . . . . . . 131
El
ectric window controls* . . . . . . . . .120 Note
Some of the items of equipment listed here
are fitt ed on
ly on certain model versions or
are optional extras. 17
18
19
20
21
22
23
24
25
26
95
Technical data
Advice
Operation
Emergencies
Safety
Page 109 of 248
Introduction to the Easy Connect system*
same time when the hazard warning lights
ar e sw
it
ched on.
If any of both turn signals fails, the warning
lamp will start flashing twice faster than nor-
mal.
For further information on the turn signals,
please see ››› page 125.
Electronic immobiliser “SAFE”* This warning lamp flashes if an unauthorised
k
ey
i
s used.
Inside the key there is a chip that deactivates
the electronic immobiliser automatically
when the key is inserted into the ignition.
The electronic immobiliser will be activated
again automatically as soon as you pull the
key out of the ignition lock.
If the following message* is shown on the in-
strument panel display: SAFE, the vehicle
cannot be started.
The engine can, however, be started if the
appropriate coded SEAT genuine key is used. Note
The vehicle cannot operate properly if you do
not h av
e a genuine SEAT key. Introduction to the Easy
C
onnect
sy
stem*
System settings (CAR)* CAR menu (Setup) Read the additional information carefully
›› ›
page 24
To select the settings menus, press the Easy
Connect button and the
Set
up function
b utt
on.
The act
ual number of menus available and
the name of the various options in these me-
nus will depend on the vehicle’s electronics
and equipment.
Pressing the menu button will always take
you to the last menu used.
When the function button check box is activa-
ted , the function is active.
Pressing the menu button will always take
y ou t
o the l
ast menu used.
Any changes made using the settings menus
are automatically saved on closing those me-
nus.
Function buttons in the vehicle’s settings
menuPage
ESC system››› page 169
Tyres››› page 104
Driver assistance››› table on page 24
Parking and manoeuvring››› page 176
Vehicle lights››› table on page 24
Rear vision mirrors and wind-
screen wipers››› table on page 24
Opening and closing››› table on page 24
Multifunction display››› table on page 24
Date and time››› table on page 24
Units››› table on page 24
Service››› page 97
Factory settings››› table on page 24 WARNING
Any distraction may lead to an accident, with
the risk of
injury. Operating the Easy Connect
system while driving could distract you from
traffic. 107
Technical data
Advice
Operation
Emergencies
Safety
Page 126 of 248
Operation
and to ensure that other road users are able
to see
y
ou. Always use your dipped beam
headlights if it is dark or if visibility is poor. Note
● The dip ped beam he
adlights will only work
with the ignition on. The side lights come on
automatically when the ignition is turned off.
● If the lights are left on after the key has
been taken out
of the ignition lock, an audi-
ble warning sounds while the driver door re-
mains open. This is a reminder to switch the
lights off.
● The rear fog light is so bright that it can
dazzl
e drivers behind you. You should use
the rear fog light only when visibility is very
poor.
● The use of the lighting described here is
subj
ect to the relevant statutory require-
ments. Automatic lighting*
Activation
– Rotate the switch to the po
s
ition, this
indication will light up.
Deactivation
– Turn the light switch to . Automatic lighting
If autom
atic headlight control is switched on,
dipped beam headlights are automatically
switched on by a photosensor if you drive in-
to a tunnel, for example. WARNING
● Ev en if
the automatic headlight control is
switched on, the dipped beam headlights will
not be switched on with fog. Therefore, the
dipped beam must be switched on manually. Note
● For tho se
vehicles with the automatic head-
light system, when the key is removed from
the ignition, the audible warning will only
sound if the light knob is in position or .
● If the daylight driving automatic light func-
tion is sw
itched on, the front fog lights or
rear fog light cannot be switched on in addi-
tion.
● The use of the lighting described here is
subj
ect to the relevant statutory require-
ments.
● Do not put stickers on the windscreen in
front of
the sensor. This may cause disrup-
tions or faults in the automatic lighting sys-
tem.
● The rain sensor switches on the dipped
beam hea
dlights when the windscreen wipers
have been operating continuously for a few
seconds and it switches the lights off when the continuous or interval wipe is switched
off f
or some minut
es. Daytime running lights
›› ›
table on page 2
The daytime running lights are enabled auto-
matically when the ignition is switched on.
Daytime running lights are signalling devices
for improving road safety. The lights are built
into the headlights and come on each time
the ignition is turned on if the light switch is
in position 0 or . It is automatically
switched off when the dipped beam lights
are turned on. WARNING
The side lights or daytime driving lights are
not bright enough t
o illuminate the road
ahead and to ensure that other road users are
able to see you.
● Always use your dipped beam head lights if
it is
raining or if visibility is poor.
● The rear lights do not come on with the
daytime driv
ing light. A vehicle which does
not have the rear lights on may not be visible
to other drivers in the darkness, if it is rain-
ing or in conditions of poor visibility. 124
Page 131 of 248
Lights and visibility
For the sake of the environment
The heated rear window should be switched
off a s
soon as the glass is demisted. By sav-
ing electrical power you can also save fuel. Note
To avoid possible damage to the battery, an
autom atic
temporary disconnection of this
function is possible, coming back on when
normal operating conditions are re-establish-
ed. Sun visors
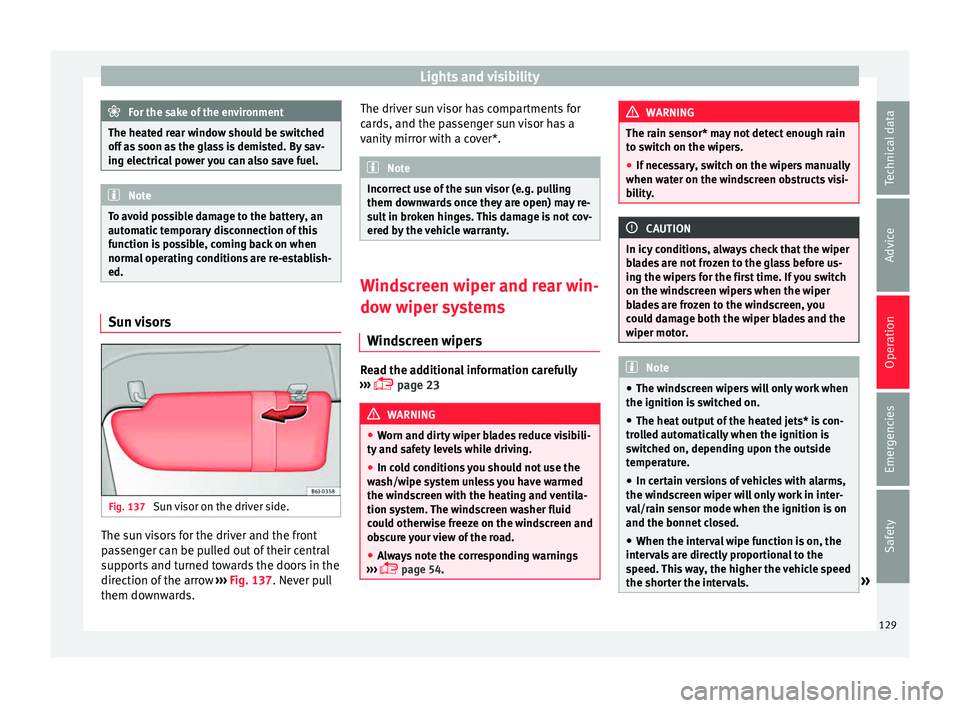
Fig. 137
Sun visor on the driver side. The sun visors for the driver and the front
p
a
s
senger can be pulled out of their central
supports and turned towards the doors in the
direction of the arrow ››› Fig. 137. Never pull
them downwards. The driver sun visor has compartments for
card
s, and the passenger sun visor has a
vanity mirror with a cover*. Note
Incorrect use of the sun visor (e.g. pulling
them down w
ards once they are open) may re-
sult in broken hinges. This damage is not cov-
ered by the vehicle warranty. Windscreen wiper and rear win-
dow w
iper sy
stems
Windscreen wipers Read the additional information carefully
› ›
›
page 23 WARNING
● Worn and dir ty
wiper blades reduce visibili-
ty and safety levels while driving.
● In cold conditions you should not use the
wash/w
ipe system unless you have warmed
the windscreen with the heating and ventila-
tion system. The windscreen washer fluid
could otherwise freeze on the windscreen and
obscure your view of the road.
● Always note the corresponding warnings
›››
page 54. WARNING
The rain sensor* may not detect enough rain
to sw it
ch on the wipers.
● If necessary, switch on the wipers manually
when water on the w
indscreen obstructs visi-
bility. CAUTION
In icy conditions, always check that the wiper
bl a
des are not frozen to the glass before us-
ing the wipers for the first time. If you switch
on the windscreen wipers when the wiper
blades are frozen to the windscreen, you
could damage both the wiper blades and the
wiper motor. Note
● The wind s
creen wipers will only work when
the ignition is switched on.
● The heat output of the heated jets* is con-
trol
led automatically when the ignition is
switched on, depending upon the outside
temperature.
● In certain versions of vehicles with alarms,
the winds
creen wiper will only work in inter-
val/rain sensor mode when the ignition is on
and the bonnet closed.
● When the interval wipe function is on, the
interv
als are directly proportional to the
speed. This way, the higher the vehicle speed
the shorter the intervals. » 129
Technical data
Advice
Operation
Emergencies
Safety