engine coolant Seat Leon 5D 2007 Owner's manual
[x] Cancel search | Manufacturer: SEAT, Model Year: 2007, Model line: Leon 5D, Model: Seat Leon 5D 2007Pages: 302, PDF Size: 9.14 MB
Page 6 of 302
Contents
4Trailer towing
. . . . . . . . . . . . . . . . . . . . . . . . . . . . .
Instructions to follow . . . . . . . . . . . . . . . . . . . . .
Ball coupling of towing bracket* . . . . . . . . . . . .
Driving tips . . . . . . . . . . . . . . . . . . . . . . . . . . . . .
Fitting a towing bracket* . . . . . . . . . . . . . . . . . . .
Cleaning and caring for your vehicle
. . . . . . .
General notes . . . . . . . . . . . . . . . . . . . . . . . . . . .
Care of the vehicle exterior . . . . . . . . . . . . . . . . .
Care of the vehicle interior . . . . . . . . . . . . . . . . .
Accessories, parts replacement and
modifications
. . . . . . . . . . . . . . . . . . . . . . . . . . . .
Accessories and parts . . . . . . . . . . . . . . . . . . . . .
Modifications . . . . . . . . . . . . . . . . . . . . . . . . . . . .
Roof aerial* . . . . . . . . . . . . . . . . . . . . . . . . . . . . .
Mobile telephones and radiotelephones . . . . .
Checking and refilling levels
. . . . . . . . . . . . . .
Refuelling . . . . . . . . . . . . . . . . . . . . . . . . . . . . . . .
Petrol . . . . . . . . . . . . . . . . . . . . . . . . . . . . . . . . . .
Diesel . . . . . . . . . . . . . . . . . . . . . . . . . . . . . . . . . .
Working in the engine compartment . . . . . . . . .
Engine oil . . . . . . . . . . . . . . . . . . . . . . . . . . . . . . .
Coolant . . . . . . . . . . . . . . . . . . . . . . . . . . . . . . . . .
Washer fluid and windscreen wiper blades . . . .
Brake fluid . . . . . . . . . . . . . . . . . . . . . . . . . . . . . .
Battery . . . . . . . . . . . . . . . . . . . . . . . . . . . . . . . . .
Wheels and tyres
. . . . . . . . . . . . . . . . . . . . . . . . .
Wheels . . . . . . . . . . . . . . . . . . . . . . . . . . . . . . . . .
If and when
. . . . . . . . . . . . . . . . . . . . . . . . . . . . . .
Vehicle tools, tyre repair kit and spare wheel . .
Wheel change . . . . . . . . . . . . . . . . . . . . . . . . . . .
Tyre repair kit (Tyre-Mobility-System)* . . . . . . . .
Fuses . . . . . . . . . . . . . . . . . . . . . . . . . . . . . . . . . .
Bulb change . . . . . . . . . . . . . . . . . . . . . . . . . . . . .
Jump-starting . . . . . . . . . . . . . . . . . . . . . . . . . . . .
Towing and tow-starting . . . . . . . . . . . . . . . . . . .
Te c h n i c a l D a t a
. . . . . . . . . . . . . . . . . . . . . . .
General notes on the technical data
. . . . . . .
What you should be aware of . . . . . . . . . . . . . . .
How are the figures measured? . . . . . . . . . . . . .
Towing a trailer . . . . . . . . . . . . . . . . . . . . . . . . . .
Wheels . . . . . . . . . . . . . . . . . . . . . . . . . . . . . . . . .
Techn ical data
. . . . . . . . . . . . . . . . . . . . . . . . . . . .
Checking fluid levels . . . . . . . . . . . . . . . . . . . . . .
Petrol engine 1.4 63 kW (86 bhp) . . . . . . . . . . .
Petrol engine 1.4 92 kW (125 bhp) . . . . . . . . . .
Petrol engine 1.6l 75 kW (102 bhp) . . . . . . . . . .
Petrol engine 1.8 118 kW (160 bhp) . . . . . . . . .
Petrol engine 2.0l 110 kW (150 bhp). Manual .
Petrol engine 2.0 litre 110 kW (150 bhp).
Automatic . . . . . . . . . . . . . . . . . . . . . . . . . . . . . .
Petrol engine 2.0 litre 147 kW (200 bhp). Manual
Petrol engine 2.0 litre 147 kW (200 bhp).
Automatic . . . . . . . . . . . . . . . . . . . . . . . . . . . . . .
Petrol engine 2.0 litre 177 kW (240 bhp). Cupra
Diesel engine 1.9l TDI 66 kW (90 bhp) . . . . . . .
Diesel engine 1.9l TDI 77 kW (105 bhp) . . . . . .
Diesel engine 1.9 TDI 77 kW (105 bhp).
Automatic . . . . . . . . . . . . . . . . . . . . . . . . . . . . . .
Diesel engine 2.0l 103 kW (140 bhp). Manual .
Diesel engine 2.0l 103 kW (140 bhp). Automatic
Diesel engine 2.0l 100 kW (136 bhp). Manual .
Diesel engine 2.0l 100 kW (136 bhp). Automatic
Diesel engine 2.0l 125 kW (170 bhp) . . . . . . . .
Dimensions and capacities . . . . . . . . . . . . . . . .
Index
. . . . . . . . . . . . . . . . . . . . . . . . . . . . . . . . . .
186
186
187
187
188
190
190
191
197
199
199
199
200
200
201
201
202
203
204
207
212
214
217
218
221
221
229
229
231
237
239
246
255
258 261
261
261
263
264
264
266
266
267
268
269
270
272
273
274
275
277
278
279
280
282
283
284
285
287
289
291
leon ingles.book Seite 4 Dienst
ag, 11. September 2007 1:47 13
Page 58 of 302

Cockpit
56InstrumentsInstrument overview
The instruments display the vehicle operating status.Detailed view of dash panel instrument panel
Fuel gauge ⇒ page 57
Multi-function display
Engine coolant temperature gauge ⇒page 57
Rev counter ⇒ page 58
Time adjustment button / tr ip recorder reset button ⇒page 58
Speedometer
Fig. 32 Detailed view of dash panel instrument panel
A1A2A3A4A5A6
leon ingles.book Seite 56 Dienstag, 11. September 2007 1:47 13
Page 59 of 302

Cockpit57
Safety First
Operating instructions
Tips and Maintenance
Te c h n i c a l D a t a
Fuel gauge
and reserve indicator
Instrument panel: fuel gauge
The fuel tank has a capacity of approx. 55 litres.
When the needle reaches the reserve zone ⇒fig. 33 (arrow), the warning
lamp will light and an acoustic signal will sound reminding the driver to
refuel . At this point there are still about 7 litres of fuel in the tank.
The following text appears in the instrument panel display
3) PLEASE
REFUEL *.
Engine coolant temperature display
This gauge shows the engine coolant temperature.
Needle in cold zone
Avoid high engine speeds and heavy engine loads ⇒fig. 34.
Needle in normal zone
In normal driving conditions, the needle should be in the middle section of
the scale. The temperature may also rise when the engine is working hard,
especially at high outside temperatures. This is no cause for concern as long
as the warning lamp does not light up and no warning* text appears in the
combi-instrument display.
Needle in warning zone
The warning lamp* ⇒page 72, fig. 46 will light up if the needle is in the
warning zone. The following warning appears in the instrument panel
3)Depending on the model version
Fig. 33 Instrument panel:
fuel gauge
Fig. 34 Instrument panel:
engine coolant tempera-
ture gauge
AAABAC
A2
leon ingles.book Seite 57 Dienstag, 11. September 2007 1:47 13
Page 60 of 302

Cockpit
58display
4). Stop the car and switch off the engine. Check the coolant level
⇒ page 212 ⇒.
Even if the coolant level is correct do not continue driving. You should obtain
technical assistance.WARNING
When working in the engine compartment, always bear in mind the safety
warnings ⇒ page 204.
Caution
Accessories in front of the air inlet reduce the cooling effect of the coolant. At
high outside temperatures and high engine loads, there is a risk of the
engine overheating.Rev counter
The rev. counter displays the engine speed in revolutions per
minute.The start of the red zone on the dial ⇒page 56, fig. 32 indicates the
maximum engine speed which may be used briefly when the engine is warm
and after it has been run in properly. However, it is advisable to change up a
gear or move the selector lever to D (or l ift your foot off the accelerator) before
the needle reaches the red zone.
Caution
The rev counter needle must never enter the red zone on the scale. Risk of
engine damage.
For the sake of the environment
Changing up a gear early will help you to save fuel and minimise engine
noise.Setting the digital clock*
The digital clock is located in the instrument panel display.– Turn the setting knob ⇒page 56, fig. 32 anti-clockwise to
the stop to set the hour. If the kn ob is turned briefly anti-clock-
wise the clock will advance one hour further.
– Turn the setting knob clockwise to the limit stop to set the minutes. If the knob is turned briefly clockwise the clock will
advance one minute further.
4)Depending on the model version
A4
A5
leon ingles.book Seite 58 Dienstag, 11. September 2007 1:47 13
Page 66 of 302
Cockpit
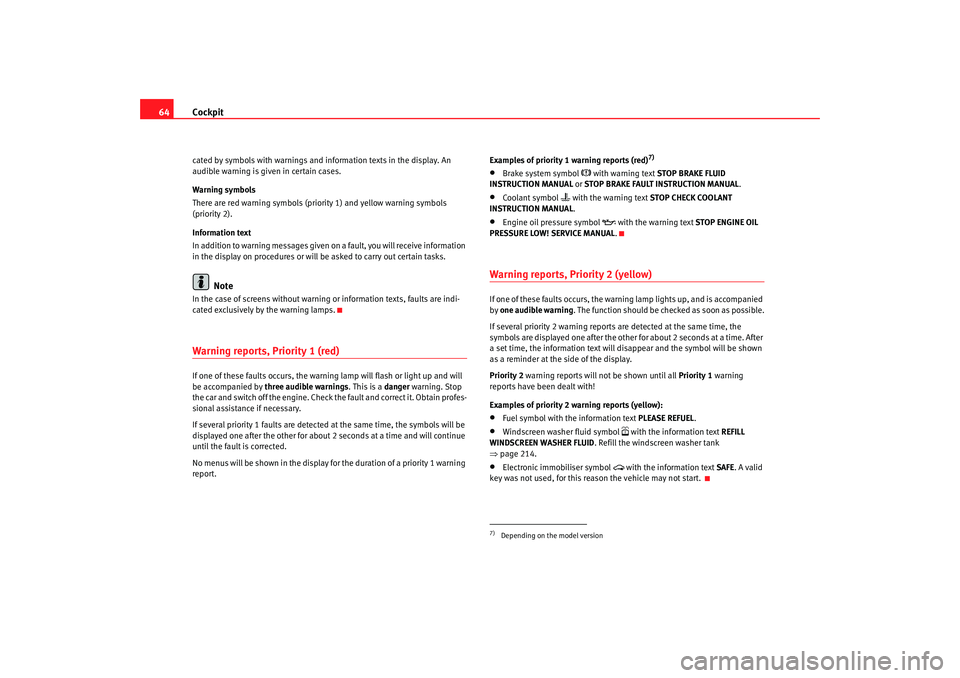
64cated by symbols with warnings and information texts in the display. An
audible warning is given in certain cases.
Warning symbols
There are red warning symbols (priority 1) and yellow warning symbols
(priority 2).
Information text
In addition to warning me ssages given on a fault, you will receive information
in the display on procedures or will be asked to carry out certain tasks.
Note
In the case of screens without warning or information texts, faults are indi-
cated exclusively by the warning lamps.Warning reports, Priority 1 (red)If one of these faults occurs, the warning lamp will flash or light up and will
be accompanied by three audible warnings . This is a danger warning. Stop
the car and switch off the engine. Check the fault and correct it. Obtain profes-
sional assistance if necessary.
If several priority 1 faults are detected at the same time, the symbols will be
displayed one after the other for about 2 seconds at a time and will continue
until the fault is corrected.
No menus will be shown in the display fo r the duration of a priority 1 warning
report. Examples of priority 1 warning reports (red)
7)
•
Brake system symbol
with warning text
STOP BRAKE FLUID
INSTRUCTION MANUAL or STOP BRAKE FAULT INSTRUCTION MANUAL .
•
Coolant symbol
with the warning text STOP CHECK COOLANT
INSTRUCTION MANUAL .
•
Engine oil pressure symbol
with the warning text STOP ENGINE OIL
PRESSURE LOW! SERVICE MANUAL .
Warning reports, Priority 2 (yellow)If one of these faults occurs, the warning lamp lights up, and is accompanied
by one audible warning . The function should be checked as soon as possible.
If several priority 2 warning reports are detected at the same time, the
symbols are displayed one after the other for about 2 seconds at a time. After
a set time, the information text will disappear and the symbol will be shown
as a reminder at the side of the display.
Priority 2 warning reports will not be shown until all Priority 1 warning
reports have been dealt with!
Examples of priority 2 warning reports (yellow):•
Fuel symbol with the information text PLEASE REFUEL.
•
Windscreen washer fluid symbol
with the information text REFILL
WINDSCREEN WASHER FLUID . Refill the windscreen washer tank
⇒ page 214.
•
Electronic immobiliser symbol
with the information text SAFE. A valid
key was not used, for this reason the vehicle may not start.
7)Depending on the model version
leon ingles.book Seite 64 Dienstag, 11. September 2007 1:47 13
Page 75 of 302
Cockpit73
Safety First
Operating instructions
Tips and Maintenance
Te c h n i c a l D a t a
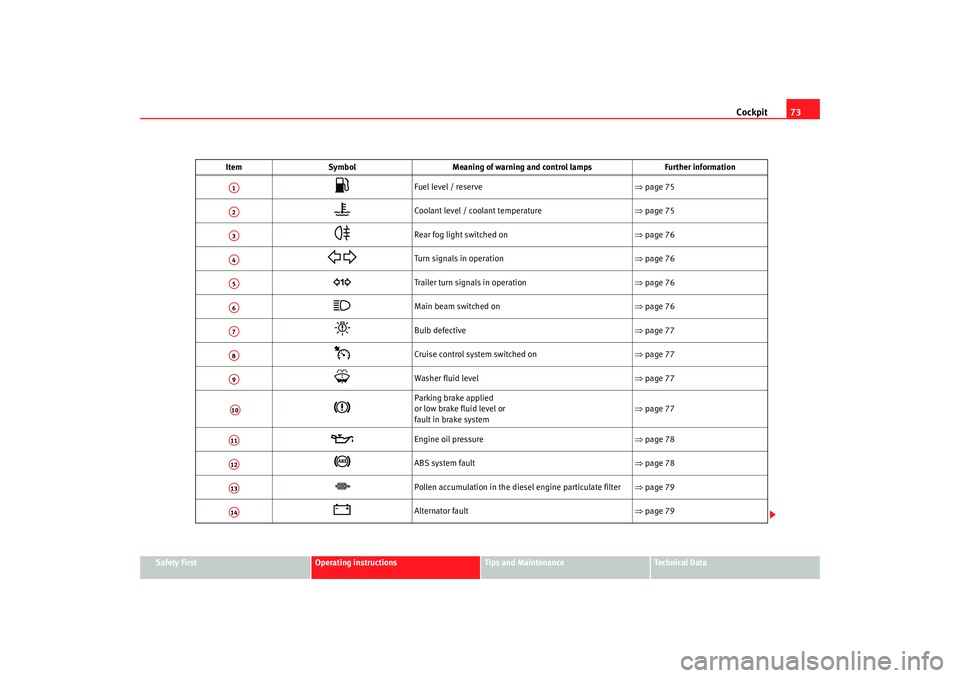
Item
Symbol Meaning of warning and control lamps Further information
Fuel level / reserve ⇒page 75
Coolant level / coolant temperature ⇒page 75
Rear fog light switched on ⇒page 76
Turn signals in operation ⇒page 76
Trailer turn signals in operation ⇒page 76
Main beam switched on ⇒page 76
Bulb defective ⇒page 77
Cruise control system switched on ⇒page 77
Washer fluid level ⇒page 77
Parking brake applied
or low brake fluid level or
fault in brake system ⇒
page 77
Engine oil pressure ⇒page 78
ABS system fault ⇒page 78
Pollen accumulation in the diesel engine particulate filter ⇒page 79
Alternator fault ⇒page 79
A1A2A3A4A5A6A7A8A9A10A11A12A13A14
leon ingles.book Seite 73 Dienstag, 11. September 2007 1:47 13
Page 77 of 302
Cockpit75
Safety First
Operating instructions
Tips and Maintenance
Te c h n i c a l D a t a
WARNING
•
Failure to observe warning lamps and warning messages can result in
serious personal injury or damage to your vehicle.
•
The risk of an accident increases if your vehicle breaks down. Use a
warning triangle to draw the attention of other road users to your
stationary vehicle so that it does not represent a danger.
•
The engine compartment of any motor vehicle is a dangerous area!
Before you open the bonnet to work on the engine or in the engine compart-
ment, you must switch off the engine and allow it to cool to reduce the risk
of scalding or other injuries. Read and observe the relevant warnings
⇒ page 204.Note
•
The appropriate warning lamp for a fault will light up in vehicles without
warning or information texts in the display.
•
In vehicles with warning or information texts in the display, the appro-
priate warning lamp for a fault will ligh t up and a warning or information text
will also appear in the display.
Fuel level / reserve
This symbol lights up to indicate that the fuel tank is down to
the reserve level.This lights when only 7 litres of fuel remain in the tank. Also, an audible
warning is given. This serves as a reminder to fill up with fuel at the earliest
opportunity ⇒page 201. The instrument panel displays
shows the following message
8): PLEASE
REFUEL!
Coolant Level* / temperature
The warning lamp lights up if the coolant temperature is too
high or if the coolant level is too low.There is a fault if:•
The warning symbol does not go out again after a few seconds.
•
The warning lamp lights up or flashes while the vehicle is moving, while
three acoustic warning signals ⇒ are emitted.
This means that either the coolant level is too low or the coolant temperature
is too high.
Coolant temperature too high
The instrument panel displays shows the following message
9): CHECK
COOLANT INSTRUCTIONS MANUAL .
First look at the coolant temperature gauge. The coolant temperature is too
high if the needle is over the warning area on the dial. Stop the vehicle,
switch off the engine and wait for it to cool down. Check the coolant level.
If the coolant level is correct, the over heating may be caused by a malfunction
of the radiator fan. Check the radiator fan fuse and have it replaced if neces-
sary ⇒page 239.
If the warning lamp lights up again after driving on for a short distance, stop
the vehicle and switch off the engine . Contact an Authorised Service Centre
or a qualified workshop.
8)Depending on the model version9)Depending on the model version
leon ingles.book Seite 75 Dienstag, 11. September 2007 1:47 13
Page 78 of 302
Cockpit
76Coolant level too low
The instrument panel displays shows the following message
10): STOP CHECK
COOLANT INSTRUCTION MANUAL ⇒ page 212.
First look at the coolant temperature gauge. If the needle is in the normal
range, top up with coolant at the earliest opportunity ⇒ .
WARNING
•
If your vehicle is immobilised for any technical reasons, move it to a
safe distance from traffic. Turn off the engine, turn on the hazard lights and
place the warning triangle.
•
Never open the bonnet if you can see or hear steam or coolant escaping
from the engine compartment. Risk of scalding. Wait until you can no
longer see or hear escaping steam or coolant.
•
The engine compartment of any motor vehicle is a dangerous area!
Before carrying out any work in the engine compartment, switch off the
engine and allow it to cool down. Always note the corresponding warnings
⇒ page 204.
Rear fog light
This warning lamp lights up when the rear fog light is switched on
. Further
information ⇒page 112.
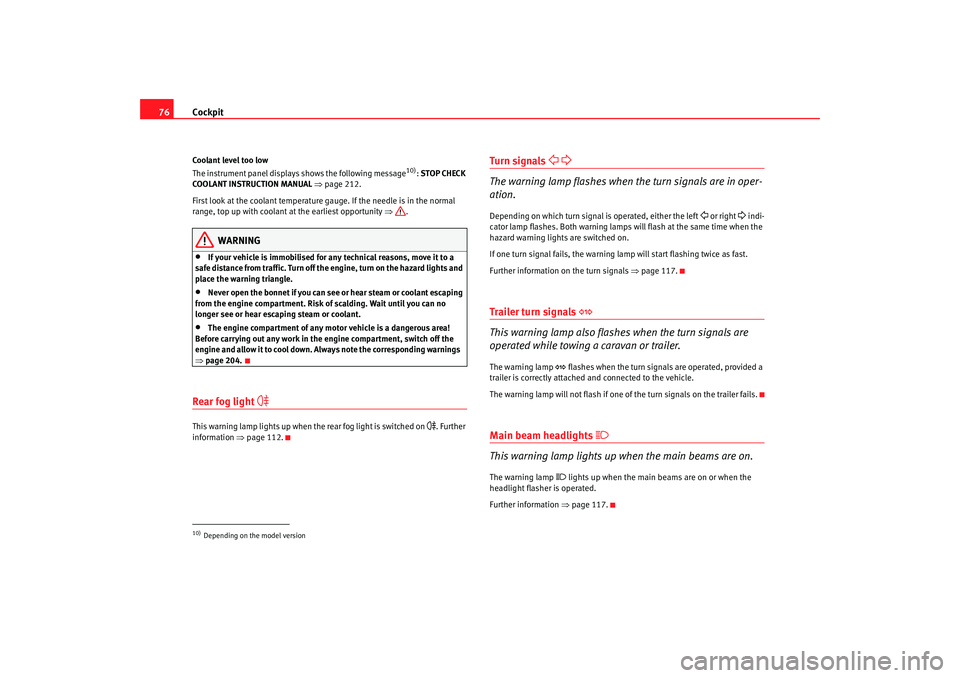
Turn sig nals
The warning lamp flashes when the turn signals are in oper-
ation.Depending on which turn signal is operated, either the left
or right
indi-
cator lamp flashes. Both warning lamps will flash at the same time when the
hazard warning lights are switched on.
If one turn signal fails, the warning lamp will start flashing twice as fast.
Further information on the turn signals ⇒page 117.
Trailer turn signals
This warning lamp also flashes when the turn signals are
operated while towing a caravan or trailer.The warning lamp
flashes when the turn signals are operated, provided a
trailer is correctly attached and connected to the vehicle.
The warning lamp will not flash if one of the turn signals on the trailer fails.
Main beam headlights
This warning lamp lights up when the main beams are on.The warning lamp
lights up when the main beams are on or when the
headlight flasher is operated.
Further information ⇒page 117.
10)Depending on the model version
leon ingles.book Seite 76 Dienstag, 11. September 2007 1:47 13
Page 148 of 302

Heating, Ventilation and Air conditioning
146
– Use the air distribution control to guide the flow of air in the required direction: (to the windscreen), (to the upper
body), (to the foot well) and (to the windscreen and to the
foot well).Heating
Maximum heat output, which is needed to defrost the windows quickly, is
only available when the engine has reached its operating temperature.
Air conditioner
When the air conditioning system is switched on, not only the temperature,
but also the air humidity in the vehicle interior is reduced. This improves comfort for the vehicle occupants and prevents misting of the windows when
the ambient air humidity is high.
If the air conditioning system cannot be switched on this may be caused by
the following reasons:
•
The engine may not be running.
•
The blower is switched off.
•
The ambient air temperature is lower than +3°C.
•
The air conditioning system compressor has been temporarily switched
off because the engine coolant temperature is too high.
•
The air conditioning fuse is faulty.
•
Another fault in the vehicle. Have the air conditioning checked by a qual-
ified workshop.
Air recirculation mode
Air recirculation mode prevents fumes or unpleasant smells from entering the vehicle.
Fig. 110 On the dash panel: Climatic controls
leon ingles.book Seite 146 Dienst ag, 11. September 2007 1:47 13
Page 159 of 302
Driving157
Safety First
Operating instructions
Tips and Maintenance
Te c h n i c a l D a t a
Glow plug system for the diesel engine
To avoid unnecessary load on the battery, do not use any other major elec-
trical equipment while the
glow plugs are pre-heating.
Start the engine as soon as the glow plug warning lamp ⇒page 81 goes out.
Starting the engine after the fuel tank has been completely run dry
If the fuel tank has been completely ru n dry, it may take longer than normal
(up to one minute) to start the engine af ter refuelling with diesel fuel. This is
because the system must eliminate air first.
WARNING
•
Never start or run the engine in unventilated or closed rooms. The
exhaust fumes contain carbon monoxide, an odourless and colourless
poisonous gas. Risk of fatal accidents. Carbon monoxide can cause loss of
consciousness. It can also cause death.
•
Never leave the vehicle unattended if the engine is running.
•
Never use “cold start sprays”, they could explode or cause the engine
to run at high revs. Risk of injury.Caution
•
When the engine is cold, you should avo id high engine speeds, driving at
full throttle and over-loading th e engine. Risk of engine damage.
•
The vehicle should not be pushed or towed for more than approximately
50 metres to start the engine. Fuel could enter the catalytic converter and
damage it.
•
Before attempting to push-start or tow a vehicle to start it, you should first
try to start it using the battery of another vehicle. Note and follow the instruc-
tions ⇒ page 255, “Jump-starting”.
For the sake of the environment
Do not warm-up the engine by running th e engine with the vehicle stationary.
You should drive off as soon as you start the engine. This helps the engine
reach operating temperature faster and reduces emissions.Switching off the engine– Stopping the engine.
– Turn the ignition key to position ⇒page 154, fig. 116 .After the engine is switched off the radiator fan may run on for up to 10
minutes, even if the ignition is switched of f. It is also possible that it will turn
itself on once more if the temperature of the coolant increases due to the
elimination of built up heat in the engine compartment or if this is heated due
to prolonged exposure to the heat of the sun.
WARNING
•
Never switch off the engine until the vehicle is stationary.
•
The brake servo works only when the engine is running. You will need
more strength to brake the vehicle when the engine is switched off. As you
cannot brake in the normal manner, there is a greater risk of accidents and
serious injury.
•
The steering lock can engage immediately when the key is removed
from the ignition lock. The vehicle cannot be steered. Risk of accident.
A0
leon ingles.book Seite 157 Dienst ag, 11. September 2007 1:47 13