ESP Seat Leon 5D 2013 MEDIA SYSTEM TOUCH - COLOUR
[x] Cancel search | Manufacturer: SEAT, Model Year: 2013, Model line: Leon 5D, Model: Seat Leon 5D 2013Pages: 56, PDF Size: 2.47 MB
Page 27 of 56
26Audio mode●To play music, do not link the external media player simultaneously toBluetooth and the USB interface of the infotainment system, as this cancause limitations during playback.
●
Depending on the external player connected, the response time of thesystem can vary.
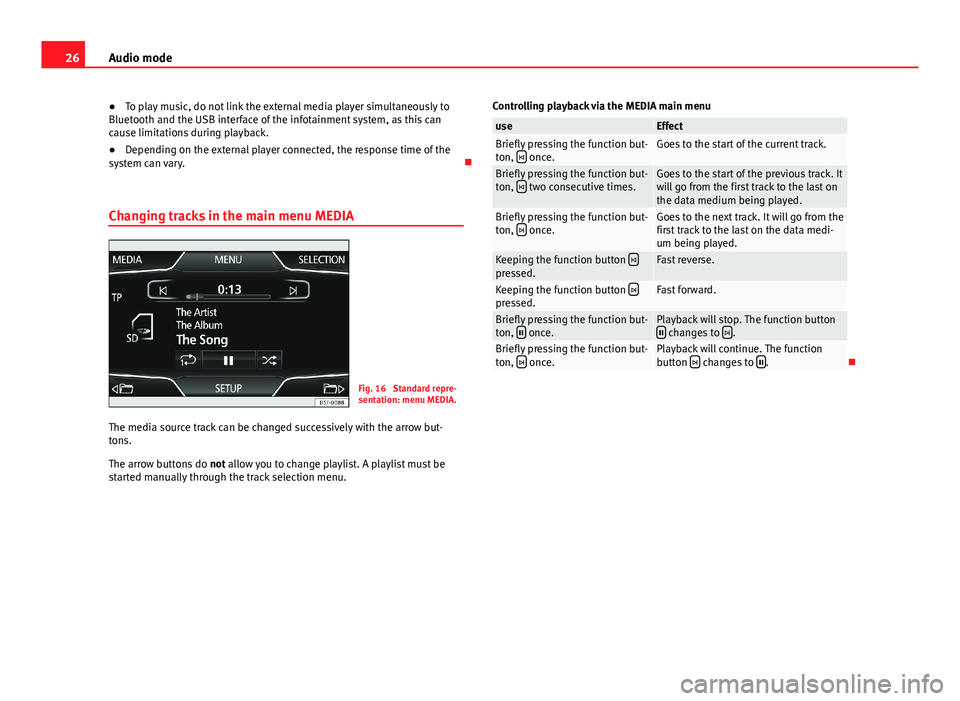
Changing tracks in the main menu MEDIA
Fig. 16
Standard repre-sentation: menu MEDIA.
The media source track can be changed successively with the arrow but-tons.
The arrow buttons do not allow you to change playlist. A playlist must bestarted manually through the track selection menu.
Controlling playback via the MEDIA main menuuseEffectBriefly pressing the function but-ton, once.Goes to the start of the current track.Briefly pressing the function but-ton, two consecutive times.Goes to the start of the previous track. Itwill go from the first track to the last onthe data medium being played.
Briefly pressing the function but-ton, once.Goes to the next track. It will go from thefirst track to the last on the data medi-um being played.
Keeping the function button pressed.Fast reverse.Keeping the function button pressed.Fast forward.Briefly pressing the function but-ton, once.Playback will stop. The function button changes to .Briefly pressing the function but-ton, once.Playback will continue. The functionbutton changes to .
Page 31 of 56
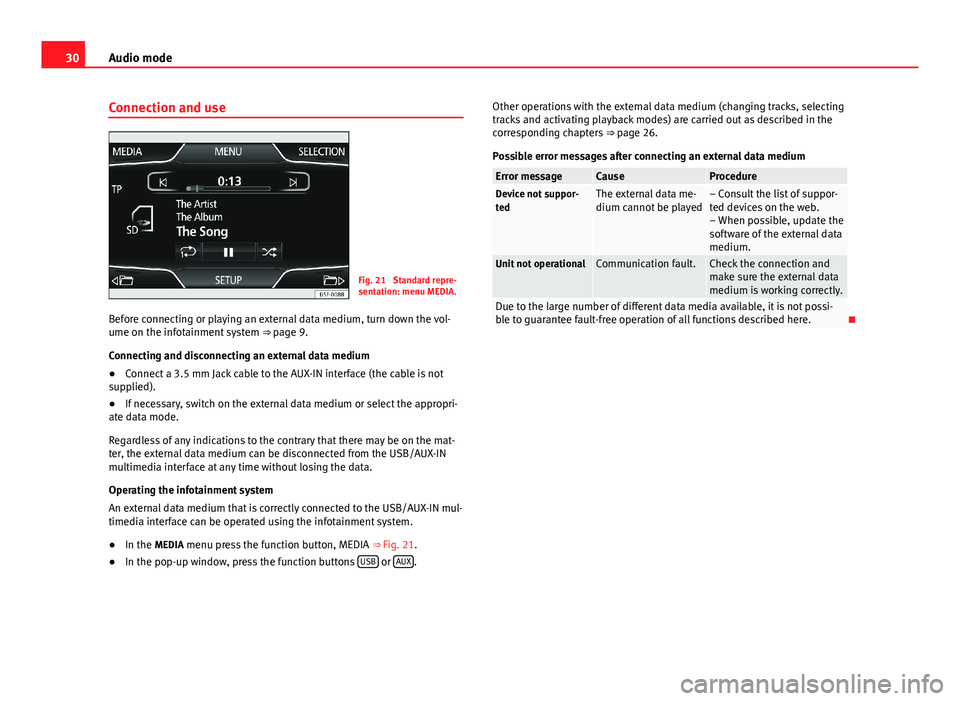
30Audio modeConnection and useFig. 21
Standard repre-sentation: menu MEDIA.
Before connecting or playing an external data medium, turn down the vol-ume on the infotainment system ⇒ page 9.
Connecting and disconnecting an external data medium
●
Connect a 3.5 mm Jack cable to the AUX-IN interface (the cable is notsupplied).
●
If necessary, switch on the external data medium or select the appropri-ate data mode.
Regardless of any indications to the contrary that there may be on the mat-ter, the external data medium can be disconnected from the USB/AUX-INmultimedia interface at any time without losing the data.
Operating the infotainment system
An external data medium that is correctly connected to the USB/AUX-IN mul-timedia interface can be operated using the infotainment system.
●
In the MEDIA menu press the function button, MEDIA ⇒ Fig. 21.
●
In the pop-up window, press the function buttons USB or AUX.
Other operations with the external data medium (changing tracks, selectingtracks and activating playback modes) are carried out as described in thecorresponding chapters ⇒ page 26.
Possible error messages after connecting an external data medium
Error messageCauseProcedureDevice not suppor-tedThe external data me-dium cannot be played– Consult the list of suppor-ted devices on the web.– When possible, update thesoftware of the external datamedium.
Unit not operationalCommunication fault.Check the connection andmake sure the external datamedium is working correctly.
Due to the large number of different data media available, it is not possi-ble to guarantee fault-free operation of all functions described here.
Page 32 of 56
31PHONE mode*PHONE mode*Introduction to telephone management
The telephone functions described below can be managed through the info-tainment system provided a mobile phone is paired and connected to theinfotainment system.
●
Linking and connecting a mobile phone to the infotainment system.
The requirement for establishing a connection between a mobile phone andthe infotainment system is that the mobile phone has Bluetooth®.
When there is no mobile phone linked to the infotainment system, tele-phone management is not available.
Please refer to the notes on how to use mobile telephones in vehicles with-out connection to the exterior antenna ⇒ Booklet Instruction Manual, chap-ter Accessories and technical modifications.
WARNINGMaking calls and managing the preinstallation for mobile phones whiledriving can distract you from the traffic and cause an accident.●
Always stay alert and drive responsibly.
●
Select volume settings that allow you to easily hear signals from out-side the vehicle at all times (e.g. emergency service sirens).
●
In areas with no or poor network coverage, under certain circumstan-ces in tunnels, garages and underpasses, telephone conversations maycut out or it may be impossible to make calls, even in an emergency.
WARNINGA loose or incorrectly secured mobile phone could be thrown inside thevehicle and cause injury in the event of sudden manoeuvres, braking oraccidents.
●
While driving, the mobile phone must always be correctly secured,outside of the working radius of the airbag.
WARNINGIf you carry a mobile phone that is switched on directly over a pacemaker,this may cause interference in its functioning.●
Between the antenna of the mobile phone and the pacemaker theremust be a minimum distance of 20 centimetres for the mobile phone notto affect the functioning of the pacemaker.
●
Do not carry your mobile phone in your breast pocket, directly overthe pacemaker, when it is switched on.
●
If you suspect your mobile phone is causing interference, switch it offimmediately.
Note
●Telephone conversations inside the vehicle can be affected by highspeed, poor atmospheric conditions and the road surface, as well as by thequality of the network.
●
The instructions that appear on the screen related to the menu of eachphone depend on the mobile phone used. There may be differences.
●
Take into account the instruction manuals of the mobile phone and thesupplier of the accessories, and any instructions for using the headset.
●
In areas with poor coverage there may be anomalies in the receptionand calls may be interrupted.
Page 33 of 56
32PHONE mode*●Consult the compatibility list to ensure your mobile phone will workproperly.●
If you detect any strange behaviour between your mobile phone and theradio, restart your mobile by switching it off and on again.
●
Most electronic devices are shielded against high-frequency radio sig-nals. On certain occasions, nevertheless, electronic equipment might notbe protected against the radio frequency signals of the telephone manage-ment (Phone). This may produce interference.
Places with special regulations
Switch off the mobile phone and the preinstallation for mobile telephonesin places with risk of explosion. These areas are common but are not alwaysclearly marked ⇒ in Introduction to telephone management on page 31.They include, for example:
●
Areas with piping and reservoirs containing chemical products.
●
Below deck, on boats and ferries.
●
Near vehicles that run on liquefied gas (such as propane or butane).
●
In places where there are chemical substances or particles such as flour,dust or metal chips in the air.
●
In any other place where you must turn off the engine of your vehicle.
WARNINGSwitch off your mobile phone in places with risk of explosion! Your mo-bile phone will automatically connect to the mobile phone network assoon as the Bluetooth connection is cut from the mobile preinstallation.
NoteIn areas with special requirements and where the use of mobile phones isprohibited, you must keep the mobile phone and its preinstallation switch-ed off at all times. The radiation emitted by mobile phones when switchedon can cause interference in sensitive technical and medical equipment,which could damage this equipment or cause it to stop working properly.
Linking and connecting your mobile phone to
the infotainment system
To operate a mobile phone through the infotainment system, you need tolink both devices one time only.
For your safety, we recommend you carry out this connection when the vehi-cle is stationary. In some countries you cannot perform the pairing with thevehicle running.
You must guarantee the following setup in the mobile phone and the info-tainment system:
●
The Bluetooth® function must be active and visible on the mobile phoneand infotainment system, respectively.
●
The keypad lock of the mobile phone must be disconnected.
●
The notification and key tones of your mobile phone must be disconnec-ted.
In some countries, after switching the ignition on, the Bluetooth® functionof the infotainment system must be activated or remain visible for around 3minutes.
During the linking process you must enter data using your mobile phone'skeypad. To do so, you must have your mobile phone to hand.
Page 35 of 56
34PHONE mode*Note●The behaviour may vary depending on the device connected.●
For some android mobile devices you must accept the request to accessthe PBAP phonebook after linking, to be able to access the phonebook. It isrecommended to activate the option “always” so as not to have to accept itevery time you connect.
General information
Please refer to the notes on using a mobile phone in the vehicle withoutconnection to exterior antenna ⇒ Booklet Instruction Manual, chapter Ac-cessories and technical modifications.
Only use devices that support Bluetooth. At your SEAT dealership, or on theInternet, you will find information about products that support Bluetooth.
Take into account the instruction manual of the mobile phone and of themanufacturer of the accessories. In areas with poor coverage there may beanomalies in the reception and calls may be interrupted.
Most electronic devices are shielded against radio frequency signals (high-frequency). On some occasions, nevertheless, electronic devices cannot beprotected against the radio frequency signals from the telephone manager.This may produce interference.
Note
●There may be restrictions on the use of Bluetooth devices in some coun-tries. Information is available from the local authorities.●
To connect the phone manager to a device via Bluetooth technology,read the corresponding instruction manual for the particular safety instruc-tions. Only use products that support Bluetooth.
Bluetooth®
Bluetooth®
Bluetooth technology is used to connect a mobile phone to the vehicle'sphone manager. To use the phone manager with a mobile phone with Blue-tooth, the pairing process must be performed once.
If a connection has already been established, some mobile phones withBluetooth are recognised and a connection is established with them auto-matically when the ignition is switched on. For this purpose, the mobilephone and its Bluetooth must be switched on, and all the live Bluetoothconnections with other devices must be closed.
The Bluetooth wireless connection is free.
Bluetooth® is a registered trademark of Bluetooth® SIG, Inc.
Bluetooth profiles®
When you connect a mobile phone to the phone manager, the data ex-change is through one of the 2 Bluetooth profiles.
●
Hands-free Bluetooth profile (HFP): If a mobile phone is connected tothe telephone manager through the HFP, calls can be made wirelesslythrough the hands-free device.
●
Advanced audio profile (A2DP): Bluetooth profile for transmitting audiosignals with stereo quality.
Description of the telephone manager
Some functions and settings can only be carried out when the vehicle is sta-tionary, and are not compatible with all mobile telephones.
Page 36 of 56
35PHONE mode*Description1)
The telephone manager described in these instructions is approved for useon the following networks: GSM 850, GSM 900, GSM 1800 and GSM 1900.
With the help of the telephone manager, up to 2 mobile telephones can beconnected to the infotainment system via the Bluetooth profiles (for exam-ple, one used as a Bluetooth-audio player and another as a hands-free tele-phone).
Note
●Using a mobile phone inside the vehicle may provoke noise in thespeakers.●
It is possible that some networks may not offer the characters of all lan-guages, nor certain services.
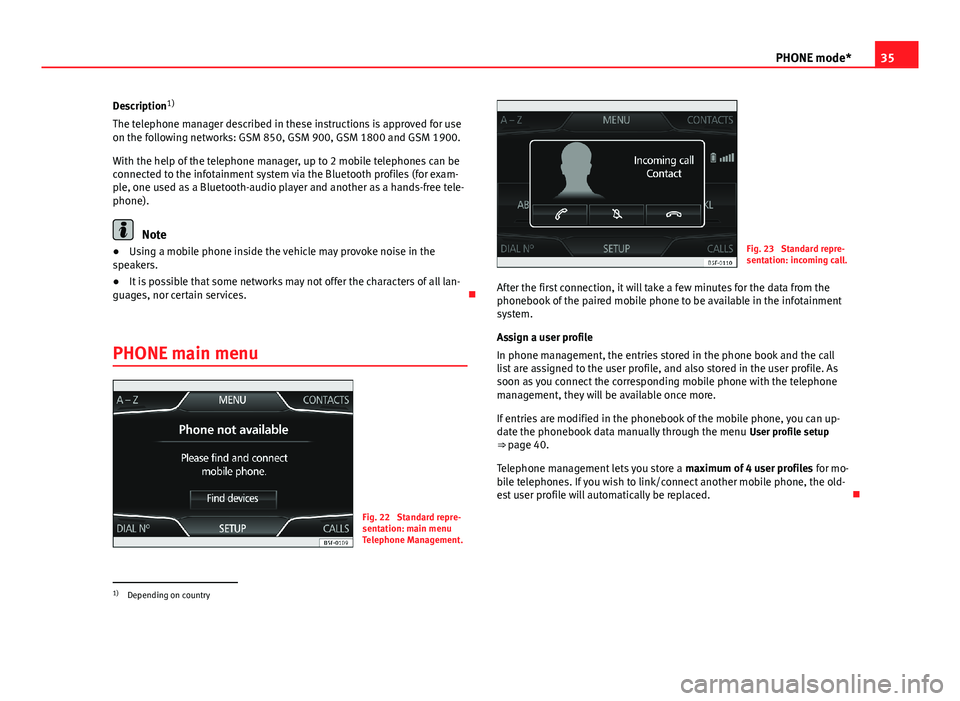
PHONE main menu
Fig. 22
Standard repre-sentation: main menuTelephone Management.
Fig. 23
Standard repre-sentation: incoming call.
After the first connection, it will take a few minutes for the data from thephonebook of the paired mobile phone to be available in the infotainmentsystem.
Assign a user profile
In phone management, the entries stored in the phone book and the calllist are assigned to the user profile, and also stored in the user profile. Assoon as you connect the corresponding mobile phone with the telephonemanagement, they will be available once more.
If entries are modified in the phonebook of the mobile phone, you can up-date the phonebook data manually through the menu User profile setup⇒ page 40.
Telephone management lets you store a maximum of 4 user profiles for mo-bile telephones. If you wish to link/connect another mobile phone, the old-est user profile will automatically be replaced.
1)
Depending on country
Page 40 of 56
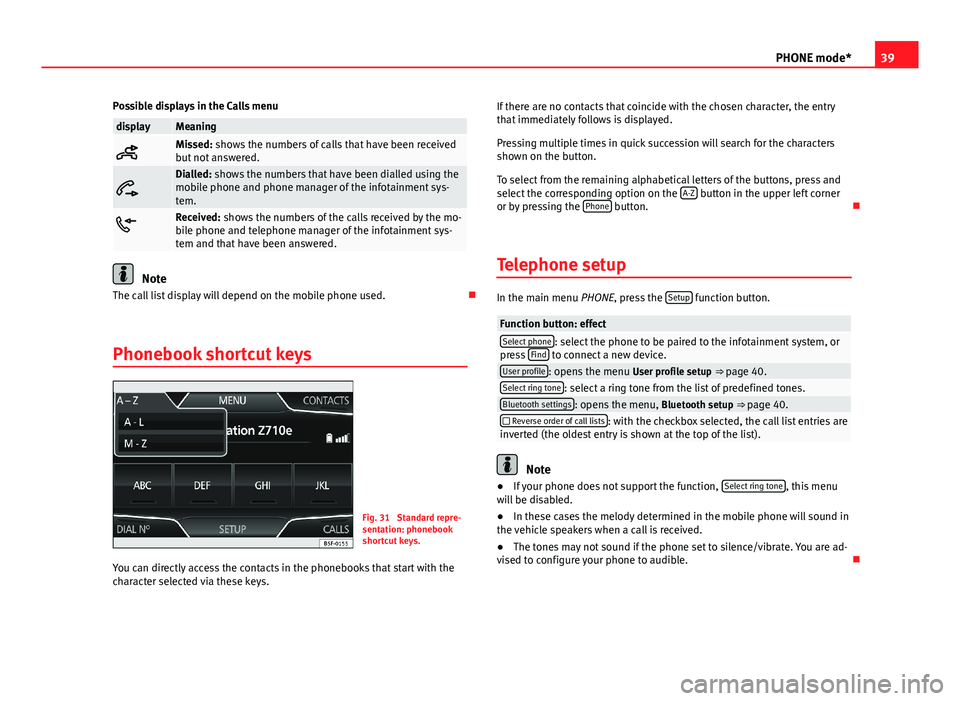
39PHONE mode*Possible displays in the Calls menudisplayMeaningMissed: shows the numbers of calls that have been receivedbut not answered.
Dialled: shows the numbers that have been dialled using themobile phone and phone manager of the infotainment sys-tem.Received: shows the numbers of the calls received by the mo-bile phone and telephone manager of the infotainment sys-tem and that have been answered.
Note
The call list display will depend on the mobile phone used.
Phonebook shortcut keys
Fig. 31
Standard repre-sentation: phonebookshortcut keys.
You can directly access the contacts in the phonebooks that start with thecharacter selected via these keys.
If there are no contacts that coincide with the chosen character, the entrythat immediately follows is displayed.
Pressing multiple times in quick succession will search for the charactersshown on the button.
To select from the remaining alphabetical letters of the buttons, press andselect the corresponding option on the A-Z button in the upper left corneror by pressing the Phone button.
Telephone setup
In the main menu PHONE, press the Setup function button.
Function button: effectSelect phone: select the phone to be paired to the infotainment system, orpress Find to connect a new device.User profile: opens the menu User profile setup ⇒ page 40.Select ring tone: select a ring tone from the list of predefined tones.Bluetooth settings: opens the menu, Bluetooth setup ⇒ page 40. Reverse order of call lists: with the checkbox selected, the call list entries areinverted (the oldest entry is shown at the top of the list).
Note
●If your phone does not support the function, Select ring tone, this menuwill be disabled.●
In these cases the melody determined in the mobile phone will sound inthe vehicle speakers when a call is received.
●
The tones may not sound if the phone set to silence/vibrate. You are ad-vised to configure your phone to audible.
Page 45 of 56
44Air Conditioning MenuAir Conditioning MenuAir conditioning
Adjust through the Easy Connect system*
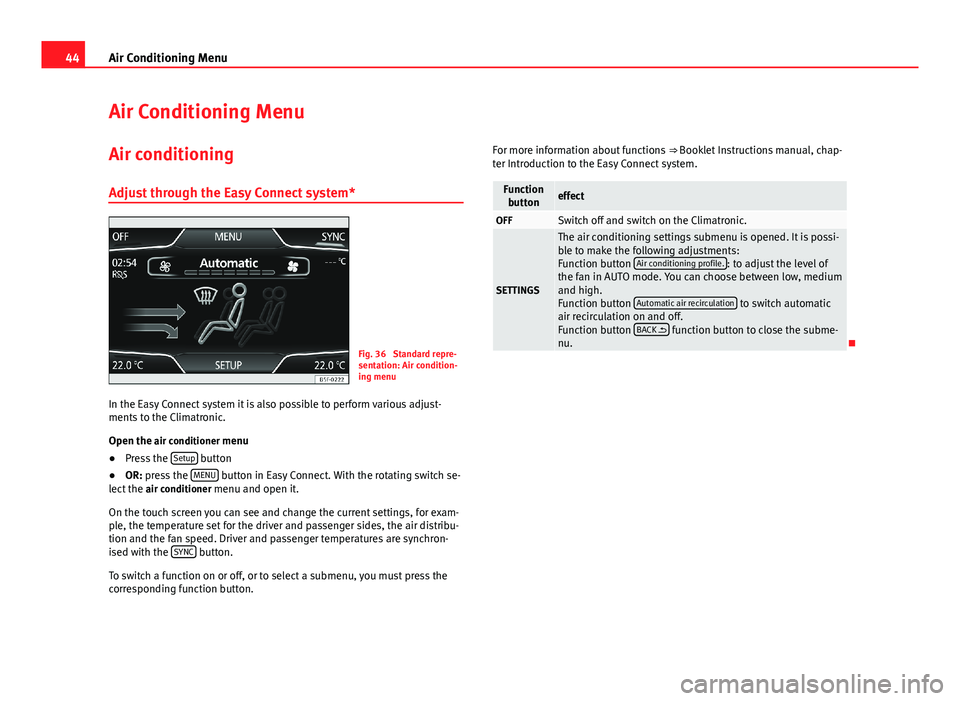
Fig. 36
Standard repre-sentation: Air condition-ing menu
In the Easy Connect system it is also possible to perform various adjust-ments to the Climatronic.
Open the air conditioner menu
●
Press the Setup button
●
OR: press the MENU button in Easy Connect. With the rotating switch se-lect the air conditioner menu and open it.
On the touch screen you can see and change the current settings, for exam-ple, the temperature set for the driver and passenger sides, the air distribu-tion and the fan speed. Driver and passenger temperatures are synchron-ised with the SYNC button.
To switch a function on or off, or to select a submenu, you must press thecorresponding function button.
For more information about functions ⇒ Booklet Instructions manual, chap-ter Introduction to the Easy Connect system.FunctionbuttoneffectOFFSwitch off and switch on the Climatronic.
SETTINGS
The air conditioning settings submenu is opened. It is possi-ble to make the following adjustments:Function button Air conditioning profile.: to adjust the level ofthe fan in AUTO mode. You can choose between low, mediumand high.Function button Automatic air recirculation to switch automaticair recirculation on and off.Function button BACK function button to close the subme-nu.
Page 46 of 56
45SetupSetupSystem setup Menu (SETUP)
Introduction
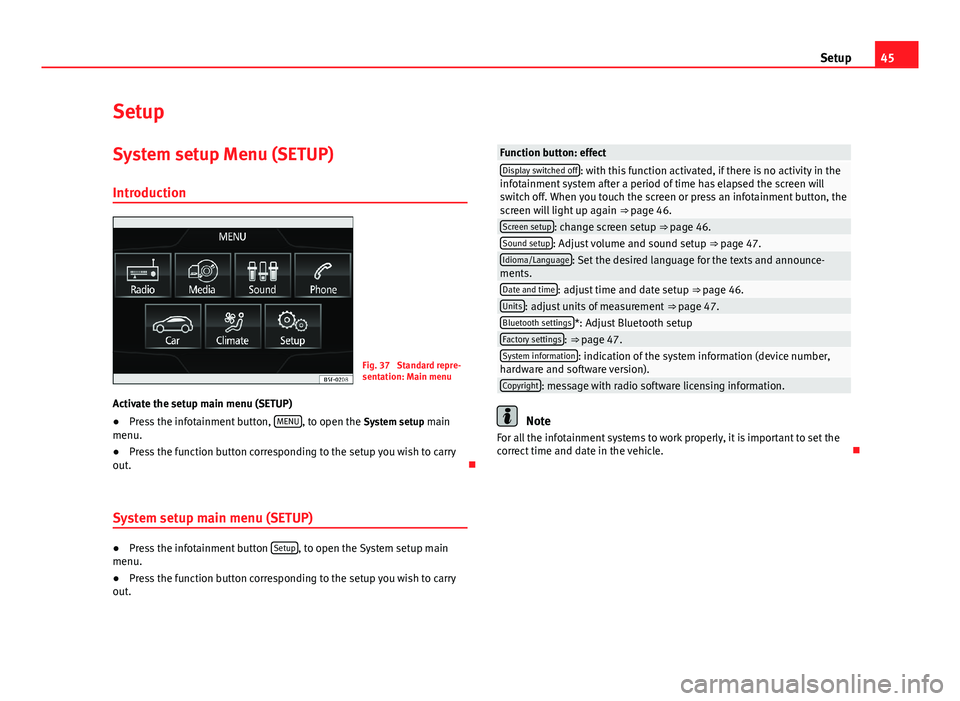
Fig. 37
Standard repre-sentation: Main menu
Activate the setup main menu (SETUP)
●
Press the infotainment button, MENU, to open the System setup mainmenu.
●
Press the function button corresponding to the setup you wish to carryout.
System setup main menu (SETUP)
●
Press the infotainment button Setup, to open the System setup mainmenu.
●
Press the function button corresponding to the setup you wish to carryout.
Function button: effectDisplay switched off: with this function activated, if there is no activity in theinfotainment system after a period of time has elapsed the screen willswitch off. When you touch the screen or press an infotainment button, thescreen will light up again ⇒ page 46.
Screen setup: change screen setup ⇒ page 46.Sound setup: Adjust volume and sound setup ⇒ page 47.Idioma/Language: Set the desired language for the texts and announce-ments.Date and time: adjust time and date setup ⇒ page 46.Units: adjust units of measurement ⇒ page 47.Bluetooth settings*: Adjust Bluetooth setupFactory settings: ⇒ page 47.System information: indication of the system information (device number,hardware and software version).Copyright: message with radio software licensing information.
Note
For all the infotainment systems to work properly, it is important to set thecorrect time and date in the vehicle.
Page 48 of 56
47SetupUnits1)●
Press the infotainment button, Setup to open the System setup mainmenu.
●
Press the function button, Units.
Factory settings
Restoring default settings
When you reset the settings to the vehicle's default setup, all the data en-tered is deleted accordingly, in addition to the setup configured.
●
Scroll through the list below and press the lower function button,Factory settings.
●
Select the required setting or the option All.
●
Confirm the safety question that appears by pressing the function but-ton Reset.
Note
The music files stored on the unit's hard disk must be manually deleted.
Sound and volume setup
Introduction
Depending on the country, the unit and the vehicle equipment, there maybe differences in the variety of settings.
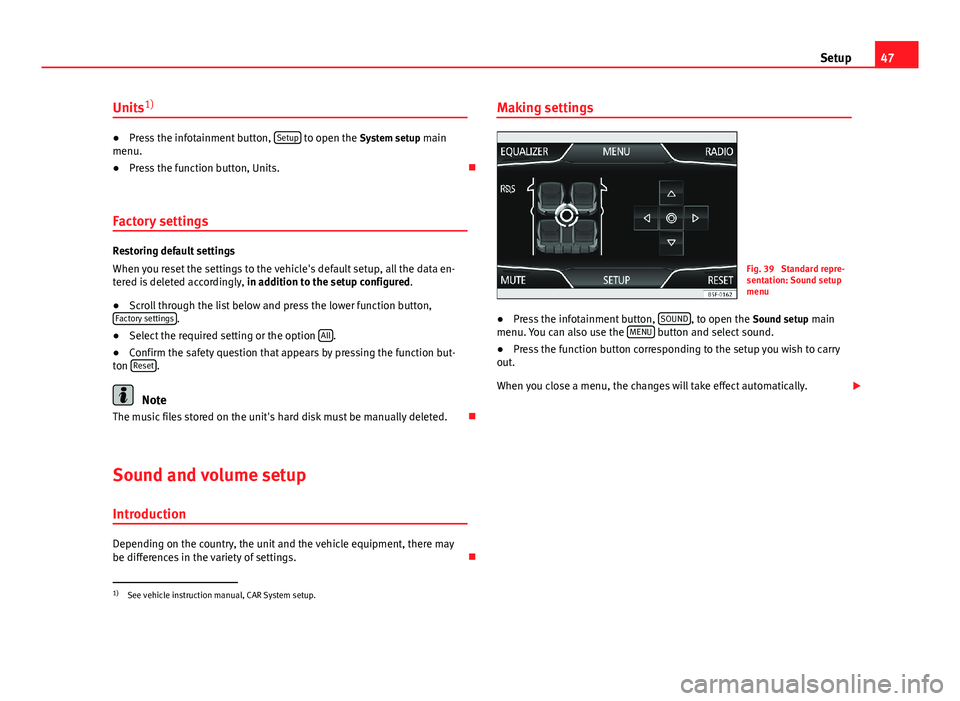
Making settingsFig. 39
Standard repre-sentation: Sound setupmenu
●
Press the infotainment button, SOUND, to open the Sound setup mainmenu. You can also use the MENU button and select sound.
●
Press the function button corresponding to the setup you wish to carryout.
When you close a menu, the changes will take effect automatically.
1)
See vehicle instruction manual, CAR System setup.