warning Seat Leon 5D 2015 MEDIA SYSTEM PLUS - NAVI SYSTEM
[x] Cancel search | Manufacturer: SEAT, Model Year: 2015, Model line: Leon 5D, Model: Seat Leon 5D 2015Pages: 88, PDF Size: 2.23 MB
Page 2 of 88
SEAT S.A. is permanently concerned about continuous development of its t\
ypes and models. For this reason we ask you to under-
stand, that at any given time, changes regarding shape, equipment and te\
chnique may take place on the car delivered. For this reason
no right at all may derive based on the data, drawings and descriptions \
in this current handbook.
All texts, illustrations and standards in this handbook are based on the\
status of information at the time of printing. Except for error
or omission, the information included in the current handbook is valid a\
s of the date of closing print.
Re-printing, copying or translating, whether total or partial is not all\
owed unless SEAT allows it in written form.
SEAT reserves all rights in accordance with the “Copyright” Act.
All rights on changes are reserved.
❀This paper has been manufactured using bleached non-chlorine cellulose.
© SEAT S.A. - Reprint: 15.11.15
About this manual
This manual contains information, recommen-
dations, advice and warnings related to your
radio system. The other publications in the
vehicle documentation contain further infor -
mation of which you should be aware for your
own safety and for that of your passengers.
Ensure that the onboard documentation is
kept in the vehicle at all times. This is espe -
cially important when lending or selling the
vehicle to another person.
This manual contains a description of the
equipment supplied with the vehicle at the
time of press. Some of the units described
herein will not be available until a later date or
is only available in certain markets.
The illustrations are intended as a general
guide and may vary from the equipment �tted
in your vehicle in some details.
The screen colour and the colour of the infor -
mation displayed on it can vary according to
vehicle model. Directions and positions
of components (e.g.
right, left, front, rear) are always relative to the
direction of travel of the vehicle unless other -
wise stated.
The audiovisual material only is intended to
help users to understand certain car function -
alities better. It does not replace the instruc -
tion manual. Please use the instruction manu-
al to obtain more comprehensive information
and indications.
The equipment marked with an aster -
isk* is �tted as standard only in certain
versions, and is only supplied as op -
tional extras for some versions, or are
only offered in certain countries.
® All registered marks are indicated with
®. Although the copyright symbol does
not appear, it is a copyrighted mark.
>> The section is continued on the follow -
ing page.
Audiovisual material on a given page
WARNING
Texts preceded by this symbol contain infor -
mation on safety. They warn you about possi -
ble dangers of accident or injury.
CAUTION
Texts with this symbol draw your attention to
potential sources of damage to your vehicle.
For the sake of the environment
Texts preceded by this symbol contain rele-
vant information concerning environmental
protection.
Note
Texts preceded by this symbol contain additio -
nal information.
Page 8 of 88
Introduction
Introduction Saf ety
in
structions relating to the In-
fotainment system Travelling on today's roads requires the driv-
er's f
u
ll attention at all times.
Only operate the radio and its various func-
tions when the traffic situation really permits
this. WARNING
● Bef or
e starting the trip, you should famili-
arise yourself with the different radio func-
tions.
● High audio volume may represent a danger
to y
ou and to others.
● Adjust the volume in a way that you can
distin
guish surrounding noise, for example,
horns and sirens, etc.
● Radio settings should be made when the
car is
stopped or by a passenger. WARNING
Distracting the driver in any way can lead to
an acc ident
and cause injuries. Operating the
Infotainment system can distract your atten-
tion from the traffic.
● Always drive carefully and responsibly.
● Select volume settings that allow you to
eas
ily hear signals from outside the vehicle at all times (e.g. emergency services sirens
and horns).
● He arin
g may be impaired if using too high a
volume settin
g, even if only for short periods
of time. WARNING
The volume level may suddenly change when
y ou sw it
ch audio source or connect a new au-
dio source.
● Lower the base volume before connecting
or switc
hing audio sources. WARNING
The driving recommendations and traffic indi-
cation s
shown on the navigation system may
differ from the current traffic situation.
● Traffic signs and traffic regulations have
priority ov
er the recommendations and dis-
plays provided by the navigation system.
● Adjust your vehicle speed and driving style
to suit
visibility, weather, road and traffic
conditions. WARNING
Connecting, inserting or removing a data me-
dium whil e driv
ing can distract your attention
from the traffic and cause an accident. WARNING
Connecting leads for external devices may
ob s
truct the driver.
● Arrange the connecting leads so that they
do not ob
struct the driver. WARNING
External devices that are loose or not proper-
ly sec ur
ed could move around the passenger
compartment during a sudden driving or
braking manoeuvre or an accident and cause
damage or injury.
● Never place or fit external devices to the
doors, wind
screen, steering wheel, dash pan-
el, the backs of the seats, on top of or near
the area marked “AIRBAG” or between these
areas and the occupants. External devices
can cause serious injury in an accident, espe-
cially when the airbags inflate. WARNING
The armrest may obstruct the driver's arm
mov ement
s, which could cause an accident
and severe injuries.
● Always keep the armrest closed while the
vehicl
e is in motion. WARNING
Opening a CD player's housing may lead to
injuries fr
om invisible laser radiation.
● Have CD players repaired only by a quali-
fied workshop
.6
Page 25 of 88
Audio and Media Mode
Press the S
ETUP function button to open the
AM Settings menu.Function button: function
Sound: Sound settings ››› page 73.
Seek mode: To adjust settings for the buttons with the ar-
rows and . This setting applies to all frequency
bands (FM, AM and DAB).
Preset list: All stored stations on the selected fre-
quency band can be browsed with the arrow but-
tons.
Station list: All available stations on the selected fre-
quency band can be browsed with the arrow but-
tons.
Scan: Scan function. When the scan function is active,
all available stations on the current frequency band are
played in sequence for approximately 5 seconds each
››› page 20.
Traffic news station (TP): The TP function (traffic news sta-
tion tracking) is active ››› page 21.
Delete presets: To delete all or some of the stored sta-
tions.
Station logos: To assign the logos to the stations stored
on the memory buttons ››› page 19. DAB Settings
Sel
ect
the D
AB frequency range by pressing
the RADIO Infotainment button.
OR: Pr e
s
s function button ››› Fig. 18 1 and
sel ect
the D
AB frequency range. Press the
SETUP function button to open the
DAB Settings menu.
Function button: function
Sound: Sound settings ››› page 73.
Seek mode: To adjust settings for the buttons with the ar-
rows and . This setting applies to all frequency
bands (FM, AM and DAB).
Preset list: All stored stations on the selected fre-
quency band can be browsed with the arrow but-
tons.
Station list: All available stations on the selected fre-
quency band can be browsed with the arrow but-
tons.
Scan: Scan function. When the scan function is active,
all available stations on the current frequency band are
played in sequence for approximately 5 seconds each
››› page 20.
Traffic news station (TP): The TP function (traffic news sta-
tion tracking) is active ››› page 21.
Delete presets: To delete all or some of the stored sta-
tions.
Station logos: To assign the logos to the stations stored
on the memory buttons ››› page 19.
Radio text: Radio Text is active
››› page 16, Radio Text
(RDS).
Advanced settings: DAB services settings.
Auto-save station logos: The station logos are auto-
matically assigned when the radio stations are stor-
ed to the memory buttons ››› page 19.
Function button: function
DAB traffic announcements: DAB traffic announce-
ments are played in the same way as TP traffic an-
nouncements in all operating modes.
Other DAB alerts: DAB announcements (news,
sport, weather, warnings etc.) will interrupt the cur-
rent DAB radio mode.
DAB-DAB station tracking: Automatic station tracking
within the DAB frequency band is active.
DAB-FM Automatic switching: switching to FM fre-
quency band is allowed for automatic station track-
ing.
L-Band: L-band is activated (low-range station fre-
quencies for local reception). Media mode
Intr oduction
››
›
table on page 2
“Media sources” are audio sources contain-
ing audio files on various different data stor-
age devices (e.g. CD, memory card, external
MP3 player). These audio files can be played
by the Infotainment system via their corre-
sponding drives or audio input sockets (inter-
nal CD drive, memory card slot, AUX-IN multi-
media socket etc.). »
23
Page 33 of 88
Audio and Media Mode
● The CD in the driv e w
i
ll be ejected and
must be removed within approximately
10 seconds.
If the CD is not removed within the 10 sec-
onds, it is automatically retracted for security
reasons without activating the CD mode.
CD cannot be read or is faulty
If the data on an inserted CD cannot be read
or a faulty CD is inserted, the corresponding
warning appears on screen.
Depending on the unit, unreadable CDs are
ejected 3 times automatically and inserted
again to initiate another three attempts be-
fore said message is displayed. Note
● Uneven r o
ad surfaces and strong vibrations
can cause playback to jump.
● You will be unable to insert or play a CD if
the temperat
ure inside the unit is too high.
● If you insert a number of different CDs and
receiv
e the message CD drive error every
time, contact a qualified workshop. Insert or eject a memory card
Only supported audio files are displayed and
p
l
a
yed. Other files are ignored. Inserting a memory card
Insert
the compatible memory card, bevelled
edge first and with the label face up (con-
tacts face down), into one of the two slots
››› Fig. 28 2 , until properly inserted.
If a memor
y
card cannot be inserted, make
sure it is positioned correctly and is compati-
ble with the unit.
Removing a memory card
The inserted memory cards must be prepared
for removal.
● From the main Media menu, press the
SETUP button to open the Media Settings
menu or pr e
s
s the Infotainment MENU button
and then pr e
s
s Settings to open the System
settings menu.
● Press the R
emo
v
e safely function button. A
dr opdo
wn menu ap
pears with three options:
SD Card1, SD Card 2 and USB. After correctly
ejecting the memory card from the system,
the function button becomes inactive (grey
colour).
● Press the inserted memory card. The mem-
ory c
ard “jumps” to the eject position.
● Remove the memory card.
Unrea
dable memory card
If a memory card is inserted and the data
cannot be read, the following warning ap-
pears: No playable files available .External data storage device connec-
ted to USB por
t Depending on the equipment and the coun-
try
, the
vehicle may have a USB/AUX-IN con-
nection.(vehicle instruction manual).
Audio files on an external data storage de-
vice connected to the USB port can be
played and controlled via the Infotainment
system.
Where this manual refers to external data
storage devices, this means USB mass stor-
age devices containing supported audio
files, such as MP3 players, iPods™ and USB
sticks.
Only supported audio files are displayed and
played. Other files are ignored.
Further operation of the external data medi-
um (changing track, selecting tracks and
playback modes) is described in the appro-
priate chapters of this manual ›››
page 23.
Instructions and restrictions
Compatibility with Apple™ devices and other
media players depends on the unit.
The USB port supplies the usual USB volt-
age of 5 volts for a USB connection.
External hard disks with a capacity greater
than 32 GB must be reformatted for the
FAT32 file system in some circumstances. You »
31
Page 36 of 88
Audio and Media Mode
Conditions
● The Bluetooth ®
audio sour c
e mu st support
the A2DP Bluetooth ®
profile.
● In the Bluetooth settings menu, the
Bluetooth Audio (A2DP/AVRCP) function must
be activ at
ed ›
›› page 61.
Starting Bluetooth ®
audio transfer
● Activate Bluetooth ®
vis
ibility on the exter-
nal Bluetooth ®
audio source (e.g., mobile tel-
ephone).
● Lower the base volume on the Infotainment
syst
em.
● Press the Infotainment MEDIA button.
● Press the SOURC
E function button and then
sel ect
B
T audio .
● Press Find new dev
ic
e in order to connect an
e xt
ern
al Bluetooth ®
audio source for the first
time ››› page 53.
● OR: Select a Bluetooth ®
ext
ernal audio
source from the list.
● Please refer to the instructions on the
scr
een of the Infotainment system and on the
Bluetooth ®
audio source regarding the rest
of the procedure.
You may still need to manually start playback
on the Bluetooth ®
source.
When playback on the Bluetooth ®
audio
source is stopped, the Infotainment system
remains in Bluetooth ®
Audio mode. Controlling playback
The extent
to which the Bluetooth ®
audio
source can be controlled via the Infotainment
system depends on the connected Blue-
tooth ®
audio source.
The available functions will depend on the
Bluetooth ®
Audio profile that the connected
external player supports.
With media players that support the AVRCP
Bluetooth ®
profile, playback on the Blue-
tooth ®
audio source can be automatically
started or stopped when the unit is switched
to Bluetooth ®
Audio mode or to a different
audio source. In addition, it is possible to
view or change the track via the Infotainment
system. Note
● Due t o the l
arge number of possible Blue-
tooth ®
audio sources, it is not possible to
guarantee fault-free operation of all descri-
bed functions.
● Always switch off the warning and service
tones
on a connected Bluetooth ®
audio
source, e.g. key tones on a mobile telephone,
to prevent possible interference noise and
malfunctions.
● Do not connect an external media player to
pla
y music via Bluetooth ®
and via the USB
port ››› page 31 at the same time with the
Infotainment system, as this could cause
playback limitations. ●
If the e xt
ernal player is an Apple device™,
it cannot be simultaneously connected by
USB and by Bluetooth. Media settings
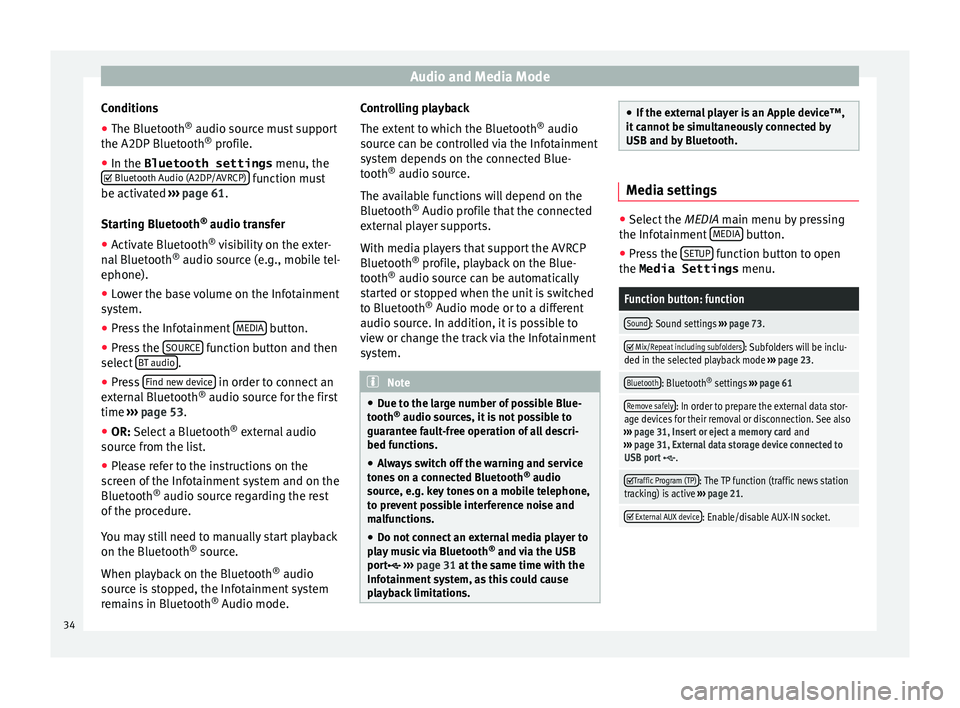
●
Select the MEDIA main menu b y
pressing
the Infotainment MEDIA button.
● Press the SETUP function button to open
the Media Settings menu.
Function button: function
Sound: Sound settings ››› page 73.
Mix/Repeat including subfolders: Subfolders will be inclu-
ded in the selected playback mode ››› page 23.
Bluetooth: Bluetooth ®
settings ››› page 61
Remove safely: In order to prepare the external data stor-
age devices for their removal or disconnection. See also
››› page 31, Insert or eject a memory card and
››› page 31, External data storage device connected to
USB port
.
Traffic Program (TP): The TP function (traffic news station
tracking) is active ››› page 21.
External AUX device: Enable/disable AUX-IN socket.
34
Page 49 of 88
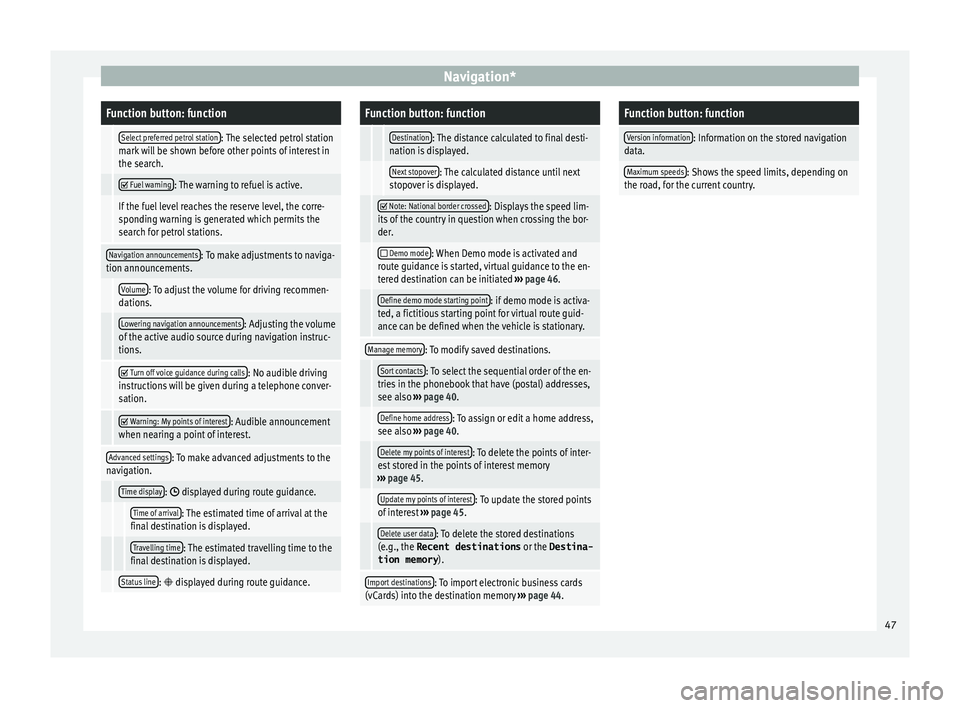
Navigation*Function button: function
Select preferred petrol station: The selected petrol station
mark will be shown before other points of interest in
the search.
Fuel warning: The warning to refuel is active.
If the fuel level reaches the reserve level, the corre-
sponding warning is generated which permits the
search for petrol stations.
Navigation announcements: To make adjustments to naviga-
tion announcements.
Volume: To adjust the volume for driving recommen-
dations.
Lowering navigation announcements: Adjusting the volume
of the active audio source during navigation instruc-
tions.
Turn off voice guidance during calls: No audible driving
instructions will be given during a telephone conver-
sation.
Warning: My points of interest: Audible announcement
when nearing a point of interest.
Advanced settings: To make advanced adjustments to the
navigation.
Time display: displayed during route guidance.
Time of arrival: The estimated time of arrival at the
final destination is displayed.
Travelling time: The estimated travelling time to the
final destination is displayed.
Status line: displayed during route guidance.
Function button: function
Destination: The distance calculated to final desti-
nation is displayed.
Next stopover: The calculated distance until next
stopover is displayed.
Note: National border crossed: Displays the speed lim-
its of the country in question when crossing the bor-
der.
Demo mode: When Demo mode is activated and
route guidance is started, virtual guidance to the en-
tered destination can be initiated ››› page 46.
Define demo mode starting point: if demo mode is activa-
ted, a fictitious starting point for virtual route guid-
ance can be defined when the vehicle is stationary.
Manage memory: To modify saved destinations.
Sort contacts: To select the sequential order of the en-
tries in the phonebook that have (postal) addresses,
see also ››› page 40.
Define home address: To assign or edit a home address,
see also ››› page 40.
Delete my points of interest: To delete the points of inter-
est stored in the points of interest memory
››› page 45.
Update my points of interest: To update the stored points
of interest ››› page 45.
Delete user data: To delete the stored destinations
(e.g., the Recent destinations or the Destina-
tion memory ).
Import destinations: To import electronic business cards
(vCards) into the destination memory ››› page 44.
Function button: function
Version information: Information on the stored navigation
data.
Maximum speeds: Shows the speed limits, depending on
the road, for the current country. 47
Page 54 of 88
Telephone management system (PHONE)
Telephone management sys-
t em (PHONE)
Intr oduction t
o the telephone
management system
General information
›› ›
table on page 2
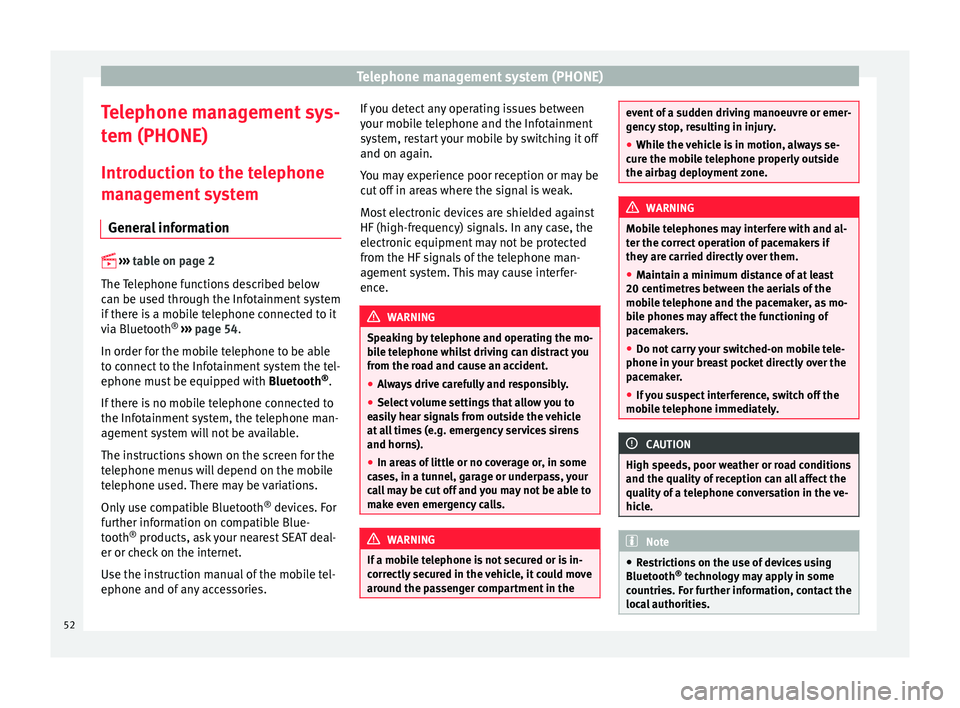
The Telephone functions described below
can be used through the Infotainment system
if there is a mobile telephone connected to it
via Bluetooth ®
››› page 54.
In order for the mobile telephone to be able
to connect to the Infotainment system the tel-
ephone must be equipped with Bluetooth®
.
If there is no mobile telephone connected to
the Infotainment system, the telephone man-
agement system will not be available.
The instructions shown on the screen for the
telephone menus will depend on the mobile
telephone used. There may be variations.
Only use compatible Bluetooth ®
devices. For
further information on compatible Blue-
tooth ®
products, ask your nearest SEAT deal-
er or check on the internet.
Use the instruction manual of the mobile tel-
ephone and of any accessories. If you detect any operating issues between
your mo
b
ile telephone and the Infotainment
system, restart your mobile by switching it off
and on again.
You may experience poor reception or may be
cut off in areas where the signal is weak.
Most electronic devices are shielded against
HF (high-frequency) signals. In any case, the
electronic equipment may not be protected
from the HF signals of the telephone man-
agement system. This may cause interfer-
ence. WARNING
Speaking by telephone and operating the mo-
bi l
e telephone whilst driving can distract you
from the road and cause an accident.
● Always drive carefully and responsibly.
● Select volume settings that allow you to
eas
ily hear signals from outside the vehicle
at all times (e.g. emergency services sirens
and horns).
● In areas of little or no coverage or, in some
case
s, in a tunnel, garage or underpass, your
call may be cut off and you may not be able to
make even emergency calls. WARNING
If a mobile telephone is not secured or is in-
corr ectly
secured in the vehicle, it could move
around the passenger compartment in the event of a sudden driving manoeuvre or emer-
gency
s
top, resulting in injury.
● While the vehicle is in motion, always se-
cure the mo
bile telephone properly outside
the airbag deployment zone. WARNING
Mobile telephones may interfere with and al-
t er the c orr
ect operation of pacemakers if
they are carried directly over them.
● Maintain a minimum distance of at least
20 centimetre
s between the aerials of the
mobile telephone and the pacemaker, as mo-
bile phones may affect the functioning of
pacemakers.
● Do not carry your switched-on mobile tele-
phone in your br
east pocket directly over the
pacemaker.
● If you suspect interference, switch off the
mobi
le telephone immediately. CAUTION
High speeds, poor weather or road conditions
and the quality of
reception can all affect the
quality of a telephone conversation in the ve-
hicle. Note
● Re s
trictions on the use of devices using
Bluetooth ®
technology may apply in some
countries. For further information, contact the
local authorities. 52
Page 55 of 88
Telephone management system (PHONE)
●
If y
ou wish to connect a device to the tele-
phone management system via Bluetooth ®
technology, consult the safety warnings in its
instruction manual. Only use compatible
Bluetooth ®
devices. Areas where special regulations apply
Switch off the mobile telephone and the mo-
bi
l
e Bluetooth function in places with a risk
of explosion. In the majority of cases, these
places are signposted, but not always clearly
››› in General information on page 52.
They
inc lude, f
or example:
● the vicinity of chemical pipelines and tanks
● The lower decks of boats and ferries.
● In the proximity of vehicles that run on liq-
uid gas
(such as propane or butane).
● places where the air is laden with chemi-
cals
or particles such as flour, dust or metal
powder.
● all other places where the vehicle engine
must
be switched off WARNING
Switch off the mobile phone in areas with a
risk of
explosion! The mobile telephone can
automatically connect to the mobile tele-
phone network again if it loses the Blue-
tooth ®
connection to the telephone manage-
ment system. CAUTION
In areas where special regulations apply or
the use of mo
bile telephones is prohibited,
both the telephone and the telephone man-
agement system must be switched off. The
radiation produced by the mobile telephone
when switched on may interfere with sensi-
tive technical and medical equipment, possi-
bly resulting in a malfunction or damage to
the equipment. Bluetooth
® Bluetooth
®
Bluet ooth®
tec
hnology allows a mobile tele-
phone to be connected to your vehicle's tele-
phone management system. In order to use
the telephone management system with a
mobile telephone with Bluetooth ®
technolo-
gy, it is first necessary to pair them.
Some Bluetooth ®
mobile telephones detect
and automatically connect when turning on
the ignition if a connection has been previ-
ously established. For this to take place the
telephone must be switched on and its Blue-
tooth ®
function activated, and there must be
no active Bluetooth ®
connection with other
devices.
Bluetooth ®
connections are free.
Bluetooth ®
is a registered trademark of
Bluetooth ®
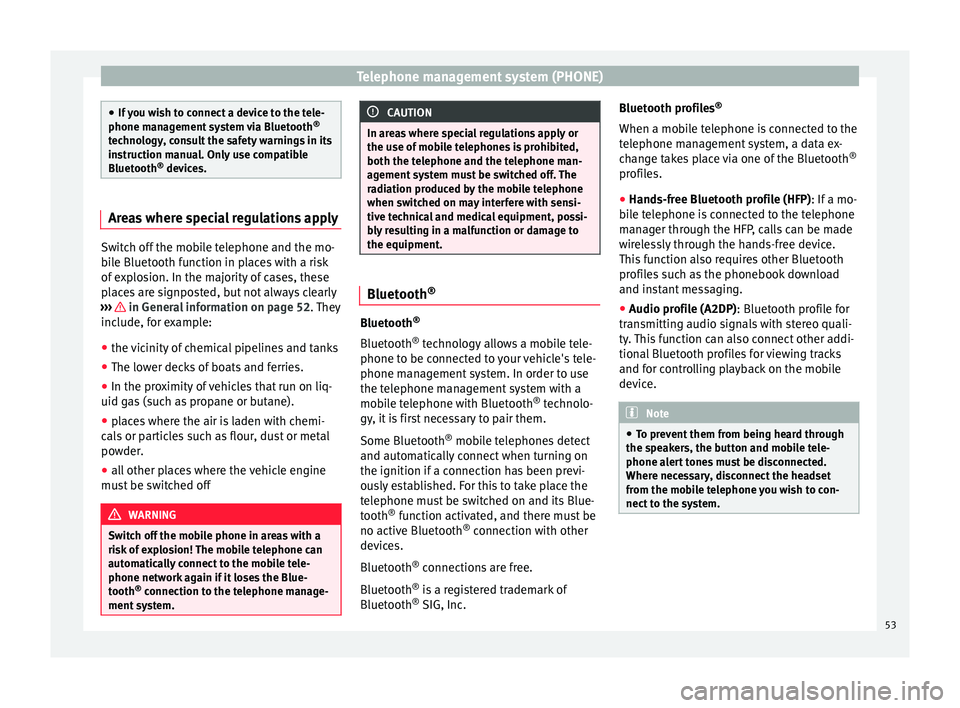
SIG, Inc. Bluetooth profiles
®
When a mobi
le telephone is connected to the
telephone management system, a data ex-
change takes place via one of the Bluetooth ®
profiles.
● Hands-free Bluetooth profile (HFP): If a mo-
bi
le telephone is connected to the telephone
manager through the HFP, calls can be made
wirelessly through the hands-free device.
This function also requires other Bluetooth
profiles such as the phonebook download
and instant messaging.
● Audio profile (A2DP): Bluetooth profi
le for
transmitting audio signals with stereo quali-
ty. This function can also connect other addi-
tional Bluetooth profiles for viewing tracks
and for controlling playback on the mobile
device. Note
● To pr ev
ent them from being heard through
the speakers, the button and mobile tele-
phone alert tones must be disconnected.
Where necessary, disconnect the headset
from the mobile telephone you wish to con-
nect to the system. 53
Page 59 of 88
Telephone management system (PHONE)
To activate private mode:
● Setup menu.
● Uncheck the checkbox: Hand
s-fr
ee .
W ith the priv
at
e mode activated the active
audio and microphone become that of the
mobile phone connected to the hands-free.
When deactivated, the audio reverts to the
vehicle's audio system. This configuration is
only applicable to the active call, so for sub-
sequent calls, the audio will revert by default
to vehicle's audio system. WARNING
Remember that the driver must not operate
the mob i
le telephone while driving. Enter telephone number menu
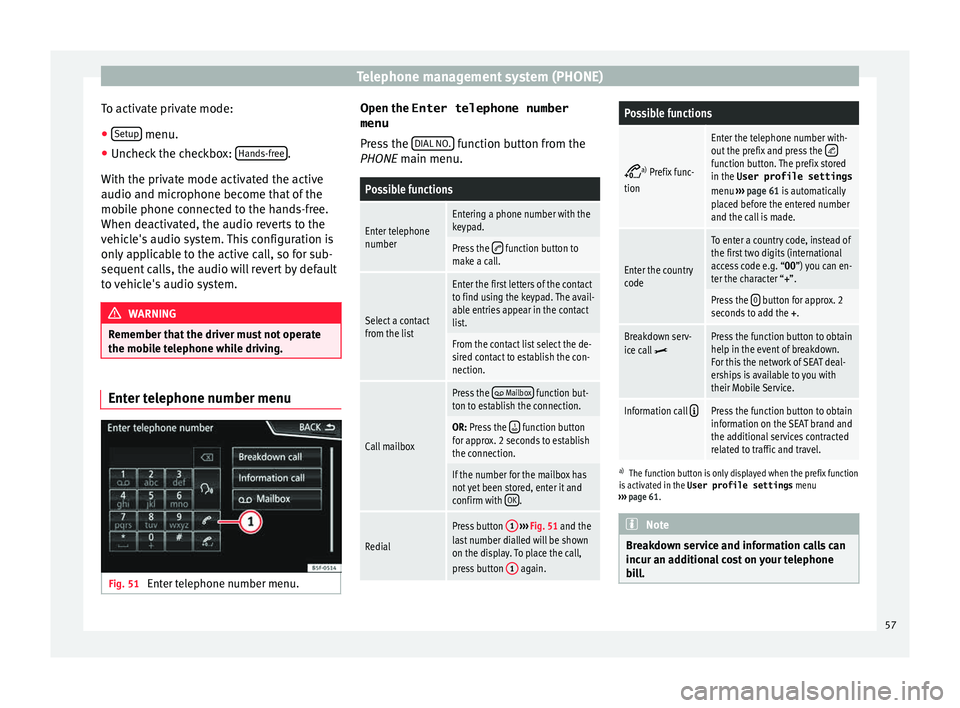
Fig. 51
Enter telephone number menu. Open the
Enter telephone number
menu
Pr es
s the DIAL NO. function button from the
PHONE m ain menu.
Possible functions
Enter telephone
numberEntering a phone number with the
keypad.
Press the function button to
make a call.
Select a contact
from the list
Enter the first letters of the contact
to find using the keypad. The avail-
able entries appear in the contact
list.
From the contact list select the de-
sired contact to establish the con-
nection.
Call mailbox
Press the Mailbox function but-
ton to establish the connection.
OR: Press the function button
for approx. 2 seconds to establish
the connection.
If the number for the mailbox has
not yet been stored, enter it and
confirm with OK
.
Redial
Press button
1
››› Fig. 51 and the
last number dialled will be shown
on the display. To place the call,
press button 1
again.
Possible functions
a)
Prefix func-
tion
Enter the telephone number with-
out the prefix and press the function button. The prefix stored
in the User profile settings
menu ››› page 61 is automatically
placed before the entered number
and the call is made.
Enter the country
code
To enter a country code, instead of
the first two digits (international
access code e.g. “00 ”) you can en-
ter the character “+”.
Press the 0 button for approx. 2
seconds to add the +.
Breakdown serv-
ice call Press the function button to obtain
help in the event of breakdown.
For this the network of SEAT deal-
erships is available to you with
their Mobile Service.
Information call Press the function button to obtain
information on the SEAT brand and
the additional services contracted
related to traffic and travel.
a)
The function button is only displayed when the prefix function
is activated in the User profile settings menu
››› page 61. Note
Breakdown service and information calls can
incur an a d
ditional cost on your telephone
bill. 57
Page 65 of 88
Full Link™*
Full Link™* F u
l
l Link™ technology descrip-
tion
Introduction
›› ›
table on page 2
The Full Link™ system has a context that
groups those technologies that allow com-
munication between the Infotainment Sys-
tems and mobile devices:
● MirrorLink™
● Android Auto™
● Apple CarPlay™
Data tr an
sfer
This communication can allow data (media,
navigation, radio, audio and vehicle data) to
be read and/or written.
From the SETUP menu,
A ctiv
at
e data transfer for SEAT apps , there is a
c hec
k
box to activate/deactivate the function,
and a dropdown menu called Use apps to operate which controls the level of
int er
action betw
een the Apps and the System
››› table on page 72: Deactivate, Confirm,
and Allow. Interfaces
The connection to F
ull Link™ is done with a
USB interface. WARNING
If a mobile terminal is not secured or is incor-
rectly sec
ured in the vehicle, it could move
around the passenger compartment in the
event of a sudden driving manoeuvre, emer-
gency stop or accident, resulting in injury.
● While driving, mobile terminals must be se-
curely
fastened in position, outside the air-
bag deployment zones, or safely stowed
away. WARNING
Any applications that are not suitable or exe-
cut e inc
orrectly may cause damage to the ve-
hicle, accidents and serious injuries.
● SEAT recommends the use of the Apps that
SEAT pr
ovides for this vehicle.
● For the full use of SEAT Apps, it is necessa-
ry t
o activate the Setup option, “Activate da-
ta transfer for SEAT apps” ››› page 72.
● The interaction level of the Apps on the
syst
em must be: ALLOW.
● Protect the mobile terminal with its appli-
cations
from improper use.
● Never make modifications to the applica-
tions.
● Con
sult the instruction manual for the mo-
bil
e terminal. WARNING
The use of applications while driving can dis-
tract
your attention from the traffic. Distract-
ing the driver in any way can lead to an acci-
dent and cause injuries.
● Always drive carefully and responsibly. CAUTION
● In are a
s where special regulations apply or
the use of mobile terminals is forbidden, the
mobile terminal must be switched off at all
times. The radiation produced by the mobile
terminal when switched on may interfere with
sensitive technical and medical equipment,
possibly resulting in malfunction or damage
to the equipment.
● SEAT cannot be held liable for any damage
caused t
o the vehicle as a result of the use of
applications that are of poor quality or are
defective, the inadequate programming of
the applications, the insufficient coverage of
the network, the loss of data during trans-
mission or the improper use of mobile termi-
nals. Note
● The use of F
ull Link™ technology may re-
sult in high consumption of your 3G/4G data
plan.
● SEAT recommends using the device with a
high batter
y charge when connected to Full
Link™. » 63