start stop button Seat Leon 5D 2015 MEDIA SYSTEM TOUCH - COLOUR
[x] Cancel search | Manufacturer: SEAT, Model Year: 2015, Model line: Leon 5D, Model: Seat Leon 5D 2015Pages: 52, PDF Size: 1.43 MB
Page 14 of 52
RadioSelecting a station
To update
the list of
stationsThe list of stations in the FM frequency
band is automatically updated. For the
AM and DAB frequency bands, press the
function button
Update
to update the sta-
tion list.
Selecting the available frequency manually
Viewing the
frequency di-
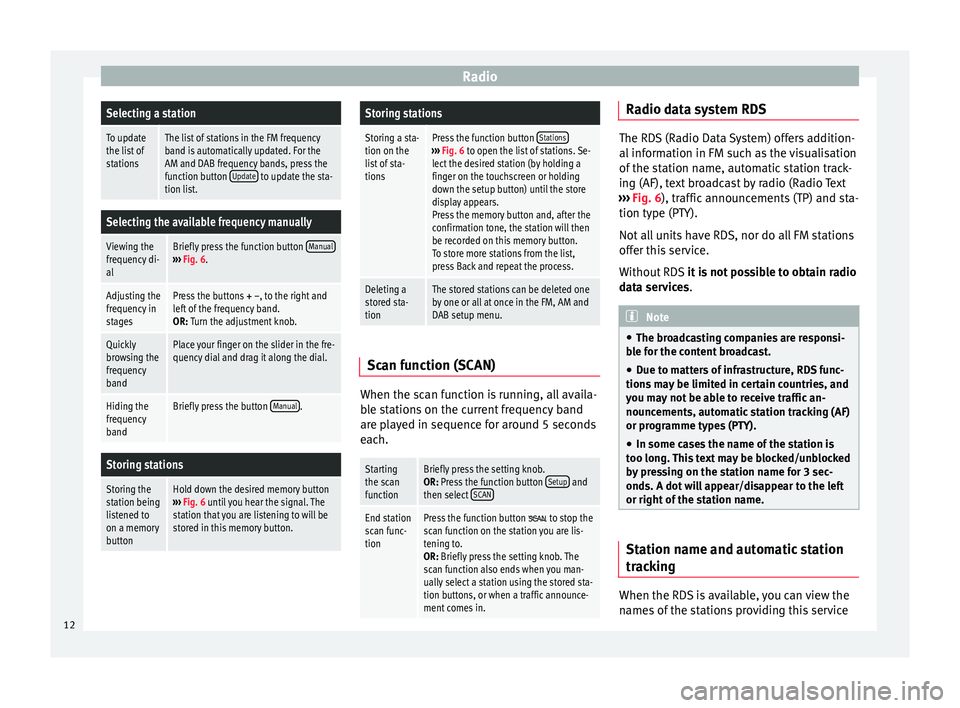
alBriefly press the function button Manual›››
Fig. 6.
Adjusting the
frequency in
stagesPress the buttons + –, to the right and
left of the frequency band.
OR: Turn the adjustment knob.
Quickly
browsing the
frequency
bandPlace your finger on the slider in the fre-
quency dial and drag it along the dial.
Hiding the
frequency
bandBriefly press the button Manual.
Storing stations
Storing the
station being
listened to
on a memory
buttonHold down the desired memory button
››› Fig. 6 until you hear the signal. The
station that you are listening to will be
stored in this memory button.
Storing stations
Storing a sta-
tion on the
list of sta-
tionsPress the function button Stations›››
Fig. 6 to open the list of stations. Se-
lect the desired station (by holding a
finger on the touchscreen or holding
down the setup button) until the store
display appears.
Press the memory button and, after the
confirmation tone, the station will then
be recorded on this memory button.
To store more stations from the list,
press Back and repeat the process.
Deleting a
stored sta-
tionThe stored stations can be deleted one
by one or all at once in the FM, AM and
DAB setup menu. Scan function (SCAN)
When the scan function is running, all availa-
b
l
e s
tations on the current frequency band
are played in sequence for around 5 seconds
each.
Starting
the scan
functionBriefly press the setting knob.
OR: Press the function button Setup and
then select SCAN
End station
scan func-
tionPress the function button to stop the
scan function on the station you are lis-
tening to.
OR: Briefly press the setting knob. The
scan function also ends when you man-
ually select a station using the stored sta-
tion buttons, or when a traffic announce-
ment comes in. Radio data system RDS
The RDS (Radio Data System) offers addition-
al inf
orm
ation in FM such as the visualisation
of the station name, automatic station track-
ing (AF), text broadcast by radio (Radio Text
››› Fig. 6), traffic announcements (TP) and sta-
tion type (PTY).
Not all units have RDS, nor do all FM stations
offer this service.
Without RDS it is not possible to obtain radio
data services. Note
● The bro a
dcasting companies are responsi-
ble for the content broadcast.
● Due to matters of infrastructure, RDS func-
tions m
ay be limited in certain countries, and
you may not be able to receive traffic an-
nouncements, automatic station tracking (AF)
or programme types (PTY).
● In some cases the name of the station is
too long.
This text may be blocked/unblocked
by pressing on the station name for 3 sec-
onds. A dot will appear/disappear to the left
or right of the station name. Station name and automatic station
tr
ac
k
ing When the RDS is available, you can view the
n
ame s
of the stations providing this service
12
Page 22 of 52
Media
Inserting and removing memory cards Inserting a memory card
If a memor
y
card cannot be inserted, make
sure it is positioned correctly and is compati-
ble with the unit.
Playback starts automatically if supported
audio files are stored on the memory card.
● Insert a compatible memory card into the
memory c
ard slot with the bevelled edge first
and facing right until the card clicks into
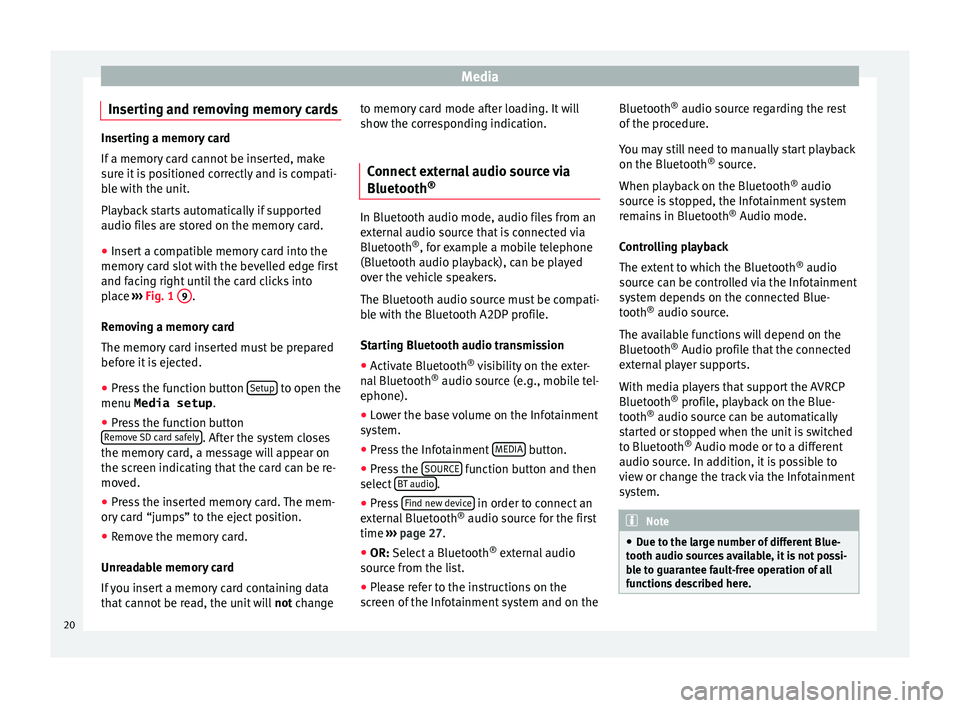
place ››› Fig. 1 9 .
R emo
v
ing a memory card
The memory card inserted must be prepared
before it is ejected.
● Press the function button Setup to open the
menu Media setup .
● Press the function button
R emo
v
e SD card safely . After the system closes
the memor y
c
ard, a message will appear on
the screen indicating that the card can be re-
moved.
● Press the inserted memory card. The mem-
ory c
ard “jumps” to the eject position.
● Remove the memory card.
Unrea
dable memory card
If you insert a memory card containing data
that cannot be read, the unit will not changeto memory card mode after loading. It will
show the corr
esponding indication.
Connect external audio source via
Bluetooth ® In Bluetooth audio mode, audio files from an
ext
ern
al audio source that is connected via
Bluetooth ®
, for example a mobile telephone
(Bluetooth audio playback), can be played
over the vehicle speakers.
The Bluetooth audio source must be compati-
ble with the Bluetooth A2DP profile.
Starting Bluetooth audio transmission
● Activate Bluetooth ®
vi s
ibility on the exter-
nal Bluetooth ®
audio source (e.g., mobile tel-
ephone).
● Lower the base volume on the Infotainment
syst
em.
● Press the Infotainment MEDIA button.
● Press the SOURC
E function button and then
sel ect
B
T audio .
● Press Find new dev
ic
e in order to connect an
e xt
ern
al Bluetooth ®
audio source for the first
time ›››
page 27.
● OR: Select a Bluetooth ®
ext
ernal audio
source from the list.
● Please refer to the instructions on the
scr
een of the Infotainment system and on the Bluetooth
®
audio source r
egarding the rest
of the procedure.
You may still need to manually start playback
on the Bluetooth ®
source.
When playback on the Bluetooth ®
audio
source is stopped, the Infotainment system
remains in Bluetooth ®
Audio mode.
Controlling playback
The extent to which the Bluetooth ®
audio
source can be controlled via the Infotainment
system depends on the connected Blue-
tooth ®
audio source.
The available functions will depend on the
Bluetooth ®
Audio profile that the connected
external player supports.
With media players that support the AVRCP
Bluetooth ®
profile, playback on the Blue-
tooth ®
audio source can be automatically
started or stopped when the unit is switched
to Bluetooth ®
Audio mode or to a different
audio source. In addition, it is possible to
view or change the track via the Infotainment
system. Note
● Due t o the l
arge number of different Blue-
tooth audio sources available, it is not possi-
ble to guarantee fault-free operation of all
functions described here. 20
Page 26 of 52
Media
and then press Settin
g
s to open the System
settings menu.
● Press the R
emo
v e safely function button. A
dr opdo
wn menu ap
pears with three options:
SD Card1, SD Card 2 and USB. After correctly
ejecting the data storage device from the sys-
tem, the function button becomes inactive
(grey colour).
● Now the data storage device can be discon-
nected. Note
● Do not c onnect
an external media player at
the same time to play music via Bluetooth ®
and via the USB port with the Infotain-
ment system, as this could cause playback
limitations.
● If the external player is an Apple device™,
it cannot
be simultaneously connected by
USB and by Bluetooth.
● If a connected device is not recognised, dis-
connect a
ll the connected devices and try
connecting the device again.
● Do not use memory card adaptors, USB ex-
tens
ion cords or USB hubs! External audio source connected to
the A
UX
-IN mu
ltimedia socket Fig. 22
AUX-IN menu. Depending on the equipment and country
ther
e m
a
y be an AUX-IN multimedia socket
››› Booklet Instruction Manual, chapter Prac-
tical equipment .
In order to connect the external audio source
to the AUX-IN socket, a suitable cable is re-
quired with a 3.5 mm jack that is inserted in-
to the AUX-IN socket of the vehicle.
Ensure that the AUX-IN connection is ena-
bled ››› page 22.
The connected external audio source is
played over the vehicle speakers and cannot
be controlled via the Infotainment system
controls.
The connection of an external audio source is
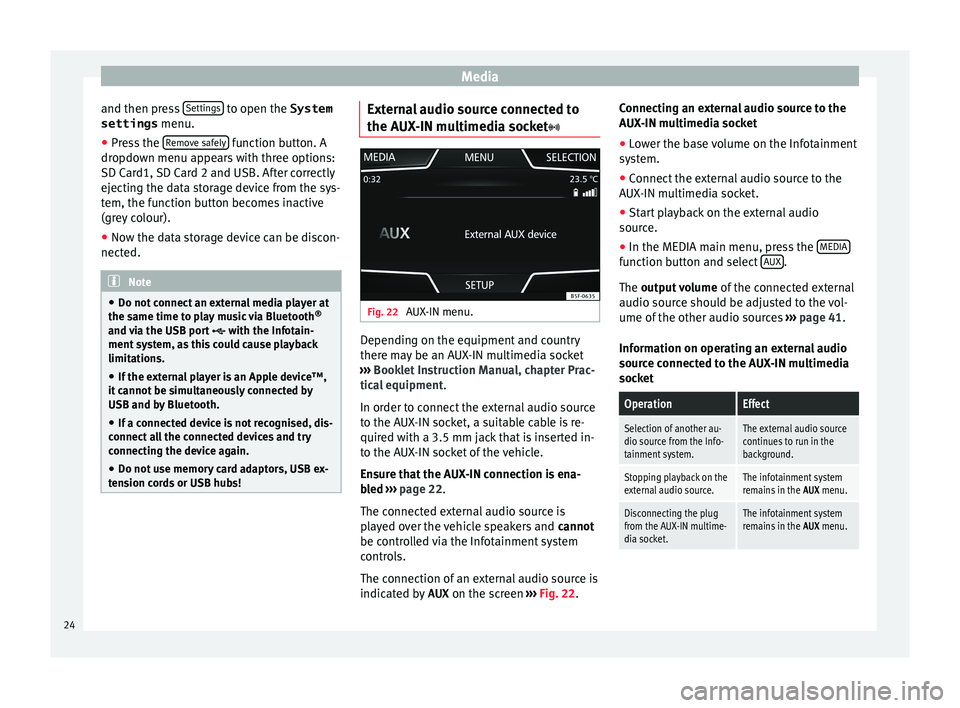
indicated by AUX on the screen ››› Fig. 22. Connecting an external audio source to the
AUX-IN mu
ltimedia socket
● Lower the base volume on the Infotainment
syst
em.
● Connect the external audio source to the
AUX-IN mu
ltimedia socket.
● Start playback on the external audio
source.
● In the MEDIA m
ain menu, press the MEDIA function button and select
A
UX .
The outp ut
volume of the connected external
audio source should be adjusted to the vol-
ume of the other audio sources ››› page 41.
Information on operating an external audio
source connected to the AUX-IN multimedia
socket
OperationEffect
Selection of another au-
dio source from the Info-
tainment system.The external audio source
continues to run in the
background.
Stopping playback on the
external audio source.The infotainment system
remains in the AUX menu.
Disconnecting the plug
from the AUX-IN multime-
dia socket.The infotainment system
remains in the AUX menu.24
Page 39 of 52
CAR menu
Since refuel
Di s
p
lay and storage of the values for the jour-
ney and the consumption. By refuelling, the
memory will be erased automatically.
Long-term
The memory records the values for a specific
number of partial trips, up to a total of 19
hours and 59 minutes or 99 hours and 59 mi-
nutes, or 1999.9 km (or miles) for 9999 km
(or miles), depending on the model of instru-
ment panel.
When one of these values is reached (de-
pending on the version of the instrument
panel), the memory is automatically deleted
and it starts counting from 0 again. Note
The values that appear in the figure are indi-
cativ e and m
ay vary depending on the fea-
tures. Ecotrainer*
Fig. 34
Ecotrainer menu. Fig. 35
Driving style symbols. Open ECOTRAINER menu
● With the vehicle stopped, press the CAR button on the Infotainment system.
● Press the VIEW function button and then
sel ect
ECOTRAINER . If
the corresponding equipment is available,
the ECO
TRAINER will provide information on
driving style. The information on driving style
is only evaluated and displayed when mov-
ing forward.
Points: Driving style display
This indicates the driving style since starting
the vehicle on a scale of 0 to 100. The higher
the score displayed, the more efficient the
driving style. To see more information, press
the display. It shows statistics for the last 30
minutes of driving since starting the vehicle.
If the car has not yet been driven for 30 mi-
nutes, it shows values from the last trip in
grey.
∅ km/l: Average fuel consumption
Shows the average fuel consumption. The
value is calculated by using the kilometres
covered since starting the vehicle. To see
more information, press the display. It shows
statistics for the last 30 minutes of driving
since starting the vehicle. If the car has not
yet been driven for 30 minutes, it shows val-
ues from the last trip in grey.
ECO tips: Tips on how to save fuel
By pressing the ECO tips function button, you
c an
v
iew tips on how to save fuel. These tips
can only be viewed when the vehicle is stop-
ped. »
37
Page 40 of 52
CAR menu
Evaluation of efficient driving style
The effic iency
of
the driving style is reflected
by different elements on the display.
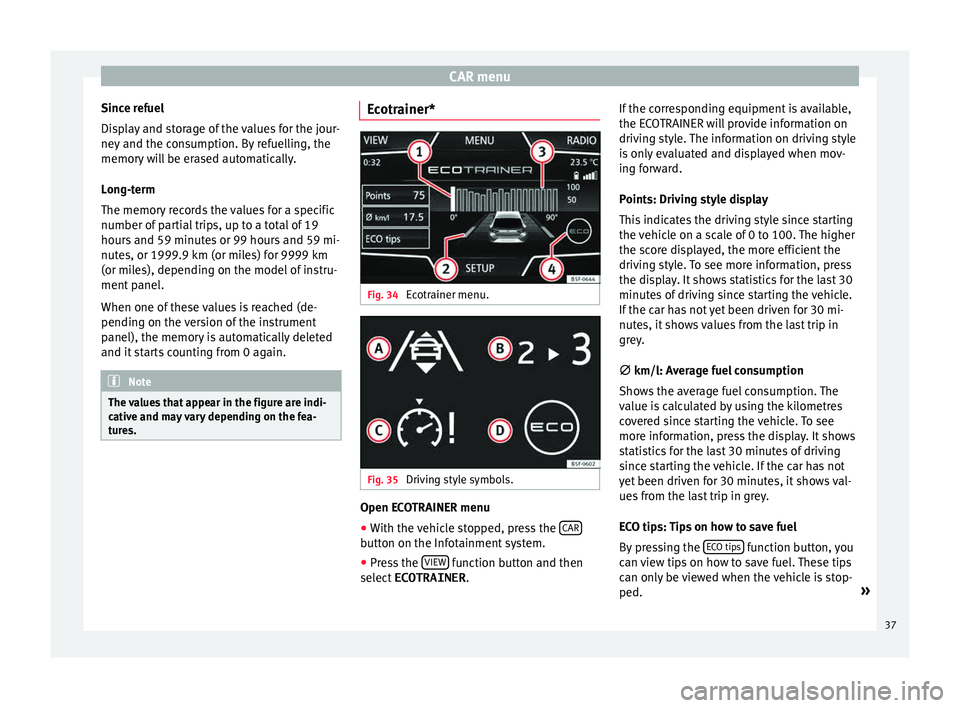
Display ››› Fig. 34: Meaning
1The white column represents the current time.
It shows the position of the evaluation that is cur-
rently being performed.
2
Bars to represent acceleration.
The position of the car represents the acceleration.
If speed is constant, the car remains in the central
area. When accelerating or braking, the car moves
forward or backward respectively.
3
Columns to show driving style efficiency.
On the horizon, the columns represent the effi-
ciency of the driving style in a retrospective man-
ner and move from left to right every five seconds
or so. The higher the height of the columns, the
more efficient the driving style.
The colour of the sky represents the average of the
last three minutes. The colour changes from grey
(less efficient) to blue (more efficient).
4
Different symbols can be displayed on the right of
the vehicle representation; these provide informa-
tion on the current driving style. ››› table on
page 38 .
Symbols ››› Fig. 35: Meaning
AForesight when driving. If sudden changes of ac-
celeration occur, driving style efficiency is re-
duced.
BGear-change indicator.
Symbols ››› Fig. 35: Meaning
CThe current vehicle speed is having a negative im-
pact on fuel consumption.
DEcological driving style. Vehicle condition
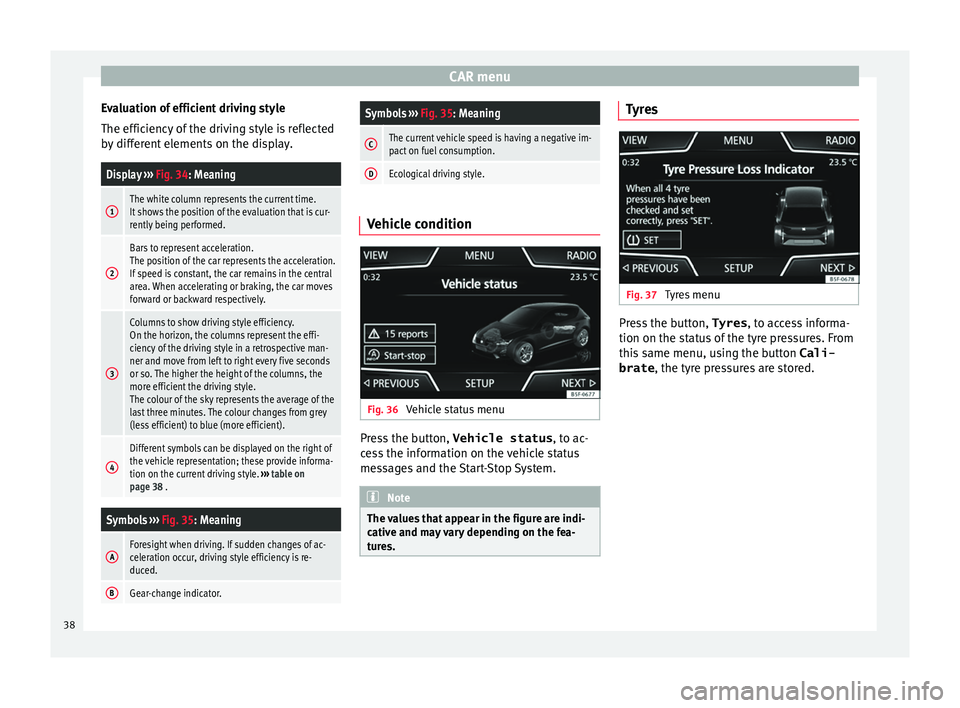
Fig. 36
Vehicle status menu Press the button,
Vehicle status , to ac
-
c
ess the information on the vehicle status
messages and the Start-Stop System. Note
The values that appear in the figure are indi-
cativ e and m
ay vary depending on the fea-
tures. Tyres
Fig. 37
Tyres menu Press the button,
Tyres, to ac
c
ess informa-
tion on the status of the tyre pressures. From
this same menu, using the button Cali-
brate , the tyre pressures are stored.38