window Seat Leon 5D 2015 MEDIA SYSTEM TOUCH - COLOUR
[x] Cancel search | Manufacturer: SEAT, Model Year: 2015, Model line: Leon 5D, Model: Seat Leon 5D 2015Pages: 52, PDF Size: 1.43 MB
Page 10 of 52
Introduction
● OR: Pr e
s
s the MUTE function button
› ›
›
Fig. 4 1)
.
While the unit is muted, the active media
source is paused. is displayed on the
screen. Note
If the basic playback volume of an audio
sourc e h
as been increased substantially, low-
er the volume before changing to another au-
dio source. Operating the function buttons on-
s
c
r
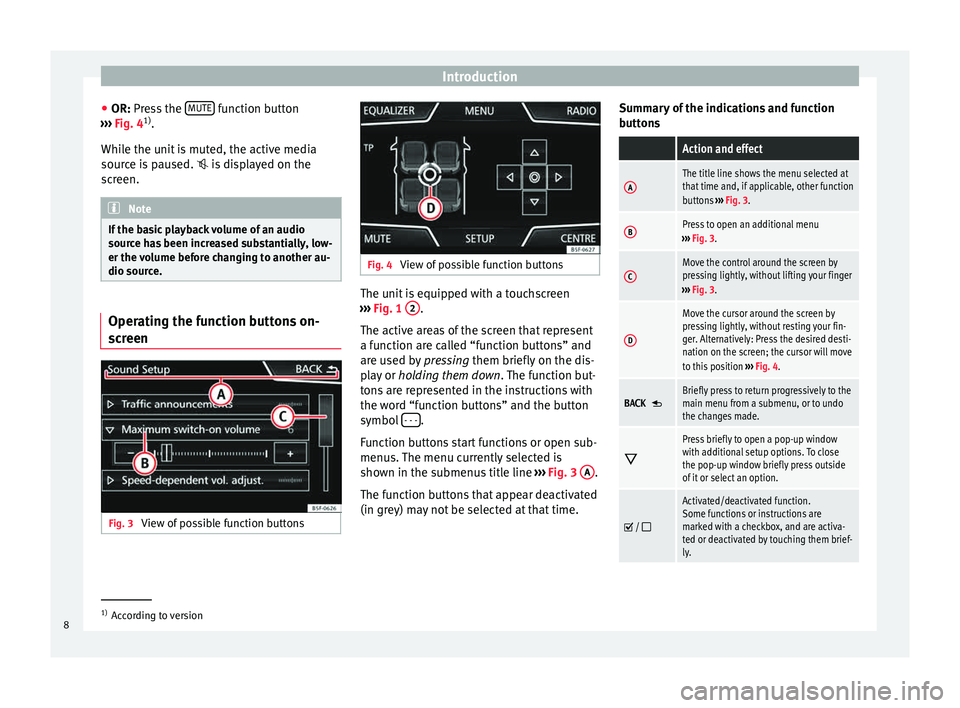
een Fig. 3
View of possible function buttons Fig. 4
View of possible function buttons The unit is equipped with a touchscreen
› ›
›
Fig. 1 2 .
The activ e ar
e
as of the screen that represent
a function are called “function buttons” and
are used by pressing them briefly on the dis-
play or holding them down . The function but-
tons are represented in the instructions with
the word “function buttons” and the button
symbol - - - .
F u
nction b
uttons start functions or open sub-
menus. The menu currently selected is
shown in the submenus title line ››› Fig. 3 A .
The f u
nction b
uttons that appear deactivated
(in grey) may not be selected at that time. Summary of the indications and function
button
s
Action and effect
AThe title line shows the menu selected at
that time and, if applicable, other function
buttons ››› Fig. 3.
BPress to open an additional menu
››› Fig. 3.
CMove the control around the screen by
pressing lightly, without lifting your finger
››› Fig. 3.
D
Move the cursor around the screen by
pressing lightly, without resting your fin-
ger. Alternatively: Press the desired desti-
nation on the screen; the cursor will move
to this position ››› Fig. 4.
BACK Briefly press to return progressively to the
main menu from a submenu, or to undo
the changes made.
Press briefly to open a pop-up window
with additional setup options. To close
the pop-up window briefly press outside
of it or select an option.
/
Activated/deactivated function.
Some functions or instructions are
marked with a checkbox, and are activa-
ted or deactivated by touching them brief-
ly.
1)
According to version
8
Page 11 of 52
Introduction Action and effect
OKBriefly press to confirm the data entered
or to select.
×
Briefly press to close a pop-up window or
a data entry screen.
/ Briefly press to modify the setup progres-
sively.
SETUPTo activate the setup of the menus and
systems.
MENUGo to menu selection.
Activating the list entries and search-
in
g thr
ough the li
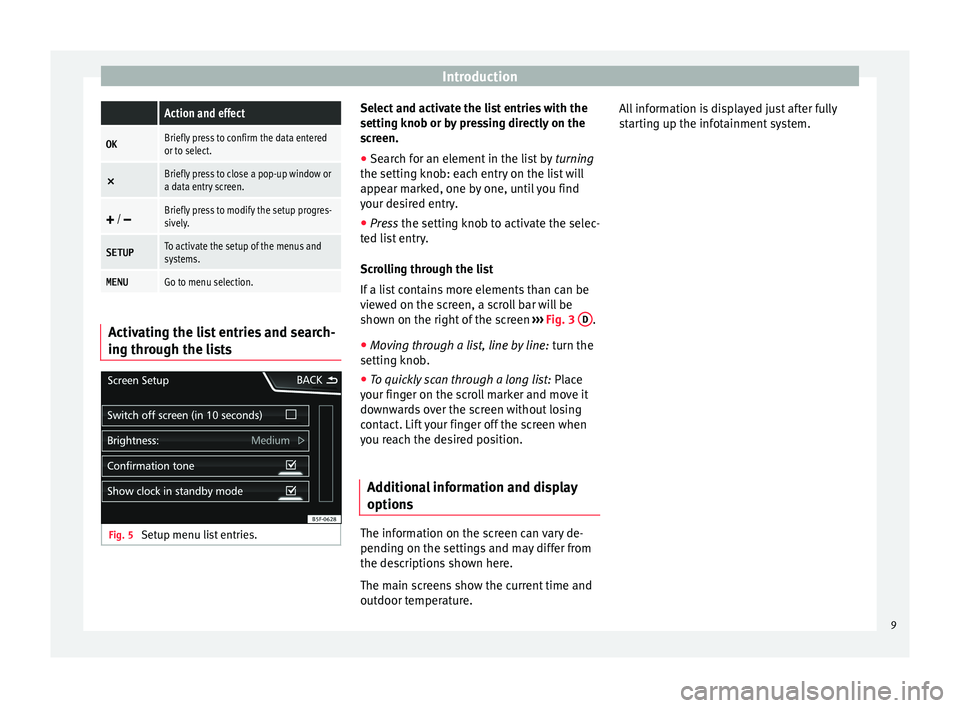
stsFig. 5
Setup menu list entries. Select and activate the list entries with the
settin
g kno
b or b
y pressing directly on the
screen.
● Search for an element in the list by turnin
g
the setting knob: each entry on the list will
appear marked, one by one, until you find
your desired entry.
● Press the setting knob t
o activate the selec-
ted list entry.
Scrolling through the list
If a list contains more elements than can be
viewed on the screen, a scroll bar will be
shown on the right of the screen ››› Fig. 3 D .
● Moving through a list, line by line: turn the
settin g kno
b.
● To quickly scan through a long list: Place
y
our finger on the scroll marker and move it
downwards over the screen without losing
contact. Lift your finger off the screen when
you reach the desired position.
Additional information and display
options The information on the screen can vary de-
pendin
g on the settin
g
s and may differ from
the descriptions shown here.
The main screens show the current time and
outdoor temperature. All information is displayed just after fully
star
ting up the infotainment system. 9
Page 12 of 52
Radio
Radio R a
dio mode
Intr
oduction Note
● Ple a
se bear in mind that in car parks, tun-
nels, areas with high buildings or mountains
the radio signal can be impaired.
● Foil or metal-coated stickers attached to
the window
s may affect reception on vehicles
with a window aerial. RADIO main menu
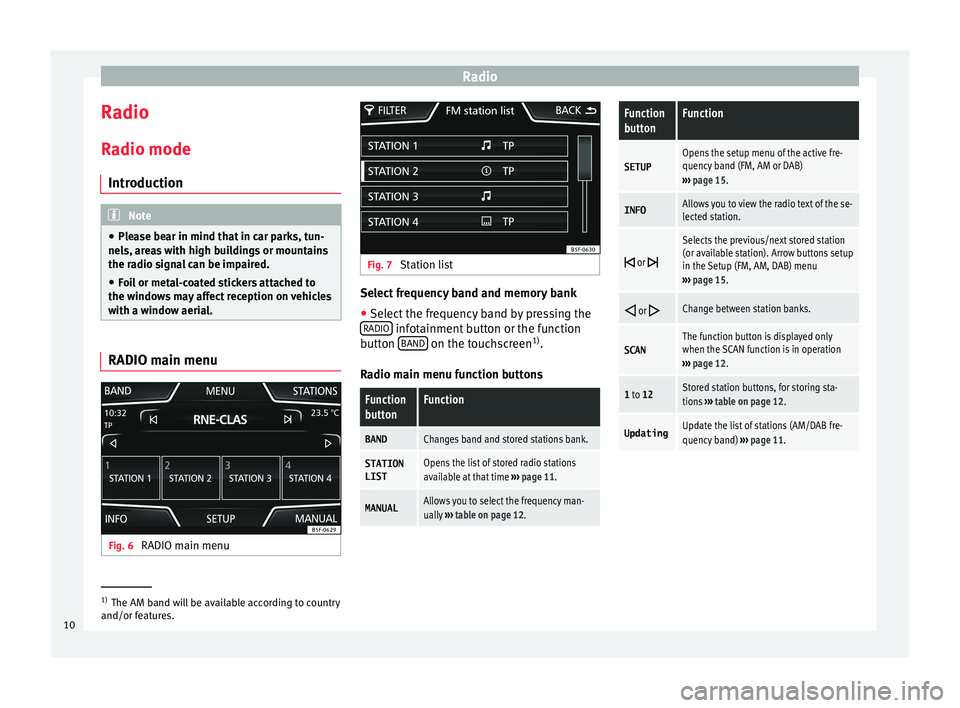
Fig. 6
RADIO main menu Fig. 7
Station list Select frequency band and memory bank
● Select the frequency band by pressing the
RADIO infotainment button or the function
b utt
on B
AND on the touchscreen
1)
.
R a
dio m
ain menu function buttons
Function
buttonFunction
BANDChanges band and stored stations bank.
STATION LISTOpens the list of stored radio stations
available at that time ››› page 11.
MANUALAllows you to select the frequency man-
ually ››› table on page 12.
Function
buttonFunction
SETUPOpens the setup menu of the active fre-
quency band (FM, AM or DAB)
››› page 15.
INFOAllows you to view the radio text of the se-
lected station.
or
Selects the previous/next stored station
(or available station). Arrow buttons setup
in the Setup (FM, AM, DAB) menu
››› page 15.
or Change between station banks.
SCANThe function button is displayed only
when the SCAN function is in operation
››› page 12.
1 to 12Stored station buttons, for storing sta-
tions ››› table on page 12.
UpdatingUpdate the list of stations (AM/DAB fre-
quency band) ››› page 11. 1)
The AM band will be available according to country
and/or fe at
ures.
10
Page 17 of 52
Radio
Some stations that do not have their own
tr affic
new
s support the TP function by broad-
casting traffic announcements from other
stations (EON).
Switching the TP function on and off
● In the menu Setup (FM, AM and
DAB), pres
s the function button
Traffic Program (TP) to activate or de
activ
at
e
this function ››› page 15.
If the station you are listening to at that time
does not support the TP function,
will be
displayed halfway up the left of the screen.
Active TP function and station selection
While the traffic news tracking is operative, in
audio mode TP will be displayed half-way up
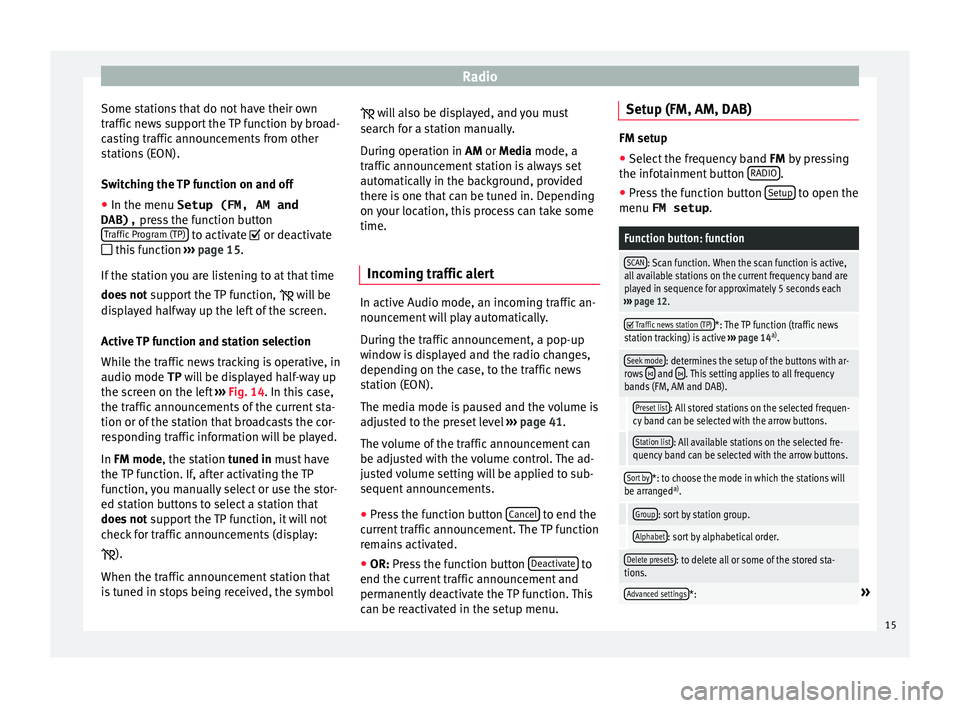
the screen on the left ››› Fig. 14. In this case,
the traffic announcements of the current sta-
tion or of the station that broadcasts the cor-
responding traffic information will be played.
In FM mode, the station tuned in must have
the TP function. If, after activating the TP
function, you manually select or use the stor-
ed station buttons to select a station that
does not support the TP function, it will not
check for traffic announcements (display:
).
When the traffic announcement station that
is tuned in stops being received, the symbol
wi
l
l also be displayed, and you must
search for a station manually.
During operation in AM or Media mode, a
traffic announcement station is always set
automatically in the background, provided
there is one that can be tuned in. Depending
on your location, this process can take some
time.
Incoming traffic alert In active Audio mode, an incoming traffic an-
nou
nc
ement
will play automatically.
During the traffic announcement, a pop-up
window is displayed and the radio changes,
depending on the case, to the traffic news
station (EON).
The media mode is paused and the volume is
adjusted to the preset level ››› page 41.
The volume of the traffic announcement can
be adjusted with the volume control. The ad-
justed volume setting will be applied to sub-
sequent announcements.
● Press the function button Cancel to end the
c urr
ent
traffic announcement. The TP function
remains activated.
● OR: Press the function button De
activate to
end the c urrent
traffic announcement and
permanently deactivate the TP function. This
can be reactivated in the setup menu. Setup (FM, AM, DAB) FM setup
● Select the frequency band FM by pr
essing
the infotainment button RADIO .
● Press the function button Setup to open the
menu FM setup .
Function button: function
SCAN: Scan function. When the scan function is active,
all available stations on the current frequency band are
played in sequence for approximately 5 seconds each
››› page 12.
Traffic news station (TP)*: The TP function (traffic news
station tracking) is active ››› page 14 a)
.
Seek mode: determines the setup of the buttons with ar-
rows and . This setting applies to all frequency
bands (FM, AM and DAB).
Preset list: All stored stations on the selected frequen-
cy band can be selected with the arrow buttons.
Station list: All available stations on the selected fre-
quency band can be selected with the arrow buttons.
Sort by*: to choose the mode in which the stations will
be arranged a)
.
Group: sort by station group.
Alphabet: sort by alphabetical order.
Delete presets: to delete all or some of the stored sta-
tions.
Advanced settings*:» 15
Page 21 of 52
Media
Function buttons of the main menu MediaFunction button: Function
MEDIA
Press to select another media source
››› page 19.
SD card
: SD memory card ››› page 20.
Bluetooth audio: Bluetooth audio
››› page 20.
USB
: USB data medium ››› page 23.
AUX: external audio source ››› page 23.
SELECTIONOpens the list of tracks ››› page 22.
or Changes track in Media mode
››› page 21.
Playback will stop. The function button changes to
››› page 21.
Playback will continue. The function but-
ton changes to
››› page 21.
SETUPOpens the menu Media setup
››› page 22.
Repeat all the tracks.
Repeat the current track.
Random play. Information and possible icons
Display: Meaning
A›››
Fig. 17
Display of track information (ID3 tag in
MP3 files).
Audio files: display of the artist name,
album title and song title.
B››› Fig. 17
Playing time so far.
The time bar allows you to select the de-
sired playing time.
RDS radio data service deactivated. The
RDS can be activated in the menu
Setup
(FM, AM) ››› page 15.
TPThe TP is active and receiving ››› page 14.
No traffic announcement station can be
received.
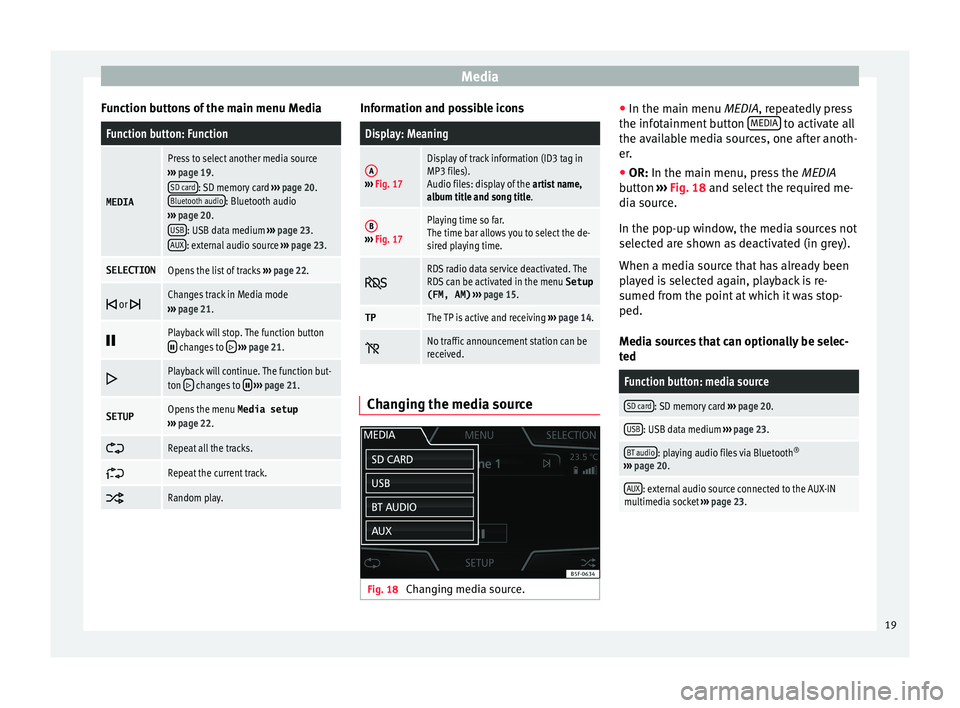
Changing the media source
Fig. 18
Changing media source. ●
In the m ain menu
MEDIA
, repeatedly press
the infotainment button MEDIA to activate all
the av ai
l
able media sources, one after anoth-
er.
● OR: In the main menu, pre
ss the MEDIA
button ››› Fig. 18 and select the required me-
dia source.
In the pop-up window, the media sources not
selected are shown as deactivated (in grey).
When a media source that has already been
played is selected again, playback is re-
sumed from the point at which it was stop-
ped.
Media sources that can optionally be selec-
ted
Function button: media source
SD card: SD memory card ››› page 20.
USB: USB data medium ››› page 23.
BT audio: playing audio files via Bluetooth ®
››› page 20.
AUX: external audio source connected to the AUX-IN
multimedia socket ››› page 23. 19
Page 34 of 52
Telephone management system (PHONE)
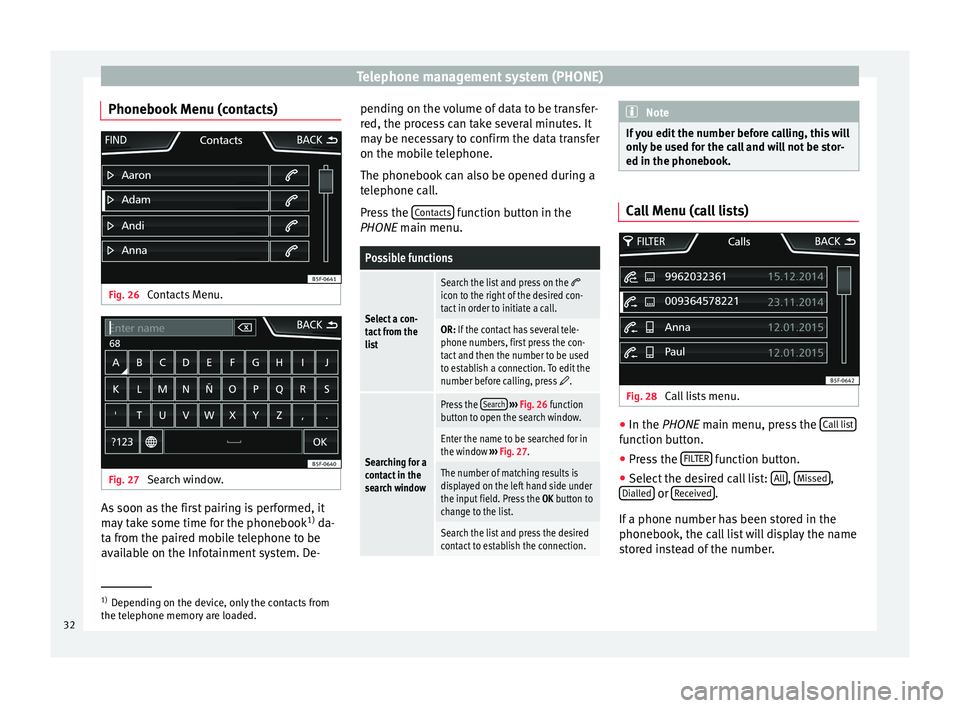
Phonebook Menu (contacts) Fig. 26
Contacts Menu. Fig. 27
Search window. As soon as the first pairing is performed, it
m
a
y
take some time for the phonebook 1)
da-
ta from the paired mobile telephone to be
available on the Infotainment system. De- pending on the volume of data to be transfer-
red, the proc
ess can take several minutes. It
may be necessary to confirm the data transfer
on the mobile telephone.
The phonebook can also be opened during a
telephone call.
Press the Contacts function button in the
PHONE m ain menu.
Possible functions
Select a con-
tact from the
list
Search the list and press on the icon to the right of the desired con-
tact in order to initiate a call.
OR: If the contact has several tele-
phone numbers, first press the con-
tact and then the number to be used
to establish a connection. To edit the
number before calling, press
.
Searching for a
contact in the
search window
Press the Search
››› Fig. 26 function
button to open the search window.
Enter the name to be searched for in
the window ››› Fig. 27.
The number of matching results is
displayed on the left hand side under
the input field. Press the OK button to
change to the list.
Search the list and press the desired
contact to establish the connection. Note
If you edit the number before calling, this will
only be u
sed for the call and will not be stor-
ed in the phonebook. Call Menu (call lists)
Fig. 28
Call lists menu. ●
In the PHONE m ain menu, pr
e
ss the Call list function button.
● Press the FIL
TER function button.
● Select the desired call list: A
l
l ,
Mi
s
sed ,
Di al
l
ed or
R
ec
eiv ed .
If a phone number h
a
s been stored in the
phonebook, the call list will display the name
stored instead of the number. 1)
Depending on the device, only the contacts from
the tel ephone memor
y are loaded.
32
Page 48 of 52
Index
O Oper atin
g in
structions
checkboxes . . . . . . . . . . . . . . . . . . . . . . . . . . . . . . 8
function buttons . . . . . . . . . . . . . . . . . . . . . . . . . . 8
Unit buttons . . . . . . . . . . . . . . . . . . . . . . . . . . . . . 8
Operation PHONE . . . . . . . . . . . . . . . . . . . . . . . . . . . . . . 26, 29
P PHONE A2DP . . . . . . . . . . . . . . . . . . . . . . . . . . . . . . . . . . 27
Areas where special regulations apply . . . . . . . 27
Bluetooth profiles . . . . . . . . . . . . . . . . . . . . . . . . 27
Bluetooth settings . . . . . . . . . . . . . . . . . . . . . . . 34
call lists . . . . . . . . . . . . . . . . . . . . . . . . . . . . . . . . 32
call mailbox . . . . . . . . . . . . . . . . . . . . . . . . . . . . . 31
connect and disconnect the telephone man-agement system . . . . . . . . . . . . . . . . . . . . . . . 34
connection via the Infotainment system . . . . . . 28
contacts . . . . . . . . . . . . . . . . . . . . . . . . . . . . . . . . 32
description of the function . . . . . . . . . . . . . . . . 27
dial . . . . . . . . . . . . . . . . . . . . . . . . . . . . . . . . 31, 32
Display and symbols . . . . . . . . . . . . . . . . . . . . . 30
enter telephone number . . . . . . . . . . . . . . . . . . 31
Explosion risk areas . . . . . . . . . . . . . . . . . . . . . . 27
favourites (speed dial buttons) . . . . . . . . . . . . . 33
general information . . . . . . . . . . . . . . . . . . . . . . 26
GSM network . . . . . . . . . . . . . . . . . . . . . . . . . . . 27
HFP . . . . . . . . . . . . . . . . . . . . . . . . . . . . . . . . . . . 27
main menu . . . . . . . . . . . . . . . . . . . . . . . . . . . . . 29
mobile telephone pairing . . . . . . . . . . . . . . . . . 28
pairing of mobile telephone . . . . . . . . . . . . . . . 28
pairing via the Infotainment system . . . . . . . . . 28
phonebook . . . . . . . . . . . . . . . . . . . . . . . . . . . . . 32
settings . . . . . . . . . . . . . . . . . . . . . . . . . . . . . . . . 34
telephone management system . . . . . . . . . 26, 29
user profile settings . . . . . . . . . . . . . . . . . . . . . . 34 Play
extern al data storage device (USB) . . . . . . . . . . 23
Playback AUX-IN . . . . . . . . . . . . . . . . . . . . . . . . . . . . . . . . . 24
Pop-up window . . . . . . . . . . . . . . . . . . . . . . . . . . . . . 8
Q Quick reference guide . . . . . . . . . . . . . . . . . . . . . . . 6
R
Radio . . . . . . . . . . . . . . . . . . . . . . . . . . . . . . . . . . . . 10
RADIO frequency bands . . . . . . . . . . . . . . . . . . . . . . . . . 11
Main menu . . . . . . . . . . . . . . . . . . . . . . . . . . . . . 10
radio data system RDS . . . . . . . . . . . . . . . . . . . . 12
radio text . . . . . . . . . . . . . . . . . . . . . . . . . . . . . . . 14
scan function (SCAN) . . . . . . . . . . . . . . . . . . . . . 12
selecting and storing a station . . . . . . . . . . . . . 11
station name and automatic station tracking . . 12
Stored station buttons . . . . . . . . . . . . . . . . . . . . 11
RDS . . . . . . . . . . . . . . . . . . . . . . . . . . . . . . . . . . . . . 43 TP (Traffic Program) . . . . . . . . . . . . . . . . . . . 14, 15
Requirements for memory cards . . . . . . . . . . . . . . . . . . . . . . . . . . . 17
SD cards . . . . . . . . . . . . . . . . . . . . . . . . . . . . . . . 17
Rotary/push knobs . . . . . . . . . . . . . . . . . . . . . . . . . 8
Rotary knobs . . . . . . . . . . . . . . . . . . . . . . . . . . . . . . . 7
S Safety notes . . . . . . . . . . . . . . . . . . . . . . . . . . . . . . . 6
SCAN see scan function . . . . . . . . . . . . . . . . . . . . . . . . 12
Scan function (SCAN) Radio mode . . . . . . . . . . . . . . . . . . . . . . . . . . . . . 12
SD card . . . . . . . . . . . . . . . . . . . . . . . . . . . . . . . . . . 20 Settings
Bluetooth . . . . . . . . . . . . . . . . . . . . . . . . . . . . . . 34
PHONE . . . . . . . . . . . . . . . . . . . . . . . . . . . . . . . . . 34
user profile settings . . . . . . . . . . . . . . . . . . . . . . 34
SETUP see: "Setup (SETUP)" . . . . . . . . . . . . . . . . . . 39, 41
Setup (SETUP) . . . . . . . . . . . . . . . . . . . . . . . . . . 39, 41 Bluetooth setup . . . . . . . . . . . . . . . . . . . . . . . . . 39
Date and Time . . . . . . . . . . . . . . . . . . . . . . . . . . . 39
factory settings . . . . . . . . . . . . . . . . . . . . . . . . . . 39
language . . . . . . . . . . . . . . . . . . . . . . . . . . . . . . . 39
screen setup . . . . . . . . . . . . . . . . . . . . . . . . . . . . 39
sound . . . . . . . . . . . . . . . . . . . . . . . . . . . . . . . . . 41
system . . . . . . . . . . . . . . . . . . . . . . . . . . . . . . . . . 39
units . . . . . . . . . . . . . . . . . . . . . . . . . . . . . . . . . . 39
volume distribution . . . . . . . . . . . . . . . . . . . . . . 41
Sound distribution (Balance/Fader) . . . . . . . . . . . 41
Sound setup . . . . . . . . . . . . . . . . . . . . . . . . . . . . . . 41
Sound (treble/midrange/bass) . . . . . . . . . . . . . . . 41
Speed dial buttons See PHONE . . . . . . . . . . . . . . . . . . . . . . . . . . . . . 33
Station search see scan function . . . . . . . . . . . . . . . . . . . . . . . . 12
Switch-on volume . . . . . . . . . . . . . . . . . . . . . . . . . . 41
Switching off . . . . . . . . . . . . . . . . . . . . . . . . . . . . . . . 7
Switching on . . . . . . . . . . . . . . . . . . . . . . . . . . . . . . . 7
Symbols used in this manual . . . . . . . . . . . . . . . . . 8
T
Things to note AUX mode . . . . . . . . . . . . . . . . . . . . . . . . . . . . . . 24
Touchscreen . . . . . . . . . . . . . . . . . . . . . . . . . . . . . . . 8
TP (Traffic Program) traffic news station . . . . . . . . . . . . . . . . . . . . 14, 15
Tracking of traffic news stations (TP) . . . . . . . . . . 15
Track search . . . . . . . . . . . . . . . . . . . . . . . . . . . . . . 21
Traffic news (TP) station tracking . . . . . . . . . . 14, 15
46