display Seat Leon 5D 2015 NAVI SYSTEM PLUS
[x] Cancel search | Manufacturer: SEAT, Model Year: 2015, Model line: Leon 5D, Model: Seat Leon 5D 2015Pages: 96, PDF Size: 2.48 MB
Page 35 of 96
Audio and Media Mode
The USB port sup
p lies the usual USB volt-
age of 5 volts for a USB connection.
External hard disks with a capacity greater
than 32 GB must be reformatted for the
FAT32 file system in some circumstances. You
will find the necessary software and informa-
tion on the Internet.
Take into account all other instructions and
limitations regarding requirements for media
sources ››› page 24.
iPod™, iPad™ and iPhone™
Depending on the country and the equip-
ment, iPods™, iPads™ or iPhones™ can be
connected using the device's USB cable to
the USB port of the vehicle and used as
audio sources.
After connecting an iPod™, iPad™ or
iPhone™, the specific list views of the iPod
are displayed in the upper selection level
( Playlists , Artists, Albums,
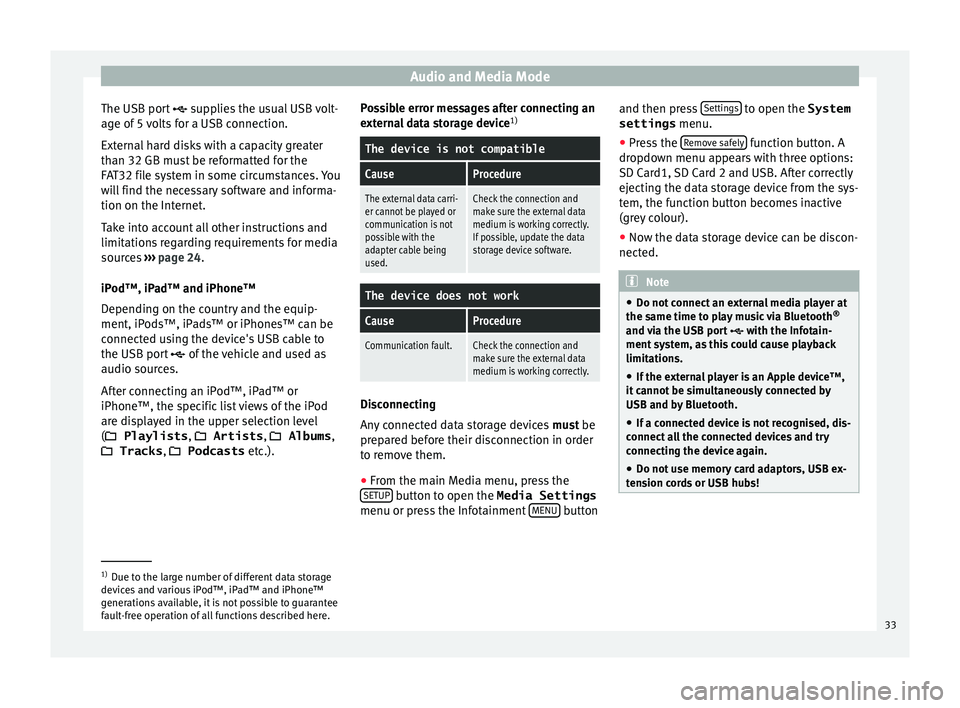
Tracks , Podcasts etc.). Possible error messages after connecting an
extern
al data storage device 1)
The device is not compatible
CauseProcedure
The external data carri-
er cannot be played or
communication is not
possible with the
adapter cable being
used.Check the connection and
make sure the external data
medium is working correctly.
If possible, update the data
storage device software.
The device does not work
CauseProcedure
Communication fault.Check the connection and
make sure the external data
medium is working correctly. Disconnecting
An
y
c
onnected data storage devices must be
prepared before their disconnection in order
to remove them.
● From the main Media menu, press the
SETUP button to open the Media Settings
menu or pr e
s
s the Infotainment MENU buttonand then press
Settin
g
s to open the System
settings menu.
● Press the R
emo
v
e safely function button. A
dr opdo
wn menu ap
pears with three options:
SD Card1, SD Card 2 and USB. After correctly
ejecting the data storage device from the sys-
tem, the function button becomes inactive
(grey colour).
● Now the data storage device can be discon-
nected. Note
● Do not c onnect
an external media player at
the same time to play music via Bluetooth ®
and via the USB port with the Infotain-
ment system, as this could cause playback
limitations.
● If the external player is an Apple device™,
it cannot
be simultaneously connected by
USB and by Bluetooth.
● If a connected device is not recognised, dis-
connect a
ll the connected devices and try
connecting the device again.
● Do not use memory card adaptors, USB ex-
tens
ion cords or USB hubs! 1)
Due to the large number of different data storage
devic e
s and various iPod™, iPad™ and iPhone™
generations available, it is not possible to guarantee
fault-free operation of all functions described here. 33
Page 38 of 96
Audio and Media Mode
imported from different data storage devices
t o the
jukebox and thi
s used to play them.
The files will only be copied when the engine
is running. Copying copy-protected CDs and
DVDs is prohibited
Importing files
● In Media mode, press the SETUP function
b utt
on and then sel
ect Manage jukebox .
● Press the IMPOR
T function button.
● Select the desired source from the Select
source menu.
The d at
a s
torage device is prepared. This op-
eration may take a few seconds.
● Activate the checkboxes to the right of the
file
s or folders to be imported.
● If Select al
l is activated, all files and folders
on the d at
a s
torage device will be imported.
● Press the IMPORT function button.
D ependin
g on the sel
ection, all files and fold-
ers will be imported with the indicated name
to the Jukebox .
If no track information is available, the audio
files will be placed in the following folders:
Audio data CD ■ Album ■
Unknown albums
■ Track. mp31)
■ Artists
■ Unknown artists
■Unknown albums
■ Track. mp31)
Function
s and progress display during the
copying operation
While copying, an animation is displayed
along with the progress percentage on the
import screen.
Audio data CD: It is not possible to copy and
play files at the same time.
● Press the Cancel function button to end the
impor t
of
the whole track that is currently be-
ing imported.
● To obtain information on the status of the
import, pre
ss the Information function button.
● Press the B
A
CK
function button to close
the impor t
s
creen with the progress informa-
tion.
● When the file import ends, the following
mess
age will appear: Files have been
imported . Deleting files
● In Media mode, press the SETUP function
b utt
on and then sel
ect Manage jukebox .
● Press the DELETE function button.
● Activate the checkboxes to the right of the
fi l
e
s or folders to be deleted.
● If Select al
l is activated, all the files and
f o
l
ders on the data storage device will be de-
leted.
● Press the DELETE function button. The files
and f o
l
ders will be deleted according to the
selection made.
● When the files have been deleted, the fol-
lowin
g message will appear: Files have
been deleted .
● Press the BACK
function button to close
the menu.
Openin g s
t
ored audio and video files
● Change to Jukebox (SSD) cont
ent
››› page 30.
When storing the tracks, they are stored un-
der different categories and lists according to
the information available.
The tracks saved can be checked and opened
from these lists according to different catego-
ries. 1)
The name and extension of the file are examples.
36
Page 40 of 96
Audio and Media Mode
●
Via the
WLAN, only the connection between
the device and the Infotainment system can
be guaranteed, its operation depends on the
application itself. WLAN setup
To access the WLAN settings, the ignition
mus
t
be on.
● Select the main Media menu by pressing
the MEDIA Infotainment button.
● Press the S
ETUP function button to open
the Media Settings menu.
● Press the WLAN function button to open the
WLAN settings menu.
Function button: function
Mobile hotspot: To configure the system access point.
The number of WLAN devices that are connected to the
Infotainment system's WLAN function is displayed.
Security level: To select the code type (encryption)
WAP , WAP2 or No security level . An 8-character
network key is automatically generated.
Network key: Network key automatically generated.
Press the function button to manually change the
network key. The network key must have a minimum
of 8 characters and a maximum of 63.
SSID: Name of the Infotainment system WLAN net-
work.
Function button: function
Do not send network name (SSID): Activate the check-
box to deactivate the visibility of the WLAN network. To save the changes made to the mobile ac-
ce
s
s point configuration, press the STORE button.
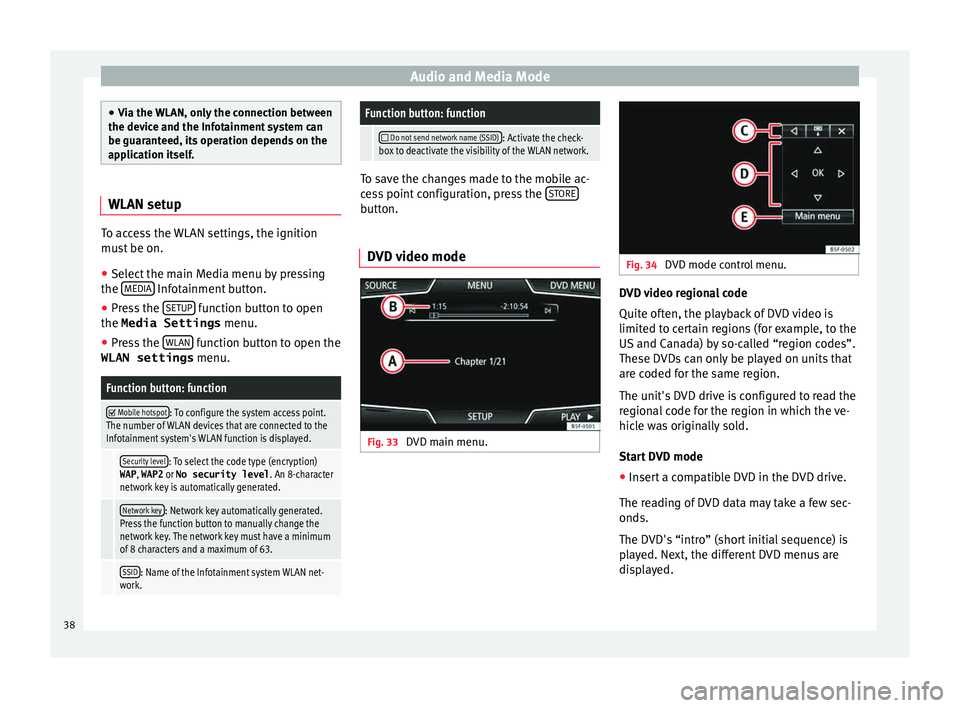
DVD video mode Fig. 33
DVD main menu. Fig. 34
DVD mode control menu. DVD video regional code
Quit
e of
t
en, the playback of DVD video is
limited to certain regions (for example, to the
US and Canada) by so-called “region codes”.
These DVDs can only be played on units that
are coded for the same region.
The unit's DVD drive is configured to read the
regional code for the region in which the ve-
hicle was originally sold.
Start DVD mode
● Insert a compatible DVD in the DVD drive.
The rea
ding of DVD data may take a few sec-
onds.
The DVD's “intro” (short initial sequence) is
played. Next, the different DVD menus are
displayed.
38
Page 41 of 96
Audio and Media Mode
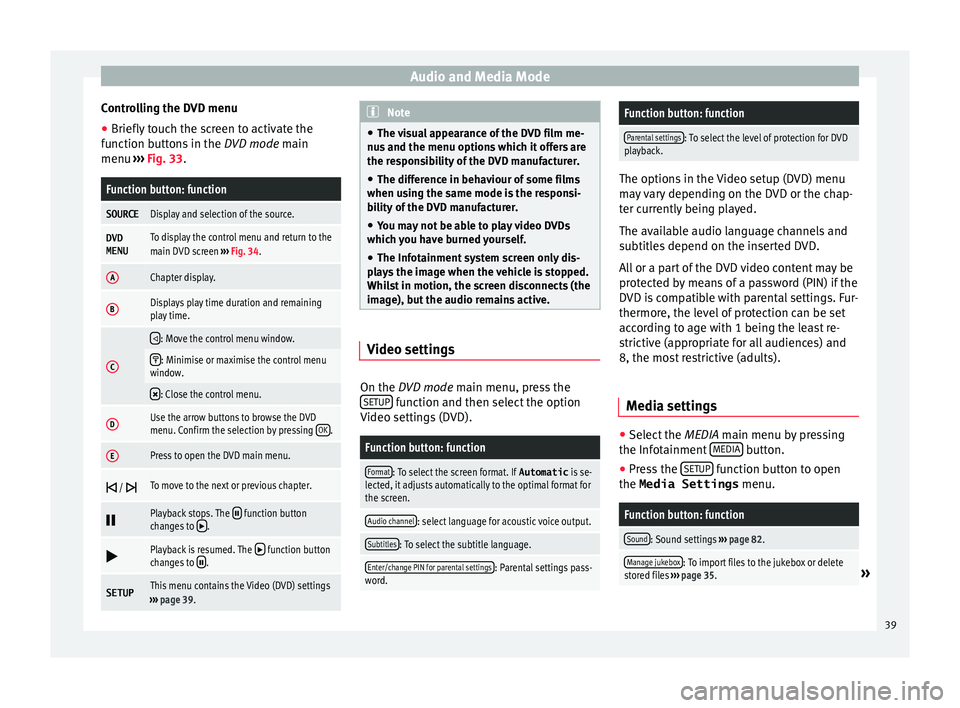
Controlling the DVD menu
● Briefly touch the screen to activate the
f u
nction b
uttons in the DVD mode main
menu ››› Fig. 33.
Function button: function
SOURCEDisplay and selection of the source.
DVD
MENUTo display the control menu and return to the
main DVD screen ››› Fig. 34.
AChapter display.
BDisplays play time duration and remaining
play time.
C
: Move the control menu window.
: Minimise or maximise the control menu
window.
: Close the control menu.
DUse the arrow buttons to browse the DVD
menu. Confirm the selection by pressing
OK.
EPress to open the DVD main menu.
/ To move to the next or previous chapter.
Playback stops. The function button
changes to .
Playback is resumed. The function button
changes to .
SETUPThis menu contains the Video (DVD) settings
››› page 39. Note
● The v i
sual appearance of the DVD film me-
nus and the menu options which it offers are
the responsibility of the DVD manufacturer.
● The difference in behaviour of some films
when usin
g the same mode is the responsi-
bility of the DVD manufacturer.
● You may not be able to play video DVDs
which y
ou have burned yourself.
● The Infotainment system screen only dis-
pla
ys the image when the vehicle is stopped.
Whilst in motion, the screen disconnects (the
image), but the audio remains active. Video settings
On the D
VD mode main menu, press the
S ETUP function and then select the option
V ideo settin
g
s (DVD).
Function button: function
Format: To select the screen format. If Automatic is se-
lected, it adjusts automatically to the optimal format for
the screen.
Audio channel: select language for acoustic voice output.
Subtitles: To select the subtitle language.
Enter/change PIN for parental settings: Parental settings pass-
word.
Function button: function
Parental settings: To select the level of protection for DVD
playback. The options in the Video setup (DVD) menu
ma
y
vary depending on the DVD or the chap-
ter currently being played.
The available audio language channels and
subtitles depend on the inserted DVD.
All or a part of the DVD video content may be
protected by means of a password (PIN) if the
DVD is compatible with parental settings. Fur-
thermore, the level of protection can be set
according to age with 1 being the least re-
strictive (appropriate for all audiences) and
8, the most restrictive (adults).
Media settings ●
Select the MEDIA main menu b
y
pressing
the Infotainment MEDIA button.
● Press the S
ETUP function button to open
the Media Settings menu.
Function button: function
Sound: Sound settings ››› page 82.
Manage jukebox: To import files to the jukebox or delete
stored files ››› page 35.» 39
Page 42 of 96
Audio and Media ModeFunction button: function
Mix/Repeat including subfolders: Subfolders will be inclu-
ded in the selected playback mode ››› page 23.
Bluetooth: Bluetooth ®
settings ››› page 70
WLAN: WLAN settings ››› page 38.
Video settings: Setup for video playback.
Remove safely: In order to prepare the external data stor-
age devices for their removal or disconnection. See also
››› page 32, Insert or eject a memory card and
››› page 32, External data storage device connected to
USB port
.
Traffic Program (TP): The TP function (traffic news station
tracking) is active ››› page 21.
External AUX device: Enable/disable AUX-IN socket.
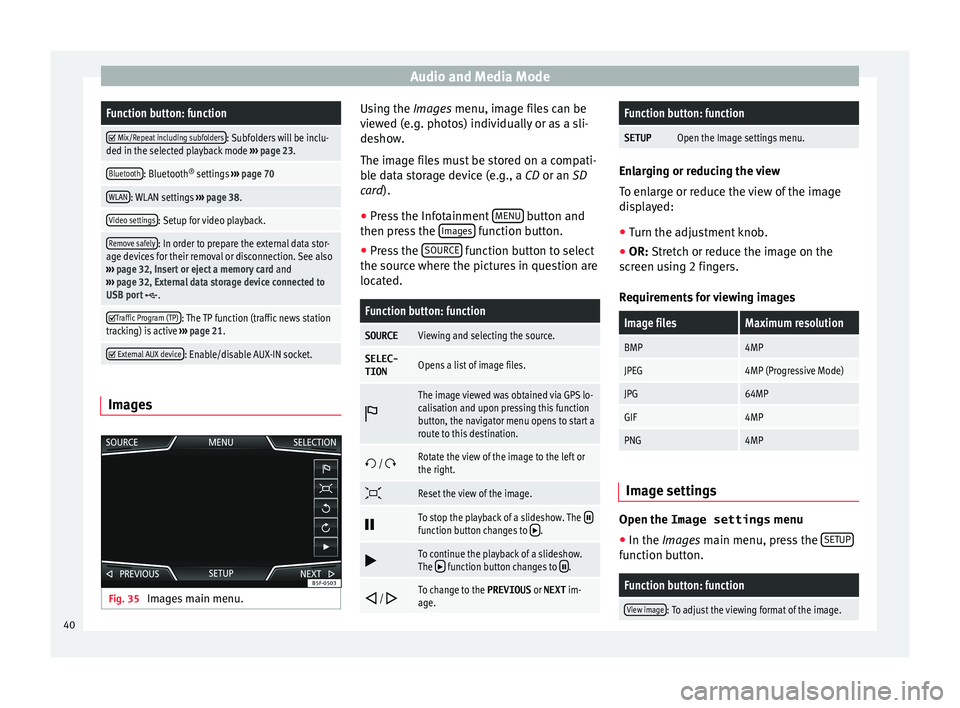
Images
Fig. 35
Images main menu. Using the Ima
ge
s
menu, image files can be
viewed (e.g. photos) individually or as a sli-
deshow.
The image files must be stored on a compati-
ble data storage device (e.g., a CD or an SD
card).
● Press the Infotainment MENU button and
then pr e
s
s the Images function button.
● Press the SOURC
E function button to select
the sour c
e wher
e the pictures in question are
located.
Function button: function
SOURCEViewing and selecting the source.
SELEC-
TIONOpens a list of image files.
The image viewed was obtained via GPS lo-
calisation and upon pressing this function
button, the navigator menu opens to start a
route to this destination.
/ Rotate the view of the image to the left or
the right.
Reset the view of the image.
To stop the playback of a slideshow. The function button changes to .
To continue the playback of a slideshow.
The function button changes to .
/ To change to the PREVIOUS
or NEXT im-
age.
Function button: function
SETUPOpen the Image settings menu. Enlarging or reducing the view
To en
l
arge or reduce the view of the image
displayed:
● Turn the adjustment knob.
● OR: Stretch or reduce the image on the
sc
reen using 2 fingers.
Requirements for viewing images
Image filesMaximum resolution
BMP4MP
JPEG4MP (Progressive Mode)
JPG64MP
GIF4MP
PNG4MP Image settings
Open the Image settings
menu
● In the Ima ges main menu, press the S
ETUP function button.
Function button: function
View image: To adjust the viewing format of the image.
40
Page 43 of 96
Audio and Media ModeFunction button: function
Automatic
: The images are shown in scale in rela-
tion to the size of the screen (the image may not be
displayed in its entirety).
Full : The full images are displayed on the screen.
Display time: To adjust the display time of the images
during a slideshow.
Repeat slideshow: The active slideshow will be repeated
indefinitely. 41
Page 45 of 96
Navigation
● Inser
t
the memory card containing the navi-
gation data ››› page 23.
● Press the Infotainment MENU button and
then sel ect
Set
up .
● In the System settings menu, pre
s
s the
System information function button.
● Press U
pd
at
e software to import the stored
n av
ig
ation data.
● Follow the instructions displayed on the
scr
een.
Once installed, the memory card can be re-
moved. The memory card must be prepared
for removal ››› page 23. CAUTION
Do not remove the memory card while the
nav ig
ation data is being installed. The memo-
ry card may be irreparably damaged! Note
● The nav ig
ation memory card may not be
used as memory storage for other files. The
Infotainment system will not recognise the
files saved on it.
● SEAT recommends a CLASS 10 1)
memory
car
d for the use of navigation data. The use of
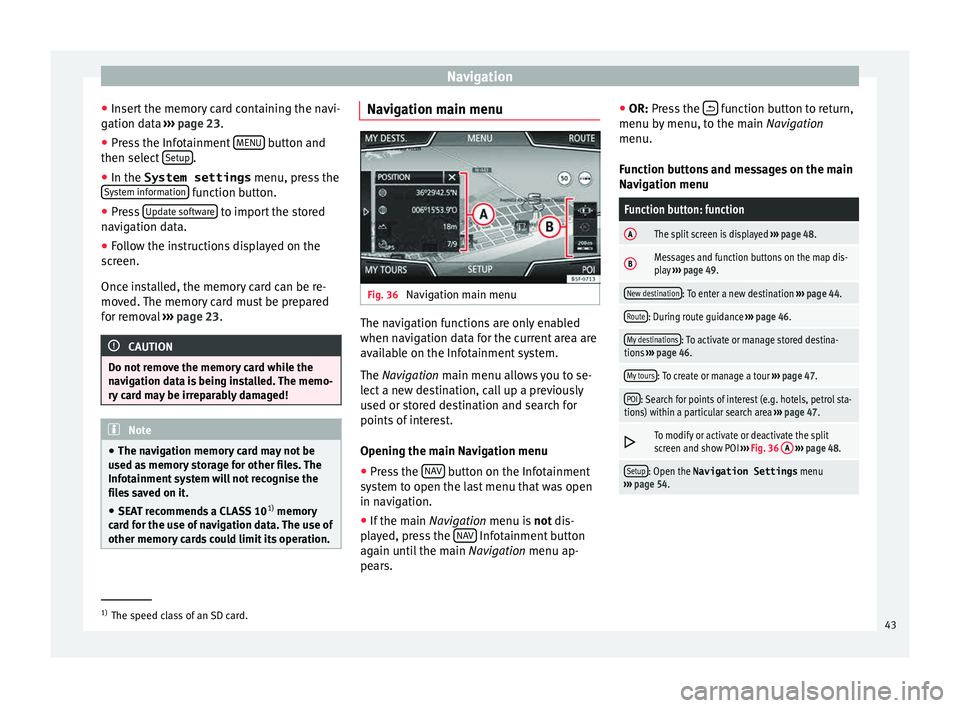
other memory cards could limit its operation. Navigation main menu
Fig. 36
Navigation main menu The navigation functions are only enabled
when n
av
ig
ation data for the current area are
available on the Infotainment system.
The Navigation main menu allows you to se-
lect a new destination, call up a previously
used or stored destination and search for
points of interest.
Opening the main Navigation menu
● Press the NAV button on the Infotainment
sy s
t
em to open the last menu that was open
in navigation.
● If the main Navigation menu i
s not dis-
played, press the NAV Infotainment button
ag ain u
nti
l the main Navigation menu ap-
pears. ●
OR: Pres
s the function button to return,
menu b y
menu, t
o the main Navigation
menu.
Function buttons and messages on the main
Navigation menu
Function button: function
AThe split screen is displayed ››› page 48.
BMessages and function buttons on the map dis-
play ››› page 49.
New destination: To enter a new destination ››› page 44.
Route: During route guidance ››› page 46.
My destinations: To activate or manage stored destina-
tions ››› page 46.
My tours: To create or manage a tour ››› page 47.
POI: Search for points of interest (e.g. hotels, petrol sta-
tions) within a particular search area ››› page 47.
To modify or activate or deactivate the split
screen and show POI
››› Fig. 36 A
››› page 48.
Setup: Open the Navigation Settings menu
››› page 54. 1)
The speed class of an SD card.
43
Page 46 of 96
Navigation
New destination (enter destination) ●
In the Navigation main menu, press the
New de s
tination function button.
● Press the Options function button and se-
lect the r
equired type of destination entry
(Address , POI or On the map ).
● Using voice control*, if you say Town, street
and number, without
pauses, and then the
instruction “Start Route Guidance” a route to
the given destination will start.
Address
After entering a country and a town, you can
start navigating towards the centre of the se-
lected town.
When narrowing down the destination ad-
dress, please note that every entry restricts
the available range of subsequent selections.
For instance, if the street you are looking for
is not in the postcode area you have selected
in a previous window, you will not be able to
find the street at the street selection stage.
Function button: function
Country: To select the desired country.
City: To enter the desired city or postcode.
Street: To enter the desired street name.
House number: To enter the desired house number.
Junction: To select the desired intersection.
Function button: function
Last destinations: Open My destinations menu
››› page 46.
Start: Start route guidance to the selected address. Points of Interest (POI)
Start route guidance to a point of interest.
Function button: function
Search area: To select the search area for the points of in-
terest.
Near current location: The points of interest are
searched for near the current location.
Near destinationa) : The points of interest are
searched for near the destination.
Along the routea) : The points of interest are searched
for along the route.
Near address: The points of interest are searched for
near the address.
Select on map: The points of interest are searched
for near the destination selected on the map. To se-
lect a destination on the map, press the Edit
func-
tion button.
Categories: Select the main category (e.g. Vehicle and
travel ), the category (e.g. Airports) and then the
desired entry from the list.
Save: To save the selected point of interest in the
destination memory ››› page 46.
Function button: function
Dial number: Establishes a telephone connection to
the number registered under the point of interest.
Start: Starts guided navigation to the selected
point of interest.
Find: To search for a point of interest by entering the
name or by means of synonyms of categories (e.g.
“Sleep” for hotels and hostels).
a) This function button is only displayed with route guidance ac-
tivated.
Using the
● Select the destination on the map or enter
the GPS c
oordinates and confirm with OK .
Function button: function
Save: To save the selected point of interest in the desti-
nation memory ››› page 46.
Edit: To edit a destination or to enter another destina-
tion.
Route options: To adjust route options, see Navigation
Setup ››› page 54.
Start: Starts guided navigation to the selected point of
interest. 44
Page 48 of 96
Navigation
Note
The quality of the navigation recommenda-
tions giv
en by the Infotainment system de-
pends on the navigation data available and
any reported traffic problems. Route
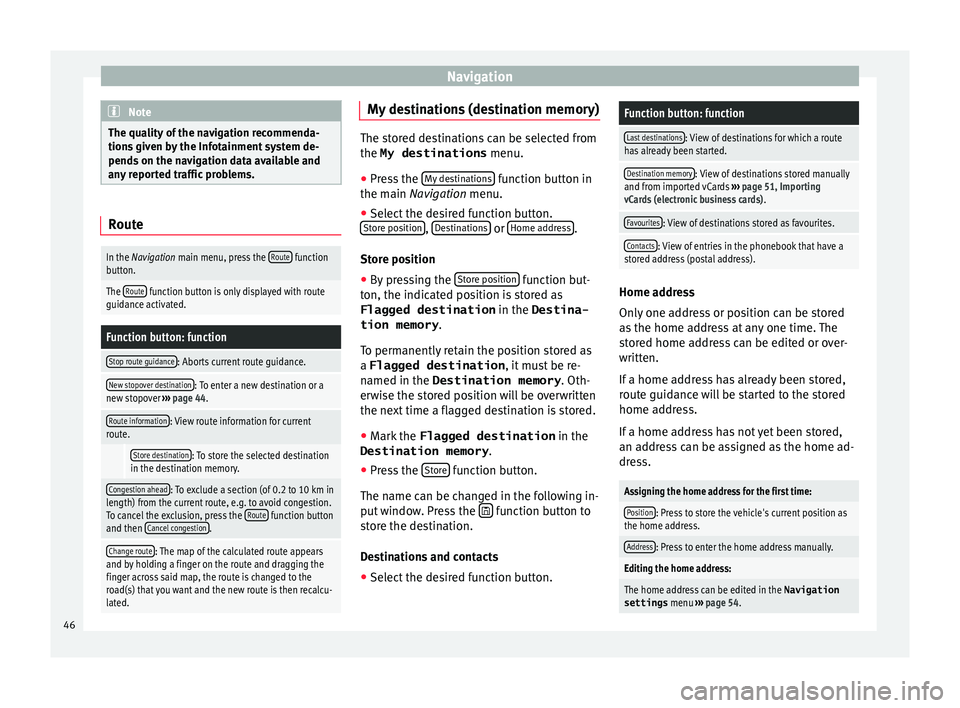
In the Navigation main menu, press the
Route function
button.
The Route function button is only displayed with route
guidance activated.
Function button: function
Stop route guidance: Aborts current route guidance.
New stopover destination: To enter a new destination or a
new stopover ››› page 44.
Route information: View route information for current
route.
Store destination: To store the selected destination
in the destination memory.
Congestion ahead: To exclude a section (of 0.2 to 10 km in
length) from the current route, e.g. to avoid congestion.
To cancel the exclusion, press the Route
function button
and then Cancel congestion.
Change route: The map of the calculated route appears
and by holding a finger on the route and dragging the
finger across said map, the route is changed to the
road(s) that you want and the new route is then recalcu-
lated. My destinations (destination memory)
The stored destinations can be selected from
the My destinations
menu.
● Press the My
de
stinations function button in
the main Na
vigation menu.
● Select the desired function button.
Store po
sition ,
De
s tinations or
Home ad
dr ess .
Stor e po
sition
● By pressing the Store po
sition function but-
ton, the indic at
ed position is stored as
Flagged destination in the Destina-
tion memory .
To permanently retain the position stored as
a Flagged destination , it must be re-
named in the Destination memory . Oth-
erwise the stored position will be overwritten
the next time a flagged destination is stored.
● Mark the Flagged destination in the
Destination memory .
● Press the Stor
e function button.
The n ame c
an be c
hanged in the following in-
put window. Press the function button to
s t
or
e the destination.
Destinations and contacts
● Select the desired function button.
Function button: function
Last destinations: View of destinations for which a route
has already been started.
Destination memory: View of destinations stored manually
and from imported vCards ››› page 51, Importing
vCards (electronic business cards) .
Favourites: View of destinations stored as favourites.
Contacts: View of entries in the phonebook that have a
stored address (postal address). Home address
On
ly
one a
ddress or position can be stored
as the home address at any one time. The
stored home address can be edited or over-
written.
If a home address has already been stored,
route guidance will be started to the stored
home address.
If a home address has not yet been stored,
an address can be assigned as the home ad-
dress.
Assigning the home address for the first time:
Position: Press to store the vehicle's current position as
the home address.
Address: Press to enter the home address manually.
Editing the home address:
The home address can be edited in the Navigation
settings menu ››› page 54.
46
Page 49 of 96
Navigation
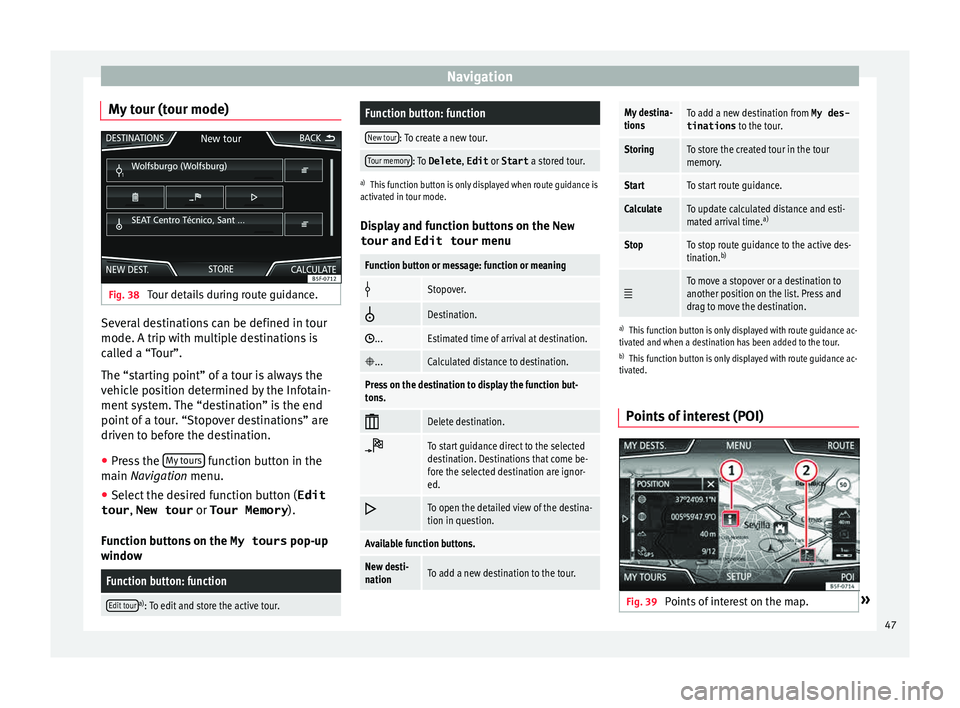
My tour (tour mode) Fig. 38
Tour details during route guidance. Several destinations can be defined in tour
mode. A trip w
ith mu
ltip
le destinations is
called a “Tour”.
The “starting point” of a tour is always the
vehicle position determined by the Infotain-
ment system. The “destination” is the end
point of a tour. “Stopover destinations” are
driven to before the destination.
● Press the My t
ours function button in the
m ain
Na
vigation menu.
● Select the desired function button ( Edit
tour , New tour or Tour Memory ).
Function b
uttons on the My tours pop-up
window
Function button: function
Edit toura) : To edit and store the active tour.
Function button: function
New tour: To create a new tour.
Tour memory: To Delete , Edit or Start a stored tour.
a)
This function button is only displayed when route guidance is
activated in tour mode.
Display and function buttons on the New
tour and Edit tour menu
Function button or message: function or meaning
Stopover.
Destination.
...Estimated time of arrival at destination.
...Calculated distance to destination.
Press on the destination to display the function but-
tons.
Delete destination.
To start guidance direct to the selected
destination. Destinations that come be-
fore the selected destination are ignor-
ed.
To open the detailed view of the destina-
tion in question.
Available function buttons.
New desti-
nationTo add a new destination to the tour.
My destina-
tionsTo add a new destination from My des-
tinations
to the tour.
StoringTo store the created tour in the tour
memory.
StartTo start route guidance.
CalculateTo update calculated distance and esti-
mated arrival time. a)
StopTo stop route guidance to the active des-
tination.b)
To move a stopover or a destination to
another position on the list. Press and
drag to move the destination.
a)
This function button is only displayed with route guidance ac-
tivated and when a destination has been added to the tour.
b) This function button is only displayed with route guidance ac-
tivated.
Points of interest (POI) Fig. 39
Points of interest on the map. » 47