manual radio set Seat Leon 5D 2015 NAVI SYSTEM PLUS
[x] Cancel search | Manufacturer: SEAT, Model Year: 2015, Model line: Leon 5D, Model: Seat Leon 5D 2015Pages: 96, PDF Size: 2.48 MB
Page 7 of 96
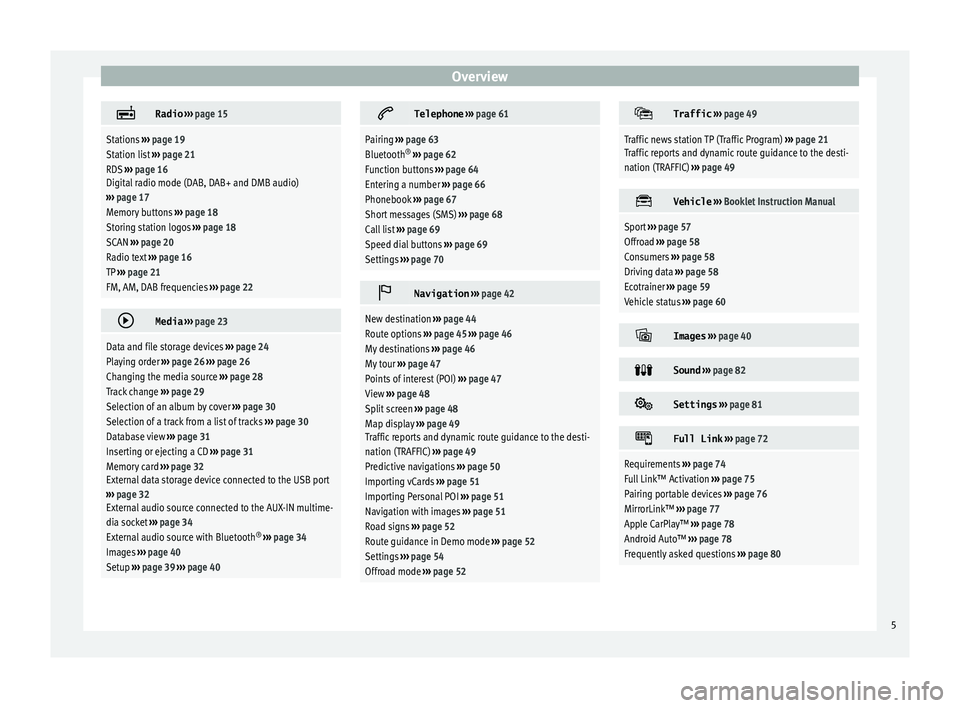
Overview
Radio
››› page 15
Stations ››› page 19
Station list ››› page 21
RDS ››› page 16
Digital radio mode (DAB, DAB+ and DMB audio)
››› page 17
Memory buttons ››› page 18
Storing station logos ››› page 18
SCAN ››› page 20
Radio text ››› page 16
TP ››› page 21
FM, AM, DAB frequencies ››› page 22
Media
››› page 23
Data and file storage devices ››› page 24
Playing order ››› page 26 ››› page 26
Changing the media source ››› page 28
Track change ››› page 29
Selection of an album by cover ››› page 30
Selection of a track from a list of tracks ››› page 30
Database view ››› page 31
Inserting or ejecting a CD ››› page 31
Memory card ››› page 32
External data storage device connected to the USB port
››› page 32
External audio source connected to the AUX-IN multime-
dia socket ››› page 34
External audio source with Bluetooth ®
››› page 34
Images ››› page 40
Setup ››› page 39 ››› page 40
Telephone
››› page 61
Pairing ››› page 63
Bluetooth ®
››› page 62
Function buttons ››› page 64
Entering a number ››› page 66
Phonebook ››› page 67
Short messages (SMS) ››› page 68
Call list ››› page 69
Speed dial buttons ››› page 69
Settings ››› page 70
Navigation
››› page 42
New destination ››› page 44
Route options ››› page 45 ››› page 46
My destinations ››› page 46
My tour ››› page 47
Points of interest (POI) ››› page 47
View ››› page 48
Split screen ››› page 48
Map display ››› page 49
Traffic reports and dynamic route guidance to the desti-
nation (TRAFFIC) ››› page 49
Predictive navigations ››› page 50
Importing vCards ››› page 51
Importing Personal POI ››› page 51
Navigation with images ››› page 51
Road signs ››› page 52
Route guidance in Demo mode ››› page 52
Settings ››› page 54
Offroad mode ››› page 52
Traffic
››› page 49
Traffic news station TP (Traffic Program) ››› page 21
Traffic reports and dynamic route guidance to the desti-
nation (TRAFFIC) ››› page 49
Vehicle
››› Booklet Instruction Manual
Sport ››› page 57
Offroad ››› page 58
Consumers ››› page 58
Driving data ››› page 58
Ecotrainer ››› page 59
Vehicle status ››› page 60
Images
››› page 40
Sound
››› page 82
Settings
››› page 81
Full Link
››› page 72
Requirements ››› page 74
Full Link™ Activation ››› page 75
Pairing portable devices ››› page 76
MirrorLink™ ››› page 77
Apple CarPlay™ ››› page 78
Android Auto™ ››› page 78
Frequently asked questions ››› page 80 5
Page 14 of 96
Introduction
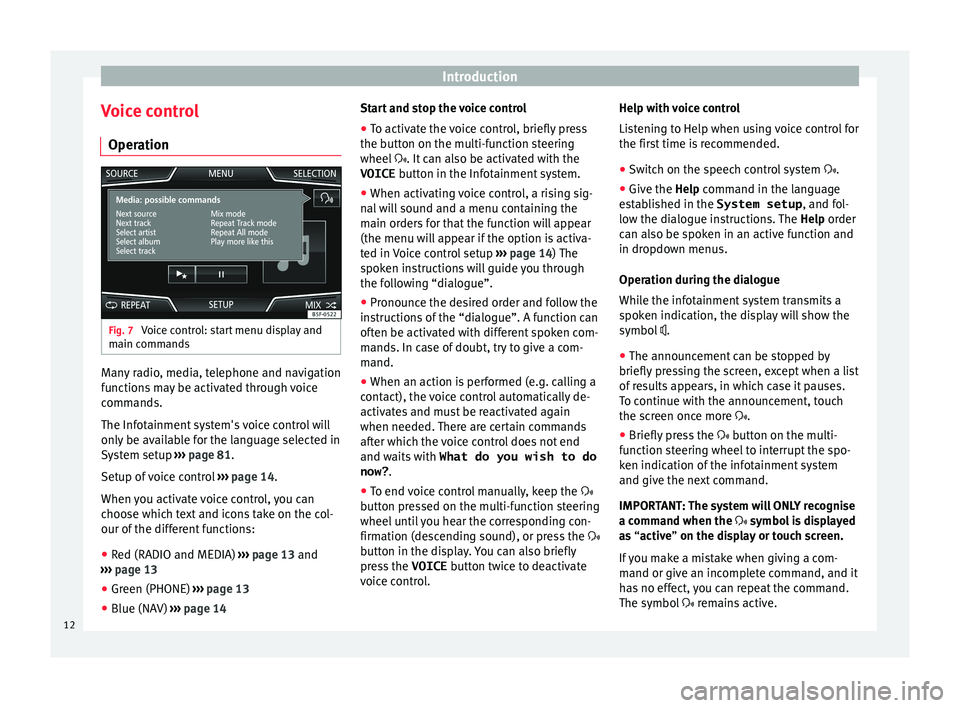
Voice control Oper ation Fig. 7
Voice control: start menu display and
m ain c
omm
ands Many radio, media, telephone and navigation
f
u
nction
s may be activated through voice
commands.
The Infotainment system's voice control will
only be available for the language selected in
System setup ››› page 81.
Setup of voice control ››› page 14.
When you activate voice control, you can
choose which text and icons take on the col-
our of the different functions:
● Red (RADIO and MEDIA) ›››
page 13 and
››› page 13
● Green (PHONE) ›››
page 13
● Blue (NAV) ››› p
age 14 Start and stop the voice control
●
To activate the voice control, briefly press
the button on the mu
lti-function steering
wheel . It can also be activated with the
VOICE button in the Infotainment system.
● When activating voice control, a rising sig-
nal w
ill sound and a menu containing the
main orders for that the function will appear
(the menu will appear if the option is activa-
ted in Voice control setup ››› page 14) The
spoken instructions will guide you through
the following “dialogue”.
● Pronounce the desired order and follow the
instruction
s of the “dialogue”. A function can
often be activated with different spoken com-
mands. In case of doubt, try to give a com-
mand.
● When an action is performed (e.g. calling a
contact), the
voice control automatically de-
activates and must be reactivated again
when needed. There are certain commands
after which the voice control does not end
and waits with What do you wish to do
now? .
● To end voice control manually, keep the
button pr
essed on the multi-function steering
wheel until you hear the corresponding con-
firmation (descending sound), or press the
button in the display. You can also briefly
press the VOICE button twice to deactivate
voice control. Help with voice control
List
ening to Help when using voice control for
the first time is recommended.
● Switch on the speech control system .
● Give the Help command in the l
anguage
established in the System setup , and fol-
low the dialogue instructions. The Help order
can also be spoken in an active function and
in dropdown menus.
Operation during the dialogue
While the infotainment system transmits a
spoken indication, the display will show the
symbol .
● The announcement can be stopped by
briefly pre
ssing the screen, except when a list
of results appears, in which case it pauses.
To continue with the announcement, touch
the screen once more .
● Briefly press the button on the mu
lti-
function steering wheel to interrupt the spo-
ken indication of the infotainment system
and give the next command.
IMPORTANT: The system will ONLY recognise
a command when the symbol is displayed
as “active” on the display or touch screen.
If you make a mistake when giving a com-
mand or give an incomplete command, and it
has no effect, you can repeat the command.
The symbol remains active.
12
Page 17 of 96
Audio and Media Mode
Audio and Media Mode
R a
dio Mode
RADIO m
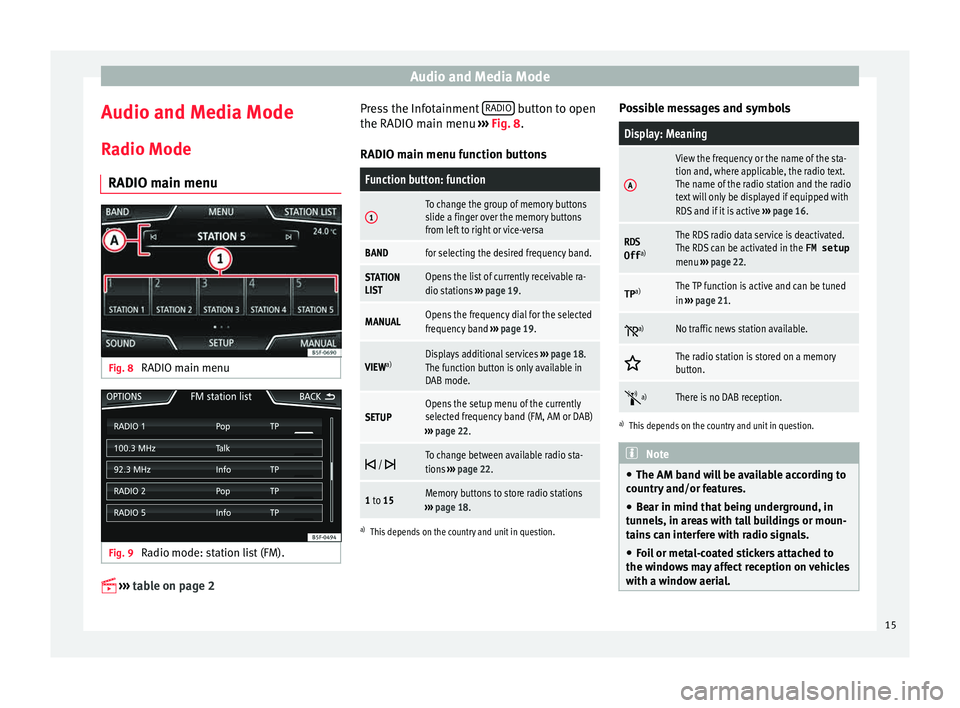
ain menuFig. 8
RADIO main menu Fig. 9
Radio mode: station list (FM).
›› ›
table on page 2 Press the Infotainment
RADIO button to open
the RADIO m ain menu
›
›
› Fig. 8.
RADIO main menu function buttons
Function button: function
1To change the group of memory buttons
slide a finger over the memory buttons
from left to right or vice-versa
BANDfor selecting the desired frequency band.
STATION
LISTOpens the list of currently receivable ra-
dio stations ››› page 19.
MANUALOpens the frequency dial for the selected
frequency band ››› page 19.
VIEW a)Displays additional services
››› page 18.
The function button is only available in
DAB mode.
SETUPOpens the setup menu of the currently
selected frequency band (FM, AM or DAB)
››› page 22.
/ To change between available radio sta-
tions
››› page 22.
1 to 15Memory buttons to store radio stations
››› page 18.
a)
This depends on the country and unit in question.
Possible messages and symbols
Display: Meaning
A
View the frequency or the name of the sta-
tion and, where applicable, the radio text.
The name of the radio station and the radio
text will only be displayed if equipped with
RDS and if it is active ››› page 16.
RDS
Off a)The RDS radio data service is deactivated.
The RDS can be activated in the
FM setup
menu ››› page 22.
TP a)The TP function is active and can be tuned
in
››› page 21.
a)No traffic news station available.
The radio station is stored on a memory
button.
a)There is no DAB reception.
a)
This depends on the country and unit in question. Note
● The AM band w i
ll be available according to
country and/or features.
● Bear in mind that being underground, in
tunnel
s, in areas with tall buildings or moun-
tains can interfere with radio signals.
● Foil or metal-coated stickers attached to
the window
s may affect reception on vehicles
with a window aerial. 15
Page 20 of 96
Audio and Media Mode
Once the corresponding FM station has been
f ou
nd,
(FM) is displayed after the station
name. When reception for the corresponding
DAB station returns, the unit will switch back
to DAB mode after a short time. The (FM)
display is hidden.
If the reception of the selected DAB station is
too weak and the station can no longer be
found on the FM frequency band, the radio
will be muted.
Screen view menu
The function buttons refer to the menu that
appears when the View button is pressed
› ›
›
Fig. 12.
Function button: function
Preset list: Memory buttons display ››› Fig. 12.
Station information: Simultaneous displaying of radio text
››› Fig. 13 A and slideshow B instead of the memory
buttons.
Radio text: Radio text is displayed instead of memory
buttons.
Presentation: The slideshows are displayed in full screen. Note
● Not a l
l DAB stations support Radio Text and
slideshows.
● Radio stations are responsible for the con-
tent of
the information they transmit. Memory buttons
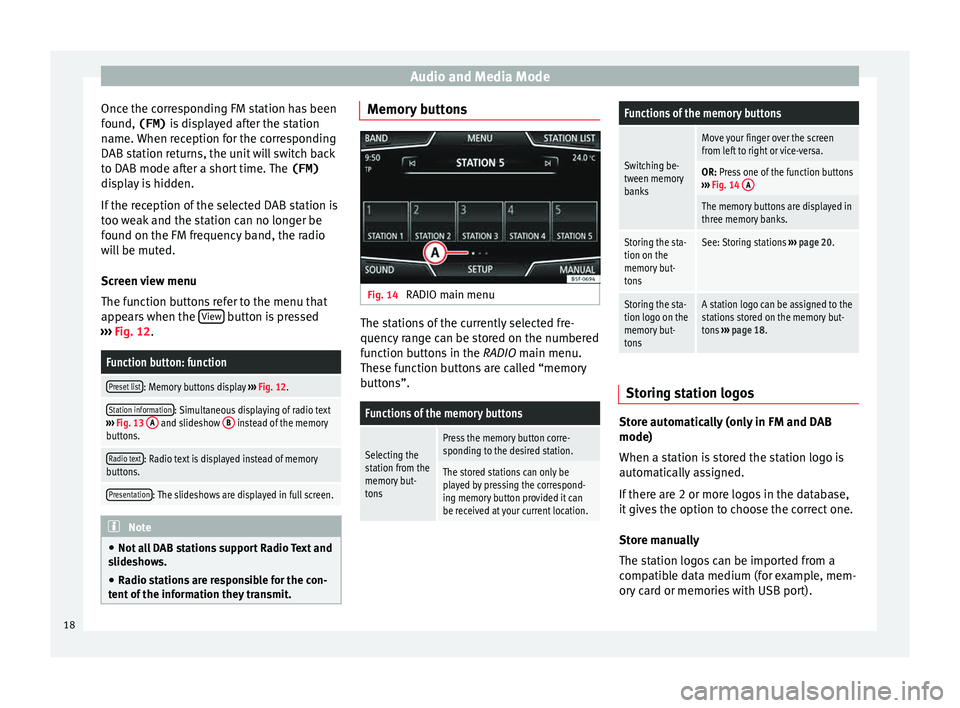
Fig. 14
RADIO main menu The stations of the currently selected fre-
quency r
an
ge can be stored on the numbered
function buttons in the RADIO main menu.
These function buttons are called “memory
buttons”.
Functions of the memory buttons
Selecting the
station from the
memory but-
tonsPress the memory button corre-
sponding to the desired station.
The stored stations can only be
played by pressing the correspond-
ing memory button provided it can
be received at your current location.
Functions of the memory buttons
Switching be-
tween memory
banks
Move your finger over the screen
from left to right or vice-versa.
OR: Press one of the function buttons
››› Fig. 14 A
The memory buttons are displayed in
three memory banks.
Storing the sta-
tion on the
memory but-
tonsSee: Storing stations
››› page 20.
Storing the sta-
tion logo on the
memory but-
tonsA station logo can be assigned to the
stations stored on the memory but-
tons ››› page 18. Storing station logos
Store automatically (only in FM and DAB
mode)
When a s
t
ation i
s stored the station logo is
automatically assigned.
If there are 2 or more logos in the database,
it gives the option to choose the correct one.
Store manually
The station logos can be imported from a
compatible data medium (for example, mem-
ory card or memories with USB port).
18
Page 21 of 96
Audio and Media Mode
● Pr e
s
s the function button Setup and then
St ation log
o
s .
● Press the station button where you wish to
s t
or
e the logo of a station.
● Select the source where the logo is stored
(for ex
ample, SD card 1 ). We recommend sav-
in g log
o
s in the memory unit’s root directory.
● Select the station logo.
● Repeat the process to assign other logos;
pres
s the infotainment button RADIO to re-
t urn t
o the RADIO m
ain menu.
● If you wish to change the logo of a memory
button th
at already has one assigned to it, it
must first be deleted from the button in ques-
tion. Note
Not all stations are stored in the database
and theref or
e it is not always possible to as-
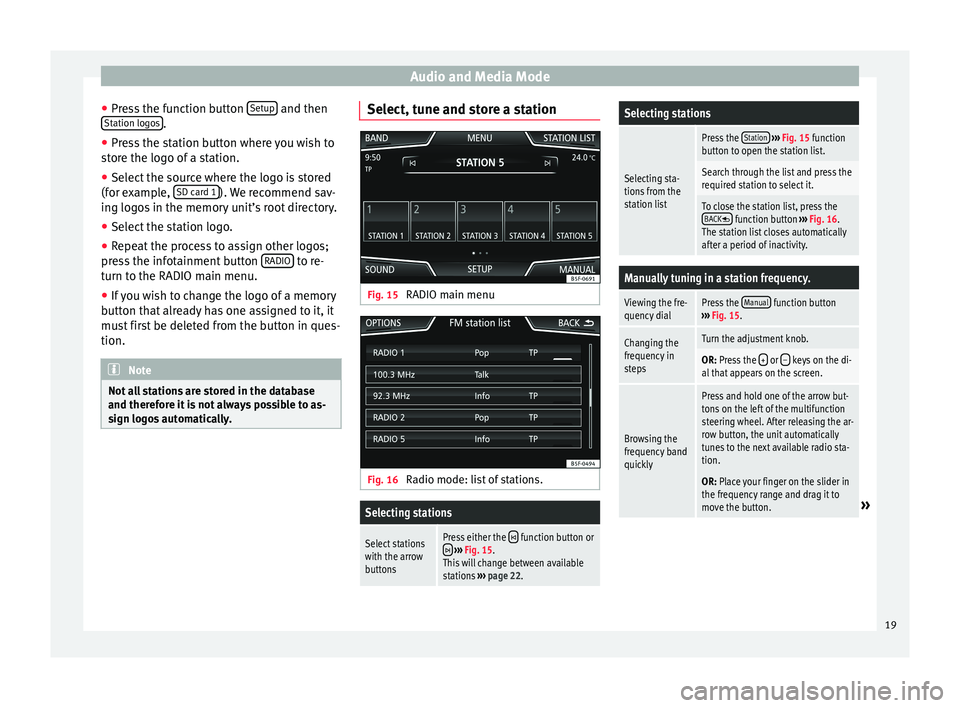
sign logos automatically. Select, tune and store a station
Fig. 15
RADIO main menu Fig. 16
Radio mode: list of stations.
Selecting stations
Select stations
with the arrow
buttonsPress either the function button or ››› Fig. 15.
This will change between available
stations ››› page 22.
Selecting stations
Selecting sta-
tions from the
station list
Press the Station
››› Fig. 15 function
button to open the station list.
Search through the list and press the
required station to select it.
To close the station list, press the BACK function button ››› Fig. 16.
The station list closes automatically
after a period of inactivity.
Manually tuning in a station frequency.
Viewing the fre-
quency dialPress the Manual function button
››› Fig. 15.
Changing the
frequency in
stepsTurn the adjustment knob.
OR: Press the + or – keys on the di-
al that appears on the screen.
Browsing the
frequency band
quickly
Press and hold one of the arrow but-
tons on the left of the multifunction
steering wheel. After releasing the ar-
row button, the unit automatically
tunes to the next available radio sta-
tion.
OR: Place your finger on the slider in
the frequency range and drag it to
move the button.
» 19
Page 22 of 96
Audio and Media ModeManually tuning in a station frequency.
Hiding the fre-
quency band
Briefly press the adjustment knob
››› Fig. 1 12
Manual frequency selection is also
closed if you select a station with a
memory button. If no operation is
performed, the frequency range will
disappear after a period of inactivity.
Storing stations
Storing the sta-
tion that is cur-
rently being lis-
tened to.Press and hold
the desired memory
button ››› Fig. 15 until an audible sig-
nal is heard.
The station tuned in will be stored on
this memory button.
Storing stations
Storing a sta-
tion on the list
of stations
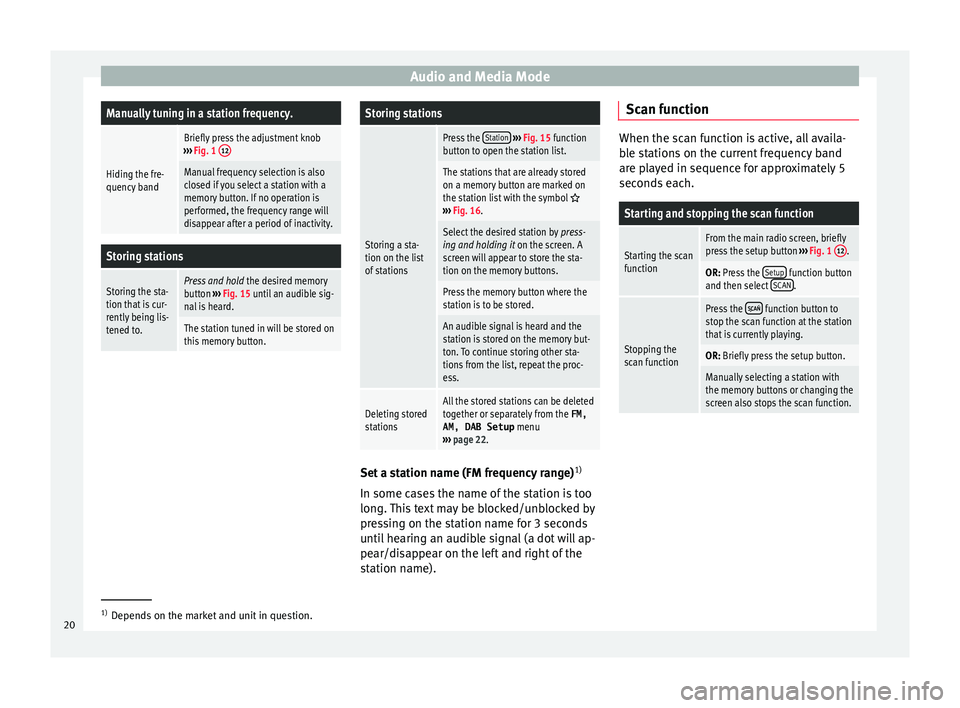
Press the Station
››› Fig. 15 function
button to open the station list.
The stations that are already stored
on a memory button are marked on
the station list with the symbol
››› Fig. 16.
Select the desired station by press-
ing and holding it on the screen. A
screen will appear to store the sta-
tion on the memory buttons.
Press the memory button where the
station is to be stored.
An audible signal is heard and the
station is stored on the memory but-
ton. To continue storing other sta-
tions from the list, repeat the proc-
ess.
Deleting stored
stationsAll the stored stations can be deleted
together or separately from the FM,
AM, DAB Setup menu
››› page 22. Set a station name (FM frequency range)
1)
In some c a
se
s the name of the station is too
long. This text may be blocked/unblocked by
pressing on the station name for 3 seconds
until hearing an audible signal (a dot will ap-
pear/disappear on the left and right of the
station name). Scan function When the scan function is active, all availa-
bl
e s
tations on the current frequency band
are played in sequence for approximately 5
seconds each.
Starting and stopping the scan function
Starting the scan
functionFrom the main radio screen, briefly
press the setup button ››› Fig. 1 12.
OR: Press the
Setup function button
and then select SCAN.
Stopping the
scan function
Press the function button to
stop the scan function at the station
that is currently playing.
OR: Briefly press the setup button.
Manually selecting a station with
the memory buttons or changing the
screen also stops the scan function. 1)
Depends on the market and unit in question.
20
Page 24 of 96
Audio and Media Mode
Incoming traffic announcement In active Audio mode, an incoming traffic an-
nounc
ement
will play automatically.
During the traffic announcement, a pop-up
window is displayed and the radio changes,
depending on the case, to the traffic news
station (EON).
The media mode is paused and the volume is
adjusted to the preset level ››› page 82.
The volume of the traffic announcement can
be modified with the volume control . The
adjusted volume setting will be applied to
subsequent announcements.
● Press the Canc
el function button to end the
c urr
ent
traffic announcement. The TP function
remains switched on.
● OR: Press the De
activate function button to
end the tr affic
annou
ncement and disconnect
the TP function permanently.
Setup (FM, AM, DAB) FM setup
Sel
ect
the FM
frequency band by pressing
the RADIO Infotainment button.
OR: Pr e
s
s the ›››
Fig. 18 BAND function but-
t on and sel
ect
the FM frequency band. Press the
SETUP function button to open the
FM Settings menu.
Function button: function
Sound: Sound settings ››› page 82.
Seek mode: To adjust settings for the buttons with the ar-
rows and . This setting applies to all frequency
bands (FM, AM and DAB).
Preset list: All stored stations on the selected fre-
quency band can be browsed with the arrow but-
tons.
Station list: All available stations on the selected fre-
quency band can be browsed with the arrow but-
tons.
Scan: Scan function. When the scan function is active,
all available stations on the current frequency band are
played in sequence for approximately 5 seconds each
››› page 20.
Traffic news station (TP): The TP function (traffic news sta-
tion tracking) is active ››› page 21.
Delete presets: To delete all or some of the stored sta-
tions.
Station logos: To manually assign or delete the stored
station logos to and from the memory buttons
››› page 18.
Radio text: Radio Text is active
››› page 16, Radio Text
(RDS).
Advanced settings: Setup of the RDS (radio data system).
Auto-save station logosa)
: Logos can be automatical-
ly assigned to the stations stored on the memory
buttons if they are available in the Infotainment sys-
tem. Also see ››› page 18.
Function button: function
Region for station logo: Allows you to select the region
(country) in which the vehicle is located. This opti-
mises the automatic assignment of station logos.
The option also allows the system to select the re-
gion automatically.
Alternative frequency (AF): The automatic station
tracking by RDS is active. When the checkbox is
deactivated, automatic station tracking will be dis-
connected. The regional RDS
function button will be
inactive (grey colour).
Radio data system (RDS)a)
: The Radio Data System
(RDS) is deactivated ››› page 16. If the checkbox
is deactivated, the traffic news station functions
(TP), Radio Text, station name and programme type
will not be available.
Regional RDS: Setting automatic station tracking by
RDS ››› page 16.
Fixed: The unit only switches to alternative fre-
quencies for the selected station if the same re-
gional service is being broadcast.
Automatic: the unit always switches to the sta-
tion's frequency that currently offers the best
reception. As a result, regional programmes
may be interrupted.
a) This depends on the country and unit in question.
AM Setup
Select the AM frequency band by pressing
the RADIO Infotainment button.
OR: Pr e
s
s the ››› Fig. 18 BAND function but-
t on and sel
ect
the FM frequency band.
22
Page 59 of 96

CAR menu
CAR menu Intr oduction t
o m
anaging the
CAR menu
Car menu By pressing the “CAR” infotainment button
you w
i
ll access its main menu with the follow-
ing options:
● VIEW
● MINIPLAYER, in the top right corner (Radio
or Medi a f
unction if the HDC descent control*
is not active).
● PREVIOUS-NEXT (to change screen)
● SETUP ›››
Booklet Instruction Manual,
chapter System setup (CAR)
With the function button View you can access
the f o
l
lowing information:
● SPORT*
● OFFROAD*
● CONSUMERS
● DRIVING DATA
● ECOTRAINER* ●
VEHICLE S
TATUS
Sport* Fig. 49
SPORT menu Fig. 50
Lap Timer SPORT menu ●
Pr e
s
s the CAR button on the Infotainment
sy s
t
em.
● Press the VIEW function button and then
sel ect
S
PORT.
If the corresponding equipment is available,
the information that appears in the Sport op-
tion is the following ››› Fig. 49:
Instantaneous power expressed in kW
G forces
Turbo pressure, expressed in bar
(“bar”), kilopascals (“kPa”) or in pounds
per square inch (“psi”). Press the Setup
button to change the units of pressure
››› page 81
Coolant temperature
Oil temperature
Only three of these items of information can
be displayed at the same time, but the user
chooses which to display, and in what order,
by moving the finger vertically over the dials.
If the Next button is pressed, the
Lap timer1)
menu i s
di
splayed; this is described below
››› Fig. 50:
Analogue lap timer.
Start/pause lap timer recording. »
1.
2.
3.
4.
5.
1 2
1)
This lap timer is independent of the one that ap-
pear s
on the instrument panel ››› Booklet Instruction
Manual 57
Page 74 of 96

Full Link™*
Full Link™* F u
l
l Link™ technology descrip-
tion
Introduction
›› ›
table on page 2
The Full Link™ system has a context that
groups those technologies that allow com-
munication between the Infotainment Sys-
tems and mobile devices:
● MirrorLink™
● Android Auto™
● Apple CarPlay™
Data tr an
sfer
This communication can allow data (media,
navigation, radio, audio and vehicle data) to
be read and/or written.
From the SETUP menu,
A ctiv
at
e data transfer for SEAT apps , there is a
c hec
k
box to activate/deactivate the function,
and a dropdown menu called Use apps to operate which controls the level of
int er
action betw
een the Apps and the System
››› table on page 81: Deactivate, Confirm,
and Allow. Interfaces
The connection to F
ull Link™ is done with a
USB interface. WARNING
If a mobile terminal is not secured or is incor-
rectly sec
ured in the vehicle, it could move
around the passenger compartment in the
event of a sudden driving manoeuvre, emer-
gency stop or accident, resulting in injury.
● While driving, mobile terminals must be se-
curely
fastened in position, outside the air-
bag deployment zones, or safely stowed
away. WARNING
Any applications that are not suitable or exe-
cut e inc
orrectly may cause damage to the ve-
hicle, accidents and serious injuries.
● SEAT recommends the use of the Apps that
SEAT pr
ovides for this vehicle.
● For the full use of SEAT Apps, it is necessa-
ry t
o activate the Setup option, “Activate da-
ta transfer for SEAT apps” ››› page 81.
● The interaction level of the Apps on the
syst
em must be: ALLOW.
● Protect the mobile terminal with its appli-
cations
from improper use.
● Never make modifications to the applica-
tions.
● Con
sult the instruction manual for the mo-
bil
e terminal. WARNING
The use of applications while driving can dis-
tract
your attention from the traffic. Distract-
ing the driver in any way can lead to an acci-
dent and cause injuries.
● Always drive carefully and responsibly. CAUTION
● In are a
s where special regulations apply or
the use of mobile terminals is forbidden, the
mobile terminal must be switched off at all
times. The radiation produced by the mobile
terminal when switched on may interfere with
sensitive technical and medical equipment,
possibly resulting in malfunction or damage
to the equipment.
● SEAT cannot be held liable for any damage
caused t
o the vehicle as a result of the use of
applications that are of poor quality or are
defective, the inadequate programming of
the applications, the insufficient coverage of
the network, the loss of data during trans-
mission or the improper use of mobile termi-
nals. Note
● The use of F
ull Link™ technology may re-
sult in high consumption of your 3G/4G data
plan.
● SEAT recommends using the device with a
high batter
y charge when connected to Full
Link™. 72