Seat Leon 5D 2015 Owner's manual
Manufacturer: SEAT, Model Year: 2015, Model line: Leon 5D, Model: Seat Leon 5D 2015Pages: 308, PDF Size: 5.93 MB
Page 251 of 308

Checking and refilling levels
Checking engine oil level Fig. 235
Engine oil dipstick. Read the additional information carefully
› ›
›
page 51
The engine oil dipstick indicates the level of
the oil.
Checking oil level
– Park the vehicle in a horizontal position.
– Briefly run the engine at idle speed until
the operating t
emperature is reached and
then stop.
– Wait for about two minutes.
– Pull out the dipstick. Wipe the dipstick with
a cle
an cloth and insert it again, pushing it
in as far as it will go.
– Then pull it out once more and check the oil
level
››› Fig. 235. Top up with engine oil if
necessary. Depending on how you drive and the condi-
tions in whic
h the vehicle is used, oil con-
sumption can be up to 0.5 l/1000 km. Oil
consumption is likely to be higher for the first
5,000 km. For this reason the engine oil level
must be checked at regular intervals, prefera-
bly when filling the tank and before a jour-
ney. WARNING
Any work carried out in the engine compart-
ment or on the en gine mu
st be carried out
cautiously.
● When working in the engine compartment,
alwa
ys observe the safety warnings
››› page 246. CAUTION
If the oil level is above the area A do not
st ar
t the engine. This could result in damage
to the engine and catalytic converter. Contact
a Technical Service. Topping up engine oil
Fig. 236
In the engine compartment: Engine
oi l
fi
ller cap Read the additional information carefully
› ›
›
page 51
Before opening the bonnet, read and observe
the warnings ››› in Work in the engine
c omp
ar
tment on page 246.
The position of the oil filler opening is shown
in the corresponding engine compartment il-
lustration ››› page 246.
Engine oil specification ›››
page 52. WARNING
Oil is highly inflammable! Ensure that no oil
come s
into contact with hot engine compo-
nents when topping up. » 249
Technical data
Advice
Operation
Emergencies
Safety
Page 252 of 308
Advice
CAUTION
If the oil level is above the area A do not
st ar
t the engine. This could result in damage
to the engine and catalytic converter. Contact
a specialised workshop. For the sake of the environment
The oil level must never be above area A .
Otherw i
se oil can be drawn in through the
crankcase breather and escape into the at-
mosphere via the exhaust system. Note
Before a long trip, we recommend finding an
engine oi l
that conforms to the correspond-
ing VW specifications and recommend keep-
ing it in the vehicle. This way, the correct en-
gine oil will always be available for a top-up if
needed. Changing engine oil
Read the additional information carefully
› ›
›
page 51.
The engine oil must be changed at the inter-
vals given in the service schedule.
We recommend that you have the engine oil
changed by a Technical Service.
The oil change intervals are shown in the
Maintenance Programme. WARNING
Only change the engine oil yourself if you
hav e the s
pecialist knowledge required!
● Before opening the bonnet, read and ob-
serve the w
arnings ››› page 246.
● Wait for the engine to cool down. Hot oil
may
cause burn injuries.
● Wear eye protection to avoid injuries, such
as ac
id burns, caused by splashes of oil.
● When removing the oil drain plug with your
finger
s, keep your arm horizontal to help pre-
vent oil from running down your arm.
● Wash your skin thoroughly if it comes into
contact
with engine oil.
● Engine oil is poisonous! Used oil must be
stor
ed in a safe place out of the reach of chil-
dren. CAUTION
No additives should be used with engine oil.
This c
ould result in engine damage. Any dam-
age caused by the use of such additives
would not be covered by the factory warranty. For the sake of the environment
● Bec au
se of disposal problems and the spe-
cial tools and specialist knowledge required,
we recommend that you have the engine oil
and filter changed by a Technical Service.
● Never pour oil down drains or into the
ground. ●
Use a s uit
able container when draining the
used oil. It must be large enough to hold all
the engine oil. Cooling system
Top pin
g up coolant Read the additional information carefully
›› ›
page 52
Top up coolant when the level is below the
MIN (minimum) mark.
Checking coolant level
– Park the vehicle in a horizontal position.
– Switch the ignition off.
– Read off the coolant level on coolant ex-
pan s
ion tank. When the engine is cold, the
coolant level should be between the marks.
When the engine is hot, it may be slightly
above the upper mark.
Topping up coolant
– Wait for the engine to cool down.
– Cover the coolant expansion tank cap with
a cloth and car
efully unscrew it to the left
››› .
– Top up the coolant only if there is still cool-
ant in the e xp
ansion tank, otherwise you
250
Page 253 of 308
Checking and refilling levels
could d amage the engine. If there is no
c oo
lant in the expansion tank, do not con-
tinue driving. You should obtain professio-
nal assistance ››› .
– If there is still some coolant in the expan-
sion t
ank, t
op up to the upper mark.
– Top up with coolant until the level becomes
stab
le.
– Screw the cap back on correctly.
Any lo
ss of coolant fluid normally indicates a
leak in the cooling system. Take the vehicle
straight to a specialised workshop to have
the cooling system examined. If there are no
leaks in the engine cooling system, a loss of
coolant can only occur if the coolant boils
and is forced out of the system as a result of
overheating. WARNING
● The coo lin
g system is under pressure. Do
not unscrew the cap on the coolant expan-
sion tank when the engine is hot: risk of
burns!
● The antifreeze and coolant fluid can be a
health h
azard. Therefore, the antifreeze
should be stored in the original container in a
safe place out of reach of children. Failure to
comply could result in poisoning.
● If working inside the engine compartment,
remember that, ev
en when the ignition is
switched off, the radiator fan may start up au- tomatically, and therefore there is a risk of in-
jury
. WARNING
If there is not enough anti-freeze in the cool-
ant sys
tem, the engine may fail leading to se-
rious damage.
● Please make sure that the percentage of
additiv
e is correct with respect to the lowest
expected ambient temperature in the zone in
which the vehicle is to be used.
● When the outside temperature is very low,
the cool
ant could freeze and the vehicle
would be immobilised. In this case, the heat-
ing would not work either and inadequately
dressed passengers could die of cold. CAUTION
Do not top up the expansion tank with cool-
ant fluid if it
is empty! Air could enter the
cooling system. In this case, stop driving.
Seek specialist assistance. Otherwise, there
is a risk of engine damage. CAUTION
The original additives should never be mixed
with c oo
lants which are not approved by
SEAT. Otherwise, you run the risk of causing
severe damage to the engine and the engine
cooling system.
● If the fluid in the expansion tank is not pur-
ple b
ut is, for example, brown, this indicates that the G13 additive has been mixed with an
ina
dequat
e coolant. The coolant must be
changed as soon as possible if this is the
case! This could result in serious faults and
engine damage. For the sake of the environment
Coolants and additives can contaminate the
en vir
onment. If any fluids are spilled, they
should be collected and correctly disposed
of, with respect to the environment. Brake fluid
Top
pin
g up brake fluid Read the additional information carefully
› ›
›
page 53
Checking the brake fluid level
The brake fluid level must be between the
MIN and MAX markings.
However, if the brake fluid level goes down
noticeably in a short time, or drops below the
MIN mark, there may be a leak in the brake
system. Seek specialist assistance. A warn-
ing light on the instrument panel display
monitors the brake fluid level ››› page 108. »
251
Technical data
Advice
Operation
Emergencies
Safety
Page 254 of 308
Advice
In right-hand drive vehicles the brake fluid
r e
ser
voir is on the other side of the engine
compartment.
Changing brake fluid
The regular intervals at which the brake fluid
should be replaced are listed in the Mainte-
nance Programme. We recommend you have
it replaced at a SEAT Official Service, during
an Inspection Service. WARNING
● Brak e fluid shou
ld be stored in the closed
original container in a safe place out of reach
of children. Risk of poisoning!
● If the brake fluid is left in the system for
too long and the br
akes are subjected to
heavy use, vapour bubbles may form in the
brake system. This would seriously affect the
efficiency of the brakes and the safety of the
vehicle. This may cause an accident. CAUTION
Brake fluid should not come into contact with
the v ehic
le paintwork, as it is abrasive. Windscreen washer reservoir
Chec k
in
g and topping up the wind-
screen washer reservoir Read the additional information carefully
›› ›
page 53
Check the water level in the windscreen
washer reservoir regularly and top up as re-
quired.
The container for the windscreen washer con-
tains the cleaning fluid for the windscreen,
the rear window and the headlight washer
system*.
● Open the bonnet ››
›
page 246.
● The windscreen washer reservoir is marked
with the symbol
on the cap.
● Check there is enough windscreen water in
the reser
voir.
Recommended windscreen wipers
● For the hottest seasons we recommend
summer G 052 184 A1 for c
lear glass. Propor-
tions of the mixture in the washer fluid tank:
1:100 (1 part concentrate per 100 parts wa-
ter).
● All year round, G 052 164 A2 for clear
glas
s. Approximate proportion of the winter
mixture, up to -18°C (0°F): 1:2 (1 part con-
centrate per 2 parts water); otherwise, a 1:4 proportion of mixture in the washer fluid
tank.
Cap
acity
The reservoir holds approximately 3 litres in
versions without headlight washer and 5 li-
tres in versions with headlight washer. WARNING
If the water from the windscreen washer does
not c ont
ain enough anti-freeze, it may freeze
on the windscreen and rear window, reducing
forward and rear visibility.
● In winter, ensure the windscreen washer
contain
s enough anti-freeze.
● In cold conditions, you should not use the
winds
creen washer system unless you have
warmed the windscreen with the ventilation
system. The antifreeze could freeze on the
windscreen and reduce visibility. WARNING
Never mix an unsuitable antifreeze or other
simi l
ar additives with the windscreen washer
water. A greasy layer may be formed on the
windscreen which will impair visibility.
● Use clean water with a window cleaner rec-
ommended by
SEAT.
● If necessary, add a suitable antifreeze to
the water in the r
eservoir.252
Page 255 of 308
Checking and refilling levels
CAUTION
● Do not mi x
cleaning products recommen-
ded by SEAT with other products. This could
lead to flocculation and may block the wind-
screen washer jets.
● When topping up service fluids, make abso-
lutely c
ertain that you fill the fluids into the
correct reservoirs. Using the wrong fluids
could cause serious malfunctions and engine
damage!
● Not having windscreen wiper fluid reduces
vis
ibility through the windscreen, and leads
to loss of visibility in headlights in models
with headlight washer. Battery
Gener a
l
informationRead the additional information carefully
› ›
›
page 53.
The battery is located in the engine compart-
ment and is almost maintenance-free. It is
checked as part of the Inspection Service.
Nevertheless, check the terminals are clean
and have the correct tightening torque, espe-
cially in summer and winter.
Disconnecting the battery
The battery should only be disconnected in
exceptional cases. When the battery is dis- connected, some of the vehicle's functions
are “los
t” (››› table on page 253). These
functions will require resetting after the bat-
tery is reconnected.
Deactivate the anti-theft alarm* before you
disconnect the battery Otherwise the alarm
will be triggered.
FunctionReprogramming
One-touch function of
the electric windows››› page 126, One-touch
opening and closing*.
Remote control key
If the vehicle does not re-
spond to the key, they
should be synchronised
››› page 121.
Digital clock››› page 106.
ESC warning lampAfter driving for a few me-
tres, the warning lamp goes
out again. If the vehicle is not used for long periods
The
v
ehic
le has a system for monitoring the
current consumption when the engine is left
unused for long periods of time ››› page 239.
Some functions, such as the interior lights, or
the remote door opening, may be temporarily
disabled to prevent the battery from running
flat. These functions will come back on as
soon as the ignition is switched on and the
engine started. Winter conditions
During the w
inter, the starting power may be
reduced, and if necessary, the battery should
be charged ››› in Important safety warn-
in g
s
for handling a vehicle battery on
page 254
Important safety warnings for han-
dling a v
ehicle battery All work on batteries requires specialist
kno
wl
edg
e. Please refer to a SEAT Official
Service or a workshop specialising in batter-
ies: risk of burns or exploding battery!
The battery must not be opened. Never try to
change the fluid level of the battery. Other-
wise explosive gas is released from the bat-
tery that could cause an explosion.
Wear eye protection.
Battery acid is very corrosive and caustic. Wear
protective gloves and eye protection. In the event
of electrolyte splashes, rinse off with plenty of
water.
Fires, sparks, open flames and smoking are pro-
hibited.
The battery should only be charged in a well-ven-
tilated zone. Risk of explosion!
Keep children away from acid and batteries!»
253
Technical data
Advice
Operation
Emergencies
Safety
Page 256 of 308

Advice
WARNING
● When rep airin
g or working on the electrical
system, proceed as follows:
–1. Remove the key from the ignition. The
negative cable on the battery must be
disconnected.
– 2. When the repair is finished, reconnect
the negative pole of the battery.
● Switch off all electrical devices before re-
connecting the b
attery. Reconnect first the
positive cable and then the negative cable.
Never reverse the polarity of the connections.
This could cause an electrical fire.
● Ensure that the vent hose is always connec-
ted to the b
attery.
● Never use damaged batteries. This could
cause an e
xplosion! Replace a damaged bat-
tery immediately. CAUTION
● Never di s
connect the battery if the ignition
is switched on or if the engine is running.
This could damage the electrical system or
electronic components. Charging the battery
Terminals for charging the battery are fitted
in the en
gine comp
artment. –
Note the warnin
gs ››› in Important safety
w arnin
g
s for handling a vehicle battery on
page 254 and ››› .
– Switch off all electrical devices. Remove the
ignition k ey
.
– R
aise the bonnet ›››
page 247.
– Open the battery cover.
– Connect the charger clamps as described
to the po
sitive pole of the battery (+) and
exclusively to an earth on the bodywork
(–).
– Only use a charger which is compatible for
use with 12
V nominal voltage batteries.
The charge must not exceed a voltage of 15
V.
– Now connect the battery charger to the
power soc
ket and switch on.
– After charging the battery: switch off the
batter
y charger and disconnect the power
socket cable.
– Finally disconnect the charger cables from
the batter
y.
– Replace the battery cover correctly.
– Close the bonnet ›››
page 247.
Important: Before you charge the battery
make sure you read the manufacturer's in-
structions for using the battery charger. WARNING
Never charge a battery that has frozen: re-
pl ac
e battery! Failure to do so may lead to an
explosion. Note
Use only the terminals in the engine compart-
ment t o c
harge the battery. Replacing the battery
The new battery should have the same speci-
fic
ation
s
(amperage, load and voltage) as the
used battery.
Your vehicle is equipped with an intelligent
power management system to control the
distribution of electrical energy ›››
page 239.
The power management function ensures
that the battery is charged much more effi-
ciently than on vehicles without a power
management system. To maintain this func-
tion after replacing the battery, we recom-
mend that the replacement battery used is of
the same make and type as the original fitted
battery. To make proper use of the power
management function after the battery has
been changed, have the battery coded to the
power management mode at a specialised
workshop.
254
Page 257 of 308

Wheels
CAUTION
● Some v ehic
les, for example those with the
Start-Stop system* are fitted with a special
battery (AGM-type or EFB-type battery). If any
other type of battery is fitted, the Start-Stop
function may be considerably reduced and
the vehicle may not stop on repeated occa-
sions.
● Make sure that the vent hose is always at-
tached t
o the original opening on the side of
the battery. Gases or battery acid can other-
wise escape and possibly cause damage.
● The battery holder and clamps must always
be correctly
secured.
● Before starting any work on the battery, al-
way
s observe the warnings listed under
››› page 253, Important safety warnings for
handling a vehicle battery .
● Do not forget to replace the battery cover-
ings, wher
e applicable. It is a protection for
high temperatures. This in turn extends the
vehicle service life. For the sake of the environment
Batteries contain toxic substances includ-
in g s
ulphuric acid and lead. They must be
disposed of appropriately and must not be
disposed of with ordinary household waste.
Make sure disconnected batteries cannot tip
over. Sulphuric acid could be spilt! Wheels
Wheel s
and ty
res
General notes –
When driving with new tyr e
s, be especially
careful during the first 500 km (300 miles).
– If you have to drive over a kerb or similar
obs
tacle, drive very slowly and as near as
possible at a right angle to the obstacle.
– Check from time to time if the tyres are
dam ag
ed (punctures, cuts, cracks or
dents). Remove any foreign objects embed-
ded in the treads.
– Damaged wheels and tyres must be re-
plac
ed immediately.
– Keep grease, oil and fuel off the tyres.
– Replace any missing valve caps as soon as
poss
ible.
– Mark the wheels before taking them off so
that they
rotate in the same direction when
put back.
– When removed, the wheels or tyres should
be stor
ed in a cool, dry and preferably dark
place.
New tyres
New tyres do not give maximum grip straight
away and should therefore be “run in” by driving carefully and at moderate speeds for
about the firs
t 500 km (300 miles). This will
also increase the useful life of the tyres.
The tread depth of new tyres may vary, ac-
cording to the type and make of tyre and the
tread pattern.
Concealed damage
Damage to tyres and rims is often not readily
visible. If you notice unusual vibration or the
car pulling to one side, this may indicate that
one of the tyres is damaged. Reduce speed
immediately if there is any reason to suspect
that damage may have occurred. Inspect the
tyres for damage. If no external damage is
visible, drive slowly and carefully to the near-
est specialised workshop and have the car
inspected.
Tyres with directional tread pattern
An arrow on the tyre sidewall indicates the di-
rection of rotation on single drive tyres. Al-
ways note the direction of rotation indicated
when mounting the wheel. This guarantees
optimum grip and helps to avoid aquaplan-
ing, excessive noise and wear.
Retrofitting accessories
If you wish to change or fit wheels, rims or
wheel trims, we recommend that you consult
with a SEAT Official Service centre for advice
regarding current techniques.
255
Technical data
Advice
Operation
Emergencies
Safety
Page 258 of 308
Advice
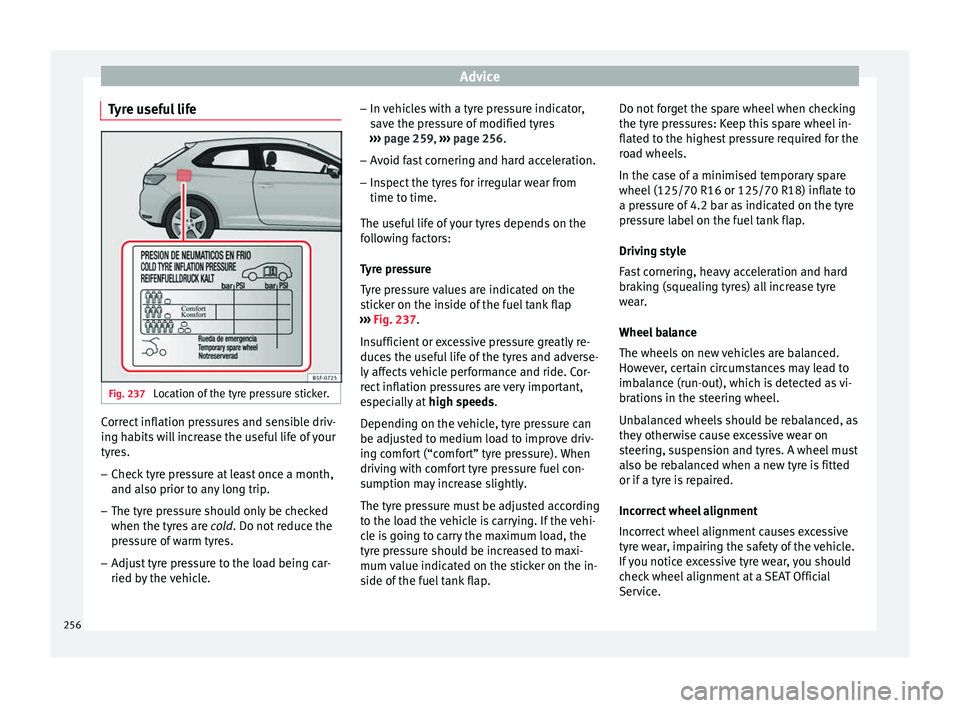
Tyre useful life Fig. 237
Location of the tyre pressure sticker. Correct inflation pressures and sensible driv-
in
g h
ab
its will increase the useful life of your
tyres.
– Check tyre pressure at least once a month,
and also prior to an
y long trip.
– The tyre pressure should only be checked
when the tyre
s are cold. Do not reduce the
pressure of warm tyres.
– Adjust tyre pressure to the load being car-
ried by the
vehicle. –
In vehic
les with a tyre pressure indicator,
save the pressure of modified tyres
››› page 259, ››› page 256.
– Avoid fast cornering and hard acceleration.
– Inspect the tyres for irregular wear from
time to time.
The usef
ul life of your tyres depends on the
following factors:
Tyre pressure
Tyre pressure values are indicated on the
sticker on the inside of the fuel tank flap
››› Fig. 237.
Insufficient or excessive pressure greatly re-
duces the useful life of the tyres and adverse-
ly affects vehicle performance and ride. Cor-
rect inflation pressures are very important,
especially at high speeds.
Depending on the vehicle, tyre pressure can
be adjusted to medium load to improve driv-
ing comfort (“comfort” tyre pressure). When
driving with comfort tyre pressure fuel con-
sumption may increase slightly.
The tyre pressure must be adjusted according
to the load the vehicle is carrying. If the vehi-
cle is going to carry the maximum load, the
tyre pressure should be increased to maxi-
mum value indicated on the sticker on the in-
side of the fuel tank flap. Do not forget the spare wheel when checking
the tyre pr
essures: Keep this spare wheel in-
flated to the highest pressure required for the
road wheels.
In the case of a minimised temporary spare
wheel (125/70 R16 or 125/70 R18) inflate to
a pressure of 4.2 bar as indicated on the tyre
pressure label on the fuel tank flap.
Driving style
Fast cornering, heavy acceleration and hard
braking (squealing tyres) all increase tyre
wear.
Wheel balance
The wheels on new vehicles are balanced.
However, certain circumstances may lead to
imbalance (run-out), which is detected as vi-
brations in the steering wheel.
Unbalanced wheels should be rebalanced, as
they otherwise cause excessive wear on
steering, suspension and tyres. A wheel must
also be rebalanced when a new tyre is fitted
or if a tyre is repaired.
Incorrect wheel alignment
Incorrect wheel alignment causes excessive
tyre wear, impairing the safety of the vehicle.
If you notice excessive tyre wear, you should
check wheel alignment at a SEAT Official
Service.
256
Page 259 of 308

Wheels
WARNING
● Alw a
ys adapt the tyre pressure accordingly
when the vehicle load changes.
● A tyre with low air pressure has to flex a lot
more when the v
ehicle is heavily loaded or at
high speeds, therefore causing overheating
to occur. Under these conditions, the tyre
bead may be released or the tyre may burst.
Risk of accident! For the sake of the environment
Under-inflated tyres will increase fuel con-
sumption. Wear indicators
Fig. 238
Tyre tread: tread wear indicators Tread wear indicators indicate if a tyre is
w
orn. The origin
al
tyres on your vehicle have
1.6 mm high “trea
d wear indicators” running
across the tread. Depending on the manufac-
turer, there will be 6 to 8 of them spaced at
equal distances around the tyre. Markings on
the tyre sidewall (for instance the letters
“TWI” or a triangle) indicate the positions of
the tread wear indicators.
The minimum tread depth required by law is
1.6 mm (measured in the tread grooves next
to the tread wear indicators). (Different fig-
ures may apply in other countries.) WARNING
The tyres must be replaced at the latest when
the tre a
d is worn down to the tread wear indi-
cators. Failure to follow this instruction could
result in an accident.
● Especially in difficult driving conditions
such a
s wet or icy roads. It is important that
the tyre tread be as deep as possible and be
approximately the same on the tyres of both
the front and the rear axles.
● The scant driving safety due to insufficient
trea
d depth is particularly evident in vehicle
handling, when there is a risk of “aquaplan-
ing” in deep puddles of water and when driv-
ing through corners, and braking is also ad-
versely affected.
● The speed has to be adapted accordingly,
otherwi
se there is a risk of losing control over
the vehicle. Changing wheels
Fig. 239
Interchanging tyres. To ensure that the wear is equal on all tyres
the wheel
s
shou
ld be changed round from
time to time according to the system
››› Fig. 239. The useful life of all the tyres will
then be about the same time.
New tyres or new wheels –
All four wheels must be fitted with tyres of
the s ame type, s
iz
e (rolling circumference)
and preferably the same tread pattern.
– Tyres should be replaced at least in pairs
and not individual
ly (i.e. both front tyres or
both rear tyres together).
– Do not use tyres whose effective size ex-
ceeds
the dimensions of the factory-ap-
proved makes of tyre. »
257
Technical data
Advice
Operation
Emergencies
Safety
Page 260 of 308
Advice
– If
y
ou wish to fit the vehicle with rims or
tyres different to those installed in manu-
facture, it is advisable to consult a SEAT Of- ficial Service before purchasing them.
The tyres and wheel rims are an essential
part of the vehicle's design. The tyres and
rims approved by SEAT are specially matched
to the characteristics of the vehicle and make
a major contribution to good roadholding
and safe handling ››› .
The s iz
e
s of the rims and tyres approved for
your vehicle are listed in the vehicle docu-
mentation (e.g. EC Certificate of Conformity or
COC document 1)
). The vehicle documentation
varies depending on the country of resi-
dence.
Note for Italy: A SEAT Service Centre should
be consulted whether different sized wheels
or tyres to those originally fitted by SEAT may
be fitted, as well as the combinations al-
lowed between the front axle (axle 1) and
back axle (axle 2).
A knowledge of tyre designations makes it
easier to choose the correct tyres. The follow-
ing wording can be read on the sides of the
tyre:
205/55 R16 91V
This contains the following information:
205Tyre width in mm
55Height/width ratio in %
RTyre construction: Radial
16Rim diameter in inches
91Load rating code
VSpeed index The manufacturing date is also indicated on
the ty
r
e sidewall (possibly only on the inner
part):
DOT ... 2212 ...
it means, for example, that the tyre was man-
ufactured in the 22nd week of 2012.
But note that with some types of tyre, the ac-
tual tyre size can differ from the nominal size
marked on the tyre (for instance 205/55 R 16
91 W), and there may be significant differen-
ces in the contours of the tyres, even though
the tyres are marked with the same nominal
size designation. When replacing the tyres,
it is therefore important to make sure that
the actual size of the new tyres does not ex-
ceed the dimensions of the factory-approved
makes of tyre.
Failure to observe this requirement can af-
fect the clearance needed for the tyres. If the
tyres rub against the bodywork, in certain circumstances the tyres , suspension or
bodywork
and pipe
s may be damaged, and
vehicle safety could be severely impaired
››› .
If
y
ou use tyres that are approved by SEAT
you can be sure that the actual tyre dimen-
sions will be correct for your vehicle. If you
decide to fit a different type of tyre, you must
obtain the appropriate manufacturer's certif-
icate from the tyre retailer to confirm that
the tyres are suitable for your vehicle. Keep
this certificate in a safe place.
Your SEAT Official Service will be able to ad-
vise you on which tyres may be fitted to your
vehicle.
It is best to have all servicing of wheels and
tyres performed by a specialised workshop.
They are familiar with the procedure and
have the necessary special tools and spare
parts as well as the proper facilities for dis-
posing of the old tyres respecting the envi-
ronment. WARNING
● It i s
very important to ensure that the tyres
you have chosen have adequate clearance.
When selecting replacement tyres, do not re-
ly entirely on the nominal tyre size marked on
the tyre, since the effective tyre size can dif-
fer significantly depending on the 1)
COC = certificate of conformity.
258