battery Seat Leon 5D 2015 Owner's manual
[x] Cancel search | Manufacturer: SEAT, Model Year: 2015, Model line: Leon 5D, Model: Seat Leon 5D 2015Pages: 308, PDF Size: 5.93 MB
Page 8 of 308
Table of Contents
Monitoring system Front Assist* . . . . . . . . . . . . 197
Lane Assist system* . . . . . . . . . . . . . . . . . . . . . . 202
SEAT Drive Profile* . . . . . . . . . . . . . . . . . . . . . . . 204
Traffic sign detection system . . . . . . . . . . . . . . . 208
Tiredness detection (break recommenda-
tion)* . . . . . . . . . . . . . . . . . . . . . . . . . . . . . . . . . .
210
P ark
ing aid . . . . . . . . . . . . . . . . . . . . . . . . . . . . . 211
Rear Assist âRear View Cameraâ* . . . . . . . . . . . 217
Towing bracket device . . . . . . . . . . . . . . . . . . . . 220
Towing bracket device* . . . . . . . . . . . . . . . . . . . 220
Trailer towing . . . . . . . . . . . . . . . . . . . . . . . . . . . 225
Advice . . . . . . . . . . . . . . . . . . . . . . . . . . . . . . . . 230
Care and maintenance . . . . . . . . . . . . . . . . . . . . 230
Accessories and modifications to the vehi-
cle
. . . . . . . . . . . . . . . . . . . . . . . . . . . . . . . . . . . . 230
Care and cleaning . . . . . . . . . . . . . . . . . . . . . . . 231
Vehicle exterior care . . . . . . . . . . . . . . . . . . . . . . 231
Caring for the vehicle interior . . . . . . . . . . . . . . 235
Intelligent technology . . . . . . . . . . . . . . . . . . . . 238
Electromechanical steering . . . . . . . . . . . . . . . . 238
Progressive steering . . . . . . . . . . . . . . . . . . . . . 238
Four-wheel drive . . . . . . . . . . . . . . . . . . . . . . . . . 239
Power Management . . . . . . . . . . . . . . . . . . . . . . 239
Checking and refilling levels . . . . . . . . . . . . . . . 241
Filling the tank . . . . . . . . . . . . . . . . . . . . . . . . . . 241
Fuel . . . . . . . . . . . . . . . . . . . . . . . . . . . . . . . . . . . 243
Engine compartment . . . . . . . . . . . . . . . . . . . . . 246
Engine oil . . . . . . . . . . . . . . . . . . . . . . . . . . . . . . 248
Cooling system . . . . . . . . . . . . . . . . . . . . . . . . . . 250
Brake fluid . . . . . . . . . . . . . . . . . . . . . . . . . . . . . 251
Windscreen washer reservoir . . . . . . . . . . . . . . 252
Battery . . . . . . . . . . . . . . . . . . . . . . . . . . . . . . . . . 253
Wheels . . . . . . . . . . . . . . . . . . . . . . . . . . . . . . . . 255
Wheels and tyres . . . . . . . . . . . . . . . . . . . . . . . . 255
Tyre monitoring systems . . . . . . . . . . . . . . . . . . 259
Temporary spare wheel . . . . . . . . . . . . . . . . . . . 262
Winter service . . . . . . . . . . . . . . . . . . . . . . . . . . . 263 Technical data
. . . . . . . . . . . . . . . . . . . . . . . . 265
Technical specifications . . . . . . . . . . . . . . . . . . 265
Important . . . . . . . . . . . . . . . . . . . . . . . . . . . . . . 265
Vehicle identification data . . . . . . . . . . . . . . . . . 265
Information on fuel consumption . . . . . . . . . . . 266
Driving with a trailer . . . . . . . . . . . . . . . . . . . . . . 267
Wheels . . . . . . . . . . . . . . . . . . . . . . . . . . . . . . . . 267
Engine data . . . . . . . . . . . . . . . . . . . . . . . . . . . . . 269
Dimensions . . . . . . . . . . . . . . . . . . . . . . . . . . . . . 292
Index . . . . . . . . . . . . . . . . . . . . . . . . . . . . . . . . . 293
6
Page 45 of 308
The essentials
ï¥ ï² Do not continue driving!
Engine oil pressure too low. If
the warning lamp flashes, stop
driving, even if the oil level is
correct. Do not even run the en-
gine at idle speed!
âºâºâº page
248 ï¦
Fault in the battery.âºâºâº
page
253 ï½
Driving light totally or partially
faulty.âºâºâº
page
94
Fault in the cornering light sys-
tem.âºâºâº page
128 ï·
Diesel particulate filter blockedâºâºâº
page
176 ï¹
Level of windscreen washer fluid
too low.âºâºâº
page
136 ï§
Flashing: Fault in the oil level de-
tection. Control manually.âºâºâº
page
248
Ignition: Insufficient engine oil. ï
Fault in the gearbox.âºâºâº
page
174 ï
Light Assist on.âºâºâº
page
130 ïïïï
Immobiliser active.
ï¤
Service interval displayâºâºâº
page
38 ïª
Mobile telephone is connected
via Bluetooth to the original tele-
phone device.âºâºâº
Book-
let Radio
or
âºâºâº Book-
let Navi-
gation
system ï
Mobile telephone battery charge
meter. Available only for devices
pre-installed in factory.
ï
Freezing warning. The outside
temperature is lower than +4°C
(+39°F).âºâºâº
page
33 ï¦
Start-Stop system activated.âºâºâº
page
183 ï§
Start-Stop system unavailable.
ï
ïï
Low consumption driving statusâºâºâº
page
32 On the instrument panel
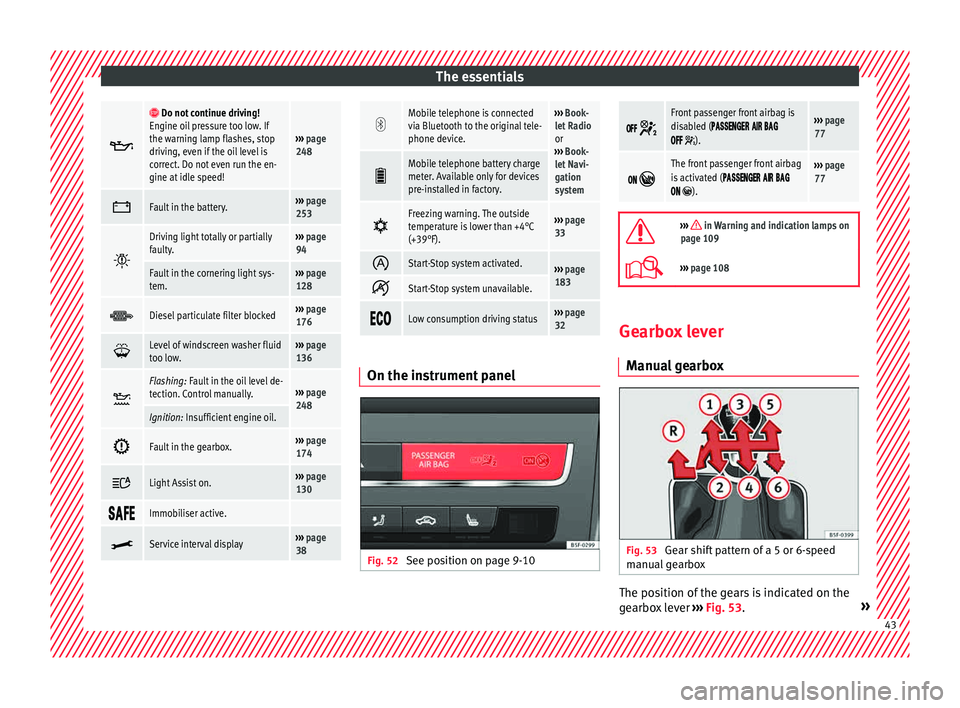
Fig. 52
See position on page 9-10 ïïï
ï¹
Front passenger front airbag is
disabled (ïïïïï
ïïï
ï ïïï ïïï
ïïï ï¹).
âºâºâº page
77 ïï
ï¶
The front passenger front airbag
is activated (ïïïïï
ïïï
ï ïïï ïïï
ïï ï¶).
âºâºâº page
77 ïª
âºâºâº in Warning and indication lamps on
page 109
ï©âºâºâº page 108 Gearbox lever
M anua
l
gearbox Fig. 53
Gear shift pattern of a 5 or 6-speed
m anual
g
earbox The position of the gears is indicated on the
g
e
arbo
x lever âºâºâº Fig. 53. » 43
Page 47 of 308
The essentials
Releasing the selector lever
â Using a screwdriver, press and hold the yel-
lo w u
n
locking tab sideways âºâºâº Fig. 55.
â Now press the interlock button on the se-
lector l
ever A and move the selector lever to
po s
ition
N.
â After carrying out the manual release, at-
tach the sel
ector lever boot on the gearbox
console again. If the power supply should ever fail (e.g. dis-
char
ged battery) and the vehicle has to be
pushed or towed, the selector lever must first
be moved to position N, after operating the
manual release mechanism. WARNING
The selector lever may be moved out of posi-
tion P only when the h
andbrake is firmly ap-
plied. If this does not work, secure the vehi-
cle with the brake pedal. On a slope the vehi- cle could otherwise start to move inadver-
tently
af
ter shifting the selector lever out of
position P - accident risk! Air conditioning
How doe s
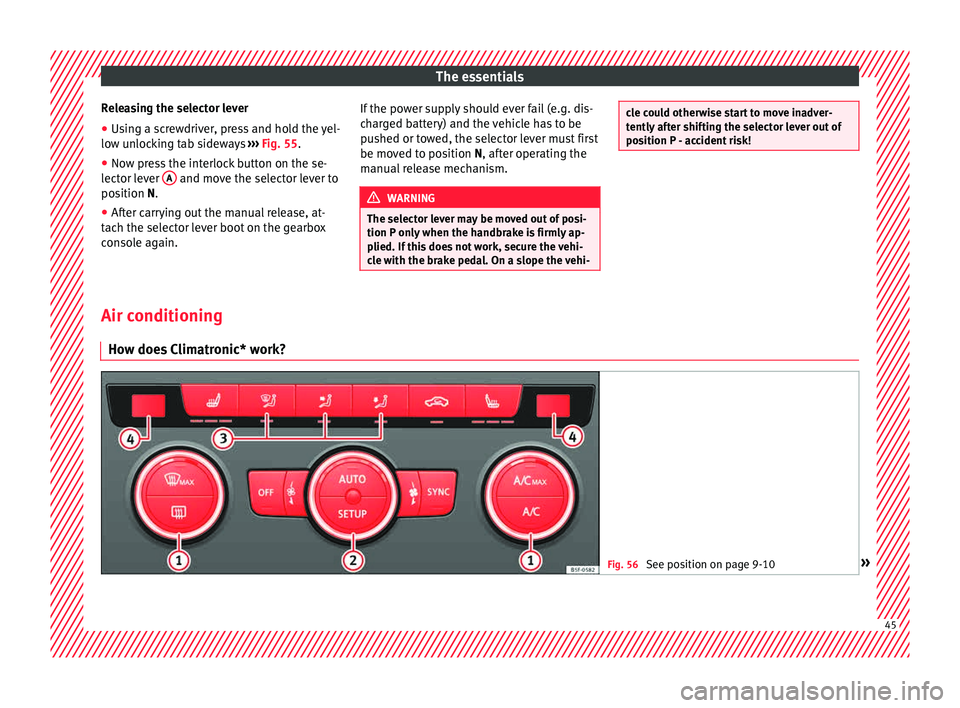
Climatronic* work? Fig. 56
See position on page 9-10 » 45
Page 55 of 308
The essentials
even in warm climates where anti-freeze pro-
t ection i
s
not required.
If for weather reasons further protection is
necessary, the proportion of additive may be
increased, but only up to 60 %; otherwise an-
tifreeze protection will diminish and this will
worsen cooling.
When the coolant is topped up, use a mixture
of distilled water and at least 40 % of the
G13 or G12 plus-plus (TL-VW 774 G) additive
(both are purple) to obtain an optimum anti-
corrosion protection âºâºâº in Topping up cool-
ant on p ag
e 251
. The mixture of G13 with
G12 plus (TL-VW 774 F), G12 (red) or G11
(green-blue) engine coolants will significant-
ly reduce anti-corrosion protection and
should therefore be avoided âºâºâº in Topping
up c oo
l
ant on page 251.
ïª
âºâºâº in Topping up coolant on page 251
ï©âºâºâº page 250 Brake fluid
Fig. 63
Engine compartment: brake fluid res-
er v
oir c
ap The brake fluid reservoir is located in the en-
gine c
omp
ar
tment âºâºâº
ï© page 246.
The level should be between the ïïï and ïïï
marks. If it is below ïïï, please visit a Techni-
cal Service.
ïª
âºâºâº in Topping up brake fluid on
page 252
ï©âºâºâº page 251 Windscreen washer
Fig. 64
In the engine compartment: wind-
s c
r
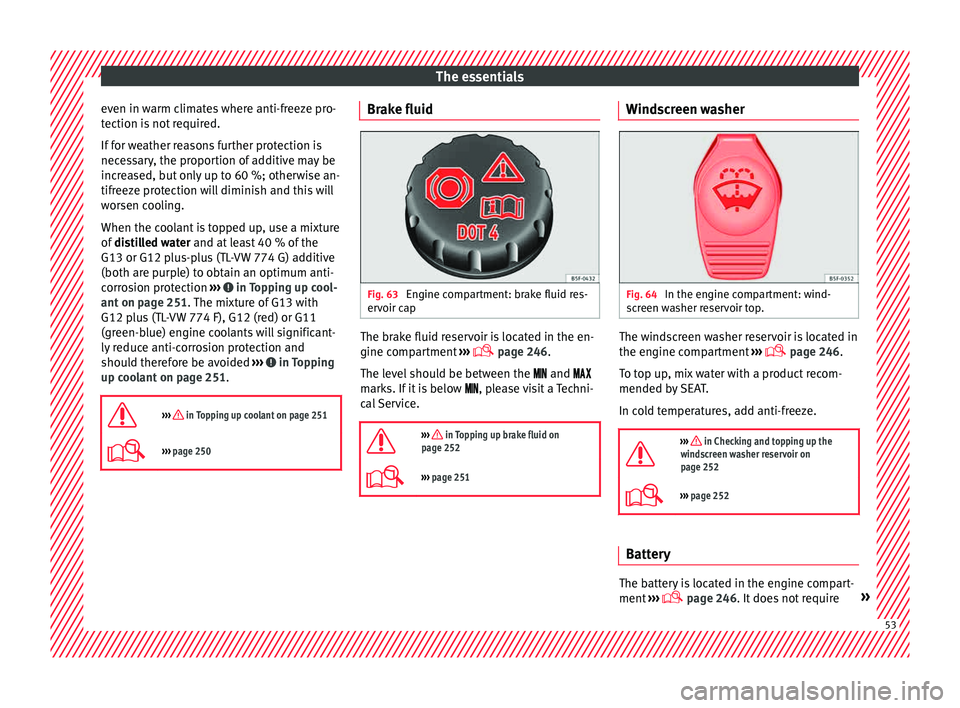
een washer reservoir top. The windscreen washer reservoir is located in
the en
gine c
omp
artment âºâºâº
ï© page 246.
To top up, mix water with a product recom-
mended by SEAT.
In cold temperatures, add anti-freeze.
ïª
âºâºâº in Checking and topping up the
windscreen washer reservoir on
page 252
ï©âºâºâº page 252 Battery
The battery is located in the engine compart-
ment
âº
âº
âº ï© page 246. It does not require » 53
Page 56 of 308

The essentials
maintenance. It is checked as part of the In-
s pection
Ser
vice.
ïª
âºâºâº in Important safety warnings for
handling a vehicle battery on page 254
ï©âºâºâº page 253 54
Page 64 of 308
The essentials
Towline anchorages
Att ac
h the b
ar or rope to the towline ancho-
rages.
The towline anchorages are located under
the floor panel in the luggage compartment,
next to the vehicle tools âºâºâº
ï© page 86.
Screw the towline anchorage into the screw
connection âºâºâº Fig. 76 o âºâºâº Fig. 77 and tighten
it with the wheel brace.
Tow rope or tow bar
The tow bar offers increased safety and a
lower risk of damage.
The tow rope is recommended when there is
no tow bar. It must be elastic so that it does
not damage the vehicle.
Notes for the driver of the towing vehicle
â The tow rope must be taut before you drive
off.
â Rel
ease the clutch very carefully when start-
ing the v
ehicle (manual gearbox), or acceler-
ate gently (automatic gearbox).
Driving style
Towing requires some experience, especially
when using a tow rope. Both drivers should
realise how difficult it is to tow a vehicle. In-
experienced drivers should not attempt to
tow. Do not pull too hard with the towing vehicle
and take c
are to avoid jerking the tow rope.
When towing on an unpaved road, there is al-
ways a risk of overloading and damaging the
anchorage points.
Switch on the ignition so that the turn sig-
nals, windscreen wipers and windscreen
washer can work. Ensure that the steering
wheel is unlocked and moves freely.
Place the gear lever in neutral on vehicles
with a manual gearbox. With an automatic
gearbox, place the lever in N.
To brake, press the brake pedal firmly. The
brake servo does not work when the engine
is switched off.
The power steering only works when the igni-
tion is switched on and the vehicle is moving,
provided that the battery is sufficiently charg-
ed. Otherwise, it will need more force.
Ensure that the tow rope remains taut at all
times.
ïª
âºâºâº in General information on page 89
ï©âºâºâº page 89 Tow-starting
If the engine will not start, first try starting it
us
in
g the battery of another vehicle
âºâºâº page 62. You should only attempt to tow-
start a vehicle if charging the battery does
not work. This is done by leveraging wheel
movement.
When tow-starting a vehicle with a petrol en-
gine, do not tow it more than a short dis-
tance, otherwise unburned fuel can enter the
catalytic converter.
â Engage 2nd or 3rd gear before moving off.
â Press the clutch and hold the pedal down.
â Switch the ignition on.
â Once both vehicles are moving, release the
clut c
h.
â As soon as the engine has started, press
the clutc
h and move the gear lever to neutral.
How to jump start Jump lea
ds The jump lead must have a sufficient wire
c
r
o
ss section.
If the engine fails to start because of a dis-
charged battery, the battery can be connec-
ted to the battery of another vehicle to start
the engine. 62
Page 65 of 308

The essentials
Jump leads must comply with standard DIN
72553 (see c ab
l
e manufacturer's instruc-
tions). The wire cross section must be at least
25 mm 2
for petrol engines and at least
35 mm 2
for diesel engines. Note
â The v ehic
les must not touch each other,
otherwise electricity could flow as soon as
the positive terminals are connected.
â The discharged battery must be properly
connected t
o the on-board network. How to jump start: description
Fig. 78
Diagram of connections for vehicles
w ithout
Start Stop system Fig. 79
Diagram of connections for vehicles
with St
art Stop system Jump lead terminal connections
1. Switch off the ignition of both vehicles
âºâº
âº
.
2. Connect one end of the re
d
jump lead to
the positive + terminal of the vehicle
w ith the fl
at
battery A
⺠âº
⺠Fig. 78 .
3. Connect the other end of the red
jump
lead to the positive terminal + in the ve-
hic l
e pr
oviding assistance B .
4. For vehicles without Start-Stop system:
connect
one end of
the black jump lead to
the negative terminal â of the vehicle
pr o
v
iding the current B
⺠âº
⺠Fig. 78 .
â For vehicles with Start-Stop system: con-
nect one end of
the black jump lead X to a
s uit
ab
le ground terminal, to a solid piece of
metal in the engine block, or to the engine
block itself âºâºâº Fig. 79. 5. Connect the other end of the
black
jump
lead X to a solid metal component bolted
t o the en
gine b
lock or to the engine block
itself of the vehicle with the flat battery.
Do not connect it to a point near the bat-
tery A .
6. Position the leads in such a way that they cannot
c
ome into contact with any moving
parts in the engine compartment.
Starting
7. Start the engine of the vehicle with the boostin
g battery and let it run at idling
speed.
8. Start the engine of the vehicle with the flat batter
y and wait for 2 or 3 minutes until
the engine is running.
Removing the jump leads
9. Before you remove the jump leads, switch off the dipped be
am headlights if they are
switched on.
10.
Turn on the heater blower and heated rear
window in the vehicle with the flat battery.
This helps minimise voltage peaks which
are generated when the leads are discon-
nected.
11.When the engine is running, disconnect the lea
ds in reverse order to the details
given above. » 63
Page 66 of 308
The essentials
Make sure the battery clamps have sufficient
met al-t
o-met
al contact with the battery termi-
nals.
If the engine fails to start after about 10 sec-
onds, switch off the starter and try again after
about 1 minute. WARNING
â Ple a
se note the safety warnings referring to
working in the engine compartment
âºâºâº ï© page 246.
â The battery providing assistance must have
the same v
oltage as the flat battery (12V) and
approximately the same capacity (see imprint
on battery). Failure to comply could result in
an explosion.
â Never use jump leads when one of the bat-
teries
is frozen. Danger of explosion! Even af-
ter the battery has thawed, battery acid could
leak and cause chemical burns. If a battery
freezes, it should be replaced.
â Keep sparks, flames and lighted cigarettes
awa
y from batteries, danger of explosion.
Failure to comply could result in an explo-
sion.
â Observe the instructions provided by the
manufact
urer of the jump leads.
â Do not connect the negative cable from the
other vehic
le directly to the negative terminal
of the flat battery. The gas emitted from the
battery could be ignited by sparks. Danger of
explosion. â
Do not att ac
h the negative cable from the
other vehicle to parts of the fuel system or to
the brake line.
â The non-insulated parts of the battery
clamp
s must not be allowed to touch. The
jump lead attached to the positive battery
terminal must not touch metal parts of the ve-
hicle, this can cause a short circuit.
â Position the leads in such a way that they
cannot c
ome into contact with any moving
parts in the engine compartment.
â Do not lean on the batteries. This could re-
sult
in chemical burns. Note
The vehicles must not touch each other, oth-
erw i
se electricity could flow as soon as the
positive terminals are connected. Changing the wiper blades
W ind
s
creen wipers service position Fig. 80
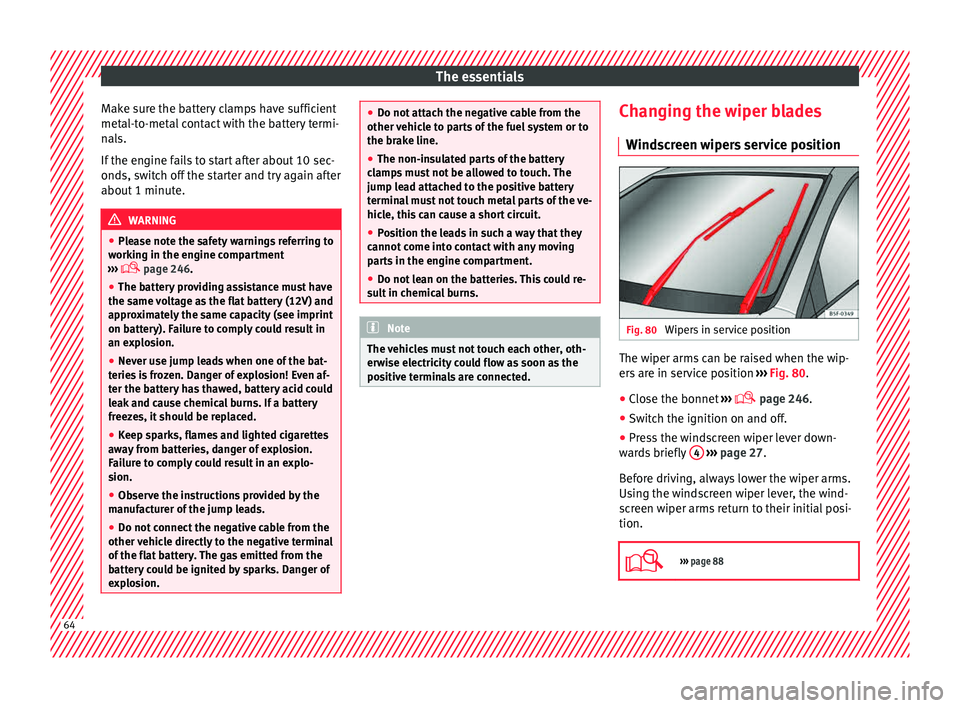
Wipers in service position The wiper arms can be raised when the wip-
er
s
ar
e in service position âºâºâº Fig. 80.
â Close the bonnet âºâºâº
ï© page 246.
â Switch the ignition on and off.
â Press the windscreen wiper lever down-
ward
s briefly 4
⺠âº
⺠page 27.
Before driving, always lower the wiper arms.
Using the windscreen wiper lever, the wind-
screen wiper arms return to their initial posi-
tion.
ï©
âºâºâº page 88 64
Page 119 of 308
Opening and closing
Note
â Never l e
ave any valuable items in the vehi-
cle unattended. Even a locked vehicle is not a
safe.
â If the diode on the driver door sill lights up
for about 30 sec
onds when the vehicle is
locked, the central locking system or anti-
theft alarm* is not working properly. You
should have the fault repaired at a SEAT Offi-
cial Service or specialised workshop.
â The vehicle interior monitoring of the anti-
theft a
larm* system will only function as in-
tended if the windows and the sunroof* are
closed. Car key
Fig. 131
Vehicle key Fig. 132
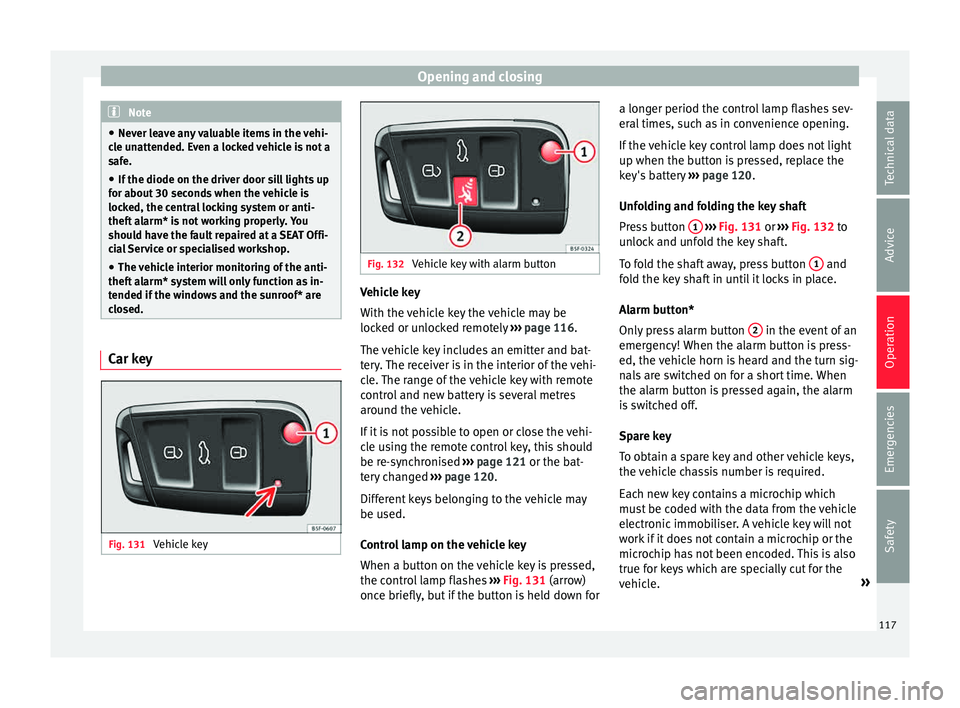
Vehicle key with alarm button Vehicle key
W
ith the
v
ehicle key the vehicle may be
locked or unlocked remotely âºâºâº page 116.
The vehicle key includes an emitter and bat-
tery. The receiver is in the interior of the vehi-
cle. The range of the vehicle key with remote
control and new battery is several metres around the vehicle.
If it is not possible to open or close the vehi-
cle using the remote control key, this should
be re-synchronised âºâºâº page 121 or the bat-
tery changed âºâºâº page 120.
Different keys belonging to the vehicle may
be used.
Control lamp on the vehicle key
When a button on the vehicle key is pressed,
the control lamp flashes âºâºâº Fig. 131 (arrow)
once briefly, but if the button is held down for a longer period the control lamp flashes sev-
eral time
s, such as in convenience opening.
If the vehicle key control lamp does not light
up when the button is pressed, replace the
key's battery âºâºâº page 120.
Unfolding and folding the key shaft
Press button 1
⺠âºâº
Fig. 131
or âº
âºâº Fig. 132 to
unlock and unfold the key shaft.
To fold the shaft away, press button 1 and
f o
l
d the key shaft in until it locks in place.
Alarm button*
Only press alarm button 2 in the event of an
emer g
ency!
When the alarm button is press-
ed, the vehicle horn is heard and the turn sig-
nals are switched on for a short time. When
the alarm button is pressed again, the alarm
is switched off.
Spare key
To obtain a spare key and other vehicle keys,
the vehicle chassis number is required.
Each new key contains a microchip which
must be coded with the data from the vehicle
electronic immobiliser. A vehicle key will not
work if it does not contain a microchip or the
microchip has not been encoded. This is also
true for keys which are specially cut for the
vehicle. »
117
Technical data
Advice
Operation
Emergencies
Safety
Page 122 of 308
Operation
Please see Instruction Manual . The
v ehic
le cannot be opened from inside. This
makes it more difficult for unauthorised per-
sons to break into the vehicle âºâºâº in De-
s c
ription on p
age 116.
The anti-theft security system can be switch-
ed off each time the vehicle is locked:
â Turn the key a second time to the lock posi-
tion, in the door lock, f
or the next two sec-
onds. If necessary, remove the protective cov-
er on the driver door handle âºâºâº
ï¨ page 11
or else
â Press ï½ on the remote control key for a
sec ond time
f
or the following 2 seconds.
The flashing frequency of the diode in the
door sill immediately confirms the process.
Initially, the diode flashes in a fast sequence
for a brief period, then it stops for approxi-
mately 30 seconds and, lastly continues
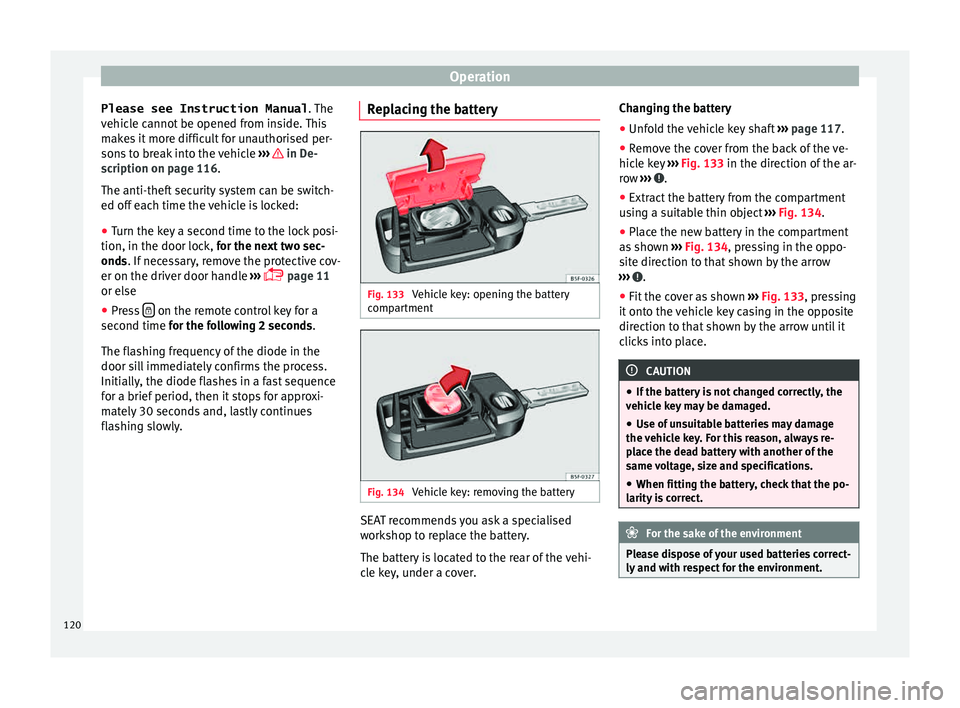
flashing slowly. Replacing the battery Fig. 133
Vehicle key: opening the battery
c omp
ar
tment Fig. 134
Vehicle key: removing the battery SEAT recommends you ask a specialised
w
ork
shop t
o replace the battery.
The battery is located to the rear of the vehi-
cle key, under a cover. Changing the battery
â Unfold the vehicle key shaft âºâºâº
page 117.
â Remove the cover from the back of the ve-
hicle k
ey âºâºâº Fig. 133 in the direction of the ar-
row âºâºâº .
â Extract the battery from the compartment
u s
in
g a suitable thin object âºâºâº Fig. 134.
â Place the new battery in the compartment
as sho
wn âºâºâº Fig. 134, pressing in the oppo-
site direction to that shown by the arrow
âºâºâº .
â Fit the cover as shown âºâº
âº
Fig. 133 , pressing
it onto the vehicle key casing in the opposite
direction to that shown by the arrow until it
clicks into place. CAUTION
â If the b att
ery is not changed correctly, the
vehicle key may be damaged.
â Use of unsuitable batteries may damage
the vehic
le key. For this reason, always re-
place the dead battery with another of the
same voltage, size and specifications.
â When fitting the battery, check that the po-
larity i
s correct. For the sake of the environment
Please dispose of your used batteries correct-
ly and w ith r
espect for the environment.120