sensor Seat Leon 5D 2015 Owner's manual
[x] Cancel search | Manufacturer: SEAT, Model Year: 2015, Model line: Leon 5D, Model: Seat Leon 5D 2015Pages: 308, PDF Size: 5.93 MB
Page 29 of 308
The essentials
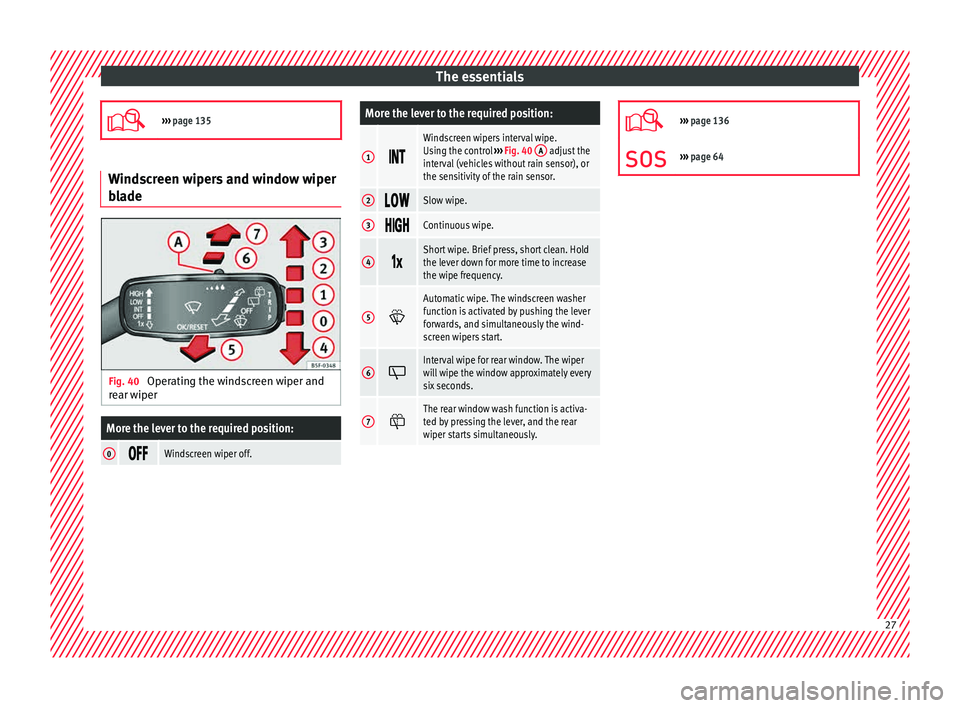
››› page 135 Windscreen wipers and window wiper
bla
de Fig. 40
Operating the windscreen wiper and
r e
ar w
iper
More the lever to the required position:
0 Windscreen wiper off.
More the lever to the required position:
1
Windscreen wipers interval wipe.
Using the control
››› Fig. 40 A adjust the
interval (vehicles without rain sensor), or
the sensitivity of the rain sensor.
2 Slow wipe.
3
Continuous wipe.
4
Short wipe. Brief press, short clean. Hold
the lever down for more time to increase
the wipe frequency.
5
Automatic wipe. The windscreen washer
function is activated by pushing the lever
forwards, and simultaneously the wind-
screen wipers start.
6
Interval wipe for rear window. The wiper
will wipe the window approximately every
six seconds.
7
The rear window wash function is activa-
ted by pressing the lever, and the rear
wiper starts simultaneously.
›››
page 136
››› page 64 27
Page 82 of 308

Safety
position must always be maintained with
seat
belt
s fastened while travelling.
● In a side-on collision the side airbags will
not work
if the sensors do not correctly meas-
ure the pressure increase on the interior of
the doors, due to air escaping through the
areas with holes or openings in the door pan-
el.
● Never drive if the interior door panels have
been remov
ed or if the panels have not been
correctly fitted.
● Never drive the vehicle if the loudspeakers
in the door panels
have been removed, un-
less the holes left by the loudspeakers have
been closed properly.
● Always check that the openings are closed
or cov
ered if loudspeakers or other equip-
ment are fitted inside the door panels.
● Occupants of the outer seats must never
carry
any objects or pets in the deployment
space between them and the airbags, or al-
low children or other passengers to travel in
this position. It is also important not to at-
tach any accessories (such as cup holders) to
the doors. This would impair the protection
offered by the side airbags.
● The built-in coat hooks should be used only
for lightweight
clothing. Do not leave any
heavy or sharp-edged objects in the pockets.
● Great forces, such as hard blows or kicks,
must
not be exerted upon the backrest bol-
ster because the system may be damaged. In
this case, the side airbags would not be trig-
gered. ●
Under no cir c
umstances should protective
covers be fitted over seats with side airbags
unless the covers have been approved for use
in your vehicle. Because the airbag deploys
from the side of the backrest, the use of con-
ventional seat covers would obstruct the side
airbag, seriously reducing the airbag's effec-
tiveness.
● Any damage to the original seat upholstery
or around the se
ams of the side airbag units
must be repaired immediately by a special-
ised workshop.
● The airbags provide protection for just one
accident; r
eplace them once they have de-
ployed.
● Any work on the side airbag system or re-
mova
l and installation of the airbag compo-
nents for other repairs (such as removal of
the front seat) should only be performed by a
specialised workshop. Otherwise, faults may
occur during the airbag system operation.
● Do not attempt to modify components of
the airbag sys
tem in any way. Curtain airbags*
Read the additional information carefully
› ›
›
page 20. WARNING
● In order for the head-protection airbags to
pro v
ide their maximum protection, the pre- scribed sitting position must always be main-
tained w
ith se
at belts fastened while travel-
ling.
● For safety reasons, the curtain airbag must
be disab
led in those vehicles fitted with a
screen dividing the interior of the vehicle.
See your technical service to make this ad-
justment.
● There must be no other persons, animals or
obj
ects between the occupants of the outer
seats and the deployment space of the head-
protection airbags so that the head-protec-
tion airbag can deploy completely without re-
striction and provide the greatest possible
protection. Therefore, sun blinds which have
not been expressly approved for use in your
vehicle may not be attached to the side win-
dows
● The built-in coat hooks should be used only
for lightweight
clothing. Do not leave any
heavy or sharp-edged objects in the pockets.
Please, do not hang the clothes on coat hang-
ers.
● The airbags provide protection for just one
accident; r
eplace them once they have de-
ployed.
● Any work on the head-protection airbag
syst
em or removal and installation of the air-
bag components for other repairs (such as re-
moval of the roof lining) should only be per-
formed by a specialised workshop. Other-
wise, faults may occur during the airbag sys-
tem operation.
● Do not attempt to modify components of
the airbag sys
tem in any way.80
Page 83 of 308
Airbag system
●
The side and he a
d airbags are managed
through sensors located in the interior of the
front doors. To ensure the correct operation of
the side and curtain airbags neither the
doors nor the door panels should be modified
in any way (e.g. fitting loudspeakers). If the
front door is damaged, the airbag system
may not work correctly. All work carried out
on the front door must be done in a special-
ised workshop. Deactivating airbags
D e
activ
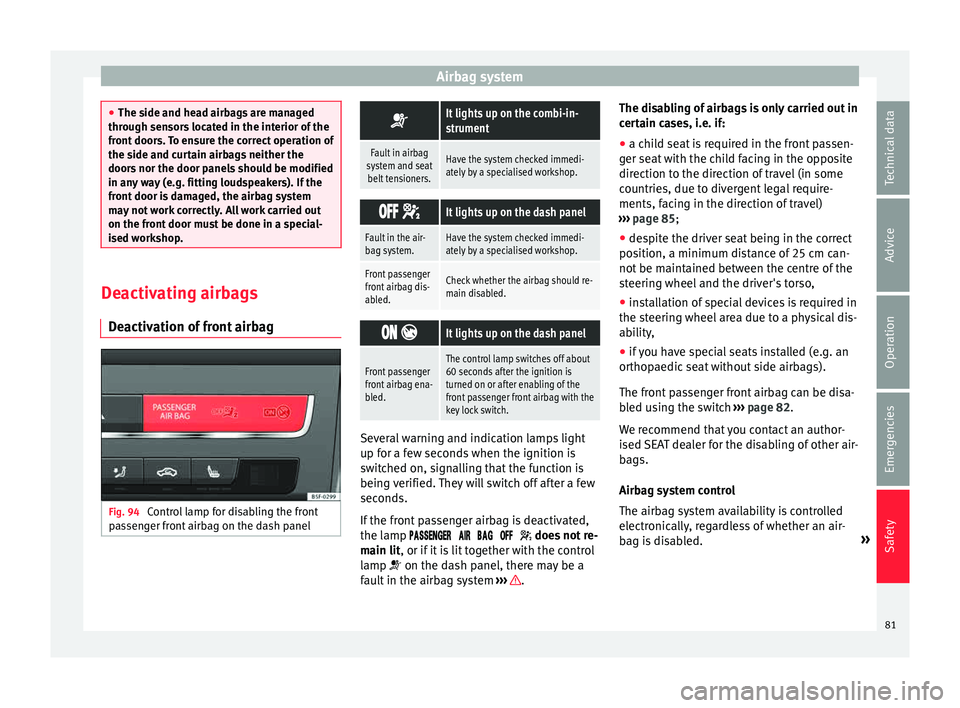
ation of front airbag Fig. 94
Control lamp for disabling the front
p a
s
senger front airbag on the dash panel
It lights up on the combi-in-
strument
Fault in airbag
system and seat belt tensioners.Have the system checked immedi-
ately by a specialised workshop.
It lights up on the dash panel
Fault in the air-
bag system.Have the system checked immedi-
ately by a specialised workshop.
Front passenger
front airbag dis-
abled.Check whether the airbag should re-
main disabled.
It lights up on the dash panel
Front passenger
front airbag ena-
bled.The control lamp switches off about
60 seconds after the ignition is
turned on or after enabling of the
front passenger front airbag with the
key lock switch. Several warning and indication lamps light
up f
or a f
ew sec
onds when the ignition is
switched on, signalling that the function is
being verified. They will switch off after a few
seconds.
If the front passenger airbag is deactivated,
the lamp does not re-
main lit, or if it is lit together with the control
lamp on the dash panel, there may be a
fault in the airbag system ››› .The disabling of airbags is only carried out in
c
er
t
ain cases, i.e. if:
● a child seat is required in the front passen-
ger seat
with the child facing in the opposite
direction to the direction of travel (in some
countries, due to divergent legal require-
ments, facing in the direction of travel)
››› page 85;
● despite the driver seat being in the correct
position, a minimum di
stance of 25 cm can-
not be maintained between the centre of the
steering wheel and the driver's torso,
● installation of special devices is required in
the steerin
g wheel area due to a physical dis-
ability,
● if you have special seats installed (e.g. an
orthopaedic
seat without side airbags).
The front passenger front airbag can be disa-
bled using the switch ››› page 82.
We recommend that you contact an author-
ised SEAT dealer for the disabling of other air-
bags.
Airbag system control
The airbag system availability is controlled
electronically, regardless of whether an air-
bag is disabled. »
81
Technical data
Advice
Operation
Emergencies
Safety
Page 95 of 308
Fuses and bulbsNo.Consumers/Amps
13Driving mode.15
14Air conditioner fan30
17Instrument panel5
18Rear camera7.5
214x4 Haldex Control Unit15
22Trailer15
23Right lights40
24Electric sunroof30
25Left door30
26Heated seats20
28Trailer25
31Left lights40
32Parking aid control unit7.5
33Airbag5
34Reverse switch, clima sensor, electro-
chromic mirror7.5
35Diagnosis, headlight control unit,
headlight adjuster10
36Front camera, Radar10
38Trailer25
39Right door30
4012V socket20
No.Consumers/Amps
42Central locking40
43Interior light30
44Trailer15
45Electric driver's seat15
47Rear window wiper15
49Starter motor; clutch sensor5
53Heated rear window30
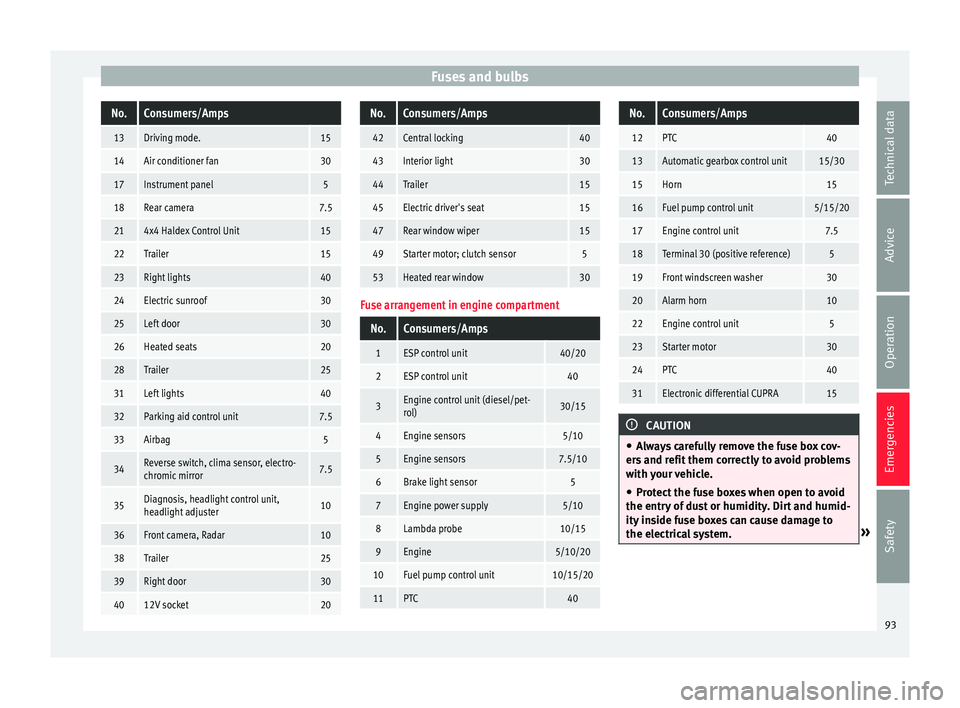
Fuse arrangement in engine compartment
No.Consumers/Amps
1ESP control unit40/20
2ESP control unit40
3Engine control unit (diesel/pet-
rol)30/15
4Engine sensors5/10
5Engine sensors7.5/10
6Brake light sensor5
7Engine power supply5/10
8Lambda probe10/15
9Engine5/10/20
10Fuel pump control unit10/15/20
11PTC40
No.Consumers/Amps
12PTC40
13Automatic gearbox control unit15/30
15Horn15
16Fuel pump control unit5/15/20
17Engine control unit7.5
18Terminal 30 (positive reference)5
19Front windscreen washer30
20Alarm horn10
22Engine control unit5
23Starter motor30
24PTC40
31Electronic differential CUPRA15
CAUTION
● Alw a
ys carefully remove the fuse box cov-
ers and refit them correctly to avoid problems
with your vehicle.
● Protect the fuse boxes when open to avoid
the entry of
dust or humidity. Dirt and humid-
ity inside fuse boxes can cause damage to
the electrical system. » 93
Technical data
Advice
Operation
Emergencies
Safety
Page 124 of 308
Operation
alarm is activated immediately on opening
the door).
● A door is opened.
● The bonnet is opened.
● The rear lid is opened.
● When the ignition is switched on with a
non- authori
sed k
ey.
● When the vehicle battery is disconnected.
● Movement inside the vehicle (in vehicles
with interior monit
oring ››› page 123).
● When the vehicle is towed (in vehicles with
anti-tow sy
stem ››› page 123).
● When the vehicle is raised (in vehicles with
anti-tow sy
stem ››› page 123).
● When the vehicle is transported on a ferry
or by r
ail (vehicles with an anti-tow system or
vehicle interior monitoring ››› page 123).
● When a trailer connected to the anti-theft
alarm sys
tem is disconnected.
How to turn OFF the alarm
Unlock the vehicle with the unlocking button
on the key or turn on the ignition with a valid
key. Note
● Aft er 28 d
ays, the indicator light will be
switched off to prevent the battery from ex-
hausting if the vehicle has been left parked for a long period of time. The alarm system
rem
ain
s activated.
● If, after the audible warning goes off, an-
other monitored ar
ea is accessed (e.g. the
rear lid is opened after a door has been
opened), the alarm is triggered again.
● The anti-theft alarm is not activated when
the vehic
le is locked from within using the
central locking button .
● If the driver door is unlocked mechanically
with the k ey
, only the driver door is unlocked,
the rest of the doors remain locked. Only
when the ignition has been turned on will the
other doors be available - but not unlocked -
and the central lock button will be activated.
● If the vehicle battery is run down or flat
then the anti-theft a
larm will not operate cor-
rectly.
● Vehicle monitoring remains active even if
the batter
y is disconnected or not working for
any reason.
● The alarm is triggered immediately if one of
the batter
y cables is disconnected while the
alarm system is active. Vehicle interior monitoring and anti-
t
o
w sy
stem* It is a monitoring or control function incorpo-
r
at ed in the anti-thef
t alarm* which detects
unauthorised vehicle entry by means of ultra-
sound. Activation
– It is automatically switched on when the
anti-theft al
arm is activated.
Deactivation – Open the vehicle with the key, either me-
chanic
ally or by pressing the button on
the r emot
e c
ontrol. The time period from
when the door is opened until the key is in-
serted in the contact should not exceed 15
seconds, otherwise the alarm will be trig-
gered.
– Press the button on the remote control
tw ic
e.
The volumetric sensor and tilt sen-
sors will be deactivated. The alarm system
remains activated.
The vehicle interior monitoring and the anti-
tow system are automatically switched on
again next time the vehicle is locked.
The vehicle interior monitoring and anti-tow
sensor (tilt sensor) are automatically switch-
ed on when the anti-theft alarm is switched
on. In order to activate it, all the doors and
the rear lid must be closed.
If you wish to switch off the vehicle interior
monitoring and the anti-tow system, it must
be done each time that the vehicle is locked;
if not, they will be automatically switched on.
The vehicle interior monitoring and the anti-
tow system should be switched off if animals
are left inside the locked vehicle (otherwise,
122
Page 125 of 308
Opening and closing
their movements will trigger the alarm) or
when, f or e
x
ample, the vehicle is transported
or has to be towed with only one axle on the
ground.
False alarms
Interior monitoring will only operate correctly
if the vehicle is completely closed. Please ob-
serve related legal requirements.
The following cases may cause a false alarm:
● Open windows (partially or fully).
● Panoramic/tilting sunroof open (partially or
compl
etely).
● Movement of objects inside the vehicle,
such a
s loose papers, items hanging from
the rear vision mirror (air fresheners), etc. Note
● If the v
ehicle is relocked and the alarm is
activated without the volumetric sensor func-
tion, relocking will activate the alarm with all
its functions, except the volumetric sensor.
This function is reactivated when the alarm is
switched on again, unless it is deliberately
switched off.
● If the alarm has been triggered by the volu-
metric sensor
, this will be indicated by a
flashing of the warning lamp on the driver
door when the vehicle is opened. The flash is
different to the flash indicating the alarm is
activated. ●
The v ibr
ation of a mobile phone left inside
the vehicle may cause the vehicle interior
monitoring alarm to trigger, as both sensors
react to movements and shakes inside the ve-
hicle.
● If on activating the alarm, any door or the
rear lid i
s open, only the alarm will be activa-
ted. The vehicle interior monitoring and the
anti-tow system will only be activated once
all the doors are closed (including the rear
lid). Deactivating the vehicle interior moni-
t
orin
g and anti-t
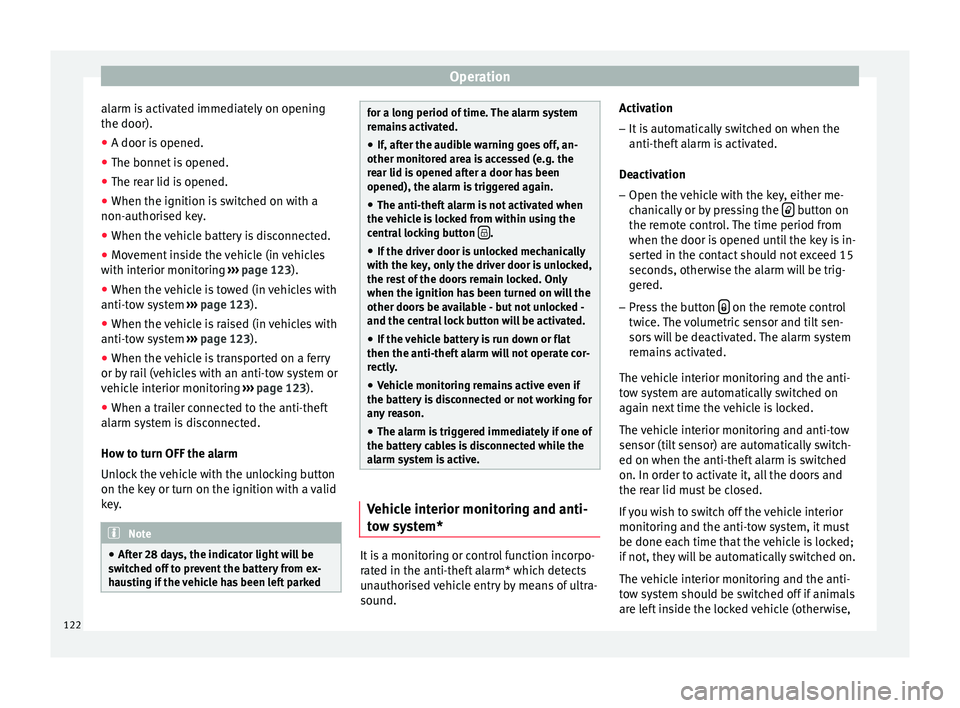
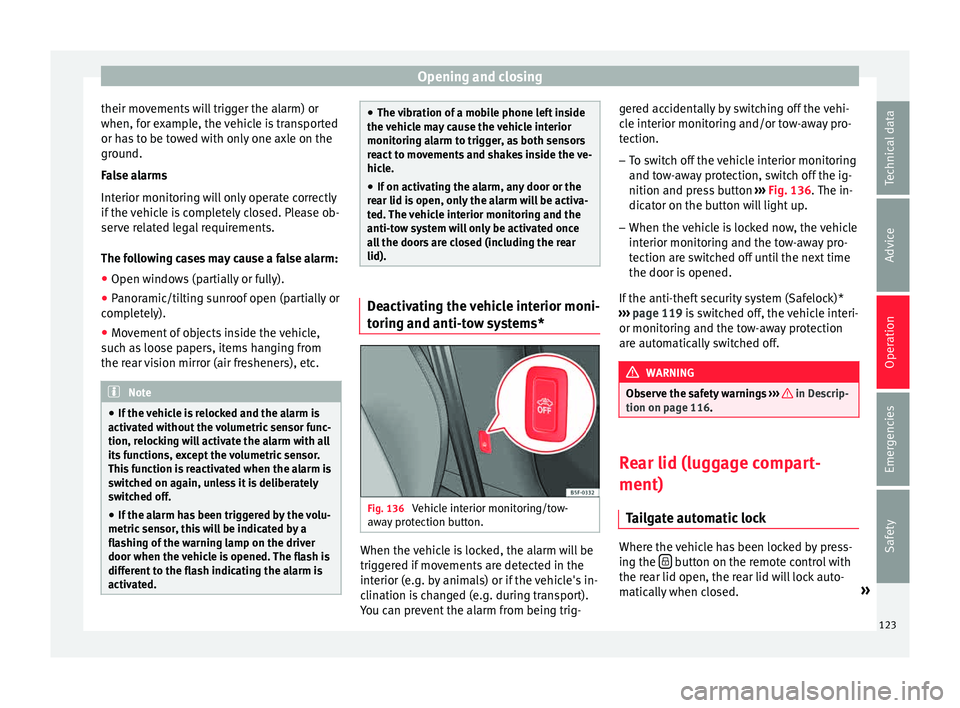
ow systems* Fig. 136
Vehicle interior monitoring/tow-
a w
a
y protection button. When the vehicle is locked, the alarm will be
trig
g
er
ed if movements are detected in the
interior (e.g. by animals) or if the vehicle's in-
clination is changed (e.g. during transport).
You can prevent the alarm from being trig- gered accidentally by switching off the vehi-
cle int
erior monitoring and/or tow-away pro-
tection.
– To switch off the vehicle interior monitoring
and tow-
away protection, switch off the ig-
nition and press button ››› Fig. 136. The in-
dicator on the button will light up.
– When the vehicle is locked now, the vehicle
interior monitorin
g and the tow-away pro-
tection are switched off until the next time
the door is opened.
If the anti-theft security system (Safelock)*
››› page 119 is switched off, the vehicle interi-
or monitoring and the tow-away protection
are automatically switched off. WARNING
Observe the safety warnings ›››
in Descrip-
tion on pag e 116
. Rear lid (luggage compart-
ment)
Tai
l
gate automatic lock Where the vehicle has been locked by press-
in
g the button on the remote control with
the r ear lid open, the r
ear lid will lock auto-
matically when closed. »
123
Technical data
Advice
Operation
Emergencies
Safety
Page 131 of 308

Lights and visibility
●
Alw a
ys use your dipped beam head lights if
it is raining or if visibility is poor. WARNING
If the headlights are set too high and not
u sed c orr
ectly, there is a risk of dazzling or
distracting other road users. This could result
in a serious accident.
● Always make sure that the headlights are
correctly
adjusted. Daytime running lights
The daytime driving lights consist of individu-
al
lights, int
e
grated in the front headlights.
With the daylight driving lights on, only these
lights switch on ››› .
The d a
ytime driv
ing lights switch on every
time the ignition is switched on, if the switch
is in positions or , according to the level
of exterior lighting.
When the light switch is in position , a
light sensor automatically switches dipped
beam on and off (including the control and
instrument lighting) or the daytime driving
lights depending on the level of exterior
lighting. WARNING
● Never driv e w
ith daytime lights if the road
is not well lit due to weather or lighting con-
ditions. Daytime lights do not provide
enough light to illuminate the road properly
or be seen by other road users.
● The rear lights do not come on with the
daytime driv
ing light. A vehicle which does
not have the rear lights on may not be visible
to other drivers in the darkness, in the case
of heavy rain or in conditions of poor visibili-
ty. Turn signal and main beam lever
Read the additional information carefully
› ›
›
page 26
Push the lever all the way down to turn off
the corresponding function.
Convenience turn signals
For the convenience turn signals, move the
lever as far as possible upwards or down-
wards and release the lever. The turn signal
will flash three times.
The convenience turn signals are activated
and deactivated in the Easy Connect system
via the key and the
Set
up function button
› ›
›
page 110. In vehicles that do not have the correspond-
ing menu, this
function can be deactivated in
a specialised workshop. WARNING
Improper or lack of use of the turn signals, or
for g
etting to deactivate them can confuse
other road users. This could result in a seri-
ous accident.
● Always give warning when you are going to
chan
ge lane, overtake or when turning, acti-
vating the turn signal in good time.
● As soon as you have finished changing
lane, ov
ertaking or turning, switch the turn
signal off. WARNING
Incorrect use of the headlights may cause ac-
cident s
and serious injury, as the main beam
may distract or dazzle other drivers. Note
● If the c on
venience turn signals are operat-
ing (three flashes) and the other convenience
turn signals are switched on, the active part
stops flashing and only flashes once in the
new part selected.
● The turn signal only works when the igni-
tion is sw
itched on. The hazard warning
lights also work when the ignition is switch-
ed off. » 129
Technical data
Advice
Operation
Emergencies
Safety
Page 132 of 308
Operation
●
If a tr ai
ler turn signal malfunctions, the
control lamp will stop flashing (trailer turn
signals) and the vehicle turn signal will flash
at double speed.
● The main beam headligh
ts can only be
switched on if the dipped beam headlights
are already on.
● In cold or damp weather conditions, the
headlight
s, tail lights and turn signals may
mist up inside temporarily. This is normal and
in no way effects the useful life of the vehicle
lighting system. Automatic dipped beam control
*The automatic dipped beam control is merely
int
ended a
s
an aid and is not able to recog-
nise all driving situations.
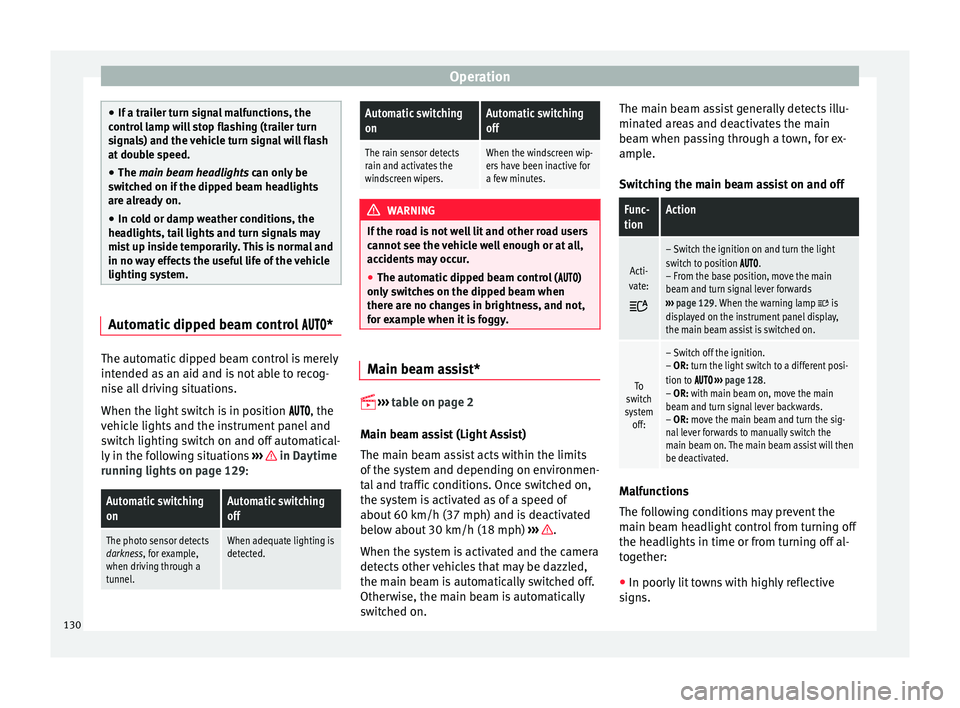
When the light switch is in position , the
vehicle lights and the instrument panel and
switch lighting switch on and off automatical-
ly in the following situations ››› in Daytime
ru nnin
g light
s on page 129:
Automatic switching
onAutomatic switching
off
The photo sensor detects
darkness, for example,
when driving through a
tunnel.When adequate lighting is
detected.
Automatic switching
onAutomatic switching
off
The rain sensor detects
rain and activates the
windscreen wipers.When the windscreen wip-
ers have been inactive for
a few minutes. WARNING
If the road is not well lit and other road users
cannot see the
vehicle well enough or at all,
accidents may occur.
● The automatic dipped beam control ( )
only sw
itches on the dipped beam when
there are no changes in brightness, and not,
for example when it is foggy. Main beam assist*
››
›
table on page 2
Main beam assist (Light Assist)
The main beam assist acts within the limits
of the system and depending on environmen-
tal and traffic conditions. Once switched on,
the system is activated as of a speed of
about 60 km/h (37 mph) and is deactivated
below about 30 km/h (18 mph) ››› .
When the sy s
t
em is activated and the camera
detects other vehicles that may be dazzled,
the main beam is automatically switched off.
Otherwise, the main beam is automatically
switched on. The main beam assist generally detects illu-
minated ar
eas and deactivates the main
beam when passing through a town, for ex-
ample.
Switching the main beam assist on and off
Func-
tionAction
Acti-
vate:
– Switch the ignition on and turn the light
switch to position .
– From the base position, move the main
beam and turn signal lever forwards
››› page 129. When the warning lamp
is
displayed on the instrument panel display,
the main beam assist is switched on.
To
switch
system off:
– Switch off the ignition.
– OR: turn the light switch to a different posi-
tion to
››› page 128.
– OR: with main beam on, move the main
beam and turn signal lever backwards.
– OR: move the main beam and turn the sig-
nal lever forwards to manually switch the
main beam on. The main beam assist will then
be deactivated. Malfunctions
The f
o
l
lowing conditions may prevent the
main beam headlight control from turning off
the headlights in time or from turning off al-
together:
● In poorly lit towns with highly reflective
signs.
130
Page 134 of 308

Operation
Function “Coming home” This function may be connected/disconnec-
ted thr
ough the r
adio menu. The “Coming
Home” and/or “Leaving Home” delay time
may also be set (default: 30 sec).
Vehicle with
halogen
headlightsIn the “Coming Home” function, the day-
time running lights (DRL), the rear side
lights and the licence plate lights are
turned on.
Vehicle with
full-LED
headlightsIn the “Coming Home” function, the dip-
ped beams and the daytime running
lights (DRL), the rear side lights and the
licence plate lights are switched on. Automatic* activation of “Coming Home”
F
or
v
ehicles with a light and rain sensor (rota-
ry light switch in position ).
● Switch off the engine and remove the key
from the ignition with the r
otary light switch
in position ›››
page 25.
● The automatic “Coming Home” function is
only activ
e when the light sensor detects
darkness.
● When the car door is opened, the “Coming
Home” lighting come
s on.
Manual “Coming Home” activation
For vehicles with a light and rain sensor (rota-
ry light switch without position ). ●
Switc
h off the engine and remove the key
from the ignition.
● Activate the headlight flashers for approxi-
mately
1 second.
● Activated for any position of the rotary light
switc
h.
● When the car door is opened, the “Coming
Home” lighting come
s on. The headlights are
turned off 60 seconds after the vehicle door
is opened.
Deactivation
● If no door has been closed, they go out au-
tomatic
ally after 60 seconds.
● After the last door has been closed, the
headlights
will be switched off after the
“Coming Home” delay (as established in the
radio menu) has elapsed.
● On turning the light switch to position
›››
page 25.
● When the ignition is switched on (when
star
ting the engine).
Function “Leaving Home” The “Leaving Home” function is only availa-
b
l
e f
or vehicles with a light and rain sensor
(rotary light switch in position ).
This function may be connected/disconnec-
ted through the radio menu. The “Leaving Home” function switch-off delay may also be
set (defau
lt: 30 sec).
Vehicle with
halogen
headlightsIn the “Leaving Home” function, the day-
time running lights (DRL), the rear side
lights and the licence plate lights are
switched on.
Vehicle with
full-LED
headlightsIn the “Leaving Home” function, the dip-
ped beams, the daytime running lights
(DRL), the rear side lights and the li-
cence plate lights are switched on. Activation
● When the vehicle is unlocked using the re-
mot e c
ontr
ol.
● The “Leaving Home” function is only activa-
ted when the rot
ary light switch is in position
and the light sensor detects darkness.
Deactivation
● When the “Leaving Home” delay period
ends (def
ault: 30 sec).
● When the vehicle is locked using the re-
mote contr
ol.
● When the light control is switched into a
position other th
an .
● With the ignition is switched on.
132
Page 139 of 308
Lights and visibility
Windscreen wiper functionsWindscreen wiper performance in different sit-
uations
If the vehicle is at a
standstillThe activated position provision-
ally changes to the previous posi-
tion.
During automatic
wipe
The air conditioner comes on for
approximately 30 seconds in air
recirculation mode to prevent the
smell of the windscreen washer
fluid entering the inside the vehi-
cle.
For the interval wipe
Intervals between wipes depend
on the vehicle's speed. The high-
er the vehicle speed the shorter
the intervals. Heated windscreen washer jets
The he
atin
g on
ly thaws the frozen jets, it
does not thaw the water in the washer hoses.
When the ignition is switched on the heated
windscreen washer jets automatically adjust
the heat depending on the ambient tempera-
ture.
Headlight wash/wipe system
The headlight washers/wipers clean the
headlight lenses.
After the ignition is switched on, the first and
every fifth time the windscreen washer is
switched on, the headlights are also washed. Therefore, the windscreen wiper lever should
be pul
led towards the steering wheel when
the dipped beam or main beam are on. Any
incrusted dirt (such as insects) should be
cleaned regularly (e.g. when refuelling).
To ensure the headlight washers work cor-
rectly in winter, any snow which has got into
the bumper jet supports should be cleaned
away. If necessary, remove snow with an anti-
icing spray. Note
The wiper will try to wipe away any obstacles
that ar
e on the windscreen. The wiper will
stop moving if the obstacle blocks its path.
Remove the obstacle and switch the wiper
back on again. Rain sensor*
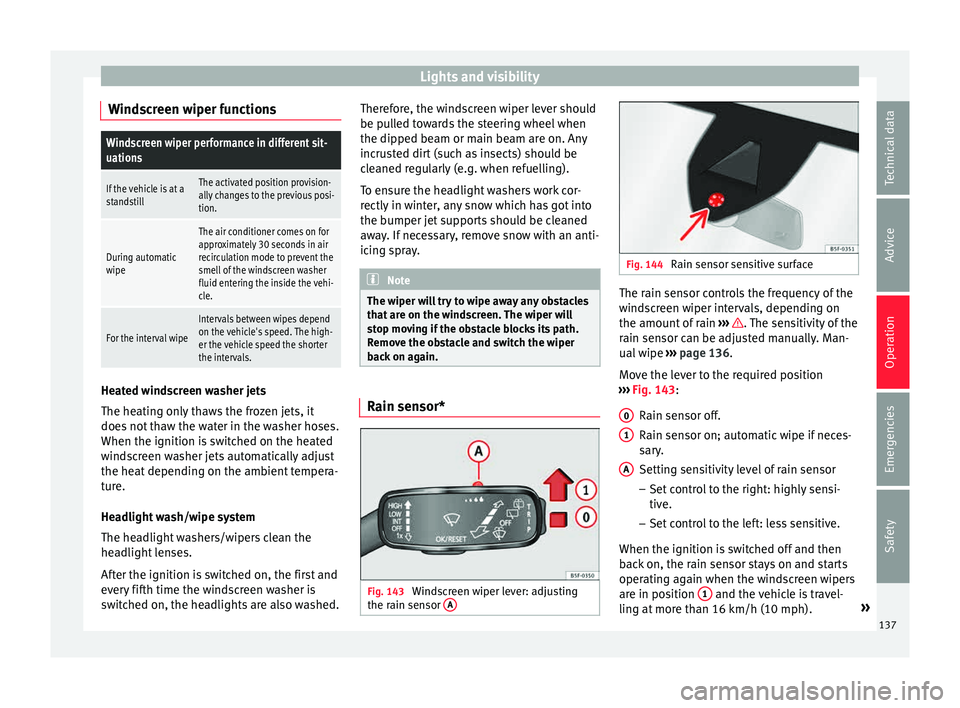
Fig. 143
Windscreen wiper lever: adjusting
the r ain sen
sor A Fig. 144
Rain sensor sensitive surface The rain sensor controls the frequency of the
w
ind
s
creen wiper intervals, depending on
the amount of rain ››› . The sensitivity of the
r ain sen
sor c
an be adjusted manually. Man-
ual wipe ››› page 136.
Move the lever to the required position
››› Fig. 143:
Rain sensor off.
Rain sensor on; automatic wipe if neces-
sary.
Setting sensitivity level of rain sensor
– Set control to the right: highly sensi-
tive.
– Set control to the left: less sensitive.
When the ignition is switched off and then
back on, the rain sensor stays on and starts
operating again when the windscreen wipers
are in position 1 and the vehicle is travel-
lin g at
mor
e than 16 km/h (10 mph). »
0 1
A
137
Technical data
Advice
Operation
Emergencies
Safety