audio Seat Leon 5D 2016 MEDIA SYSTEM PLUS - NAVI SYSTEM - NAVI SYSTEM PLUS
[x] Cancel search | Manufacturer: SEAT, Model Year: 2016, Model line: Leon 5D, Model: Seat Leon 5D 2016Pages: 96, PDF Size: 2.6 MB
Page 40 of 96
Audio and Media Mode
switch on/off the mobile hotspot and ac-
c e
ss the Configuration of the WLAN net-
work.
● Press the Configuration function b
utton
to configure the WLAN network.
Function button: function
Mobile hotspot: To switch the WLAN network on/off.
Security level: To select the code type (encryption),
choose WAP2 or No security level . An 8-charac-
ter network key is automatically generated.
Network key: Network key automatically generated.
Press the function button to manually change the
network key. The network key must have a minimum
of 8 characters and a maximum of 63.
SSID: Name of the Infotainment system WLAN net-
work.
Do not send network name (SSID): Activate the check-
box to deactivate the visibility of the WLAN network. To save the changes made to the mobile hot-
s
pot
c
onfiguration, press the STORE button.DVD video mode 3 Only available for the model: Navi System Plus
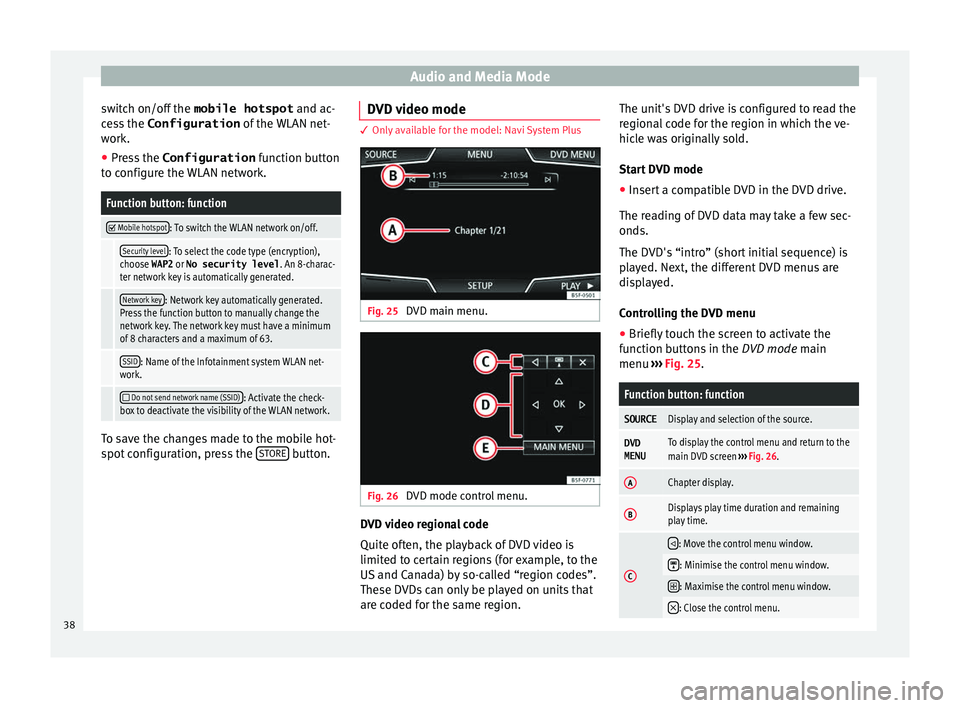
Fig. 25
DVD main menu. Fig. 26
DVD mode control menu. DVD video regional code
Quit
e of
t
en, the playback of DVD video is
limited to certain regions (for example, to the
US and Canada) by so-called “region codes”.
These DVDs can only be played on units that
are coded for the same region. The unit's DVD drive is configured to read the
region
al code for the region in which the ve-
hicle was originally sold.
Start DVD mode
● Insert a compatible DVD in the DVD drive.
The rea
ding of DVD data may take a few sec-
onds.
The DVD's “intro” (short initial sequence) is
played. Next, the different DVD menus are
displayed.
Controlling the DVD menu
● Briefly touch the screen to activate the
function b
uttons in the DVD mode main
menu ››› Fig. 25.
Function button: function
SOURCEDisplay and selection of the source.
DVD
MENUTo display the control menu and return to the
main DVD screen ››› Fig. 26.
AChapter display.
BDisplays play time duration and remaining
play time.
C
: Move the control menu window.
: Minimise the control menu window.
: Maximise the control menu window.
: Close the control menu.
38
Page 41 of 96
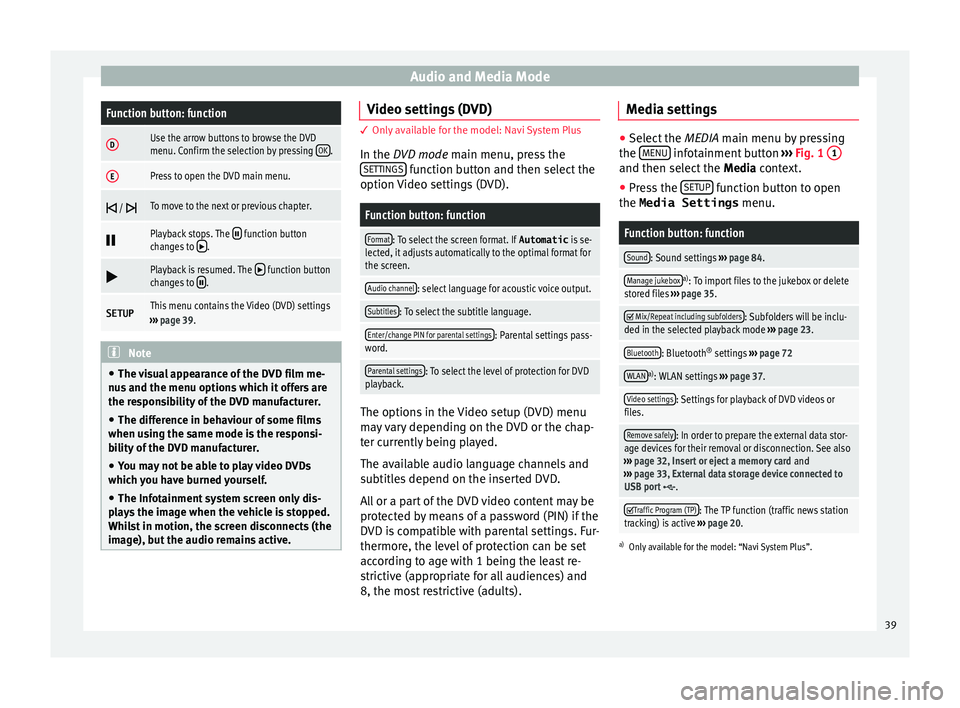
Audio and Media ModeFunction button: function
DUse the arrow buttons to browse the DVD
menu. Confirm the selection by pressing
OK.
EPress to open the DVD main menu.
/ To move to the next or previous chapter.
Playback stops. The function button
changes to .
Playback is resumed. The function button
changes to .
SETUPThis menu contains the Video (DVD) settings
››› page 39. Note
● The v i
sual appearance of the DVD film me-
nus and the menu options which it offers are
the responsibility of the DVD manufacturer.
● The difference in behaviour of some films
when usin
g the same mode is the responsi-
bility of the DVD manufacturer.
● You may not be able to play video DVDs
which y
ou have burned yourself.
● The Infotainment system screen only dis-
pla
ys the image when the vehicle is stopped.
Whilst in motion, the screen disconnects (the
image), but the audio remains active. Video settings (DVD)
3 Only available for the model: Navi System Plus
In the D
VD mode main menu, press the
SETTINGS function button and then select the
option V ideo settin
gs (DVD).
Function button: function
Format: To select the screen format. If Automatic is se-
lected, it adjusts automatically to the optimal format for
the screen.
Audio channel: select language for acoustic voice output.
Subtitles: To select the subtitle language.
Enter/change PIN for parental settings: Parental settings pass-
word.
Parental settings: To select the level of protection for DVD
playback. The options in the Video setup (DVD) menu
m
a
y
vary depending on the DVD or the chap-
ter currently being played.
The available audio language channels and
subtitles depend on the inserted DVD.
All or a part of the DVD video content may be
protected by means of a password (PIN) if the
DVD is compatible with parental settings. Fur-
thermore, the level of protection can be set
according to age with 1 being the least re-
strictive (appropriate for all audiences) and
8, the most restrictive (adults). Media settings ●
Select the MEDIA main menu b y
pressing
the MENU infotainment button
››› Fig. 1 1 and then select the
Media context.
● Press the SETUP function button to open
the Media Settings menu.
Function button: function
Sound: Sound settings ››› page 84.
Manage jukeboxa)
: To import files to the jukebox or delete
stored files ››› page 35.
Mix/Repeat including subfolders: Subfolders will be inclu-
ded in the selected playback mode ››› page 23.
Bluetooth: Bluetooth ®
settings ››› page 72
WLANa)
: WLAN settings ››› page 37.
Video settings: Settings for playback of DVD videos or
files.
Remove safely: In order to prepare the external data stor-
age devices for their removal or disconnection. See also
››› page 32, Insert or eject a memory card and
››› page 33, External data storage device connected to
USB port
.
Traffic Program (TP): The TP function (traffic news station
tracking) is active ››› page 20.
a)
Only available for the model: “Navi System Plus”.
39
Page 42 of 96
Audio and Media Mode
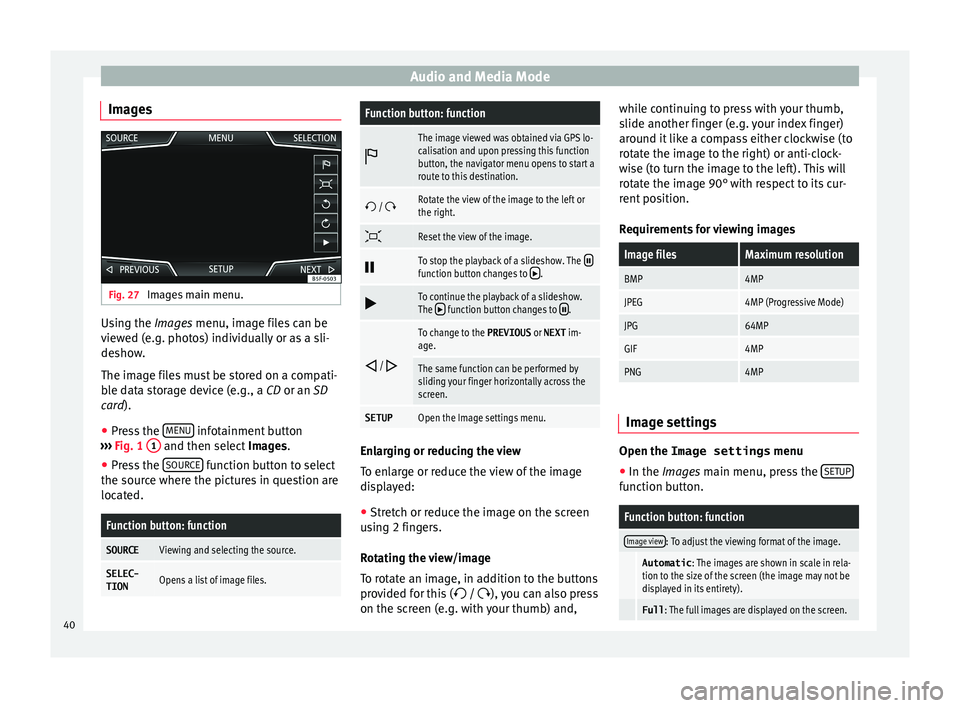
Images Fig. 27
Images main menu. Using the Ima
ge
s menu, image files can be
viewed (e.g. photos) individually or as a sli-
deshow.
The image files must be stored on a compati-
ble data storage device (e.g., a CD or an SD
card).
● Press the MENU infotainment button
› ›
›
Fig. 1 1 and then select
Imag
e s.
● Press the SOURCE function button to select
the sour c
e wher
e the pictures in question are
located.
Function button: function
SOURCEViewing and selecting the source.
SELEC-
TIONOpens a list of image files.
Function button: function
The image viewed was obtained via GPS lo-
calisation and upon pressing this function
button, the navigator menu opens to start a
route to this destination.
/ Rotate the view of the image to the left or
the right.
Reset the view of the image.
To stop the playback of a slideshow. The function button changes to .
To continue the playback of a slideshow.
The function button changes to .
/
To change to the PREVIOUS
or NEXT im-
age.
The same function can be performed by
sliding your finger horizontally across the
screen.
SETUPOpen the Image settings menu. Enlarging or reducing the view
T
o en
l
arge or reduce the view of the image
displayed:
● Stretch or reduce the image on the screen
usin
g 2 fingers.
Rotating the view/image
To rotate an image, in addition to the buttons
provided for this ( / ), you can also press
on the screen (e.g. with your thumb) and, while continuing to press with your thumb,
slide another fing
er (e.g. your index finger)
around it like a compass either clockwise (to
rotate the image to the right) or anti-clock-
wise (to turn the image to the left). This will
rotate the image 90° with respect to its cur-
rent position.
Requirements for viewing images
Image filesMaximum resolution
BMP4MP
JPEG4MP (Progressive Mode)
JPG64MP
GIF4MP
PNG4MP Image settings
Open the Image settings
menu
● In the Ima ges main menu, press the S
ETUP function button.
Function button: function
Image view: To adjust the viewing format of the image.
Automatic
: The images are shown in scale in rela-
tion to the size of the screen (the image may not be
displayed in its entirety).
Full : The full images are displayed on the screen.40
Page 43 of 96
Audio and Media ModeFunction button: function
Display time: To adjust the display time of the images
during a slideshow.
Repeat slideshow: The active slideshow will be repeated
indefinitely. 41
Page 51 of 96
NavigationFunction button: function
3D
Map display in three dimensions (bird's
eye view).
Buildings are also displayed in three di-
mensions. The places of interest and
well-known buildings are shown in detail
and in colour.
a)To display the destination on the map.
a)To display the route on the map.
Auto / Day /
NightTo change between day and night format.
Split screenPress to display the split screen
››› page 49.
POIDisplay points of interest on the map.
a)
This function button is only displayed with route guidance ac-
tivated.
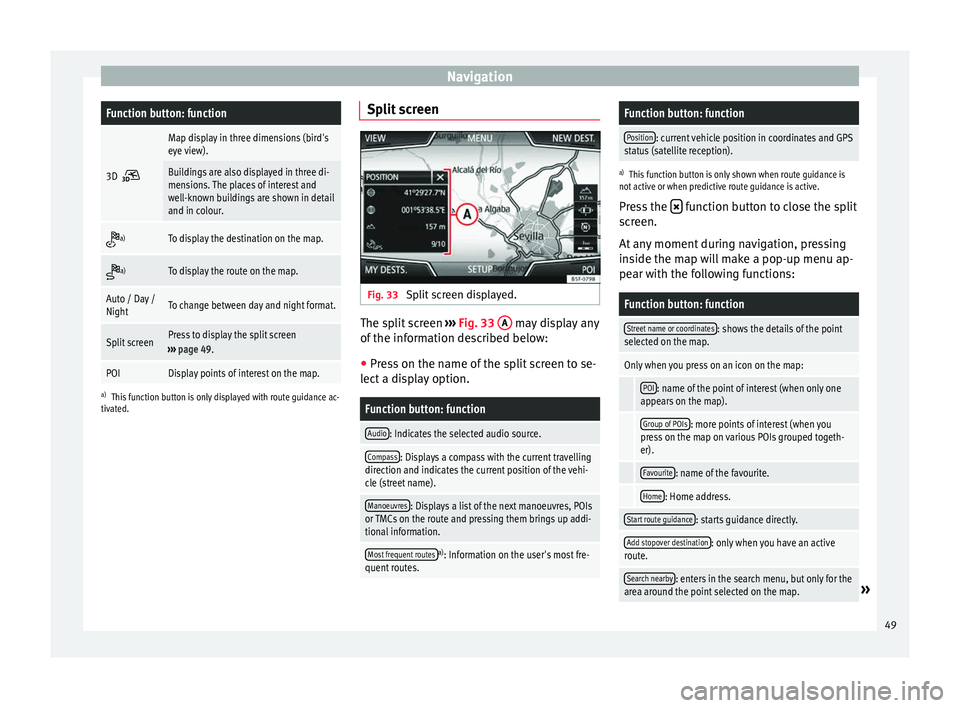
Split screen Fig. 33
Split screen displayed. The split screen
››
›
Fig. 33 A may display any
of the inf
orm
ation described below:
● Press on the name of the split screen to se-
lect a di
splay option.
Function button: function
Audio: Indicates the selected audio source.
Compass: Displays a compass with the current travelling
direction and indicates the current position of the vehi-
cle (street name).
Manoeuvres: Displays a list of the next manoeuvres, POIs
or TMCs on the route and pressing them brings up addi-
tional information.
Most frequent routesa) : Information on the user's most fre-
quent routes.
Function button: function
Position: current vehicle position in coordinates and GPS
status (satellite reception).
a) This function button is only shown when route guidance is
not active or when predictive route guidance is active.
Press the function button to close the split
sc r
een.
At any moment during navigation, pressing
inside the map will make a pop-up menu ap-
pear with the following functions:
Function button: function
Street name or coordinates: shows the details of the point
selected on the map.
Only when you press on an icon on the map:
POI: name of the point of interest (when only one
appears on the map).
Group of POIs: more points of interest (when you
press on the map on various POIs grouped togeth-
er).
Favourite: name of the favourite.
Home: Home address.
Start route guidance: starts guidance directly.
Add stopover destination: only when you have an active
route.
Search nearby: enters in the search menu, but only for the
area around the point selected on the map.» 49
Page 56 of 96
NavigationFunction button: function
Manage memory: To modify saved destinations.
Sort contacts: To select the sequential order of the en-
tries in the phonebook that have (postal) addresses,
see also ››› page 46.
Define home address: To assign or edit a home address,
see also ››› page 48.
Delete my points of interest (POI): To delete the points of
interest stored in the destination memory ››› page 52.
Update my POIs: To update the stored points of interest
››› page 52.
Import destinations (SD/USB): To import electronic busi-
ness cards (vCards) into the destination memory
››› page 51.
Delete user data: To delete the stored destinations
(e.g., the Last destinations or the Destina-
tion memory ).
Navigation announcements: To make adjustments to naviga-
tion announcements.
Volume: To adjust the volume for driving recommen-
dations.
Entertainment fading (nav. announcements): Adjusting the
volume of the active audio source during navigation
instructions.
Navigation announcementsb) : To adjust driving recom-
mendations during route guidance.
Comprehensive: Detailed driving recommendations
and other directions.
Brief: Some recommendations and directions are
muted.
Function button: function
Congestion only: Recommendations are only given
in the event of congestion along the route (e.g.
traffic jam).
No voice guidance during call: No audible driving in-
structions will be given during a telephone conversa-
tion.
Warning: My points of interest: Audible announcement
when nearing a point of interest.
Fuel options: To make adjustments relating to fuel.
Select preferred fuel station: The selected petrol station
mark will be shown before other points of interest in
the search.
Fuel warning: The warning to refuel is active.
If the fuel level reaches the reserve level, the corre-
sponding warning is generated which permits the
search for petrol stations.
Version information: Information on the stored navigation
data.
Speed limits: Shows the speed limits, depending on the
road, for the current country.
Advanced setup: To make advanced adjustments to the
navigation.
Time display: displayed during route guidance.
Estimated time of arrival: The estimated time of arrival
at the final destination is displayed.
Duration: The estimated travelling time to the final
destination is displayed.
Status line: displayed during route guidance.
Function button: function
Destination: The distance calculated to final desti-
nation is displayed.
Next stopover: The calculated distance until next
stopover is displayed.
Note: National border crossed: Displays the speed lim-
its of the country in question when crossing the bor-
der.
Demo mode: When Demo mode is activated and
route guidance is started, virtual guidance to the en-
tered destination can be initiated ››› page 52.
Define demo mode starting point: if demo mode is acti-
vated, a fictitious starting point for virtual route
guidance can be defined when the vehicle is sta-
tionary.
Waypoint modeb) : To start Offroad navigation.
a) This function depends on the country.
b) Only available for the model: “Navi System Plus”.
Navigation in Offroad mode*
Introduction 3 Only
available for the model: Navi System Plus
O
ffroad* navigation is a function for offroad
driving that provides directions in “non-digi-
tised areas” at low speeds.
Non-digitised areas are areas about which
the system does not have information for the
54
Page 65 of 96
Telephone management system (PHONE)
●
If y
ou wish to connect a device to the tele-
phone management system via Bluetooth ®
technology, consult the safety warnings in its
instruction manual. Only use compatible
Bluetooth ®
devices. Areas where special regulations apply
Switch off the mobile telephone and the mo-
bi
l
e Bluetooth function in places with a risk
of explosion. In the majority of cases, these
places are signposted, but not always clearly
››› in General information on page 62.
They
inc lude, f
or example:
● the vicinity of chemical pipelines and tanks
● The lower decks of boats and ferries.
● In the proximity of vehicles that run on liq-
uid gas
(such as propane or butane).
● places where the air is laden with chemi-
cals
or particles such as flour, dust or metal
powder.
● all other places where the vehicle engine
must
be switched off. WARNING
Switch off the mobile phone in areas with a
risk of
explosion! The mobile telephone can
automatically connect to the mobile tele-
phone network again if it loses the Blue-
tooth ®
connection to the telephone manage-
ment system. CAUTION
In areas where special regulations apply or
the use of mo
bile telephones is prohibited,
both the telephone and the telephone man-
agement system must be switched off. The
radiation produced by the mobile telephone
when switched on may interfere with sensi-
tive technical and medical equipment, possi-
bly resulting in a malfunction or damage to
the equipment. Bluetooth
® Bluetooth
®
tec
hno
logy allows a mobile tele-
phone to be connected to your vehicle's tele-
phone management system. In order to use
the telephone management system with a
mobile telephone with Bluetooth ®
technolo-
gy, it is first necessary to pair them.
Some Bluetooth ®
mobile telephones detect
and automatically connect when turning on
the ignition if a connection has been previ-
ously established. For this to take place the
telephone must be switched on and its Blue-
tooth ®
function activated, and there must be
no active Bluetooth ®
connection with other
devices.
Bluetooth ®
connections are free.
Bluetooth ®
is a registered trademark of
Bluetooth ®
SIG, Inc. Bluetooth profiles
®
When a mobi
le phone is connected to the tel-
ephone management system, a data ex-
change takes place via one of the Bluetooth ®
profiles.
● Hands-free Bluetooth profile (HFP): If a mo-
bi
le telephone is connected to the telephone
manager through the HFP, calls can be made
wirelessly through the hands-free device.
This function also requires other Bluetooth
profiles such as the phonebook download
and instant messaging.
● Audio profile (A2DP): Bluetooth profi
le for
transmitting audio signals with stereo quali-
ty. This function can also connect other addi-
tional Bluetooth profiles for viewing tracks
and for controlling playback on the mobile
device. Note
To prevent them from being heard through
the spe ak
ers, the button and mobile tele-
phone alert tones must be disconnected.
Where necessary, disconnect the headset
from the mobile telephone you wish to con-
nect to the system. 63
Page 67 of 96
Telephone management system (PHONE)
been accepted in the mobile phone. The du-
r ation of
the lo
ading process depends on the
amount of data stored on the mobile tele-
phone. After loading, the data will be availa-
ble on the Infotainment system.
Pairing and connection of mobile telephones
You can pair up to 20 mobile telephones to
the Infotainment system, but there can only
be two mobile phones simultaneously con-
nected as hands-free, and a third device as
BT audio at any time.
When the Infotainment system is switched
on, it automatically connects to the last con-
nected mobile telephone. If it is not possible
to connect to this mobile telephone, the tele-
phone management system will try to auto-
matically connect to the next mobile tele-
phone on the list of paired devices.
The maximum range of the Bluetooth ®
is ap-
proximate. 10 metres. The active Bluetooth ®
connection disconnects if this distance is ex-
ceeded. The connection is automatically re-
established as soon as the device is once
again within Bluetooth ®
range.
If the maximum number of paired devices is
reached and you wish to pair another one to
the system, it will automatically replace the
one least used recently. If you wish to replace
it with another one, the user must erase it be-
forehand. To do so: ●
Pres s the Setup button on the device while
in telephone mode.
● Press the function button Bluetooth setup .
● Activate the P
air
ed dev
ices function button.
● In the list of paired devices, press the function button next to the mobile telephone
t
o be del
et
ed and then press Delete to con-
firm the process. Note
● It m a
y be necessary to confirm the phone-
book data transfer request on the mobile tel-
ephone.
● Check that there are no requests pending
accept
ance in your mobile phone. If there are,
this could block some of the functions in the
PHONE menu. Description of the telephone
m
an
ag
ement system
Introduction Some functions and setup can only be per-
f
ormed when the
v
ehicle is stopped and are
not available on all mobile telephones.
With the help of the telephone manager, up
to 3 mobile telephones can be connected to
the Infotainment system via the Bluetooth
profiles (for example, one used as a Blue- tooth-audio player and/or another two as
hands-fr
ee telephones). Note
● Us in
g a mobile telephone inside the vehicle
may provoke noise in the speakers.
● Some networks may not recognise all lan-
guage ch
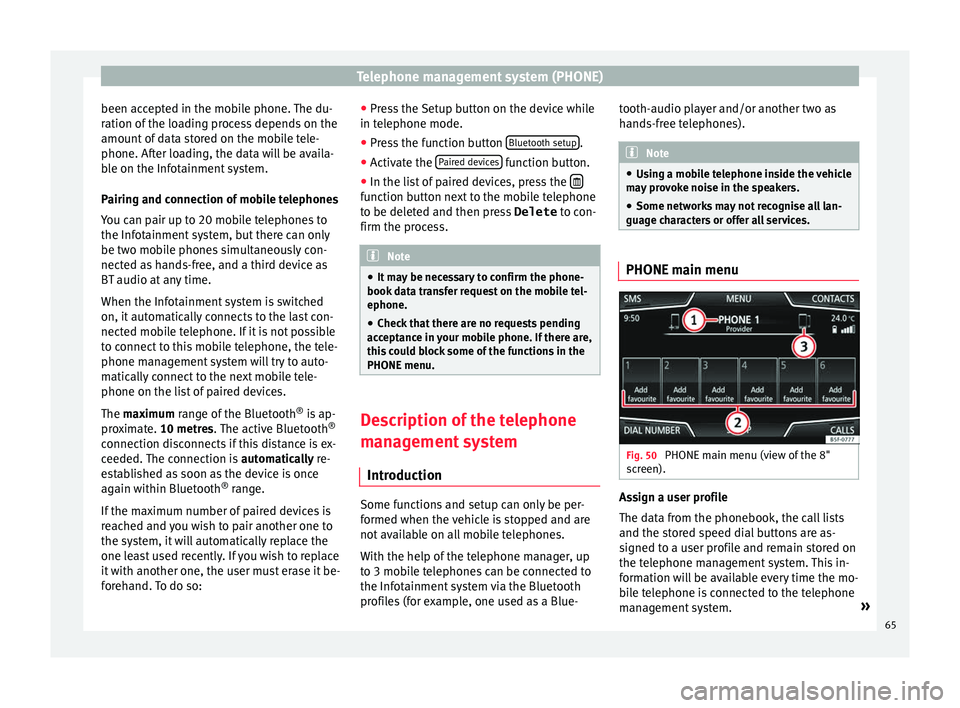
aracters or offer all services. PHONE main menu
Fig. 50
PHONE main menu (view of the 8"
s c
r
een). Assign a user profile
The d
at
a fr
om the phonebook, the call lists
and the stored speed dial buttons are as-
signed to a user profile and remain stored on
the telephone management system. This in-
formation will be available every time the mo-
bile telephone is connected to the telephone
management system. »
65
Page 69 of 96
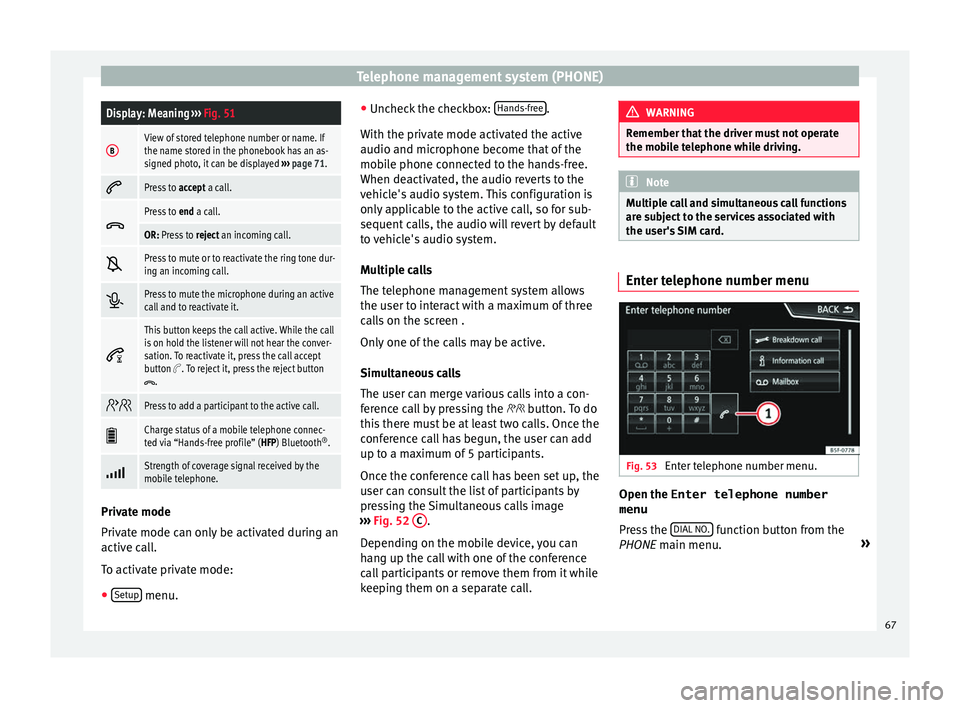
Telephone management system (PHONE)Display: Meaning
››› Fig. 51
BView of stored telephone number or name. If
the name stored in the phonebook has an as-
signed photo, it can be displayed ››› page 71.
Press to
accept a call.
Press to
end a call.
OR: Press to reject an incoming call.
Press to mute or to reactivate the ring tone dur-
ing an incoming call.
Press to mute the microphone during an active
call and to reactivate it.
This button keeps the call active. While the call
is on hold the listener will not hear the conver-
sation. To reactivate it, press the call accept
button
. To reject it, press the reject button.
Press to add a participant to the active call.
Charge status of a mobile telephone connec-
ted via “Hands-free profile” (HFP) Bluetooth
®
.
Strength of coverage signal received by the
mobile telephone.
Private mode
Priv
at
e mode c
an only be activated during an
active call.
To activate private mode:
● Setup menu. ●
Unc hec
k
the checkbox: Hands-free .
W ith the priv
at
e mode activated the active
audio and microphone become that of the
mobile phone connected to the hands-free.
When deactivated, the audio reverts to the
vehicle's audio system. This configuration is
only applicable to the active call, so for sub-
sequent calls, the audio will revert by default
to vehicle's audio system.
Multiple calls
The telephone management system allows
the user to interact with a maximum of three
calls on the screen .
Only one of the calls may be active.
Simultaneous calls
The user can merge various calls into a con-
ference call by pressing the button. To do
this there must be at least two calls. Once the
conference call has begun, the user can add
up to a maximum of 5 participants.
Once the conference call has been set up, the
user can consult the list of participants by
pressing the Simultaneous calls image
››› Fig. 52 C .
D ependin
g on the mo
bile device, you can
hang up the call with one of the conference
call participants or remove them from it while
keeping them on a separate call. WARNING
Remember that the driver must not operate
the mob i
le telephone while driving. Note
Multiple call and simultaneous call functions
are s ub
ject to the services associated with
the user's SIM card. Enter telephone number menu
Fig. 53
Enter telephone number menu. Open the
Enter telephone number
menu
Pr e
s
s the DIAL NO. function button from the
PHONE m ain menu. »
67
Page 74 of 96
Telephone management system (PHONE)
Bluetooth ®
settin g
s In the PHONE main menu, pr
e ss the SETUP function button and then the
Bluetooth func-
tion butt on.
Function button: function
Bluetooth: Press to deactivate Bluetooth
®
. Disconnects
all active connections.
Visibility: Activation and deactivation of Bluetooth ®
visi-
bility.
Visible: Bluetooth ®
visibility is active.
Hidden: Bluetooth ®
visibility is deactivated. Blue-
tooth ®
visibility must be active for the external
pairing of a Bluetooth ®
device with the Infotain-
ment system. If you have a Bluetooth audio device
active and playing, the visibility is automatically
set to Hidden .
Name: Viewing and changing the name the Bluetooth ®
of the Infotainment system. This will be the name dis-
played to other Bluetooth ®
devices.
Paired devices: Displays paired devices. To disconnect
and connect Bluetooth ®
devices and Bluetooth ®
pro-
files.
Find devices: Search for visible Bluetooth ®
devices within
the range of the Infotainment system. The maximum
range is approx. 10 metres.
Bluetooth audio (A2DP/AVRCP): This function must be ac-
tive if it is necessary to connect an external audio source
via Bluetooth ®
to the Infotainment system. ››› page 34. User profile settings
In the PHONE main menu, pr
e
ss the SETUP function button and then the
User pr
ofi le func-
tion butt on.
Function button: function
Manage favourites: Editing speed dial buttons.
Speed dial button in use : Press to delete the stored
number.
Speed dial button free : Press to assign a number
from the phonebook to the speed dial button in
question.
Mailbox number: To enter or edit the voicemail number.
Sort by: To set the order of appearance of the entries in
the phonebook ( Forename and surname or vice-versa).
Import contacts: Press to import the phonebook of the
connected telephone, or to update the imported phone-
book.
Reminder: remember your mobile phone: If there is already
an active Bluetooth ®
connection with another mobile
telephone when turning off the ignition, the following
message appears: “Remember your mobile
phone ”.
Show pictures for contactsa)
: If phonebook contacts have
been stored with a photograph, it can be displayed on
the speed dial buttons, on the call lists and in the pho-
nebook.
a) Depending on the mobile phone. Note
Some telephones need to be restarted to re-
down lo
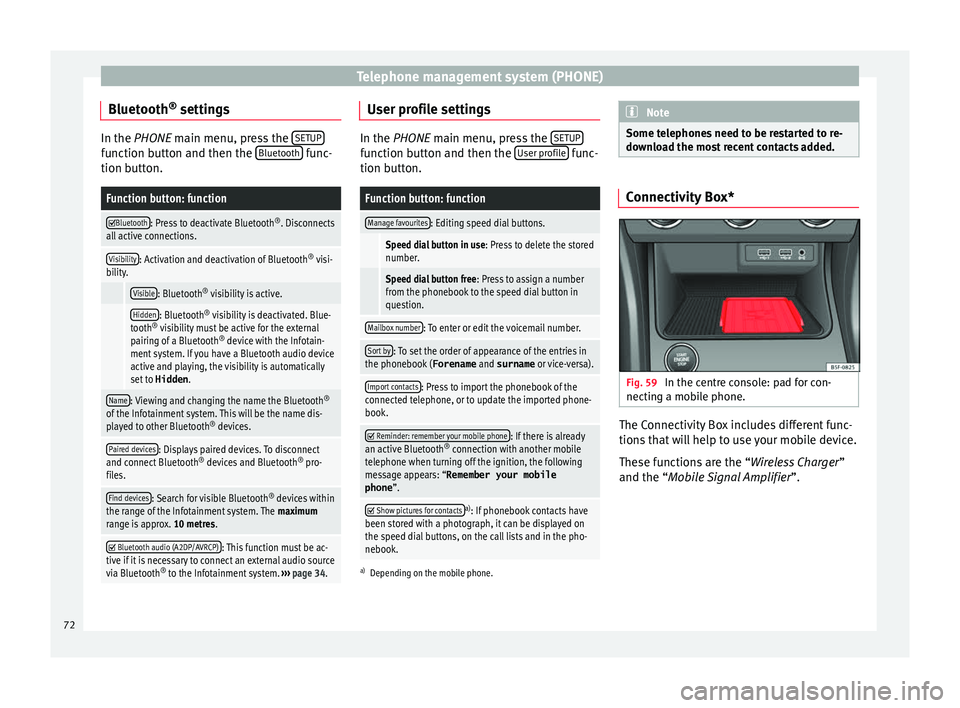
ad the most recent contacts added. Connectivity Box*
Fig. 59
In the centre console: pad for con-
nectin g a mo
b
ile phone. The Connectivity Box includes different func-
tion
s
th
at will help to use your mobile device.
These functions are the “Wireless Charger ”
and the “Mobile Signal Amplifier”.
72