key Seat Leon 5D 2016 MEDIA SYSTEM TOUCH - COLOUR
[x] Cancel search | Manufacturer: SEAT, Model Year: 2016, Model line: Leon 5D, Model: Seat Leon 5D 2016Pages: 52, PDF Size: 1.5 MB
Page 9 of 52
Introduction
●
Lightly pr
essing the buttons or briefly
pressing the touchscreen is sufficient to op-
erate the unit.
● It is possible that not all the functions and
fu
nction buttons are available as the software
of the unit responds to the specific character-
istics of each market. A missing function but-
ton on the screen is not the result of an error
in the unit.
● Due to country-specific legislation, certain
fu
nctions cannot be selected on the screen
when the vehicle is travelling above a certain
speed.
● Using a mobile telephone inside the vehicle
can c
ause noise in the speakers.
● There may be restrictions on the use of
Bluetooth dev
ices in some countries. Infor-
mation is available from the local authorities.
● In some vehicles equipped with a parking
dis
tance warning system, the volume of the
audio source is automatically lowered when
the gear is engaged.
● If the steering wheel has a voice control
butt
on , it will not work in this radio mod-
el, so it has no function in relation to the ra-
dio. Rotary knobs and buttons
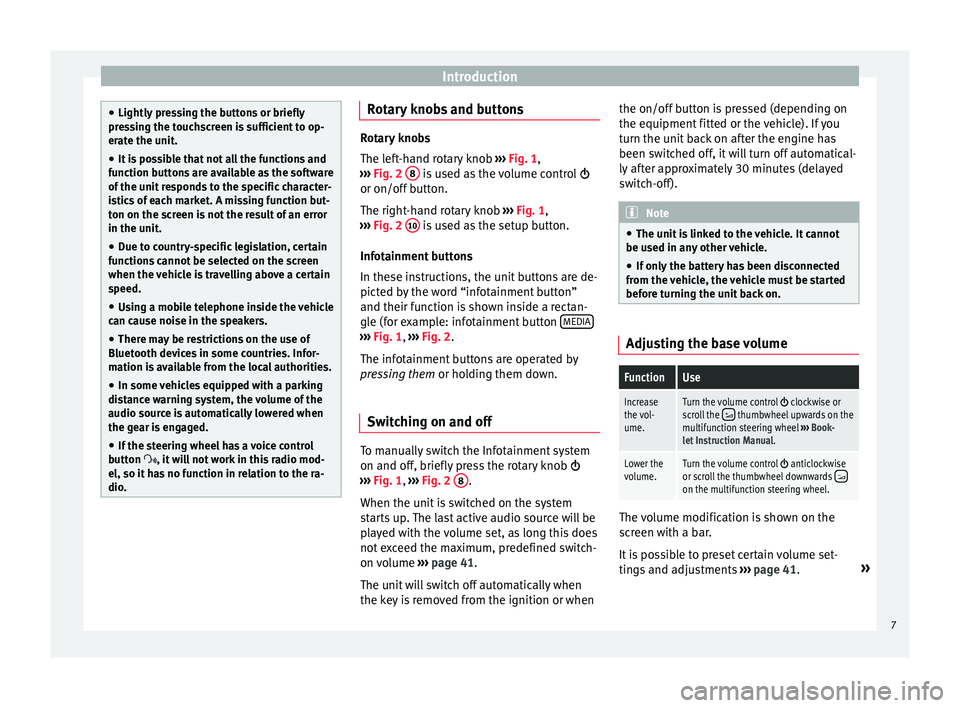
Rotary knobs
The l
ef
t-hand rotary knob ››› Fig. 1,
››› Fig. 2 8 is used as the volume control
or on/off b
utton.
The right-hand rotary knob ››› Fig. 1,
››› Fig. 2 10 is used as the setup button.
Inf ot
ainment buttons
In these instructions, the unit buttons are de-
picted by the word “infotainment button”
and their function is shown inside a rectan-
gle (for example: infotainment button MEDIA ›››
Fig. 1, ›
››
Fig. 2
.
The infotainment buttons are operated by
pressing them or holding them down.
Switching on and off To manually switch the Infotainment system
on and off
, briefly
press the rotary knob
››› Fig. 1, ›››
Fig. 2 8 .
When the u nit
is switched on the system
starts up. The last active audio source will be
played with the volume set, as long this does
not exceed the maximum, predefined switch-
on volume ›››
page 41.
The unit will switch off automatically when
the key is removed from the ignition or when the on/off button is pressed (depending on
the equipment fitt
ed or the vehicle). If you
turn the unit back on after the engine has
been switched off, it will turn off automatical-
ly after approximately 30 minutes (delayed
switch-off). Note
● The u nit
is linked to the vehicle. It cannot
be used in any other vehicle.
● If only the battery has been disconnected
from the
vehicle, the vehicle must be started
before turning the unit back on. Adjusting the base volume
FunctionUse
Increase
the vol-
ume.Turn the volume control clockwise or
scroll the thumbwheel upwards on the
multifunction steering wheel ››› Book-
let Instruction Manual.
Lower the
volume.Turn the volume control anticlockwise
or scroll the thumbwheel downwards on the multifunction steering wheel. The volume modification is shown on the
s
c
reen with a bar.
It is possible to preset certain volume set-
tings and adjustments ›››
page 41. »
7
Page 15 of 52
Radio
Digital radio mode (DAB, DAB+ and
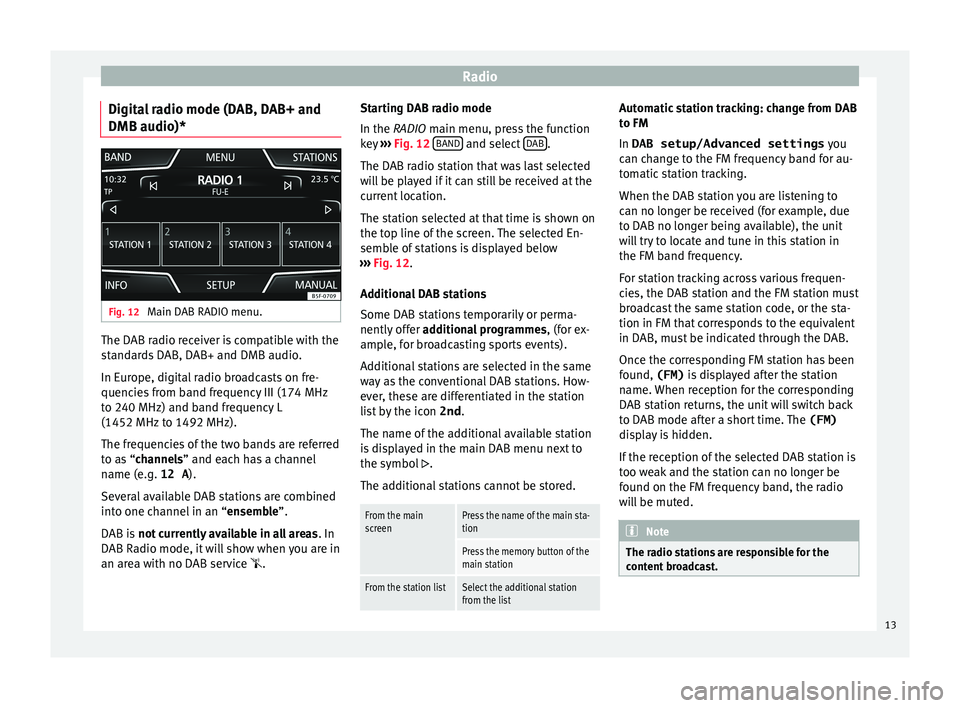
DMB audio)* Fig. 12
Main DAB RADIO menu. The DAB radio receiver is compatible with the
s
t
andards DAB, DAB+ and DMB audio.
In Europe, digital radio broadcasts on fre-
quencies from band frequency III (174 MHz
to 240 MHz) and band frequency L
(1452 MHz to 1492 MHz).
The frequencies of the two bands are referred
to as “channels” and each has a channel
name (e.g. 12 A ).
Several available DAB stations are combined
into one channel in an “ensemble”.
DAB is not currently available in all areas . In
DAB Radio mode, it will show when you are in
an area with no DAB service . Starting DAB radio mode
In the RADIO main menu, pr
ess the function
key ››› Fig. 12 BAND and select
D
AB .
The D AB r
adio station that was last selected
will be played if it can still be received at the
current location.
The station selected at that time is shown on
the top line of the screen. The selected En-
semble of stations is displayed below
››› Fig. 12.
Additional DAB stations
Some DAB stations temporarily or perma-
nently offer additional programmes , (for ex-
ample, for broadcasting sports events).
Additional stations are selected in the same
way as the conventional DAB stations. How-
ever, these are differentiated in the station
list by the icon 2nd.
The name of the additional available station
is displayed in the main DAB menu next to
the symbol .
The additional stations cannot be stored.
From the main
screenPress the name of the main sta-
tion
Press the memory button of the
main station
From the station listSelect the additional station
from the list Automatic station tracking: change from DAB
t
o FM
In
DAB setup/Advanced settings you
can change to the FM frequency band for au-
tomatic station tracking.
When the DAB station you are listening to
can no longer be received (for example, due
to DAB no longer being available), the unit
will try to locate and tune in this station in
the FM band frequency.
For station tracking across various frequen-
cies, the DAB station and the FM station must
broadcast the same station code, or the sta-
tion in FM that corresponds to the equivalent
in DAB, must be indicated through the DAB.
Once the corresponding FM station has been
found, (FM) is displayed after the station
name. When reception for the corresponding
DAB station returns, the unit will switch back
to DAB mode after a short time. The (FM)
display is hidden.
If the reception of the selected DAB station is
too weak and the station can no longer be
found on the FM frequency band, the radio
will be muted. Note
The radio stations are responsible for the
c ont
ent broadcast. 13
Page 25 of 52
Media
● Pr e
ss the Safely remove USB device func-
tion button. After the system has closed the
USB device, a message will appear on the
screen indicating that the device can be re-
moved.
● Now the data storage device can be discon-
nected. Note
● Do not c
onnect an external media player at
the same time to play music via Bluetooth ®
and via the USB port with the Infotain-
ment system, as this could cause playback
limitations.
● If the external player is an Apple device™,
it c
annot be simultaneously connected by
USB and by Bluetooth.
● If a connected device is not recognised, dis-
connect
all the connected devices and try
connecting the device again.
● Do not use memory card adaptors, USB ex-
ten
sion cords or USB hubs! Connect external audio source via
Bluet
ooth® In Bluetooth audio mode, audio files from an
e
xt
ernal audio source that is connected via
Bluetooth ®
, for example a mobile telephone
(Bluetooth audio playback), can be played
over the vehicle speakers. Conditions
● The Bluetooth ®
audio sourc
e must support
the A2DP Bluetooth ®
profile.
● In the Bluetooth Settings menu the
Bluetooth Audio (A2DP/AVRCP)
function mus
t be on.
Starting Bluetooth ®
audio transmission
● Activate Bluetooth ®
vi
sibility on the exter-
nal Bluetooth ®
audio source (e.g., mobile tel-
ephone).
● Lower the base volume on the Infotainment
sys
tem.
● Press the Infotainment MEDIA button.
● Click on the MEDIA function button and se-
l ect
BT Audio .
● Press Find new dev
ic
e in order to connect an
e xt
ernal Bluetooth ®
audio source for the first
time ››› page 27.
● OR: Select a Bluetooth ®
e
xternal audio
source from the list.
● Please refer to the instructions on the
sc
reen of the Infotainment system and on the
Bluetooth ®
audio source regarding the rest
of the procedure.
You may still need to manually start playback
on the Bluetooth ®
source.
When playback on the Bluetooth ®
audio
source is stopped, the Infotainment system
remains in Bluetooth ®
Audio mode. Controlling playback
The ext
ent to which the Bluetooth ®
audio
source can be controlled via the Infotainment
system depends on the connected Blue-
tooth ®
audio source.
The available functions will depend on the
Bluetooth ®
Audio profile that the connected
external player supports.
With media players that support the AVRCP
Bluetooth ®
profile, playback on the Blue-
tooth ®
audio source can be automatically
started or stopped when the unit is switched
to Bluetooth ®
Audio mode or to a different
audio source. In addition, it is possible to
view or change the track via the Infotainment
system. Note
● Due t
o the large number of different Blue-
tooth audio sources available, it is not possi-
ble to guarantee fault-free operation of all
functions described here.
● Deactivate the service and warning sounds
of a c
onnected Bluetooth audio source (for
example, the key tones of the mobile tele-
phone) to avoid interference noise and
anomalies in the operation.
● To play music, do not link the external me-
dia p
layer simultaneously to Bluetooth and
the USB interface of the infotainment system,
as this can cause limitations during playback. » 23
Page 30 of 52
Telephone management system (PHONE)*
Pair and connect a mobile telephone
t o the Inf
otainment systemIn order to manage a mobile telephone via
the Inf
ot
ainment system, it is necessary to
pair both devices once.
For your safety, we recommend you make the
link when the vehicle is stationary. In some
countries it is not possible to perform the
pairing with the vehicle running.
Conditions
You must guarantee the following setup in
the mobile phone and the Infotainment sys-
tem:
● The ignition must be switched on.
● The Bluet ooth®
f
unction of the mobile tele-
phone and the Infotainment system must be
active as well as visibility.
● The keypad lock on the mobile telephone
mu
st be deactivated.
Follow instructions in the manual for the mo-
bile telephone.
After turning on the ignition, the visibility of
the Bluetooth ®
function activates.
During the pairing process it is necessary to
enter data via the mobile telephone's key-
pad. To do so, the mobile telephone must be
ready. Starting mobile telephone pairing
● Make sure the Bluetooth function of the
mob
ile device is active and visible.
● Press the PHONE button on the Infotain-
ment sy
stem.
● Press the Find tel
ephone function button.
OR:
● Press the PHONE button on the Infotain-
ment sy
stem.
● Press the Setup function button.
● Press the Sel
ect
telephone function button
and then Find .
OR:
● Press the PHONE unit button of the Infotain-
ment sy
stem.
● Press the Setup function button.
● Press the Bluet
ooth function button.
● Press the Find dev
ic
es function button.
OR:
● Connect from the mobile device itself.
The n ame of
the Bluetooth function of your
Infotainment system will be displayed in Setup >
Bluet
ooth >
Name
› ›
›
page 34.
The search process can take up to 1 minute.
On the screen the system will dynamically update the names of the Bluetooth devices
fou
nd.
As soon as the search is completed, the
names of the Bluetooth ®
devices found are
displayed on-screen.
● In the Infotainment system select the mo-
bi
le telephone to which you want to connect
from the list of Bluetooth devices found. In
certain circumstances, it is possible that to
finish the connection between the two devi-
ces, you must enter additional data in the
mobile telephone and Infotainment system.
● If necessary, confirm the link to the mobile
tel
ephone.
● Use your mobile telephone to enter and
confirm
your PIN code, as indicated in the
display of the infotainment system.
OR:
● Compare the PIN code shown on the dis-
pl
ay of the Infotainment system with that
shown on the mobile telephone. If they
match, confirm on both devices.
The infotainment system and the mobile tele-
phone will now be connected to each other.
When the pairing has been finalized correct-
ly, the PHONE main menu will appear. The
phonebook and call lists stored in the mobile
phone will be loaded once the requests have
been accepted in the mobile phone. The du-
ration of the loading process depends on the
28
Page 32 of 52
Telephone management system (PHONE)*
the Infotainment system. The next time that
the mo b
ile telephone is connected (e.g. on
the next journey) the phonebook is updated
automatically.
If any entries in the mobile phonebook have
been modified while connected, a manual
update of the phonebook data can be initi-
ated from the User profile settings
menu ››› page 35.
Telephone management can store a maxi-
mum of 4 user profiles for mobile tele-
phones. If you wish to link/connect another
mobile phone, the oldest user profile will au-
tomatically be replaced.
Telephone management system function but-
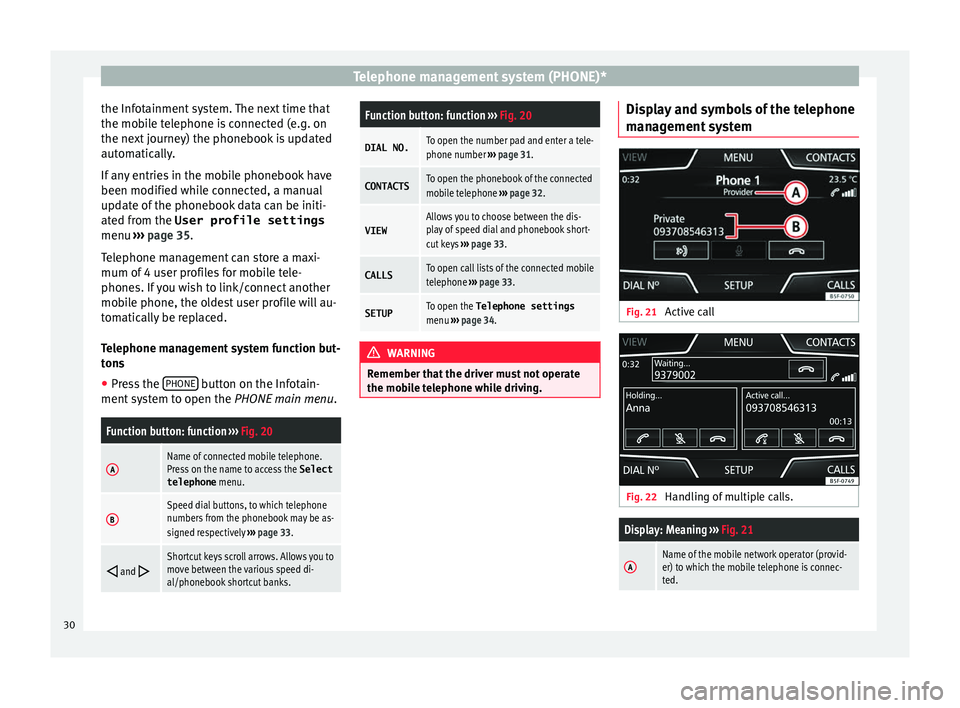
tons ● Press the PHONE button on the Infotain-
ment sy
stem to open the PHONE main menu.
Function button: function ››› Fig. 20
AName of connected mobile telephone.
Press on the name to access the Select
telephone menu.
BSpeed dial buttons, to which telephone
numbers from the phonebook may be as-
signed respectively ››› page 33.
and Shortcut keys scroll arrows. Allows you to
move between the various speed di-
al/phonebook shortcut banks.
Function button: function
››› Fig. 20
DIAL NO.To open the number pad and enter a tele-
phone number ››› page 31.
CONTACTSTo open the phonebook of the connected
mobile telephone ››› page 32.
VIEWAllows you to choose between the dis-
play of speed dial and phonebook short-
cut keys ››› page 33.
CALLSTo open call lists of the connected mobile
telephone ››› page 33.
SETUPTo open the Telephone settings
menu ››› page 34. WARNING
Remember that the driver must not operate
the mo b
ile telephone while driving. Display and symbols of the telephone
m
an
agement system Fig. 21
Active call Fig. 22
Handling of multiple calls.
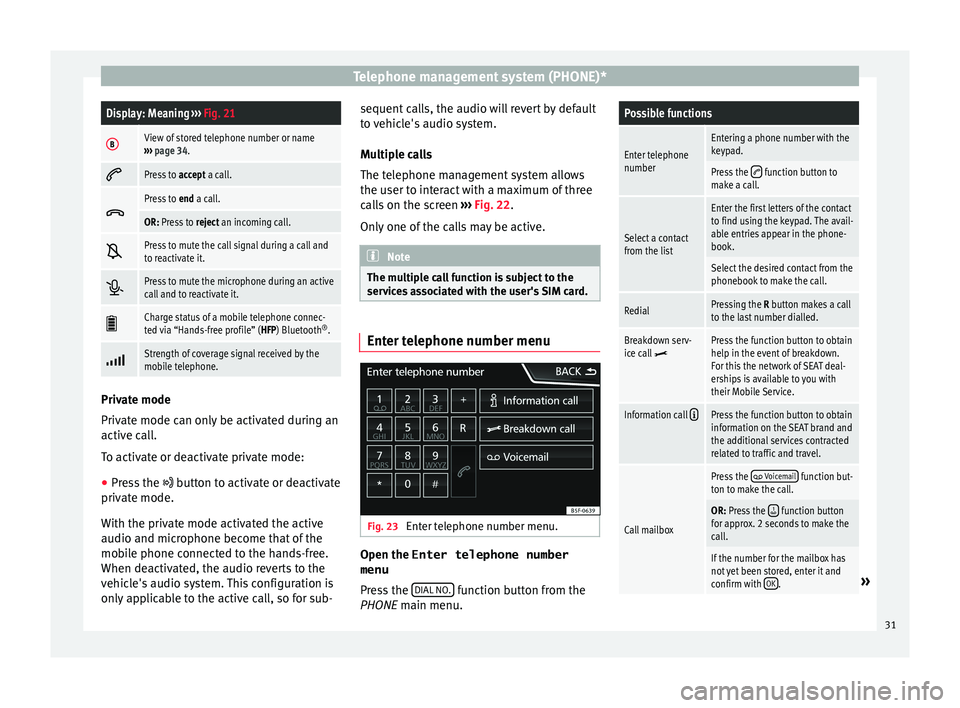
Display: Meaning ››› Fig. 21
AName of the mobile network operator (provid-
er) to which the mobile telephone is connec-
ted.30
Page 33 of 52
Telephone management system (PHONE)*Display: Meaning
››› Fig. 21
BView of stored telephone number or name
››› page 34.
Press to
accept a call.
Press to
end a call.
OR: Press to reject an incoming call.
Press to mute the call signal during a call and
to reactivate it.
Press to mute the microphone during an active
call and to reactivate it.
Charge status of a mobile telephone connec-
ted via “Hands-free profile” (HFP) Bluetooth
®
.
Strength of coverage signal received by the
mobile telephone.
Private mode
Priv
at
e mode can only be activated during an
active call.
To activate or deactivate private mode:
● Press the butt
on to activate or deactivate
private mode.
With the private mode activated the active
audio and microphone become that of the
mobile phone connected to the hands-free.
When deactivated, the audio reverts to the
vehicle's audio system. This configuration is
only applicable to the active call, so for sub- sequent calls, the audio will revert by default
to
vehicle's audio system.
Multiple calls
The telephone management system allows
the user to interact with a maximum of three
calls on the screen ››› Fig. 22.
Only one of the calls may be active. Note
The multiple call function is subject to the
ser v
ices associated with the user's SIM card. Enter telephone number menu
Fig. 23
Enter telephone number menu. Open the
Enter telephone number
menu
Pr e
ss the DIAL NO. function button from the
PHONE m ain menu.
Possible functions
Enter telephone
numberEntering a phone number with the
keypad.
Press the function button to
make a call.
Select a contact
from the list
Enter the first letters of the contact
to find using the keypad. The avail-
able entries appear in the phone-
book.
Select the desired contact from the
phonebook to make the call.
RedialPressing the R button makes a call
to the last number dialled.
Breakdown serv-
ice call Press the function button to obtain
help in the event of breakdown.
For this the network of SEAT deal-
erships is available to you with
their Mobile Service.
Information call Press the function button to obtain
information on the SEAT brand and
the additional services contracted
related to traffic and travel.
Call mailbox
Press the Voicemail function but-
ton to make the call.
OR: Press the function button
for approx. 2 seconds to make the
call.
If the number for the mailbox has
not yet been stored, enter it and
confirm with OK
.» 31
Page 35 of 52
Telephone management system (PHONE)*
Call Menu (call lists) Fig. 26
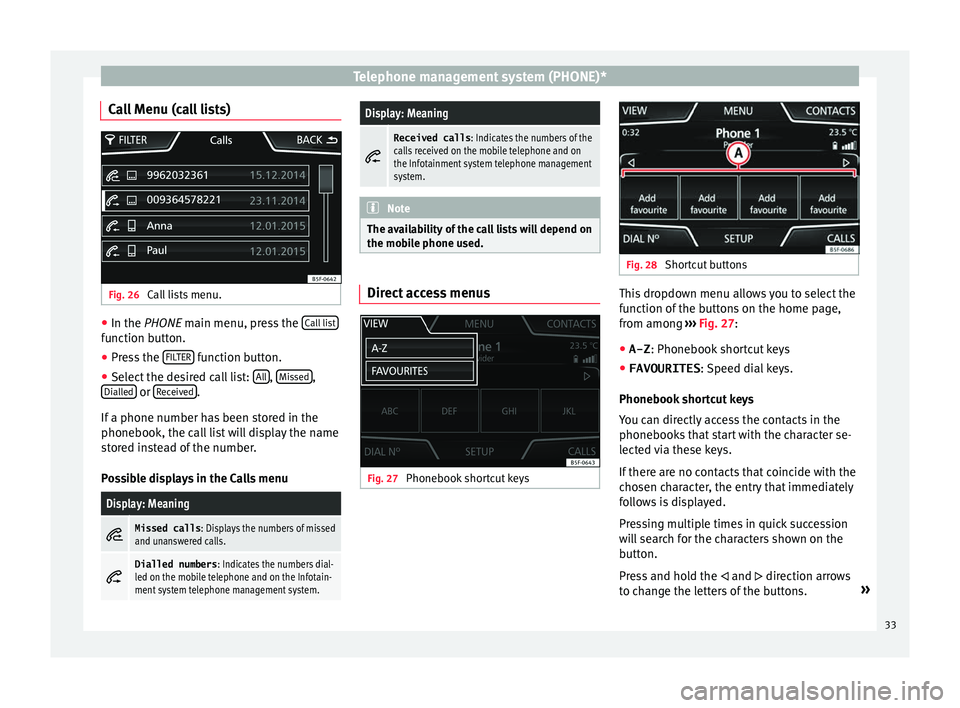
Call lists menu. ●
In the PHONE m ain menu, pr
ess the Call list function button.
● Press the FIL
TER function button.
● Select the desired call list: A
l
l ,
Mi
s sed ,
Di al
led or
R
ec eived .
If a phone number h
as been stored in the
phonebook, the call list will display the name
stored instead of the number.
Possible displays in the Calls menu
Display: Meaning
Missed calls
: Displays the numbers of missed
and unanswered calls.
Dialled numbers
: Indicates the numbers dial-
led on the mobile telephone and on the Infotain-
ment system telephone management system.
Display: Meaning
Received calls
: Indicates the numbers of the
calls received on the mobile telephone and on
the Infotainment system telephone management
system. Note
The availability of the call lists will depend on
the mo b
ile phone used. Direct access menus
Fig. 27
Phonebook shortcut keys Fig. 28
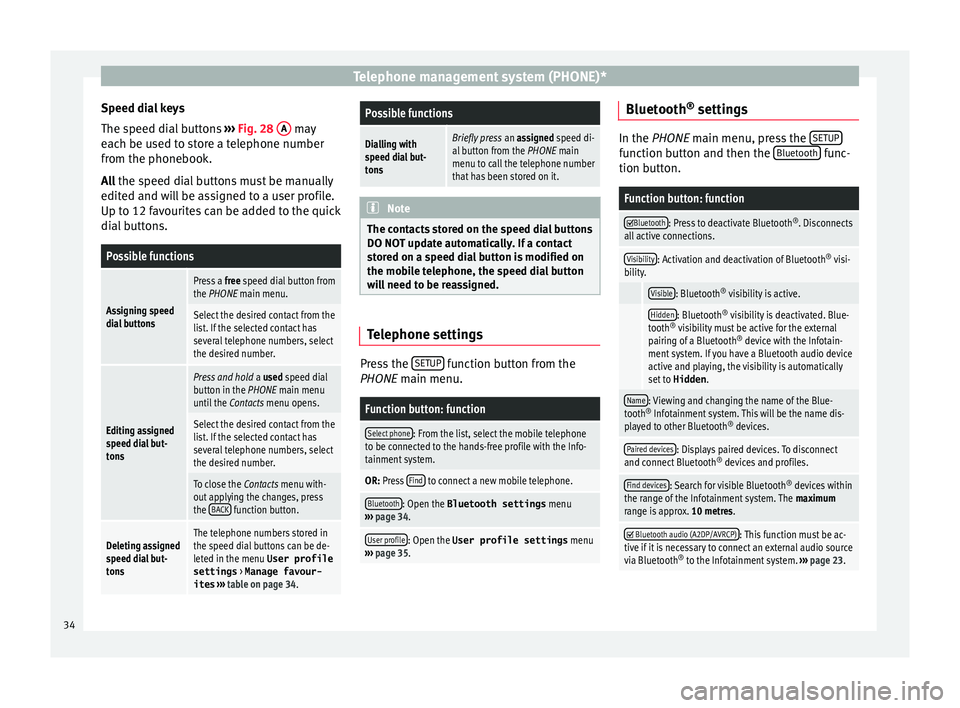
Shortcut buttons This dropdown menu allows you to select the
f
u
nction of the buttons on the home page,
from among ››› Fig. 27:
● A-Z : Phone book
shortcut keys
● FAVOURITES : S
peed dial keys.
Phonebook shortcut keys
You can directly access the contacts in the
phonebooks that start with the character se-
lected via these keys.
If there are no contacts that coincide with the
chosen character, the entry that immediately
follows is displayed.
Pressing multiple times in quick succession
will search for the characters shown on the
button.
Press and hold the and direction arrows
to change the letters of the buttons. »
33
Page 36 of 52
Telephone management system (PHONE)*
Speed dial keys
The s peed di
al buttons ››› Fig. 28 A may
e ac
h be used to store a telephone number
from the phonebook.
All the speed dial buttons must be manually
edited and will be assigned to a user profile.
Up to 12 favourites can be added to the quick
dial buttons.
Possible functions
Assigning speed
dial buttons
Press a free speed dial button from
the PHONE main menu.
Select the desired contact from the
list. If the selected contact has
several telephone numbers, select
the desired number.
Editing assigned
speed dial but-
tons
Press and hold a used speed dial
button in the PHONE main menu
until the Contacts menu opens.
Select the desired contact from the
list. If the selected contact has
several telephone numbers, select
the desired number.
To close the Contacts menu with-
out applying the changes, press
the BACK
function button.
Deleting assigned
speed dial but-
tonsThe telephone numbers stored in
the speed dial buttons can be de-
leted in the menu User profile
settings
> Manage favour-
ites ››› table on page 34.
Possible functions
Dialling with
speed dial but-
tonsBriefly press an assigned speed di-
al button from the PHONE main
menu to call the telephone number
that has been stored on it. Note
The contacts stored on the speed dial buttons
DO NO T upd
ate automatically. If a contact
stored on a speed dial button is modified on
the mobile telephone, the speed dial button
will need to be reassigned. Telephone settings
Press the
S
ETUP function button from the
PHONE m ain menu.
Function button: function
Select phone: From the list, select the mobile telephone
to be connected to the hands-free profile with the Info-
tainment system.
OR: Press Find to connect a new mobile telephone.
Bluetooth: Open the Bluetooth settings
menu
››› page 34.
User profile: Open the User profile settings menu
››› page 35. Bluetooth
®
settin g
s In the PHONE m
ain menu, pr
ess the SETUP function button and then the
Bluet
ooth func-
tion b utt
on.
Function button: function
Bluetooth: Press to deactivate Bluetooth
®
. Disconnects
all active connections.
Visibility: Activation and deactivation of Bluetooth ®
visi-
bility.
Visible: Bluetooth ®
visibility is active.
Hidden: Bluetooth ®
visibility is deactivated. Blue-
tooth ®
visibility must be active for the external
pairing of a Bluetooth ®
device with the Infotain-
ment system. If you have a Bluetooth audio device
active and playing, the visibility is automatically
set to Hidden .
Name: Viewing and changing the name of the Blue-
tooth ®
Infotainment system. This will be the name dis-
played to other Bluetooth ®
devices.
Paired devices: Displays paired devices. To disconnect
and connect Bluetooth ®
devices and profiles.
Find devices: Search for visible Bluetooth ®
devices within
the range of the Infotainment system. The maximum
range is approx. 10 metres.
Bluetooth audio (A2DP/AVRCP): This function must be ac-
tive if it is necessary to connect an external audio source
via Bluetooth ®
to the Infotainment system. ››› page 23. 34
Page 41 of 52
Setup
Setup
S y
stem setup Menu (SETUP)
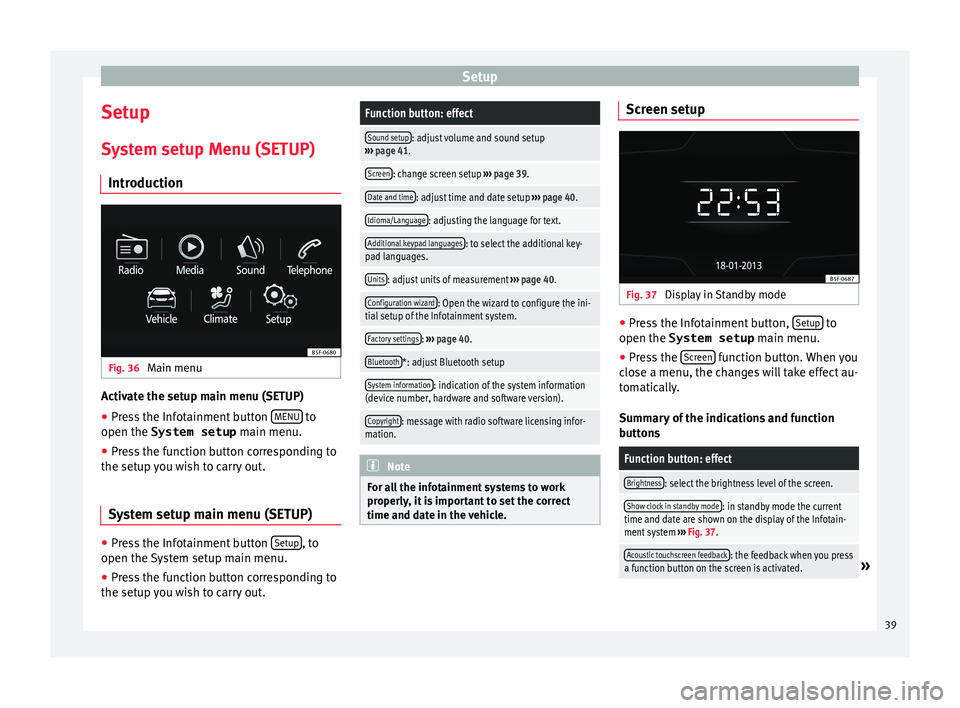
Introduction Fig. 36
Main menu Activate the setup main menu (SETUP)
● Press the Infotainment button MENU to
open the System setup main menu.
● Pr
ess the function button corresponding to
the setup
you wish to carry out.
System setup main menu (SETUP) ●
Press the Infotainment button Set
up , to
open the S
ystem setup main menu.
● Press the function button corresponding to
the setup
you wish to carry out.
Function button: effect
Sound setup: adjust volume and sound setup
››› page 41.
Screen: change screen setup ››› page 39.
Date and time: adjust time and date setup ››› page 40.
Idioma/Language: adjusting the language for text.
Additional keypad languages: to select the additional key-
pad languages.
Units: adjust units of measurement ››› page 40.
Configuration wizard: Open the wizard to configure the ini-
tial setup of the Infotainment system.
Factory settings: ››› page 40.
Bluetooth*: adjust Bluetooth setup
System information: indication of the system information
(device number, hardware and software version).
Copyright: message with radio software licensing infor-
mation. Note
For all the infotainment systems to work
pr operly
, it is important to set the correct
time and date in the vehicle. Screen setup
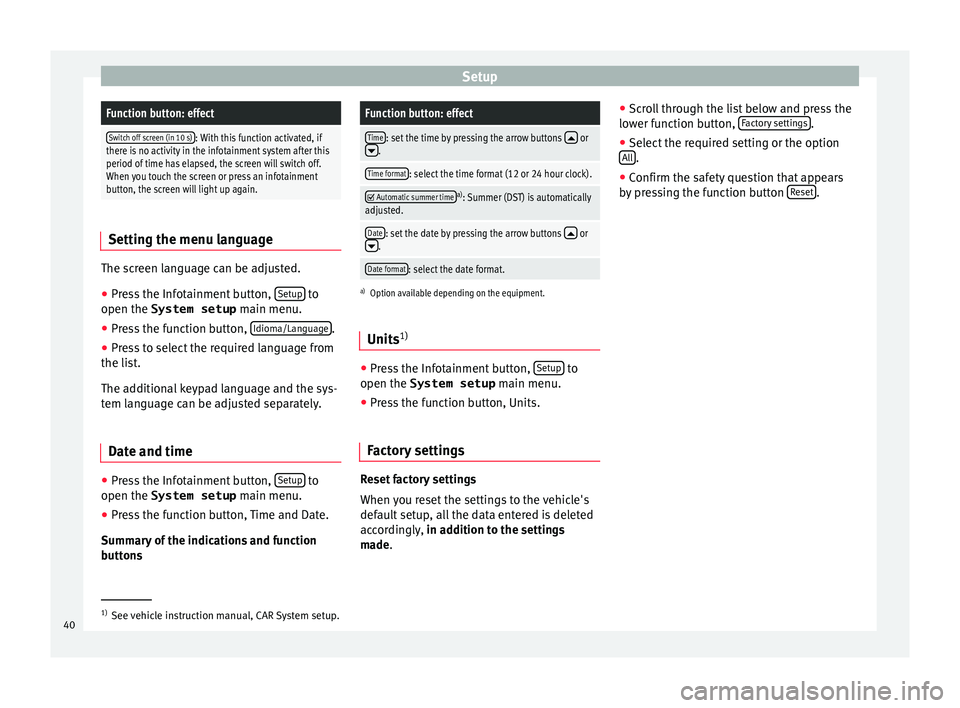
Fig. 37
Display in Standby mode ●
Press the Infotainment button, Set
up to
open the System setup main menu.
● Pr
ess the Scr
een function button. When you
c lo
se a menu, the changes will take effect au-
tomatically.
Summary of the indications and function
buttons
Function button: effect
Brightness: select the brightness level of the screen.
Show clock in standby mode: in standby mode the current
time and date are shown on the display of the Infotain-
ment system ››› Fig. 37.
Acoustic touchscreen feedback: the feedback when you press
a function button on the screen is activated.» 39
Page 42 of 52
SetupFunction button: effect
Switch off screen (in 10 s): With this function activated, if
there is no activity in the infotainment system after this
period of time has elapsed, the screen will switch off.
When you touch the screen or press an infotainment
button, the screen will light up again. Setting the menu language
The screen language can be adjusted.
● Press the Infotainment button, Set
up to
open the System setup main menu.
● Pr
ess the function button, Idioma/Lan
guage .
● Press to select the required language from
the li s
t.
The additional keypad language and the sys-
tem language can be adjusted separately.
Date and time ●
Press the Infotainment button, Set
up to
open the System setup main menu.
● Pr
ess the function button, Time and Date.
Summ
ary of the indications and function
buttons
Function button: effect
Time: set the time by pressing the arrow buttons or.
Time format: select the time format (12 or 24 hour clock).
Automatic summer timea)
: Summer (DST) is automatically
adjusted.
Date: set the date by pressing the arrow buttons or.
Date format: select the date format.
a) Option available depending on the equipment.
Units 1) ●
Press the Infotainment button, Set
up to
open the System setup main menu.
● Pr
ess the function button, Units.
Factory settings Reset factory settings
When
y
ou reset the settings to the vehicle's
default setup, all the data entered is deleted
accordingly, in addition to the settings
made. ●
Scr
oll through the list below and press the
lower function button, Factory settings .
● Select the required setting or the option
A l
l .
● Confirm the safety question that appears
b y
pressing the function button Reset .
1)
See vehicle instruction manual, CAR System setup.
40